Buenos Aires, Argentina
Joined: May 21, 2012
KitMaker: 765 posts
Armorama: 438 posts
Posted: Thursday, January 09, 2014 - 04:21 AM UTC
More advances!!!!!!!!!!!


Those Radial Fighters Campaign: 1/72 FW 190 A5
Delta 2 Campaign: 1/48 Hobby Boss Mirage IIIC
Navy Boys on those Postage Stamps 1/72 Airfix Sea Harrier FA2
Working: Trumpeter A-5 Vigilante
Waiting: Phantom 60 Campaign
Slovakia
Joined: October 15, 2010
KitMaker: 825 posts
Armorama: 246 posts
Posted: Friday, January 10, 2014 - 10:40 AM UTC
Nice to see so much progress thats been done lately. Especially the T-26 looks interesting. I was thinkin about getting one, but the single link tracks put me off. I already have bad experience with Trumpys single link tracks.
Lisboa, Portugal
Joined: March 04, 2008
KitMaker: 5,386 posts
Armorama: 4,727 posts
Posted: Saturday, January 11, 2014 - 06:01 AM UTC
Nice work so far Jose !
Here's my progress,
Some details on the upper hull

Lower hull is ready for some paint first before adding the tracks. Dragon's Magic Tracks.


Active Builds: 0
Active Campaigns: 0

#360
Connecticut, United States
Joined: June 18, 2003
KitMaker: 1,020 posts
Armorama: 131 posts
Posted: Saturday, January 11, 2014 - 03:53 PM UTC
Just Starting.

"I wish to have no Connection with any Ship that does not Sail fast for I intend to go in harm's way." - John Paul Jones
Baden-Württemberg, Germany
Joined: September 14, 2012
KitMaker: 69 posts
Armorama: 69 posts
Posted: Sunday, January 12, 2014 - 07:02 AM UTC
The final pics!
I made a few errors along the process, in the assembling and painting stage. But given the fact that this is my second (finished) tank model I am ok with it.


Buenos Aires, Argentina
Joined: May 21, 2012
KitMaker: 765 posts
Armorama: 438 posts
Posted: Monday, January 13, 2014 - 07:54 AM UTC
@Jens: Beautiful!!!!!!!!!!!!
@John: Thanks for your comments my friend. I follow your building, the Su-152 is very interesting.... ;-)
Those Radial Fighters Campaign: 1/72 FW 190 A5
Delta 2 Campaign: 1/48 Hobby Boss Mirage IIIC
Navy Boys on those Postage Stamps 1/72 Airfix Sea Harrier FA2
Working: Trumpeter A-5 Vigilante
Waiting: Phantom 60 Campaign
Lisboa, Portugal
Joined: March 04, 2008
KitMaker: 5,386 posts
Armorama: 4,727 posts
Posted: Monday, January 13, 2014 - 12:30 PM UTC
Quoted Text
@Jens: Beautiful!!!!!!!!!!!!
@John: Thanks for your comments my friend. I follow your building, the Su-152 is very interesting.... ;-)
Gracias Jose !
I'm using one of the variants provided in the kit, changing it to a JSU-122.
Active Builds: 0
Active Campaigns: 0

#186
Texas, United States
Joined: May 24, 2006
KitMaker: 771 posts
Armorama: 750 posts
Posted: Monday, January 13, 2014 - 12:53 PM UTC
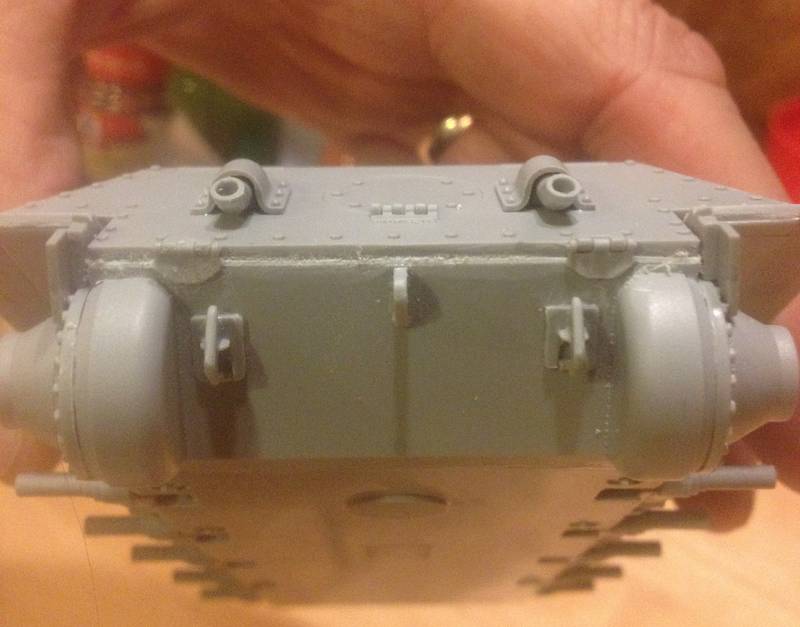
Here's my entry. I started this some time ago but put it aside due to some fit issues between the upper and lower hulls.
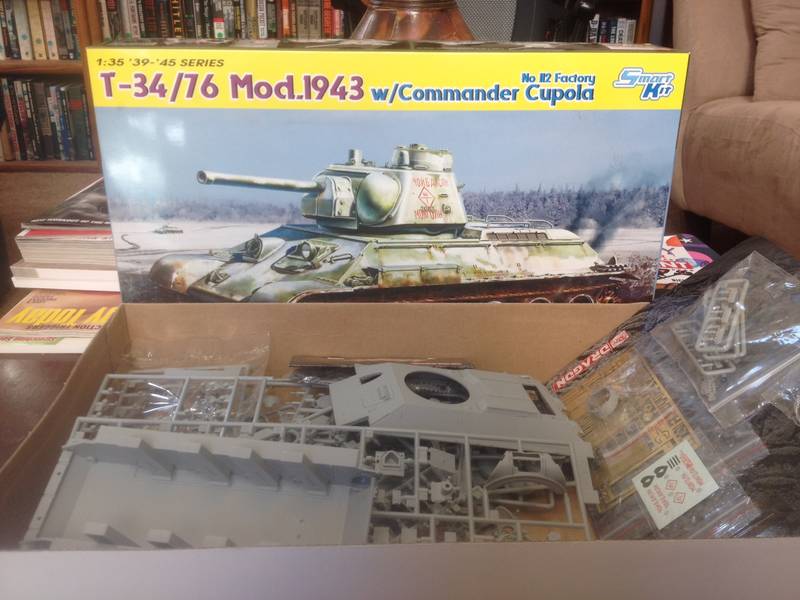
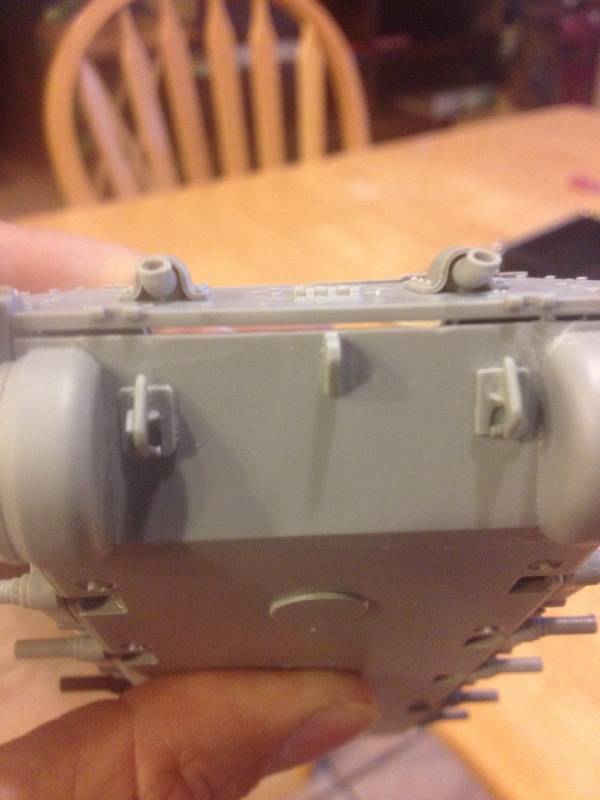
The front of the upper and lower hulls go together just fine, it is the rear end that's the problem. I have shaved the hinges off the lower hull, and will be able to re-glue them later in the right place. First, I need to glue a strip of plastic into the gap to close it up.
Pas-de-Calais, France
Joined: August 01, 2013
KitMaker: 26 posts
Armorama: 23 posts
Posted: Thursday, January 16, 2014 - 08:26 AM UTC
Hello,
I just have finished the easier part of the kit.

Now, the difficulty begins : the upper hull with photo-etched parts. I've never do this before .... It seem's very difficult. Say me good luck

I'll post new pictures this sunday (if I can work on the kit).

Arn.
My blog : http://arnzer.blogspot.fr/
Buenos Aires, Argentina
Joined: May 21, 2012
KitMaker: 765 posts
Armorama: 438 posts
Posted: Saturday, January 18, 2014 - 09:25 AM UTC
Those Radial Fighters Campaign: 1/72 FW 190 A5
Delta 2 Campaign: 1/48 Hobby Boss Mirage IIIC
Navy Boys on those Postage Stamps 1/72 Airfix Sea Harrier FA2
Working: Trumpeter A-5 Vigilante
Waiting: Phantom 60 Campaign
Buenos Aires, Argentina
Joined: May 21, 2012
KitMaker: 765 posts
Armorama: 438 posts
Posted: Sunday, January 19, 2014 - 05:01 PM UTC
Those Radial Fighters Campaign: 1/72 FW 190 A5
Delta 2 Campaign: 1/48 Hobby Boss Mirage IIIC
Navy Boys on those Postage Stamps 1/72 Airfix Sea Harrier FA2
Working: Trumpeter A-5 Vigilante
Waiting: Phantom 60 Campaign
Colorado, United States
Joined: December 12, 2013
KitMaker: 37 posts
Armorama: 35 posts
Posted: Monday, January 20, 2014 - 04:20 PM UTC
Ok hey guys I enlisted in this campaign and I have this Bronco SU-152 Early Version. I got this kit and started it after the campaign started and the tank is built but still needs painting and weathering so I consider it 50%done so can I join?
What is Fun you ask well simply stated,
F is for Fire that burns down the whole town.
U is for Uranium bombs.
N is for No survivors.
-Plankton
New York, United States
Joined: March 08, 2010
KitMaker: 3,662 posts
Armorama: 3,078 posts
Posted: Monday, January 20, 2014 - 11:36 PM UTC
Jose that's a nice looking Panzer T-34 you got there great job


Active Campaigns on the bench:
Operation Fall Gelb - Pz.Kpfw. IV Ausf. C
Engineering the Future - M-26 Recovery Vehicle
115 Campaigns completed
Buenos Aires, Argentina
Joined: May 21, 2012
KitMaker: 765 posts
Armorama: 438 posts
Posted: Tuesday, January 21, 2014 - 05:59 AM UTC
@Sal, thanks for your comment my friend!!!
Those Radial Fighters Campaign: 1/72 FW 190 A5
Delta 2 Campaign: 1/48 Hobby Boss Mirage IIIC
Navy Boys on those Postage Stamps 1/72 Airfix Sea Harrier FA2
Working: Trumpeter A-5 Vigilante
Waiting: Phantom 60 Campaign
Wojewodztwo Pomorskie, Poland
Joined: May 26, 2003
KitMaker: 1,208 posts
Armorama: 1,023 posts
Posted: Tuesday, January 21, 2014 - 07:01 AM UTC
Greetings Comrades!
The heavy tank bearing the name of our glorious leader is almost ready for painting!
Still a couple of details that need to be added, like spare track link retaining 'tabs' (to be added after painting as I'll use "blacken it" for the white metal tracks) and unditching log rack on the left sponson.
I remodeled a bit the sides of the "pike" nose to resemble the original armored plates layout after the front fenders are removed, also added upper side armor plates that should be visible just under the sponson floor.
In the mean time I had to heighten the suspension by some 2 mm, the lowest position that suspension arms can be glued using locating pins that Tamiya provided is much to low, so I had to pry the arms free and reattach them at the proper height using a styrene construction put under the belly of the tank to keep the ground clearance at the desired height.


Cheers,
Greg
For those about to rock, we salute you!
Colorado, United States
Joined: December 12, 2013
KitMaker: 37 posts
Armorama: 35 posts
Posted: Tuesday, January 21, 2014 - 08:30 AM UTC
What detail set did you use?
What is Fun you ask well simply stated,
F is for Fire that burns down the whole town.
U is for Uranium bombs.
N is for No survivors.
-Plankton
Buenos Aires, Argentina
Joined: May 21, 2012
KitMaker: 765 posts
Armorama: 438 posts
Posted: Tuesday, January 21, 2014 - 05:17 PM UTC
@Pedro,
Excellent detail work!!
Those Radial Fighters Campaign: 1/72 FW 190 A5
Delta 2 Campaign: 1/48 Hobby Boss Mirage IIIC
Navy Boys on those Postage Stamps 1/72 Airfix Sea Harrier FA2
Working: Trumpeter A-5 Vigilante
Waiting: Phantom 60 Campaign
Wojewodztwo Pomorskie, Poland
Joined: May 26, 2003
KitMaker: 1,208 posts
Armorama: 1,023 posts
Posted: Tuesday, January 21, 2014 - 09:53 PM UTC
Thanks Shaky!
Wyatt, I used Eduard's PE tool boxes and fenders for IS-3 set no. 36042, unfortunately it only comes with what is stated on the label: toolboxes and fenders, nothing more, you even have to supply your own bolt heads that mount the fender (which is somewhat easy, but it just should be there I think, also there is no replacement tow shackles rack that is located on the left front fender). So for the bolts I opted to use MIG productions bolt heads, you only have to putty up the indentations in the fenders that locate (or simulate?) the bolt heads, but as they are similar in size to the bolts I used they have to be closed to glue the bolts properly.
Also I used ATL-14 Friulmodel tracks for the IS family of tanks, rest of the details is scratchbuilt.
Cheers,
Greg
For those about to rock, we salute you!

#123
New Mexico, United States
Joined: November 17, 2008
KitMaker: 1,202 posts
Armorama: 635 posts
Posted: Friday, January 24, 2014 - 01:57 PM UTC
Howdy Y'all

Jose & Pedro, Nice work! I hope I can get back to my T-34/76 soon. It was a fun build but other things got in the way.
Don "Lakota"
Working on Campaigns:
1/72 Hasegawa Ki-84 Frank
1/144 Dragon Armor
California, United States
Joined: June 30, 2008
KitMaker: 2,408 posts
Armorama: 2,394 posts
Posted: Saturday, January 25, 2014 - 08:34 PM UTC
Nice builds everyone. Someone can take over as campaign leader. I'm too busy with these twins to do any models. Xbox at least I can hold one and play but models too much distraction. Ill get back into models again sometime. Not parting with the stash

Baden-Württemberg, Germany
Joined: September 14, 2012
KitMaker: 69 posts
Armorama: 69 posts
Posted: Sunday, January 26, 2014 - 11:50 PM UTC
Since my model is done I played around a little bit with GIMP. I hope you dont mind me posting the result.


#186
Texas, United States
Joined: May 24, 2006
KitMaker: 771 posts
Armorama: 750 posts
Posted: Tuesday, January 28, 2014 - 08:40 AM UTC
Jose, nice job!
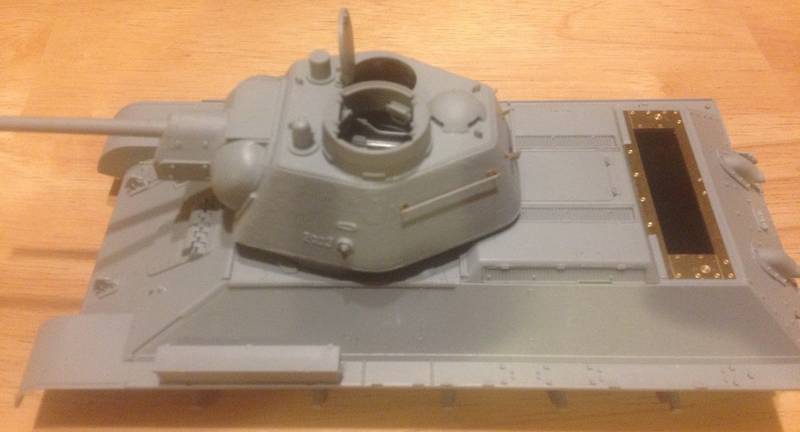
I've fixed the rear end problem on my t-34 and glued the lower hinges back on that I shaved off earlier.
Another overall shot of where I am
Removed by original poster on 01/29/14 - 18:12:51 (GMT).

#186
Texas, United States
Joined: May 24, 2006
KitMaker: 771 posts
Armorama: 750 posts
Posted: Wednesday, January 29, 2014 - 06:13 AM UTC
Quoted Text
Since my model is done I played around a little bit with GIMP. I hope you dont mind me posting the result.

looks great! It could be the Boxtop art for the kit!
Wojewodztwo Pomorskie, Poland
Joined: May 26, 2003
KitMaker: 1,208 posts
Armorama: 1,023 posts
Posted: Friday, January 31, 2014 - 11:27 AM UTC
Good job with the gimp Jens, I like it!
Last update of my Stalin before painting stage:
I've added two last details: unditching log racks and front fender mounting strips, which are actually drilled , which may not be visible in the pictures. during the last photoshoot I also tightened both tracks by one link, i think this way the tank looks tidier. Backdrop for the photos changed to black this time, which I think works quite well.
Best regards,
Greg


For those about to rock, we salute you!


