Puerto Rico
Joined: December 05, 2013
KitMaker: 314 posts
Armorama: 253 posts
Posted: Monday, September 29, 2014 - 05:20 AM UTC
Hi:
zimmerit its from Mirage Hobbies, metal barrel, PE Grill set, Friulmodel tracks. You can see more of this tank at:
https://armorama.kitmaker.net/forums/219751&page=1Visit our site and learn more about our Club:
www.ipmsborinqueneers.com
Ontario, Canada
Joined: November 03, 2012
KitMaker: 2,275 posts
Armorama: 2,233 posts
Posted: Monday, September 29, 2014 - 05:43 AM UTC
ok, i'm in doing this ---->> Just the tank.

California, United States
Joined: August 10, 2012
KitMaker: 1,510 posts
Armorama: 1,443 posts
Posted: Monday, September 29, 2014 - 01:27 PM UTC
Quoted Text
I have DML Shanghai's; yeah my kit's that old, M270 MLRS coming from Poland. Twenty dollars and free shipping, can't beat that. 
Got my MLRS, I'm certain the seller is from Poland but the address is from Texas; go figure.
The kit seems pretty nice; though some of the moulding hasn't aged well. And there are a couple of spots where the mould hadn't quite filled, particularly corners and thin edges. Almost looks like a small valley in the plastic.
The decals look a bit thin and have excess film on them. They're printed in U.S. 'sand' and I'm worried about how well the color will show through. Most of them are all pretty specific so it'll look odd if I leave them off.

What cheek! Let them have it!
Connecticut, United States
Joined: November 02, 2003
KitMaker: 984 posts
Armorama: 846 posts
Posted: Wednesday, October 01, 2014 - 02:28 AM UTC
Finally got some time to build.
latest progress.

Ontario, Canada
Joined: November 03, 2012
KitMaker: 2,275 posts
Armorama: 2,233 posts
Posted: Wednesday, October 01, 2014 - 10:24 AM UTC
update: Started gluing this terrible kit together. lol

Lisboa, Portugal
Joined: March 04, 2008
KitMaker: 5,386 posts
Armorama: 4,727 posts
Posted: Thursday, October 02, 2014 - 05:43 AM UTC
Update:


Active Builds: 0
Active Campaigns: 0
England - East Anglia, United Kingdom
Joined: October 15, 2012
KitMaker: 568 posts
Armorama: 561 posts
Posted: Thursday, October 02, 2014 - 07:02 AM UTC
Quoted Text
Finally got some time to build.
latest progress.
good choice. Enjoyed building mine no end
On the bench: Dragon flakvierling with armoured cab + AM Works PE
In the stash: Dragon Jagdpanther + AM Works PE
Dragon Panzer IV Ausf J + voyager jumbo PE
Tamiya B2 Bis - Flammenwerfer mod
ICM Henschel 33D1 + Dragon sFH18
Tamiya Tiger 1
Connecticut, United States
Joined: November 02, 2003
KitMaker: 984 posts
Armorama: 846 posts
Posted: Thursday, October 02, 2014 - 12:32 PM UTC
Quoted Text
Quoted Text
Finally got some time to build.
latest progress.
good choice. Enjoyed building mine no end
Anything imshould be aware of?
Ontario, Canada
Joined: November 03, 2012
KitMaker: 2,275 posts
Armorama: 2,233 posts
Posted: Thursday, October 02, 2014 - 10:05 PM UTC
update: got some camo on it. Note my cobble stone pieces? I made a mold out of a Miniart base...now I can make as many pieces as I need.


Ontario, Canada
Joined: November 03, 2012
KitMaker: 2,275 posts
Armorama: 2,233 posts
Posted: Thursday, October 02, 2014 - 10:17 PM UTC
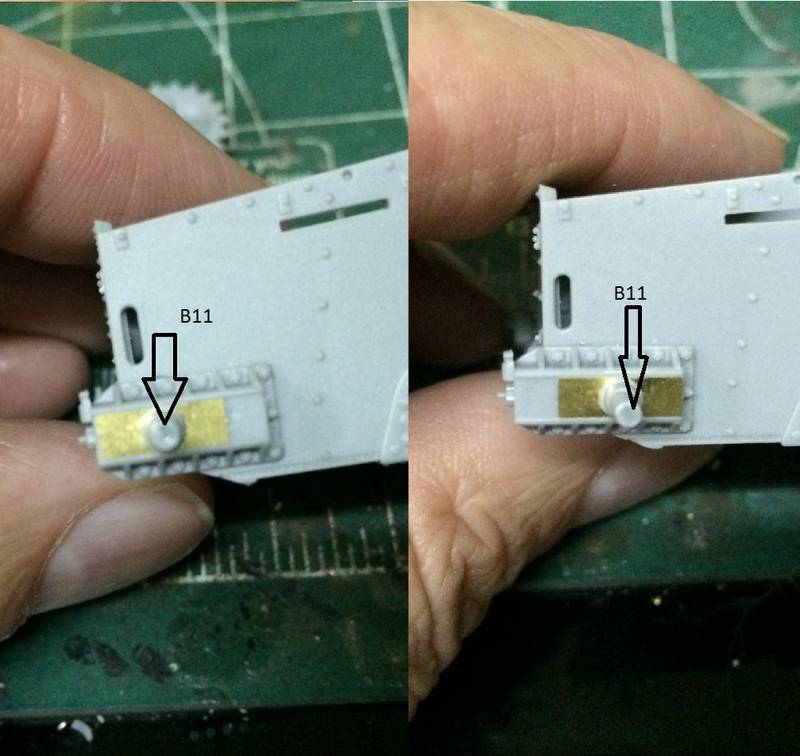
Quoted Text
You can see them in this photo. The first two are almost directly above the first two return rollers, the third a bit behind the third roller.
Your suppose to cut those tabs off.
England - East Anglia, United Kingdom
Joined: October 15, 2012
KitMaker: 568 posts
Armorama: 561 posts
Posted: Friday, October 03, 2014 - 04:13 AM UTC
Quoted Text
Quoted Text
Quoted Text
Finally got some time to build.
latest progress.
good choice. Enjoyed building mine no end
Anything imshould be aware of?
Marc
Mine was the quad with armoured cab, so slightly different. But all I know is it went together like a dream!
On the bench: Dragon flakvierling with armoured cab + AM Works PE
In the stash: Dragon Jagdpanther + AM Works PE
Dragon Panzer IV Ausf J + voyager jumbo PE
Tamiya B2 Bis - Flammenwerfer mod
ICM Henschel 33D1 + Dragon sFH18
Tamiya Tiger 1
Connecticut, United States
Joined: November 02, 2003
KitMaker: 984 posts
Armorama: 846 posts
Posted: Friday, October 03, 2014 - 10:51 AM UTC
I remember what I want to ask you Andy.
What's the best way to tackle the tracks and wheels?

#186
Texas, United States
Joined: May 24, 2006
KitMaker: 771 posts
Armorama: 750 posts
Posted: Friday, October 03, 2014 - 02:17 PM UTC
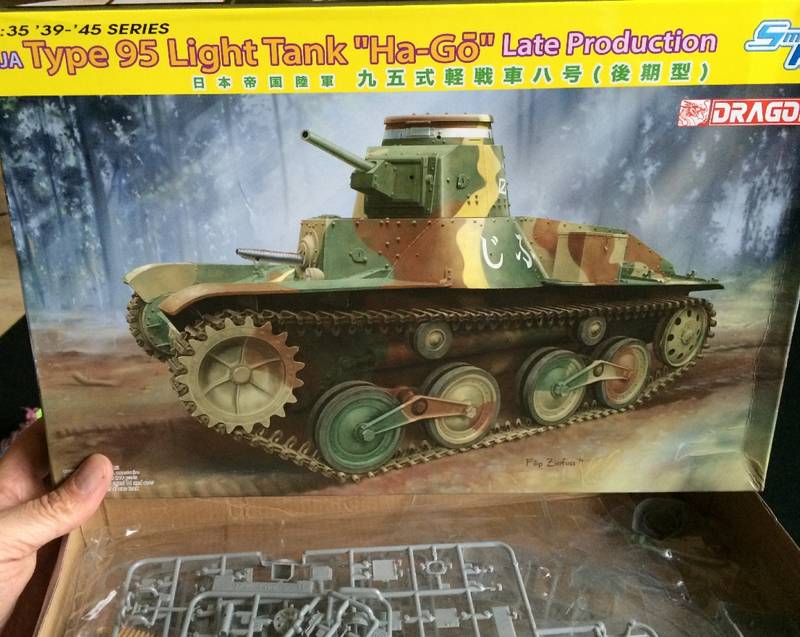
OK, late to the game, but I'm going to try to get this done in time. Never built one of the Dragon Japanese armor kits before. The reviews are all good. Time to dive in!
Ankara, Turkey / Türkçe
Joined: November 30, 2004
KitMaker: 459 posts
Armorama: 109 posts
Posted: Friday, October 03, 2014 - 10:20 PM UTC
I have not followed the campaign and just found opportunity to start. My participation is with a 1/72 Dragon Brummbar Mid Production.


Arkansas, United States
Joined: June 29, 2009
KitMaker: 11,610 posts
Armorama: 7,843 posts
Posted: Saturday, October 04, 2014 - 11:45 AM UTC
David: Do you have any build progress photos?
Ideals are peaceful. History is violent.
#186
Texas, United States
Joined: May 24, 2006
KitMaker: 771 posts
Armorama: 750 posts
Posted: Saturday, October 04, 2014 - 03:39 PM UTC
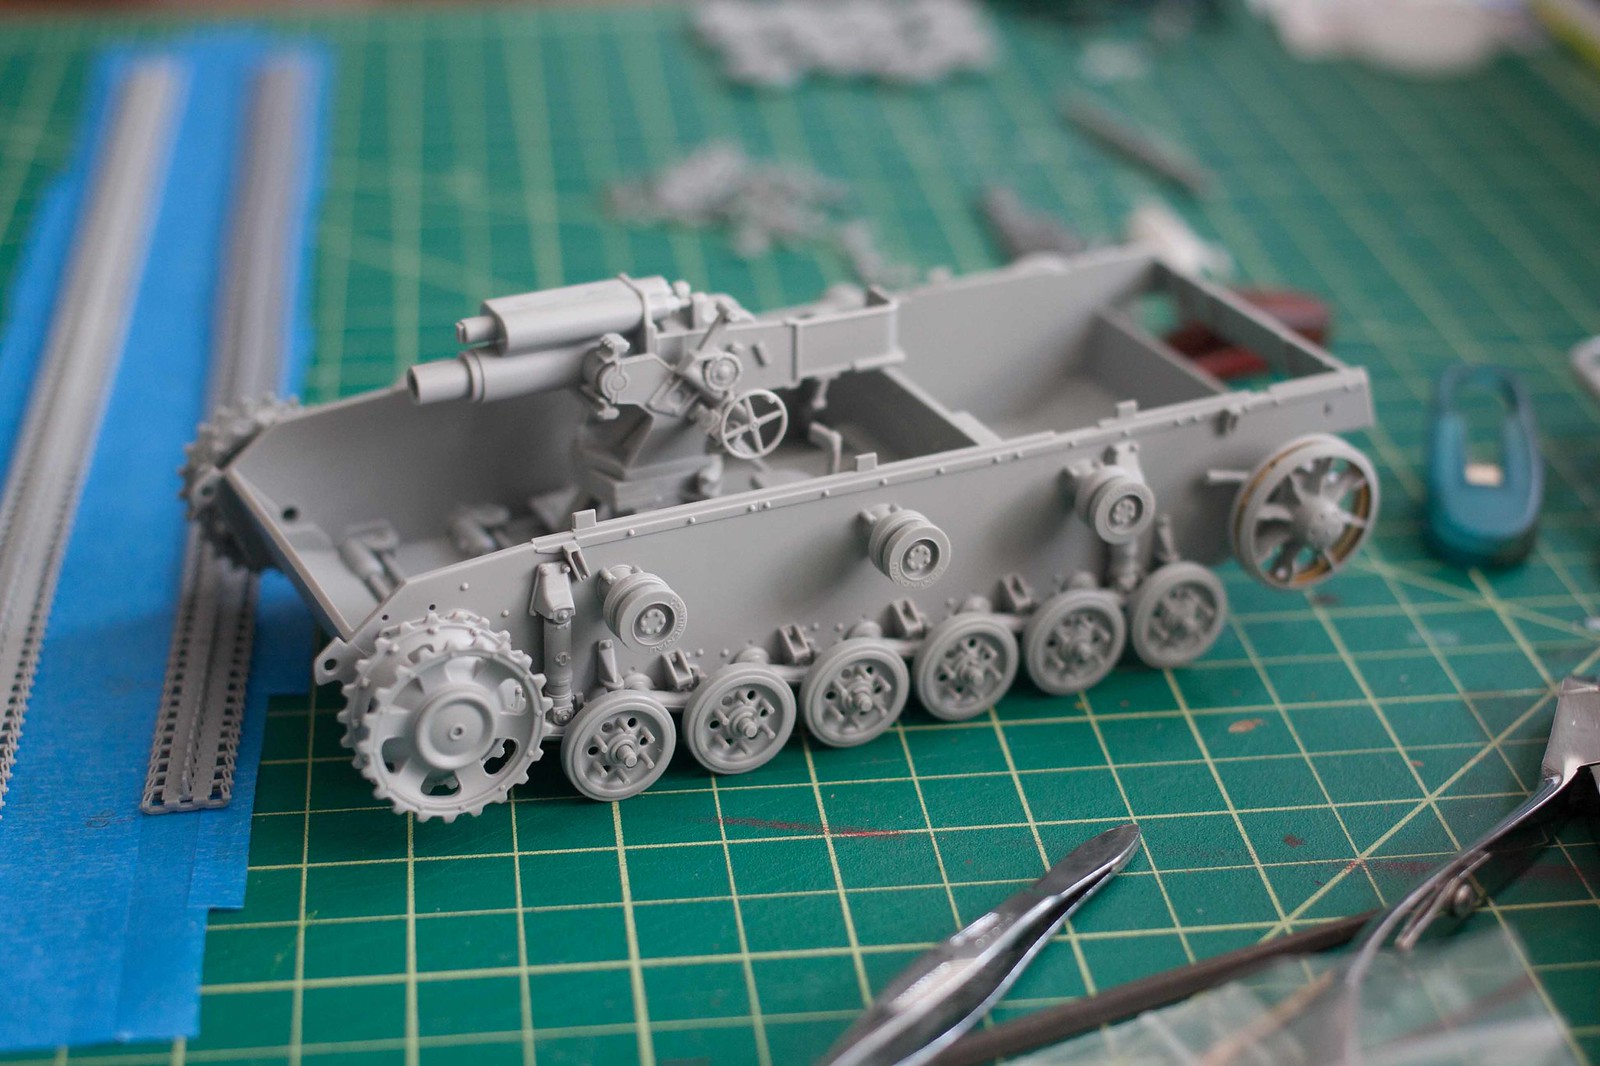
Got started on my Type 95.Got all the road wheels assembled; all the normal step 1 stuff. One thing I thought was pretty cool is that if you are careful with the glue you can leave the compensating idler arm adjustable. In this pick you can see the arm fully forward and fully back. This may come in handy when I put the DS tracks on.
Ontario, Canada
Joined: November 03, 2012
KitMaker: 2,275 posts
Armorama: 2,233 posts
Posted: Saturday, October 04, 2014 - 06:24 PM UTC
Quoted Text
David: Do you have any build progress photos?
Me? The ones I put up not good enough? Just cause I got camo on doesn't mean its almost done. The tracks were'nt even done. Never knew you wanted so many pix??? Its an Orange Series kit, had together in 2 days.
Arkansas, United States
Joined: June 29, 2009
KitMaker: 11,610 posts
Armorama: 7,843 posts
Posted: Saturday, October 04, 2014 - 06:50 PM UTC
Quoted Text
Quoted Text
David: Do you have any build progress photos?
Me? The ones I put up not good enough? Just cause I got camo on doesn't mean its almost done. The tracks were'nt even done. Never knew you wanted so many pix??? Its an Orange Series kit, had together in 2 days.
Sorry, I missed your second post. I thought you only put up the one with the paint already on.
Ideals are peaceful. History is violent.
United Kingdom
Joined: September 17, 2012
KitMaker: 462 posts
Armorama: 417 posts
Posted: Saturday, October 04, 2014 - 11:11 PM UTC
I think I've finished this one... It was my first Dragon kit in 1:35 and I really enjoyed building it. The kit went together nicely - the only minor hassle was getting the upper and lower hulls to join properly...
I've enjoyed watching all the other builds come together and will continue to do so.
cheers,
Matthew
Here are a few pictures...
URL=http://s936.photobucket.com/user/matthewaholliday/media/IMG_0451_zpsefb28050.jpg.html]

[/URL]


I'll upload another to the finished gallery soon
Bayern, Germany
Joined: October 22, 2013
KitMaker: 380 posts
Armorama: 376 posts
Posted: Saturday, October 04, 2014 - 11:23 PM UTC
congratulatuions Matthew,
One note from my side: your SU has extra amoured exhausts, this wasn´t more than a tube made from thin sheet metal... would drilling them out a bit cortradict to the ooB rules?
I made it to the basement yesterday and fonaly got my paint and decals on:


Impossible only means that you haven't found the solution yet.
United Kingdom
Joined: September 17, 2012
KitMaker: 462 posts
Armorama: 417 posts
Posted: Saturday, October 04, 2014 - 11:34 PM UTC
Thanks, Fabian.
You're right. I'll drill out those exhausts later this evening. Since I'm doing that after having said "finished", I guess I'm still within the OOB rules.
Your panzer iii looks fab.
Cheers
Matthew
Arkansas, United States
Joined: June 29, 2009
KitMaker: 11,610 posts
Armorama: 7,843 posts
Posted: Saturday, October 04, 2014 - 11:54 PM UTC
Matthew: Make sure you post photos to the gallery, before drilling out the exhausts. Otherwise, a very nice build. I like the "clean" and "fresh" look of the white wash.
Ideals are peaceful. History is violent.
Ontario, Canada
Joined: November 03, 2012
KitMaker: 2,275 posts
Armorama: 2,233 posts
Posted: Sunday, October 05, 2014 - 12:17 AM UTC
Quoted Text
Sorry, I missed your second post. I thought you only put up the one with the paint already on.
k no prob
nice work people!
Connecticut, United States
Joined: November 02, 2003
KitMaker: 984 posts
Armorama: 846 posts
Posted: Sunday, October 05, 2014 - 07:33 AM UTC
current progress as of yesterday

Engine did not go in as easily as expected, even with dry fitting a week ago.
Colorado, United States
Joined: February 24, 2014
KitMaker: 3,033 posts
Armorama: 2,492 posts
Posted: Sunday, October 05, 2014 - 08:34 AM UTC
Quoted Text
current progress as of yesterday
Engine did not go in as easily as expected, even with dry fitting a week ago.
Marc,
Just a little heads-up. Take particular care when adding the upper body parts along the chassis i.e., Radiator (done), hood, firewall, crew cabin, bed, spare tire rack. I found these steps to be a bit tricky with the two variants I've built so far.
In addition, the license plate decals are longer than the space provided on the front bumper.
Dry fit ten times ... glue once! ... But then, you probably already knew that.

mike