

My choice is the venerable ZSU-23-4m, probably done up in Iraqi colors (color), and I'm going to try and actually follow the instructed steps for once in my life, hehe.
Let's do this.


So we need to know how the little bugger did? I think it came out looking great, and I hope you enjoyed the show, I wanted to go but work took me away. Maybe next year.

Matt,
I was wondering about this radio in this sdkfz253. Can I use a Dragon set of headphones from the spares or is that pushing the spirit too much? If not, no big deal, I'll add them after the campaign.


Andy:
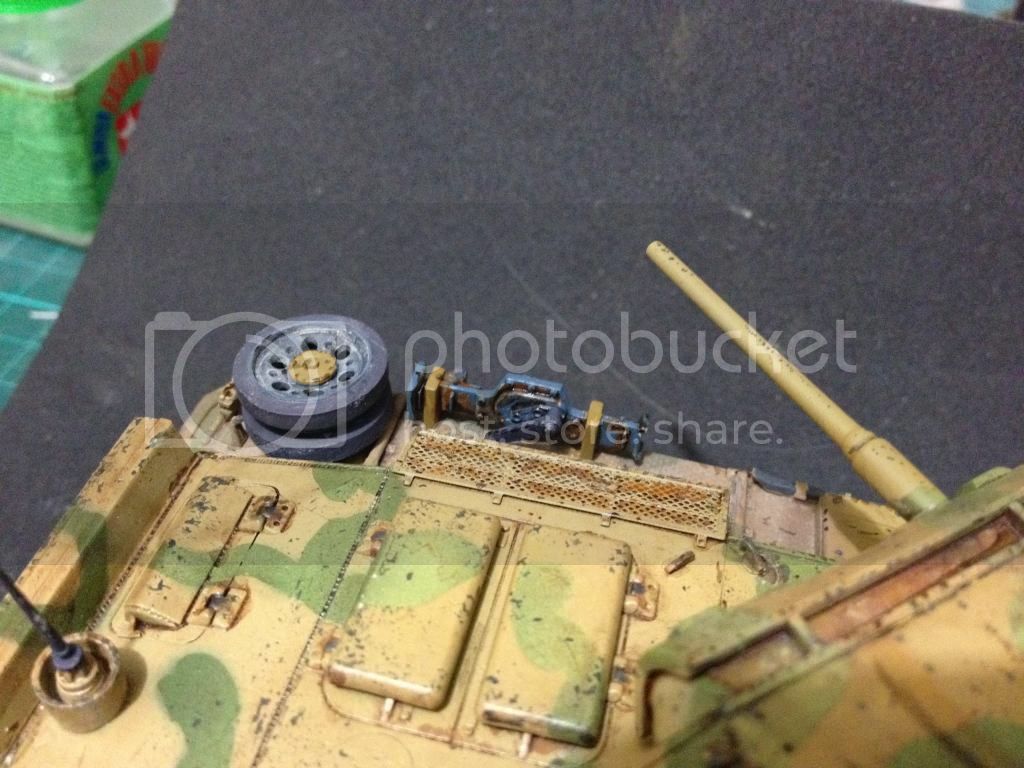
Looking like a great built to me. I see some bright spot, maybe its the light, but for the rest its looking fine.
Take a rest of the kit. When Inspiration returns, you can do other retouching, repainting, even snow camo and of course the infamous weathering and chipping!


Matt,
Looking for a mercy ruling from the master arbiter. Building the Dragon 1/4 ton 4x4 w/ bazookas. Was supposed to be quick, fun build, but instead has proved to be one of the most frustrating, poorly-executed kits I've ever worked on. I was just getting to the point of being able to finish assembly and start doing detail painting and weathering when I discovered the four little PE tie-downs for the bazookas are too short--they absolutely will not go around the bazookas and meet up with the mount. They need to be replaced, which I could do easy enough with four pieces of wire, but that would violate the strict letter of the campaign rules. How do you feel about using stretched sprue instead. Pain in the @$$ but technically it did come out of the box...


 |


