Campaigns: Completed Campaigns
Campaigns that are completed should be grouped here.
Hosted by Richard S.
WWII Panther Tanks!
PantherF
Visit this Community
Indiana, United States
Joined: June 10, 2005
KitMaker: 6,188 posts
Armorama: 5,960 posts
Posted: Saturday, October 18, 2014 - 01:30 AM UTC
Oh, everything is shaping up to be yet another great Campaign everyone! I should be able to do a few start pics today after a little housework here in the "Mission Room".

It sure is a mess and further askew since returning home, you sorta just let things lay were you drop them and not get too worked up over it. LOL


Nice work guys.


Jeff
JoeOsborne
Visit this Community
California, United States
Joined: October 08, 2013
KitMaker: 111 posts
Armorama: 67 posts
Posted: Saturday, October 18, 2014 - 01:52 AM UTC
Hello Everyone,

I'll be joining this group build with the Tamiya 1/35 Jagdpanther Late. This will be mostly OOB with just some PE grills.

One question I have for all the Panther buffs out there. Really don't want to use the rubber tracks in the kit, but don't want to invest in Fruils necessarily. I have the Dragon Panther D Premium kit that comes with both Magic Tracks and DS tracks. Would the DS tracks fit on this Jadgpanther (which I understand is a G model).


PantherF
Visit this Community
Indiana, United States
Joined: June 10, 2005
KitMaker: 6,188 posts
Armorama: 5,960 posts
Posted: Saturday, October 18, 2014 - 03:29 AM UTC
Most likely the Panther D tracks are early enough and do not have the ice cleats on it as what the Late Jagdpanther should have.

BUT, It's your tank and they could be possibly hidden with groundwork or mud.


HTH and a good choice!


Jeff
JoeOsborne
Visit this Community
California, United States
Joined: October 08, 2013
KitMaker: 111 posts
Armorama: 67 posts
Posted: Saturday, October 18, 2014 - 04:25 AM UTC
Thanks, Jeff! Let me take a good look at the DS tracks.
retiredyank
Visit this Community
Arkansas, United States
Joined: June 29, 2009
KitMaker: 11,610 posts
Armorama: 7,843 posts
Posted: Saturday, October 18, 2014 - 04:59 AM UTC
I'll have everything I need to start, in December.
PantherF
Visit this Community
Indiana, United States
Joined: June 10, 2005
KitMaker: 6,188 posts
Armorama: 5,960 posts
Posted: Saturday, October 18, 2014 - 05:00 AM UTC
It certainly will not disqualify the build if the tracks are not quite correct for the vehicle so I would use them regardless.

I might say something if they were Sherman tracks on a Jagd! LOL


Enjoy the build!


Jeff
papakilo
Visit this Community
Texas, United States
Joined: December 23, 2007
KitMaker: 54 posts
Armorama: 54 posts
Posted: Saturday, October 18, 2014 - 07:20 AM UTC
Hey Joe,

I have the DS tracks from dragon Jagdphanther early if you want them. I will never use them since I alway use aftermarket tracks. PM me your address and I will send them to you.

Mike
Tiger_213
Visit this Community
California, United States
Joined: August 10, 2012
KitMaker: 1,510 posts
Armorama: 1,443 posts
Posted: Saturday, October 18, 2014 - 08:33 AM UTC
Went to some stores today. Got some stuff to attempt the MIAG pattern zimmerit. Apperently it's been so long since I've been to Hobbylobby they moved some stuff around (they only opened two years ago!) and they now stock Iwata Eclipes' and Tamiya primer.

As far as my kit has gone; I found out soldering sucks. The brass transfers heat so well that when I add one shutzen hanger, anothers solder melts and falls off. I think so far I've added about twenty hangers, to bad there are only twelve hangers needed. It may be that I have the wrong kind but it's what I had at hand.
woltersk
Visit this Community
Utah, United States
Joined: May 27, 2003
KitMaker: 1,026 posts
Armorama: 654 posts
Posted: Saturday, October 18, 2014 - 12:12 PM UTC

Quoted Text

...As far as my kit has gone; I found out soldering sucks. The brass transfers heat so well that when I add one shutzen hanger, anothers solder melts and falls off. I think so far I've added about twenty hangers, to bad there are only twelve hangers needed. It may be that I have the wrong kind but it's what I had at hand.


Christopher,
You may need a heat shunt to divert the heat away from the other 'components'. if you Google it you'll get some ideas for household items that should work, alligator clip, etc.

I know--"Now someone tells me!"

Keith
Tiger_213
Visit this Community
California, United States
Joined: August 10, 2012
KitMaker: 1,510 posts
Armorama: 1,443 posts
Posted: Saturday, October 18, 2014 - 02:18 PM UTC
Thanks, Keith. I still have a bunch to do; one step forward, fall-down-the-rest-of-the-stairs kind of thing going on with it.
Bluestab
Visit this Community
South Carolina, United States
Joined: December 03, 2009
KitMaker: 2,160 posts
Armorama: 1,906 posts
Posted: Saturday, October 18, 2014 - 03:52 PM UTC
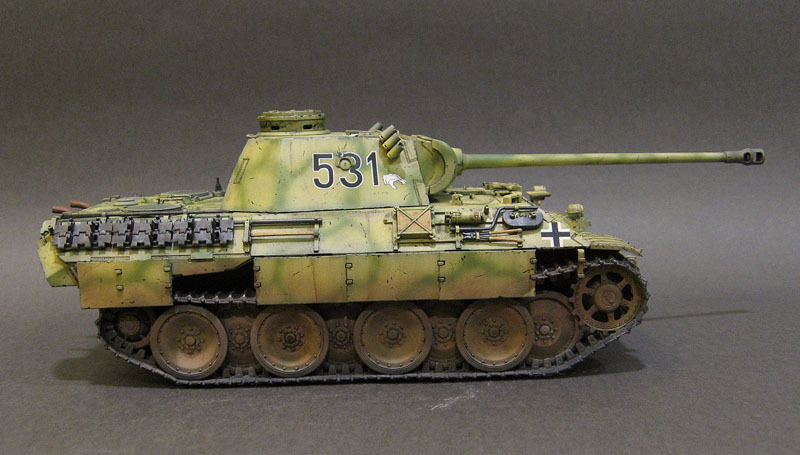
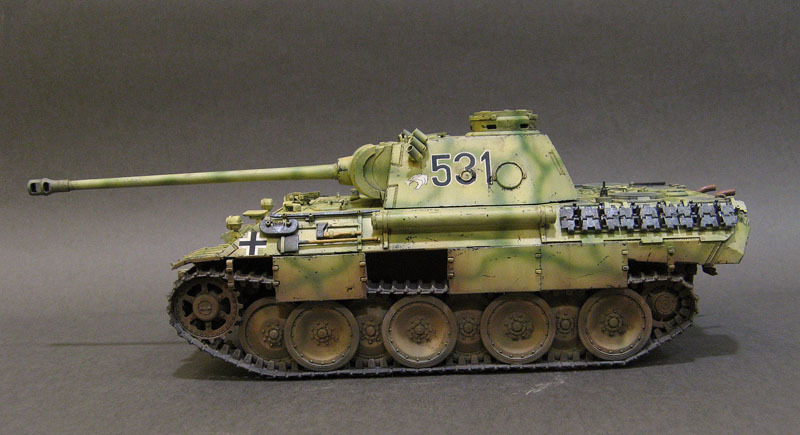
A quick update...I'm actually further along than I had expected I would be.

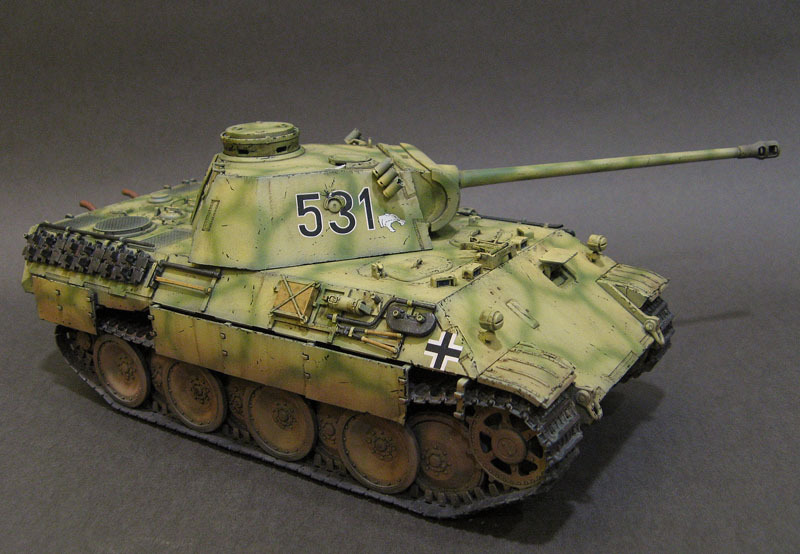
Most of the week was taken up dealing with the horrible tracks. I decided to break it down and do a few links at a time. I had to piece them together because the tracks did not like being cemented together. I actually ended up using tube glue to reinforce the runs of track. I gave them a base coat of dark-dark-gray. I did one side at a time.


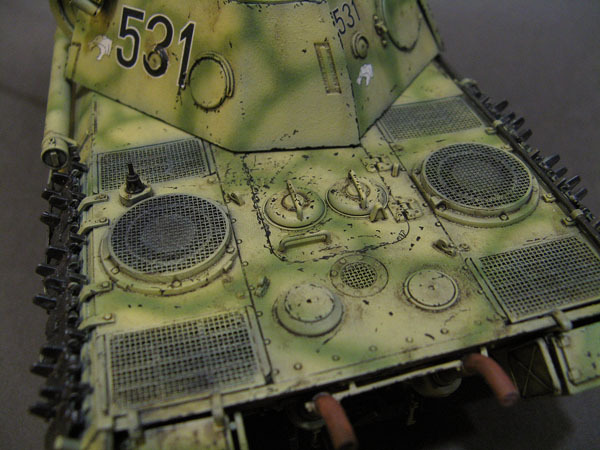
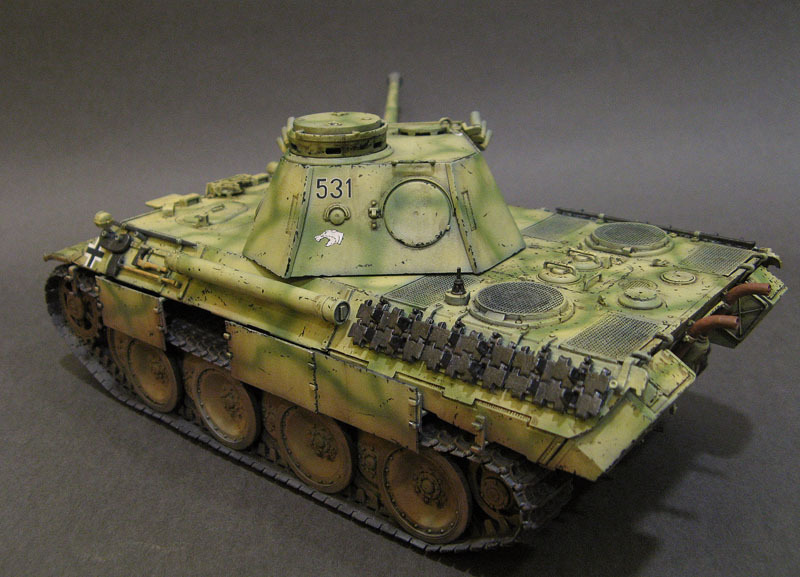
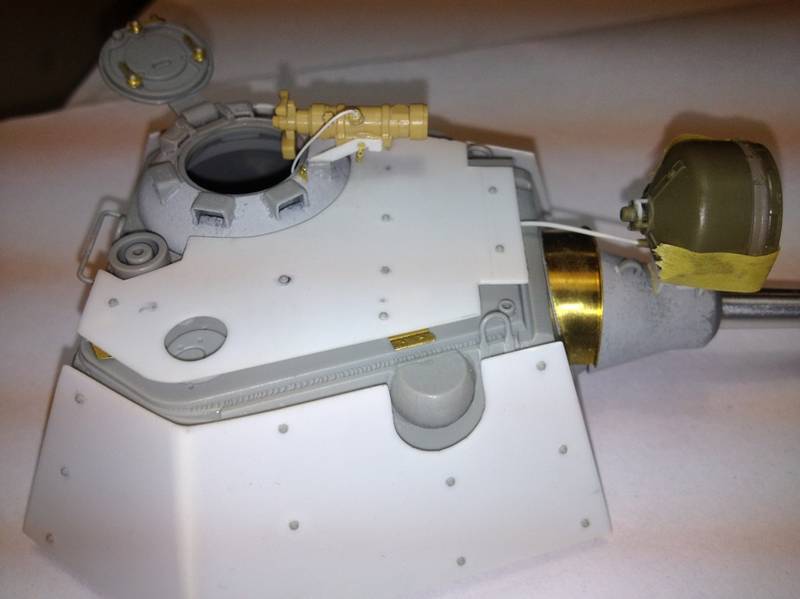
Now to the upper hull. The engine deck was got its grilling inserts. I'm glad I added the styrene back-plates underneath.


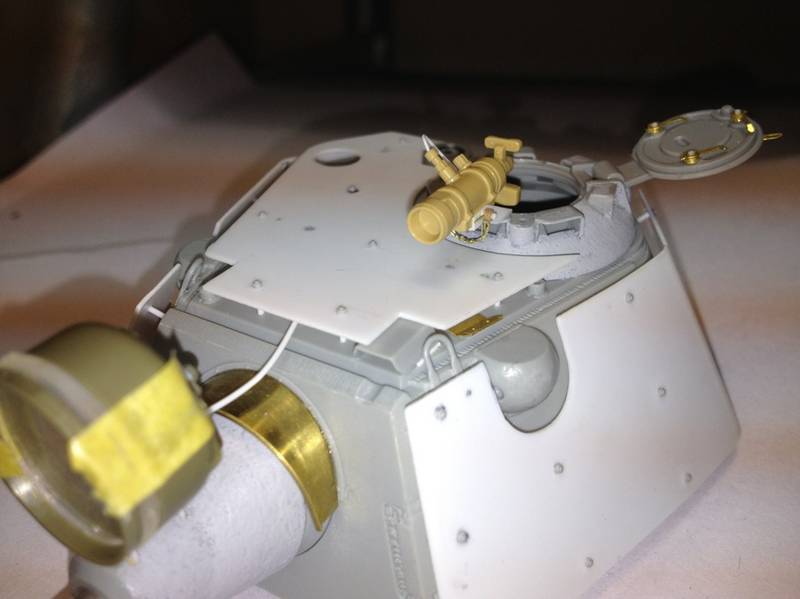
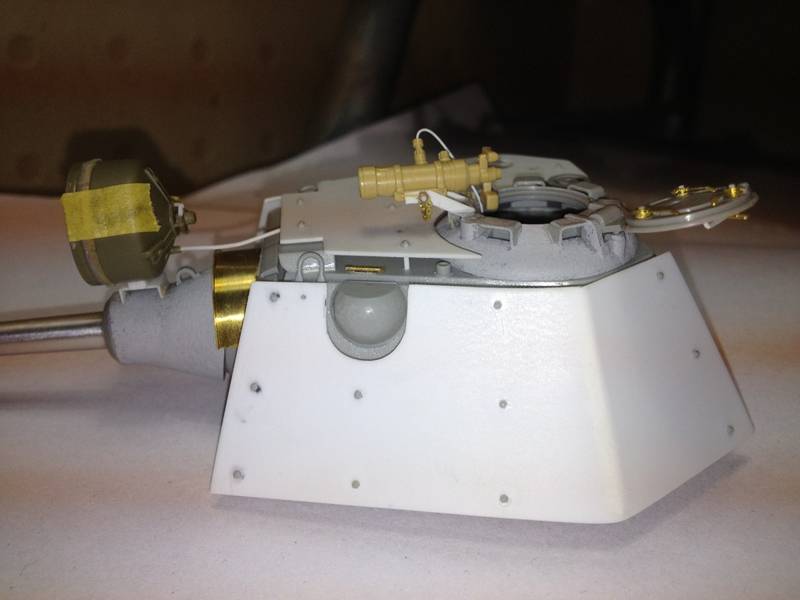
Engine hatch, tie-downs, and other baubles. The hatch was too large for the opening and required trimming...and more trimming...to fit. You also have to open the holes for the recovery pieces. The grab handle for the hatch was broken and was replaced by a Dragon one from the spares. I also mounted the periscopes to the front but cropped them out of the pictures.


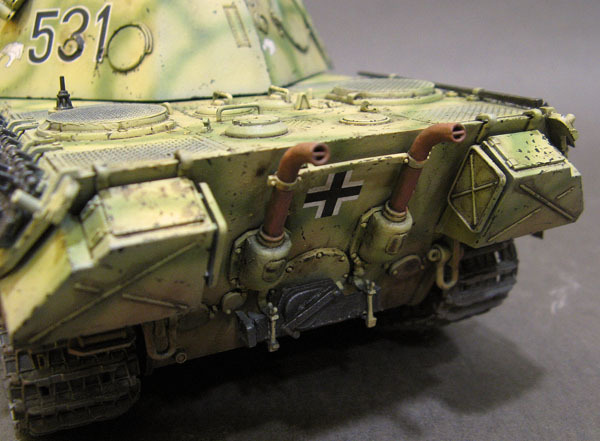
Time to combine the upper and lower hulls. Fit was pretty bad. I clamped the rear and heavily taped the front. There's a big gap on the front where the two pieces meet.


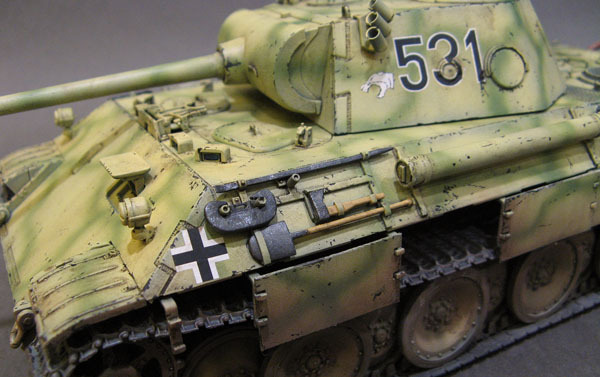
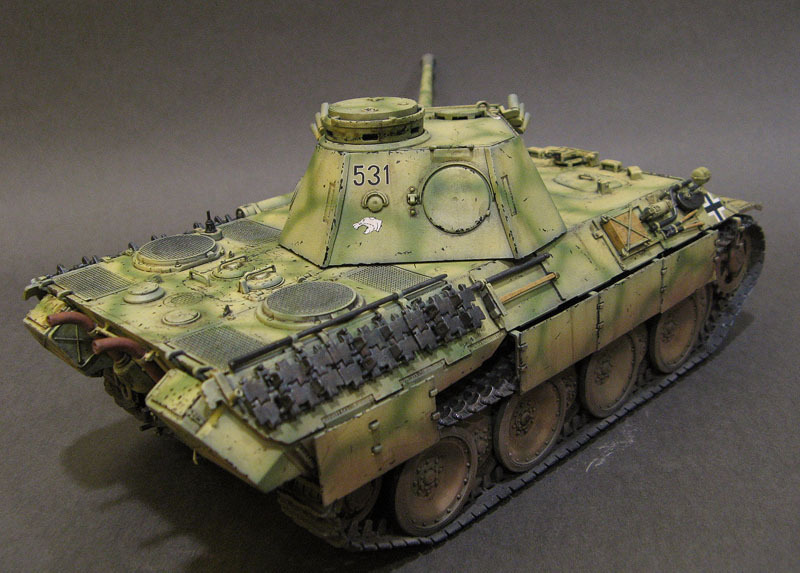
Driver and hull-gunner's hatches. The driver's hatch was broken, but was fixed. Like the engine hatch, the plate for the hatches was too big for the opening. It required a lot of trimming to fit. Watch how much you shave off the plate edges to preserve the bolt detail.


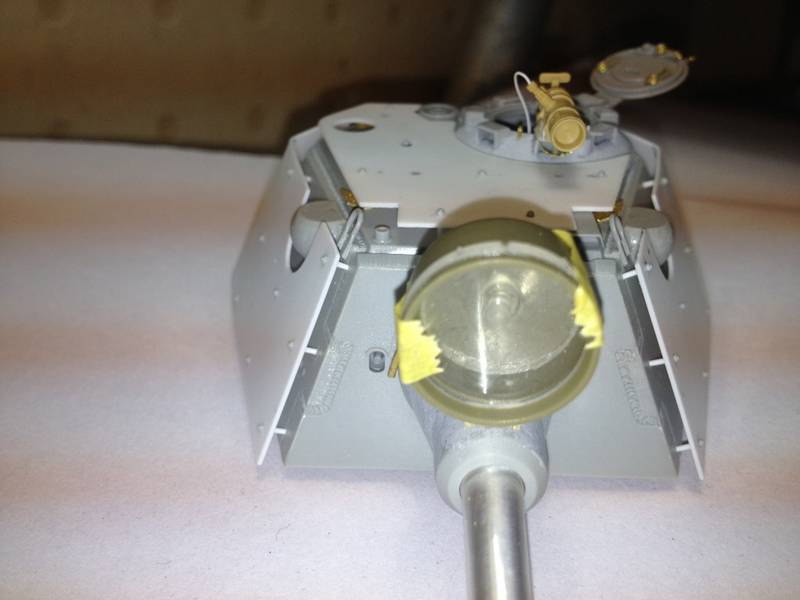
Front hull details. This kit comes designed for two headlights. Driver's visor went on surprisingly well. It actually raises and lowers. It doesn't fit the opening but it does raise and lower.


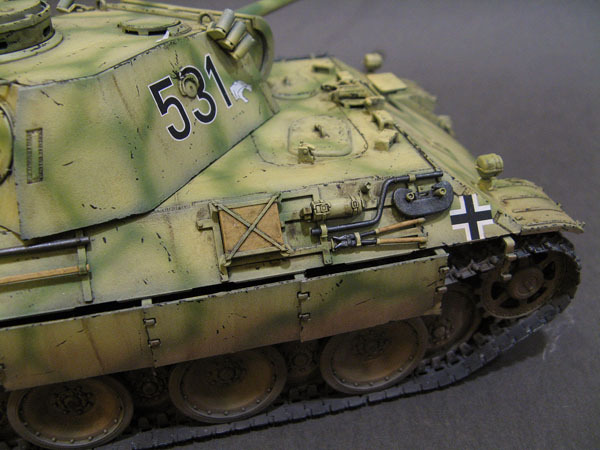
The kit comes with two flat metal pieces that are supposed to mount atop the two outside periscopes. The problem is that the hatches cannot be opened because they cannot clear these pieces. These pieces are seen on the production Bergpanthers, which do not use the standard hatches.
I googled and found a picture of an early Bergepanther. It didn't have the pieces, so I decided to leave them off.
By the way, the picture is of one of the two two-headlight early bergepanthers. It's towing a Ferdinand so I'm assuming it's from s.Pz.Jag.Abt 654. The markings for this vehicle are included with the kit, though the kit calls for a 3-color scheme whereas the picture looks to be overall dark yellow. It's a neat picture and you can see the bergepanther under full tow load.


And that's where I am at the moment. I might take a break from this one for a few days to work on my piece for the Market Garden Campaign.
JoeOsborne
Visit this Community
California, United States
Joined: October 08, 2013
KitMaker: 111 posts
Armorama: 67 posts
Posted: Sunday, October 19, 2014 - 03:05 AM UTC
Had a decent build day yesterday. Pretty straight forward build with not a lot of parts.

Here's the progress:


I had left off the exhausts as I wasn't sure what time period I'd build for (there is option A and B in the kit). I've decided the earlier as I'm going to depict an Ardennes Offensive jagdpanther.


Still doing research. Don't seem to find a lot on the jagdpanther.

rolltide31
#377
Visit this Community
Texas, United States
Joined: June 27, 2010
KitMaker: 1,481 posts
Armorama: 93 posts
Posted: Sunday, October 19, 2014 - 10:30 AM UTC
Hey all,

Hope everyones build is going well. Small update, I mounted all of the PE Zimmerit that came with this Tamiya Kit. A good fit over all, a few gaps that will require home made zimmerit. I must admit that fit is better on this kit than it was for the other Panther I am working on, which is funny cause they are the same kit.


Here is a shot with both of the kits together


Once these are done they will be mounted in a dio depicting the 107 PB cutting Hells Highway during Operation Market Garden.

Now that the zimmerit is on I am in a holding pattern until the Eduard PE kit arrives sometime this week. I am trying to build this mostly OOB except for the tracks and the Eduard PE kit. Anyway, everyones build is looking good.

Dave
Nito74
Visit this Community
Lisboa, Portugal
Joined: March 04, 2008
KitMaker: 5,386 posts
Armorama: 4,727 posts
Posted: Sunday, October 19, 2014 - 11:30 AM UTC
I have a lot on the bench, these days have been a little crazy, I need to set my mind on "bench Mode"... so many late Campaigns, Flak,IDF... crap I'll have to drop some soon.

Anyway my progress, well not much done, just opened the box and checked the hull parts that fit perfectly.


I might switch some Panther ICM / Dragon parts


PantherF
Visit this Community
Indiana, United States
Joined: June 10, 2005
KitMaker: 6,188 posts
Armorama: 5,960 posts
Posted: Sunday, October 19, 2014 - 11:35 AM UTC
Awesome John!


That kit is what I used for my Coelian build a few years back.

Love ICM.


Jeff
Nito74
Visit this Community
Lisboa, Portugal
Joined: March 04, 2008
KitMaker: 5,386 posts
Armorama: 4,727 posts
Posted: Sunday, October 19, 2014 - 03:10 PM UTC
Good to know Jeff, looks like a good kit.
It's going to be OOB except for the Dragon parts (wheels & maybe tools)
Ot's going to be a slow build with all the things I have on my bench.

Yeti01012001
Visit this Community
England - North West, United Kingdom
Joined: July 28, 2005
KitMaker: 360 posts
Armorama: 334 posts
Posted: Monday, October 20, 2014 - 01:23 AM UTC
Some added further progress. I have added some random decals to the tank they are no ment to repesent any regiment or group.

next step, wash , filter, pin wash and weathering. I have started. i have also started to builr a miniart kit to go with the panther


PantherF
Visit this Community
Indiana, United States
Joined: June 10, 2005
KitMaker: 6,188 posts
Armorama: 5,960 posts
Posted: Monday, October 20, 2014 - 01:28 AM UTC
Oh that is looking HAWT there Gary and it gave me an idea!

I need to place mine on a piece much like that so I think Mini Art has them... you know, instant gratification landscaping!


Jeff
Bluestab
Visit this Community
South Carolina, United States
Joined: December 03, 2009
KitMaker: 2,160 posts
Armorama: 1,906 posts
Posted: Monday, October 20, 2014 - 11:31 AM UTC
I decided to go ahead and soldier ahead on this one to get most of the assembly done. I'm hoping to get some paint on it by this weekend and be done with it by the end of the month.

Side shots of the tool racks and extra track links mounts. I left the track links off until after I paint.


Crane boom and tow rig. Both are really simplified. The crane only has three parts, including the block and tackle. I left that off until after painting. I wish ICM had made provisions for displaying the crane in a stowed state.


Turret ring cover.


Basic assembly done. I should have it with a base coat of paint by the weekend. I'll probably go overall, dark yellow. I'm debating on the side skirts being used or left off. No MG. I'll probably throw together some sort of crew. And I'll toss a few baubles on it.


Removed by original poster on 10/21/14 - 03:55:50 (GMT).
grafspee16
Visit this Community
Singapore / 新加坡
Joined: September 24, 2005
KitMaker: 45 posts
Armorama: 33 posts
Posted: Monday, October 20, 2014 - 04:00 PM UTC
My Panther D


Tiger_213
Visit this Community
California, United States
Joined: August 10, 2012
KitMaker: 1,510 posts
Armorama: 1,443 posts
Posted: Monday, October 20, 2014 - 07:59 PM UTC
My MIAG pattern zimmerit;


And one big piece for one side; maybe the rear plate and bit's of the hull pan;


Didn't really like doing one large sheet but I'm afraid of ruinung the kit if I don't like the results (like right now, for example, it's to damn thick).

Ken, well done. Did you add the scratches after the camouflage or chip to the undercoat?
wedgetail53
Visit this Community
Queensland, Australia
Joined: October 02, 2008
KitMaker: 658 posts
Armorama: 629 posts
Posted: Monday, October 20, 2014 - 08:37 PM UTC
Ken

Looks really good - I'll bookmark your photos to use when I build mine.

A couple of comments which I hope will help:

1. The post sticking out of the black antenna base should be bright shiny copper. The antenna was slipped over this post and held on with a screw clamp.

2. The spare track links and the "C" hooks should all have retaining pins through their brackets to hold them in place, and the retaining pins were fitted with a short length of chain to prevent their getting lost.

Regards

Rob
Nito74
Visit this Community
Lisboa, Portugal
Joined: March 04, 2008
KitMaker: 5,386 posts
Armorama: 4,727 posts
Posted: Tuesday, October 21, 2014 - 11:11 AM UTC
@Ken

Your Panther looks great but...
since the Campaign started (page 5) I didn't see a single WIP photo or a starting photo.

From your photos I can't when you did start your build.
Please read the Campaign rules & guidelines HERE
viking252200
Visit this Community
Saitama-ken, Japan / 日本
Joined: December 22, 2008
KitMaker: 13 posts
Armorama: 10 posts
Posted: Wednesday, October 22, 2014 - 03:42 AM UTC
Hi,
Just a quick update on my panther f build...

I pretty much finished the turret, it took a bit longer than anticipated, but here it is...

Since this is a "What if nacht panther", I took an old centurion searchlight and modified it a bit.

And since I had now had this big IR light mounted, I deleted the dinky lamp from the commanders sight
I scratch built a new cradle for the sight and I tried to make it look like a quick release...not quite happy with that though, but I'll properly leave it as is.

Regarding the IR light, any advise as to what colour I should go with?
I tried mixing clear red and clear blue in a 1:1 mix and while it doesn't look half bad, if you guys have any suggestions I'm all ears.

Here are a few pictures...