SgtRam
 Contributing Writer
#197
Ontario, Canada
Joined: March 06, 2011
KitMaker: 3,971 posts
Armorama: 2,859 posts
Posted: Saturday, November 07, 2015 - 04:24 AM UTC
Namabiiru
Associate Editor #399
Rhode Island, United States
Joined: March 05, 2014
KitMaker: 2,888 posts
Armorama: 1,920 posts
Posted: Sunday, November 08, 2015 - 03:49 AM UTC
Grabbed this little gem off the clearance shelf at the LHS yesterday.
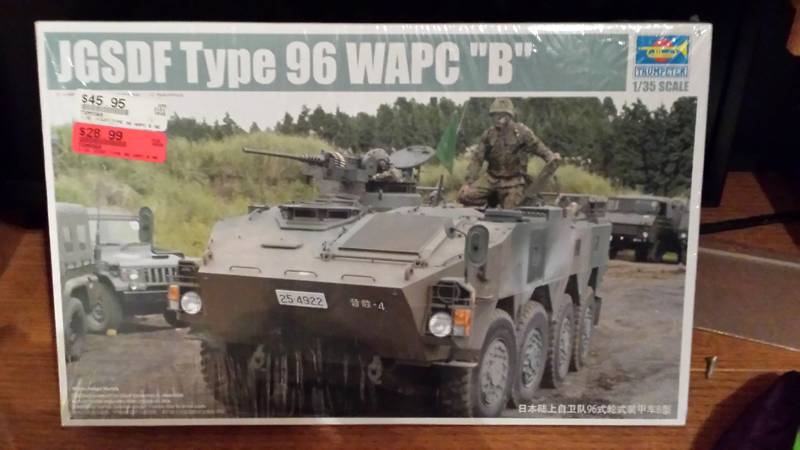
Saved enough on it that I will probably convince myself to get resin wheels to replace the vinyl tires in the kit. Cracking open the box, it appears to be a nice kit.

South Carolina, United States
Joined: December 03, 2009
KitMaker: 2,160 posts
Armorama: 1,906 posts
Posted: Monday, November 09, 2015 - 03:11 AM UTC
Marco, Nice work. I was worried on how the vinyl would turn out, especially for the center wheels. Yours look great.
I'm still planning on a 2016 start with an EBR-10. I've got it on the list for a Black Friday Sale order.
Sao Paulo, Brazil
Joined: January 24, 2012
KitMaker: 1,054 posts
Armorama: 1,050 posts
Posted: Wednesday, November 11, 2015 - 04:53 PM UTC
You're right Alex, but some wathering helps a lot.
As it's a OOB build, I'm not so worried about it, but I think it's turned out in a good way.
Cheers!
Marco
#275
Alberta, Canada
Joined: March 01, 2006
KitMaker: 174 posts
Armorama: 141 posts
Posted: Monday, November 16, 2015 - 02:35 AM UTC
SgtRam
Contributing Writer #197
Ontario, Canada
Joined: March 06, 2011
KitMaker: 3,971 posts
Armorama: 2,859 posts
Posted: Monday, November 16, 2015 - 03:03 AM UTC
@Cam - Looking good
I should have more progress pics up soon.
tatbaqui
News Writer #040
Metro Manila, Philippines
Joined: May 06, 2007
KitMaker: 2,713 posts
Armorama: 2,451 posts
Posted: Monday, November 16, 2015 - 03:41 AM UTC
Nice work Marco! Is the mud a pre-mix paint? Cheers, Tat
Noord-Brabant, Netherlands
Joined: May 22, 2012
KitMaker: 112 posts
Armorama: 97 posts
Posted: Tuesday, November 17, 2015 - 11:56 PM UTC
I am having some trouble with Dragons 234/4. How are the (preformed) brakelines supposed to be attached?
SgtRam
Contributing Writer #197
Ontario, Canada
Joined: March 06, 2011
KitMaker: 3,971 posts
Armorama: 2,859 posts
Posted: Saturday, November 21, 2015 - 07:40 AM UTC
Things are starting to come together, and it is starting to look like something.


I think I am starting to see the bottom of the box, there are a lot of parts here.
#275
Alberta, Canada
Joined: March 01, 2006
KitMaker: 174 posts
Armorama: 141 posts
Posted: Saturday, November 21, 2015 - 08:54 AM UTC
Robbert - I have the dragon kit #6221 of the 234/4 and it does not have any brake lines included. Which kit do you have?
Bayern, Germany
Joined: September 30, 2013
KitMaker: 1,615 posts
Armorama: 1,500 posts
Posted: Saturday, November 21, 2015 - 02:29 PM UTC
Nice Kevin! Is it going to be the "standard" green?
I had a short chat with Trumpter regarding the door handles on step 14. They are apparently pointing to the wrong place for the assembly and I of course ended up mounting it that way

Here's the correct position:


Hope this helps! Looking forward to seeing more of this build!
Building logs: http://armored76.wordpress.com/
Finished projects: http://armored76.wordpress.com/portfolio/
SgtRam
Contributing Writer #197
Ontario, Canada
Joined: March 06, 2011
KitMaker: 3,971 posts
Armorama: 2,859 posts
Posted: Saturday, November 21, 2015 - 07:56 PM UTC
@Cristian - thanks for the information. Yes, I am going with the basic green.
Noord-Brabant, Netherlands
Joined: May 22, 2012
KitMaker: 112 posts
Armorama: 97 posts
Posted: Saturday, November 21, 2015 - 08:38 PM UTC
Quoted Text
Robbert - I have the dragon kit #6221 of the 234/4 and it does not have any brake lines included. Which kit do you have?
Cam, I have the premium version, the one with pre formed brakelines but without metal barrel.
Here is the review of the kit Im building. #275
Alberta, Canada
Joined: March 01, 2006
KitMaker: 174 posts
Armorama: 141 posts
Posted: Sunday, November 22, 2015 - 12:16 AM UTC
Caught buying one of Dragons initial releases again.
Noord-Brabant, Netherlands
Joined: May 22, 2012
KitMaker: 112 posts
Armorama: 97 posts
Posted: Sunday, November 22, 2015 - 12:25 AM UTC
Quoted Text
Caught buying one of Dragons initial releases again.
From what I understand the initial release is better value formoney compared to the premium version. Thankfully I picked mine up for half price at a model show

tatbaqui
News Writer #040
Metro Manila, Philippines
Joined: May 06, 2007
KitMaker: 2,713 posts
Armorama: 2,451 posts
Posted: Sunday, November 22, 2015 - 04:07 AM UTC
Quoted Text
Quoted Text
Caught buying one of Dragons initial releases again.
From what I understand the initial release is better value formoney compared to the premium version. Thankfully I picked mine up for half price at a model show
Robbert,
Here's a build review from IPMS Seattle:
http://www.ipms-seattle.org/reviews/armor/2013-EC-Dragon-06772.pdfJust briefly touched on the brake lines, but maybe you can ask more from the guy who built it. Hope this helps.
Cheers,
Tat
Rimini, Italy
Joined: March 18, 2007
KitMaker: 91 posts
Armorama: 88 posts
Posted: Saturday, November 28, 2015 - 12:24 AM UTC
Hi Guy,
It's time to start.Here is the model I chose Tamiya Sd Kfz 232 8rad with Eduard PE,Panzer Art road wheels and Jordi Rubio alluminum barrel.A little old but still charming


best
Antonio
South Carolina, United States
Joined: December 03, 2009
KitMaker: 2,160 posts
Armorama: 1,906 posts
Posted: Wednesday, December 02, 2015 - 04:19 AM UTC
Okay. Package arrived today. I'm still doing the Hobby Boss EBR-10. Obligatory starter picture.

SgtRam
Contributing Writer #197
Ontario, Canada
Joined: March 06, 2011
KitMaker: 3,971 posts
Armorama: 2,859 posts
Posted: Sunday, December 06, 2015 - 01:41 AM UTC
Still moving ahead, there are a lot of parts to this kit.
The rear interior section looks good with the kit decals, but if I had wanted to leave the doors open, I would have painted and added wiring, but with doors closed, should look good.

Same goes for forward sections.

I did glue the missile halves together today, so the end may be in site.
Bayern, Germany
Joined: September 30, 2013
KitMaker: 1,615 posts
Armorama: 1,500 posts
Posted: Sunday, December 06, 2015 - 07:11 PM UTC
That looks nice, Kevin! I'm fighting the control cabin myself and the decals are not that great to work with.
Regarding the protective green of the cabin, are you sure about this? My references show a rust-brown interior for the control cabin and green for the drivers cabin.
Building logs: http://armored76.wordpress.com/
Finished projects: http://armored76.wordpress.com/portfolio/
SgtRam
Contributing Writer #197
Ontario, Canada
Joined: March 06, 2011
KitMaker: 3,971 posts
Armorama: 2,859 posts
Posted: Sunday, December 06, 2015 - 07:56 PM UTC
Quoted Text
That looks nice, Kevin! I'm fighting the control cabin myself and the decals are not that great to work with.
Regarding the protective green of the cabin, are you sure about this? My references show a rust-brown interior for the control cabin and green for the drivers cabin.
The decals are very thin, a bit of a hassle, so care needs to be taken.
From what I read, the interior, including control cab should be Light Seafoam Green, I used Vallejo Pale Green. It was stated in the instructions that is should be Pale Blue, and I have seen some images of the Pale Orange Brown, but I have also seen images of the Pale Green. So I am not sure what the actual color should be.
Bayern, Germany
Joined: September 30, 2013
KitMaker: 1,615 posts
Armorama: 1,500 posts
Posted: Monday, December 07, 2015 - 12:17 AM UTC
Building logs: http://armored76.wordpress.com/
Finished projects: http://armored76.wordpress.com/portfolio/
South Carolina, United States
Joined: December 03, 2009
KitMaker: 2,160 posts
Armorama: 1,906 posts
Posted: Tuesday, December 08, 2015 - 02:35 AM UTC
I started on the EBR-10. Looking at the parts, it looks pretty good. The PE fret has a lot of very small parts...looks like rivets. I wish HB had used styrene for the solid steel inner wheels.
Getting started. As per the instructions I started with the main suspension. A little over-engineered but everything went together well.


Opened the noted holes on the upper hull. Assembled the wheel centers for the center wheels.

Upper hull mounted to the lower hull. I did mark the front with an arrow on the underside and on the inside of the hull floor.

Mounted the suspension assemblies to the hull. Assembled the ...whatever those are...half way down the hull.

Mounts for the solid wheels.

Cover plates for the sides.

With the lower hull basically assembled, I went ahead and prepainted it.

That's where I am now.
SgtRam
Contributing Writer #197
Ontario, Canada
Joined: March 06, 2011
KitMaker: 3,971 posts
Armorama: 2,859 posts
Posted: Thursday, December 10, 2015 - 05:52 AM UTC
Getting there, and I think I am running out of parts. Wow, there is a lot to this kit.


Work is currently focused on the cab, and will be priming the rocket and the cradle soon.
#275
Alberta, Canada
Joined: March 01, 2006
KitMaker: 174 posts
Armorama: 141 posts
Posted: Friday, December 11, 2015 - 10:19 AM UTC
Alex - I had nightmares about all of those tiny photo-etched fender bolts in that kit. Gluing them on with gloss or matte coat makes the job a lot easier.
I have been working on winged things and have not finished my 234 w/luchs turret but this is where it sits.