tatbaqui
 News Writer
#040
Metro Manila, Philippines
Joined: May 06, 2007
KitMaker: 2,713 posts
Armorama: 2,451 posts
Posted: Friday, January 22, 2016 - 09:51 AM UTC
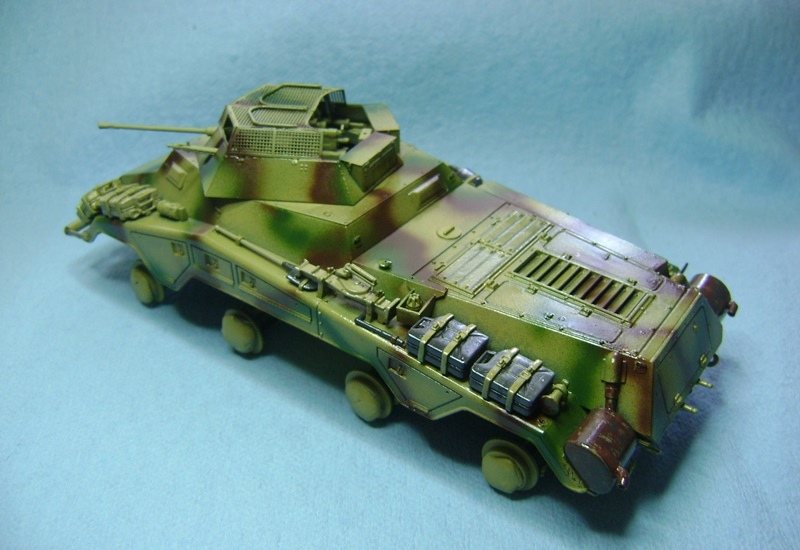
Painted the on-board tools / equipment. Put on a coat of Future. Decals and weathering next. Cheers
Oklahoma, United States
Joined: September 30, 2015
KitMaker: 2,493 posts
Armorama: 2,344 posts
Posted: Friday, January 22, 2016 - 10:51 AM UTC
"Only the dead have seen the end of war." - Plato
Namabiiru
Associate Editor #399
Rhode Island, United States
Joined: March 05, 2014
KitMaker: 2,888 posts
Armorama: 1,920 posts
Posted: Friday, January 22, 2016 - 04:36 PM UTC
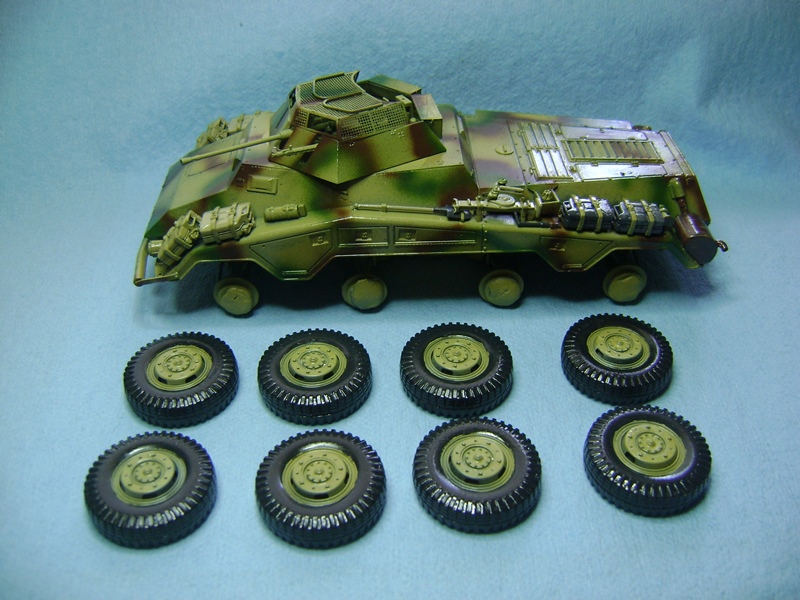
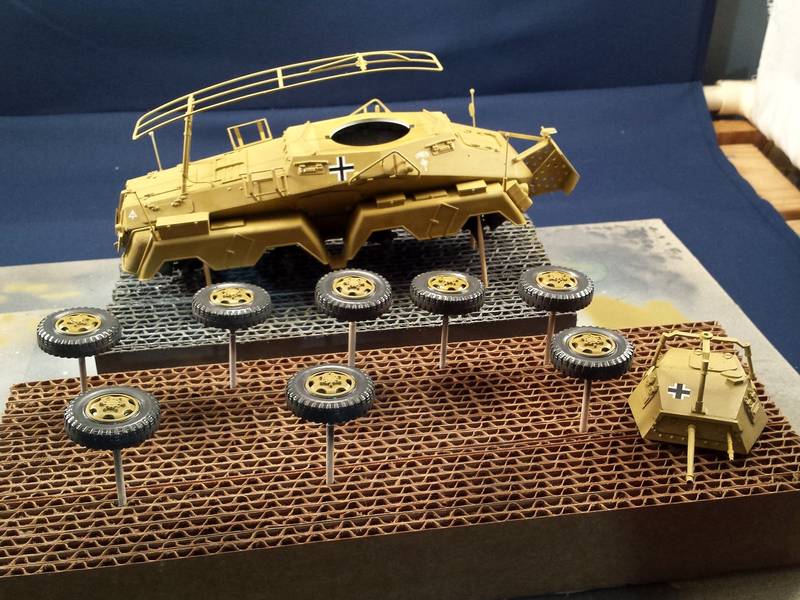
Got started on my Tamiya SdKfz 232 while the primer dried on another build. Being one of Tamiya's older kits, this was promising to be a pretty basic build so I thought I would spice things up by having a go at showing the suspension turned. Knew it would be tricky with 8 wheels to keep in alignment, and ironically the more basic the kit suspension the more challenging it is to change the position.
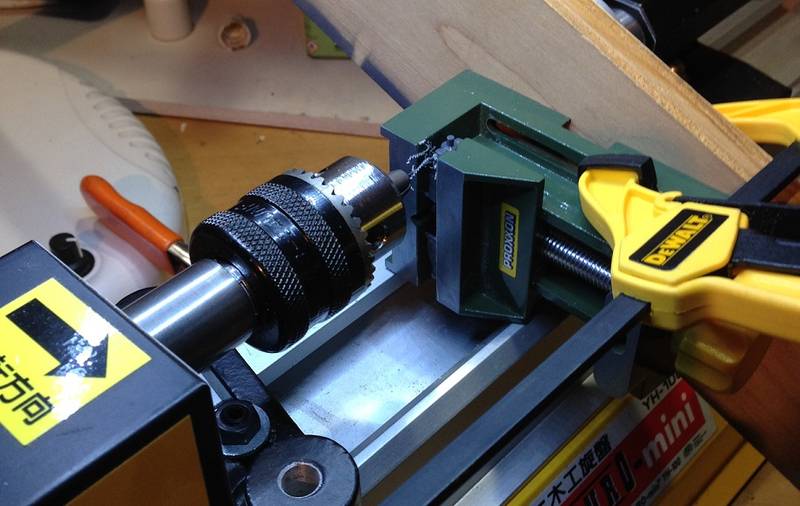
First step was to drill out the connection between the ball joints and the swing arms so I could insert pins to keep everything aligned properly once I started cutting it apart. Since the chuck on my drill press is too big for a 1mm drill bit I needed another way. Hobbyist minilathe+aftermarket drill chuck+scrap+minivise+clamp=success:
After inserting pins made from brass rod I cut the ball joints loose from the swing arms and drive axles. My initial plan was to use the steering linkages to keep all wheels aligned, but found out quickly it just wasn't going to cut it. After beating my brain for a couple of days I hit on this:
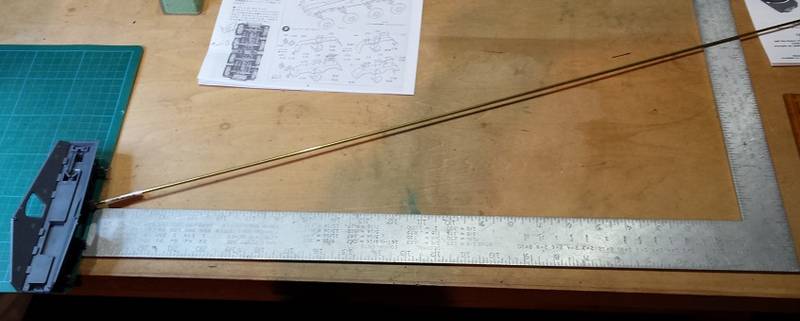
When I discovered I had a piece of tubing that would slide snugly onto the axles, I used trig to figure out the dimensions of a triangle that would give me the steering angle I wanted then laid it all out with a carpenter's square. One axle at a time:
First try at this so even if it fails miserably I will consider the learning curve a success.

tatbaqui
News Writer #040
Metro Manila, Philippines
Joined: May 06, 2007
KitMaker: 2,713 posts
Armorama: 2,451 posts
Posted: Saturday, January 23, 2016 - 04:38 AM UTC
tatbaqui
News Writer #040
Metro Manila, Philippines
Joined: May 06, 2007
KitMaker: 2,713 posts
Armorama: 2,451 posts
Posted: Saturday, January 23, 2016 - 04:44 AM UTC
Wow, you sure know how to put up a challenge Mark!

Me, just thinking about the math makes my nose bleed

Good luck on the build!
Cheers,
Tat
Namabiiru
Associate Editor #399
Rhode Island, United States
Joined: March 05, 2014
KitMaker: 2,888 posts
Armorama: 1,920 posts
Posted: Saturday, January 23, 2016 - 06:17 AM UTC
Thanks, Tat. I figured with the very nicely detailed builds guys like you are displaying I was going to need to do something to bring this old Tamiya kit up to snuff.
Spent a snowy day today crafting a replacement barrel for the 2cm cannon since the kit barrel was never going to look like anything more than a plastic stick. Whenever the gallery is working again I will try to post a photo.
Namabiiru
Associate Editor #399
Rhode Island, United States
Joined: March 05, 2014
KitMaker: 2,888 posts
Armorama: 1,920 posts
Posted: Sunday, January 24, 2016 - 11:53 PM UTC
Here's the new barrel mounted alongside a replacement MG34 from the spares box.
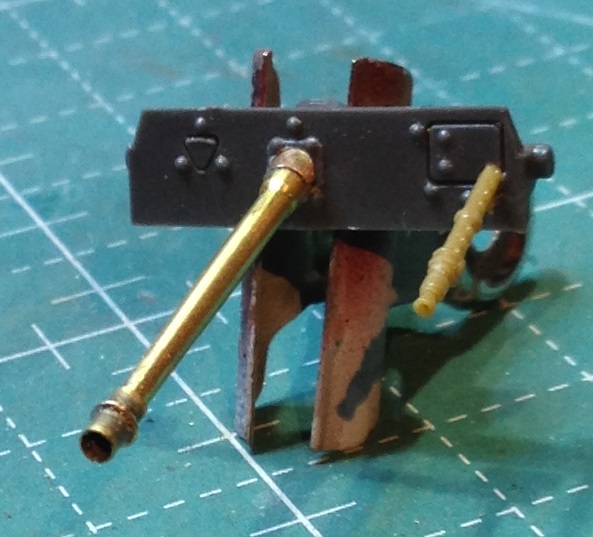
The barrel was turned out of brass rod, and the flash suppressor was soldered together from some PE 'sprue' bent into a tube and some very fine brass wire.
Also decided the solidly molded muffler guards could stand to be improved upon so I made some new ones out of brass wire and mesh. Here they are alongside the kit originals:
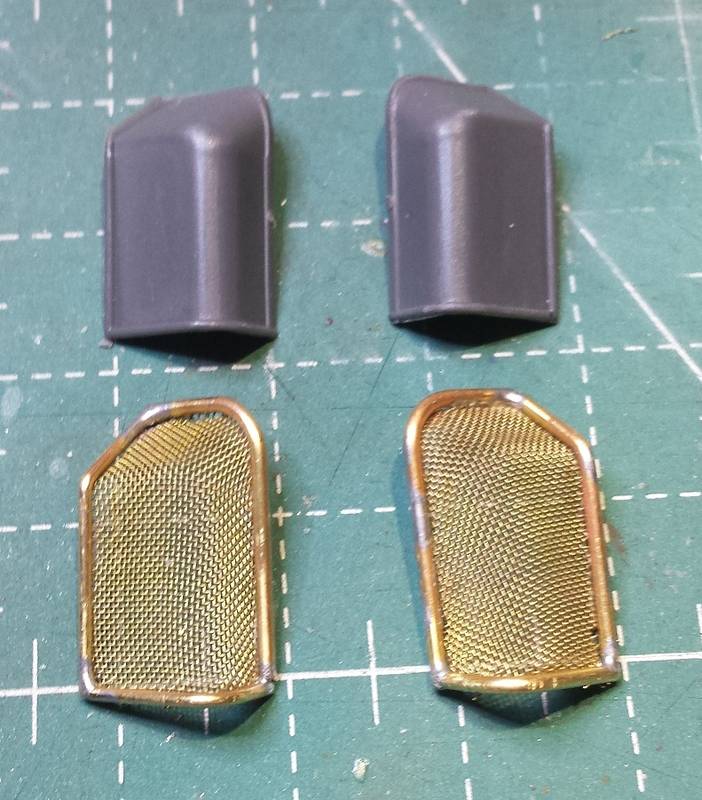
Not near perfect, but a little more convincing (to my eye anyway).
tatbaqui
News Writer #040
Metro Manila, Philippines
Joined: May 06, 2007
KitMaker: 2,713 posts
Armorama: 2,451 posts
Posted: Monday, January 25, 2016 - 04:42 AM UTC
You have me convinced Mark, very nicely done for both!
Curious, where do you source brass wire? Already having doubts that its available on my side of pond -- the only ones I can get my hands on are lengths of copper from electrical wires.
Cheers,
Tat
Namabiiru
Associate Editor #399
Rhode Island, United States
Joined: March 05, 2014
KitMaker: 2,888 posts
Armorama: 1,920 posts
Posted: Monday, January 25, 2016 - 05:03 AM UTC
Thanks, Tat.
When I was living in Japan I had the most incredible DIY and hobby store just a few blocks from my house--a place called Joyful Honda. I was able to get all kinds of things there, including the brass wire, which I loaded up on for another project quite some time ago. Might be able to get it on E-bay, which is where I got the mesh.
tatbaqui
News Writer #040
Metro Manila, Philippines
Joined: May 06, 2007
KitMaker: 2,713 posts
Armorama: 2,451 posts
Posted: Monday, January 25, 2016 - 06:51 AM UTC
Thanks Mark, my quest continues!

Western Australia, Australia
Joined: December 31, 2013
KitMaker: 338 posts
Armorama: 121 posts
Posted: Thursday, February 04, 2016 - 05:45 PM UTC
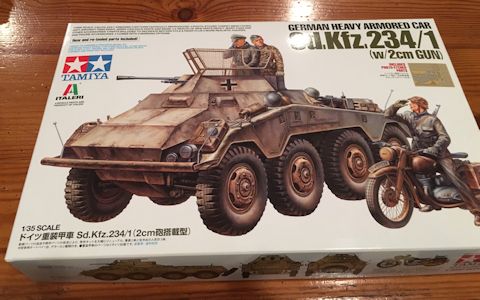
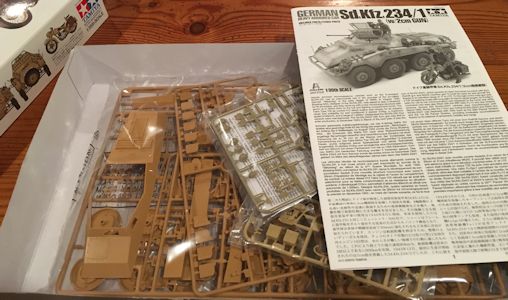
Starting my Tamiya Sd.Kfz.234/1
In the Hangar:
- 1/48 Hasegawa P-38J/L
In the Workshop
-1/35 Tamiya Mobelwagen
California, United States
Joined: June 11, 2009
KitMaker: 461 posts
Armorama: 370 posts
Posted: Friday, February 05, 2016 - 02:21 AM UTC
Here is my entry for this campaign. The Toxso SCUD Launcher. I plan to paint this in Iraqi scheme.

Lisboa, Portugal
Joined: March 04, 2008
KitMaker: 5,386 posts
Armorama: 4,727 posts
Posted: Friday, February 05, 2016 - 06:13 AM UTC
Quoted Text
Looks great, John. I like the unusual markings and camouflage. What is the unit? Some kind of Russian interior police or militia?
Are you going with a clean build or are you going the weather it?
Jesper,Trumpeter has no info on the markings, I liked the markings ans scheme.. it was a hard to choose, there were some very cool markings and different camo's with the BTR-80
I will leabe it like that since I knocked the suspension arm while handling the model.. also had to glue the left mirror again.
I will move to another build, my bench is full of plastic at the moment .
Active Builds: 0
Active Campaigns: 0
Bayern, Germany
Joined: September 30, 2013
KitMaker: 1,615 posts
Armorama: 1,500 posts
Posted: Friday, February 05, 2016 - 11:27 AM UTC
The Toxso Scud is a great choice. I always wanted to see how this kit compares to Dragon's and Trumpeter's larger scale versions.
Building logs: http://armored76.wordpress.com/
Finished projects: http://armored76.wordpress.com/portfolio/
England - North West, United Kingdom
Joined: January 02, 2007
KitMaker: 781 posts
Armorama: 676 posts
Posted: Saturday, February 06, 2016 - 05:03 AM UTC
ok guys so heres my entry

this is from friday evening gave model a basecoat of nato green and made up the wheels, and part of lower hull rear section, just waiting on the et models photoetch set before do anymore work on upper hull. debating how to do suspension but enough waffling for now


i have no idea why came out so small from kitmaker gallery or how to enlarge it..
Namabiiru
Associate Editor #399
Rhode Island, United States
Joined: March 05, 2014
KitMaker: 2,888 posts
Armorama: 1,920 posts
Posted: Saturday, February 06, 2016 - 05:23 PM UTC
Tony,
Looks Like you pasted the url for the linked thumbnail. Instead, what you need to do is click the little icon to the right of that and then copy the link that appears below labeled as "HTML Code"
England - North West, United Kingdom
Joined: January 02, 2007
KitMaker: 781 posts
Armorama: 676 posts
Posted: Sunday, February 07, 2016 - 02:56 AM UTC
Mark thank you for pointing my terrible mistake
here we go with my pic

Nova Scotia, Canada
Joined: February 07, 2015
KitMaker: 58 posts
Armorama: 27 posts
Posted: Monday, February 08, 2016 - 06:24 AM UTC
Hi everybody
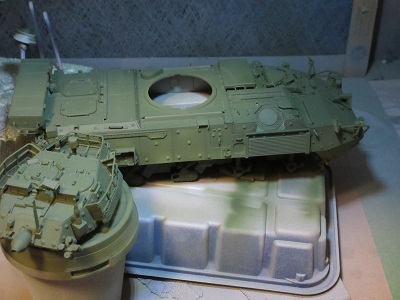
Been a while since I posted anything but I have been making progress on my LAV III. It started off as a fun build but got a bit frustrating with small parts continually breaking off and problems with gluing the PE to the plastic. This was mainly with the storage bins on the turret. It doesn't look the best but I hope to hide it with some equipment and tarps.
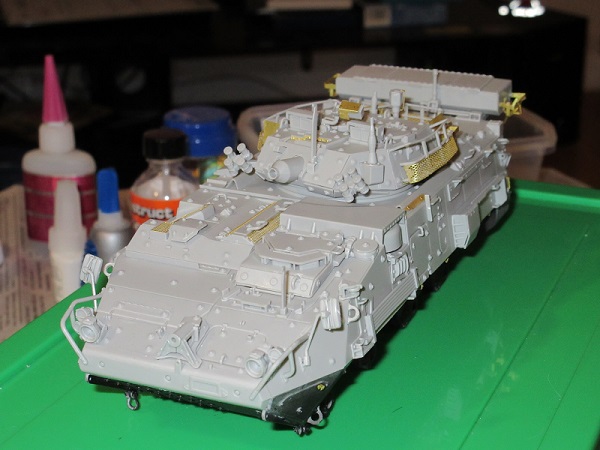
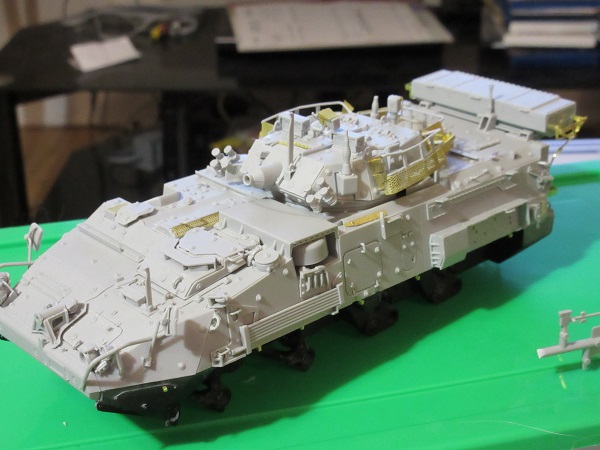
Next up is the paint booth

Ron
Namabiiru
Associate Editor #399
Rhode Island, United States
Joined: March 05, 2014
KitMaker: 2,888 posts
Armorama: 1,920 posts
Posted: Wednesday, February 10, 2016 - 03:47 AM UTC
SdKfz 232 ready for PRIME time:
#016
England - East Anglia, United Kingdom
Joined: March 18, 2009
KitMaker: 142 posts
Armorama: 138 posts
Posted: Tuesday, February 16, 2016 - 11:48 AM UTC
Hi guys I'm a bit of a late starter to this group build and haven't built any thing for a while so quite looking forward to starting up again.
I'm going to do a couple of strykers and try a suspension mod
I've looked thought the post and there some good builds so far guy, I have a week of work coming up so will get the bulk of it done then but may start tonight
North Carolina, United States
Joined: September 16, 2004
KitMaker: 1,281 posts
Armorama: 1,222 posts
Posted: Wednesday, February 17, 2016 - 02:56 AM UTC
Almost forgot about this one

Will try to complete this:


Nova Scotia, Canada
Joined: February 07, 2015
KitMaker: 58 posts
Armorama: 27 posts
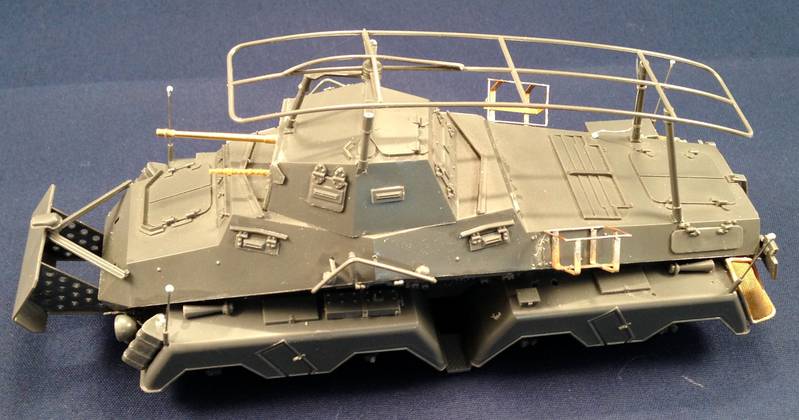
Posted: Thursday, February 18, 2016 - 05:36 AM UTC
Hi Everybody
I've started the paint process for my LAV. I'm trying some new techniques with this build like preshading the model.
I haven't got the steadiest hand for painting straight lines... I put the first coat on with a 50/50 of Tamiya NATO Green and Field Grey.
I can see some of the preshading effect but most was covered with too much paint, lessons for next time. Next I am going to lighten the paint mix up and paint the middle of the panels. Hopefully my hand will be steadier for that

Ron
Namabiiru
Associate Editor #399
Rhode Island, United States
Joined: March 05, 2014
KitMaker: 2,888 posts
Armorama: 1,920 posts
Posted: Friday, February 19, 2016 - 04:37 AM UTC
Not going to be able to compete with Ron's wicked LAV, but here's the 232 with base coat, future, and decals:
Tried to do some post-shading before I sprayed the future, but I think the color variation was too subtle to really show up. We'll see how it looks after weathering.
#016
England - East Anglia, United Kingdom
Joined: March 18, 2009
KitMaker: 142 posts
Armorama: 138 posts
Posted: Saturday, February 20, 2016 - 12:05 AM UTC
Well I had a bit of a Stryker fetish a while ago dut never got round to building one, I have four in my stash and plan on building all four witch is a little ambitious but I think I have time and cand do a bulk build
I have an M1132 ESV with a mine roller and a dozer blade I plan to fit both to two different strykers
M1126 ICV
M1127 reconnaissance vehicle
And a M1131 fire support
I Plan to make the stowage different on each vehicle so that it makes them more as they all look pretty much the same
Plan to start on Monday so I will post some pic soon
North Carolina, United States
Joined: September 16, 2004
KitMaker: 1,281 posts
Armorama: 1,222 posts
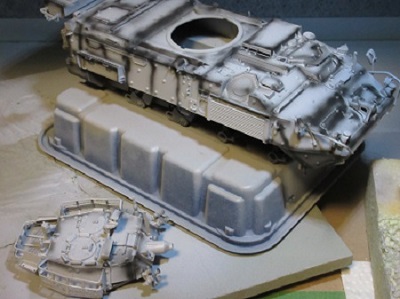
Posted: Saturday, February 20, 2016 - 11:45 AM UTC
A couple in-progress pics of my Sd.Kfz.263.


