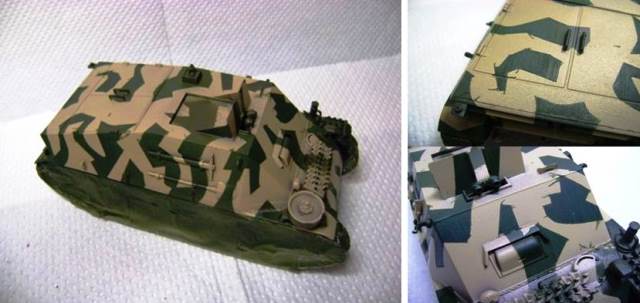
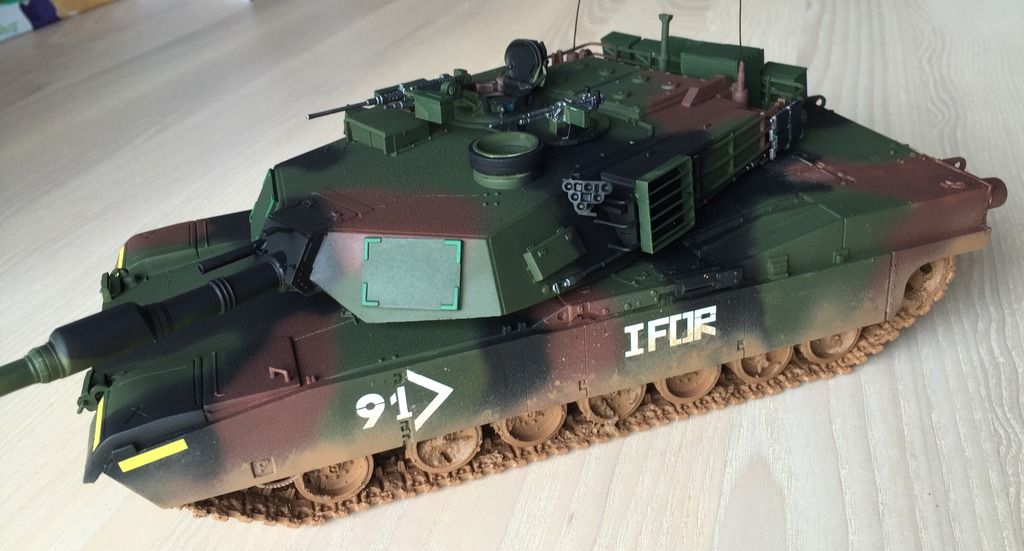
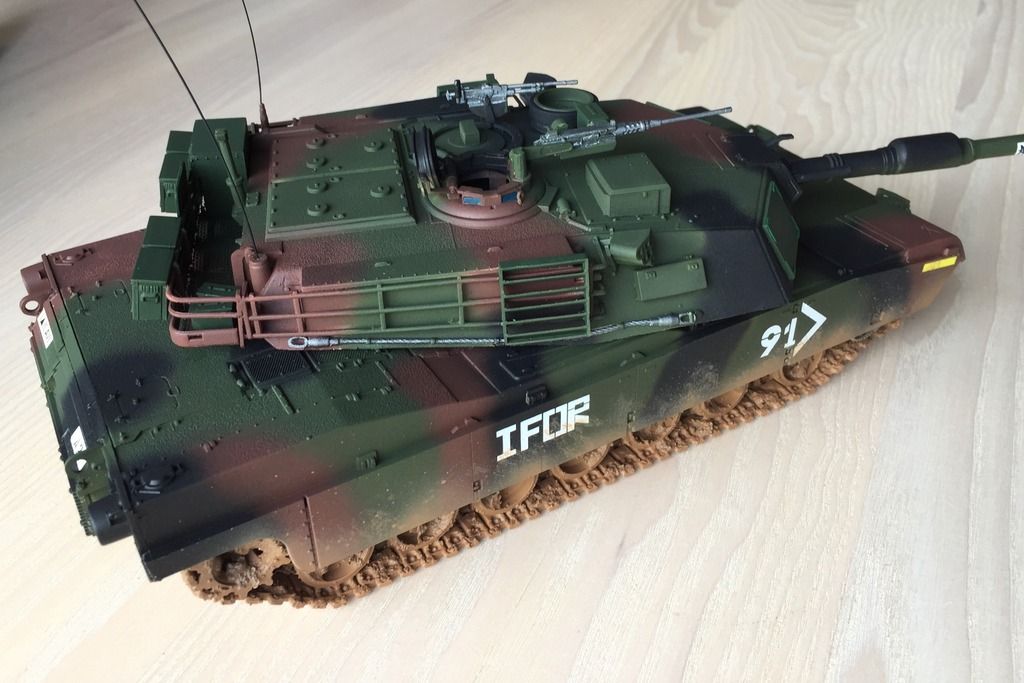
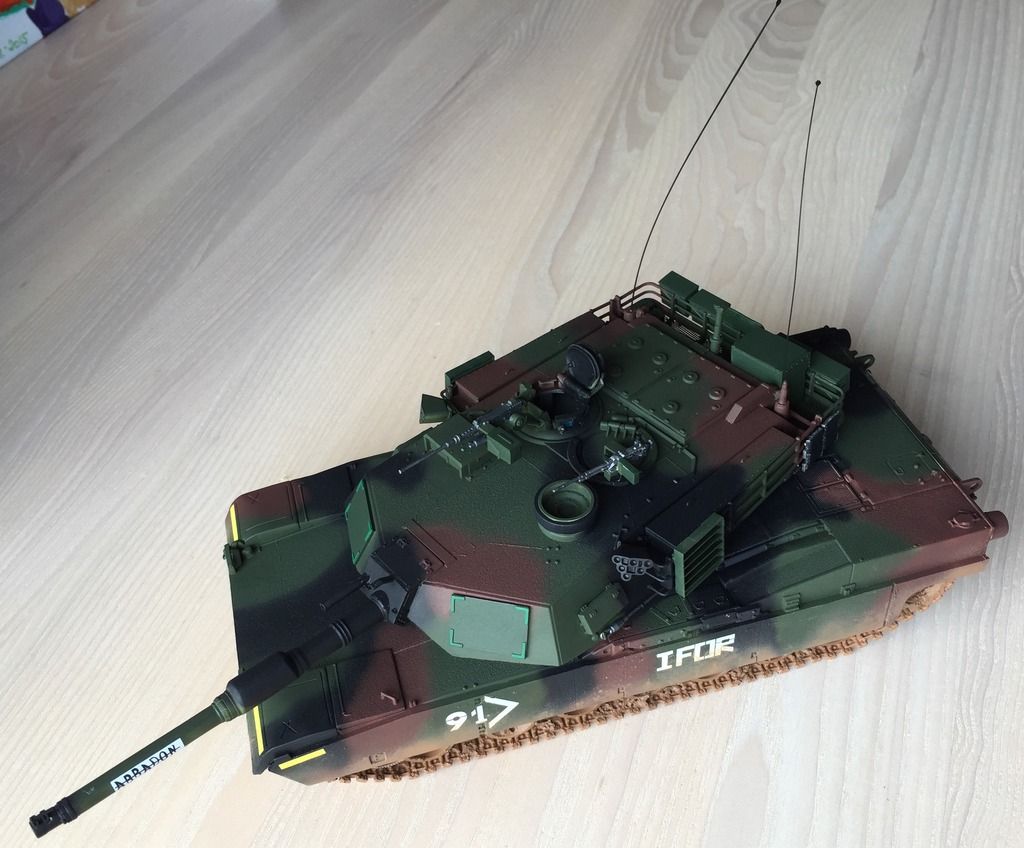
Nice work Tat camo looks good, some fantastic builds going on, Jesper I like your Abrams bud.
Pete
Campaigns: Active Campaigns
Campaigns that are either in planning or underway should be grouped here.
Campaigns that are either in planning or underway should be grouped here.
Hosted by Richard S.
Trumpeter Mk.II Campaign
Posted: Sunday, August 07, 2016 - 01:33 PM UTC
Posted: Sunday, August 07, 2016 - 02:30 PM UTC
Thanks Jesper, Pete! I've just painted the tracks and tools. Weathering next. Cheers, Tat
terminators

Joined: February 20, 2012
KitMaker: 1,932 posts
Armorama: 1,907 posts

Posted: Sunday, August 07, 2016 - 02:34 PM UTC
Quoted Text
Hello Alex
I'm replacing the vinyl tracks with PE. The PE is from ACE models originally for the PST or ACE models T-55.
OK. Those tracks have a good looking. Need to be very patient to built them !
Posted: Sunday, August 07, 2016 - 03:46 PM UTC
Thanks, Peter. Appreciated 


Ranger74

Joined: April 04, 2002
KitMaker: 1,290 posts
Armorama: 658 posts

Posted: Monday, August 08, 2016 - 11:54 PM UTC
Quoted Text
Hello,
Nice progress all.
I've been working on this on-off in the last couple of weeks. I wanted to do a sand + green combo, but the results of my masking work were not that good:
So I decided to redo it, this time using Blu-Tac and going for three colors:
Not sure why I got those outline marks on the green areas only -- hope to correct that during the weathering process. Deadline's coming up by month's end so I need to focus in getting this across the line.
Cheers,
Tat
Tat - great looking camo....the putty is easier than tape on vehicles. Is the green paint a different brand from the other two colors? If yes, may account for the residue from the putty. You could try washing with soap and a toothbrush.
Posted: Tuesday, August 09, 2016 - 02:23 AM UTC
Some more progress on the KV-1 over the weekend. It is sitting letting the paint dry and should be ready for more work tonight.
Here are a couple of shots to show where the project is right now:
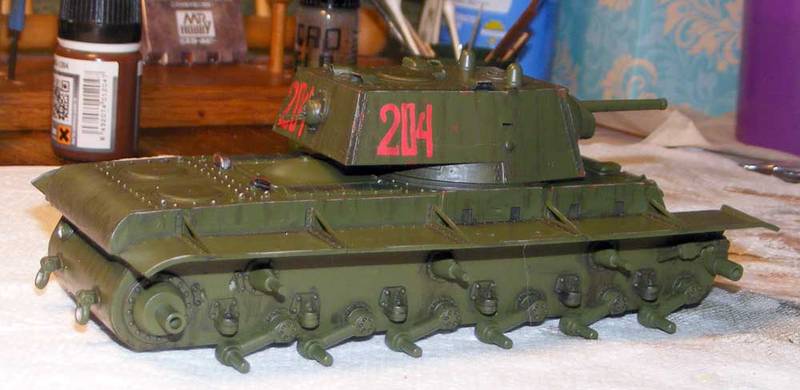
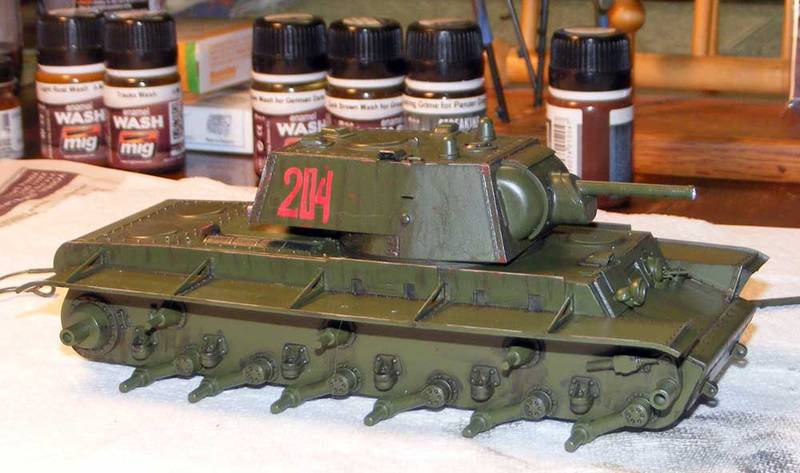
Here are a couple of shots to show where the project is right now:


Posted: Tuesday, August 09, 2016 - 10:51 AM UTC
Quoted Text
Tat - great looking camo....the putty is easier than tape on vehicles. Is the green paint a different brand from the other two colors? If yes, may account for the residue from the putty. You could try washing with soap and a toothbrush.
Thanks for the tip Jeff!
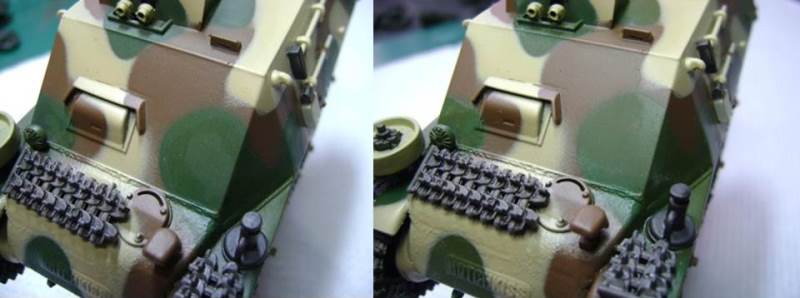
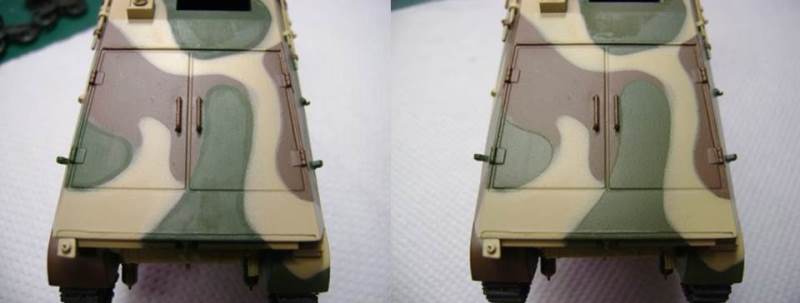
Clearly an improvement from what it was. Some areas have discoloration but I think this is manageable by weathering.
I've used Tamiya rattle cans for all the colors. It's on the green that had something extra. As I had no Olive Green, I sprayed on Tamiya Olive Drab 2, which to me looks close to my intended color. It looked light to me, so I darkened it with oils. I let it dry for a couple of days, before masking with putty. I guess it needed more curing time, or I maybe should have put on a flat clear coat (?). Anyways, lessons learned here!
Cheers,
Tat
Posted: Tuesday, August 09, 2016 - 11:30 AM UTC
Posted: Tuesday, August 09, 2016 - 07:04 PM UTC
Thanks Jesper. Nice to see an M1 with a different scheme!  Tat
Tat
 Tat
Tat
Ranger74

Joined: April 04, 2002
KitMaker: 1,290 posts
Armorama: 658 posts

Posted: Wednesday, August 10, 2016 - 12:01 AM UTC
Quoted Text
Paul, nice weathering of the paint work.
Tat, great save on the residue! Looks really good based on the pictures.
I have made some more progress on the M1A1HA. Next is some weathering and then I will call it done.
More to follow soon
Jesper, great work on your M1. Just one recommendation that should be an easy fix because of the scale. US FM radio antennae are tapered fiberglass rods with the metal antennae imbedded. They can bend only slightly, which is why the base has a large spring. Really fine steel wire or even plastic rod, both of which will be straight should work. .015 steel wire would be about right for the scale of your model. The antennae are approximately 8 feet long, don't know what that is in 1/72. I do like the eye protection devices your assrd to the ends of the antennae.

Posted: Wednesday, August 10, 2016 - 12:15 PM UTC
Jeff, thanks for the info. I was considering if my antenna were too high. 8 feet is approx. 7 cms in scale, so I will shorten accordingly.
Looking at pictures I notice how the antennas are straight even for tanks in motion. I think I will have to correct that.
How thick are the antennas? It seems like I should use quite thick rod for the antennas?
Looking at pictures I notice how the antennas are straight even for tanks in motion. I think I will have to correct that.
How thick are the antennas? It seems like I should use quite thick rod for the antennas?

Ranger74

Joined: April 04, 2002
KitMaker: 1,290 posts
Armorama: 658 posts

Posted: Wednesday, August 10, 2016 - 07:25 PM UTC
Quoted Text
Jeff, thanks for the info. I was considering if my antenna were too high. 8 feet is approx. 7 cms in scale, so I will shorten accordingly.
Looking at pictures I notice how the antennas are straight even for tanks in motion. I think I will have to correct that.
How thick are the antennas? It seems like I should use quite thick rod for the antennas?
Jesper,
The antennae come in equal length two sections that screw together so that they are easier to store and ship replacements. They are approximately 1-inch/2.5 cm at the base and tapper to about a 3/8-inch/1 cm. It may not be possible in 1/72 to replicate the taper. Plastic rod has one advantage over metal wire...I have never impaled my finger on plastic rod.
Again - nice work
Posted: Wednesday, August 10, 2016 - 08:46 PM UTC
Thanks, Jeff. I will see what I can fix on the model.

BravoTwoZero

Joined: June 11, 2009
KitMaker: 461 posts
Armorama: 370 posts

Posted: Wednesday, August 10, 2016 - 09:41 PM UTC
Hello everyone,
I have created a build thread in the Russo-Soviet forum for my Trumpeter 1/72 BTR-80, my contribution for this campaign. Here is the link
http://armorama.com/forums/250324
Thanks,
Joseph
I have created a build thread in the Russo-Soviet forum for my Trumpeter 1/72 BTR-80, my contribution for this campaign. Here is the link
http://armorama.com/forums/250324
Thanks,
Joseph
Posted: Friday, August 12, 2016 - 03:04 PM UTC
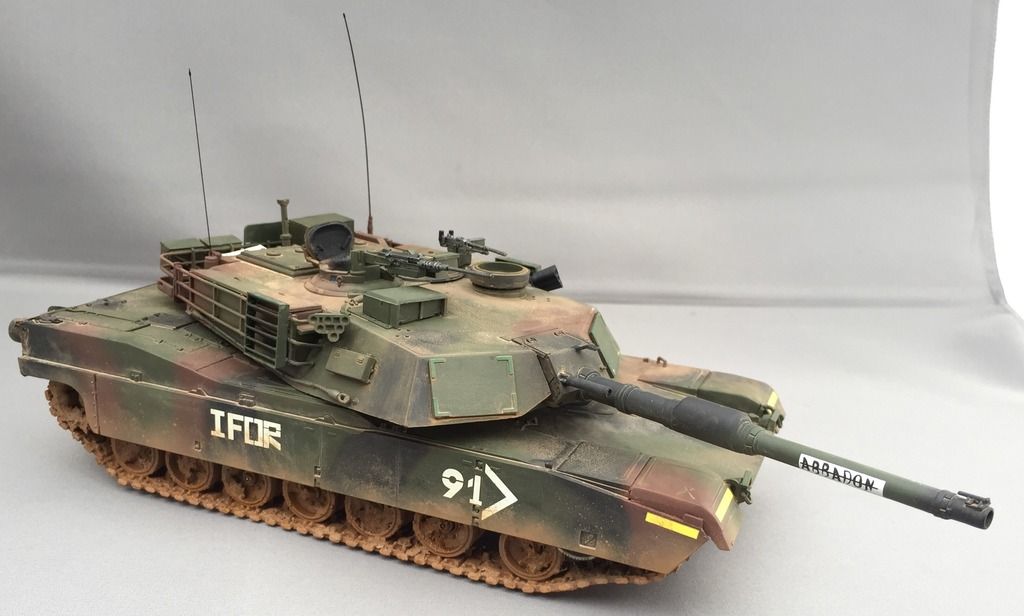
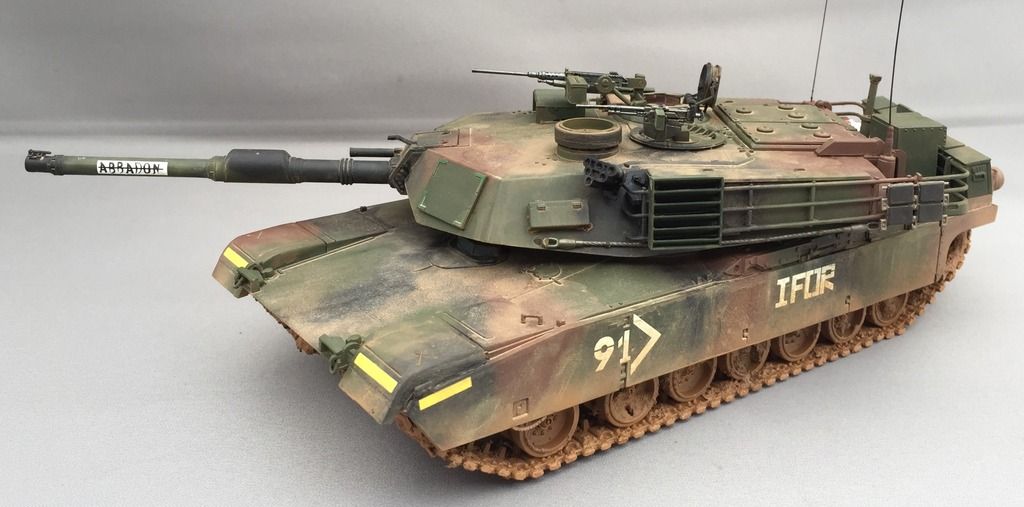
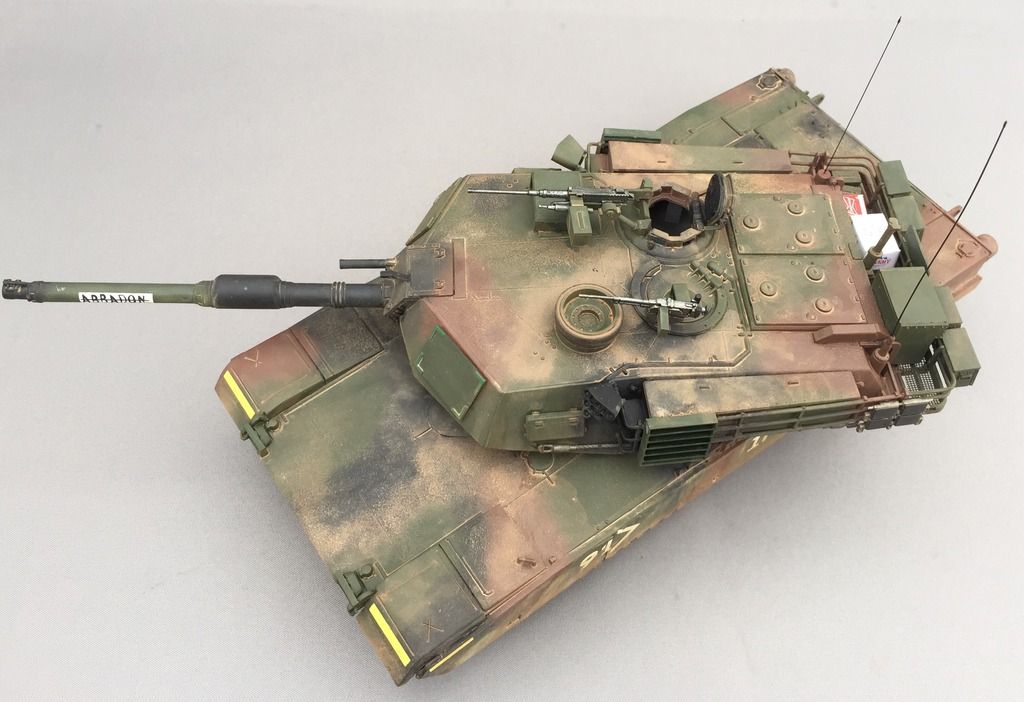
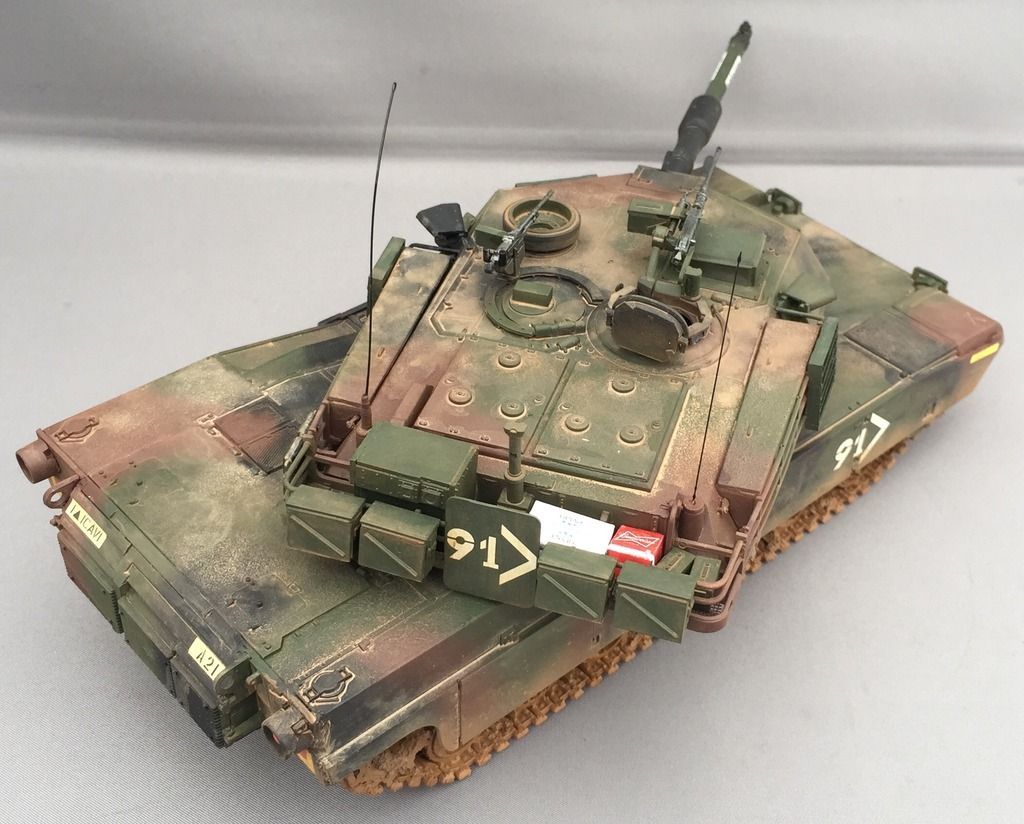
I am calling this one done. 1/35 Trumpeter M1A1HA Abrams in Bosnia 1996.
A decent kit although it shows its age in some places and the there are a few fit issues here and there.
I used the below pictures as inspiration. Although some of the pictures are actually of "Abbadon" I have not build the exact replica at that time. Some of the stawage etc. are different on my model.
I also did not have the courage to weather my M1 as Heavily as in some of the pictures. It seems like at least some of the tanks had a solid layer of dust and mud on the top side from the muddy soil. I added some dust where I expected the crew to move around a lot, but did not go all in.
Thanks for a great campaign. Looking forward to see everybody elses builds.
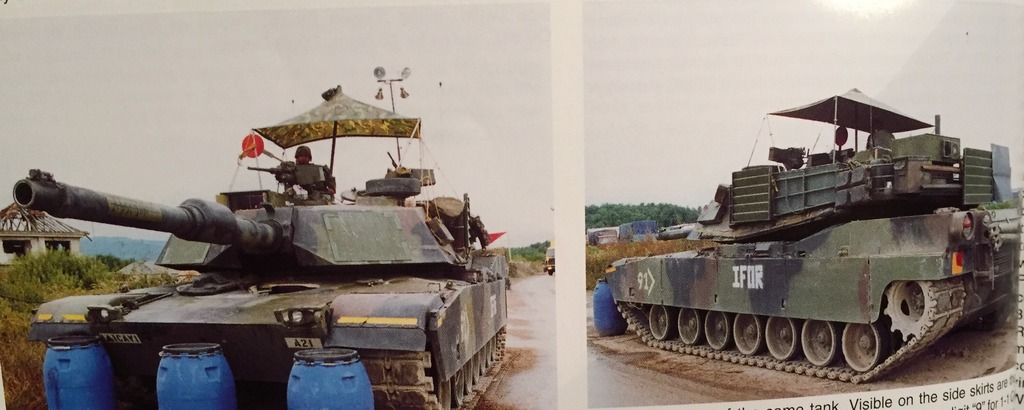

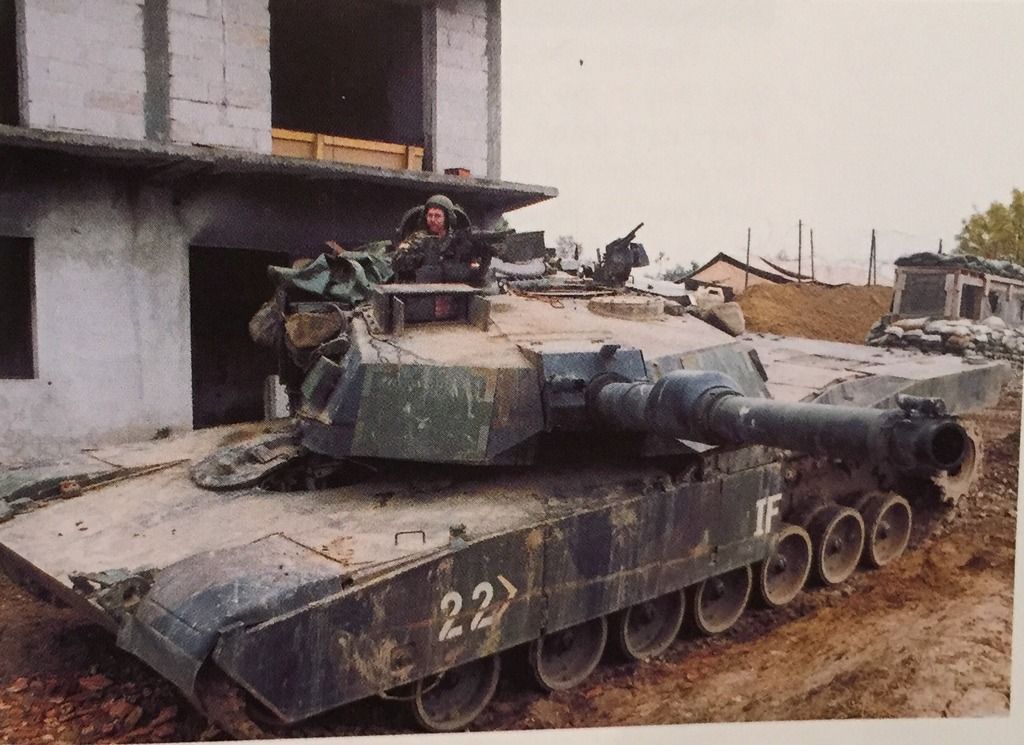
A decent kit although it shows its age in some places and the there are a few fit issues here and there.
I used the below pictures as inspiration. Although some of the pictures are actually of "Abbadon" I have not build the exact replica at that time. Some of the stawage etc. are different on my model.
I also did not have the courage to weather my M1 as Heavily as in some of the pictures. It seems like at least some of the tanks had a solid layer of dust and mud on the top side from the muddy soil. I added some dust where I expected the crew to move around a lot, but did not go all in.

Thanks for a great campaign. Looking forward to see everybody elses builds.


terminators

Joined: February 20, 2012
KitMaker: 1,932 posts
Armorama: 1,907 posts

Posted: Friday, August 12, 2016 - 08:28 PM UTC
Jesper, You have done a very nice model and I Like the free interpretation of your reference pics.
The sun cover and a figure would be nice on it. I like the weathering.
The sun cover and a figure would be nice on it. I like the weathering.
Nito74

Joined: March 04, 2008
KitMaker: 5,386 posts
Armorama: 4,727 posts

Posted: Friday, August 12, 2016 - 08:42 PM UTC
Great work Jesper.
Fine work with the weathering too


Congrats !
Fine work with the weathering too


Congrats !
Posted: Saturday, August 13, 2016 - 01:28 AM UTC
Thanks a lot for the comments, guys. Much appreciated 
A commander is on the way to the turret at some point. No sun or rain tent though.

A commander is on the way to the turret at some point. No sun or rain tent though.
Posted: Saturday, August 13, 2016 - 04:18 AM UTC
Your weathering is just right Jesper, congrats on your finish! Tat
Posted: Saturday, August 13, 2016 - 12:33 PM UTC
Thanks a lot, Tat. I also feel good about it.
One day I will do a very dirty AFV, but for this one I kept it reasonable.
One day I will do a very dirty AFV, but for this one I kept it reasonable.

TacFireGuru

Joined: December 25, 2004
KitMaker: 3,770 posts
Armorama: 2,263 posts

Posted: Sunday, August 14, 2016 - 04:48 AM UTC
terminators

Joined: February 20, 2012
KitMaker: 1,932 posts
Armorama: 1,907 posts

Posted: Sunday, August 14, 2016 - 06:14 AM UTC
My progress
Same thing that for the turret: I have cut the top of the bodywork to be able to put a figure.


Axles built

Remember I am building my model to represent a particular vehicle seen in an article of this magazine.
This magazine does not exist anymore since 2013 because of the death of his editorin-chief Yves DEBAY, killed in Syria during a report.


Registration numbers hand made with separate decals I've cut one by one !

Same thing for the front of the vehicle

missing TOW cable. hand made

New loops from Arms Corps models. I can say they are easy to cut and glue.

Same thing that for the turret: I have cut the top of the bodywork to be able to put a figure.


Axles built

Remember I am building my model to represent a particular vehicle seen in an article of this magazine.
This magazine does not exist anymore since 2013 because of the death of his editorin-chief Yves DEBAY, killed in Syria during a report.


Registration numbers hand made with separate decals I've cut one by one !


Same thing for the front of the vehicle

missing TOW cable. hand made

New loops from Arms Corps models. I can say they are easy to cut and glue.


Ranger74

Joined: April 04, 2002
KitMaker: 1,290 posts
Armorama: 658 posts

Posted: Sunday, August 14, 2016 - 09:05 PM UTC
Quoted Text
I am calling this one done. 1/35 Trumpeter M1A1HA Abrams in Bosnia 1996.
A decent kit although it shows its age in some places and the there are a few fit issues here and there.
I used the below pictures as inspiration. Although some of the pictures are actually of "Abbadon" I have not build the exact replica at that time. Some of the stawage etc. are different on my model.
I also did not have the courage to weather my M1 as Heavily as in some of the pictures. It seems like at least some of the tanks had a solid layer of dust and mud on the top side from the muddy soil. I added some dust where I expected the crew to move around a lot, but did not go all in.
Thanks for a great campaign. Looking forward to see everybody elses builds.
Now it really looks like a tank

 You did a great job on getting the dried dirt/dust in the crevices where it becomes almost impossible to remove unless the crew uses a stiff brush on the washrack

Ranger74

Joined: April 04, 2002
KitMaker: 1,290 posts
Armorama: 658 posts

Posted: Sunday, August 14, 2016 - 09:17 PM UTC
Quoted Text
My progress
Same thing that for the turret: I have cut the top of the bodywork to be able to put a figure.


Axles built

Remember I am building my model to represent a particular vehicle seen in an article of this magazine.
This magazine does not exist anymore since 2013 because of the death of his editorin-chief Yves DEBAY, killed in Syria during a report.


Registration numbers hand made with separate decals I've cut one by one !
Same thing for the front of the vehicle

missing TOW cable. hand made

New loops from Arms Corps models. I can say they are easy to cut and glue.

Looking good. Tires are hard to get right and you nailed them (no pun intended). I have one recommendation that concerns the tow cable. Crews never allow that wire rope to get rusty because rust will weaken the wire and cause small strands to break creating a hazard for personnel handing the cable. Tow cables and winch cables receive regular maintenance consisting cleaning with a wire brush and then a coating of heavy grease. The grease collects dirt on the outside and the cables can appear black or dark brown from accumulated dirt. I paint cables flat black or black/brown mixture and then lightly dry brush with steel for the used look. New cables are steel in color.
terminators

Joined: February 20, 2012
KitMaker: 1,932 posts
Armorama: 1,907 posts

Posted: Sunday, August 14, 2016 - 11:05 PM UTC
Jeff thank you for your kind words. I didn't know for what you say about TOW cables.
Several pics I've seen show rusty or diry cables on M1117. I didn't know for the colors, so thanks for your advices.
Several pics I've seen show rusty or diry cables on M1117. I didn't know for the colors, so thanks for your advices.
 |


