Tennessee, United States
Joined: April 04, 2002
KitMaker: 1,290 posts
Armorama: 658 posts
Posted: Thursday, July 28, 2016 - 07:35 AM UTC
Quoted Text
Quoted Text
Paul,
VF-6B, Saratoga's fighter squadron had just swapped their F4Bs for F3F-3s in 1936.
I'm currently reading WAKE ISLAND PILOT and found out that VMK-11 was still equipped with F3Fs until just weeks before Pearl Harbor. They had only a week to get used to the Wildcats before being sent to Wake. They went into combat having never fired the guns on the F4F.
I read somewhere else that the F4Fs were still in training squadrons into 1942.
There was a Navy scout squadron flying anti-sub patrols during 1942 out of New Caledonia in SBC-4s! As a former US SECDEF once stated, and I paraphrase, "you go to war with what you have."
Tennessee, United States
Joined: April 04, 2002
KitMaker: 1,290 posts
Armorama: 658 posts
Posted: Thursday, July 28, 2016 - 07:43 AM UTC
Construction of the Saratoga has commenced while I give the airgroup a break. I added plastic sheet to blank the numerous openings on the main deck (hanger deck) to stop see-thru. Clamps were needed to help secure the boat bays while the glue dried.


I have also started the four 8" gun turrets using some of the PE to replace the hatches and ladders on the sides of the gun boxes. They are tiny pieces....I need some stronger magnifiers!!


#460
California, United States
Joined: September 16, 2014
KitMaker: 1,156 posts
Armorama: 1,024 posts
Posted: Friday, July 29, 2016 - 01:35 AM UTC
Quoted Text
.I need some stronger magnifiers!! 
Ain't that the truth! I think the biggest single impediment to my modest skills has to be vision. Coke bottle glasses and the visor all come with costs in depth of field and eye fatigue. I can't image doing PE on a 1/700 ship . . .
Vintage Paul
I'd happily live in the past but for air conditioning, the internet, mobile phones, modern medicine & dentistry and, and, and . . .
California, United States
Joined: June 11, 2009
KitMaker: 461 posts
Armorama: 370 posts
Posted: Friday, July 29, 2016 - 08:49 AM UTC
Hello Everyone,
Here is my entry for this campaign.Trumpeter's 1/72 scale Russian BTR-80 APC. Kit number 07267.

Thanks!
-Joseph

#460
California, United States
Joined: September 16, 2014
KitMaker: 1,156 posts
Armorama: 1,024 posts
Posted: Friday, July 29, 2016 - 11:54 PM UTC
Joseph - That looks like a neat kit and in 1/72! I have some of these in 1/35 but haven't ventured into any of them yet. I look forward to seeing how yours comes out.
Vintage Paul
I'd happily live in the past but for air conditioning, the internet, mobile phones, modern medicine & dentistry and, and, and . . .
Tennessee, United States
Joined: April 04, 2002
KitMaker: 1,290 posts
Armorama: 658 posts
Posted: Saturday, July 30, 2016 - 09:24 PM UTC
Quoted Text
Quoted Text
.I need some stronger magnifiers!! 
Ain't that the truth! I think the biggest single impediment to my modest skills has to be vision. Coke bottle glasses and the visor all come with costs in depth of field and eye fatigue. I can't image doing PE on a 1/700 ship . . .
Paul,
That is why I stopped after adding new hatched and ladders to both sides of just one 8" gun house! My patience and hands needed a break.

#298
Hong Kong S.A.R. / 繁體
Joined: August 08, 2002
KitMaker: 1,182 posts
Armorama: 665 posts
Posted: Sunday, July 31, 2016 - 12:54 PM UTC
Started to build my entry JGSDF Type89 IFV.


#460
California, United States
Joined: September 16, 2014
KitMaker: 1,156 posts
Armorama: 1,024 posts
Posted: Sunday, July 31, 2016 - 10:59 PM UTC
Vintage Paul
I'd happily live in the past but for air conditioning, the internet, mobile phones, modern medicine & dentistry and, and, and . . .
California, United States
Joined: June 11, 2009
KitMaker: 461 posts
Armorama: 370 posts
Posted: Sunday, July 31, 2016 - 11:18 PM UTC
Quoted Text
Joseph - That looks like a neat kit and in 1/72! I have some of these in 1/35 but haven't ventured into any of them yet. I look forward to seeing how yours comes out.
Thanks Paul, I do like the lines of the Russian BTRs. I've seen some excellent work by others modelers on this very same kit. I'll be building this mostly OOB, with the exception of drilling holes here and there and adding grab handles. My personal goal here is test my skill on painting/weathering. I hope I'll do justice.
Scotland, United Kingdom
Joined: February 15, 2013
KitMaker: 1,273 posts
Armorama: 568 posts
Posted: Monday, August 01, 2016 - 11:15 PM UTC
Quoted Text
Hi Peter,
Thank you for the feedback - much appreciated. When you say low pressure would 10 - 12 psi qualify?
Regards,
Kobus
Sorry for late reply mate been busy getting ready for the East of Scotland show last Saturday. Yes about 10 psi is fine as Aclad II doesnt need thinned.
Pete
Oh thanks for the comments Jeff. I saw Richard Rawlings do a good job on a Falcon on Gas Monkey Garage and it inspired me to buy the Trumpy kit when I was at Telford last November. Never seen one in the flesh tho.
Pete

#460
California, United States
Joined: September 16, 2014
KitMaker: 1,156 posts
Armorama: 1,024 posts
Posted: Wednesday, August 03, 2016 - 12:05 AM UTC
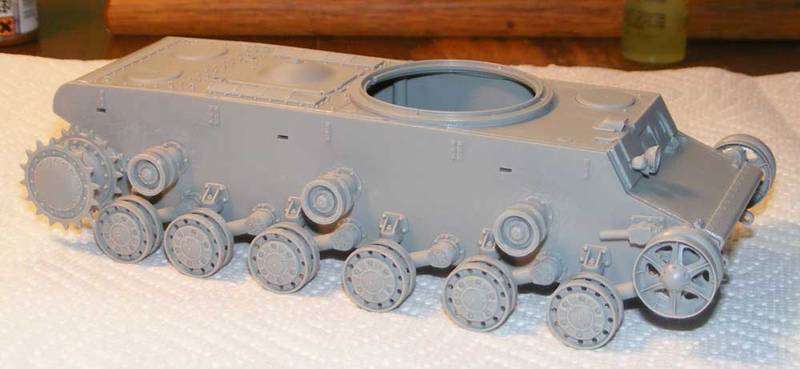
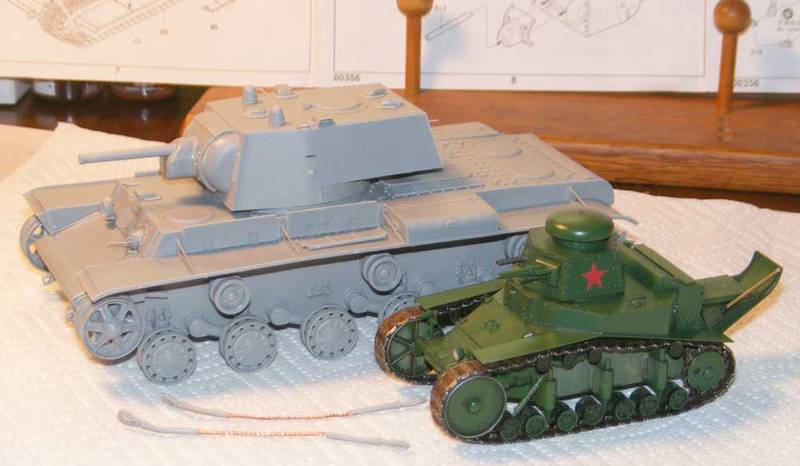
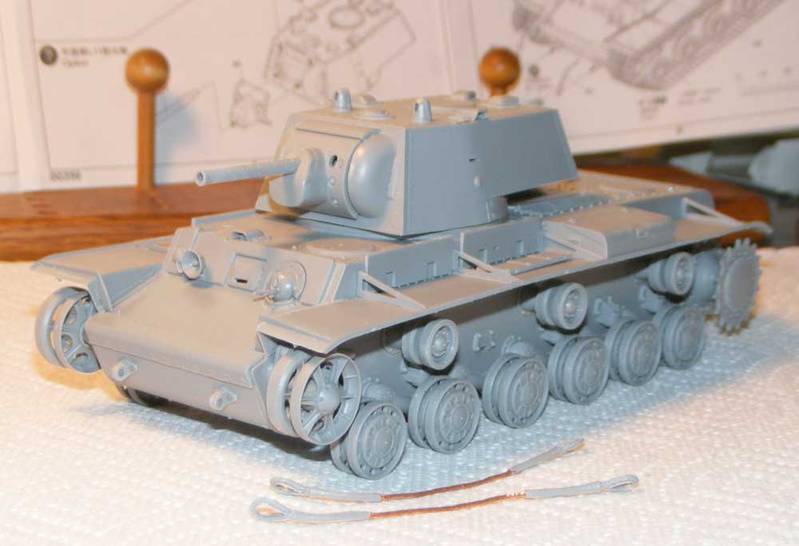
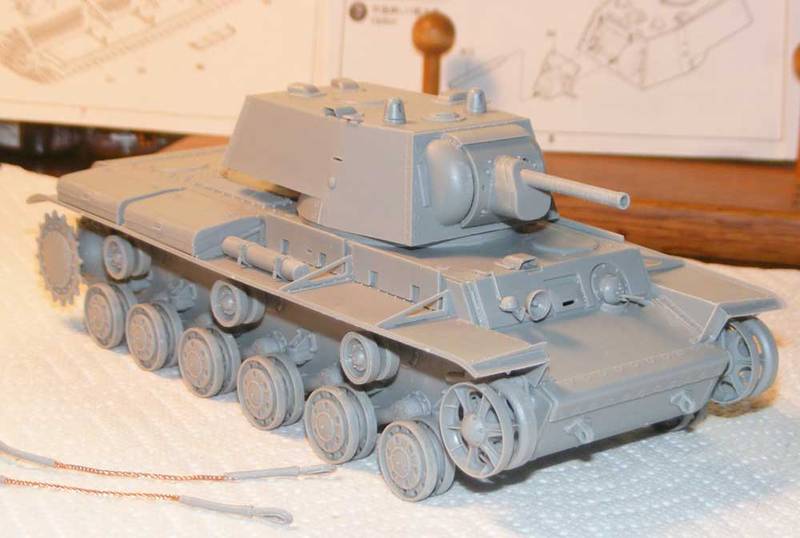
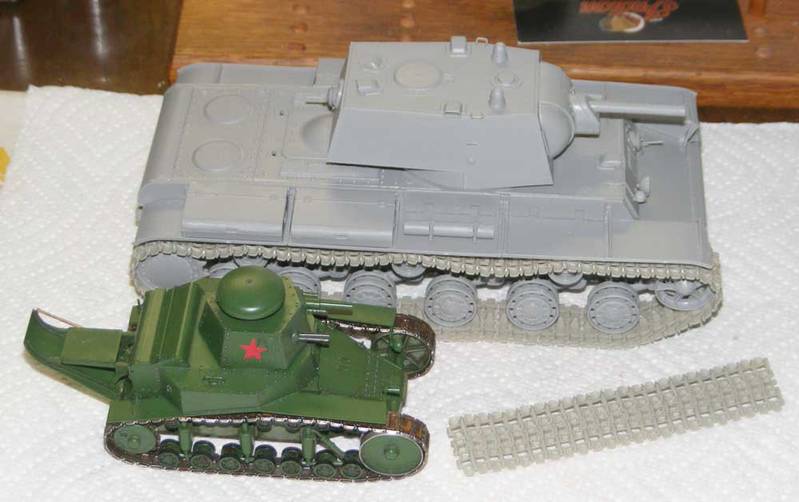
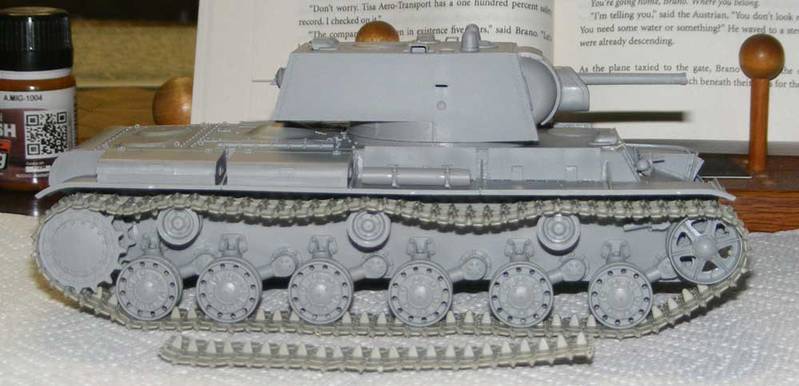
I got a little more done on the MasterClub RESIN tracks for the KV-1. The first drill busted off in two of the track links making them suitable only for spare track links so more drills were ordered and last night construction began again.
This is very slow going compared to building Fruils. Each link needs about the same amount of clean up but where the Fruils need only to have two holes cleaned out, the MCs need four holes to be drilled from the provided pilot holes. By the time I'm finished, I'll have more time in the tracks than in building the whole rest of the model. At least the tracks do look terrific and that will be remembered long after the pain of building is forgotten.
I have read online reviews of MasterClub METAL track kits that needed no drilling at all. That would be a real time and finger saver if true and I'll be buying a set of metal MCs for the next build, whatever that might be.
I suppose it is possible that this set of resin tracks were not finished at the factory and somehow got shipped. Has anyone else build and MasterClub RESIN track kits? Did they need to be drilled?
Vintage Paul
I'd happily live in the past but for air conditioning, the internet, mobile phones, modern medicine & dentistry and, and, and . . .

#041
Kobenhavn, Denmark
Joined: July 20, 2006
KitMaker: 10,069 posts
Armorama: 4,677 posts
Posted: Wednesday, August 03, 2016 - 10:55 AM UTC
Paul, beautiful looking tracks! The sag is just right.
Incredible to see the size difference in tanks. That is the result of quick development I guess.
Campaign'oholic - 252+ campaigns completed

#041
Kobenhavn, Denmark
Joined: July 20, 2006
KitMaker: 10,069 posts
Armorama: 4,677 posts
Posted: Wednesday, August 03, 2016 - 11:17 PM UTC
A little more progress on my Abrams. Initial weathering is done. Next are some detail painting and decals.
More to follow.


Campaign'oholic - 252+ campaigns completed
California, United States
Joined: October 10, 2012
KitMaker: 204 posts
Armorama: 45 posts
Posted: Thursday, August 04, 2016 - 11:28 PM UTC
Kind of forgot about this build but I'm back working on it. Had to trim down the cockpit seat as it was to tall for the canopy to fit over, still isn't the best fit but its a lot better. Everything has been glued and sanded on the main body and now just needs some paint. after that just need to add the hard points and landing gear.

Noord-Brabant, Netherlands
Joined: February 13, 2011
KitMaker: 322 posts
Armorama: 300 posts
Posted: Friday, August 05, 2016 - 01:39 PM UTC

#460
California, United States
Joined: September 16, 2014
KitMaker: 1,156 posts
Armorama: 1,024 posts
Posted: Saturday, August 06, 2016 - 01:47 AM UTC
Jesper - that is a very interesting color scheme for your m1. Usually I see them in some sort of desert colors. Where is your serving?
Martin - what are PE tracks? Are the track links actually made of photo etched metal? What scale are they? Are they working tracks or glue togethers? How do you like them compared to cast metal tracks like Fruils?
Vintage Paul
I'd happily live in the past but for air conditioning, the internet, mobile phones, modern medicine & dentistry and, and, and . . .
Noord-Brabant, Netherlands
Joined: February 13, 2011
KitMaker: 322 posts
Armorama: 300 posts
Posted: Saturday, August 06, 2016 - 09:16 AM UTC
Paul,
The tracks are 1/72 scale so I can't compare them to the cast tracks. They are glued together and not workable tracks.
This is some kind of hard PE and it is no so nice to work with.

#041
Kobenhavn, Denmark
Joined: July 20, 2006
KitMaker: 10,069 posts
Armorama: 4,677 posts
Posted: Saturday, August 06, 2016 - 07:20 PM UTC
Quoted Text
Jesper - that is a very interesting color scheme for your m1. Usually I see them in some sort of desert colors. Where is your serving?
This is 1-1 CAV serving in Northern Bosnia in September 1996. A very common camouflage scheme for M1s in Germany and rest of Europe during this period it seems.
You are right. The Iraqi wars, Afghanistan etc. seem to be more popular subjects for M1s. I like this one though and might do a winter camo M1 as well at one point.
Campaign'oholic - 252+ campaigns completed
Tennessee, United States
Joined: April 04, 2002
KitMaker: 1,290 posts
Armorama: 658 posts
Posted: Saturday, August 06, 2016 - 11:15 PM UTC
Quoted Text
Quoted Text
Jesper - that is a very interesting color scheme for your m1. Usually I see them in some sort of desert colors. Where is your serving?
This is 1-1 CAV serving in Northern Bosnia in September 1996. A very common camouflage scheme for M1s in Germany and rest of Europe during this period it seems.
You are right. The Iraqi wars, Afghanistan etc. seem to be more popular subjects for M1s. I like this one though and might do a winter camo M1 as well at one point.
Jesper is correct. It is painted in the standard NATO camo developed in the mid-80s. During the DESERT SHIELD run-up to DESERT STORM most deploying US equipment received a coat of sand paint either just before boarding ships (I know of an Army Reserve engineer battalion that was painted at Ft. Bragg while waiting for shipping) or they were painted as they came off the ships in Saudi Arabia. None of the vehicles were thoroughly cleaned before painting and the paint starting wearing off with the first sand storm. Only elements of the XVIII Corps were already factory painted in sand as the Middle East was there primary theater of operations. This included the 24th Mech Division which was first heavy division to arrive. CARC is extremely tough and their paint jobs held-up thru entire event. Today most equipment coming out of the factories is painted CARC sand color. This will probably be changing, if not already in affect with change of missions.

#041
Kobenhavn, Denmark
Joined: July 20, 2006
KitMaker: 10,069 posts
Armorama: 4,677 posts
Posted: Sunday, August 07, 2016 - 12:22 AM UTC
Thanks for the additional info, Jeff. Good details.
Campaign'oholic - 252+ campaigns completed

#460
California, United States
Joined: September 16, 2014
KitMaker: 1,156 posts
Armorama: 1,024 posts
Posted: Sunday, August 07, 2016 - 01:56 AM UTC
I had a bit of a disaster last night with the tracks. I had been working on them for a week and they were a lot more work than the Fruils I am used to. The plus side of it is that the resin track pins look terrific.
Yesterday I taped them to a hunk of cardboard and shot the inner surfaces with Tamiya TS-1 Red/Brown. The cardboard was propped up in a chair to let the paint dry. Last night just before dawn I was awakened by a crunching sound, one that did not belong in the house.
On turning on the light I found that Betty Boop the cat had pried one of the tracks loose from the tape and was playing with it, flinging it up and pouncing on it. She had it in three parts and seemed to be having a good time.
This morning I had at the damage. Betty had destroyed only one link (snapped in two parts) and a half a dozen of the pins. Everything was repaired inside of an hour and the tracks were repainted returning everything back to pre Betty Boop levels.
Later today the outer face will get its paint and will dry in a room Betty does not have access to . . .
Vintage Paul
I'd happily live in the past but for air conditioning, the internet, mobile phones, modern medicine & dentistry and, and, and . . .
France
Joined: February 20, 2012
KitMaker: 1,932 posts
Armorama: 1,907 posts
Posted: Sunday, August 07, 2016 - 03:16 AM UTC
Hello Martin, I'm curious to know how this set of tracks works. I have never seen that before.
Do you have to replace plastic tracks with PE tracks, or PE parts are just details to glue on plastic parts like the wheel on your pic ?
Noord-Brabant, Netherlands
Joined: February 13, 2011
KitMaker: 322 posts
Armorama: 300 posts
Posted: Sunday, August 07, 2016 - 08:37 AM UTC
Hello Alex
I'm replacing the vinyl tracks with PE. The PE is from ACE models originally for the PST or ACE models T-55.
tatbaqui
 News Writer
#040
Metro Manila, Philippines
Joined: May 06, 2007
KitMaker: 2,713 posts
Armorama: 2,451 posts
Posted: Sunday, August 07, 2016 - 08:54 AM UTC
Hello,
Nice progress all.
I've been working on this on-off in the last couple of weeks. I wanted to do a sand + green combo, but the results of my masking work were not that good:
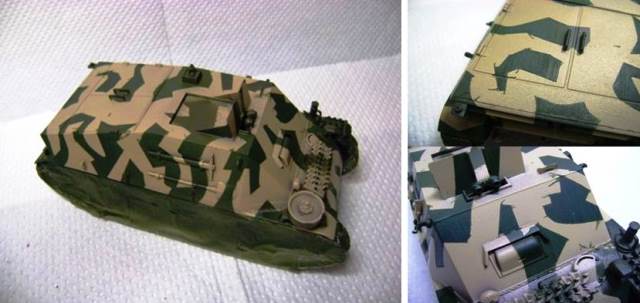
So I decided to redo it, this time using Blu-Tac and going for three colors:
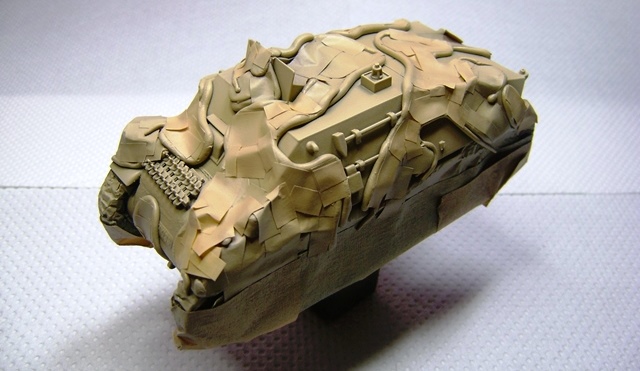
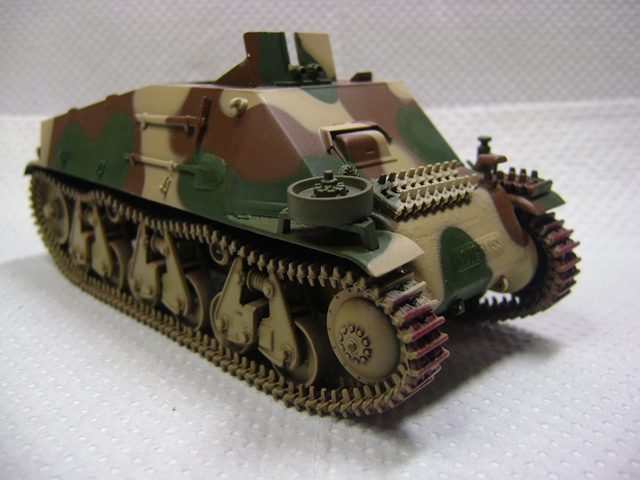
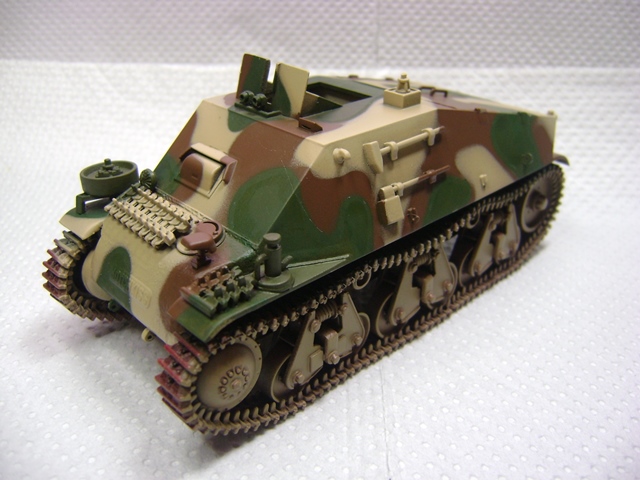
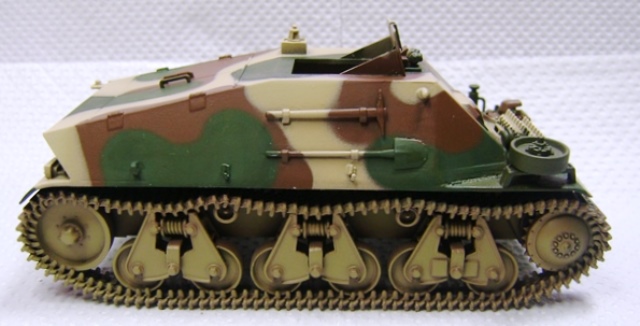
Not sure why I got those outline marks on the green areas only -- hope to correct that during the weathering process. Deadline's coming up by month's end so I need to focus in getting this across the line.
Cheers,
Tat

#041
Kobenhavn, Denmark
Joined: July 20, 2006
KitMaker: 10,069 posts
Armorama: 4,677 posts
Posted: Sunday, August 07, 2016 - 10:38 AM UTC
Nice job on the camo, Tat!
Looking forward to see more.
Campaign'oholic - 252+ campaigns completed


