Campaigns
Where Armorama group builds can be discussed, organized, and updates posted.
Where Armorama group builds can be discussed, organized, and updates posted.
Hosted by Darren Baker, Richard S.
The Fighting Frogs

Tojo72

Joined: June 06, 2006
KitMaker: 4,691 posts
Armorama: 3,509 posts

Posted: Wednesday, May 04, 2016 - 05:27 AM UTC
Nice attention to details Dennis.
DKdent

Joined: November 27, 2005
KitMaker: 182 posts
Armorama: 180 posts

Posted: Wednesday, May 04, 2016 - 06:44 PM UTC
Hello,
Thank you for your nice remarks.
Thanks to a public holiday here in Germany some further work could be done on the Panhard.
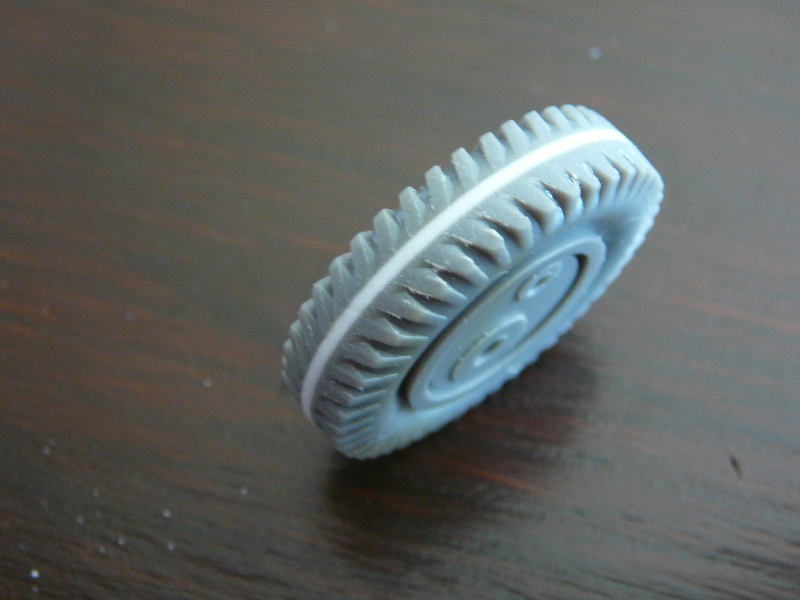
I first sanded down the additional sheet on the tires. This went pretty smooth even if some putty will be needed.
I than took care of the suspension and the axles. ALBY did use a two axle-system on the wheels with one axle attached to the tire and one to the suspension.
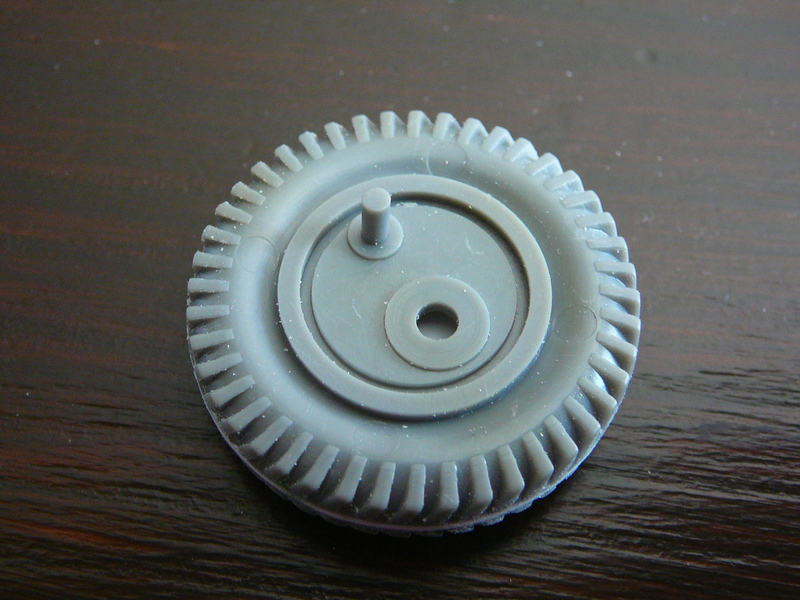
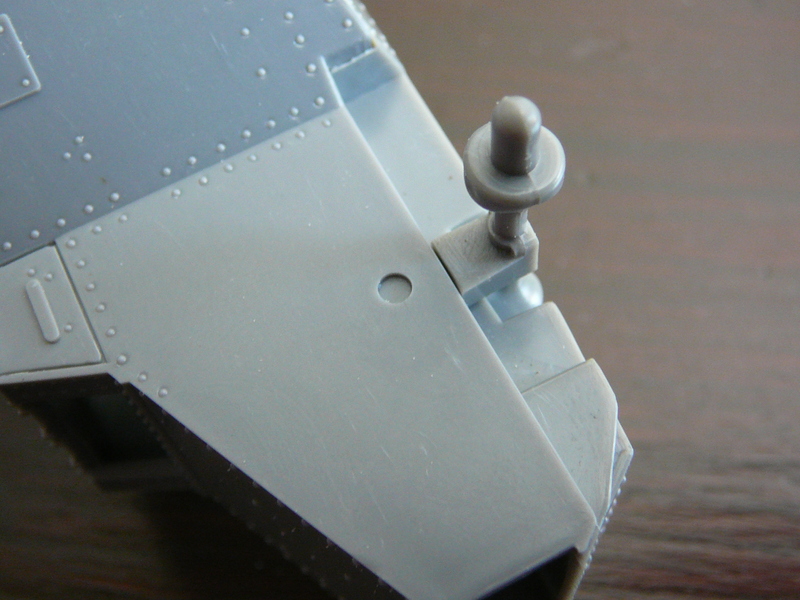
Unfortunately the axle attached to the road wheels are too short which means that the have to be replaced.
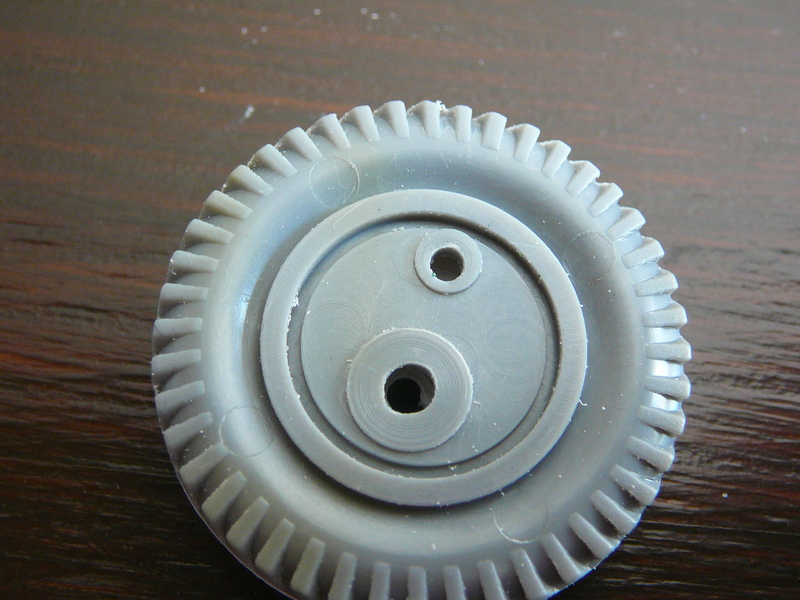
The first step was to cut the original axle of the tire and drill a hole in its place.
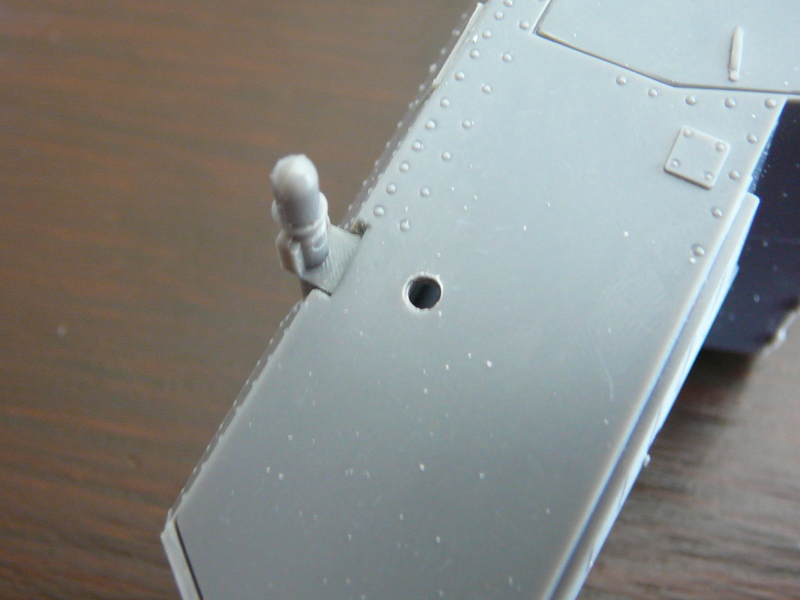
The small recess in the hull which should take the axle was drilled into also.
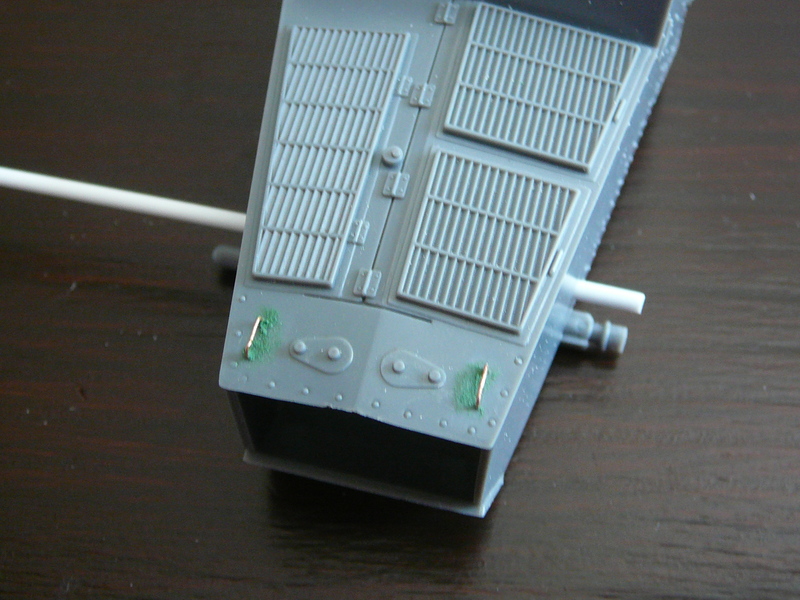
Afterwards some plastic rod of appropriate diameter was inserted and replaces the original axles on the wheels. You can see some Squadron Green Putty on the handles. In delicate places sanding gets much more easier with a glass fibre-sanding pen. I will show one later.
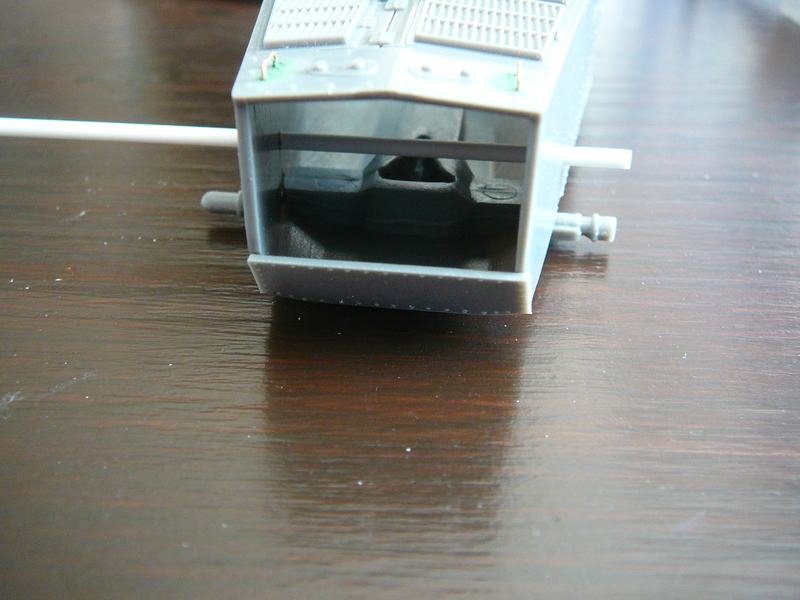
As you can see, I did use one long piece of rod which got pushed through the entire hull. Don`t be a cheap one here, as one long part will make it much more easy to align the wheels and give more stability than two seperate pieces. I won`t risk a cardiac arrest for the sake of some 2-cents plastic rod.
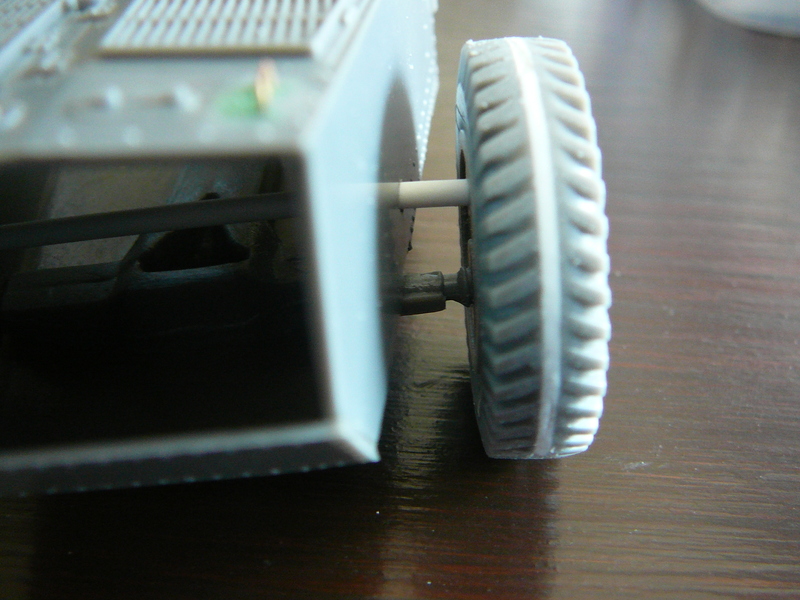
The wheel finally fitted to the new axle (not glued yet). When working with rods I usually use a drill a minimal bit smaller then the rod I want to insert. Afterwards a take a rounded file to widen the drilled bit slowly until I have a tight fit connecting the parts even without glue. This way you will get very sturdy parts.
Tonight I will hopefully continue on the road wheels and start with some overall details on the hull. Even if the kit consits of only a few parts compared to modern kits it will not be a very fast build. I guess, it gets obvious why....
Best Regards
Dennis
Thank you for your nice remarks.
Thanks to a public holiday here in Germany some further work could be done on the Panhard.

I first sanded down the additional sheet on the tires. This went pretty smooth even if some putty will be needed.
I than took care of the suspension and the axles. ALBY did use a two axle-system on the wheels with one axle attached to the tire and one to the suspension.


Unfortunately the axle attached to the road wheels are too short which means that the have to be replaced.

The first step was to cut the original axle of the tire and drill a hole in its place.

The small recess in the hull which should take the axle was drilled into also.

Afterwards some plastic rod of appropriate diameter was inserted and replaces the original axles on the wheels. You can see some Squadron Green Putty on the handles. In delicate places sanding gets much more easier with a glass fibre-sanding pen. I will show one later.

As you can see, I did use one long piece of rod which got pushed through the entire hull. Don`t be a cheap one here, as one long part will make it much more easy to align the wheels and give more stability than two seperate pieces. I won`t risk a cardiac arrest for the sake of some 2-cents plastic rod.

The wheel finally fitted to the new axle (not glued yet). When working with rods I usually use a drill a minimal bit smaller then the rod I want to insert. Afterwards a take a rounded file to widen the drilled bit slowly until I have a tight fit connecting the parts even without glue. This way you will get very sturdy parts.
Tonight I will hopefully continue on the road wheels and start with some overall details on the hull. Even if the kit consits of only a few parts compared to modern kits it will not be a very fast build. I guess, it gets obvious why....
Best Regards
Dennis
Cantstopbuyingkits

Joined: January 28, 2015
KitMaker: 2,099 posts
Armorama: 1,920 posts

Posted: Wednesday, May 04, 2016 - 08:30 PM UTC
You're a brave man tackling that kit 

DKdent

Joined: November 27, 2005
KitMaker: 182 posts
Armorama: 180 posts

Posted: Thursday, May 05, 2016 - 04:05 AM UTC
Quoted Text
You're a brave man tackling that kit
Diamonds develope only under pressure...

Last update for today:
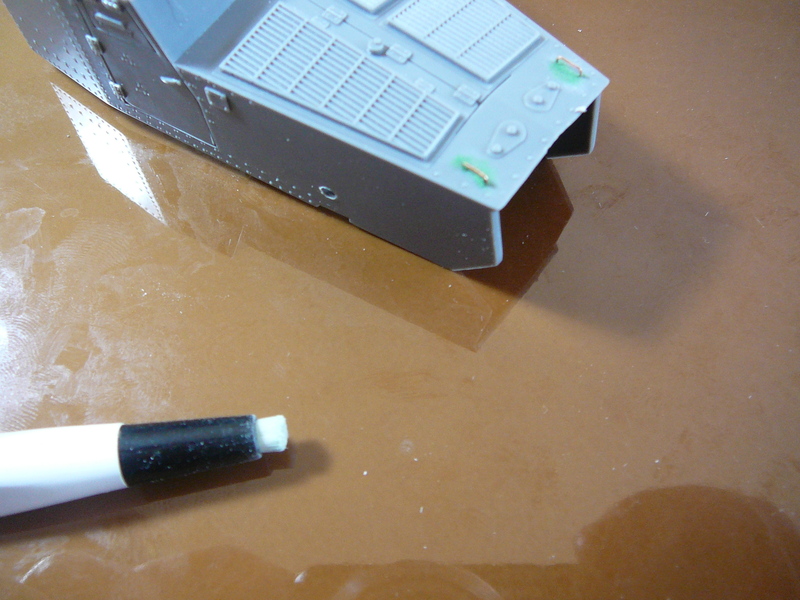
The fibre glass pen used to clean up putty under the handles.
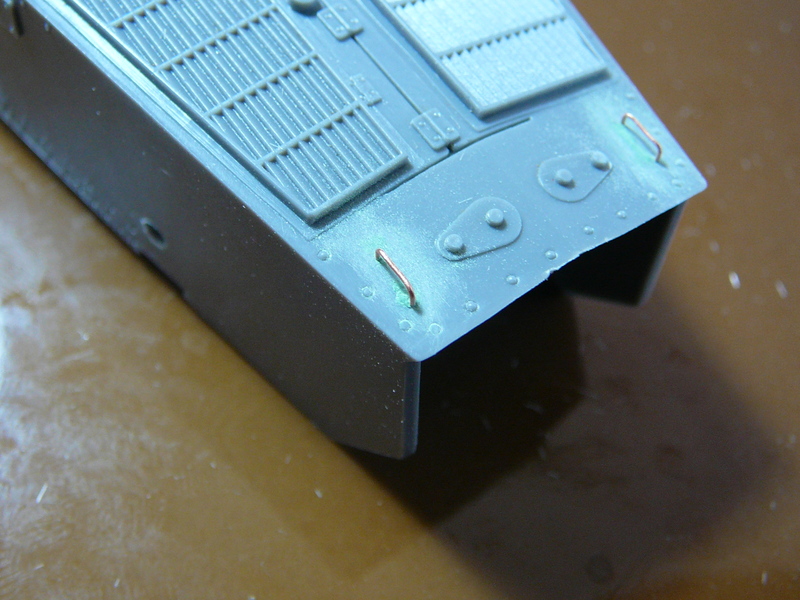
I could have done better but wanted to make the picture today. Will be cleaned out better afterwards.
The next major grueling task was to replace the hinges on the back of the turret.
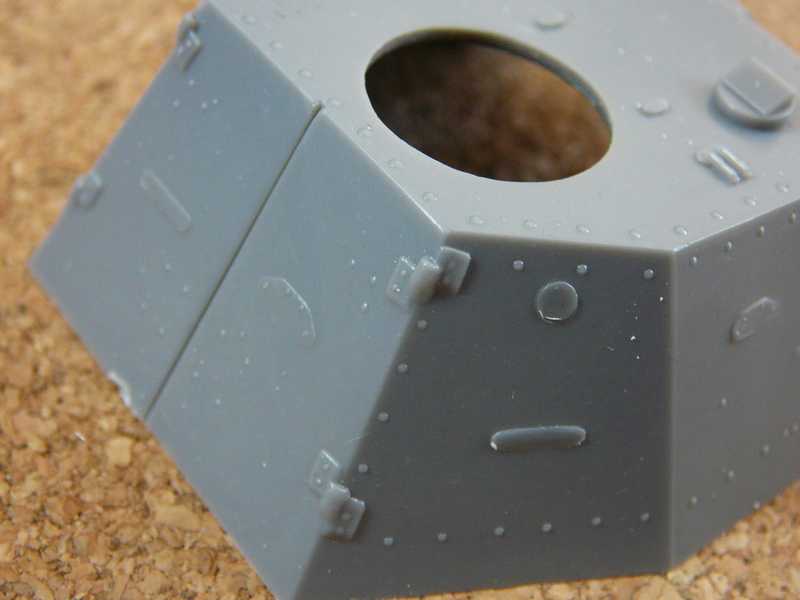
Rather large parts in a prominent area which therefore absolutely had to be redone.
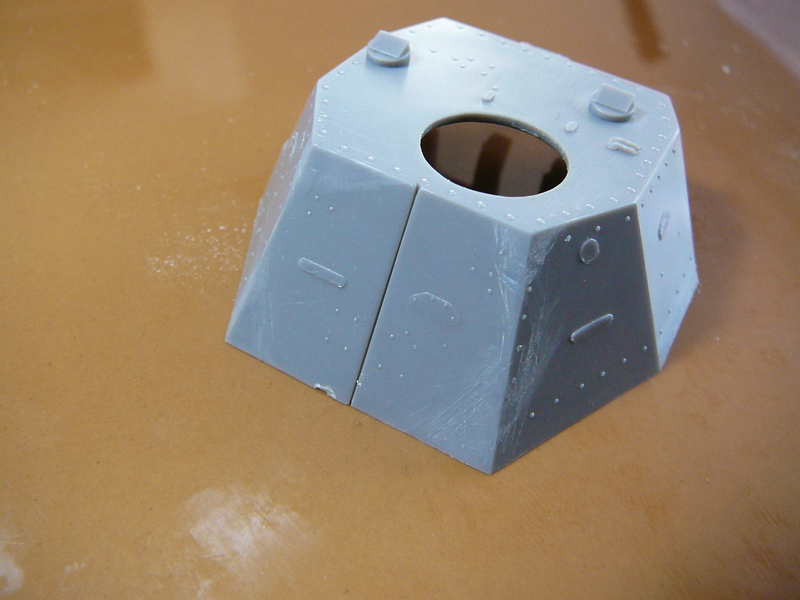
I started by removing the hinges from the turret. If you work with PE-parts you always should remove plastic parts only if you have prepared the PE parts. Otherwise you are in trouble if you fail to construct complicated PE parts. I had all PE ready before cutting something away.
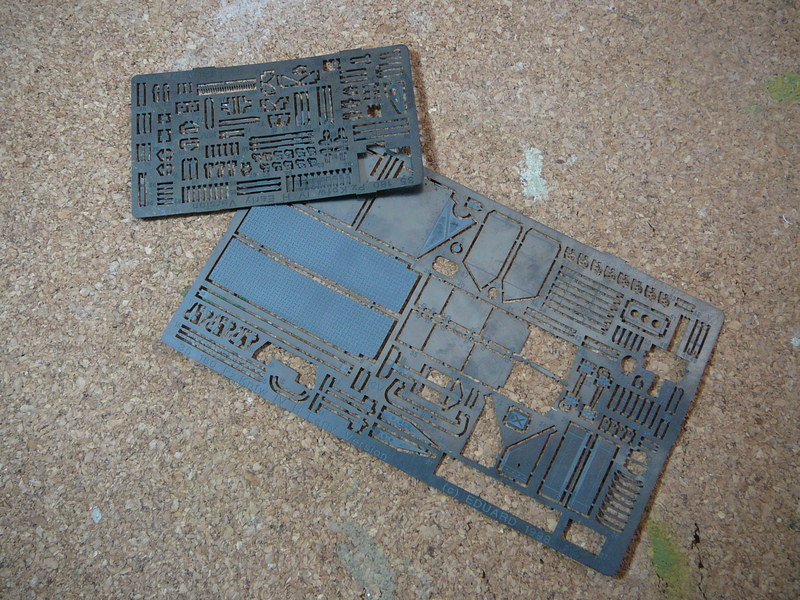
As I am not aware of some aftermarket PE for this kit I simply went trough the modeling garbage and collected some old PE sprues for a Panzer IV.
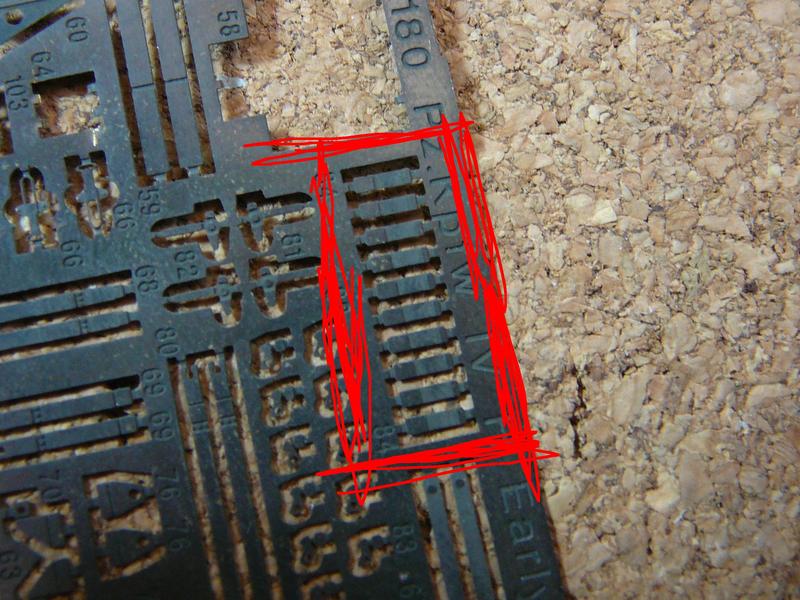
I removed these parts from the sprue, annealed them and pre-bended them.
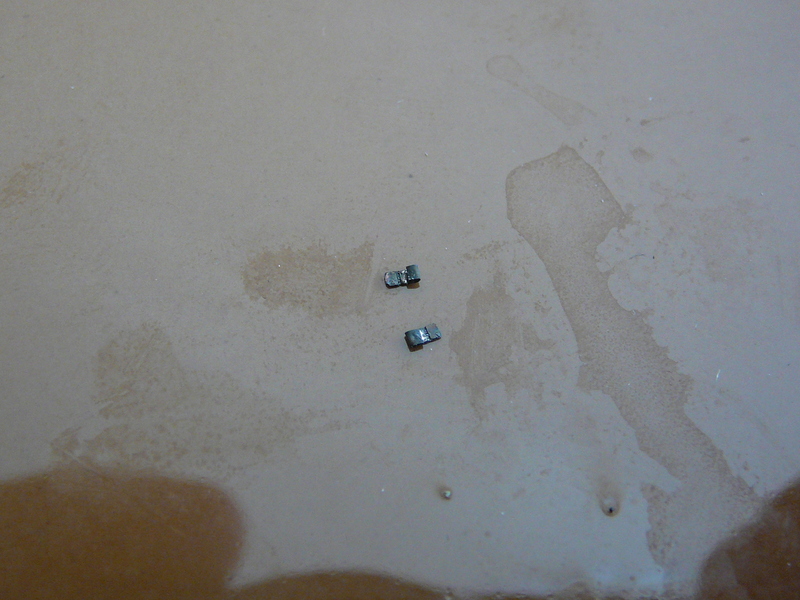
Anealing the parts will help you to bend round or curve shapes.
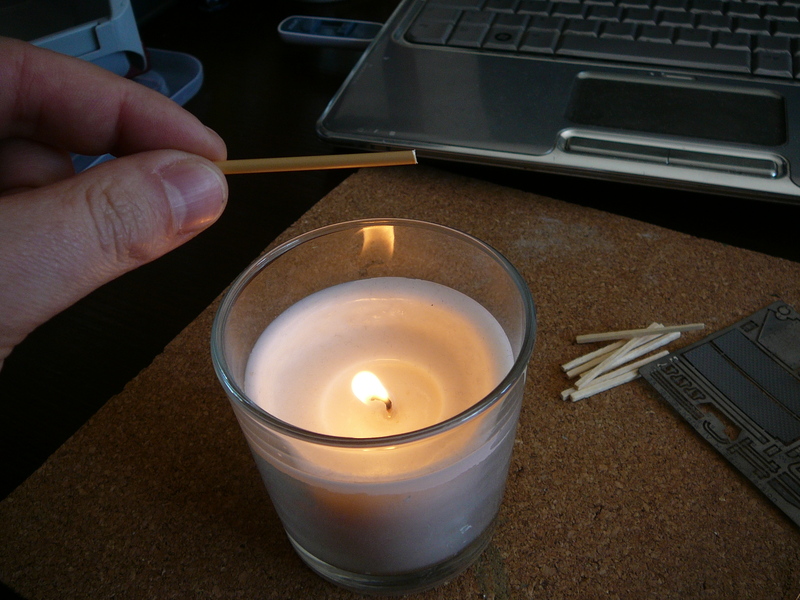
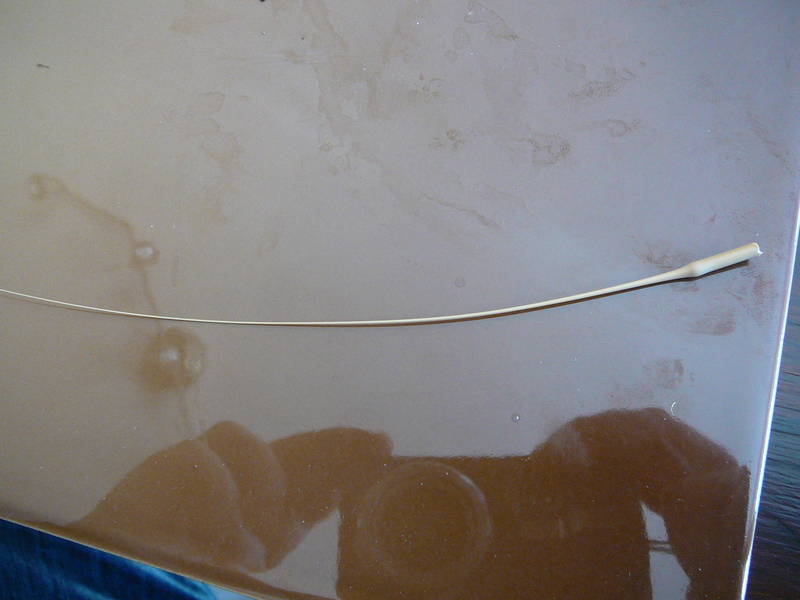
I stole one of my girlfriends candles (got the vanilla one...
 ) and startet to heat some sprue, tearing it to length.
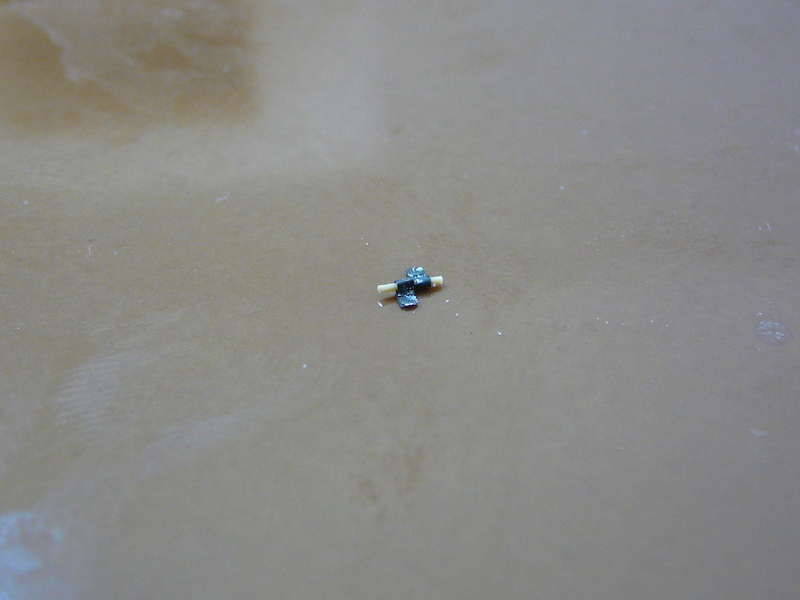
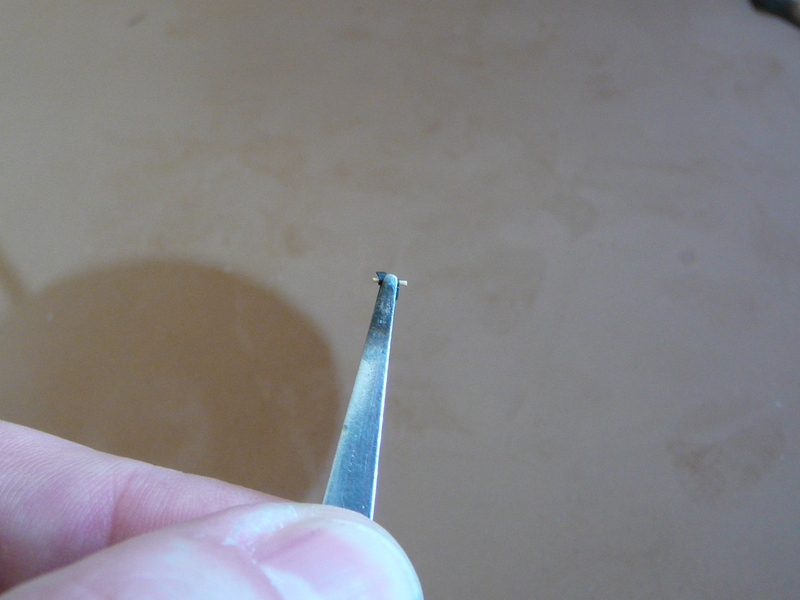
The next step was to bend the PE part around some sprue to make the hinge. I left around half a mm of sprue on each side. While holding the hinge with some tweezers I approached the excess sprue with a burning match slowly until the typical rounded bolthead often found on hinges formed from the melting plastic.
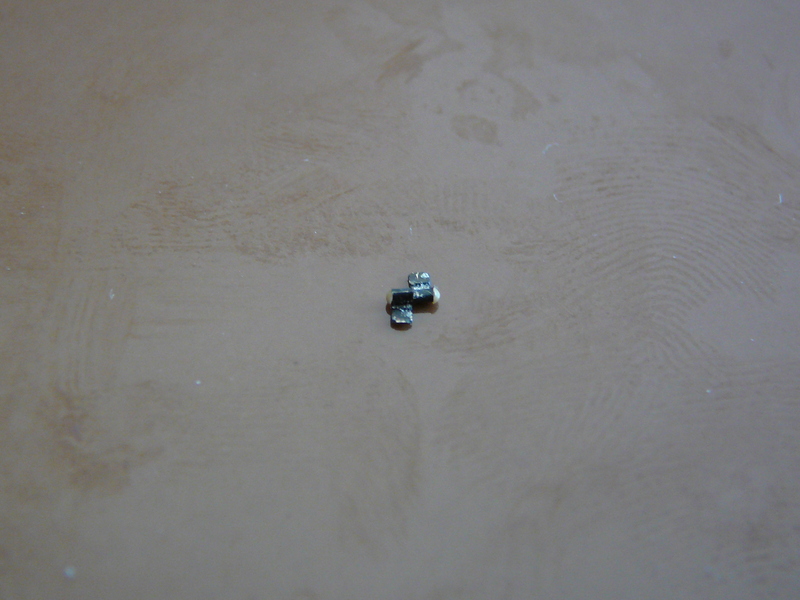
This way you get the typical look of a hinge. The whole thing is holding together without glue and is movable. This comes in very handy when fixing it to the turret.
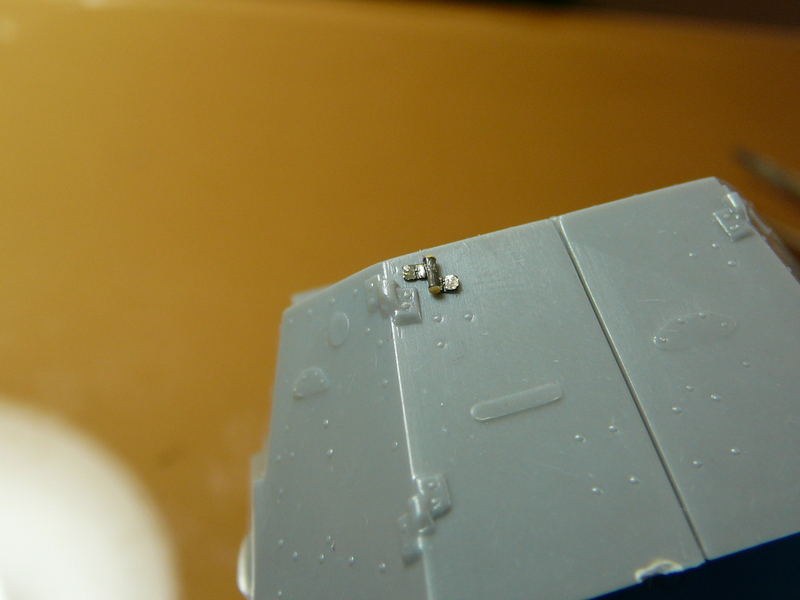
Old vs. new.
The next step was to cut some spare PE and glue it next to the hinge wings to form a small "PE foundation". I then collected some PE parts from another kit and did cut them on the green line. This way I got 8 small plates with bolt detail.
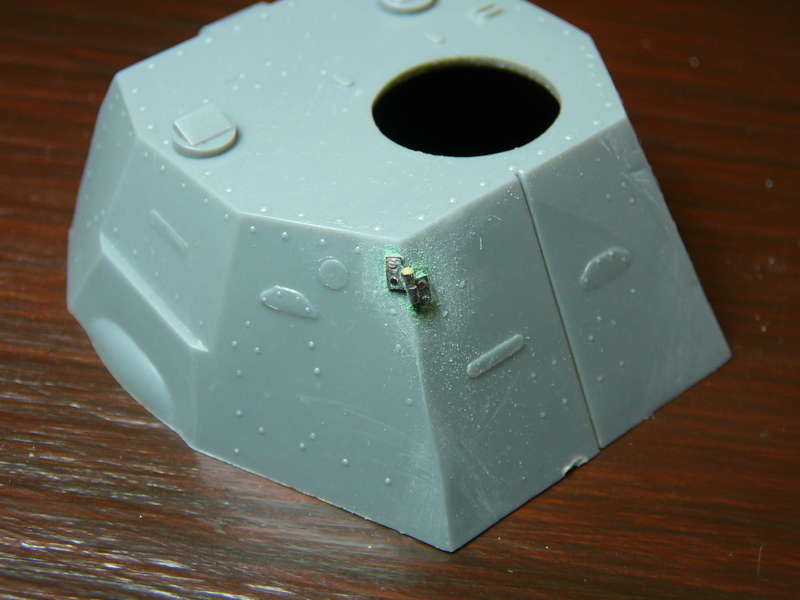
I simply glued these on top of the PE foundation,applied some putty and cleaned the putty with a brush.
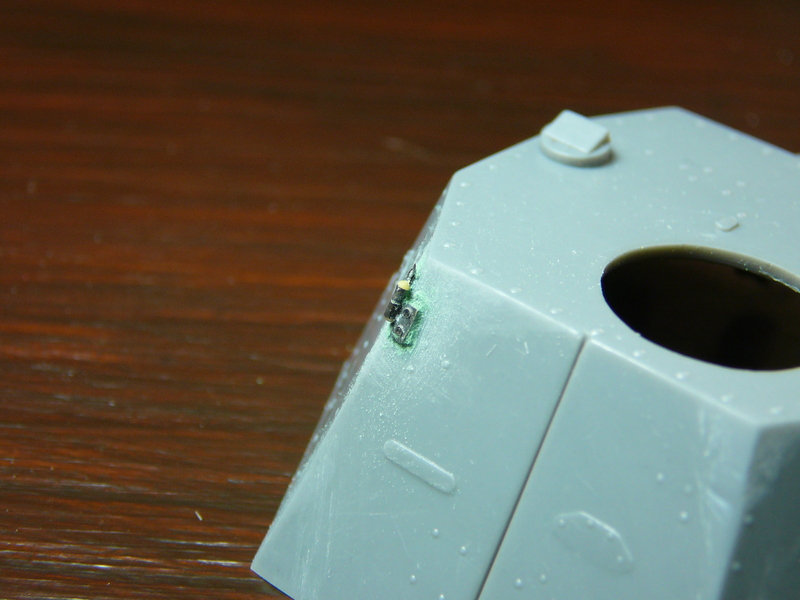
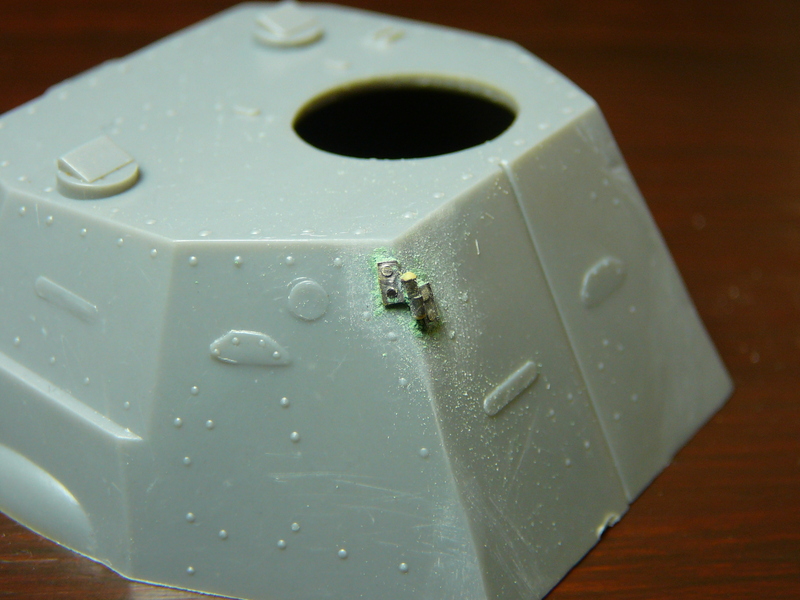
3 to go. The hinge will be cleaned and sanded another time after everyting has settled. Looks very coarse now but nice on the model. Still need to clean it up a little but I am happy with the result by now.
Best regards
Dennis
Chaman911

Joined: August 28, 2015
KitMaker: 319 posts
Armorama: 308 posts
Posted: Sunday, May 08, 2016 - 09:44 AM UTC
Holy smokes very nice scratch building! I'm learning a lot from you. You are right the kit hinges were pretty bad. Can't wait for more.
Posted: Monday, May 09, 2016 - 04:00 AM UTC
Awesome build Dennis -- looking forward to your progress! Cheers, Tat

Tojo72

Joined: June 06, 2006
KitMaker: 4,691 posts
Armorama: 3,509 posts

Posted: Wednesday, May 11, 2016 - 05:26 AM UTC
Chaman911

Joined: August 28, 2015
KitMaker: 319 posts
Armorama: 308 posts
Posted: Wednesday, May 11, 2016 - 05:29 AM UTC
Nice! What green did you decide on?

Tojo72

Joined: June 06, 2006
KitMaker: 4,691 posts
Armorama: 3,509 posts

Posted: Wednesday, May 11, 2016 - 05:40 AM UTC
Quoted Text
Nice! What green did you decide on?
Thanks,Taffy3 is doing a build blog also and he recommended Modelmaster Med Green 34102 I think it looked pretty good.
DKdent

Joined: November 27, 2005
KitMaker: 182 posts
Armorama: 180 posts

Posted: Wednesday, May 18, 2016 - 03:03 AM UTC
Gentlemen,
after a short trip to France (Verdun) I decided to get some things done on the Panhard.
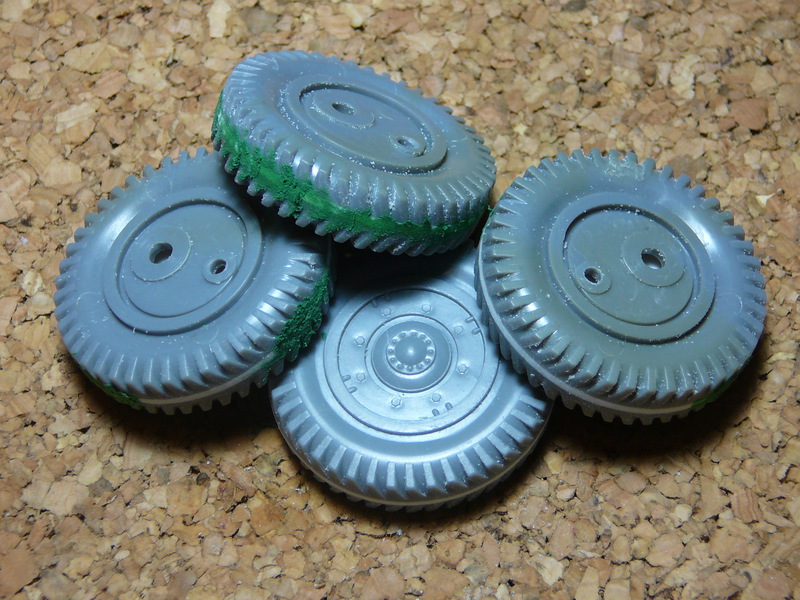
First I applied some Squadron Green Putty on the tires as these had some dents here and there from scraping down the additional plastic discs.
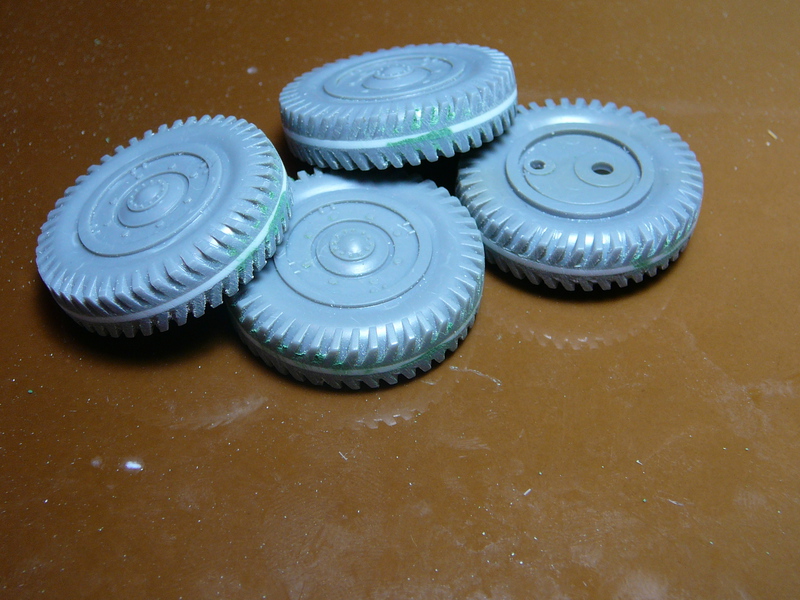
Afterwards I gave them some sanding with a coarse metal file and some fine grit sanding paper. The remains of the putty will be brushed away with an old toothbrush or cleaned up with some toothpicks.

I have by now built all 4 hinges for the back of the turret.As I had some trouble with fast drying CA glue, even as I have used the gel type, I decided to use two parts-epoxy glue to get some more time to adjust the remaining 3 hinges. As the glue needs some more time to dry thouroughly I could not add the additional parts by now.
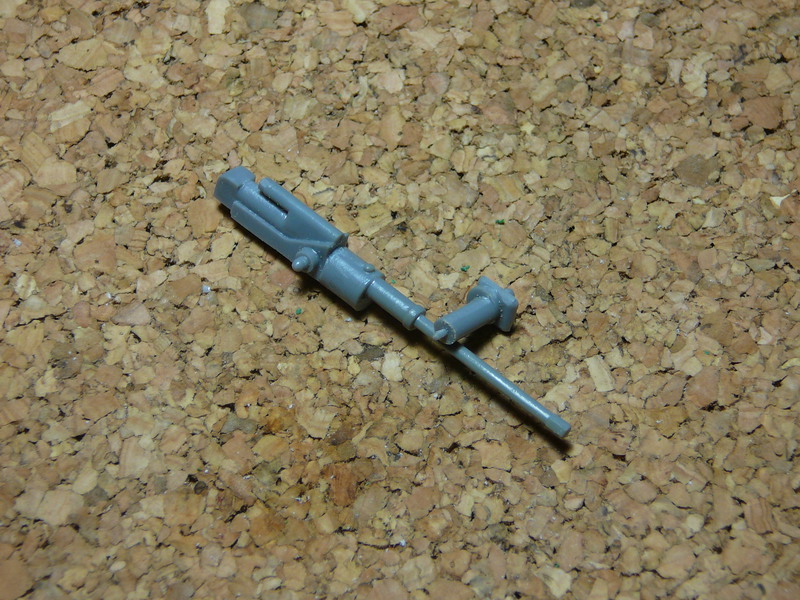
The next parts were the 25mm autocannon and the machine gun located in the turret. The original parts are rather ugly birds. Therefore I decided to give them some additional work to.
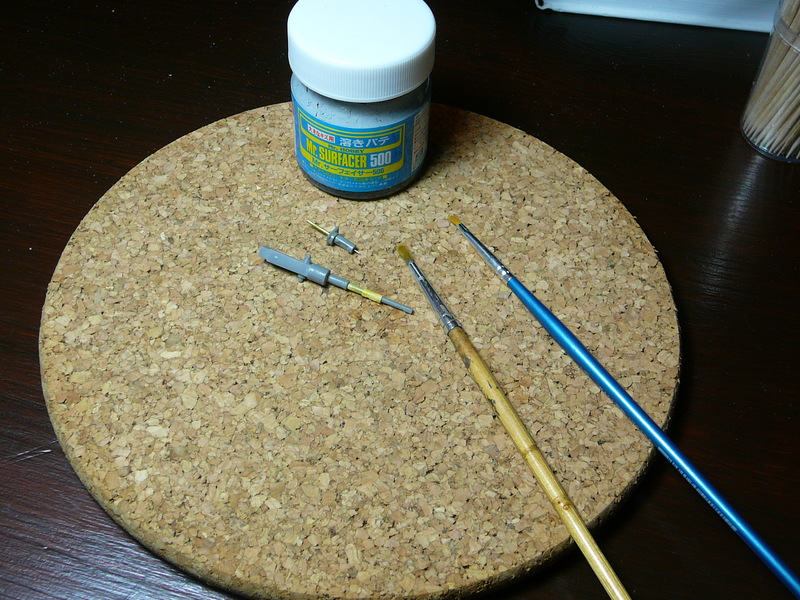
As the casings for the MG and the main gun were made from cast parts, I decided to replicate some cast structure by using Mr. Surfacer 500 and some old brushes.
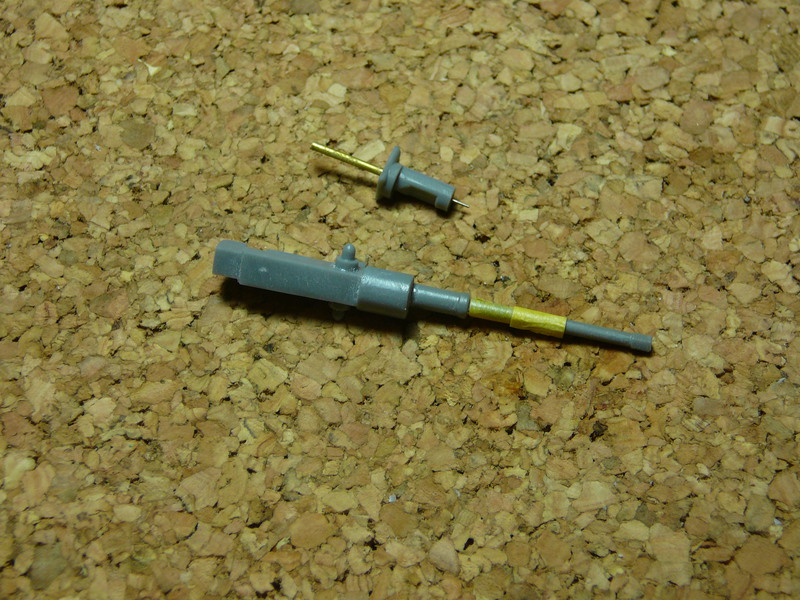
Some Tamiya tape had been used.....
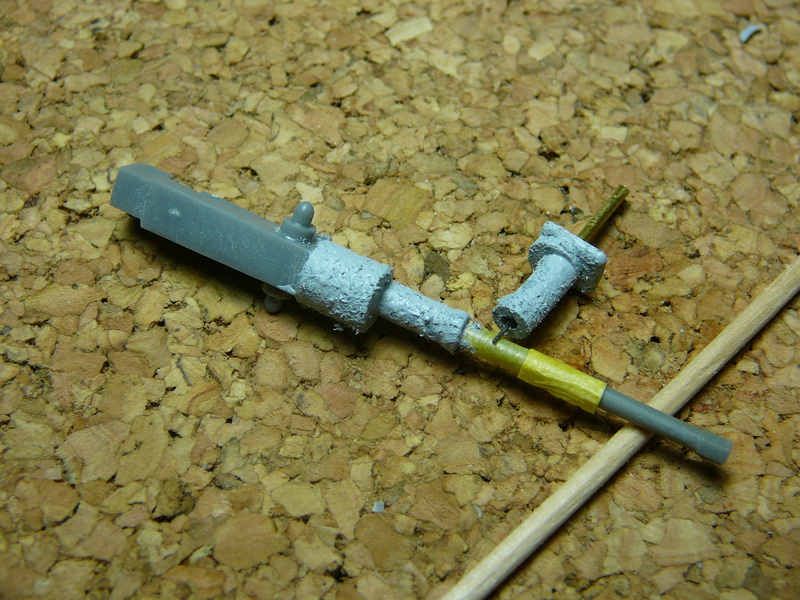
...to protect the barrel from the Surfacer. This looks rather nasty but the cast effect will show after sanding the whole thing. I did simply pick up some surfacer with an old flat brush and started to stipple it on in small circled motions until everything had been covered. Now it is time to let the whole thing dry.
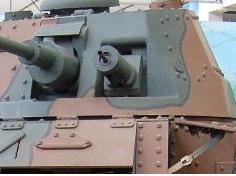
The coaxial MG used on the Panhard has a cast casing which shows a round recess right where the barrel comes out of the casing. A short reminder...

...this is how the kit part looks like.
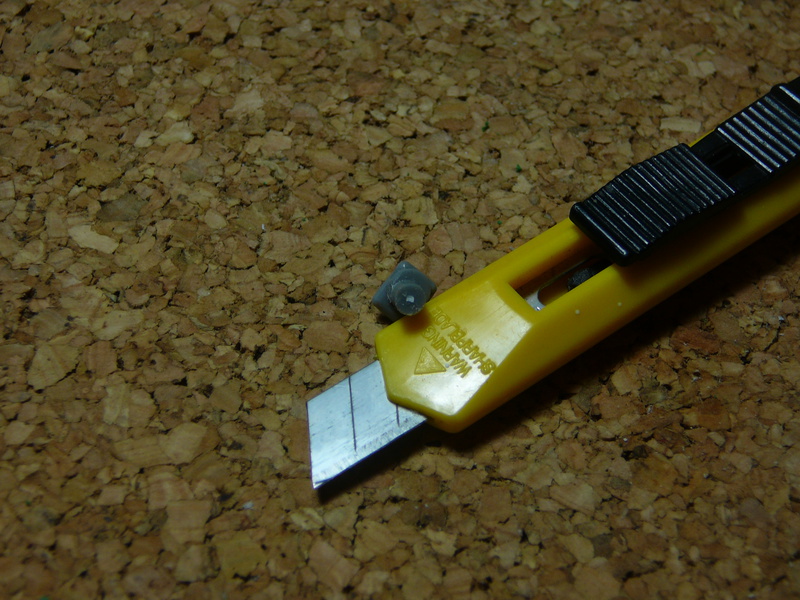
I cut off the barrel and sanded down the remains. Now one can see a bright grey spot where the plastic broke. I used this spot as a reference to adjust the drill and did bore a small hole in the part.
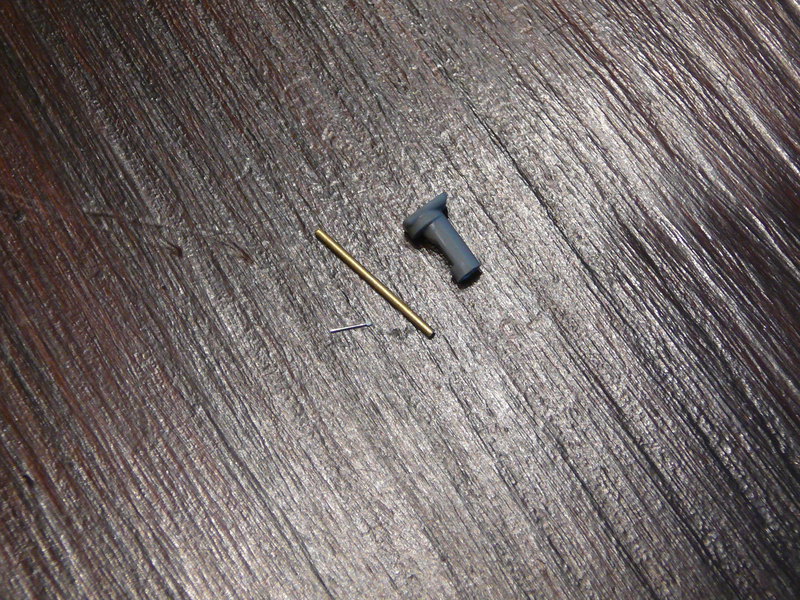
Afterwards I used a smaler diameter drill to bore a second hole which would take a small bras rod. The first hole was unneccessary as it has been widened with the second, larger drill. But it did guide and center the larger drill. If I would have made a mistake, a smaller hole would have been easier to repair as a larger one also. So, start with a small drill and slowlyadjust the diameter with larger drills until finished.
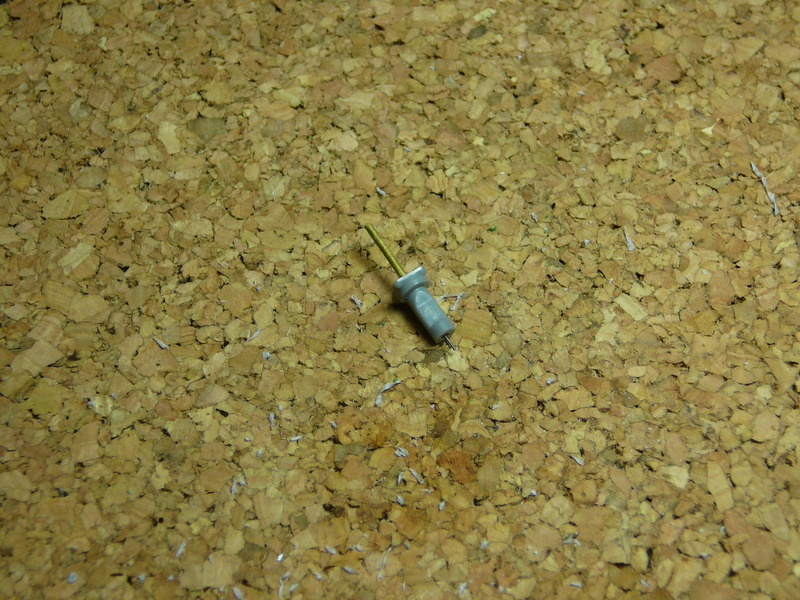
The next step was simple: I did glue the brass rod into the barrel sleve until the small recess formed. Afterwards the syringe was glued into the rod. Here we go: barrel with recess....I played with the idea to replace the barrel of the autocannon aswell. As I could not find some rod with the appropriate diameter in my "warehouse" I decided to skip the decision to a time after I have primed the barrel to see how it comes out.
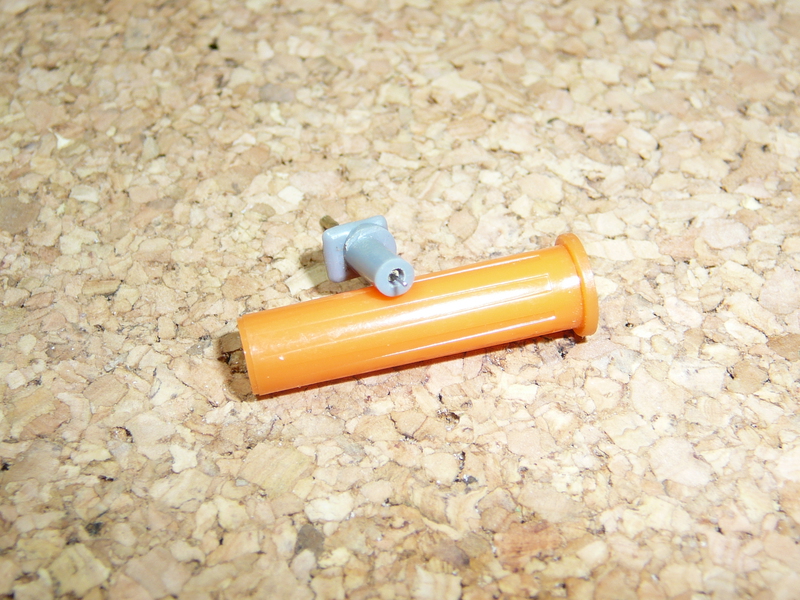
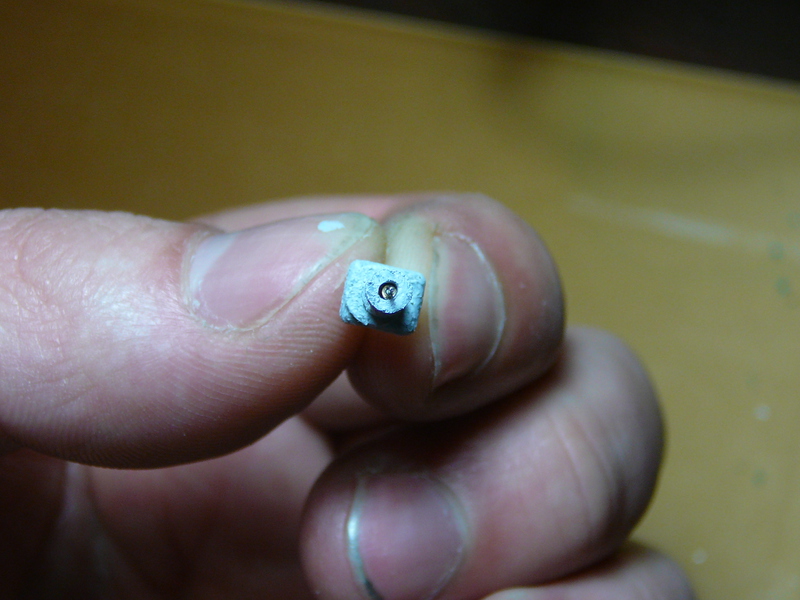
The MG sleeve by now.
Thats it for today. It is midnight here in Germany so I will get some sleep. Thanks for watching.
Best Regards
Dennis
after a short trip to France (Verdun) I decided to get some things done on the Panhard.

First I applied some Squadron Green Putty on the tires as these had some dents here and there from scraping down the additional plastic discs.

Afterwards I gave them some sanding with a coarse metal file and some fine grit sanding paper. The remains of the putty will be brushed away with an old toothbrush or cleaned up with some toothpicks.

I have by now built all 4 hinges for the back of the turret.As I had some trouble with fast drying CA glue, even as I have used the gel type, I decided to use two parts-epoxy glue to get some more time to adjust the remaining 3 hinges. As the glue needs some more time to dry thouroughly I could not add the additional parts by now.

The next parts were the 25mm autocannon and the machine gun located in the turret. The original parts are rather ugly birds. Therefore I decided to give them some additional work to.

As the casings for the MG and the main gun were made from cast parts, I decided to replicate some cast structure by using Mr. Surfacer 500 and some old brushes.

Some Tamiya tape had been used.....

...to protect the barrel from the Surfacer. This looks rather nasty but the cast effect will show after sanding the whole thing. I did simply pick up some surfacer with an old flat brush and started to stipple it on in small circled motions until everything had been covered. Now it is time to let the whole thing dry.

The coaxial MG used on the Panhard has a cast casing which shows a round recess right where the barrel comes out of the casing. A short reminder...

...this is how the kit part looks like.

I cut off the barrel and sanded down the remains. Now one can see a bright grey spot where the plastic broke. I used this spot as a reference to adjust the drill and did bore a small hole in the part.

Afterwards I used a smaler diameter drill to bore a second hole which would take a small bras rod. The first hole was unneccessary as it has been widened with the second, larger drill. But it did guide and center the larger drill. If I would have made a mistake, a smaller hole would have been easier to repair as a larger one also. So, start with a small drill and slowlyadjust the diameter with larger drills until finished.

The next step was simple: I did glue the brass rod into the barrel sleve until the small recess formed. Afterwards the syringe was glued into the rod. Here we go: barrel with recess....I played with the idea to replace the barrel of the autocannon aswell. As I could not find some rod with the appropriate diameter in my "warehouse" I decided to skip the decision to a time after I have primed the barrel to see how it comes out.


The MG sleeve by now.
Thats it for today. It is midnight here in Germany so I will get some sleep. Thanks for watching.
Best Regards
Dennis
DKdent

Joined: November 27, 2005
KitMaker: 182 posts
Armorama: 180 posts

Posted: Thursday, May 19, 2016 - 02:40 AM UTC
Hello everybody,
one small update for today:
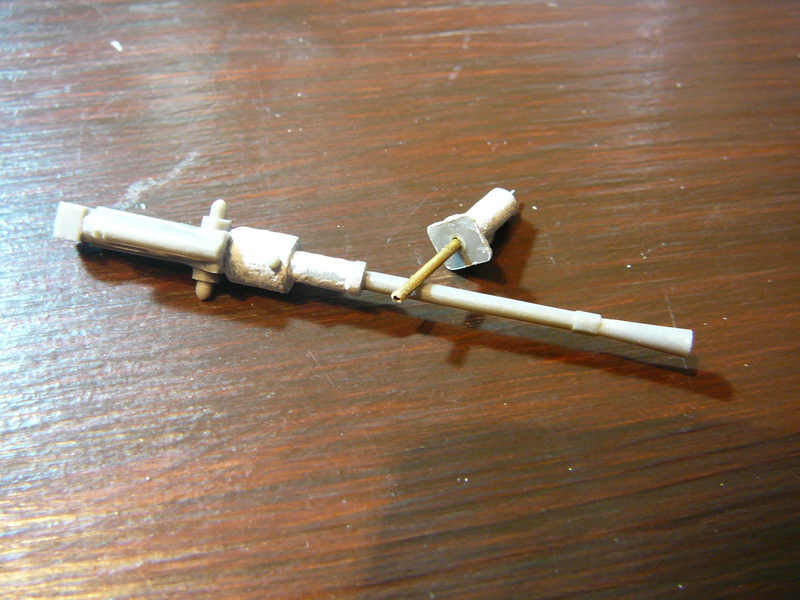
I sanded down the barrel casings of the armament. It still looks a little rough but the original parts are so small that it is hard to detect imperfections. Good enough after a layer of paint, I guess...
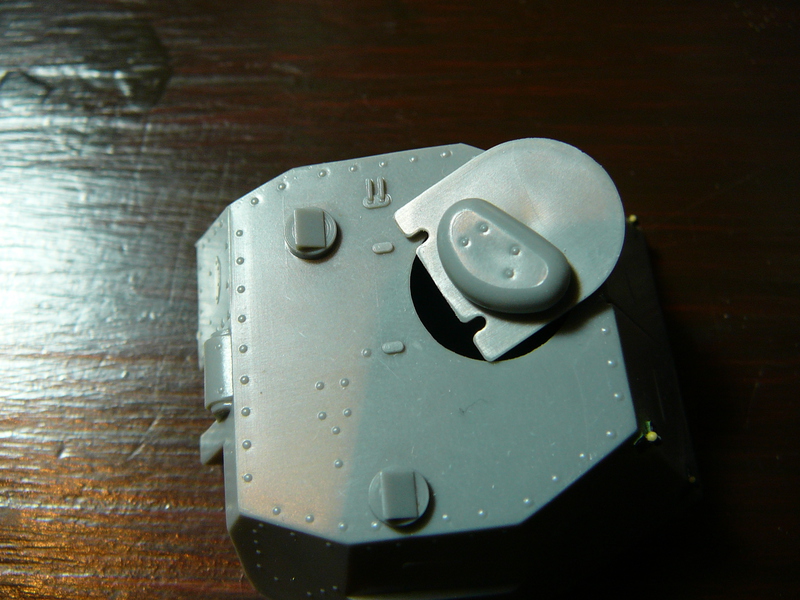
The next things I wanted to detail are the annoying "hinges" for the turret top hatch. These are simply some plastic blobs.
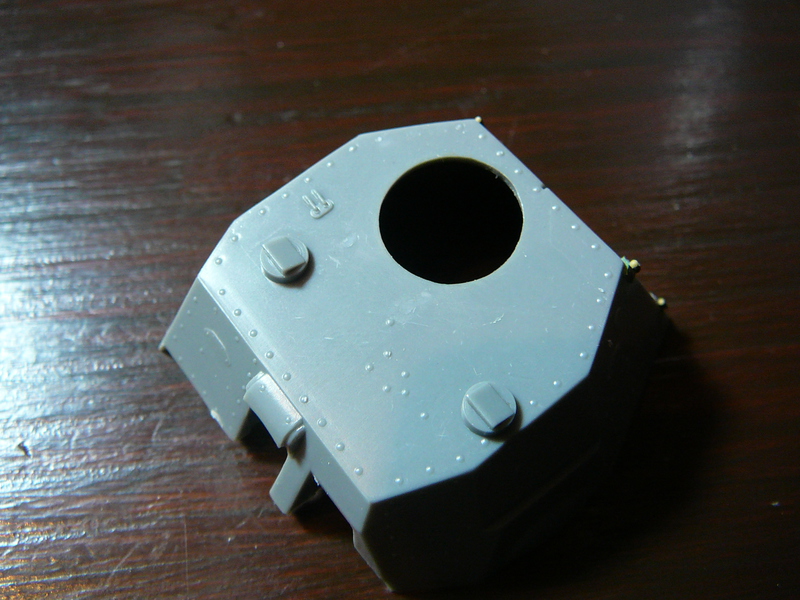
Detailling started by removing these parts and cleaning the turret top.
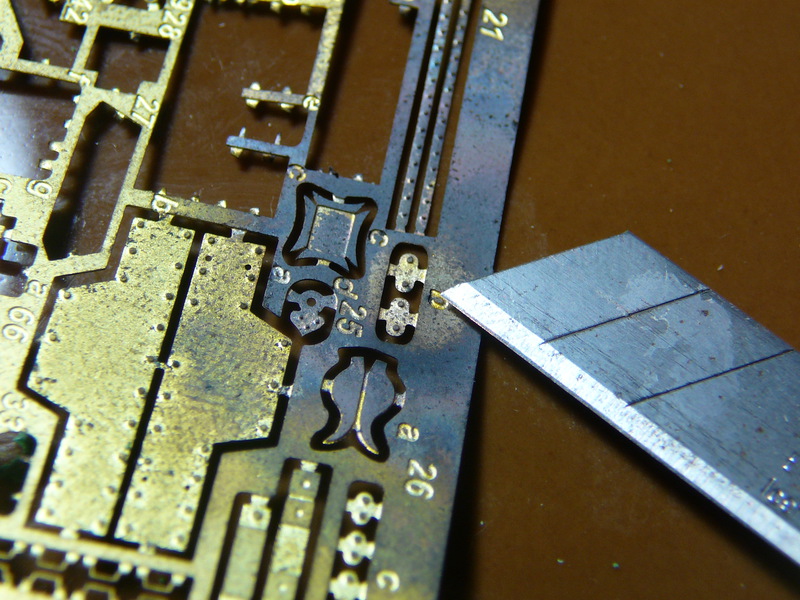
Once again I noticed that it is indeed pretty comfortable to maintain a decent spares box. I roamed through my unused pe-parts and annealed the two chosen parts.These had the right size and some etched rivets on top. Just what I needed. Keep spares!!!
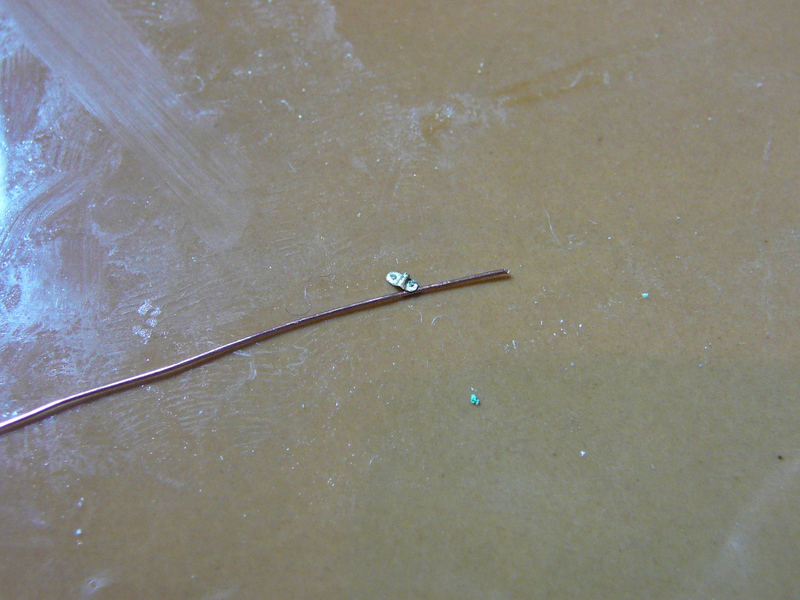
Once again I simply rolled the parts over a lenght of wire until they took the desired shape.
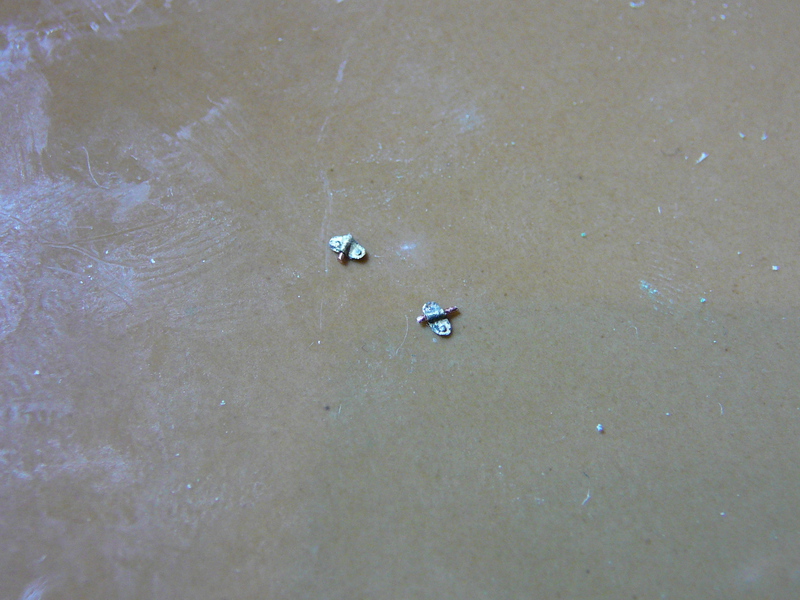
Afterwards I glued the pe-parts onto the wire and did cut the wire close to the pe-hinges.
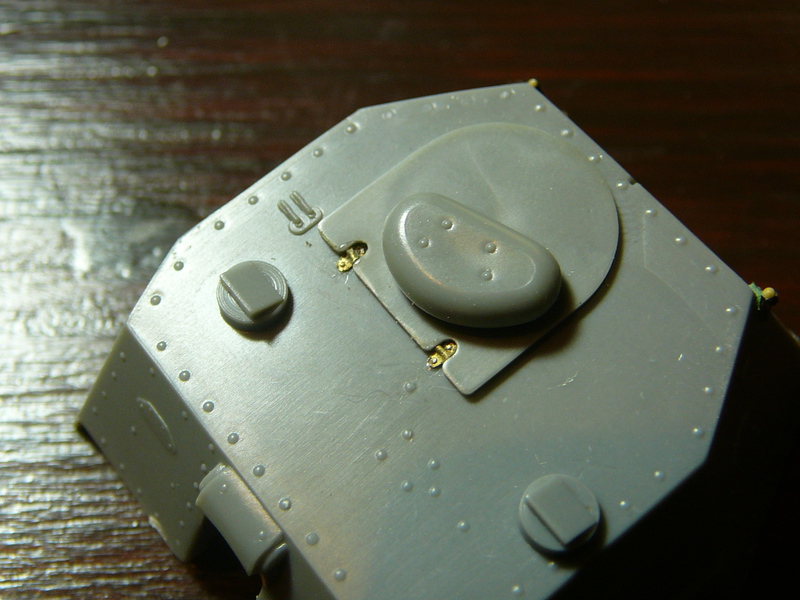
Then I started to sand down the excess wire until the part barely did fit into the locating holes of the turret hatch. By sanding them down step by step and dryfitting them several times (still takes only 30 seconds per hinge...) one can ensure a tight fit and avoid free spaces between hatch and hinge. Afterwards the hinges have been glued using CA. I did use some sharp tweezers to press the pe-parts onto the glue to ensure a nice connection. Thats how the hatch looks now. It looks out of shape here and there and some things could have done better, but some small parts are indeed rather hard to build. It could be better sometimes, but I try hard. The main idea is: it hopefully still looks better than the original parts. Room for improvement is yet still there, of course.
Have a nice evening all.
Regards
Dennis
one small update for today:

I sanded down the barrel casings of the armament. It still looks a little rough but the original parts are so small that it is hard to detect imperfections. Good enough after a layer of paint, I guess...

The next things I wanted to detail are the annoying "hinges" for the turret top hatch. These are simply some plastic blobs.

Detailling started by removing these parts and cleaning the turret top.

Once again I noticed that it is indeed pretty comfortable to maintain a decent spares box. I roamed through my unused pe-parts and annealed the two chosen parts.These had the right size and some etched rivets on top. Just what I needed. Keep spares!!!


Once again I simply rolled the parts over a lenght of wire until they took the desired shape.

Afterwards I glued the pe-parts onto the wire and did cut the wire close to the pe-hinges.

Then I started to sand down the excess wire until the part barely did fit into the locating holes of the turret hatch. By sanding them down step by step and dryfitting them several times (still takes only 30 seconds per hinge...) one can ensure a tight fit and avoid free spaces between hatch and hinge. Afterwards the hinges have been glued using CA. I did use some sharp tweezers to press the pe-parts onto the glue to ensure a nice connection. Thats how the hatch looks now. It looks out of shape here and there and some things could have done better, but some small parts are indeed rather hard to build. It could be better sometimes, but I try hard. The main idea is: it hopefully still looks better than the original parts. Room for improvement is yet still there, of course.
Have a nice evening all.
Regards
Dennis
Posted: Thursday, May 19, 2016 - 04:31 AM UTC
Awesome work Dennis! 👍👍👍
Chaman911

Joined: August 28, 2015
KitMaker: 319 posts
Armorama: 308 posts
Posted: Saturday, May 21, 2016 - 01:12 AM UTC
Very nice indeed Dennis! I used your technique of glueing wire grab bars on the inside of the hatch so you can't see the glue. Came out great! I wish I had seen your post earlier as it was too late to do the drivers hatches and phone box...oh well.
On the Fighting Frogs front I have managed to build both track runs for my AMX 30. As soon as I finish my Tamiya campaign entry I will really be able to focus and make some headway.
Hope everyone is well.
On the Fighting Frogs front I have managed to build both track runs for my AMX 30. As soon as I finish my Tamiya campaign entry I will really be able to focus and make some headway.
Hope everyone is well.
DKdent

Joined: November 27, 2005
KitMaker: 182 posts
Armorama: 180 posts

Posted: Saturday, May 21, 2016 - 03:09 AM UTC
Quoted Text
Very nice indeed Dennis! I used your technique of glueing wire grab bars on the inside of the hatch so you can't see the glue. Came out great! I wish I had seen your post earlier as it was too late to do the drivers hatches and phone box...oh well.
Hello,
thanks for the heads up. Even if I don`t see myself as an too experienced modeler, I still hope that someone might catch up a hint or two. I enormously enjoy build logs as these are the location where to learn. Of course, most is known to the "old dogs" out here....

One of these old tricks: combining parts by using rods.
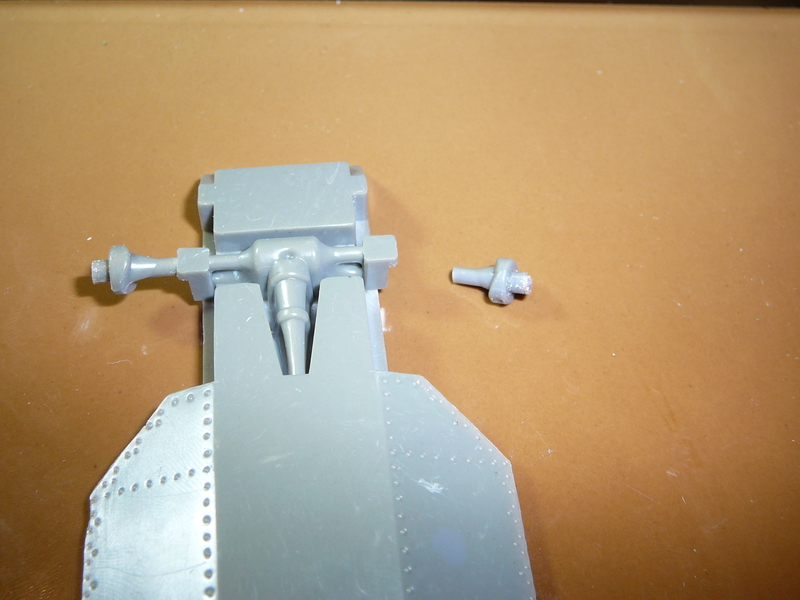
As the plastic of this old kit is very brittle some parts snaped off at first eye contact. One of these was a front axle.
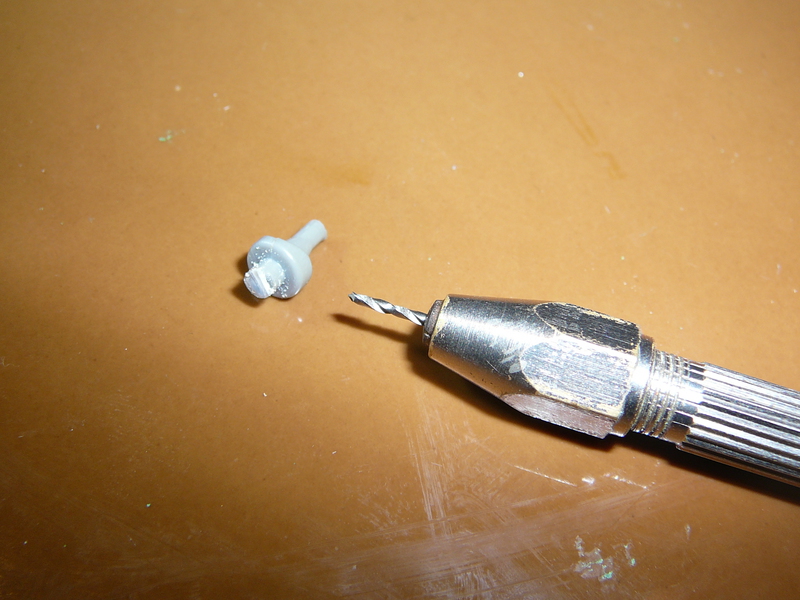
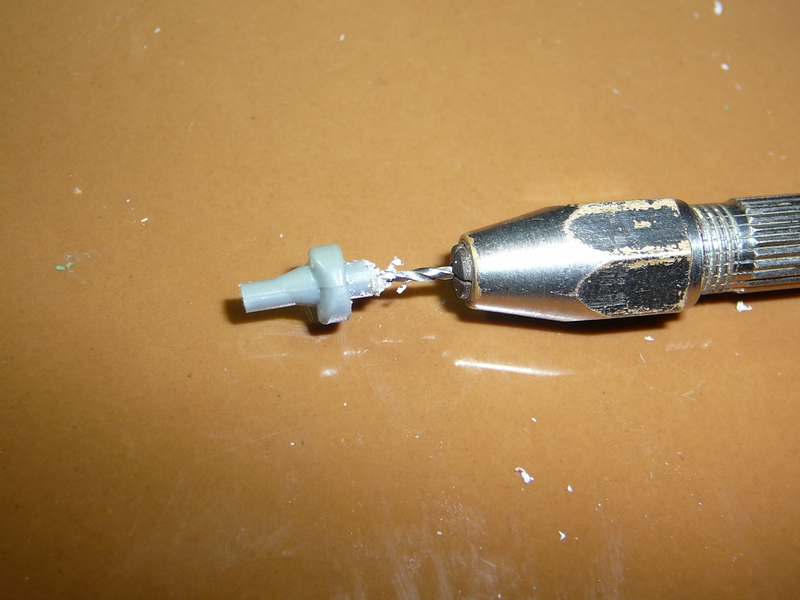
To repair the mess I first drilled a hole with an appropriate diameter into the loose part using a hand drill.
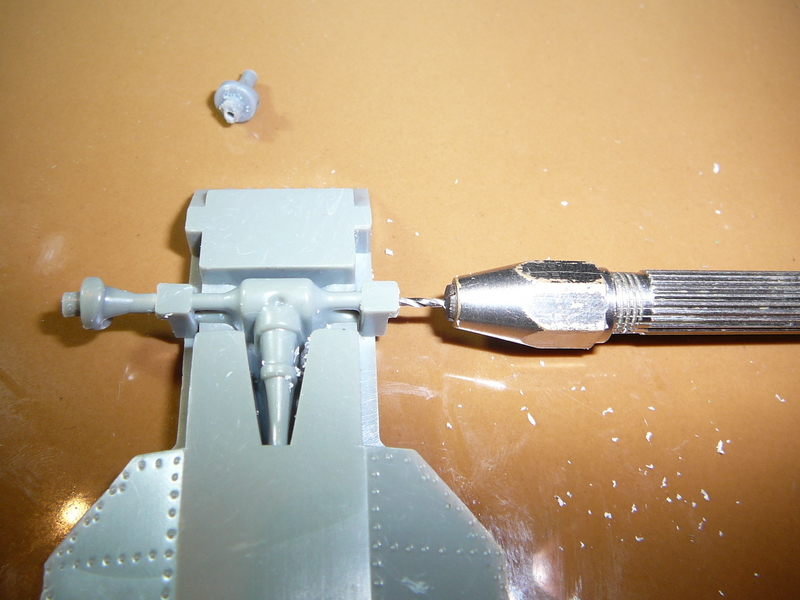
Then I repeated the process on the remains of the axle molded onto the chassis.
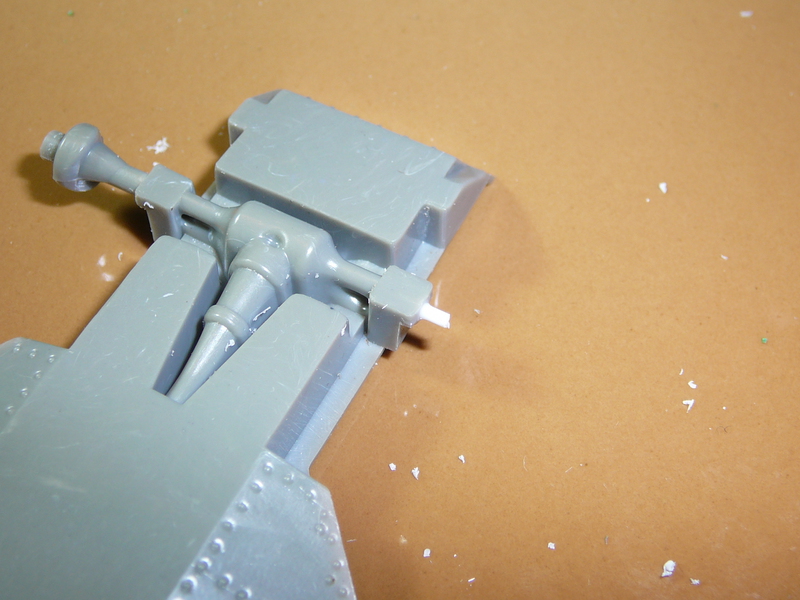
Then I glued a short piece of plastic rod into the hollow axle.
Then I figured out that I am an idiot as I drilled out the wrong side ot the broken part. At least this is no tragedy as this hole will be hidden inside the rim of the wheel. Still some minutes of work gone....
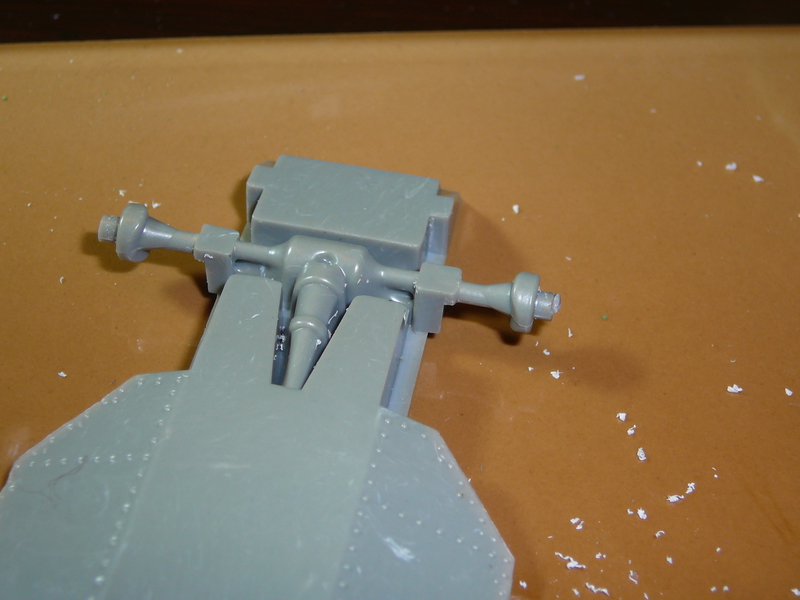
Finally I glued the two parts together using Tamiya Extra thin.
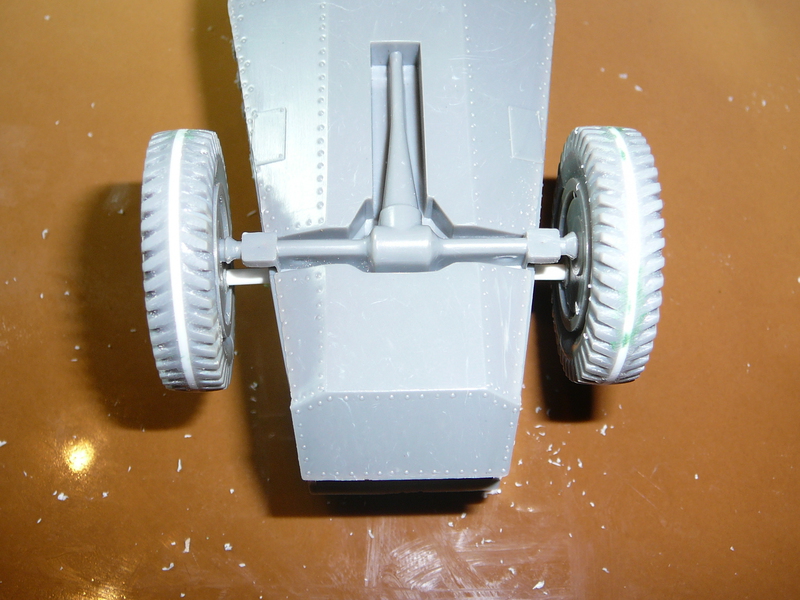
I also gave the rear wheels a dryfitting and did cut the new plastic axle to lenght. Nothing here is glued as I will have to do some serious sanding on the hull. As the plastic rod would be a nuissance there I will glue it as late as possible. Still it is good to have the parts repaired. Aligning the wheels will be a mayor pain in the ass as there are no locating pins on the whole model and because the hull sides are not straight or square to each other. We will see.....
I admit that I startet to look at the model stash with grief in my eyes as some brand new french kits are sitting there.If you consider that ICM`s Panhard kit sells for around 22 bucks here, building the old ALBY one is not getting funnier each day... But now we have started the battle....
Best Regards
Dennis
Posted: Saturday, May 21, 2016 - 05:38 PM UTC
Quoted Text
I admit that I startet to look at the model stash with grief in my eyes as some brand new french kits are sitting there.If you consider that ICM`s Panhard kit sells for around 22 bucks here, building the old ALBY one is not getting funnier each day... But now we have started the battle....
Best Regards
Dennis
Hi Dennis, there will be folks who'll have raised eyebrows knowing that there are better kit options for the subject you chose. With the effort you are putting on this, I'd say you are doing quite well. Look forward to your finish! Cheers, Tat
miniflea

Joined: October 17, 2011
KitMaker: 237 posts
Armorama: 235 posts

Posted: Sunday, May 22, 2016 - 12:18 AM UTC
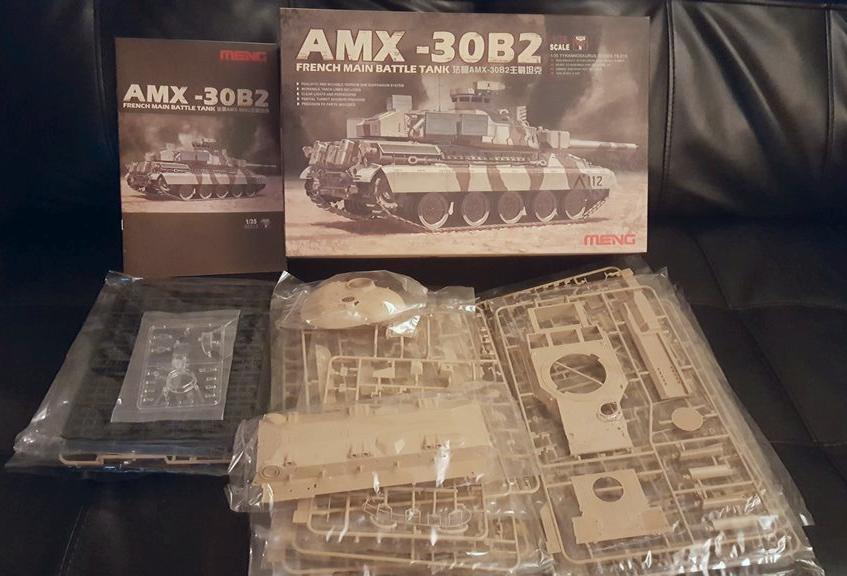
I'm entering with Meng's AMX-30B2. Apologies for the potato quality photos, but I was eager to get started on this.
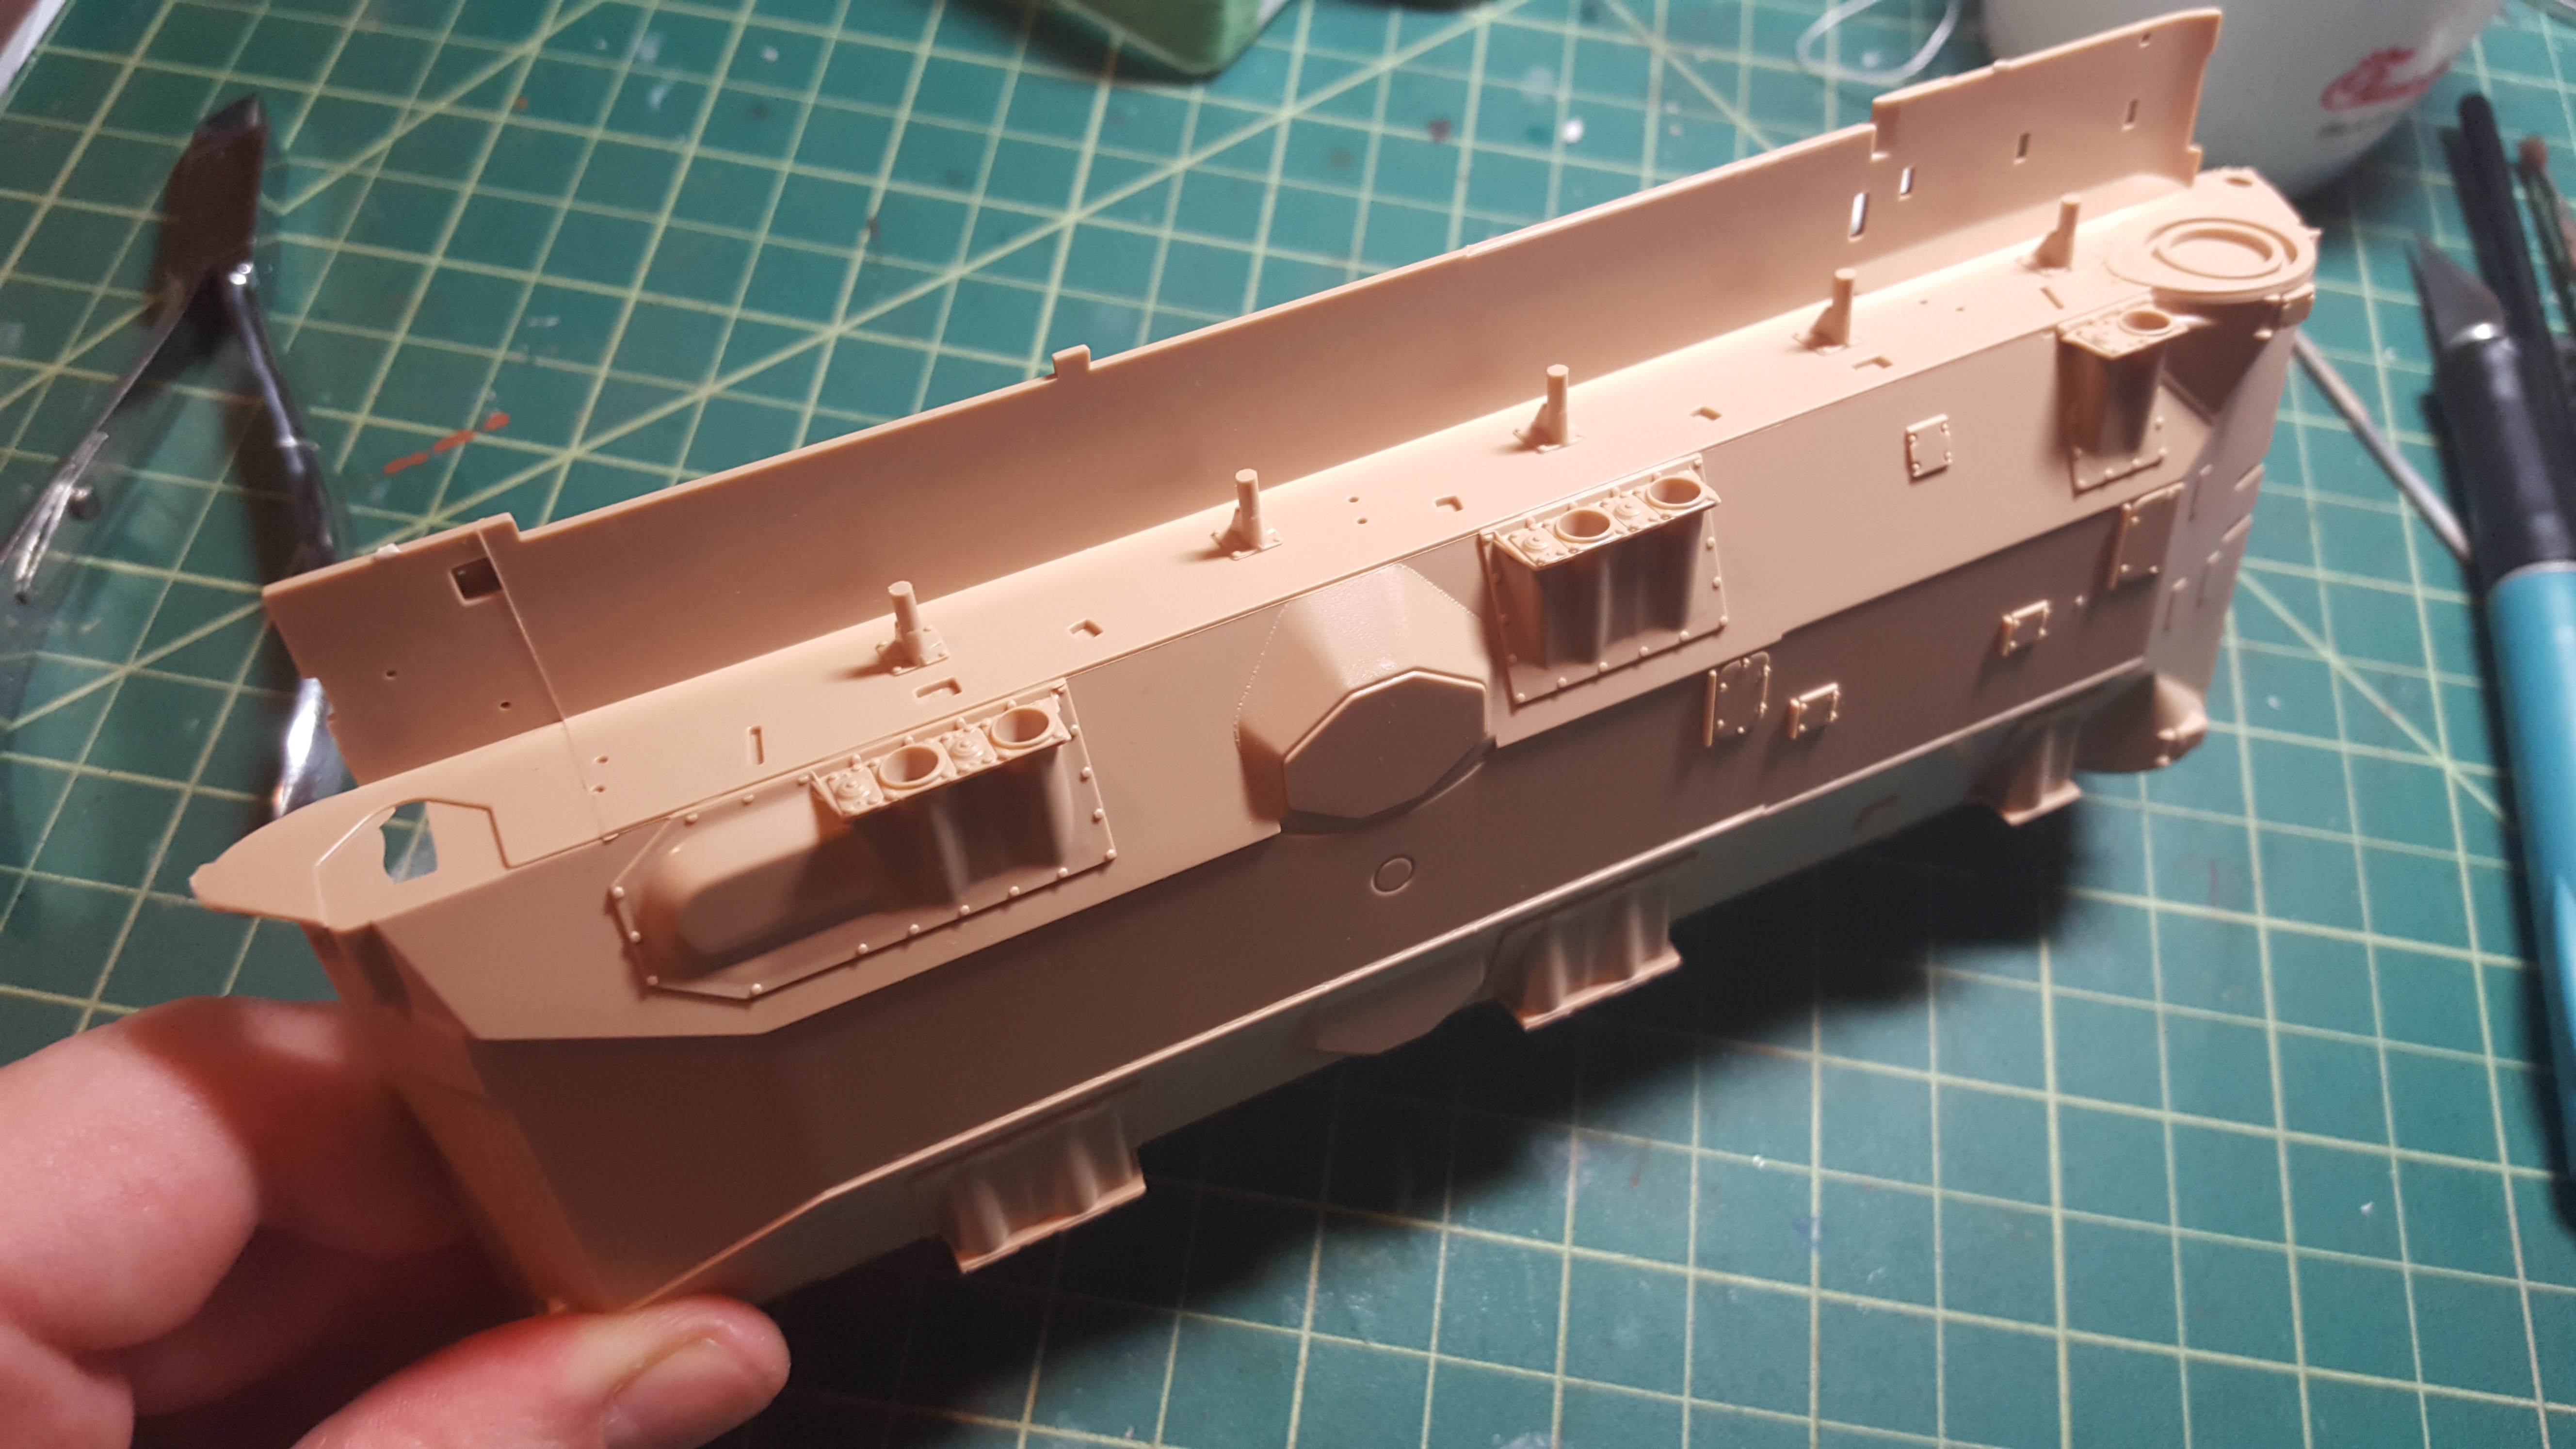
The hull tub immediately struck me as very ambitious and very nicely done.
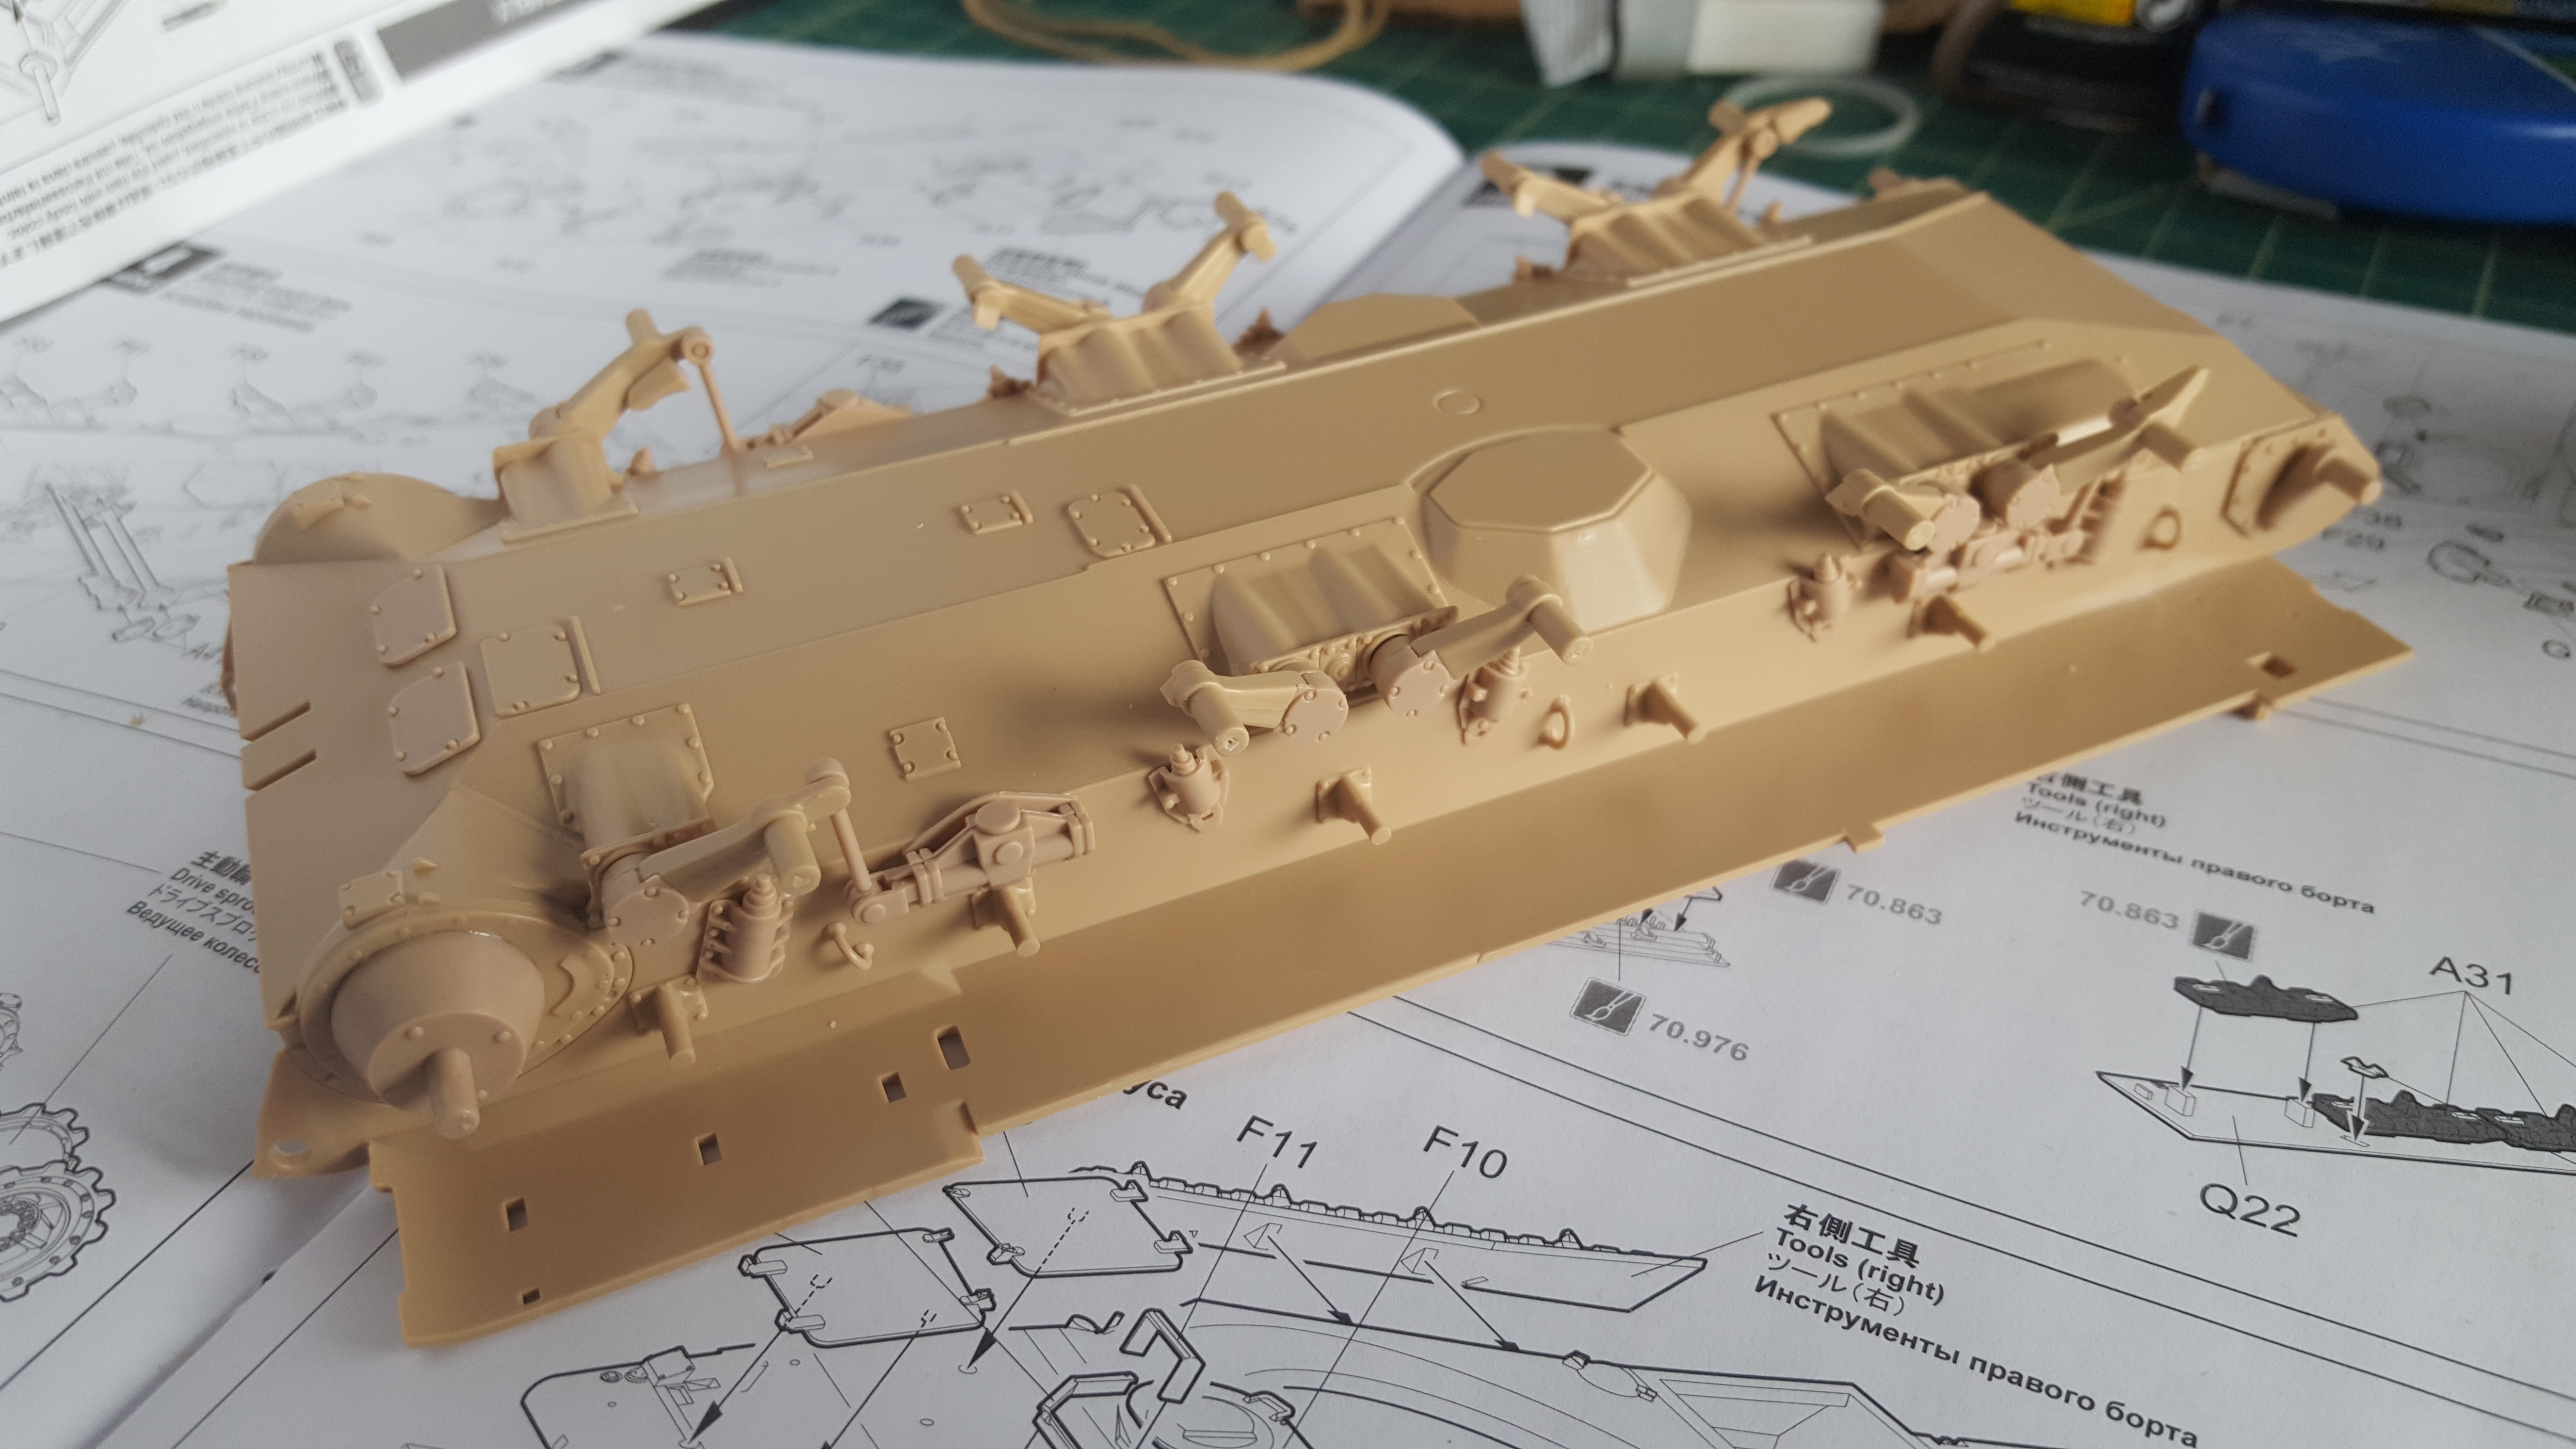
The workable suspension parts in place. Probably I will glue them into a fixed position at some point.
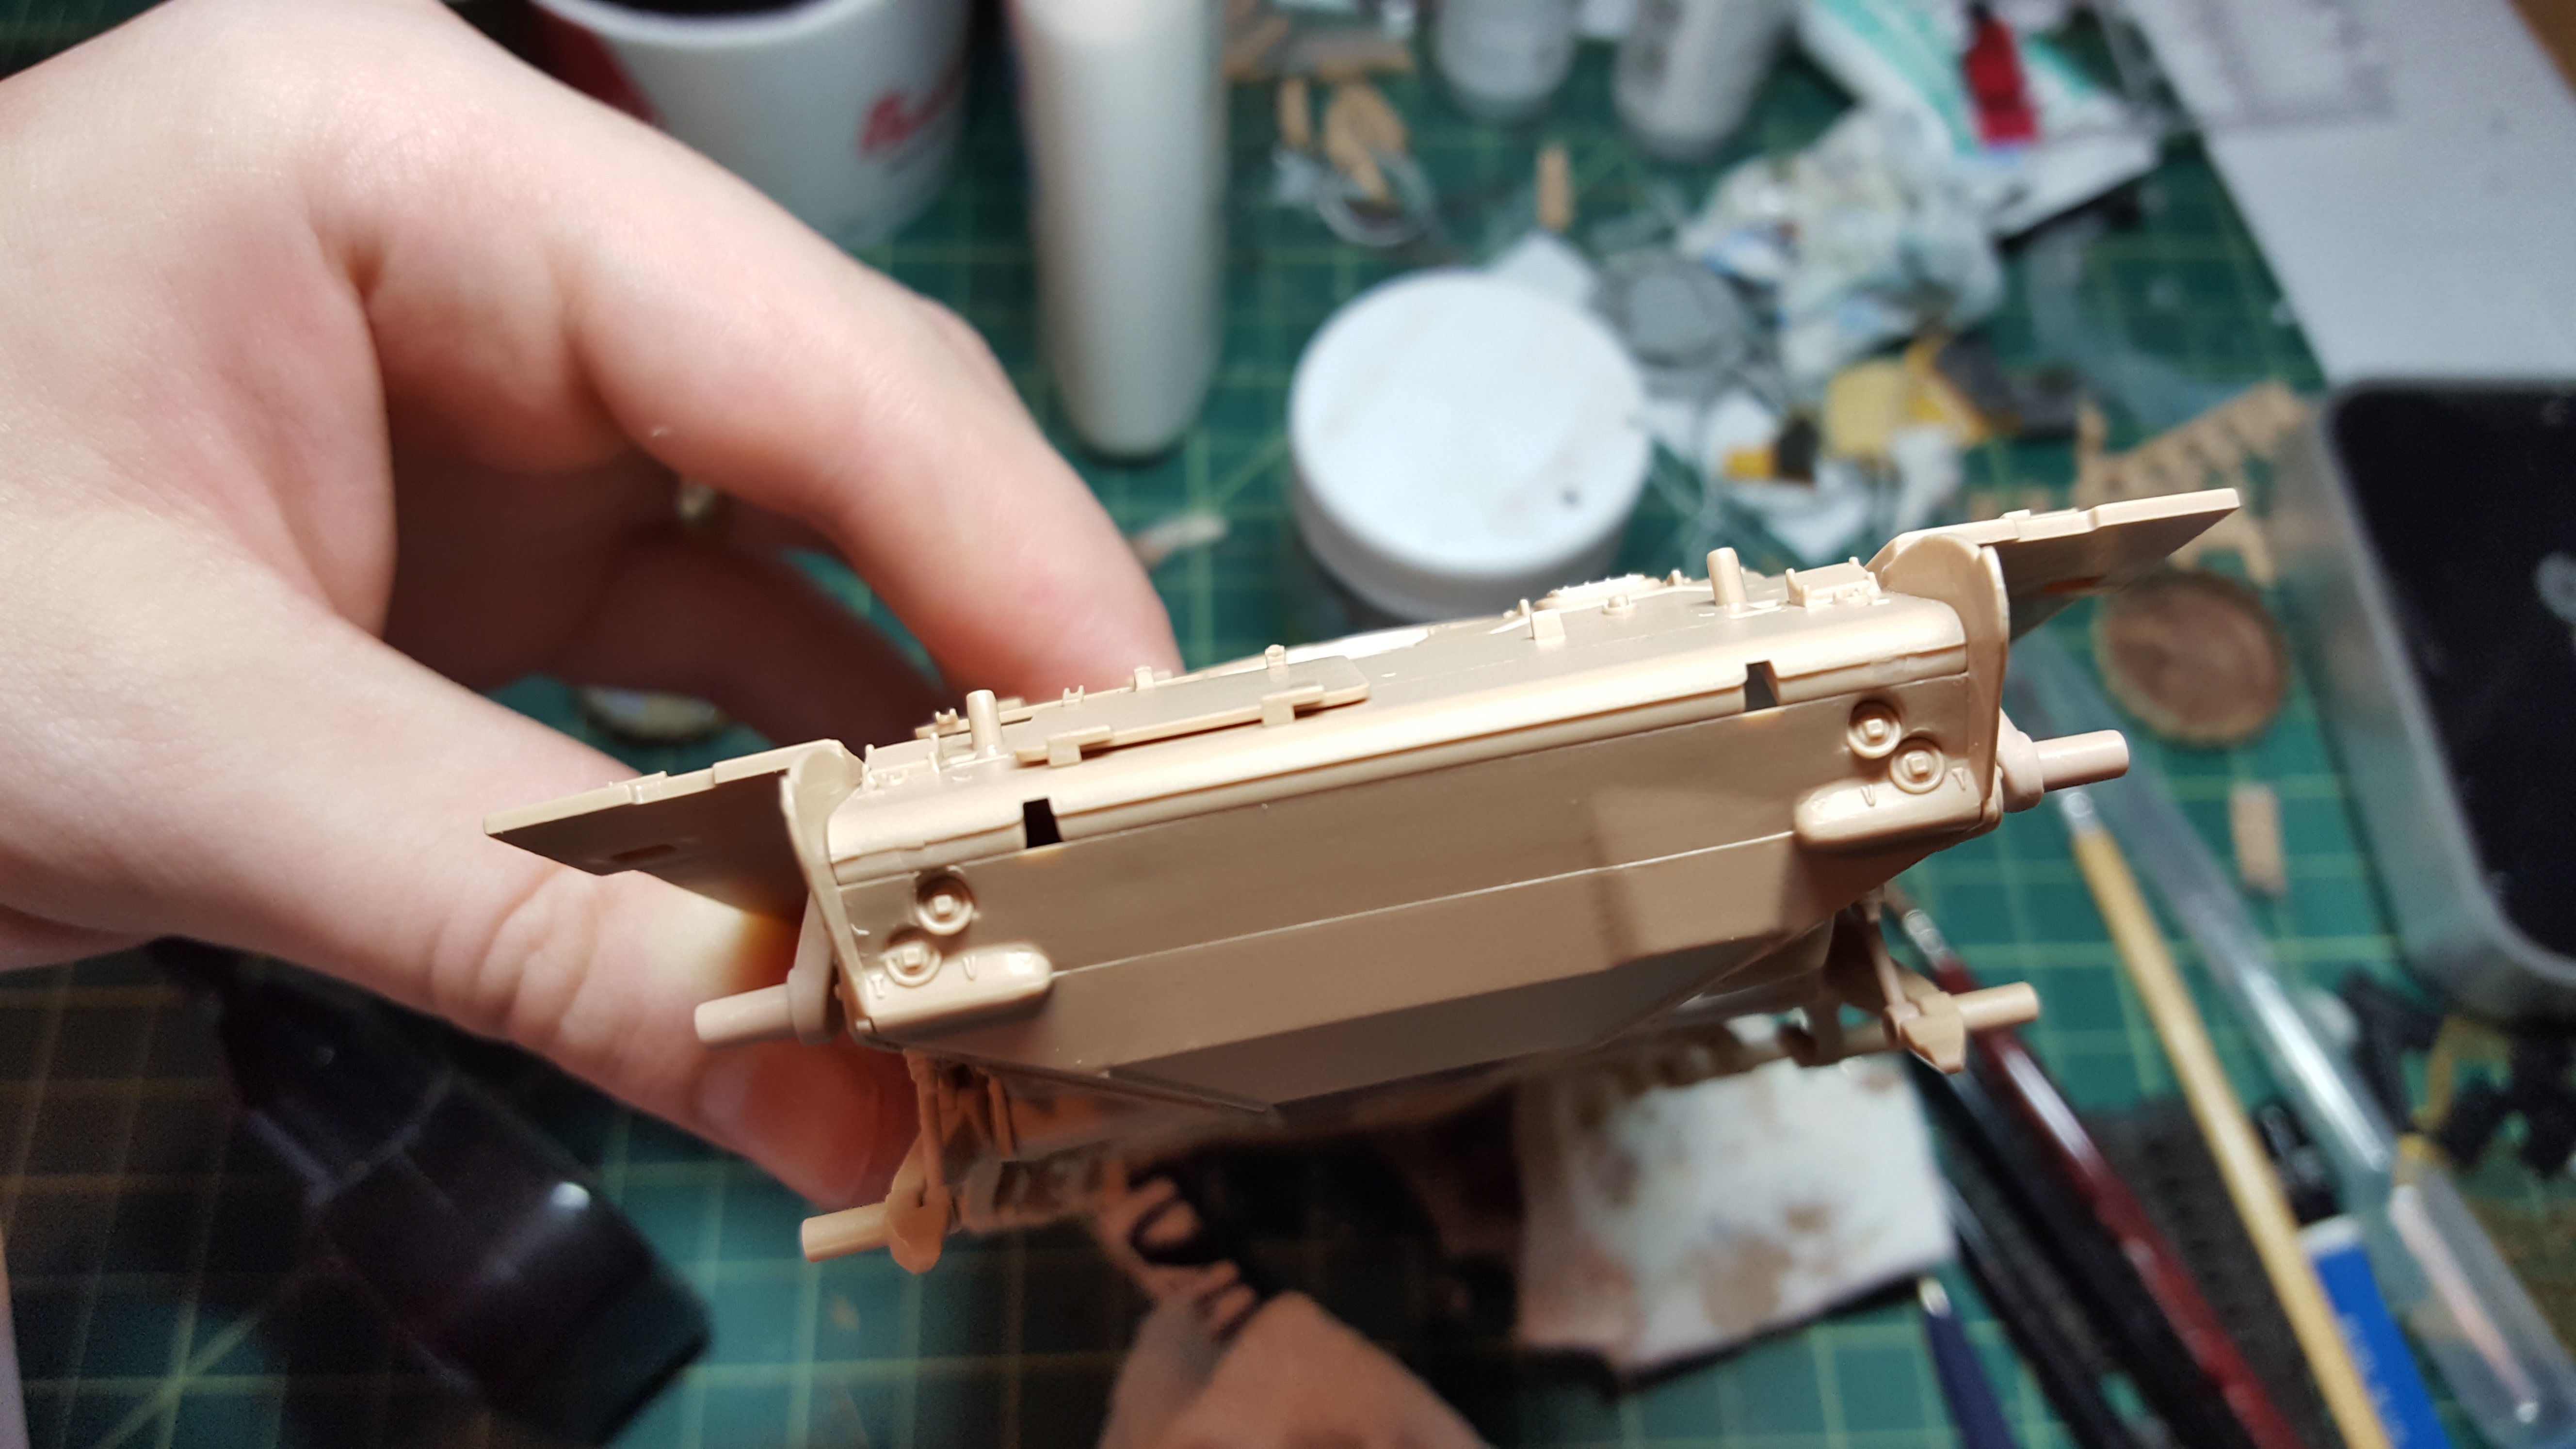
Test fit of the upper and lower hull. This gap was so prominent that I assumed for a while that there must be some sort of reinforcing strip that ran along the front, but after looking at some photos it looks like a smooth casting, so this will take some work to fix.

Which I started with some milliput.
The kit is going together fairly well so far, though I am honestly a bit surprised at how much flash there is and how many large mold seams need to be cleaned up before parts will fit. I get the feeling that Meng was a little over ambitious with some of their slide molding here, and I'm wondering if this is one of their earlier kits. I recently finished their Whippet and that kit had none of these issues.
Also, I have been having some trouble finding good operation Daguet reference photos. The same two always seem to pop up, along with some grainy youtube videos. Anyone know a good source? I would be especially interested in seeing a tank traversing some uneven terrain, maybe I can put the workable suspension to good use.


The hull tub immediately struck me as very ambitious and very nicely done.

The workable suspension parts in place. Probably I will glue them into a fixed position at some point.

Test fit of the upper and lower hull. This gap was so prominent that I assumed for a while that there must be some sort of reinforcing strip that ran along the front, but after looking at some photos it looks like a smooth casting, so this will take some work to fix.

Which I started with some milliput.
The kit is going together fairly well so far, though I am honestly a bit surprised at how much flash there is and how many large mold seams need to be cleaned up before parts will fit. I get the feeling that Meng was a little over ambitious with some of their slide molding here, and I'm wondering if this is one of their earlier kits. I recently finished their Whippet and that kit had none of these issues.
Also, I have been having some trouble finding good operation Daguet reference photos. The same two always seem to pop up, along with some grainy youtube videos. Anyone know a good source? I would be especially interested in seeing a tank traversing some uneven terrain, maybe I can put the workable suspension to good use.
DKdent

Joined: November 27, 2005
KitMaker: 182 posts
Armorama: 180 posts

Posted: Monday, May 23, 2016 - 12:13 AM UTC
Hello Brendan,
the hull parts look very charming, as you said. Even if the gap on the front is not the biggest challenge it is very interesting to hear about lots of flash. Not what I would have thought about regarding this kit. Surprising...
Good luck with the build.
Regards
Dennis
the hull parts look very charming, as you said. Even if the gap on the front is not the biggest challenge it is very interesting to hear about lots of flash. Not what I would have thought about regarding this kit. Surprising...
Good luck with the build.
Regards
Dennis
Chaman911

Joined: August 28, 2015
KitMaker: 319 posts
Armorama: 308 posts
Posted: Monday, May 23, 2016 - 10:11 PM UTC
Hi Brendan,
I too am going to complete Meng's AMX 13. As soon as my Tamiya campaign build is done I will crack into my kit and see if I have the same flash and hull gap issues. Not sure why mine would be any different but it will be interesting to see. Abrams Squad has published A new book featuring this kit as a build. That may be an option for additional photos. I went ahead and ordered the book if there are good reference photos I will let you know. Looking forward to watching your build! Update often so I know what I'm getting into
I too am going to complete Meng's AMX 13. As soon as my Tamiya campaign build is done I will crack into my kit and see if I have the same flash and hull gap issues. Not sure why mine would be any different but it will be interesting to see. Abrams Squad has published A new book featuring this kit as a build. That may be an option for additional photos. I went ahead and ordered the book if there are good reference photos I will let you know. Looking forward to watching your build! Update often so I know what I'm getting into


Tojo72

Joined: June 06, 2006
KitMaker: 4,691 posts
Armorama: 3,509 posts

Posted: Monday, May 23, 2016 - 10:22 PM UTC
Brenden,good start on an interesting vehicle.

Sean50

Joined: March 20, 2007
KitMaker: 340 posts
Armorama: 328 posts

Posted: Wednesday, May 25, 2016 - 09:11 PM UTC
Hello there
My humble contribution to this campaign....
When Meng released their FT, I bought a couple as I reckoned that given the widespread use and the different versions, I'd be sure to find something interesting. First one I built as a 37mm-armed FT in German service in Normandy. A really nice kit that went together well and had a lot of nice detail. Enjoyed it enough to buy another.
When this campaign started it prompted me to do another, in fact two- one with the Reibel MG and another 37mm-armed version.
I thought I'd push the boat out a bit with both and add a few bits and pieces, including some of the new 3D printed parts from ETS35 (Niels Henkemans).
So here goes.I'm afraid neither my modelling skills nor my photography skills do the parts justice. They are truly amazing...
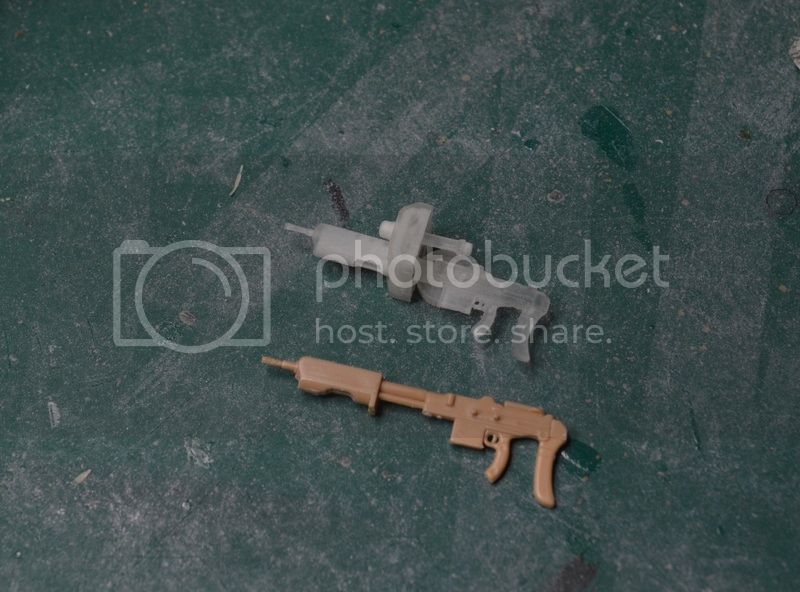
The Reibel MG in the kit is actually pretty good, but the new one takes it a bit further and is the right size:
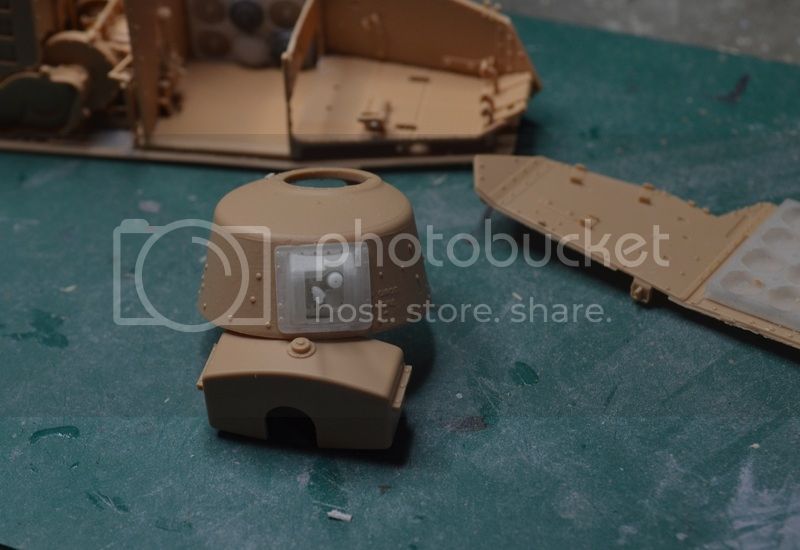
You have to do a bit of trimming on the turret, getting rid of the raised surround and cutting back a bit but nothing painful. Here the new parts for the gun mount are just pushed into place- no glue as yet. Fit is perfect:
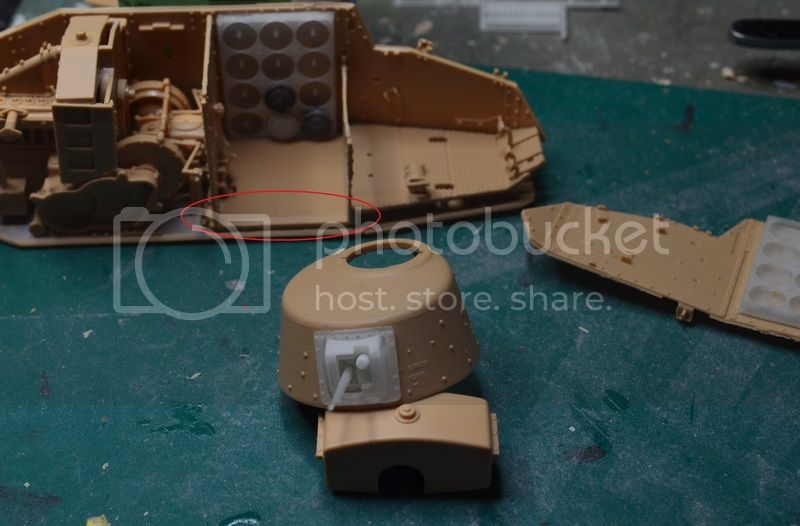
The kit's ammo racks for this version are a bit dissappointing- they're a bit clunky and they're full. The new parts again fit perfectly. They are extremely fragile (especially in my hands) which has dictated somewhat which spaces will have the drum magazines in them. The only thing I had to do to get a nice good fit was lower that part of the floor, then trim away the dot pattern where the racks meet the floor (ringed in red). Once this is done, everything fits fine:
Cheers for now,
Sean
My humble contribution to this campaign....
When Meng released their FT, I bought a couple as I reckoned that given the widespread use and the different versions, I'd be sure to find something interesting. First one I built as a 37mm-armed FT in German service in Normandy. A really nice kit that went together well and had a lot of nice detail. Enjoyed it enough to buy another.
When this campaign started it prompted me to do another, in fact two- one with the Reibel MG and another 37mm-armed version.
I thought I'd push the boat out a bit with both and add a few bits and pieces, including some of the new 3D printed parts from ETS35 (Niels Henkemans).
So here goes.I'm afraid neither my modelling skills nor my photography skills do the parts justice. They are truly amazing...
The Reibel MG in the kit is actually pretty good, but the new one takes it a bit further and is the right size:

You have to do a bit of trimming on the turret, getting rid of the raised surround and cutting back a bit but nothing painful. Here the new parts for the gun mount are just pushed into place- no glue as yet. Fit is perfect:

The kit's ammo racks for this version are a bit dissappointing- they're a bit clunky and they're full. The new parts again fit perfectly. They are extremely fragile (especially in my hands) which has dictated somewhat which spaces will have the drum magazines in them. The only thing I had to do to get a nice good fit was lower that part of the floor, then trim away the dot pattern where the racks meet the floor (ringed in red). Once this is done, everything fits fine:

Cheers for now,
Sean

Tojo72

Joined: June 06, 2006
KitMaker: 4,691 posts
Armorama: 3,509 posts

Posted: Wednesday, May 25, 2016 - 09:15 PM UTC
Nice start Sean

Tojo72

Joined: June 06, 2006
KitMaker: 4,691 posts
Armorama: 3,509 posts

Posted: Thursday, May 26, 2016 - 03:14 PM UTC
Chaman911

Joined: August 28, 2015
KitMaker: 319 posts
Armorama: 308 posts
Posted: Thursday, May 26, 2016 - 10:30 PM UTC
Looks great Anthony! That kit is going to be added to the stash for sure!
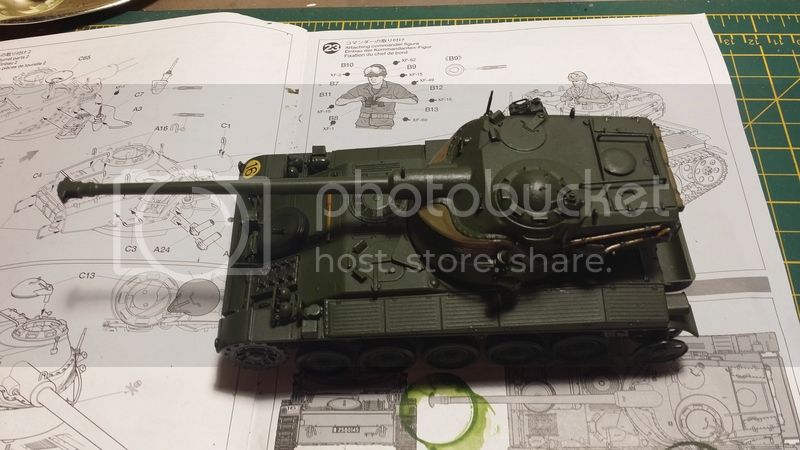
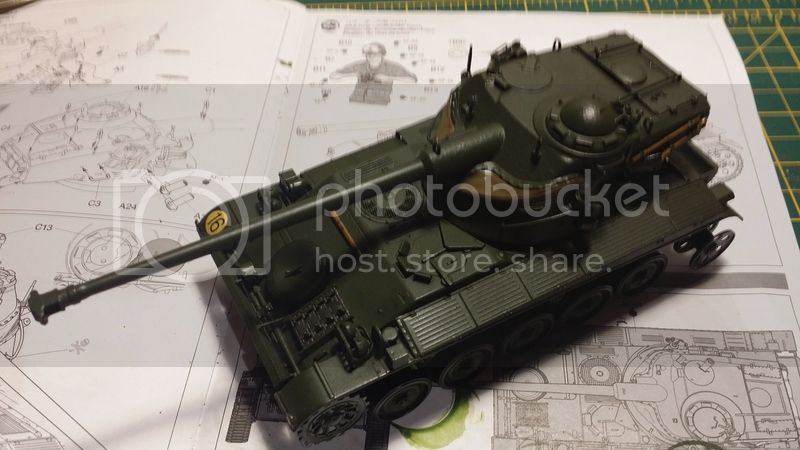
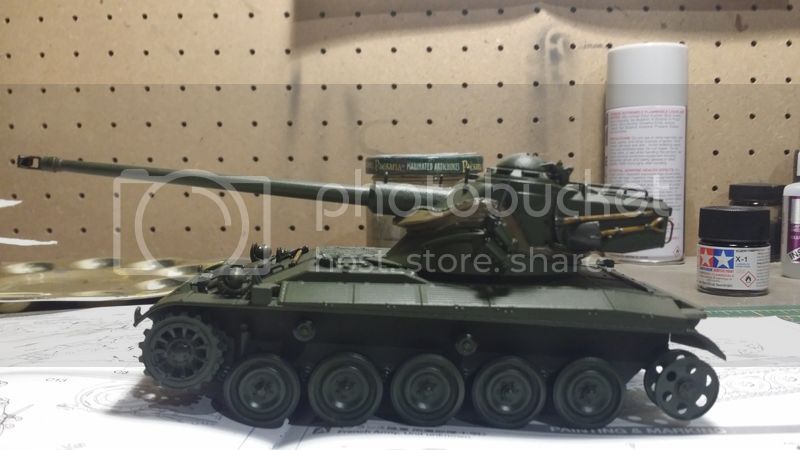
I have made a little progress myself. Got the base color down. Blocking in the stowage now. I still have a lot of packs to add to the bar around the turret and may be some more gear on the engine deck. Lots more hand painting to do then sealing, decals, and washes.

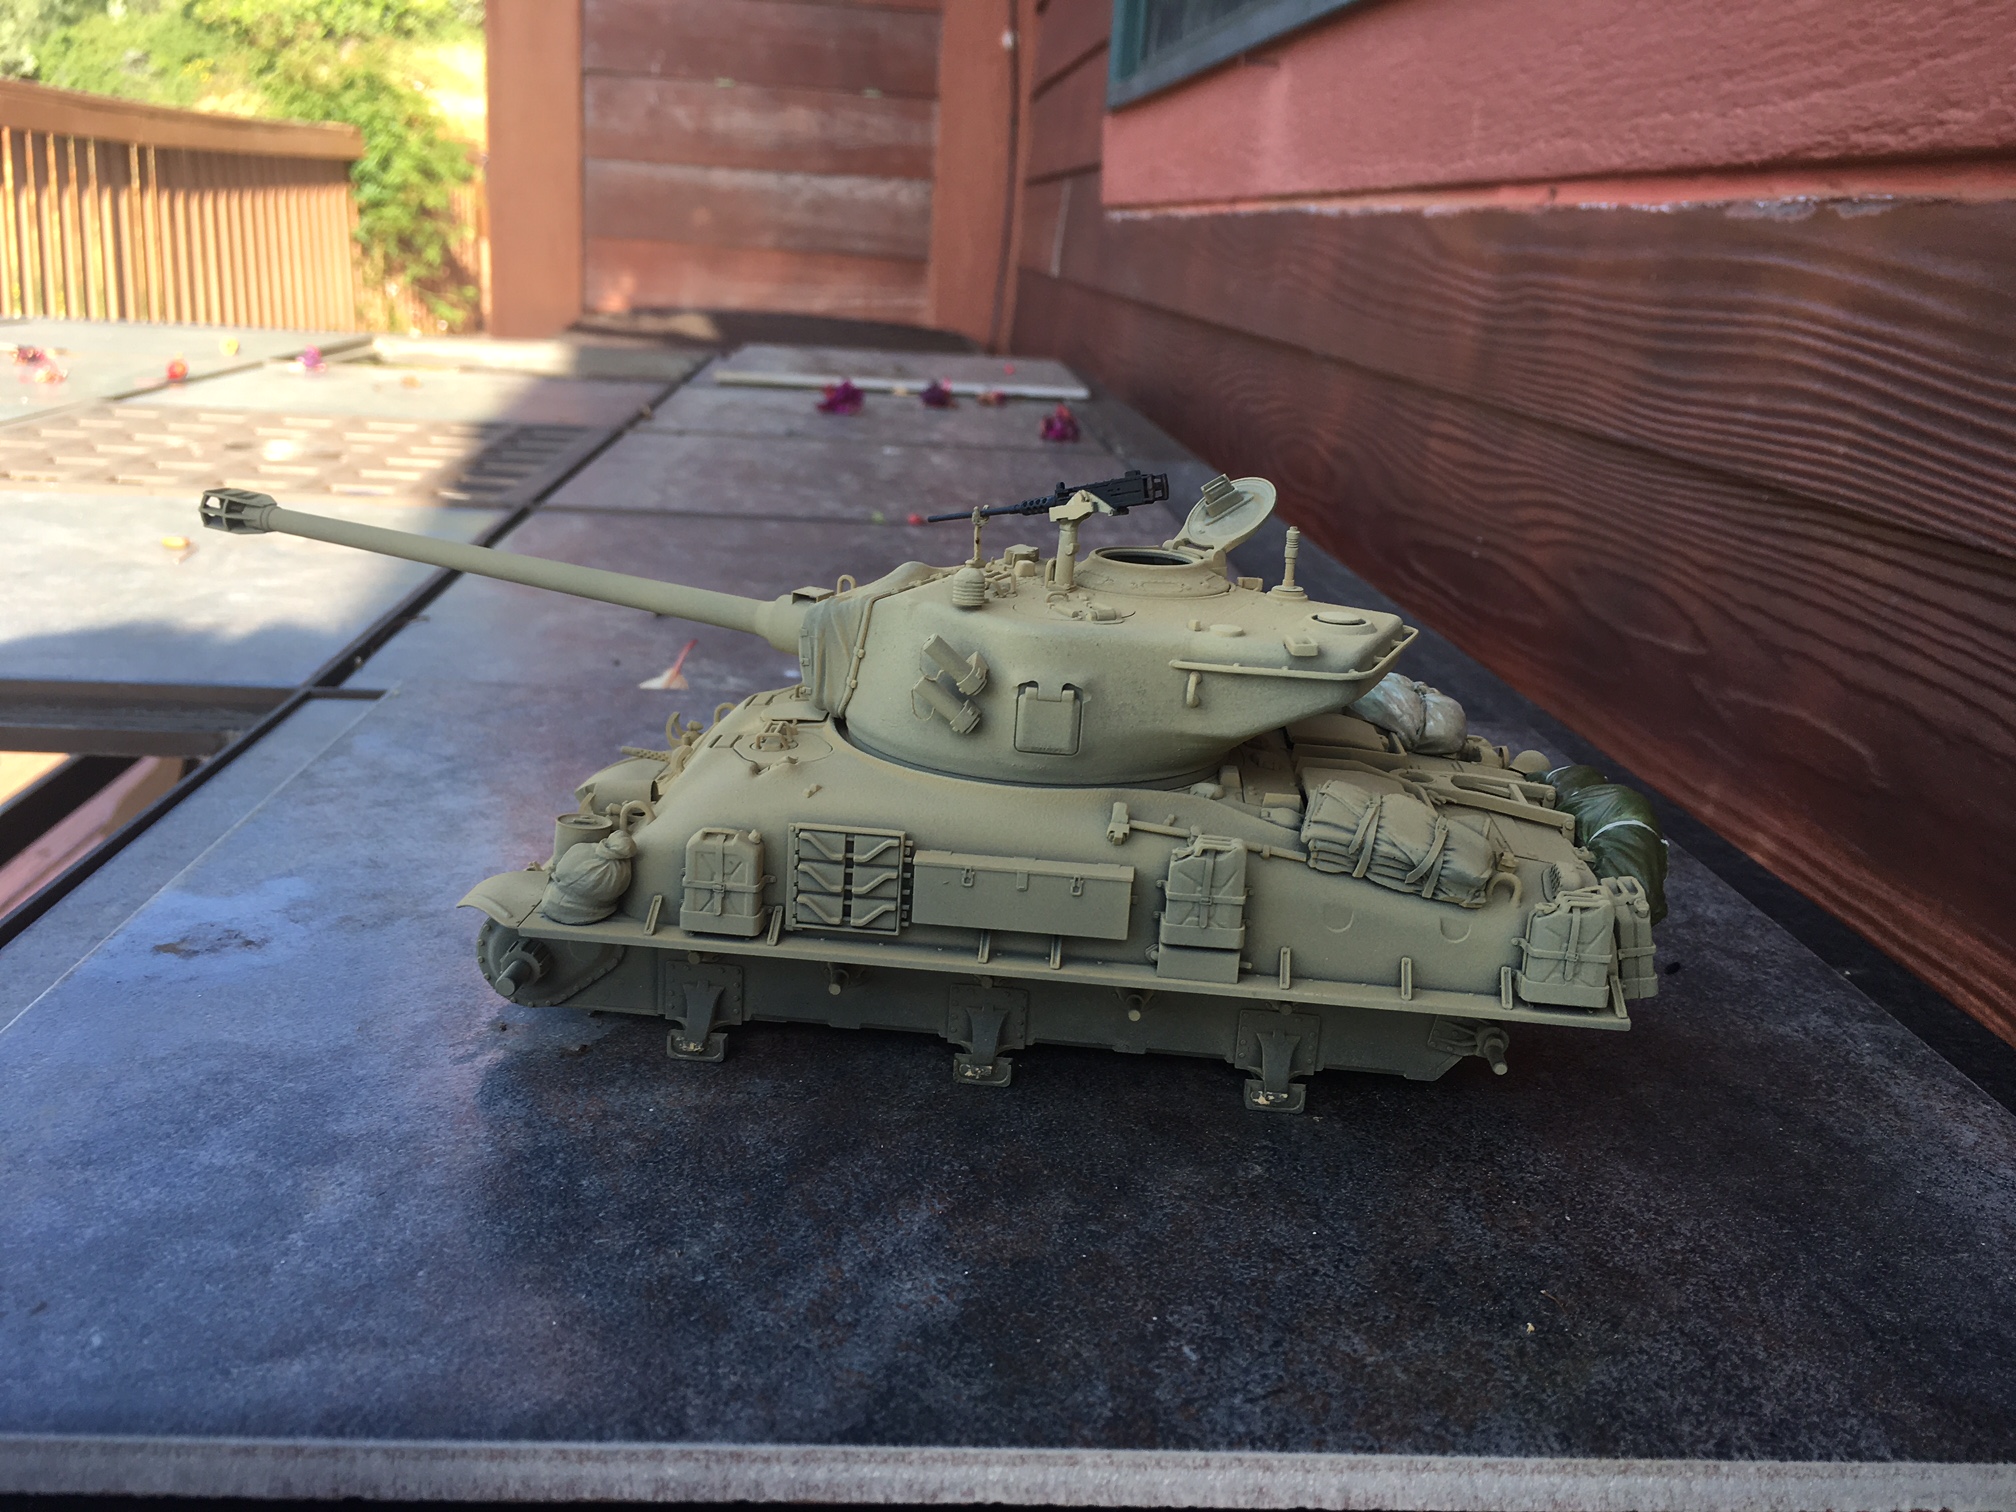
I have made a little progress myself. Got the base color down. Blocking in the stowage now. I still have a lot of packs to add to the bar around the turret and may be some more gear on the engine deck. Lots more hand painting to do then sealing, decals, and washes.


Chaman911

Joined: August 28, 2015
KitMaker: 319 posts
Armorama: 308 posts
Posted: Thursday, May 26, 2016 - 11:34 PM UTC
OOPS! Wrong campaign! Sorry folks I can be a bit slow at times. 


sherb

Joined: August 25, 2004
KitMaker: 752 posts
Armorama: 378 posts

Posted: Friday, May 27, 2016 - 01:17 AM UTC
Dennis, that's amazing work you're doing.
I'm jealous of everyone's progress, with two small kids at home there have been nights where I've literally only been able to glue two parts together on the Chaffee.
I'm jealous of everyone's progress, with two small kids at home there have been nights where I've literally only been able to glue two parts together on the Chaffee.
 |


