Campaigns
Where Armorama group builds can be discussed, organized, and updates posted.
The Fighting Frogs
Hudson29
#460
Visit this Community
California, United States
Joined: September 16, 2014
KitMaker: 1,156 posts
Armorama: 1,024 posts
Posted: Tuesday, November 08, 2016 - 03:32 AM UTC
I have been getting work done on the Hotchkiss little by little. The hard work is done and things should go more quickly now. Here are a couple of pictures showing a trial fit:


Its in the paint shop now and here is the color I settled on:


I was able to find no reference to the shade of OD the French would have used in 1940 so I took a SWAG and came up with a color that should look good with the big red heart that will go on the turret.
bison126
Visit this Community
Correze, France
Joined: June 10, 2004
KitMaker: 5,329 posts
Armorama: 5,204 posts
Posted: Saturday, November 12, 2016 - 09:02 PM UTC
I finally started the painting process. I used some XF-13 JA Green as the base color and applied a coat of gloss varnish for the decals I have to make on my own.
I'm still waiting for the DEF models wheels t oreplca the kit ones.


It looks very dark on the pictures but the color is lighter for real. The weathering will help enlighten the whole vehicle, at least this is what I intend to manage!

Olivier
Chaman911
Visit this Community
United States
Joined: August 28, 2015
KitMaker: 319 posts
Armorama: 308 posts
Posted: Sunday, November 13, 2016 - 10:09 AM UTC
Very nice Olivier!
I am happy to announce that I have completed construction! Primer will go on in the morning. Sorry for poor pics.


Hudson29
#460
Visit this Community
California, United States
Joined: September 16, 2014
KitMaker: 1,156 posts
Armorama: 1,024 posts
Posted: Thursday, November 17, 2016 - 12:08 AM UTC
A little more work on the Hotchkiss. Here are some pics showing the paint & a trial fit of the fenders:


The decals are on and the Future is dry so weathering can proceed.

Paul
Chaman911
Visit this Community
United States
Joined: August 28, 2015
KitMaker: 319 posts
Armorama: 308 posts
Posted: Saturday, November 19, 2016 - 09:29 AM UTC
Base color is on. I sprayed it over Nato Black to add a little depth. I also did some very subtle panel fading (not sure if you can even see it). Next steps are the grates over the exhaust and the brown stripes of the cammo. Also, if I am building a vehicle with two radio antennas, how long should they be? Equal length? Sorry for the photos it has been raining non-stop and I don't have an indoor photo booth.


Hudson29
#460
Visit this Community
California, United States
Joined: September 16, 2014
KitMaker: 1,156 posts
Armorama: 1,024 posts
Posted: Monday, November 21, 2016 - 12:48 AM UTC
Bryan - I think your Fighting Frog is looking terrific! I'm not normally interested in modern armor but your model has be rethinking that.

I have been working on my own contribution. The Hotchkiss has been getting some washes as have the Fruil tracks. It is coming along.

The kit did not have any sort of heat shield over the muffler and this is a prominent item that really should be on the model. I tried making one out of plastic card but it was too brittle to bend smoothly even after several baths in boiling water.

I got out some 1/64" sheet brass which had been waiting in the wings for just such an opportunity as this. I'm new to working with brass and was looking forward to trying it with the rolling tool supplied by The Small Shop, a supporter of Armorama.

The brass was to tough to deform with any amount of force I was willing to use but happily I remembered someone saying that brass would soften with heat. Holding the metal with a pair of tweezers I got it red hot over the kitchen stove and let it cool by air. Sure enough, the metal allowed itself to be bent into shape by three successive steps using the tool.

Two strips of plastic card were glued in to act as distance spacers to hold the shield away from the muffler. Next will be primer & paint. Here are some pics:


Chaman911
Visit this Community
United States
Joined: August 28, 2015
KitMaker: 319 posts
Armorama: 308 posts
Posted: Monday, November 21, 2016 - 05:07 AM UTC
Nice scratch building Hudson. I realized I knew nothing about the Hotchkiss so I went to Youtube and looked around a bit. I found this pretty cool episode of Firepower that covered the Hotchkiss, EBR, AMX30B2, AMX 13, etc. It's worth a look!

https://www.youtube.com/watch?v=oKNbcySQKMQ&sns=em

Meanwhile I have sprayed the brown disruptive pattern. Keep in mind this is my first two-toned cammo. Hopefully it looks OK. I wish I had a more precise airbrush. I need to do a little more touch up but no time left to do it today.


bison126
Visit this Community
Correze, France
Joined: June 10, 2004
KitMaker: 5,329 posts
Armorama: 5,204 posts
Posted: Thursday, November 24, 2016 - 10:49 PM UTC
Your desert camo looks really good.

Here is my EBR with some home made markings. It was not easy because my decal paper strangely reacted with the ink of my printer.
I printed the markings on the sides and the front fender. The registration plate numbers come from a decal sheet dedicated to the Leclerc MBT so the font is not fully accurate. The bridge class marking comes from the HB box as the circles on the sides. The 4 numerals are from another decals sheet and the grenade flames are hand painted (not my best job!)


Olivier
Chaman911
Visit this Community
United States
Joined: August 28, 2015
KitMaker: 319 posts
Armorama: 308 posts
Posted: Saturday, November 26, 2016 - 04:32 AM UTC
Olivier, decals look great from here! Have your wheels arrived yet?
I am having some trouble deciding on decals. The instructions are for this vehicle

My paint job doesn't really match that tank so I looked around a bit and found a wide variety of unit makings.


Why such variation? Using the decals I have available is there a combination I could use to create a vehicle that could have at-least existed in theory but there is no photo of? My cammo is different than any of the vehicles I have seen pictures of so I would like to come up with a unique but possible unit marking for my vehicle (I hope I am making sense). There also seems to be a large variation in how the brown stripes were applied.
Here are the decals I have available:

Hudson, Hows your Hotchkiss coming?

bison126
Visit this Community
Correze, France
Joined: June 10, 2004
KitMaker: 5,329 posts
Armorama: 5,204 posts
Posted: Saturday, November 26, 2016 - 03:49 PM UTC
Here are the latest pics, still without the wheels. I'll weather them prior to gluing them.


Bryan, I can't tell why there are some many variations on the brown stripes. My guess is that they have been applied by the crews in the field unlike the other vehicles painted in maintenance workshops in France.
You can "play" with the numerals paintend on the tank sides but you'd have to modifiy the registration plates which is more complicated.
The best option is to redo your camo according to Meng's instructions for the only registration plate provided.

Olivier
bison126
Visit this Community
Correze, France
Joined: June 10, 2004
KitMaker: 5,329 posts
Armorama: 5,204 posts
Posted: Saturday, November 26, 2016 - 09:23 PM UTC
With some mud on the running gear, it begins to have an operational look.


Olivier
EHAM0624
Visit this Community
Noord-Holland, Netherlands
Joined: January 27, 2014
KitMaker: 200 posts
Armorama: 95 posts
Posted: Sunday, November 27, 2016 - 04:40 AM UTC
Olivier, that "thing" looks sweet!

My participation.
Due to acquiring some of the new F.1's recently released this one can be build,..


Easy build, within no time you have an Mirage F.1


More to follow
Hudson29
#460
Visit this Community
California, United States
Joined: September 16, 2014
KitMaker: 1,156 posts
Armorama: 1,024 posts
Posted: Monday, November 28, 2016 - 05:01 AM UTC
Olivier - Your EBR is looking terrific. That green is very dark, was it the same color used for all EBR models? I have a couple of these kits waiting in the wings . . .

Last time I showed the muffler support & heat shroud made up and ready to install. Here it is in place along with a little metal clip to retain the tool. The kit acted as if it were held on by good will.

Hudson29
#460
Visit this Community
California, United States
Joined: September 16, 2014
KitMaker: 1,156 posts
Armorama: 1,024 posts
Posted: Monday, November 28, 2016 - 05:20 AM UTC
My Fighting Frog is completed and the following pics have been uoploaded to the campaign gallery:


I could find only one picture of this tank and that showed a rear view of it destroyed or abandoned in a village street. By that time the tail had been removed and the spare wheel was mounted to the upper tail mount. The picture was in B&W but I got to looking at that wheel and trying to perceive the colors from the grey scale image. The wheel was painted in a lighter shade, possibly white and I thought it possible that in an effort at identification or a swelling of national pride the wheel might have been turned into a French cockade.

I have no further proof of this beyond this very dreamy devineing but the idea seemed like a fun one and as this is no museum piece I incorporated it into this model. I wanted to build the tail and so the wheel was painted roughly as if the crew had done the job while waiting someplace for things to happen.

This was not a great kit but it came out well in the end with some extra work. My skills are modest but this project was another step in sharpening them some. Here are some additional pics:


bison126
Visit this Community
Correze, France
Joined: June 10, 2004
KitMaker: 5,329 posts
Armorama: 5,204 posts
Posted: Monday, November 28, 2016 - 06:42 PM UTC

Quoted Text

Olivier - Your EBR is looking terrific. That green is very dark, was it the same color used for all EBR models? I have a couple of these kits waiting in the wings . . .


Thanks for the comment. Yes the green is correct for all the French vehicles at that time frame 1954-1962. On period pictures, the green looks even darker.

Nice Hotchkiss! I like the tri-color spare wheel
DKdent
Visit this Community
Rheinland-Pfalz, Germany
Joined: November 27, 2005
KitMaker: 182 posts
Armorama: 180 posts
Posted: Monday, November 28, 2016 - 09:25 PM UTC
Gentlemen,

after some busy moments I finally found some time to proceed on the Panhard.

In the meantime my mancave got inspected by the neighbour`s cat of doom and terror of death....


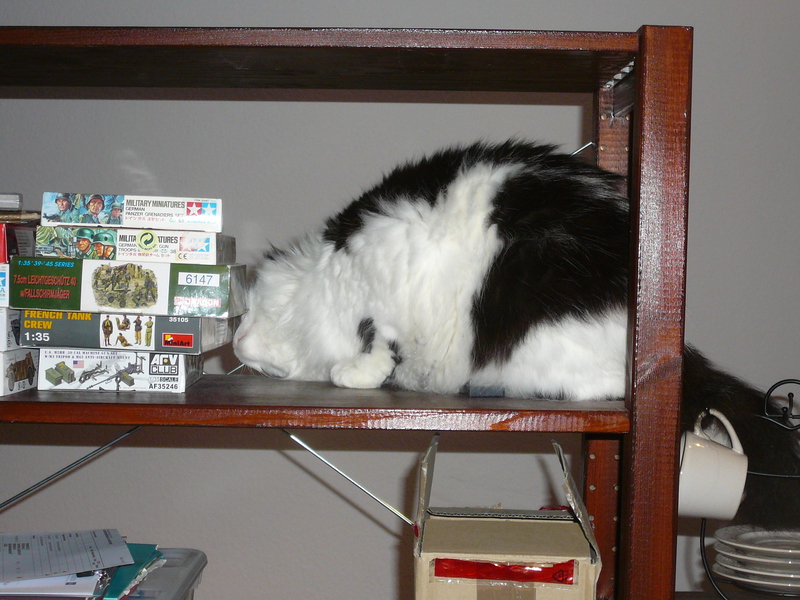
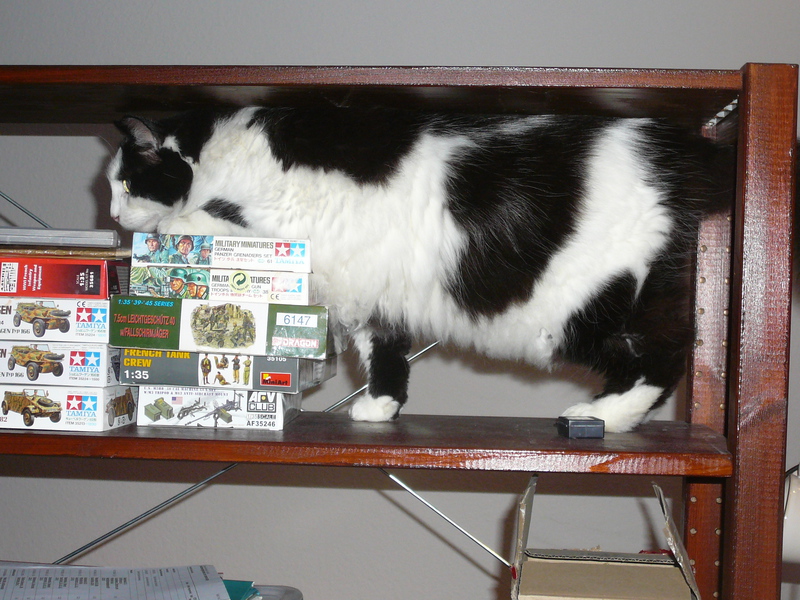
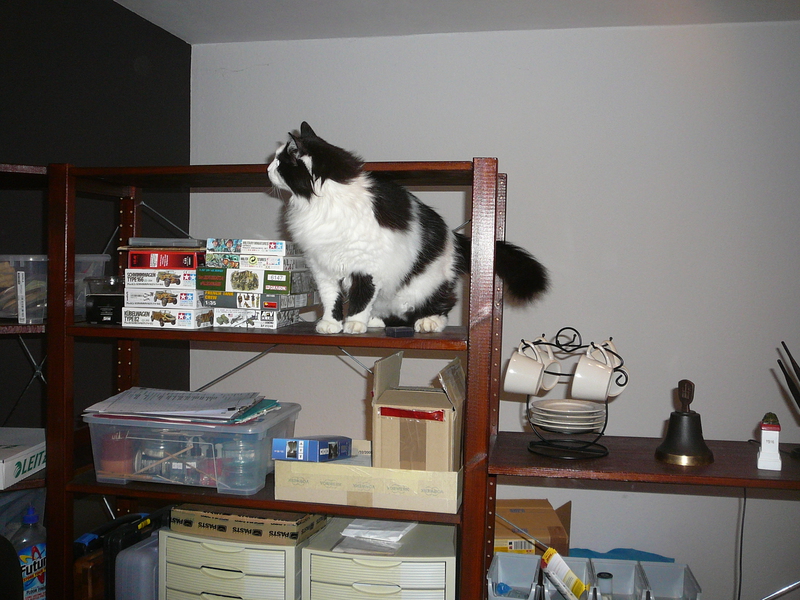
After my blood pressure sunk again under lethal limits, I continued on the model.


The last thing I did befor my "modelling hiatus" was to replicate the vision slots for the turret and hull sides. As the result in hindsight did not pleased me, basically because of the overall dimensions and the huge bolt heads, I gave it another try.


Unfortunately the new parts were so delicate that they would break every single time I tried to remove them from the moulds.


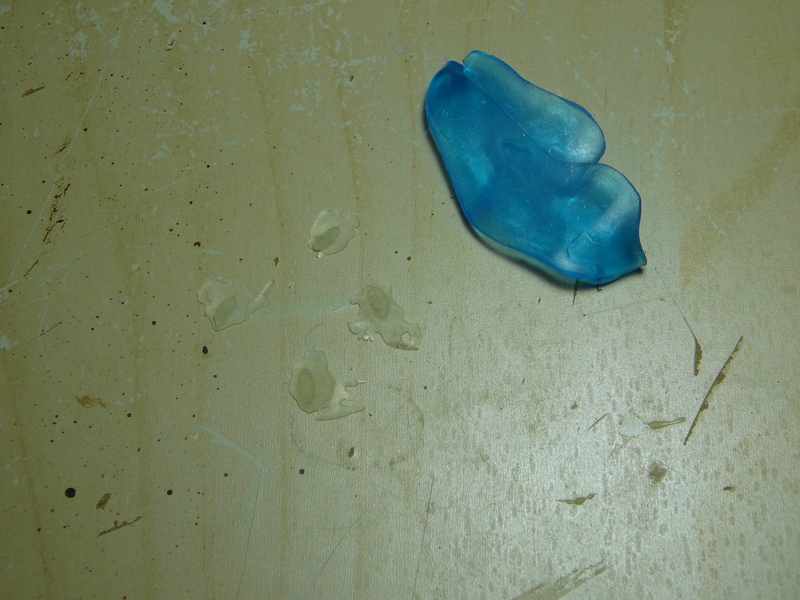
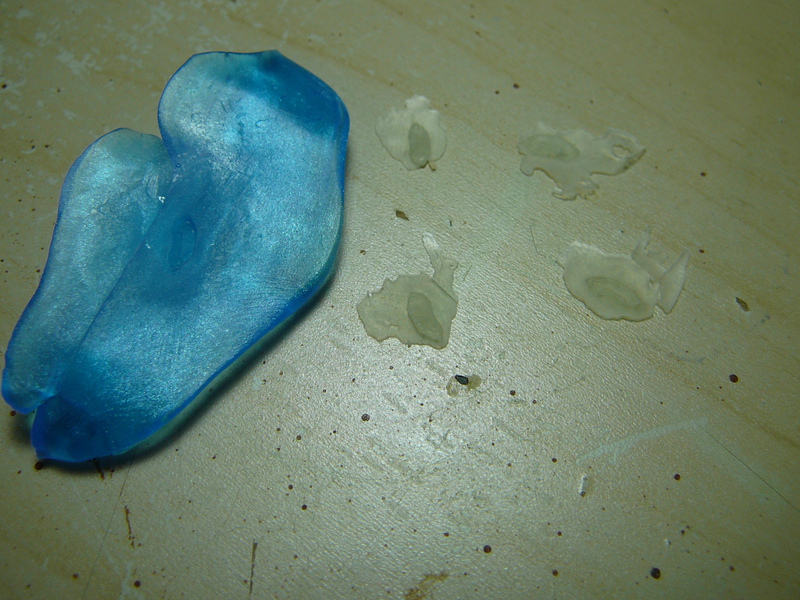
Therefore I decided not to cast them in plaster but with 2parts-epoxy which gave them some flexibility and great strength. Right now I am in the process of "mass production". As not every mould is like the same I will cast perhaps 2 or 3 times the amount I need and then select the best castings. I will need 5 parts so this will take another day due to the drying time.


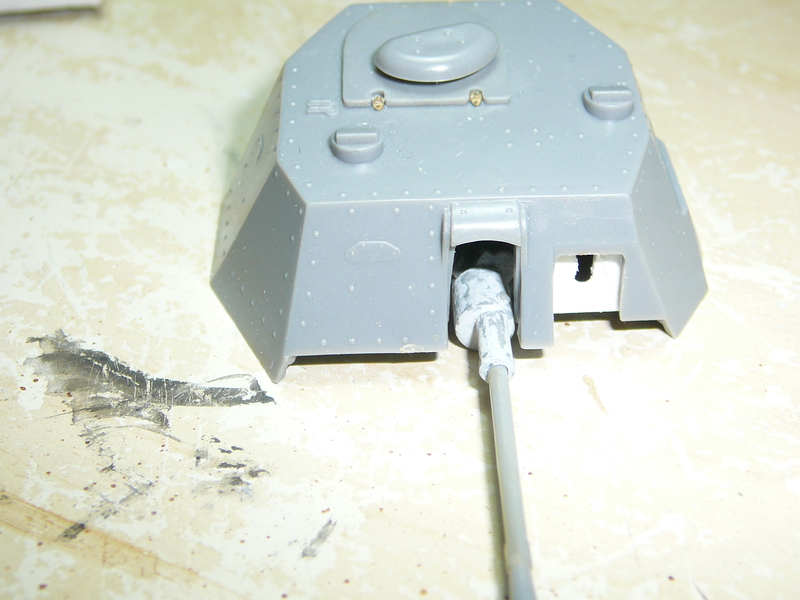
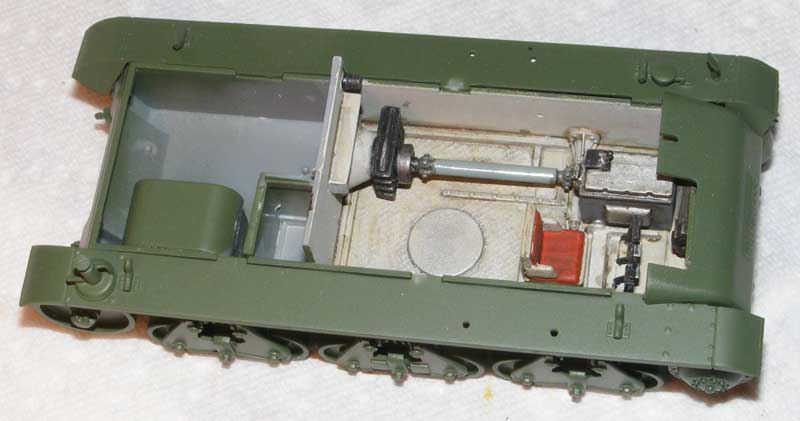
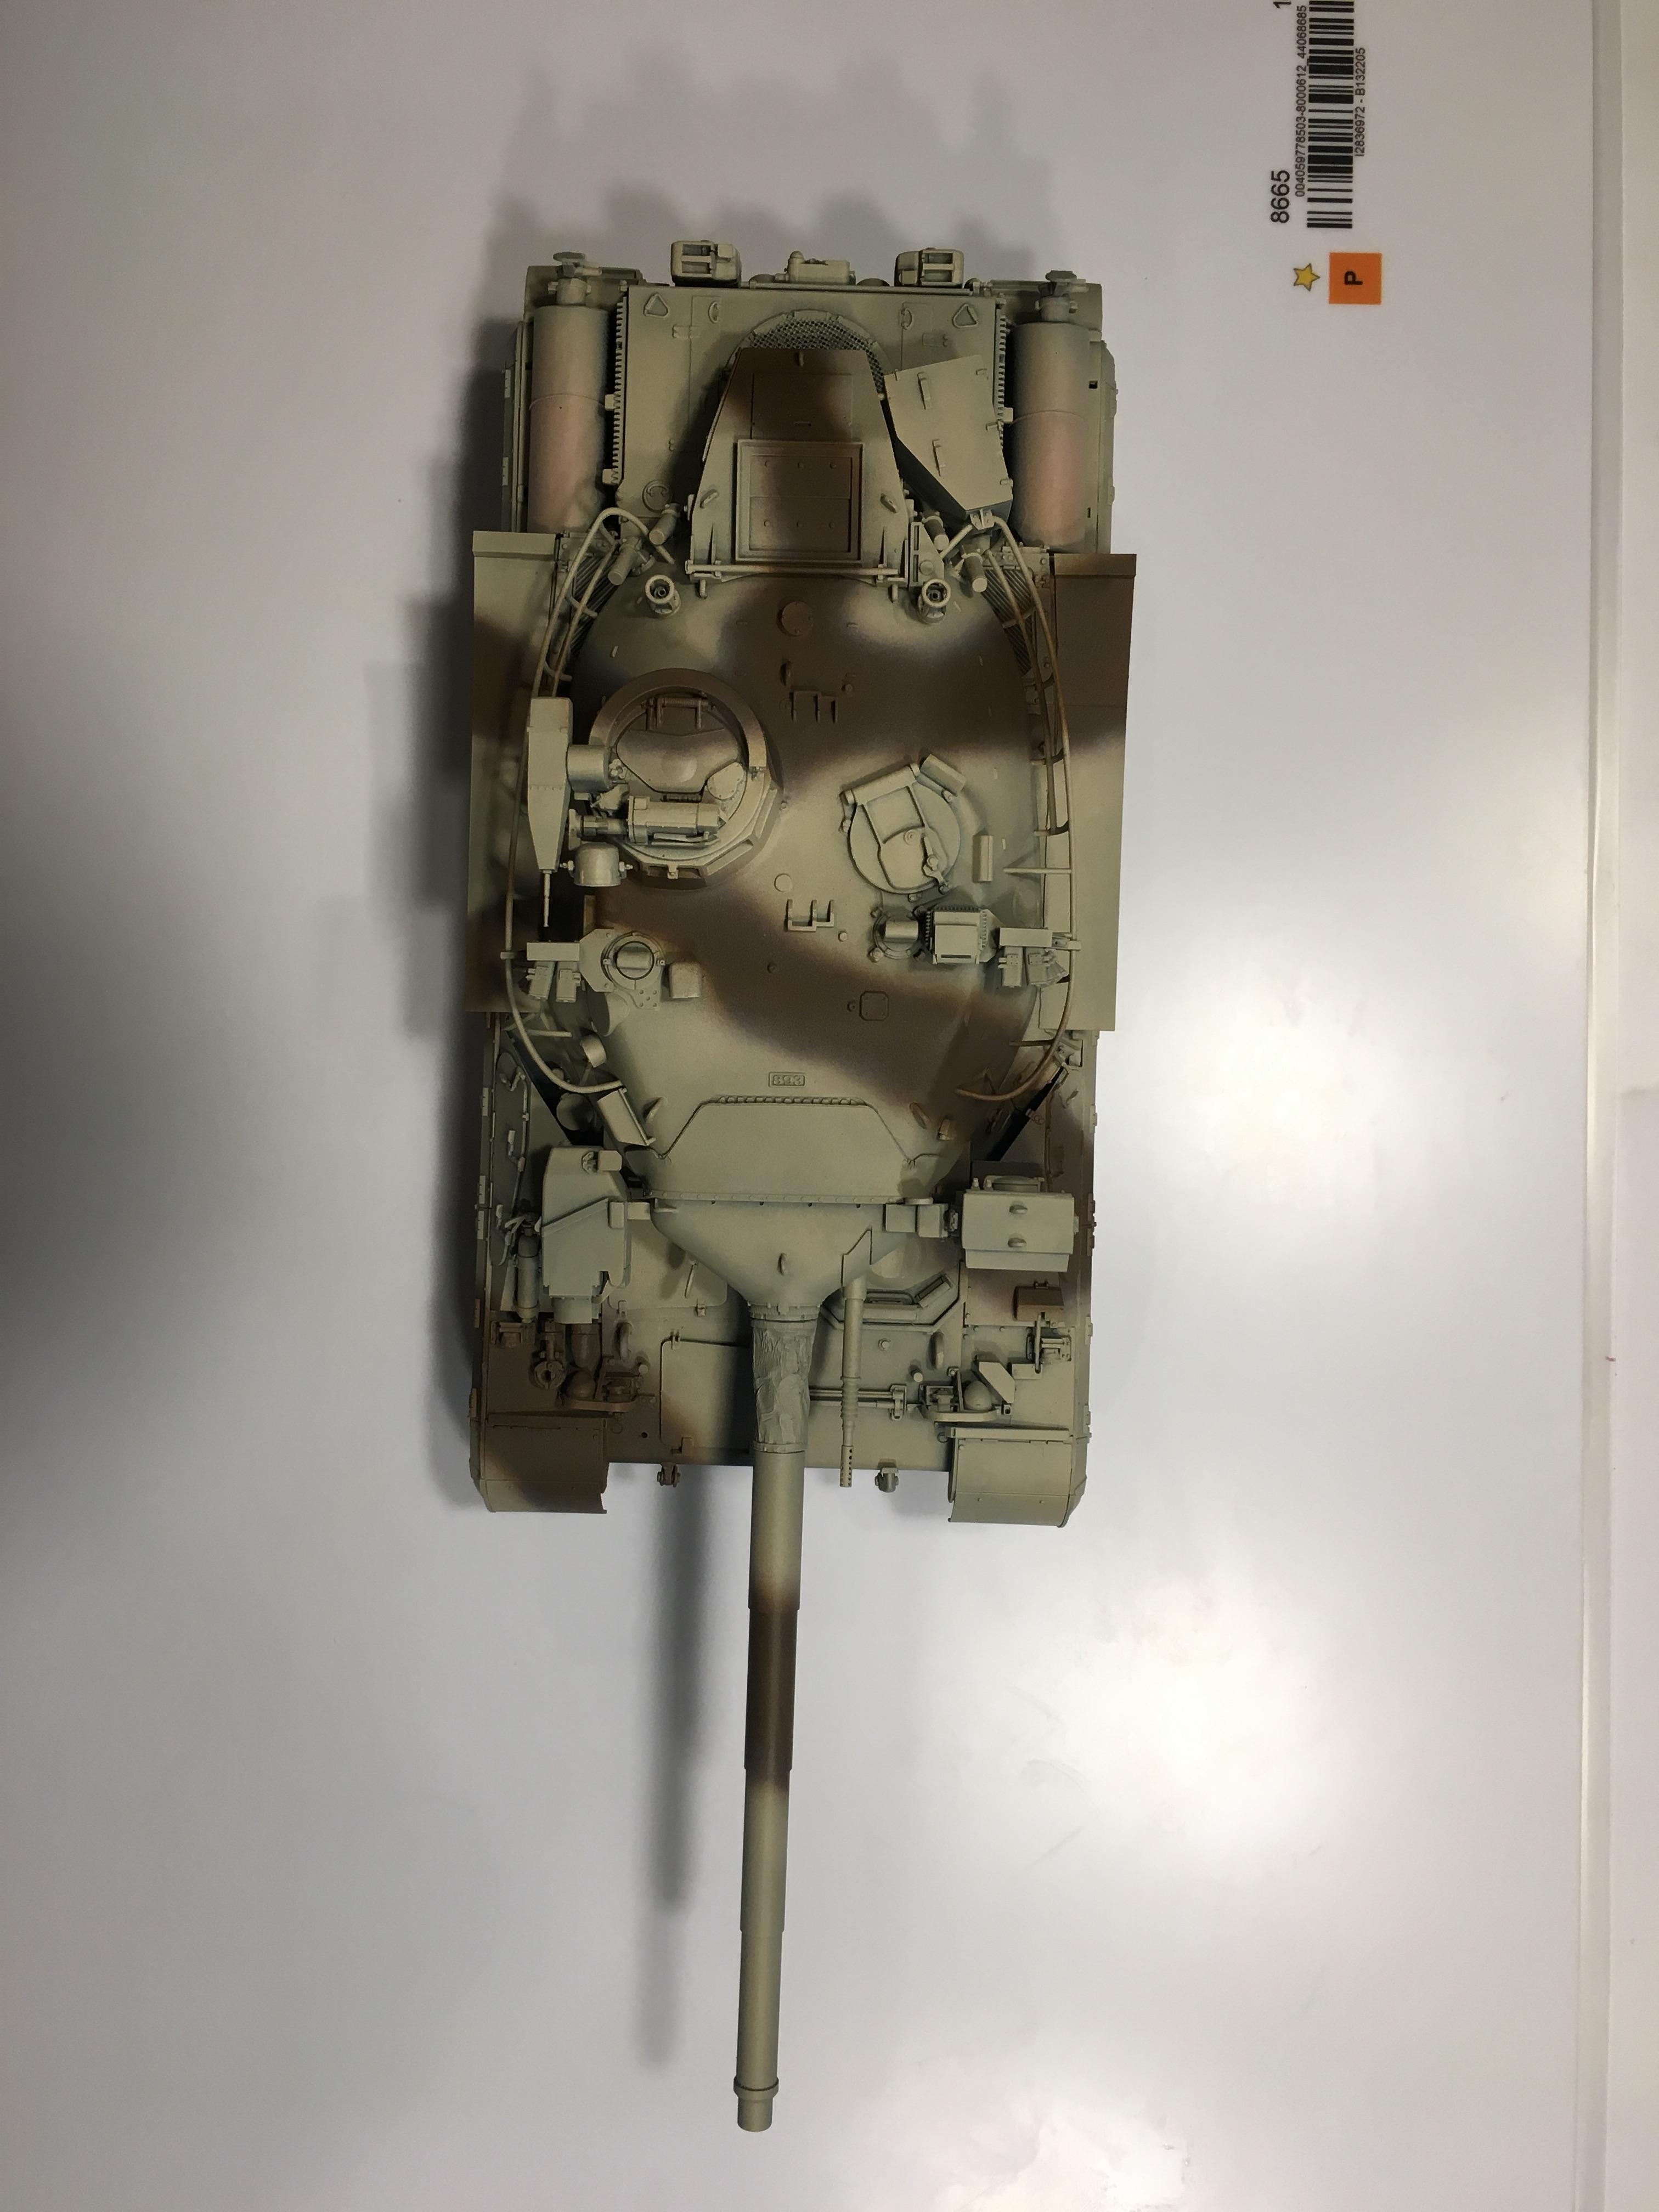
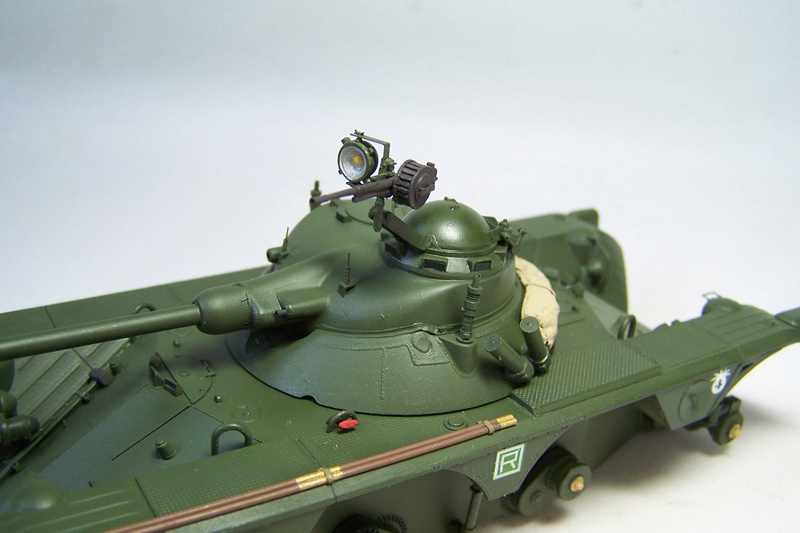
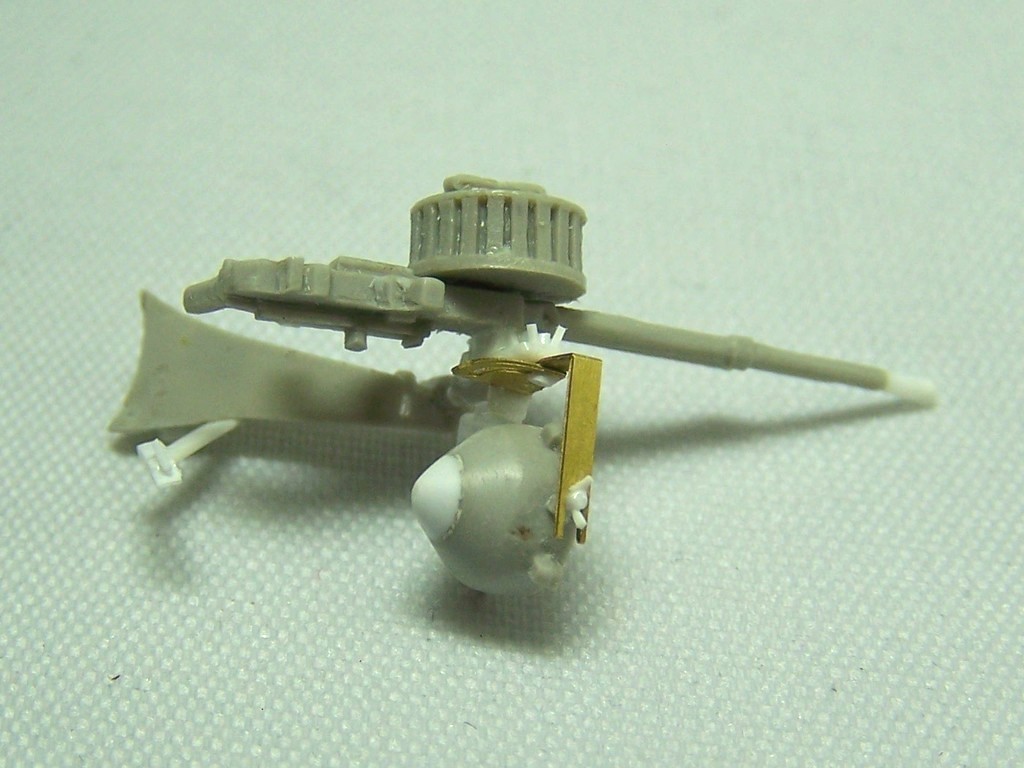
The next issue was the mount for the 25mm-autocannon. In this old kit no interior parts or stuff was included which lead to a very large gap between the gun cradle and the gun mount. So basically you got a nice huge opening on the turret front.


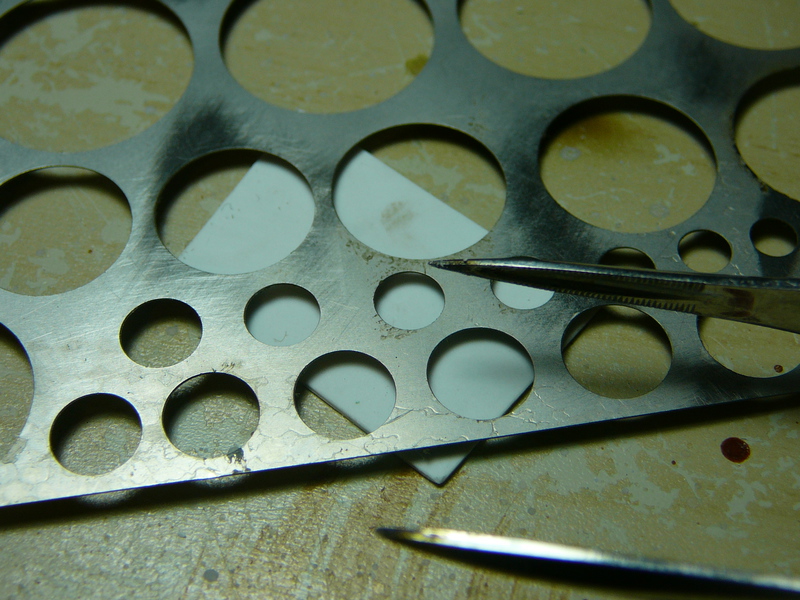
To solve this I used some spare sheet und took out a scribbing stencil. I selected a template with an apropriate diameter and carved the part with some sharp tweezers until the inner ring came off.


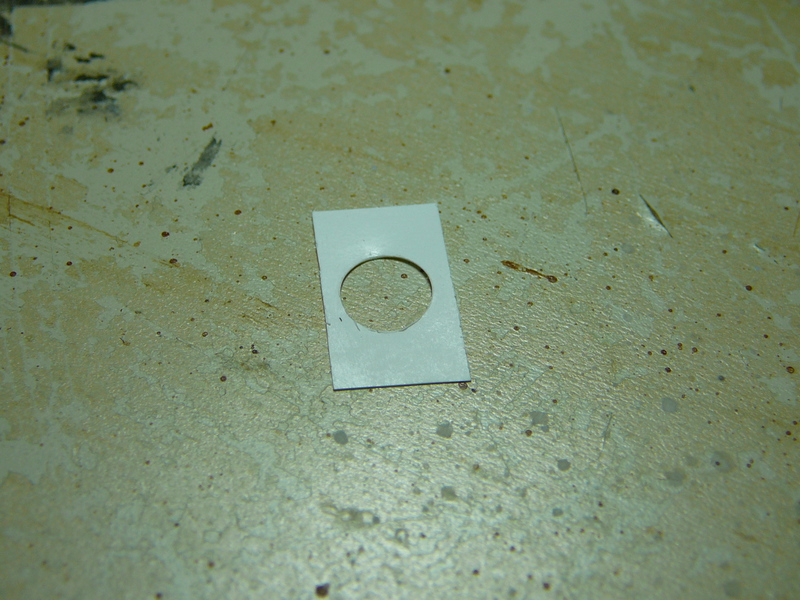
I simply did cut the part somewhat to size using the turret interior as a guidance.


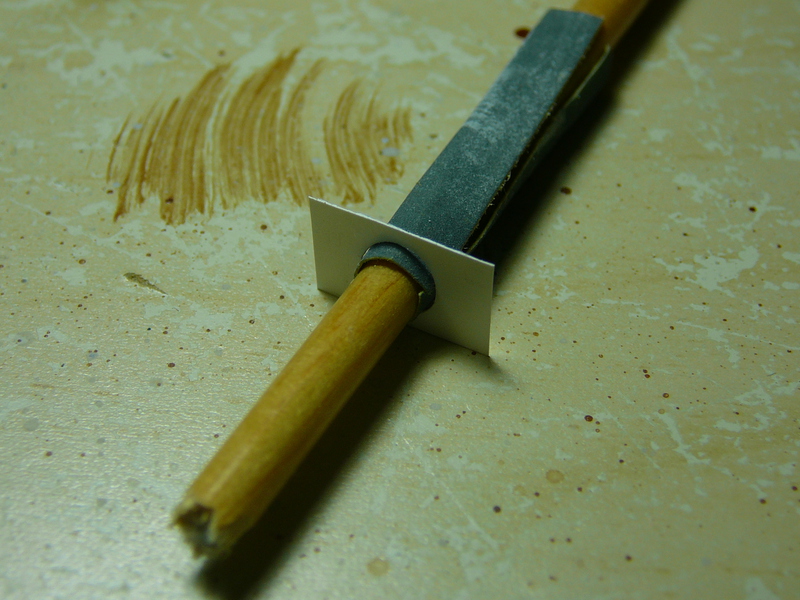
As the cutting using the tweezers was somewhat coarse, I needed to sand the ring to smoothen it. As usual when doing operations like these, I used a diameter somewhat smaller to the needed result. Then I simply inserter some rolled sandpaper into the opening, put the handle of a brush through the sandpaper and started sanding down everything. This way your round opening will stay round and you can adjust everything until you have the perfect fit. As most brush handles are not straight but vary in diameter you can slowly widen everything as desired.


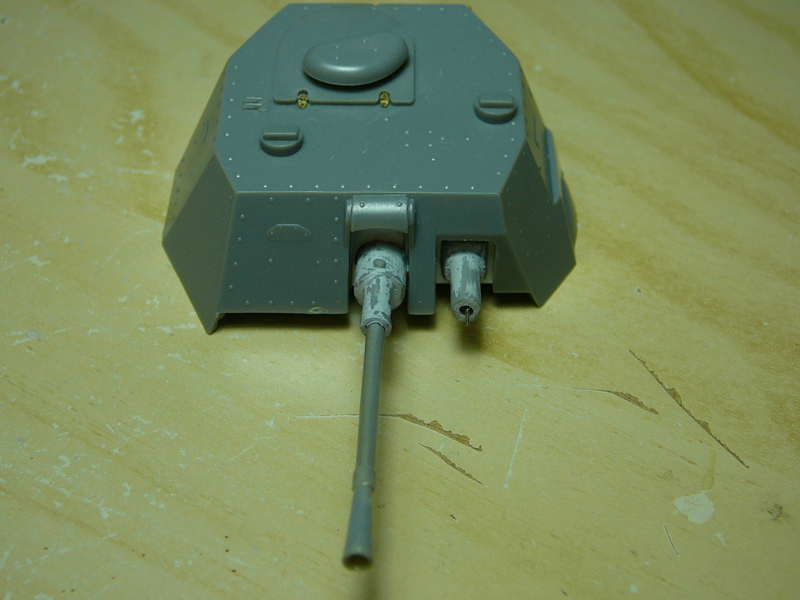
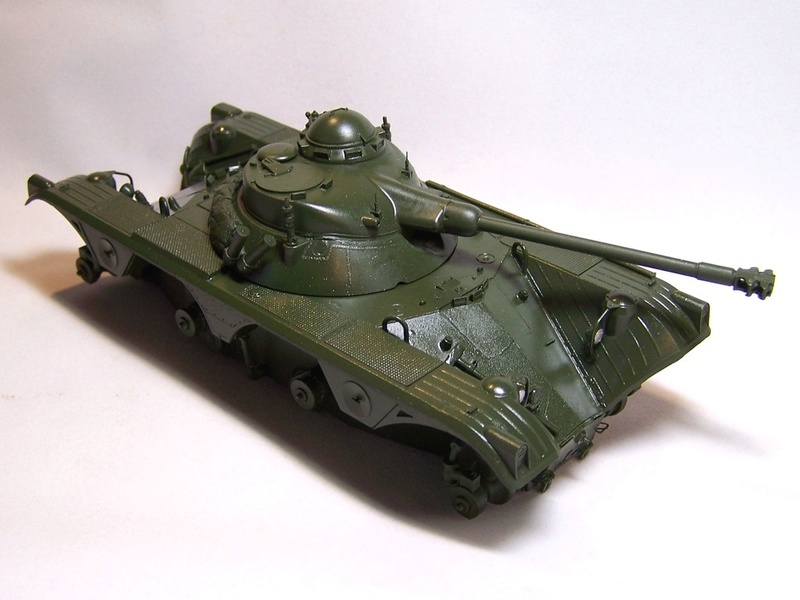
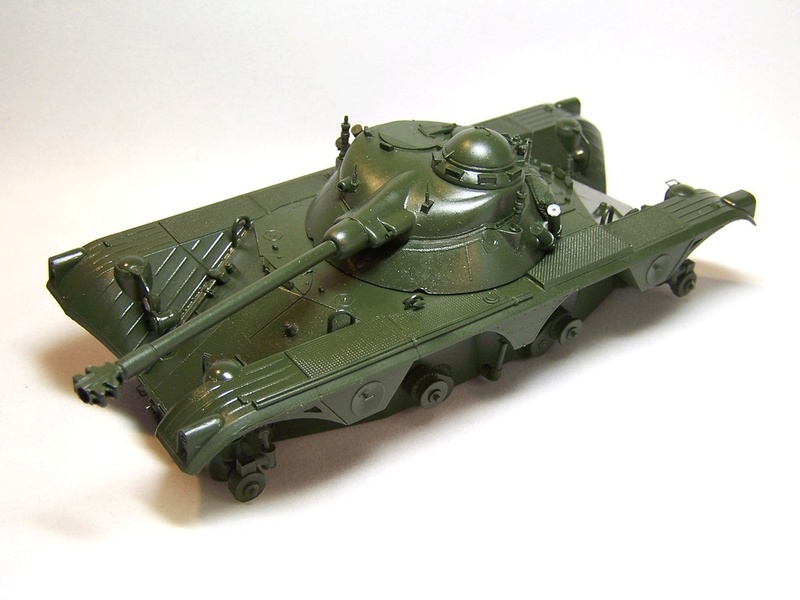
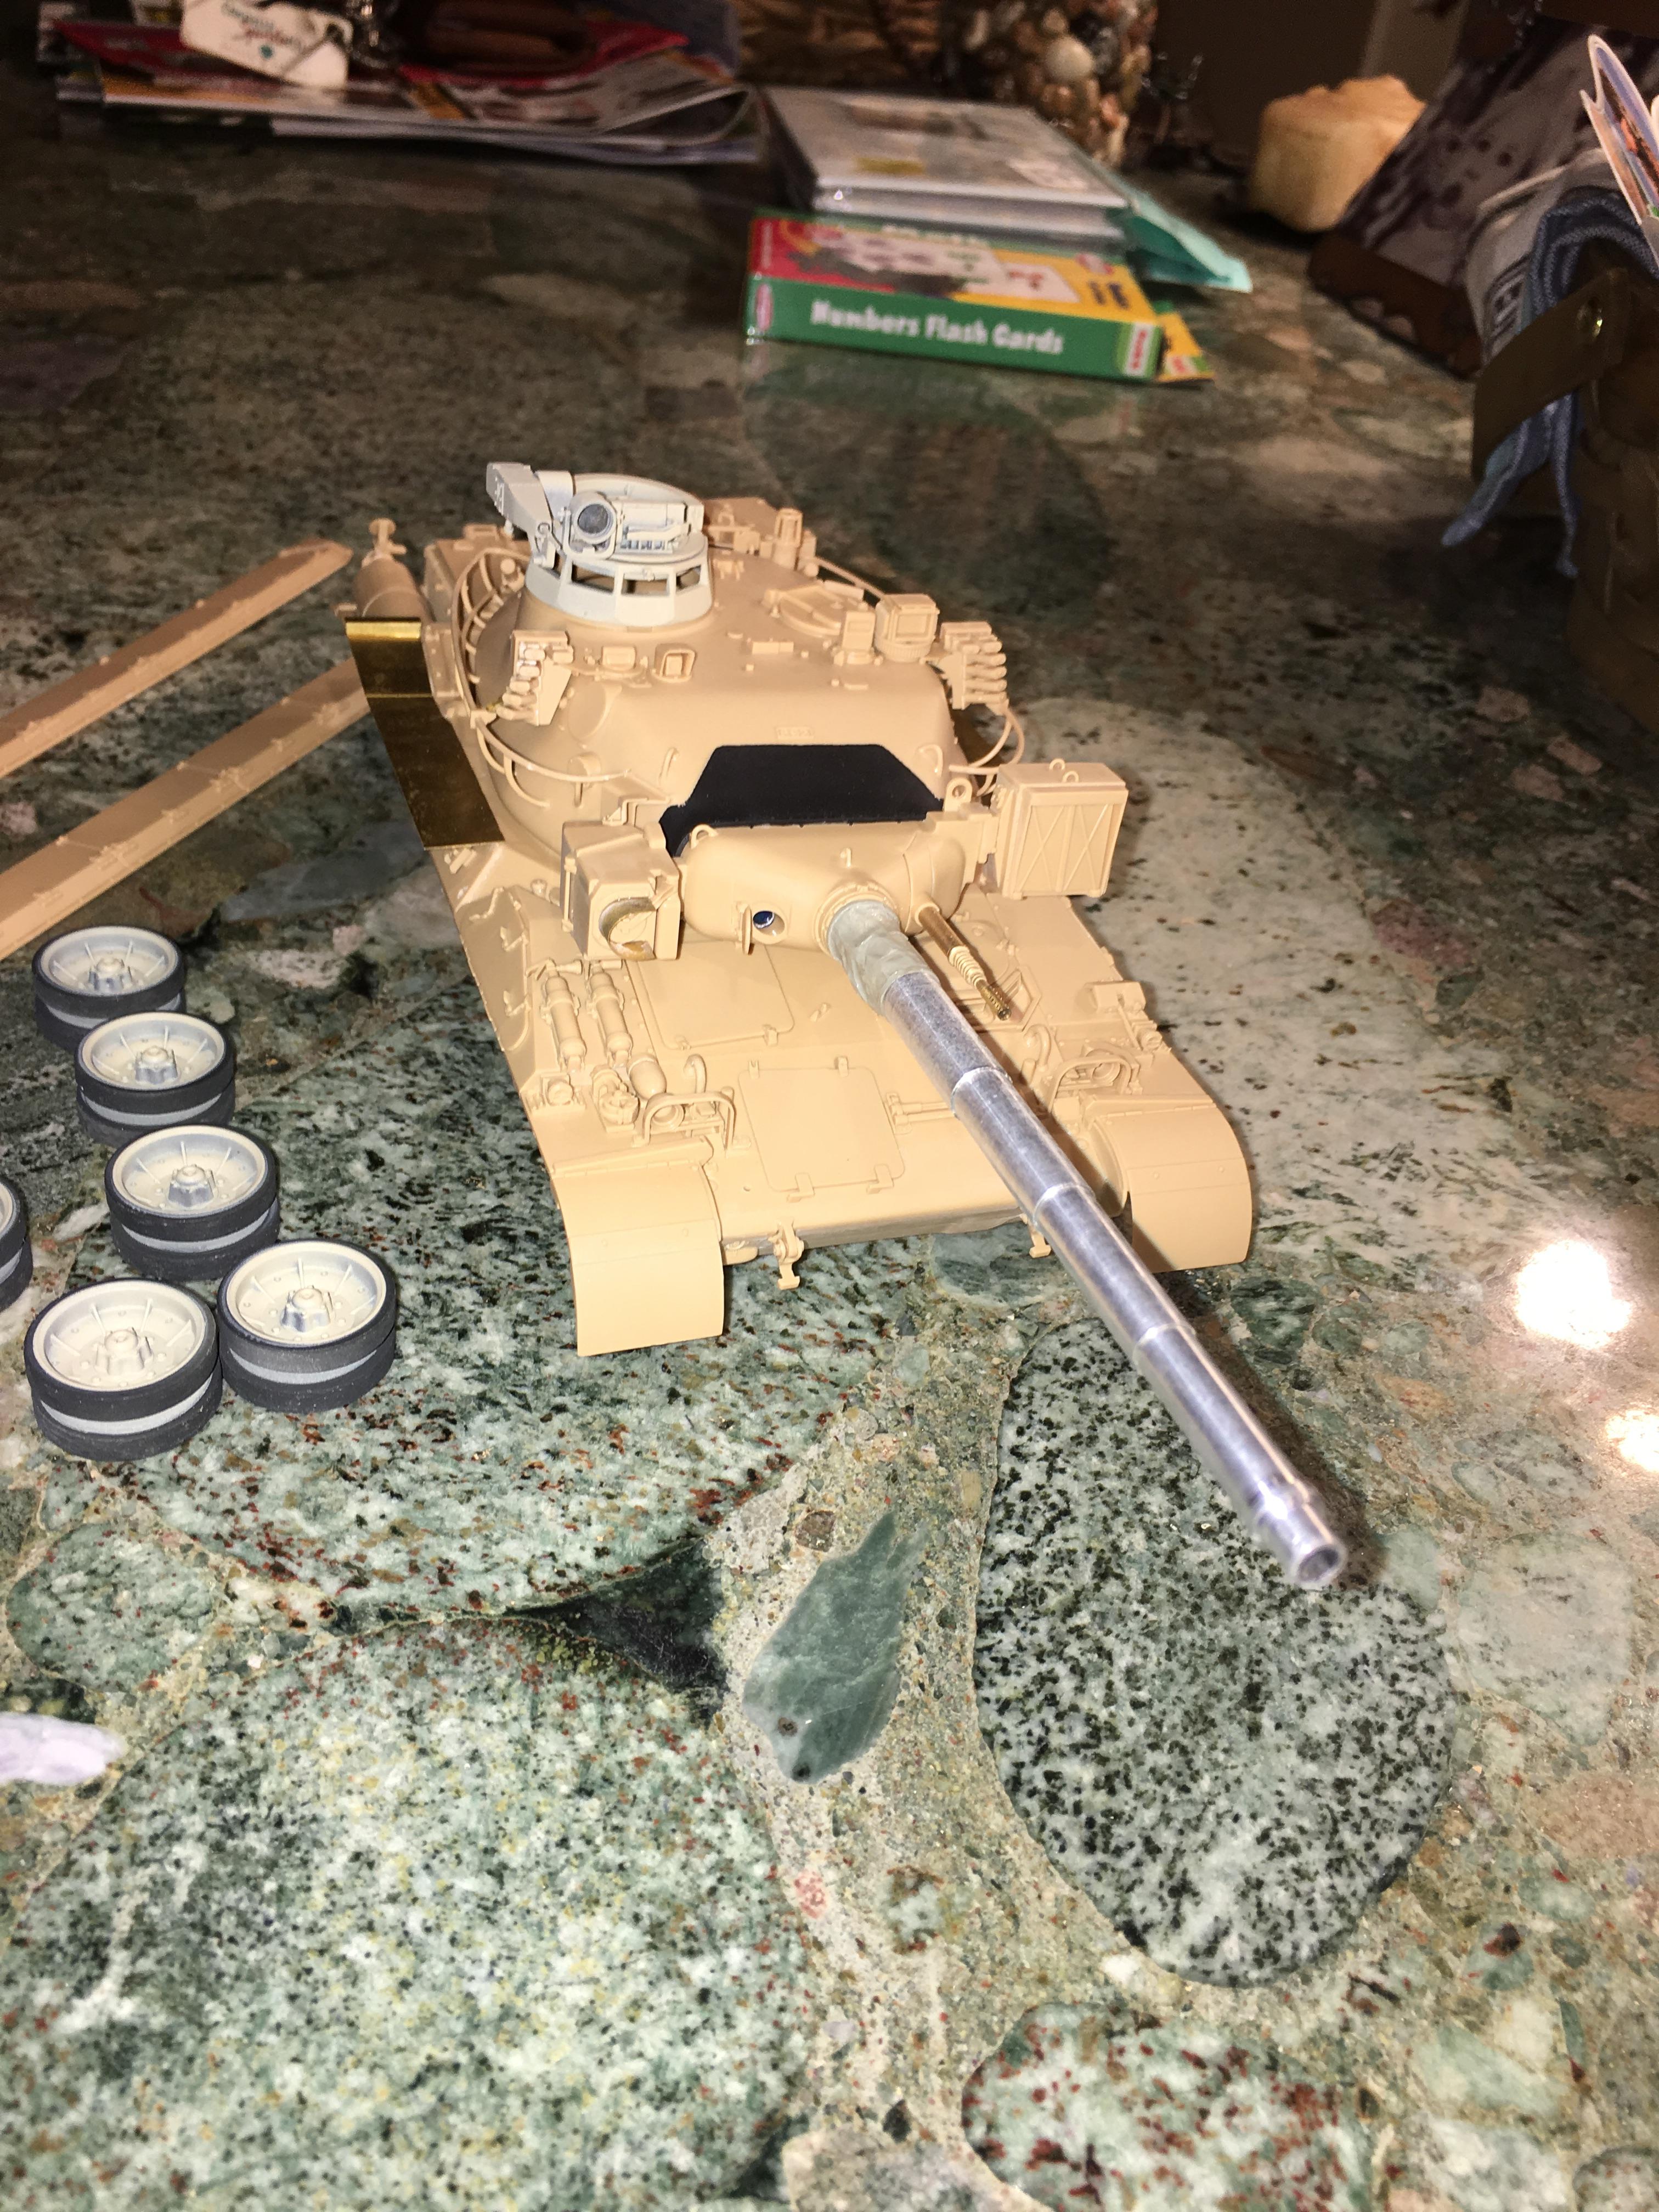
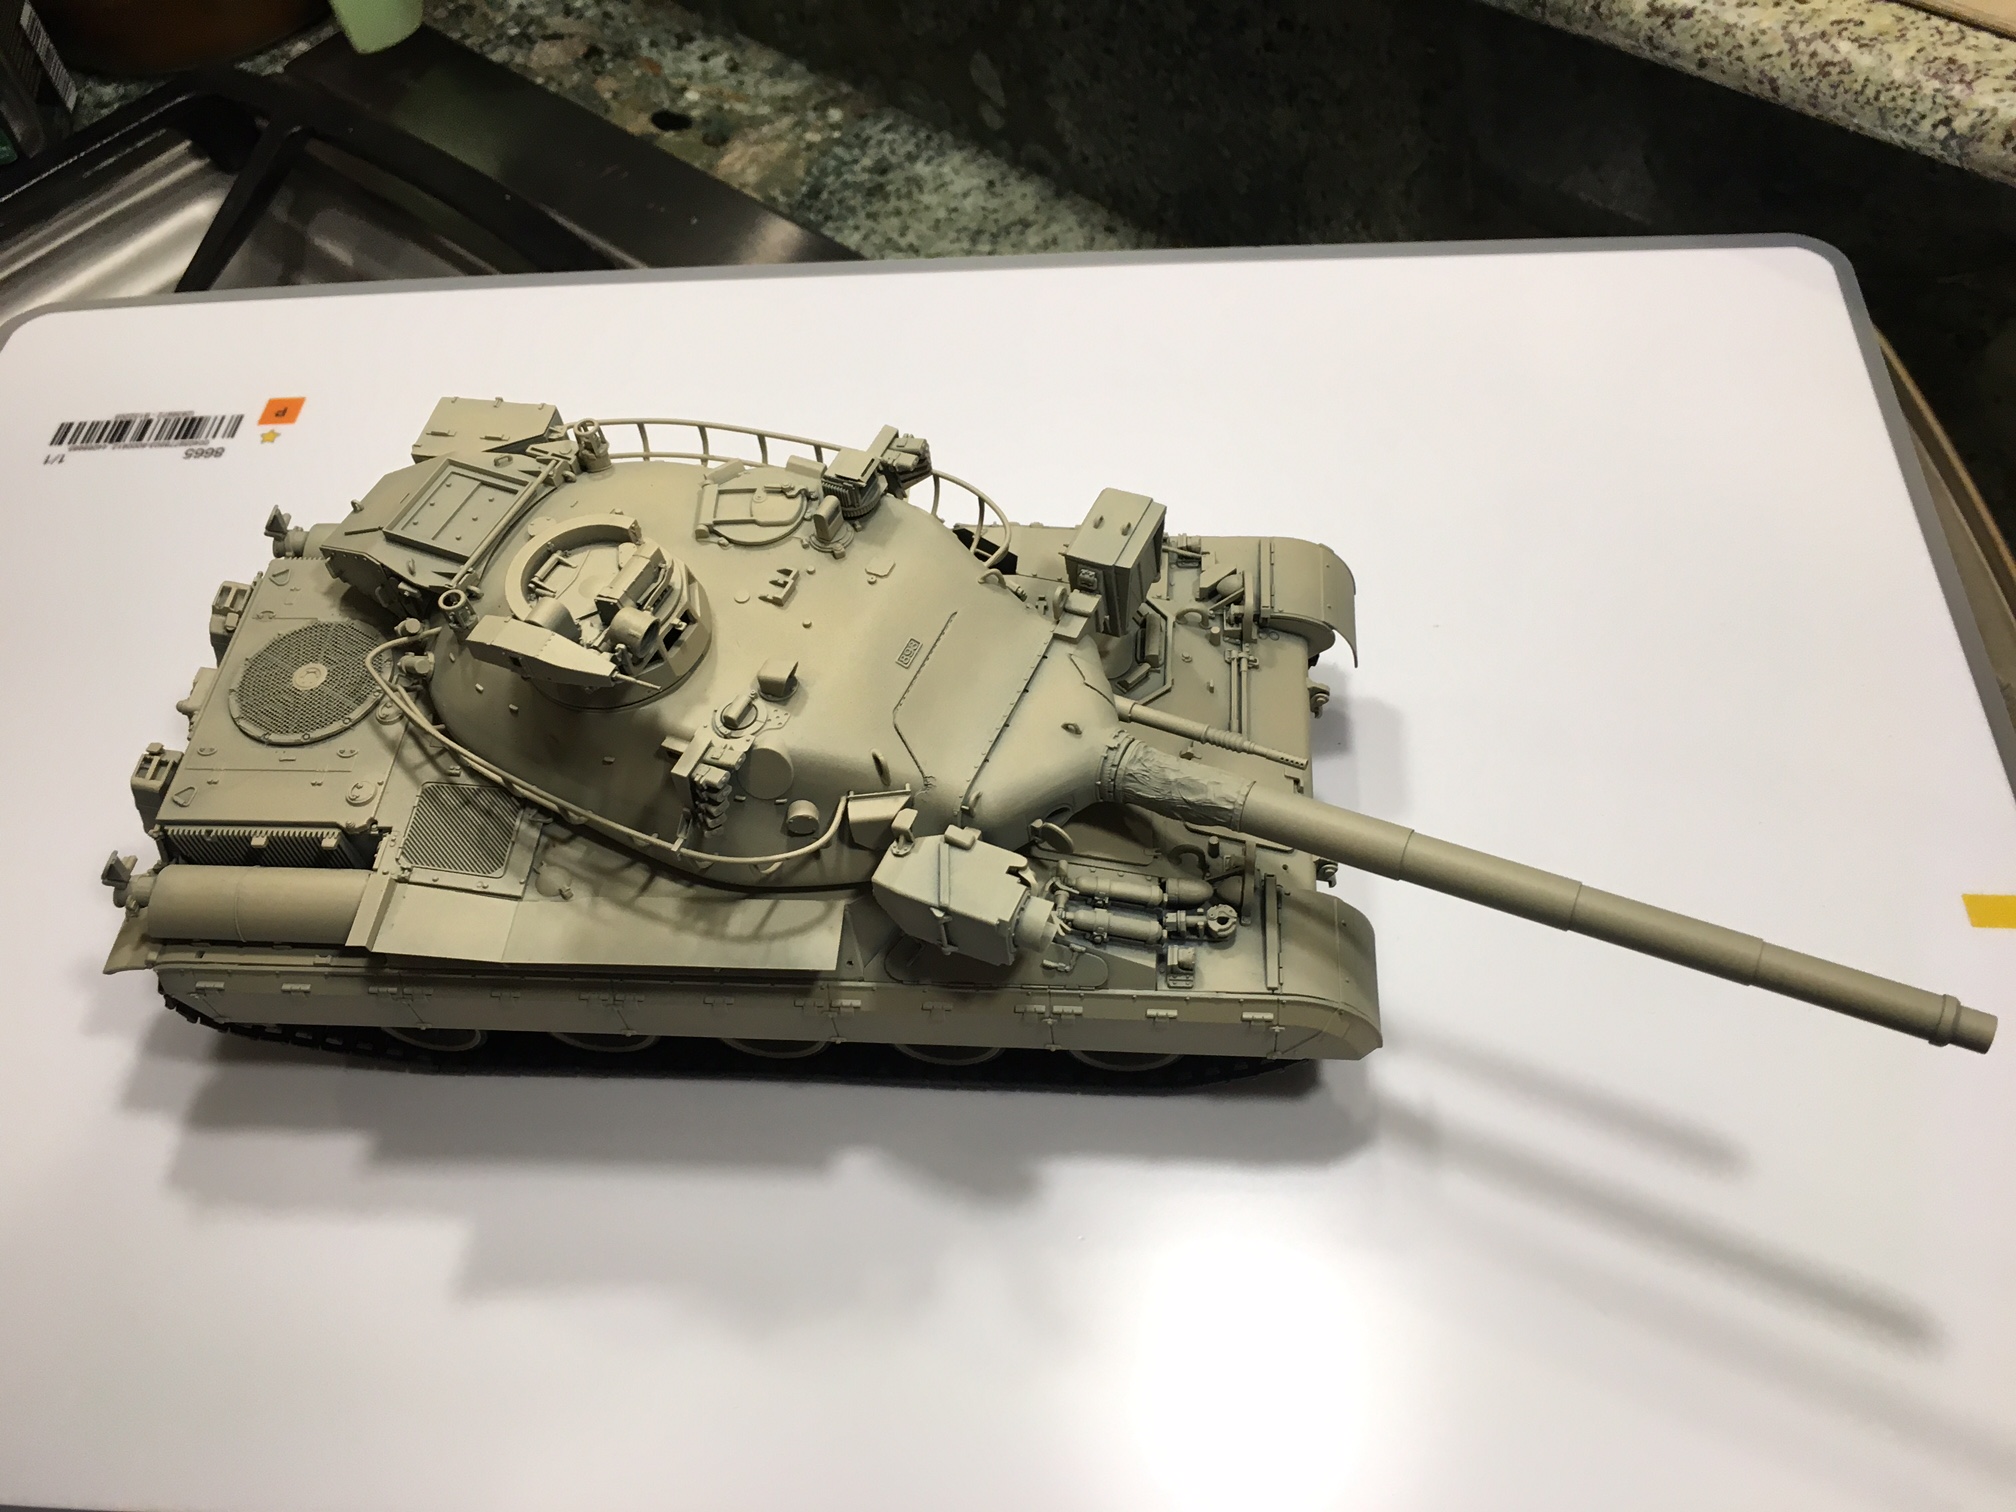
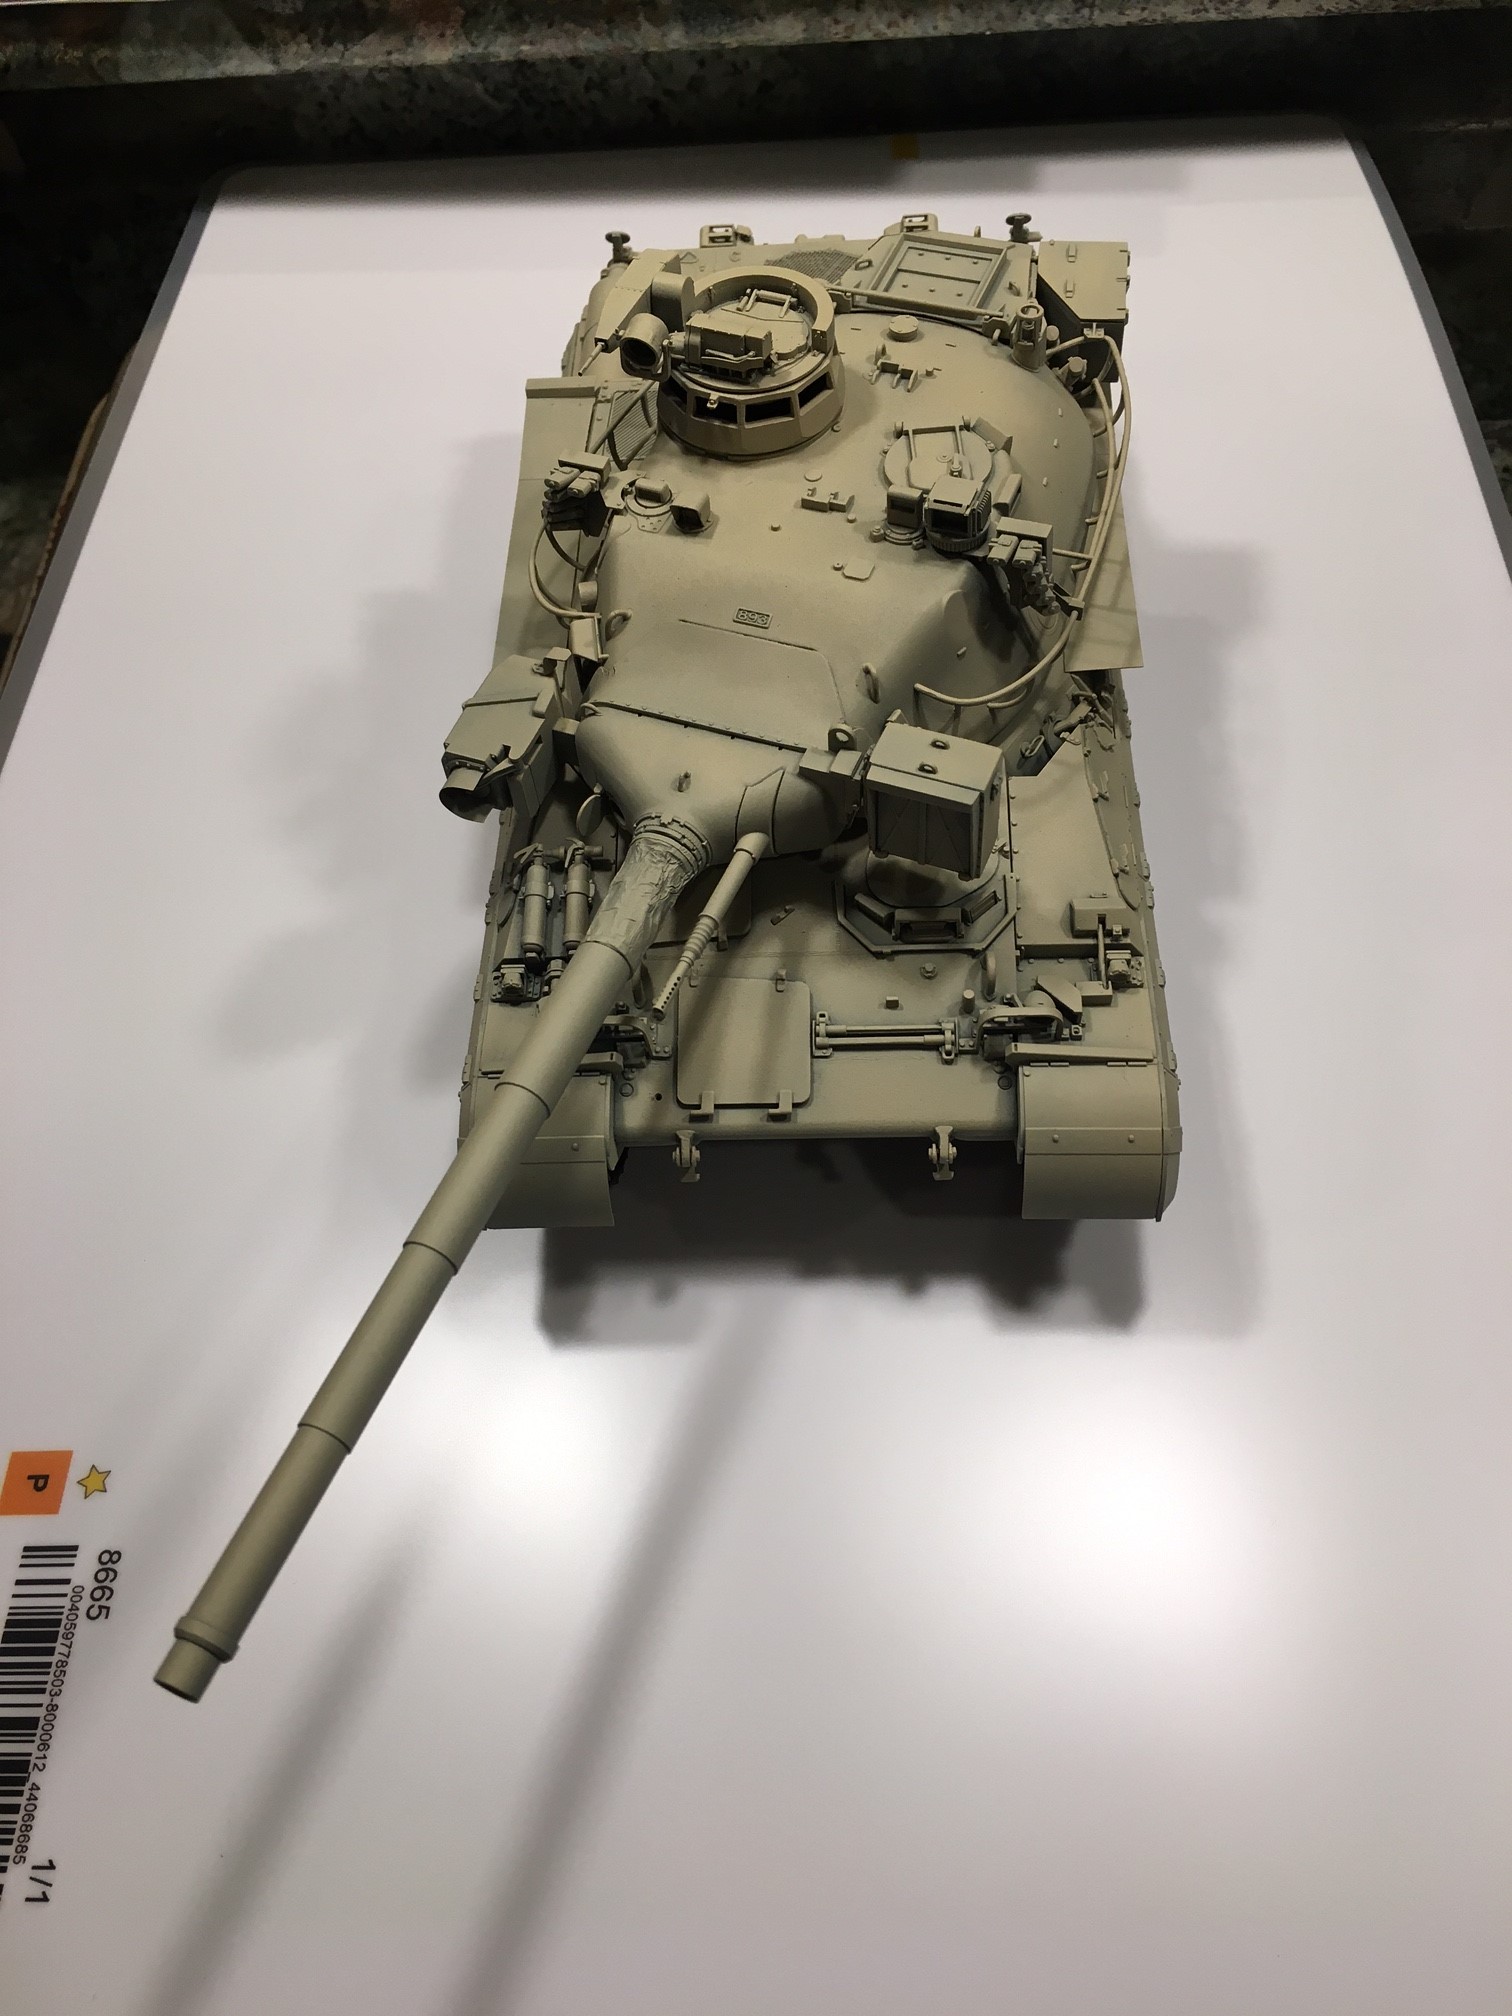
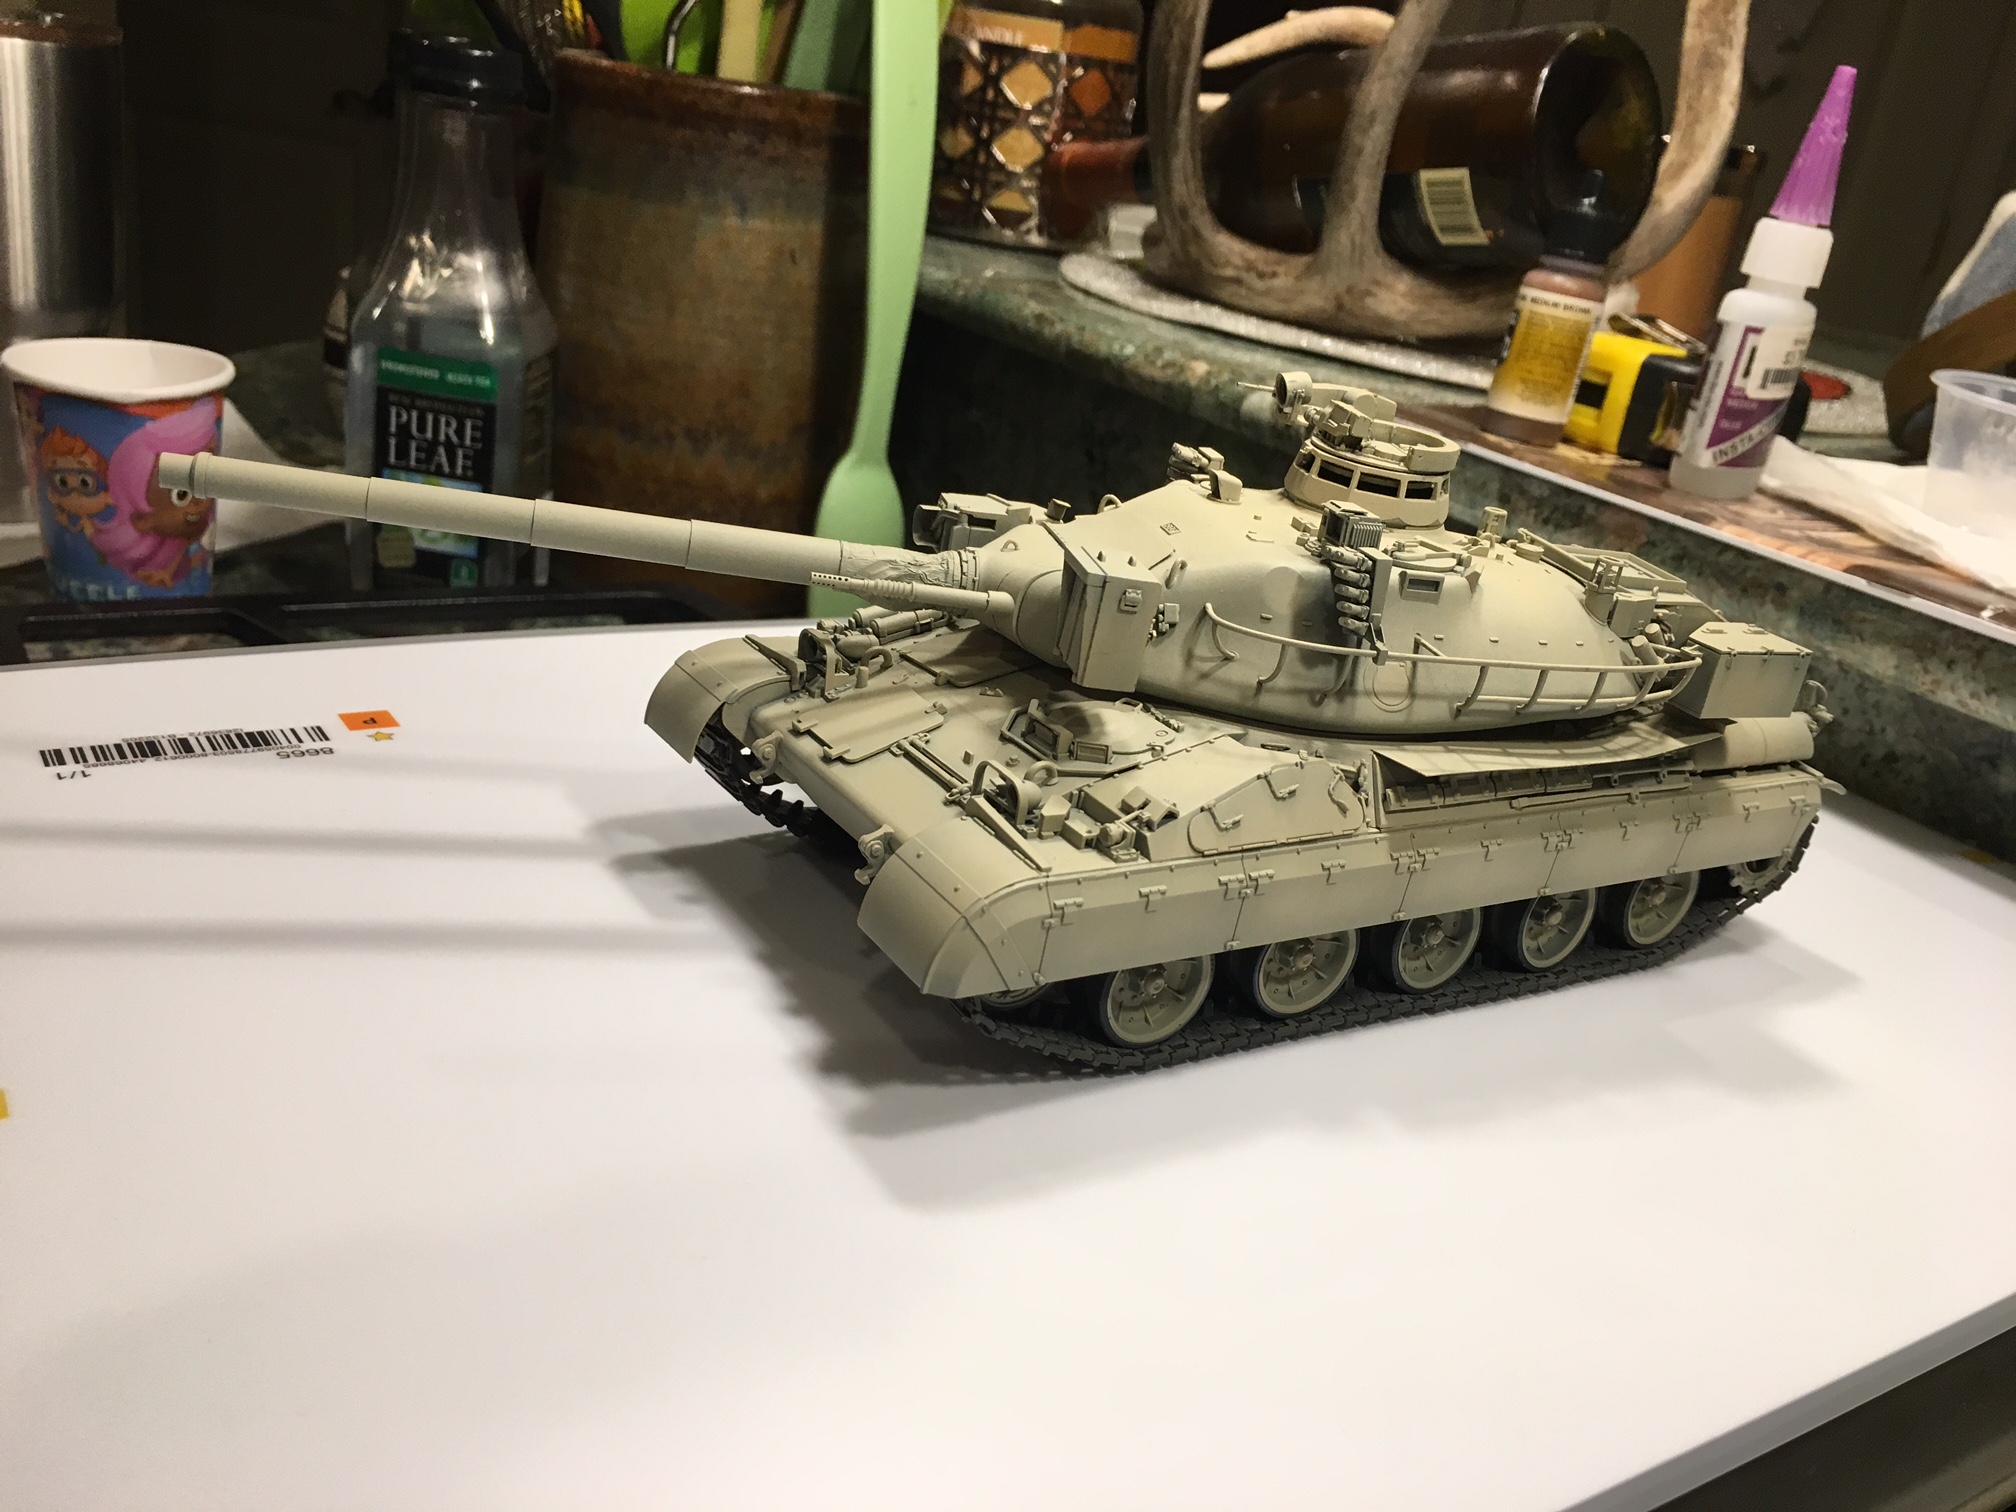
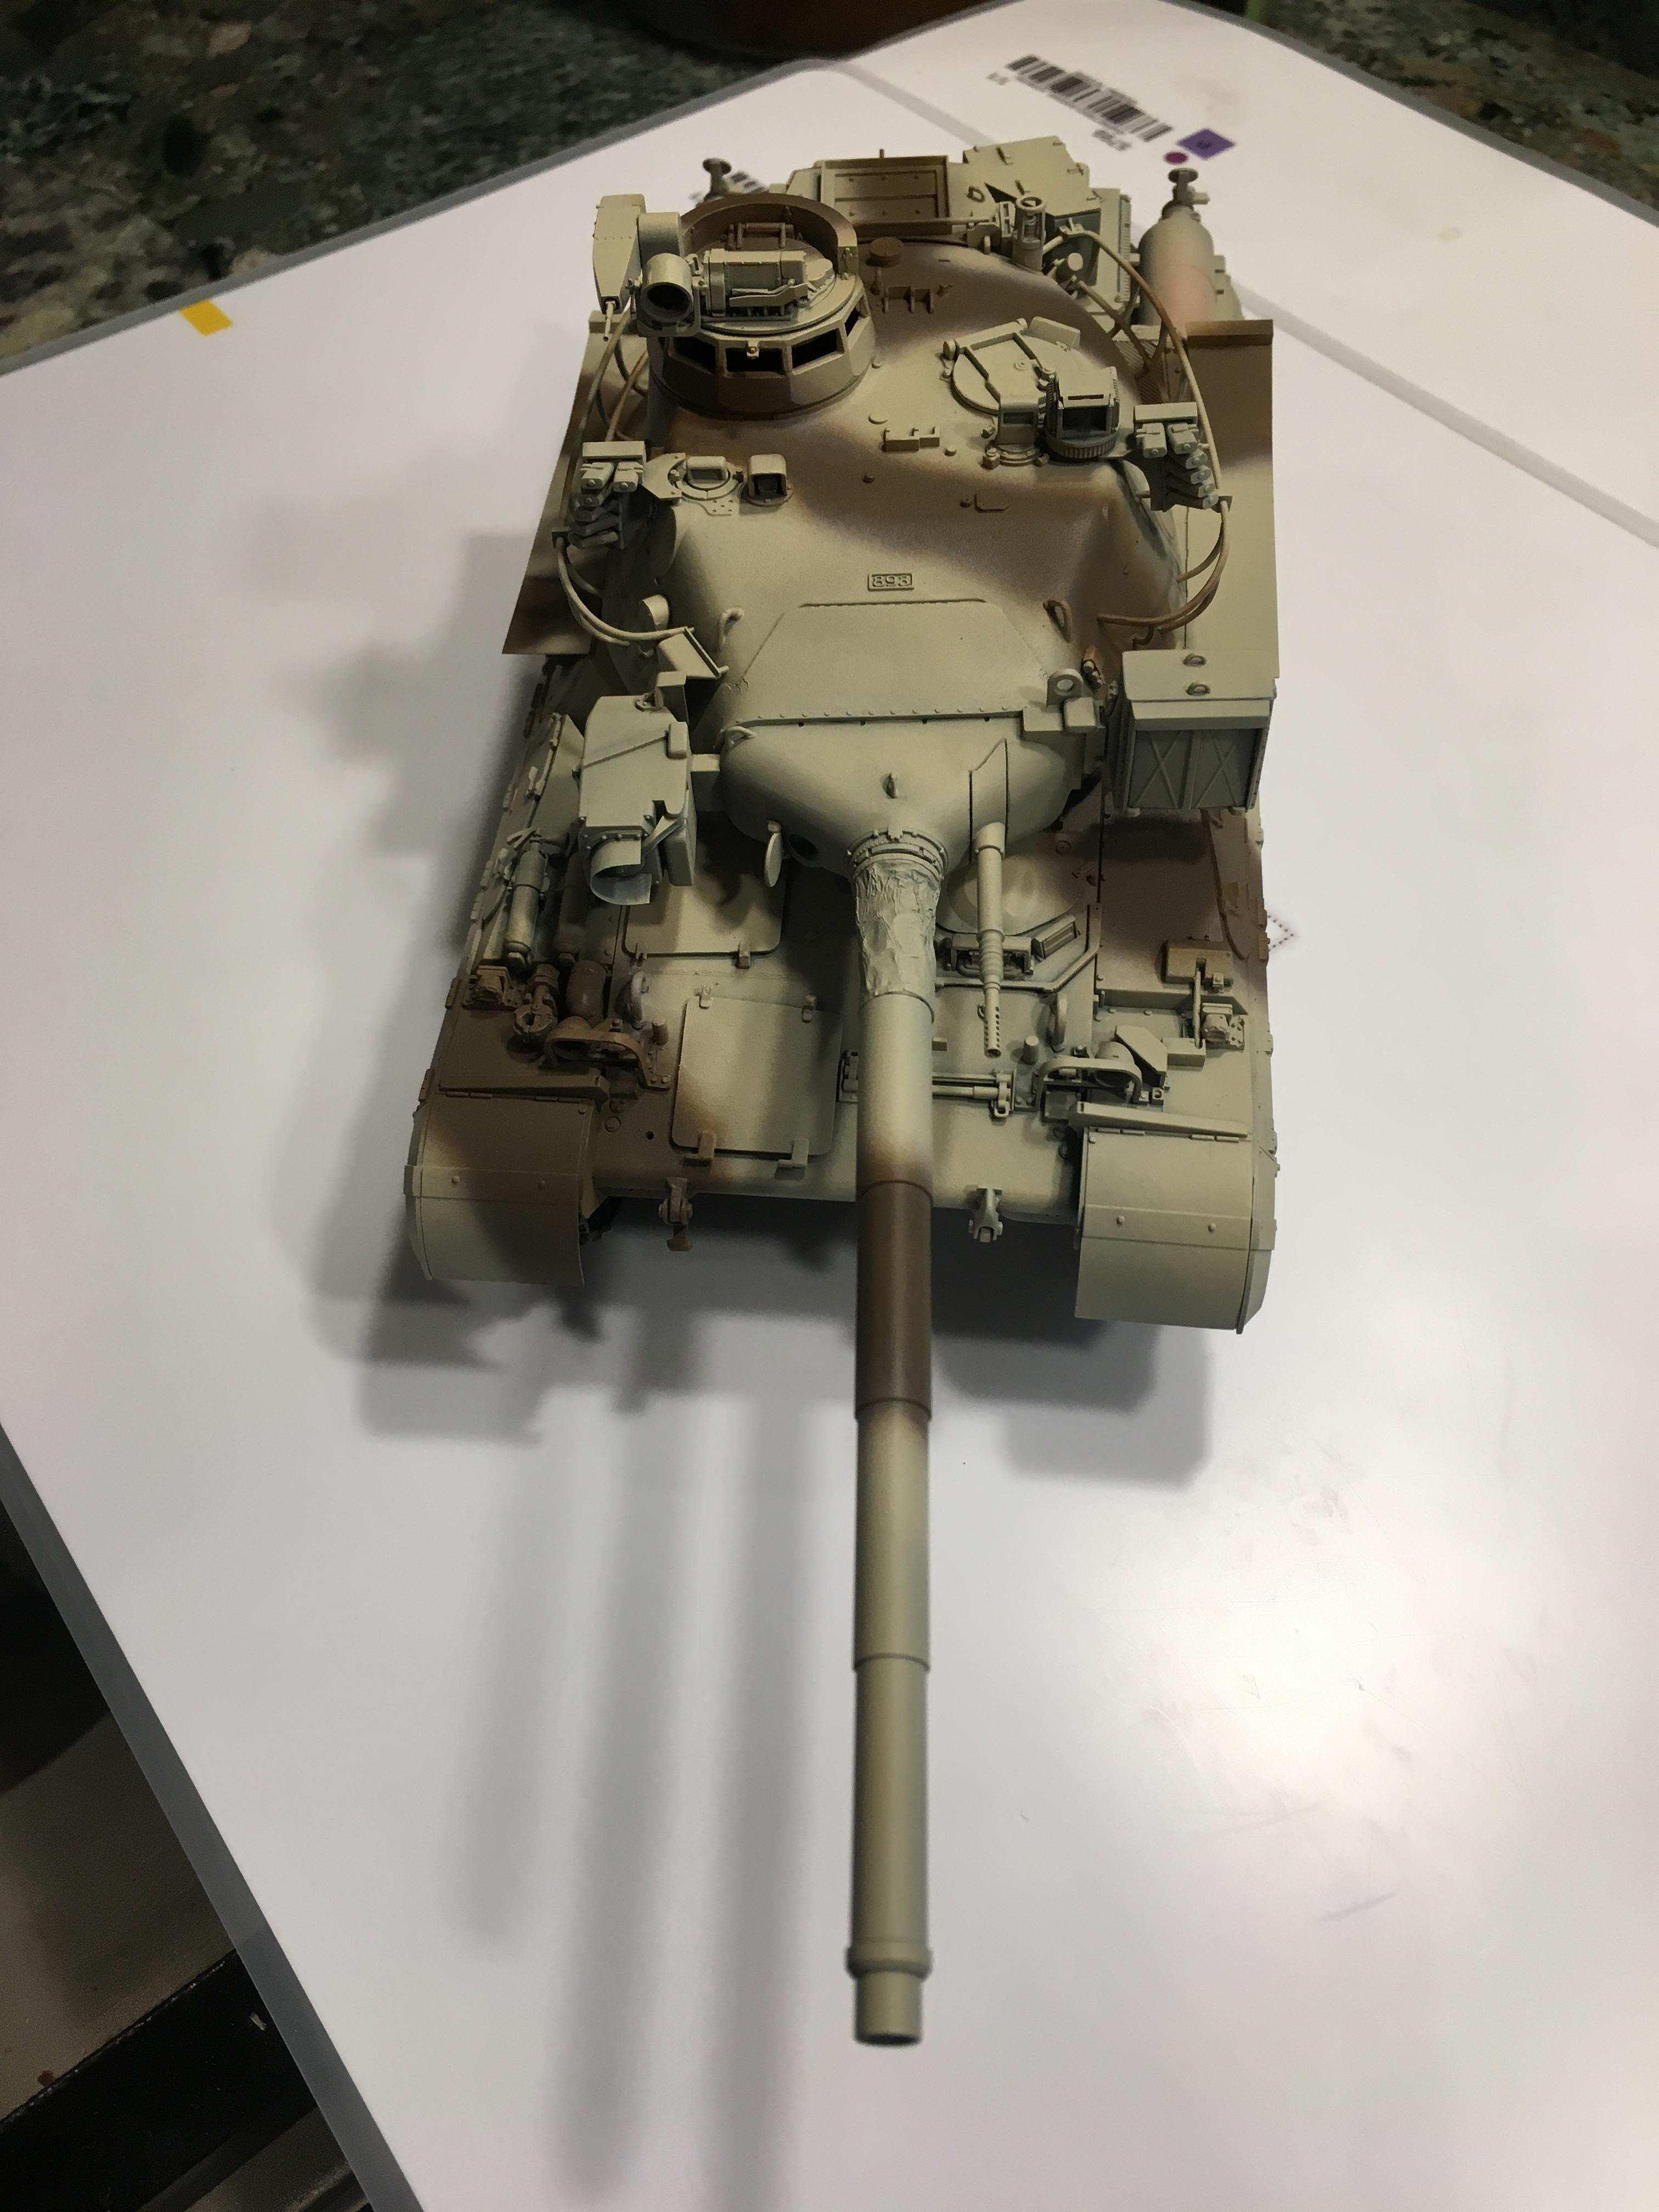
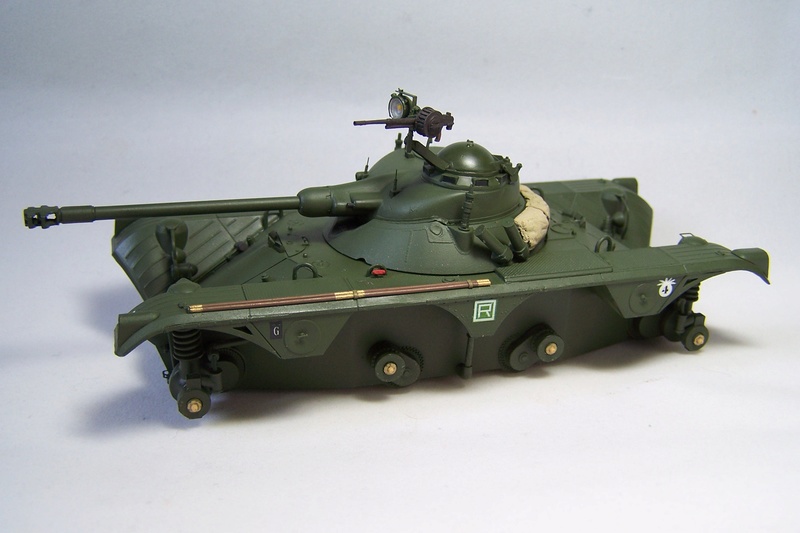
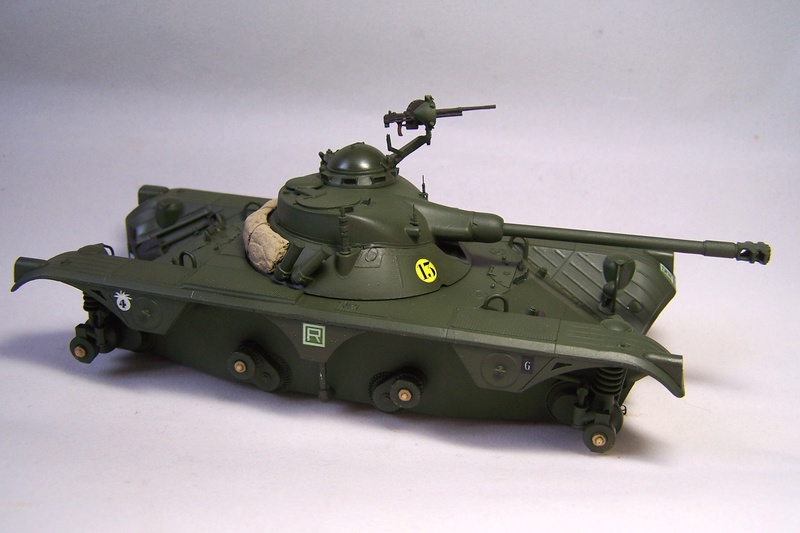
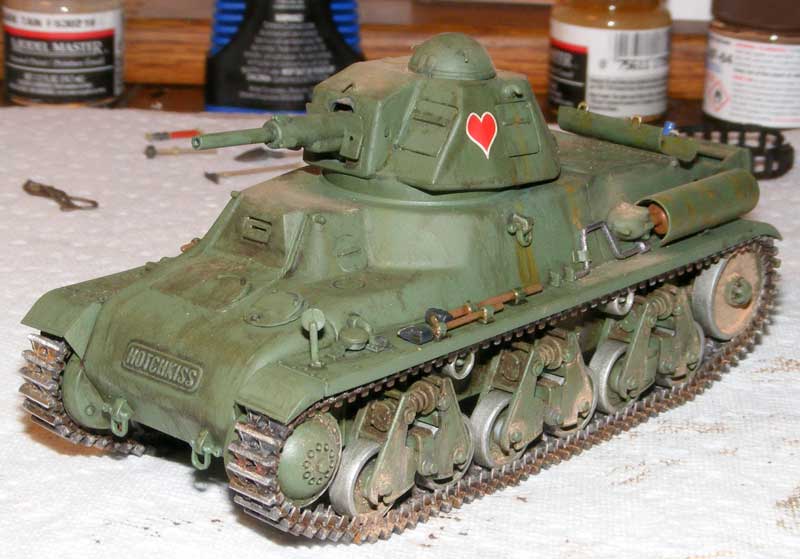
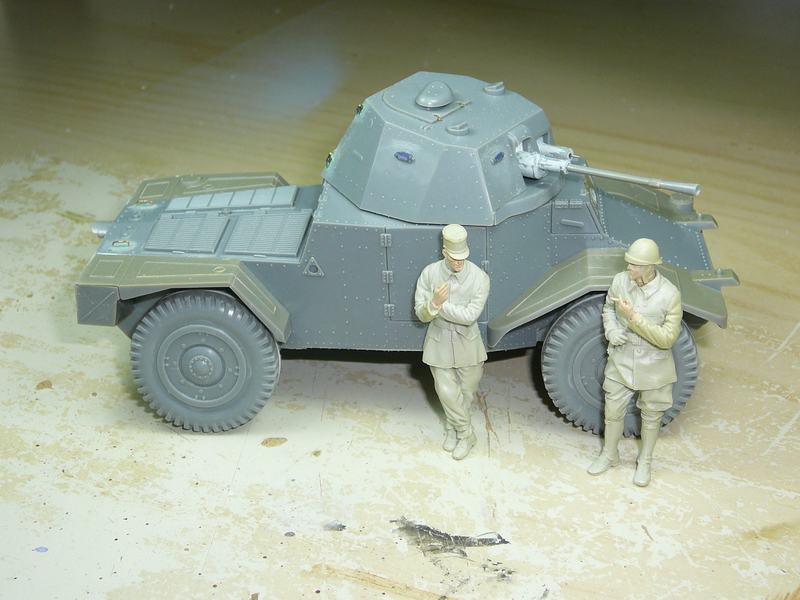
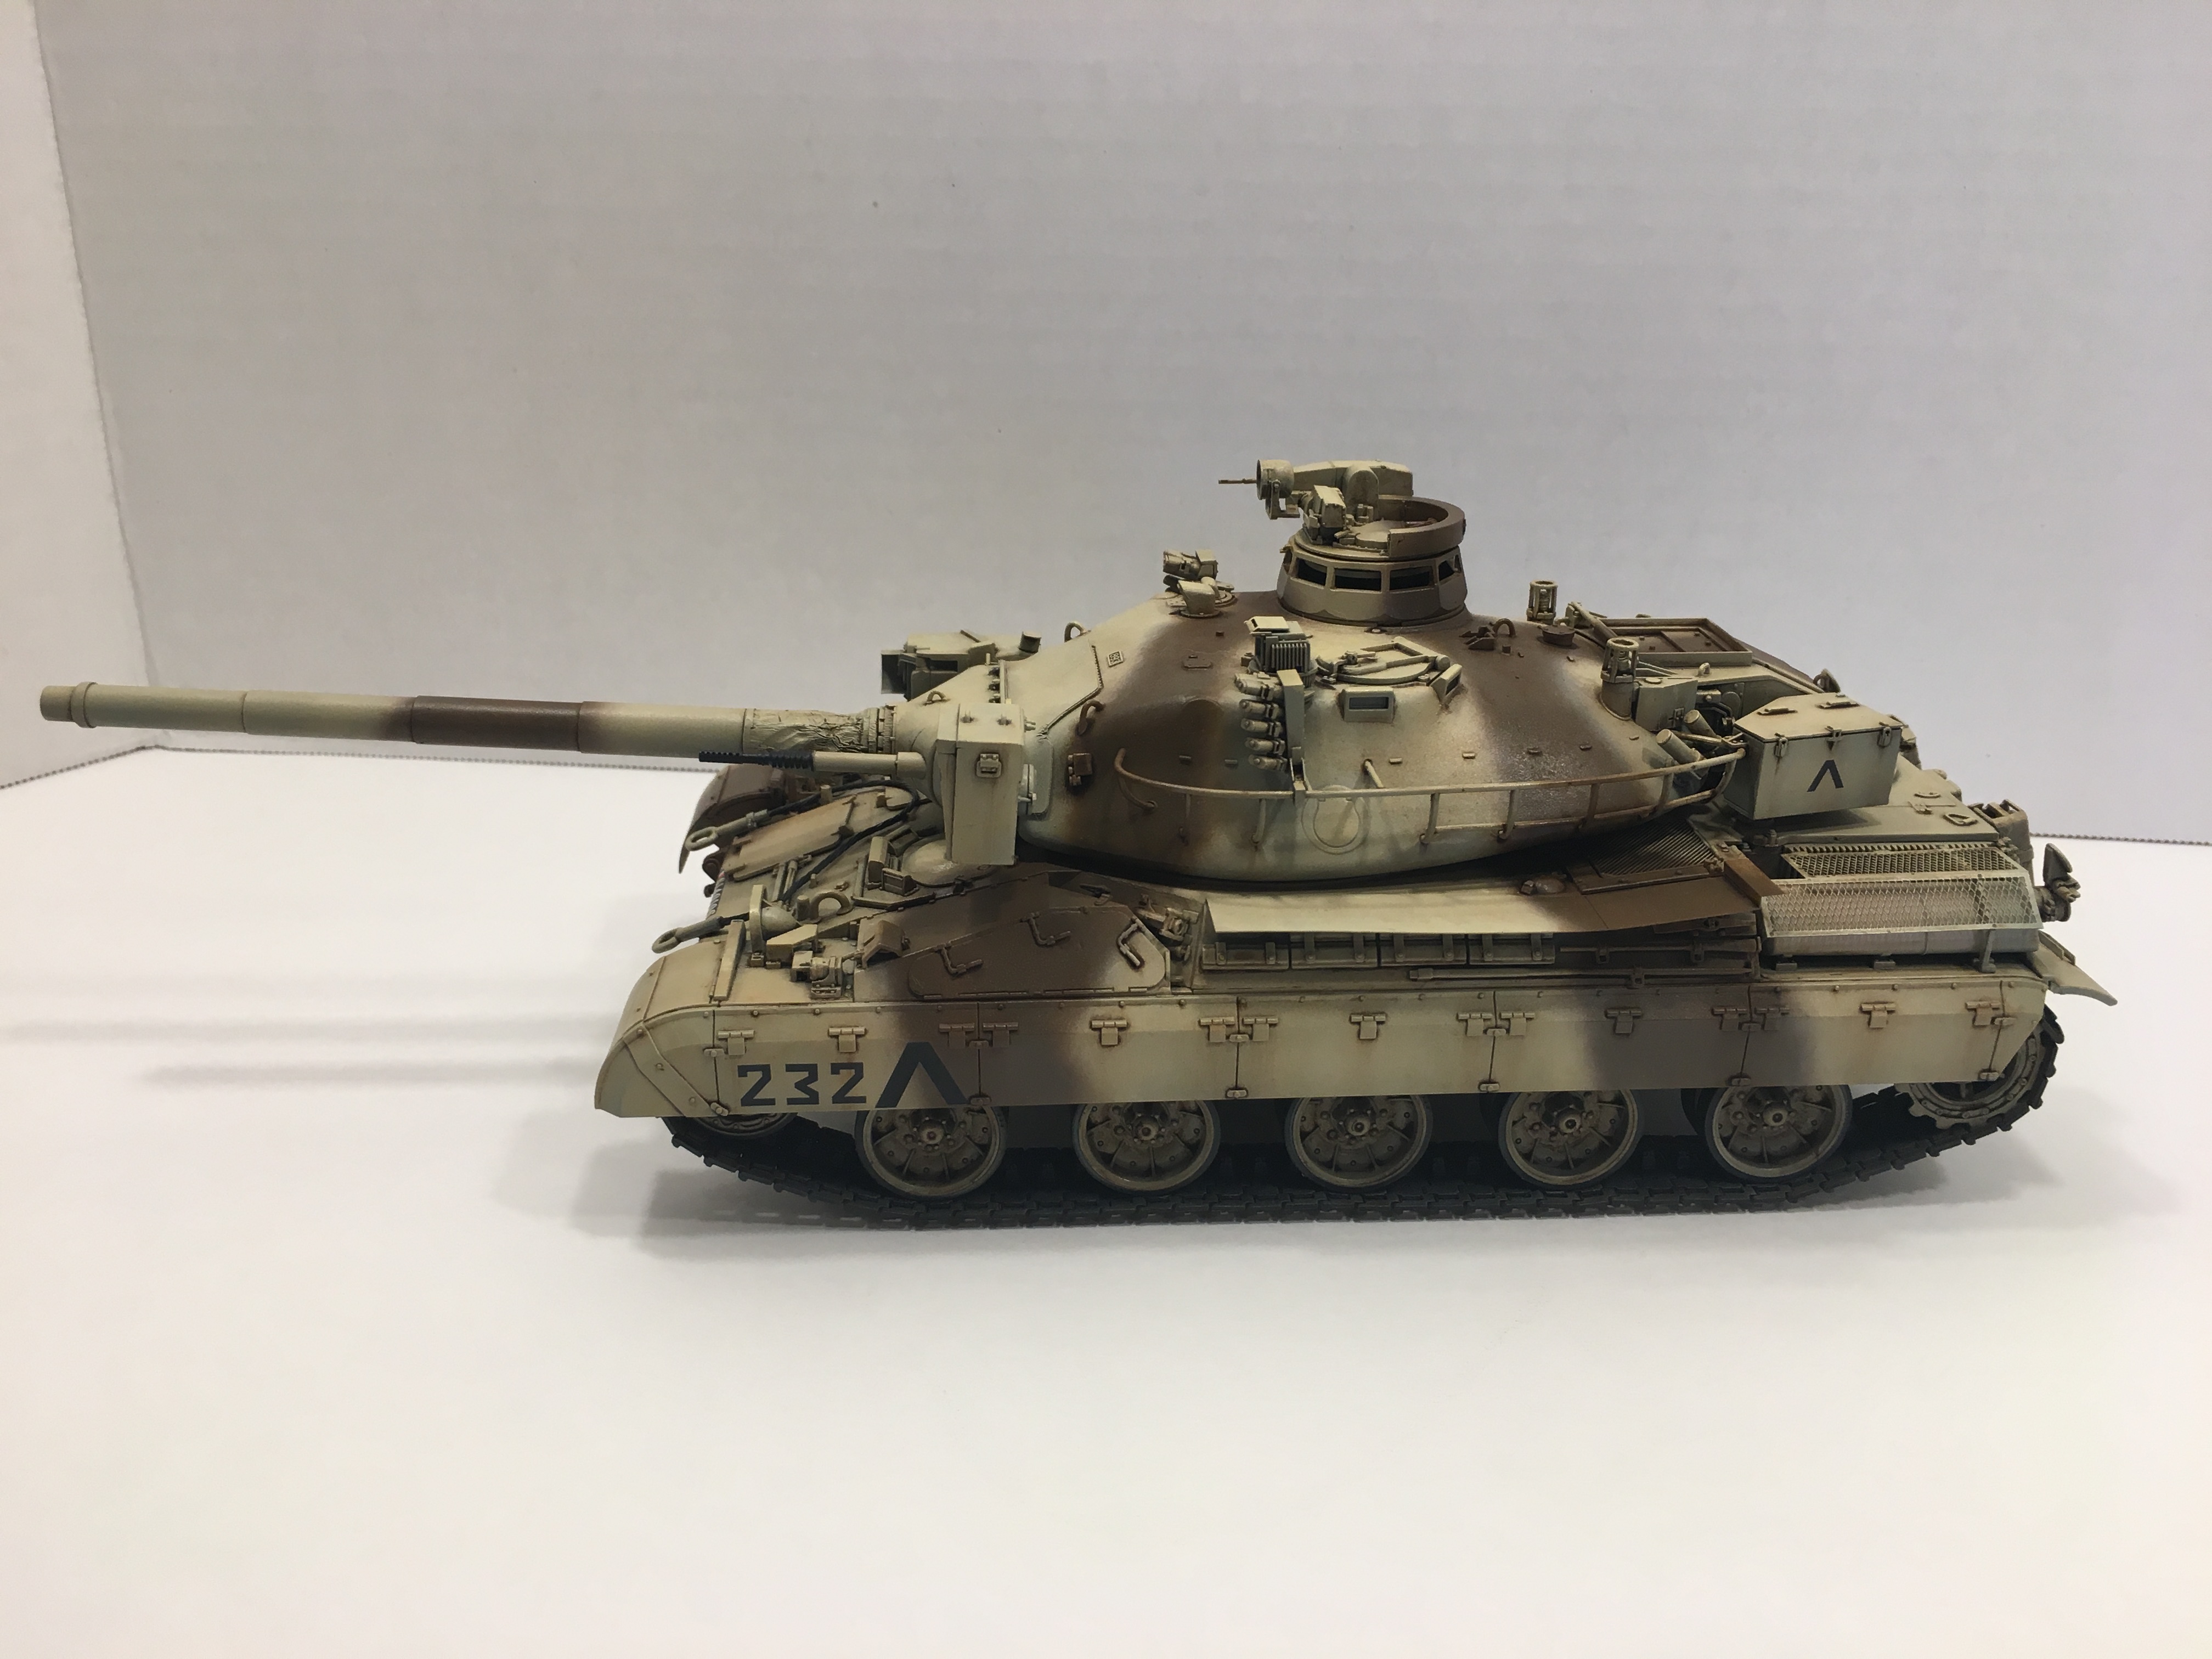
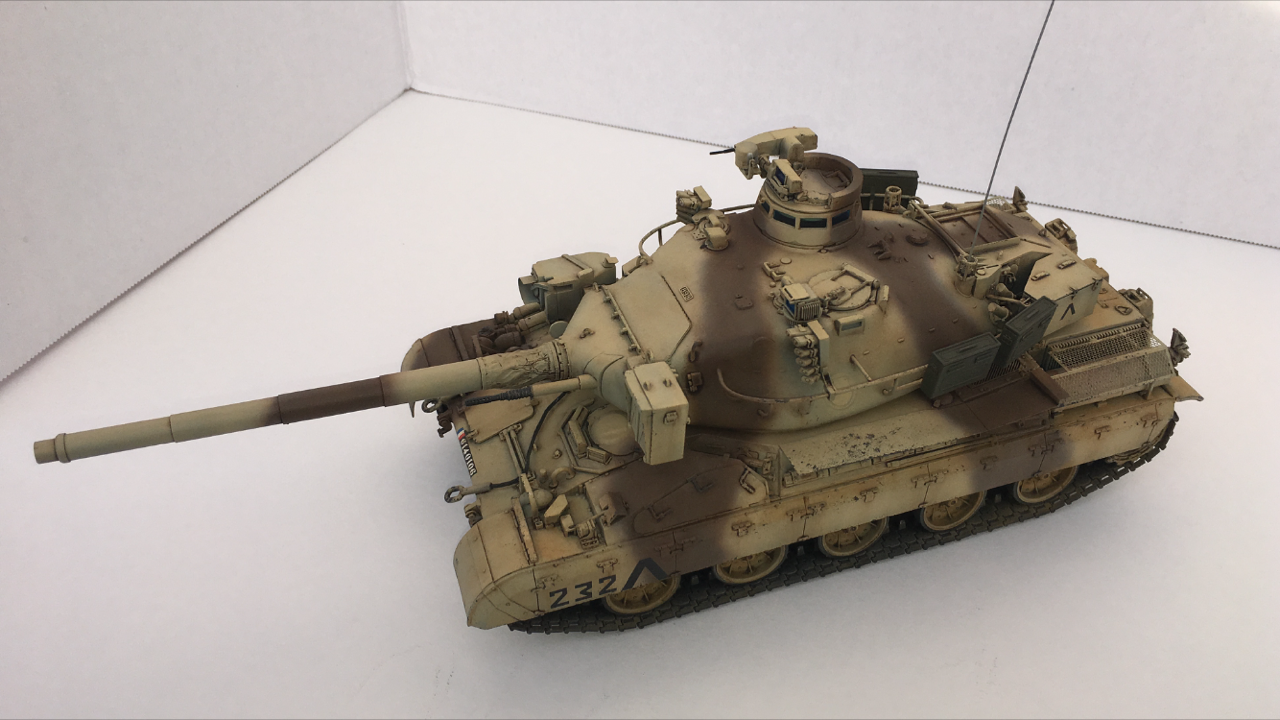
The turret with autocannon and machine gun installed. As the mounts were clearly 1990s I had a hard time installing these. On modern kits it would be perhaps 20 seconds work; here it took me perhaps 1 hour.


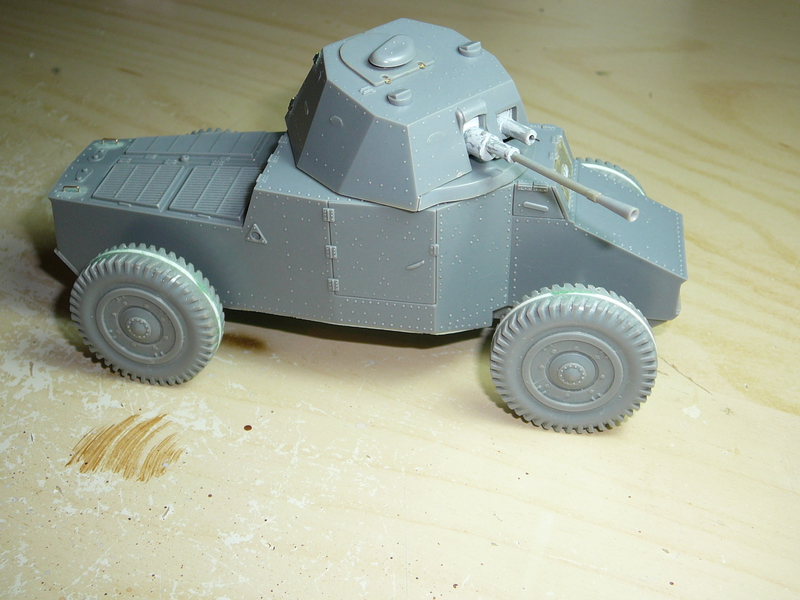
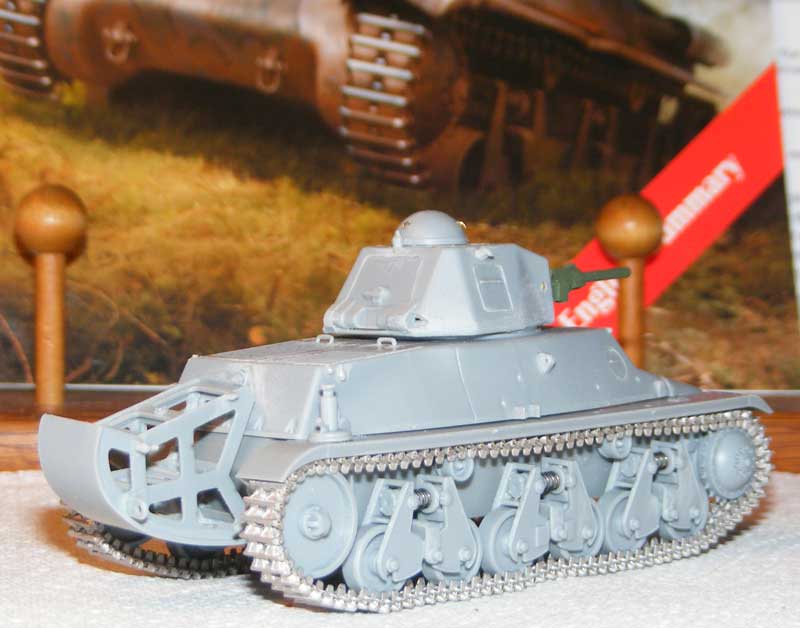
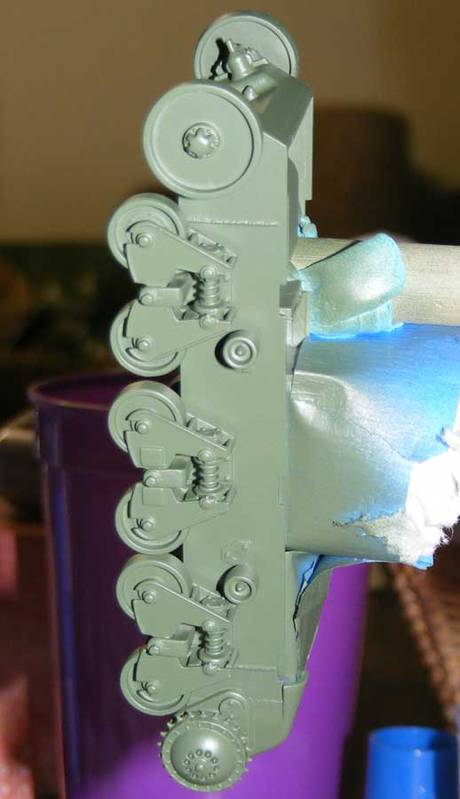
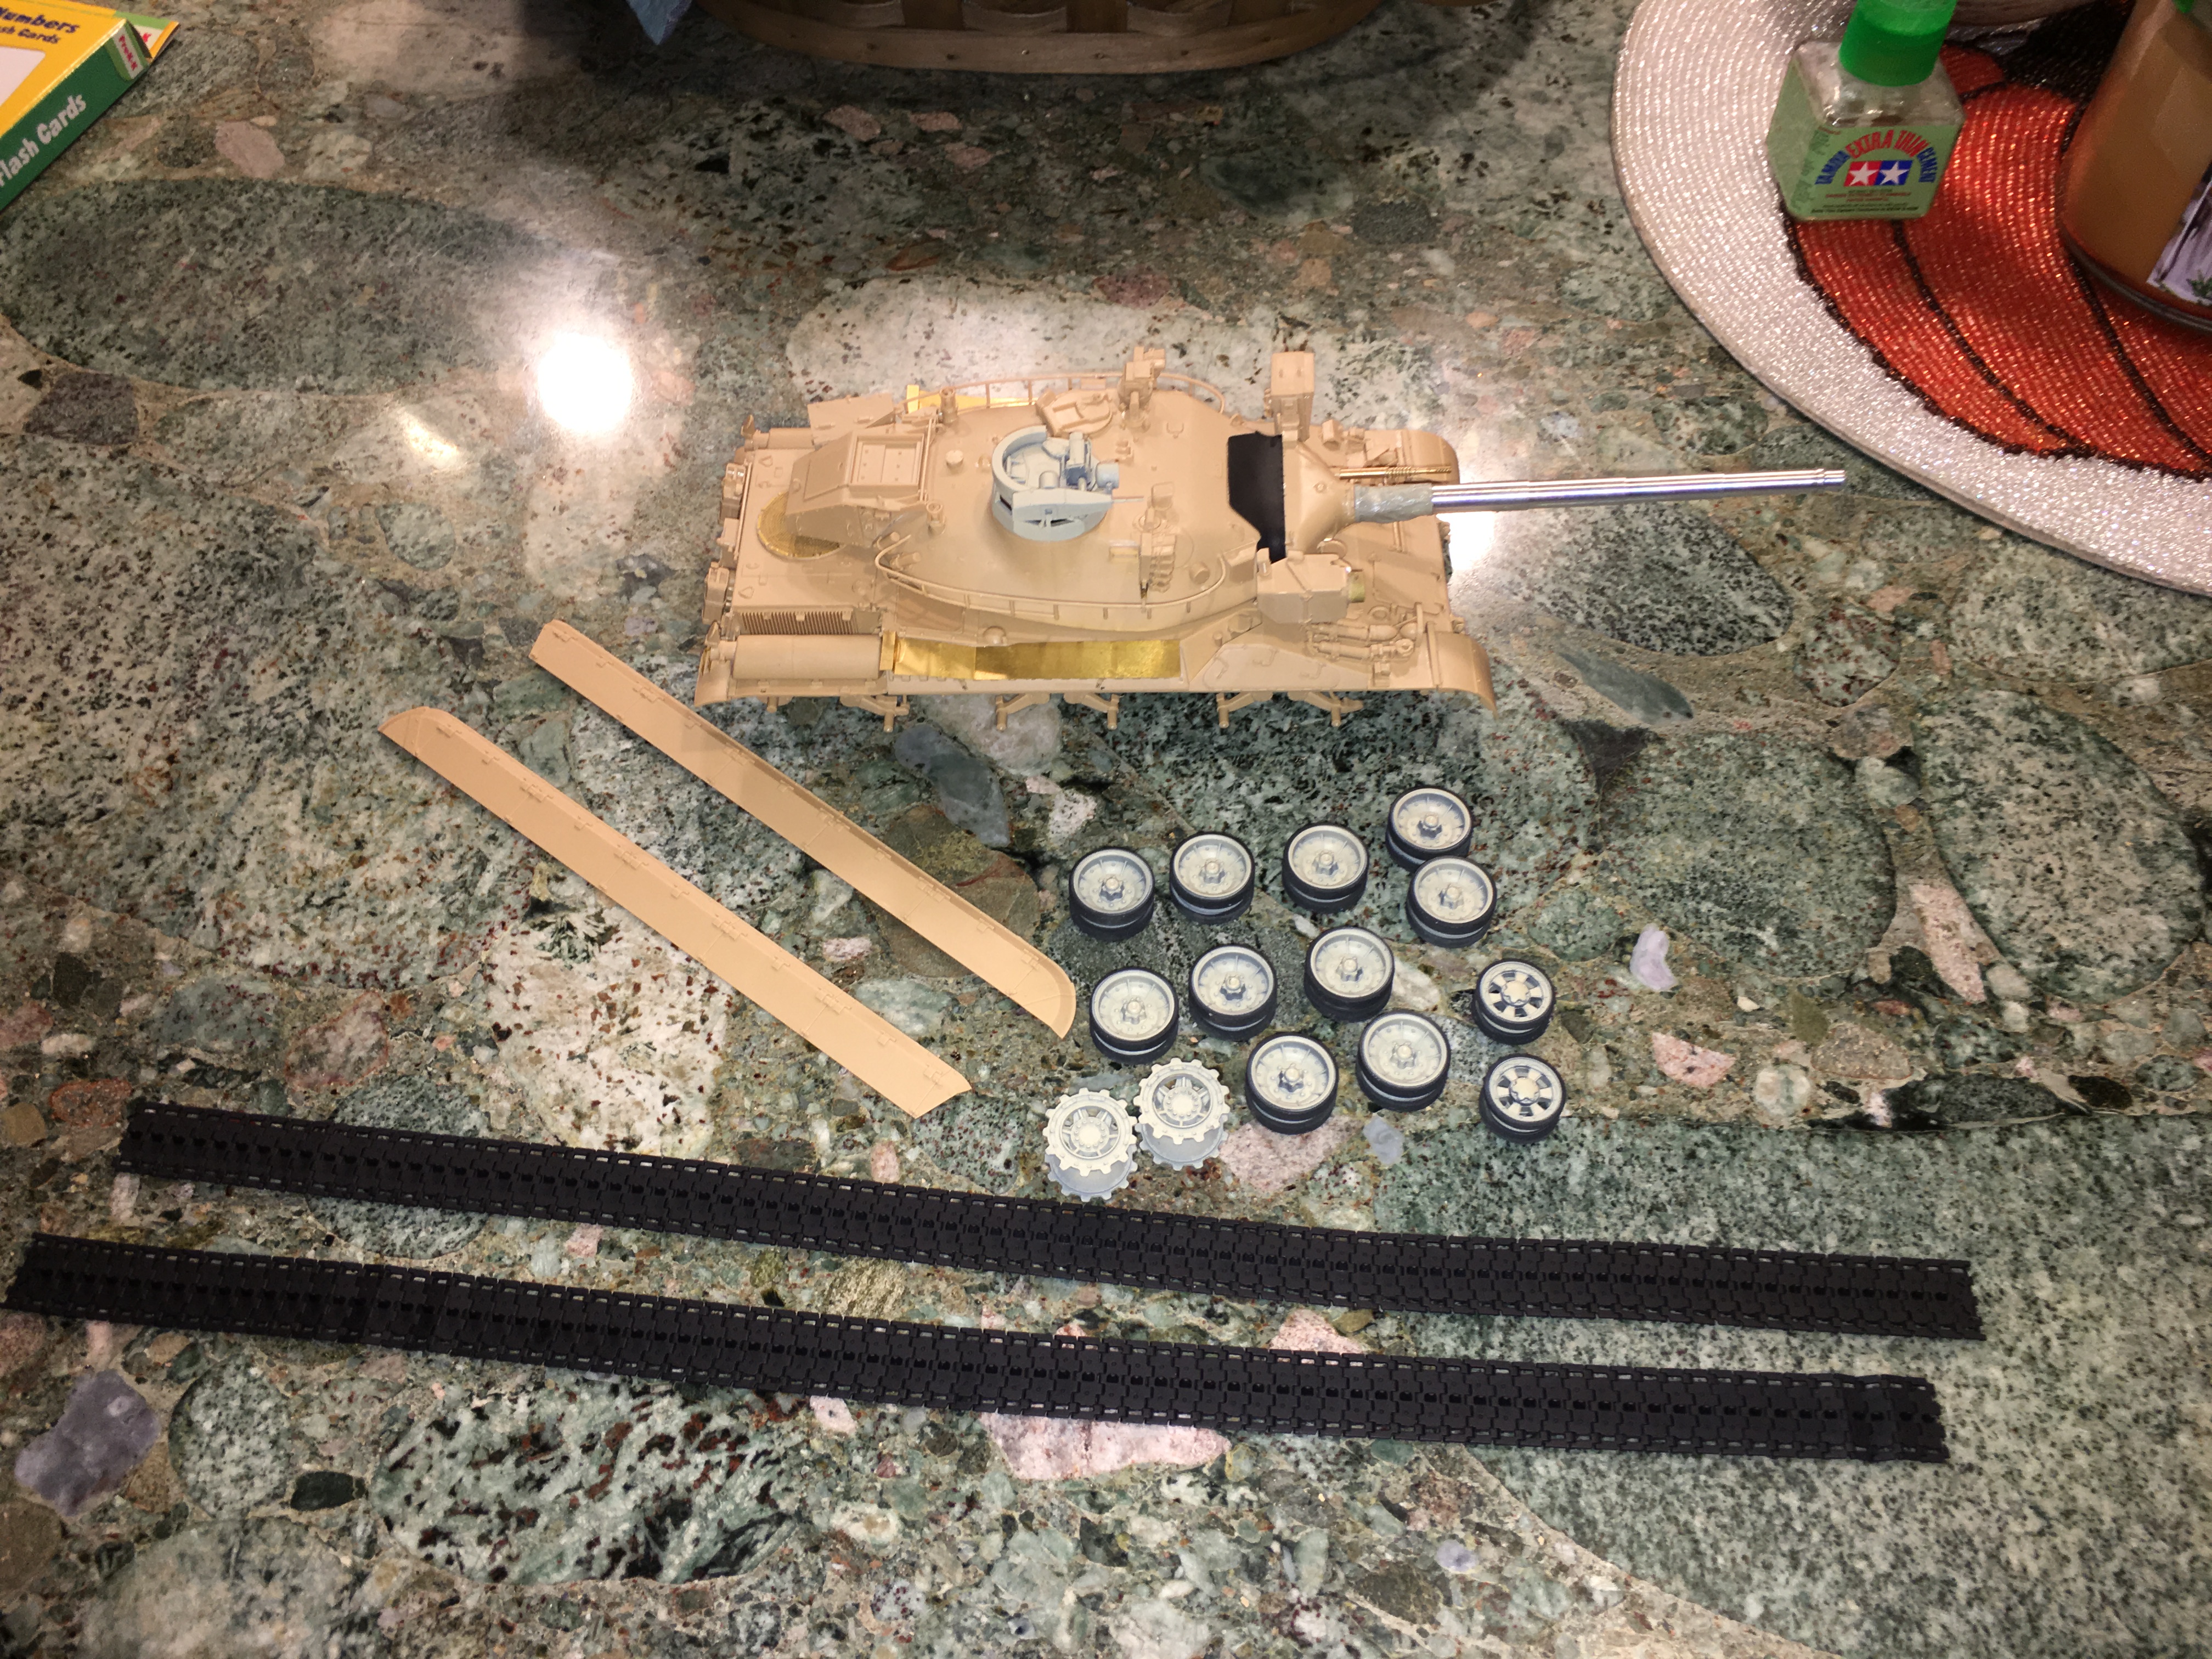
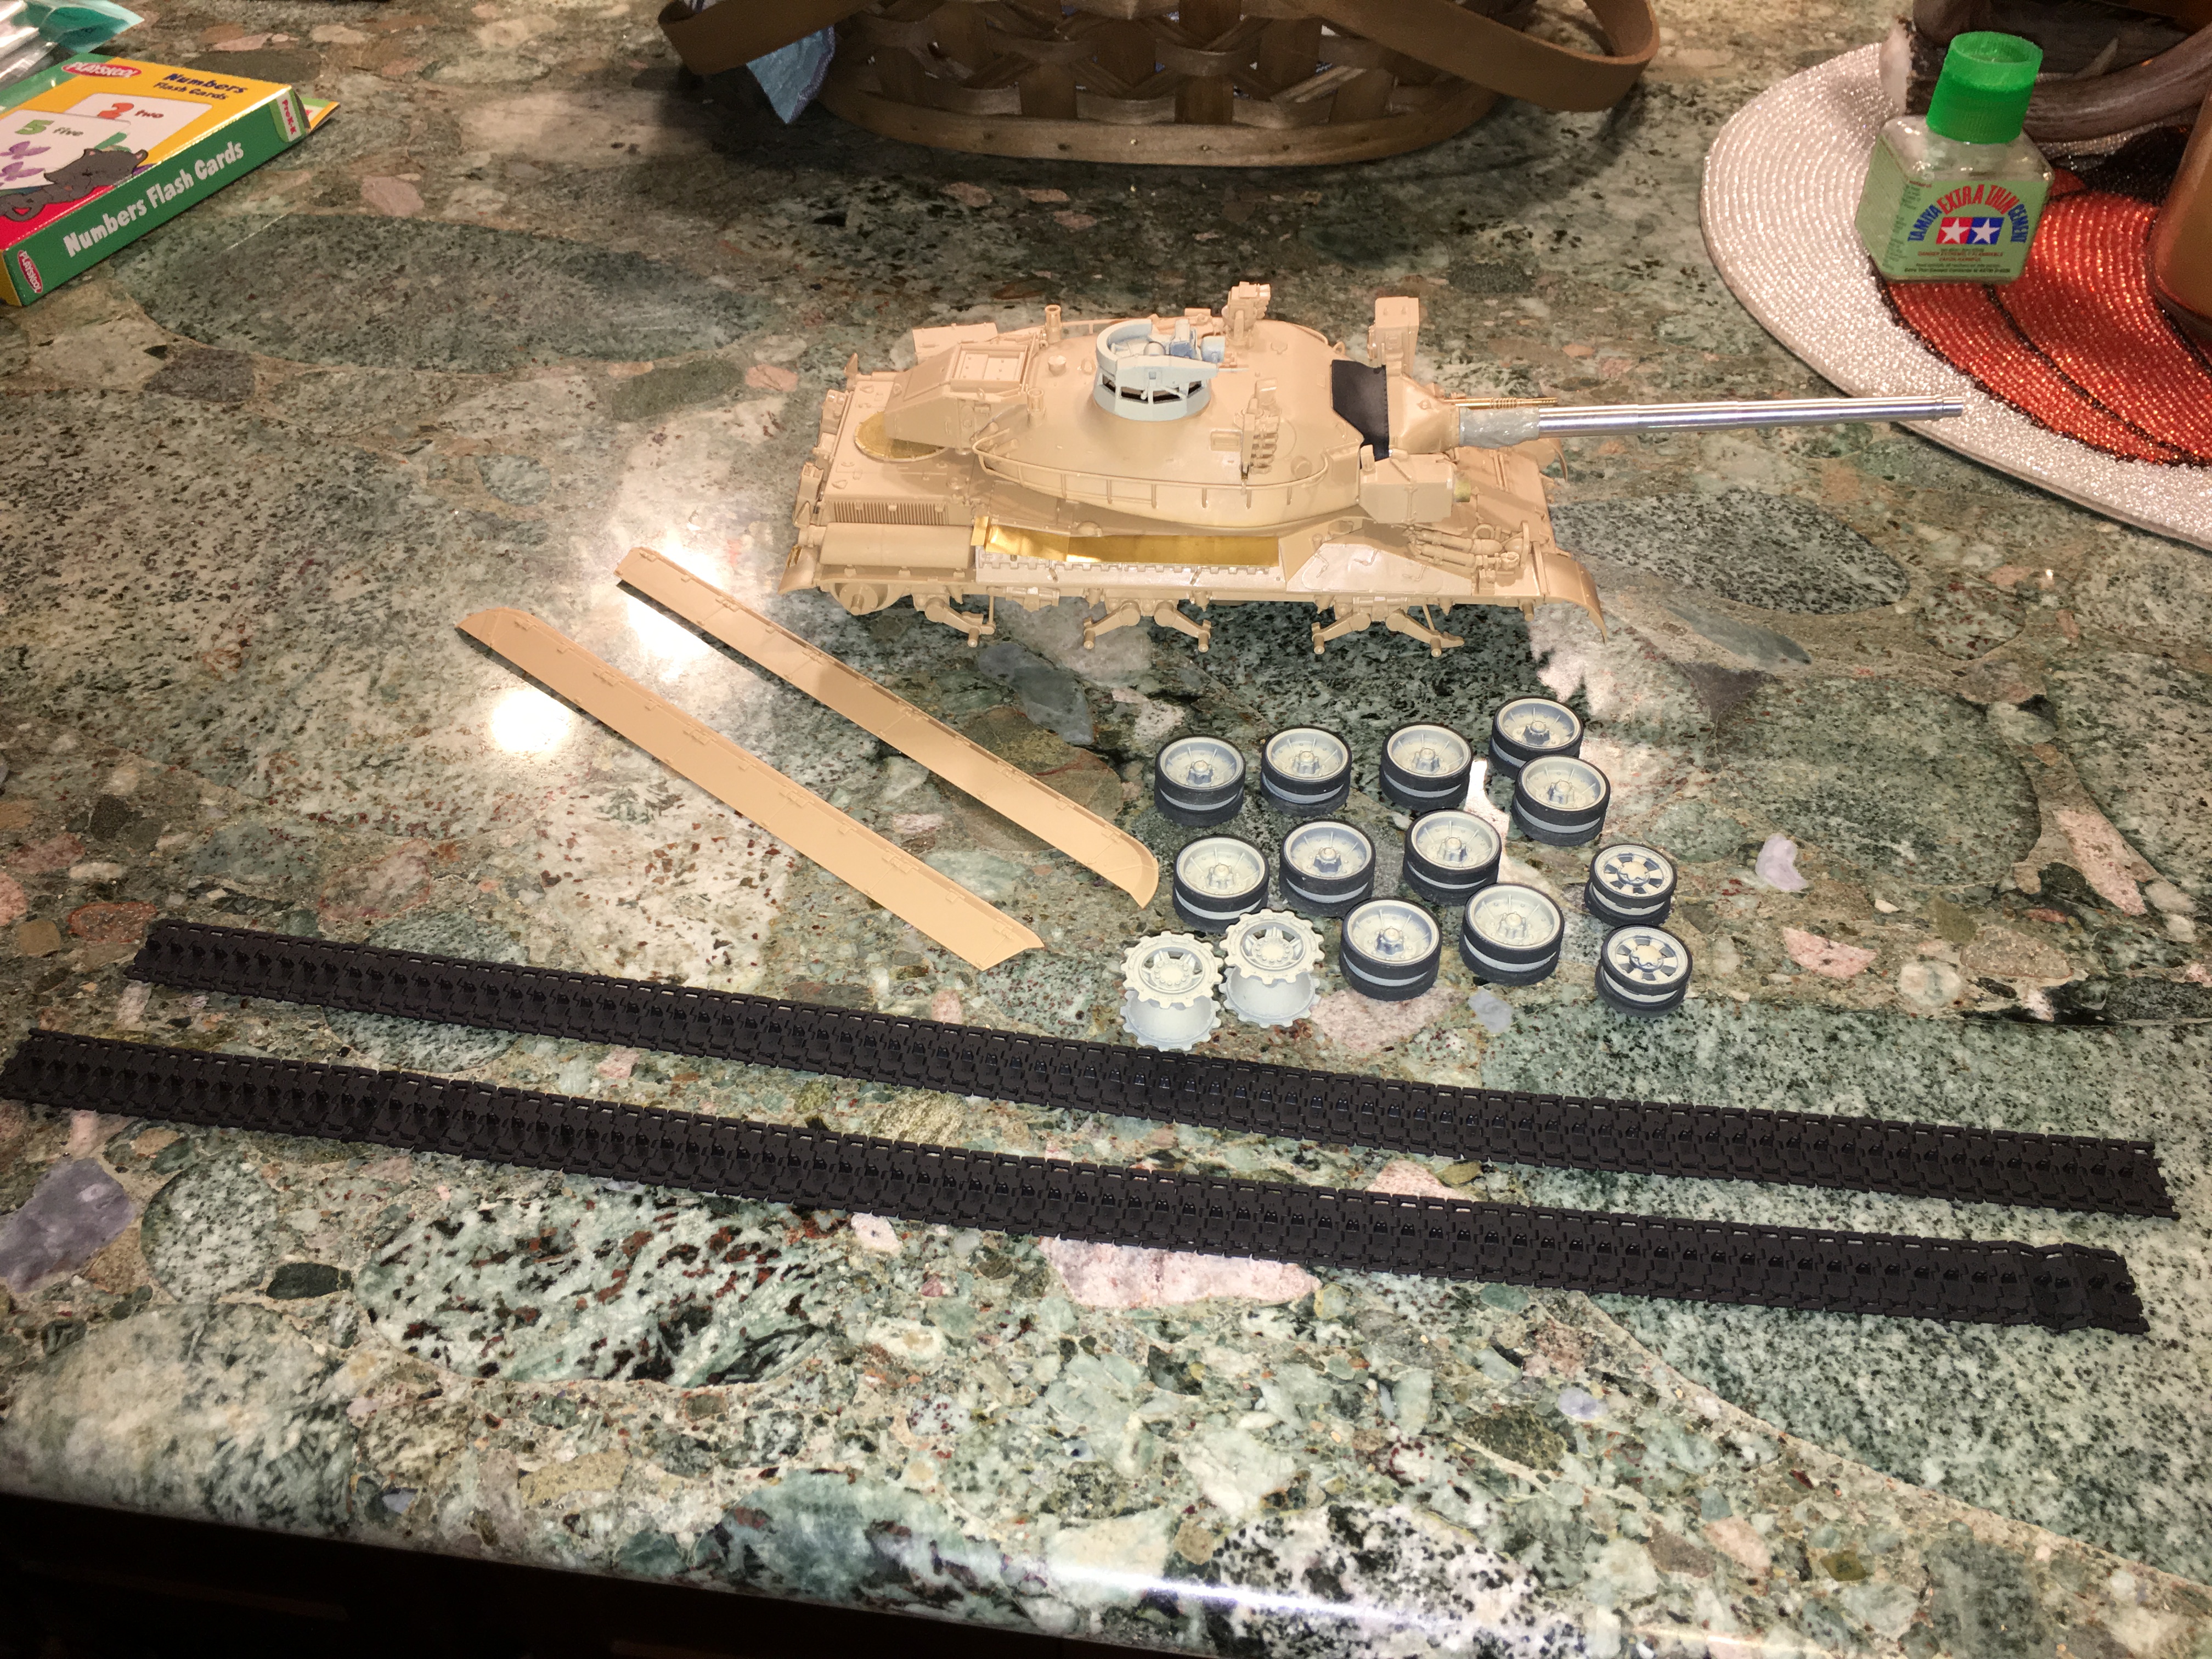
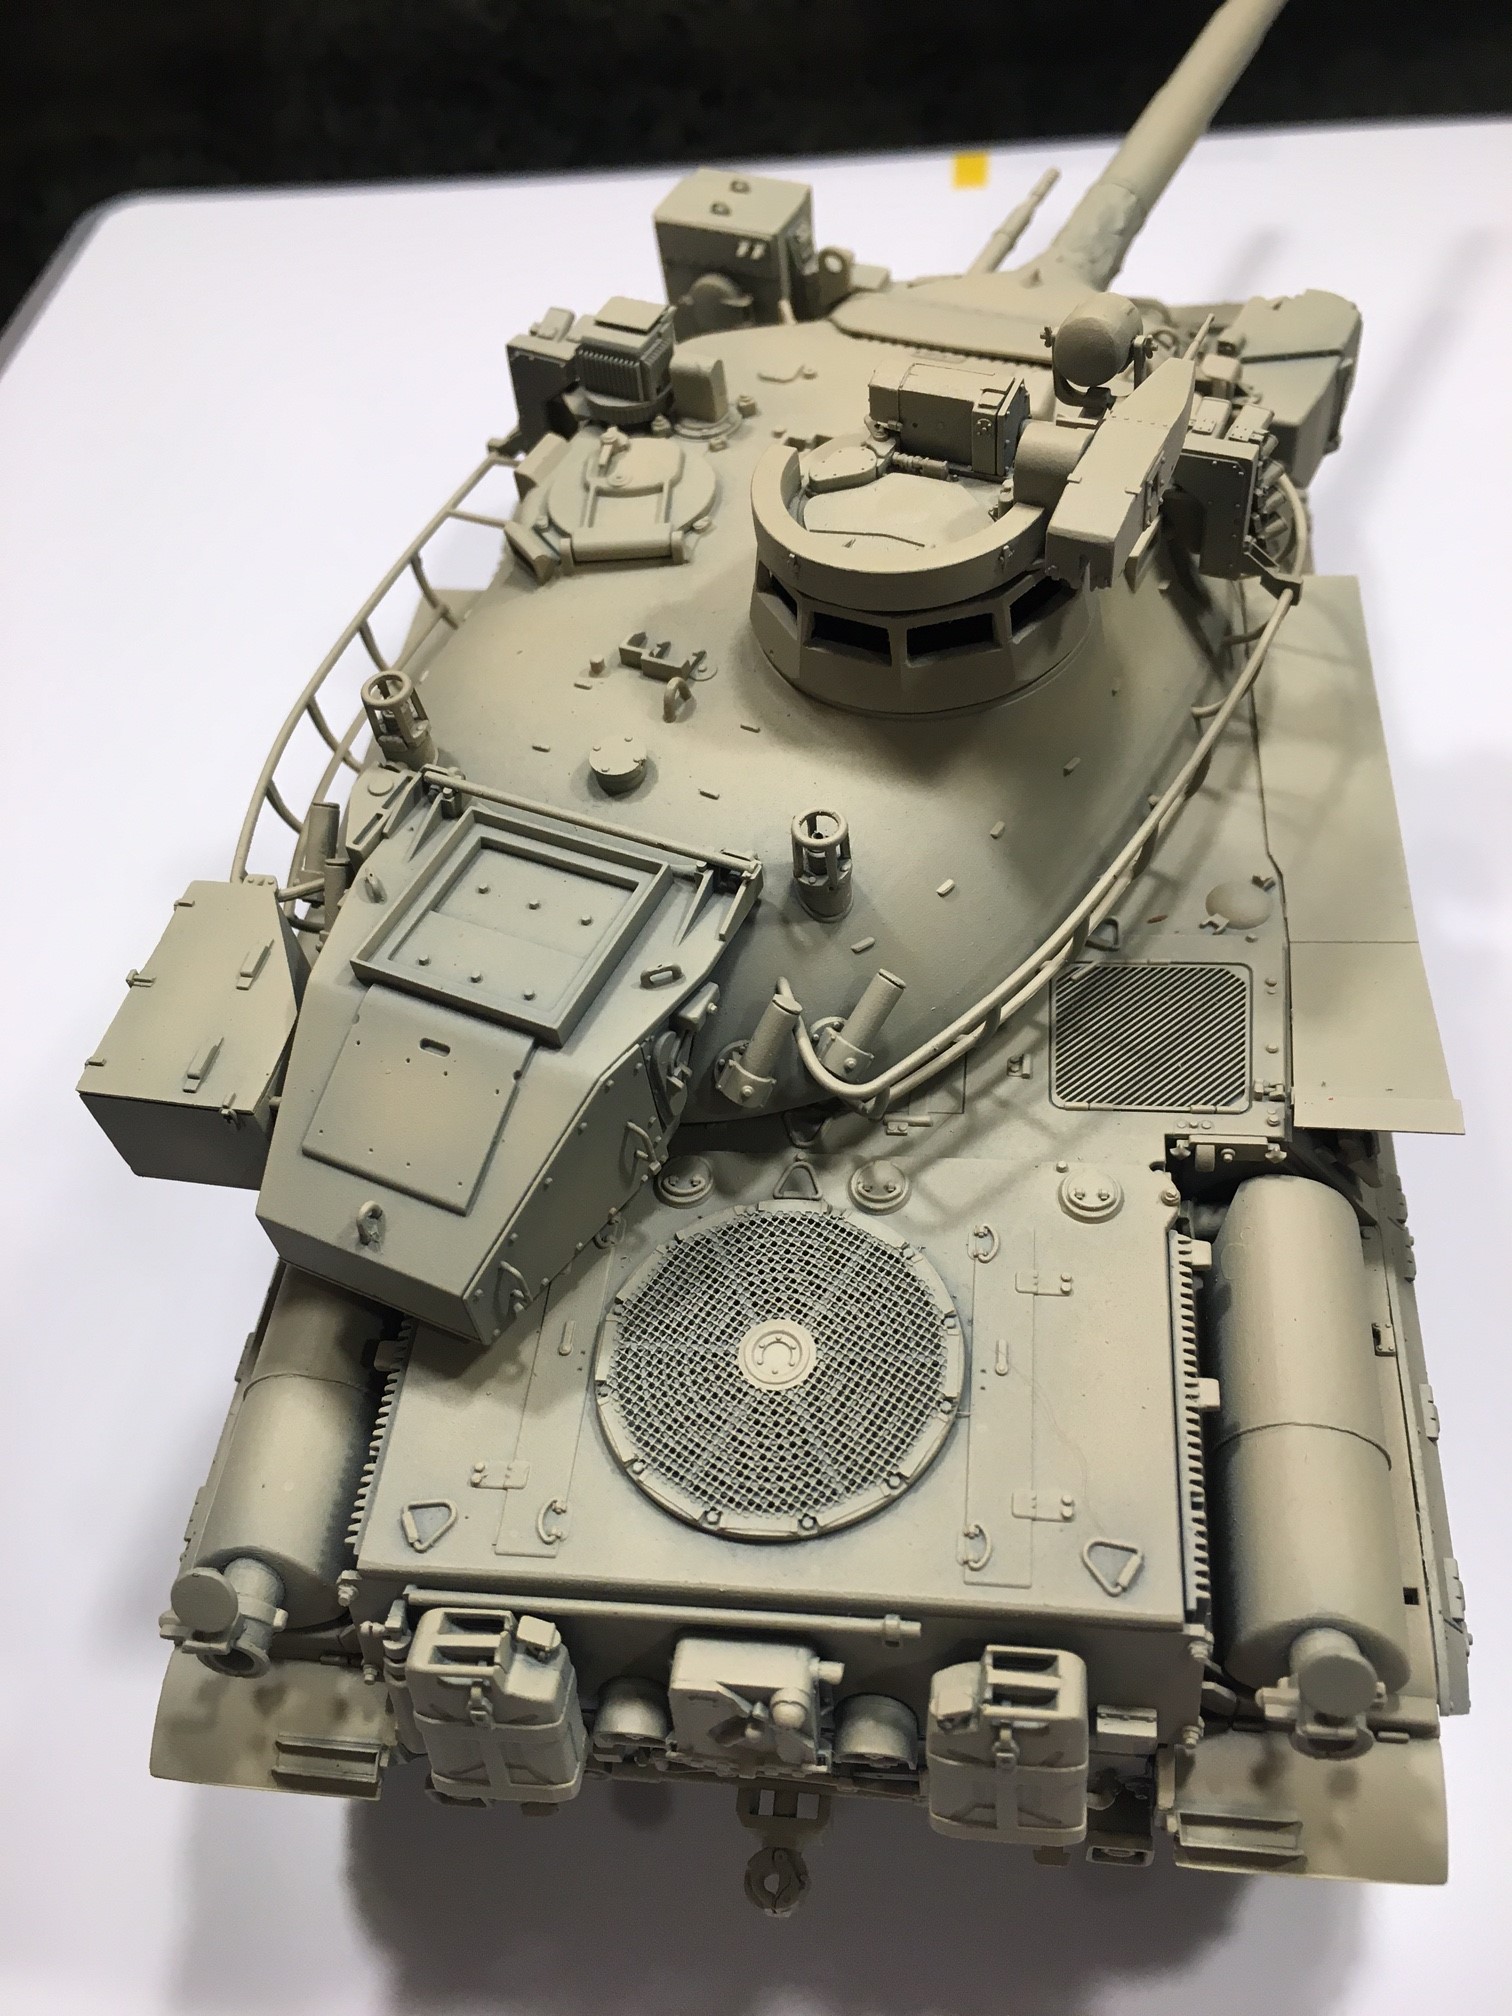
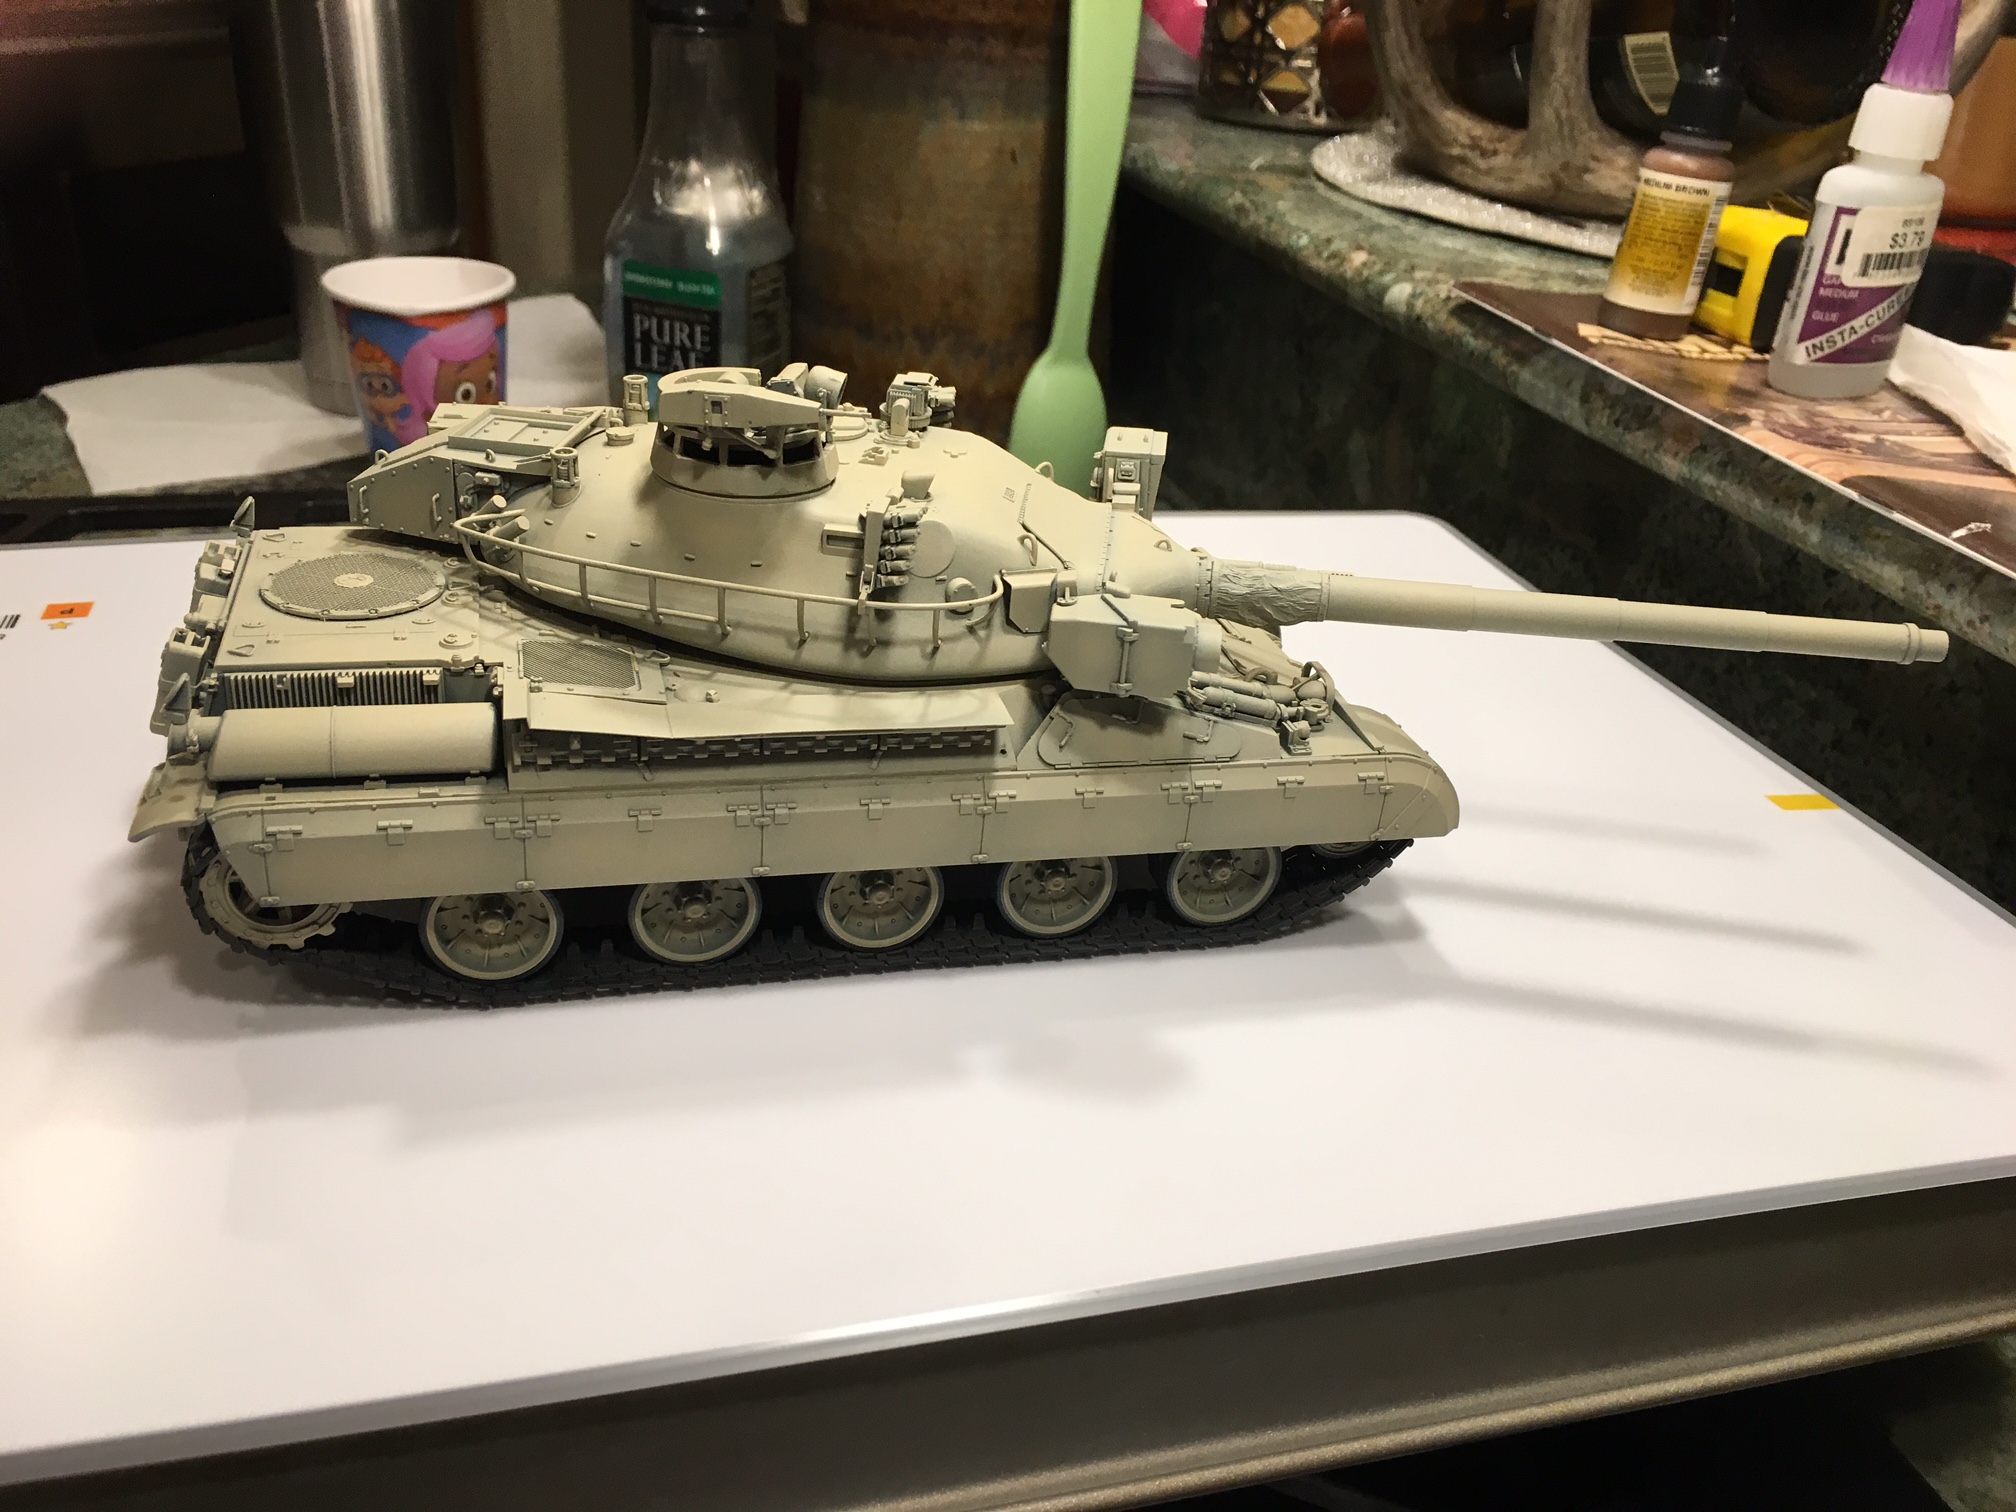
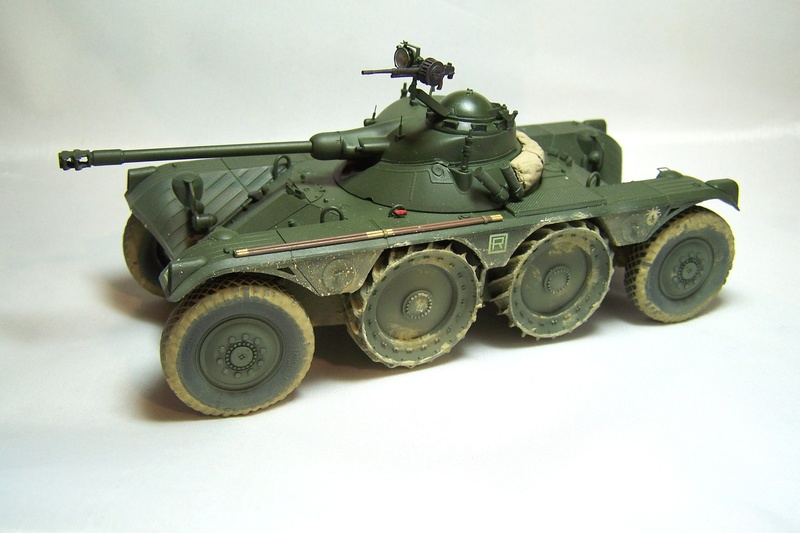
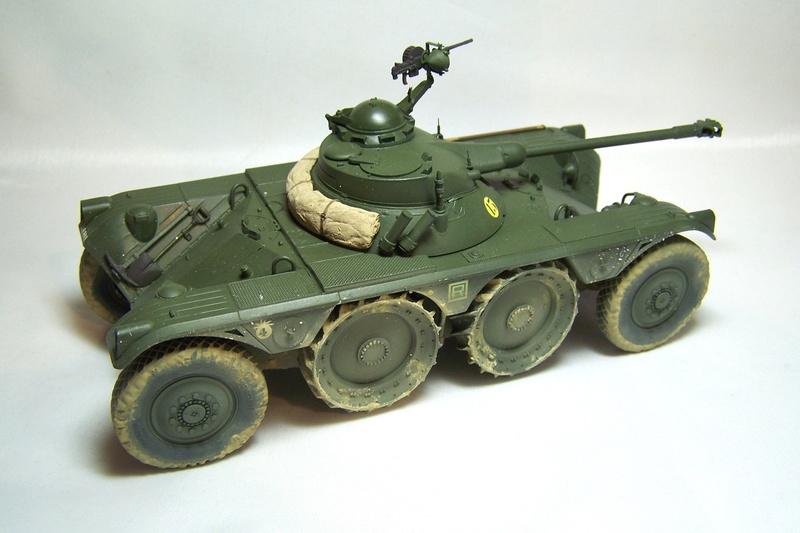
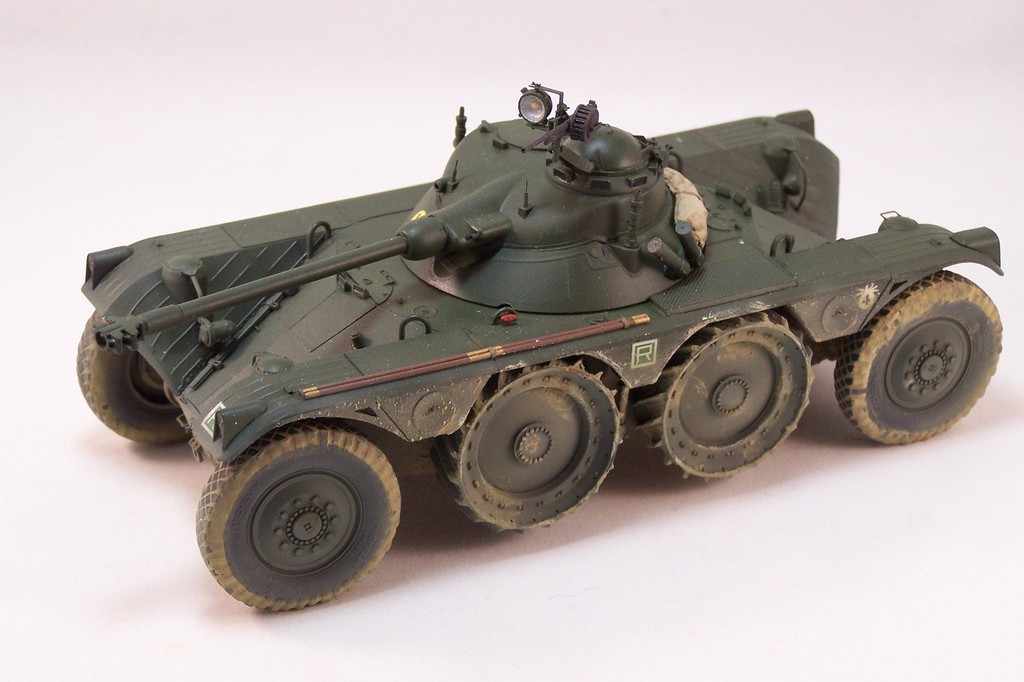
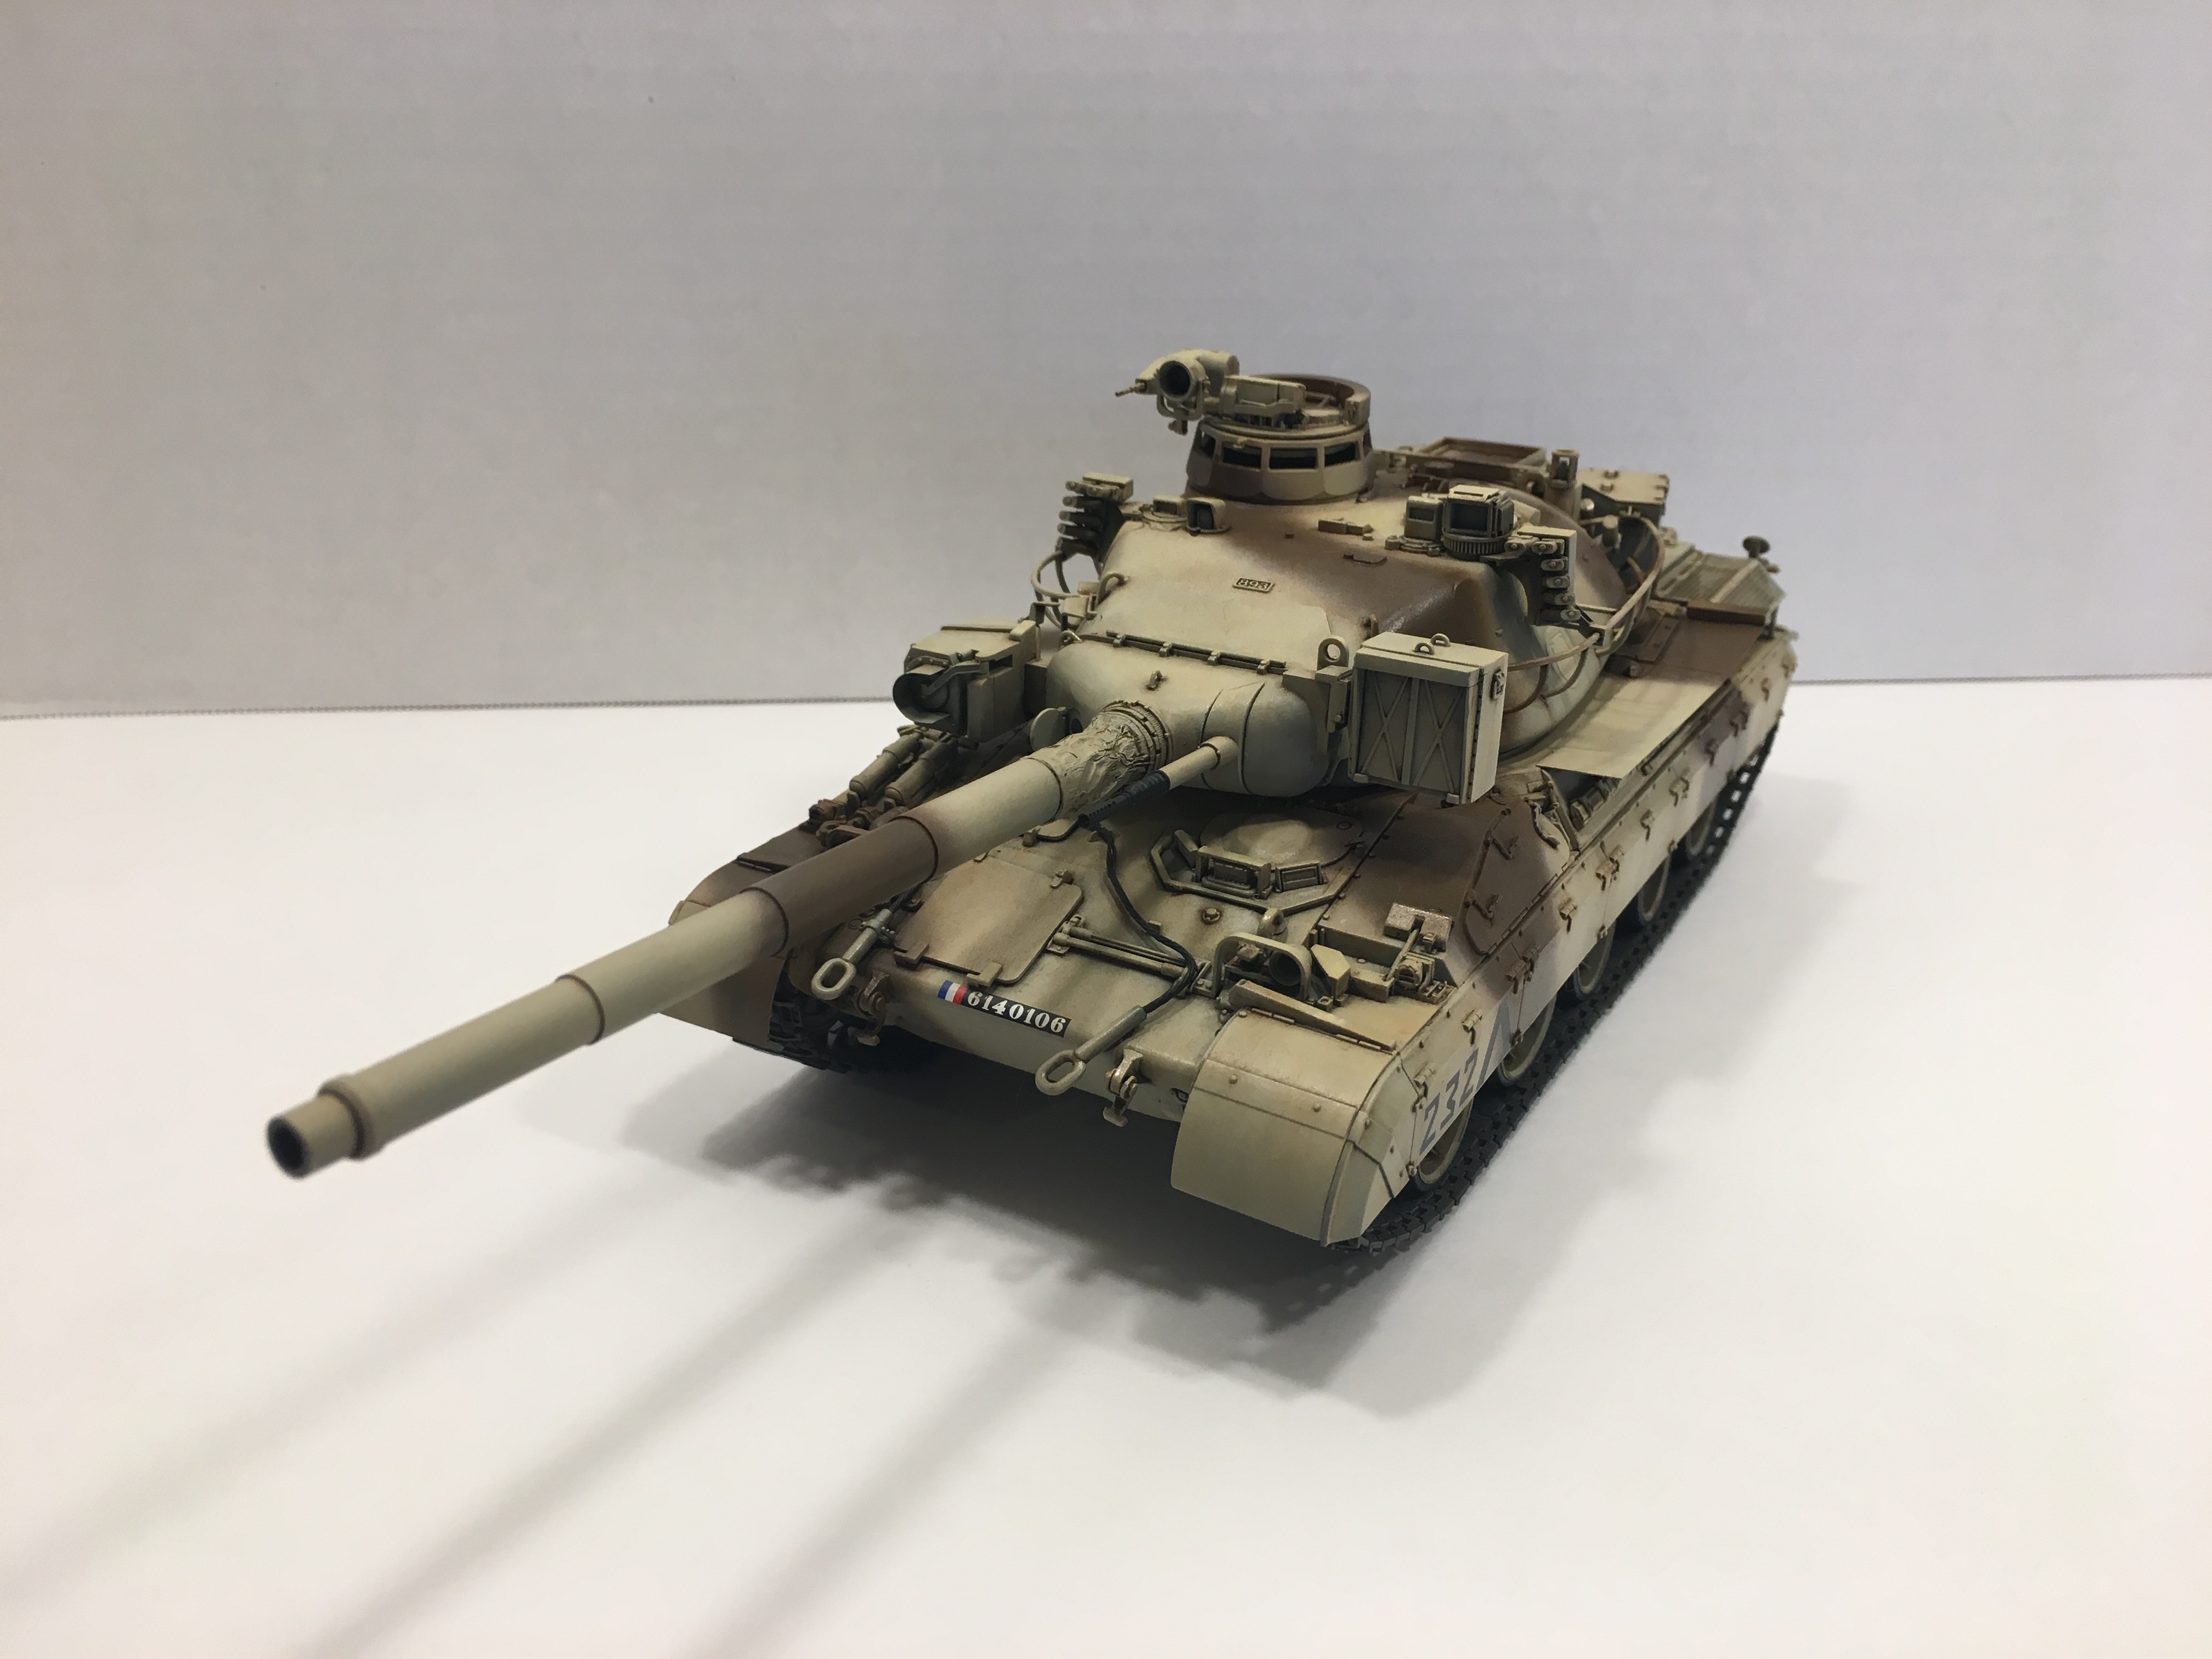
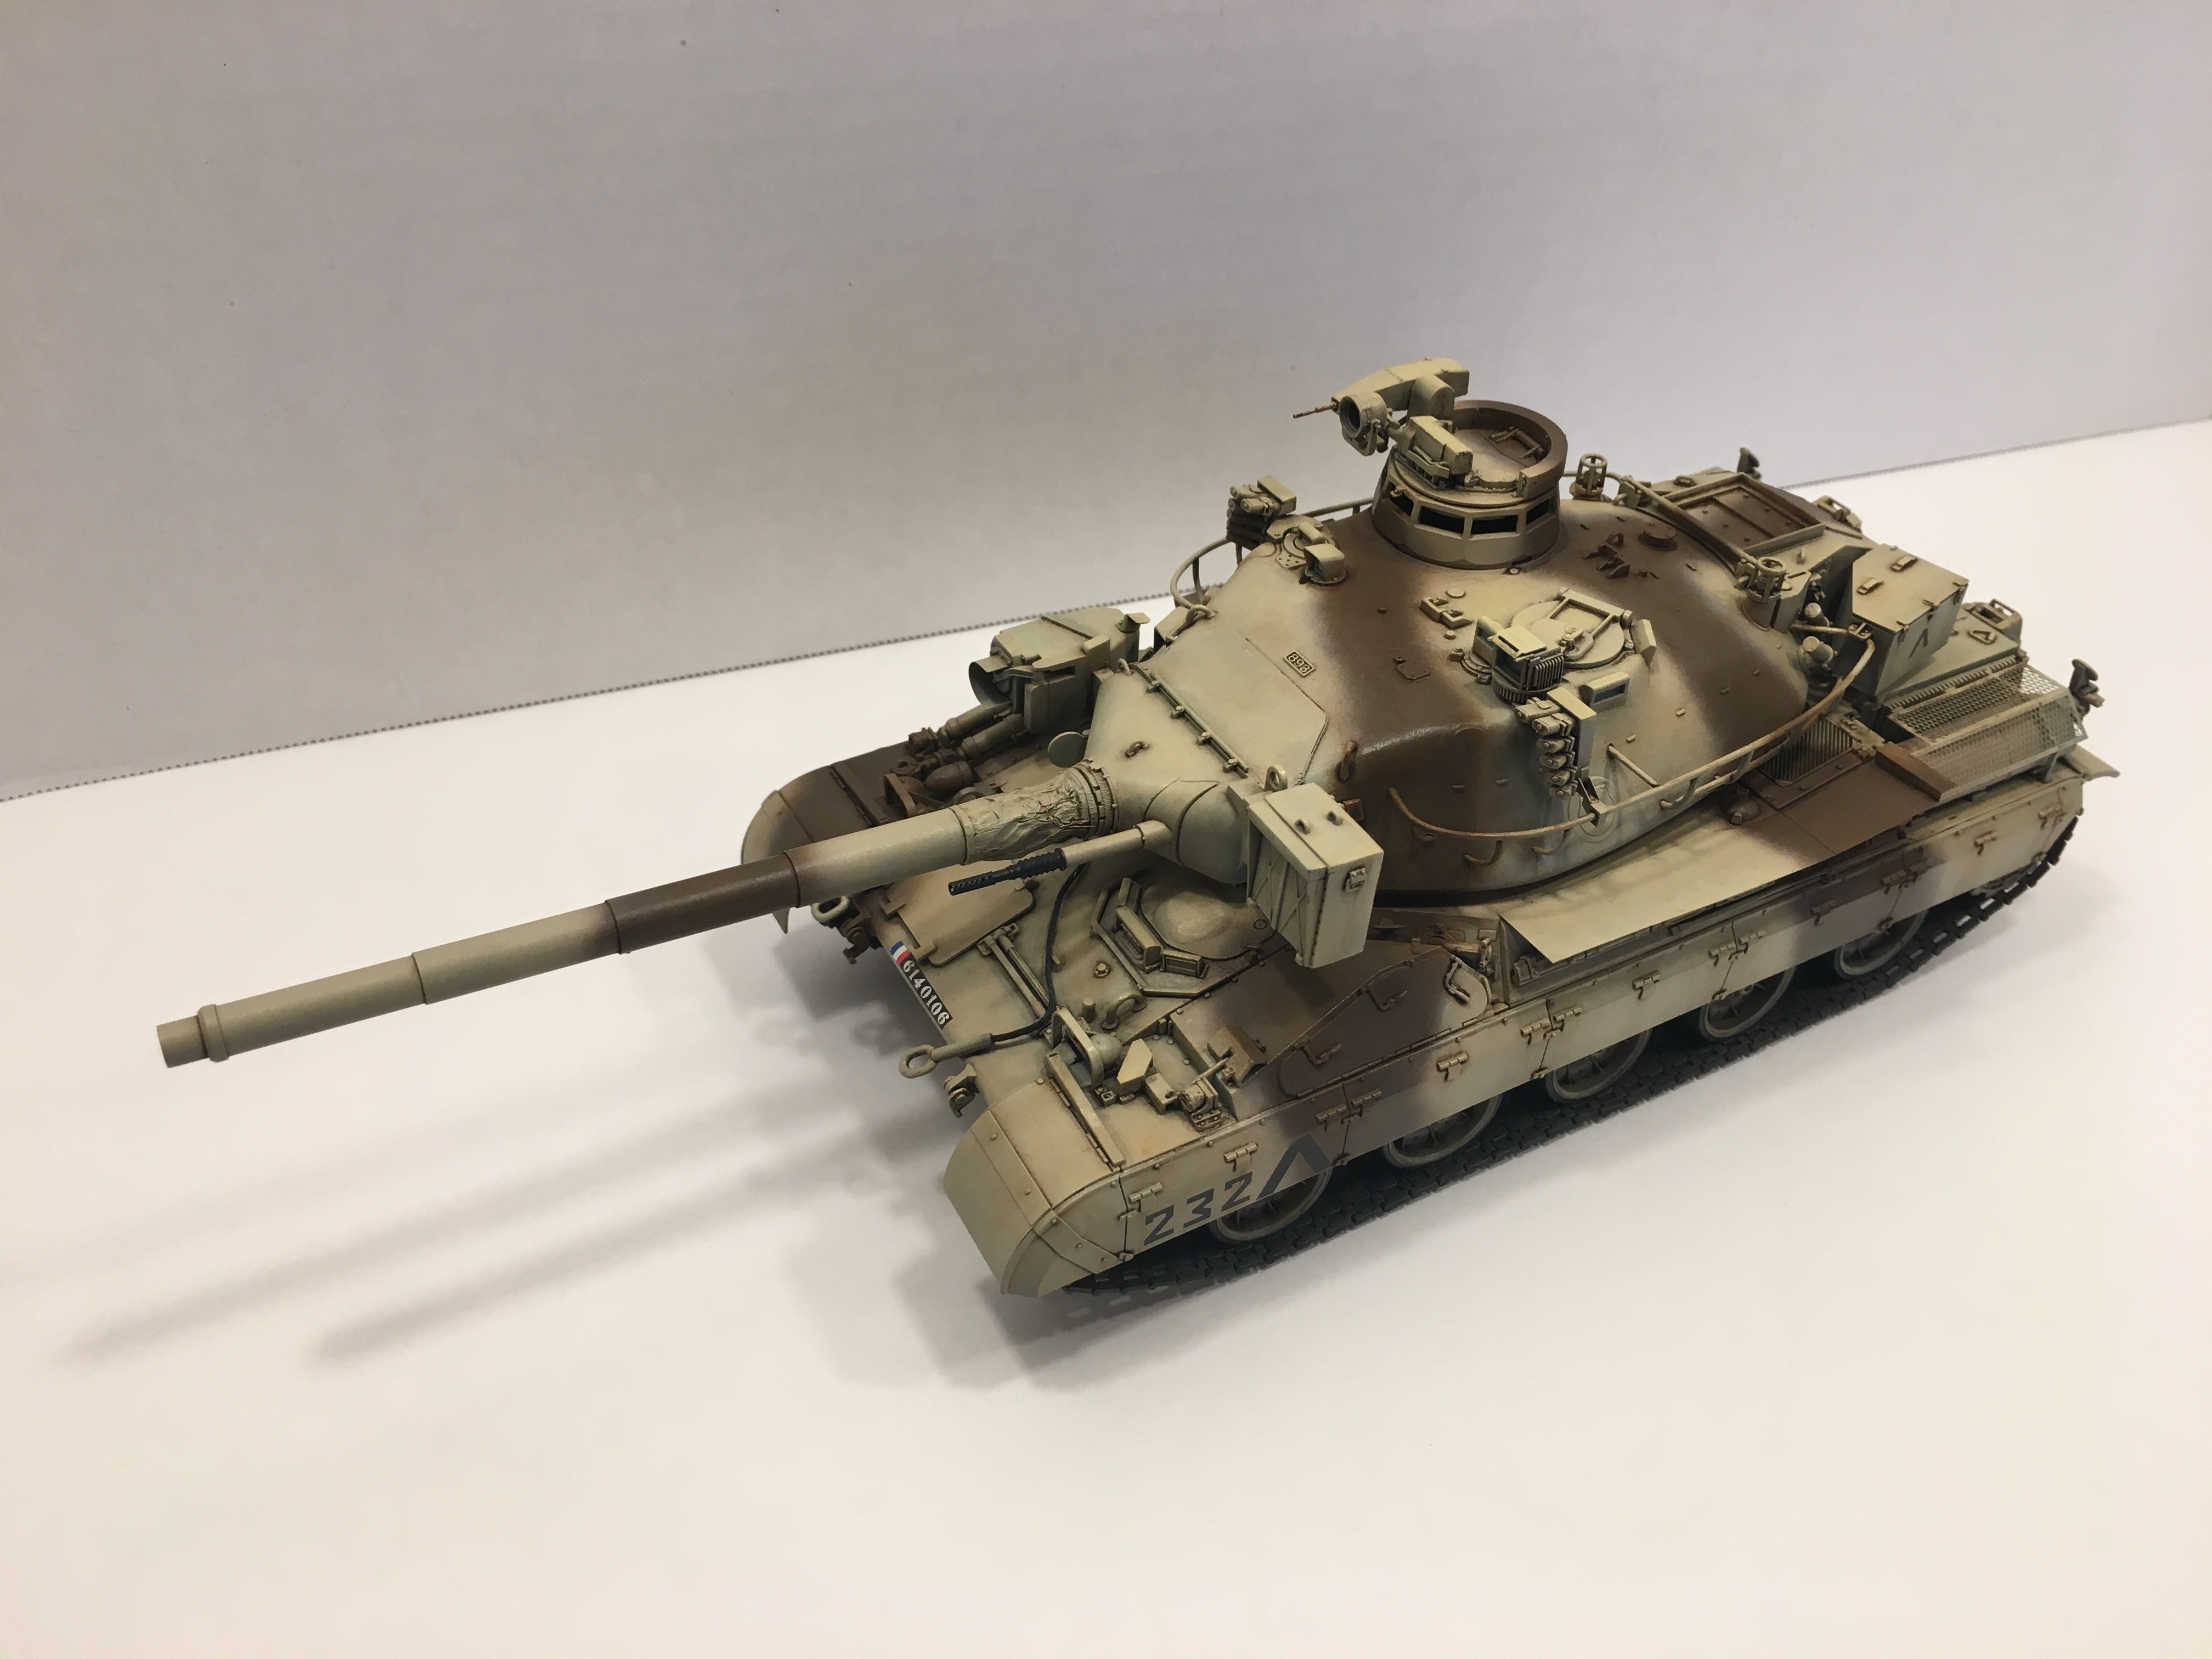
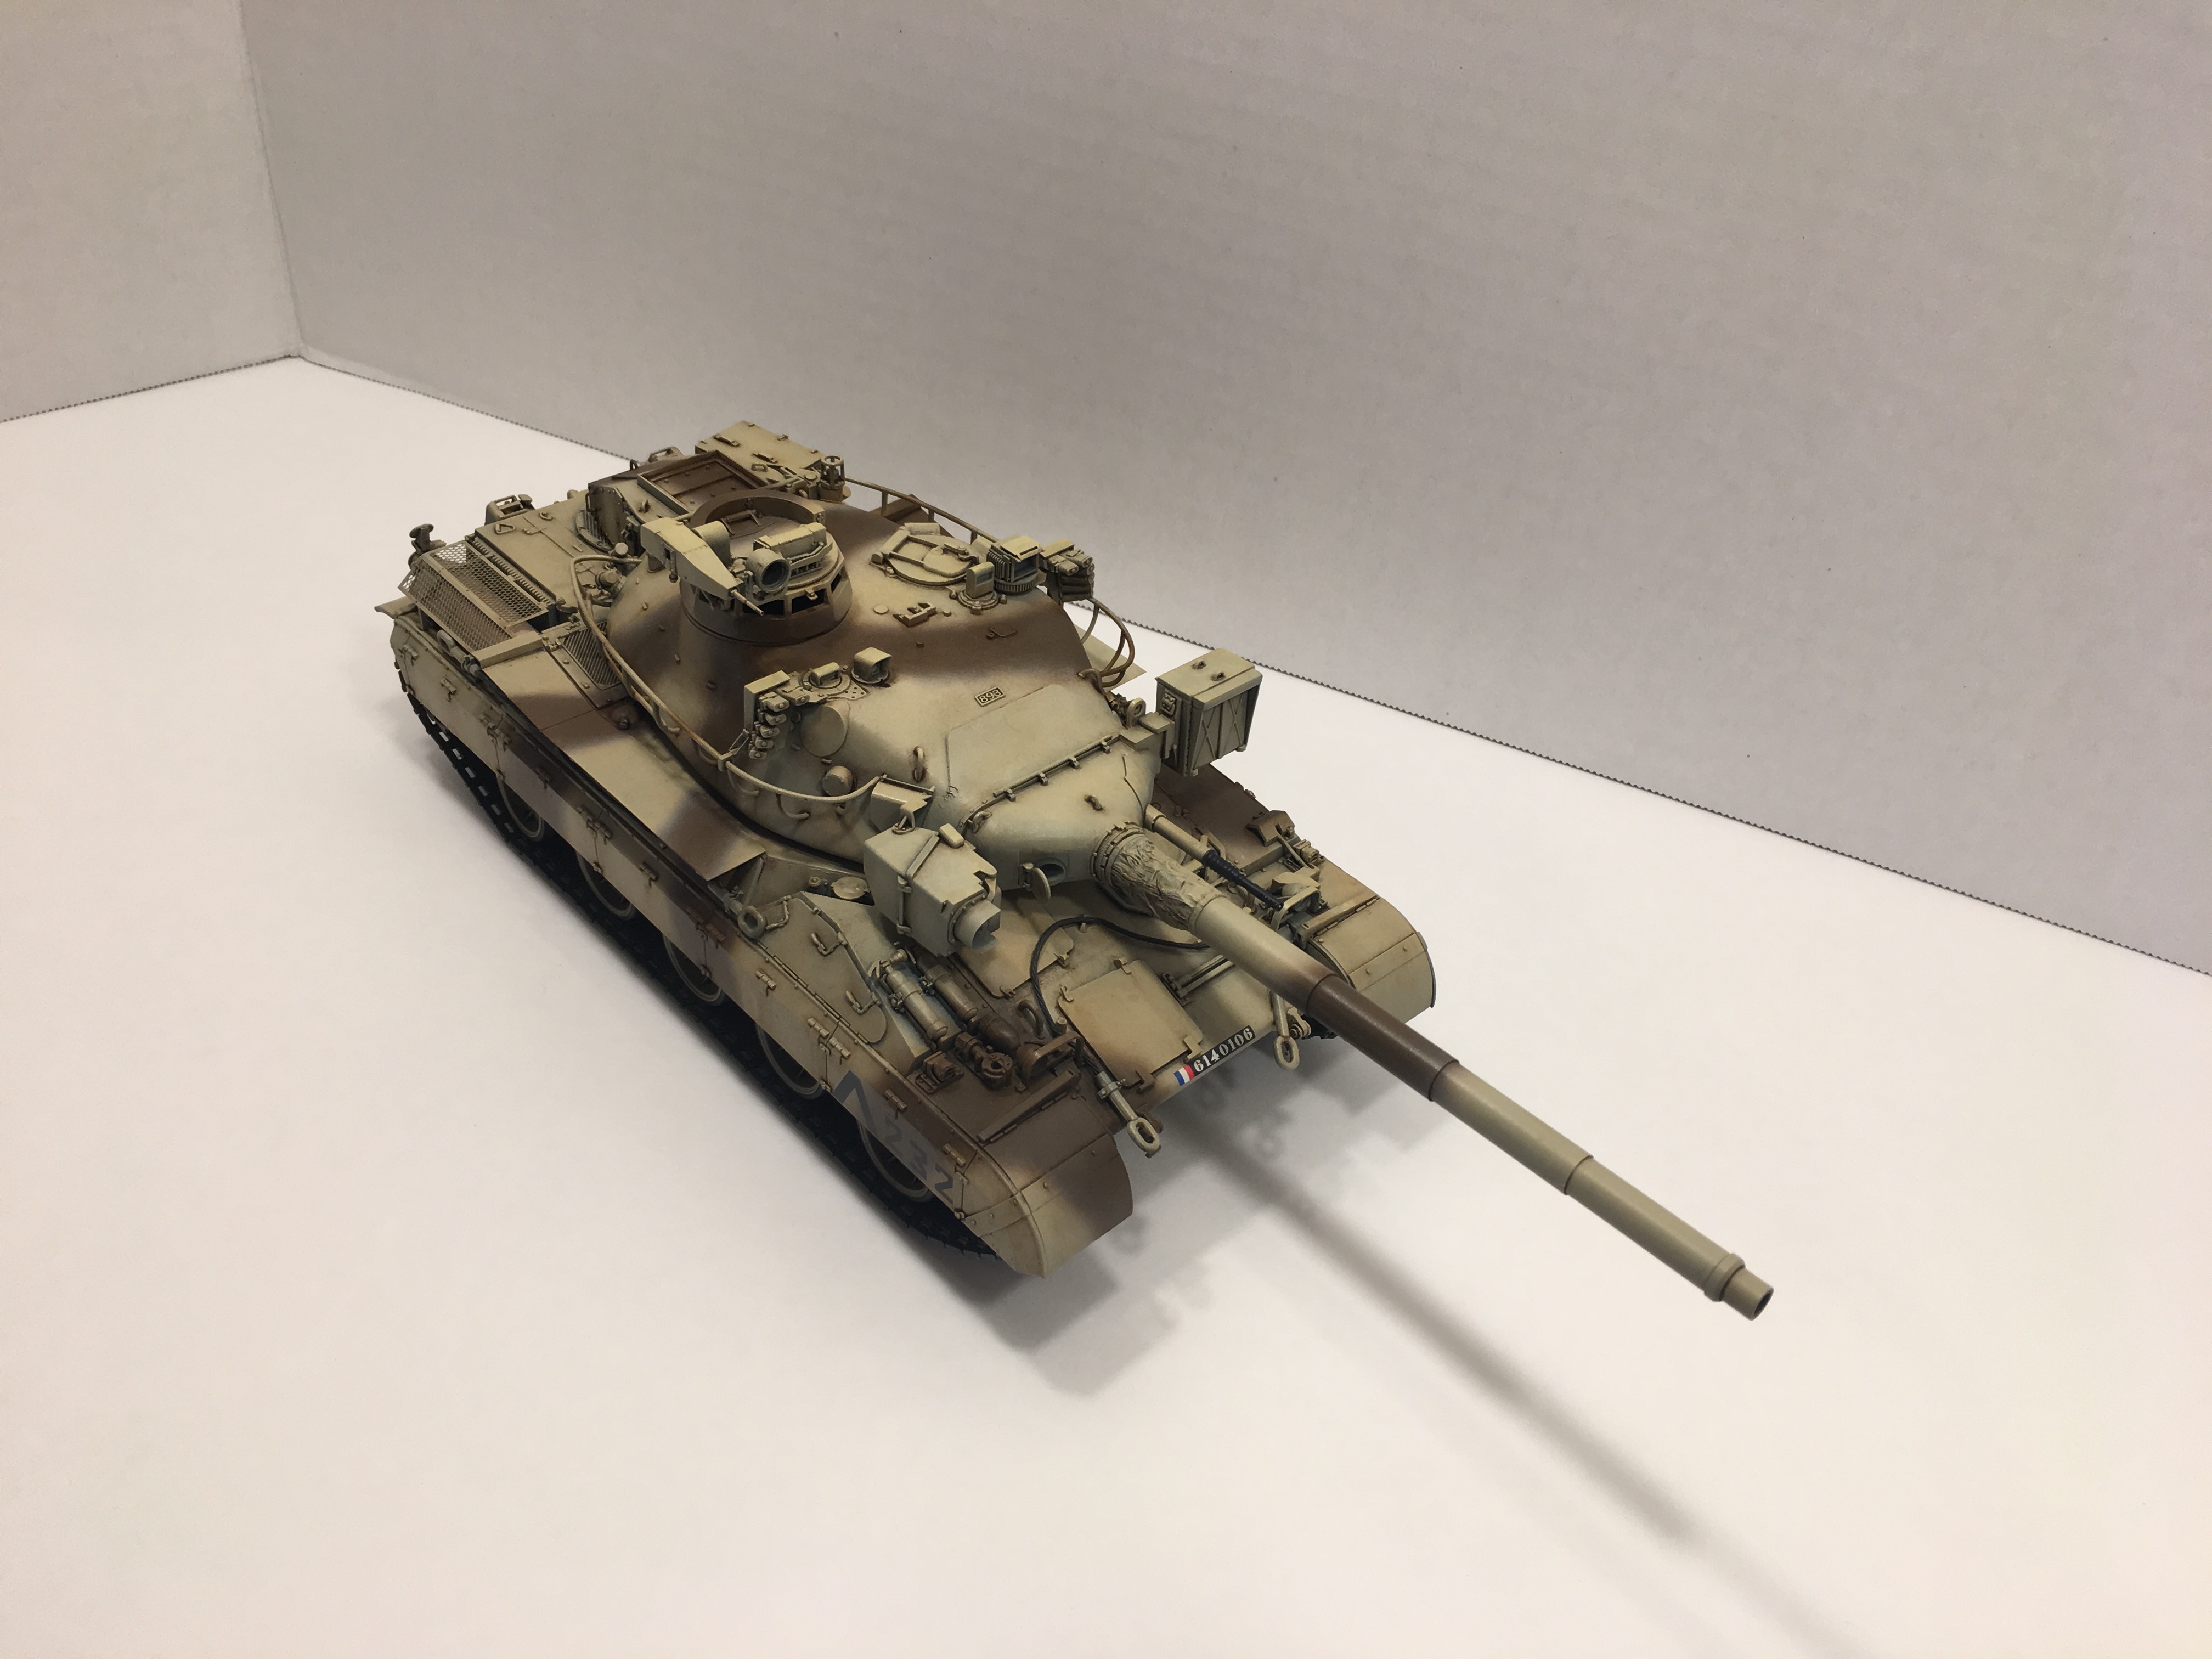
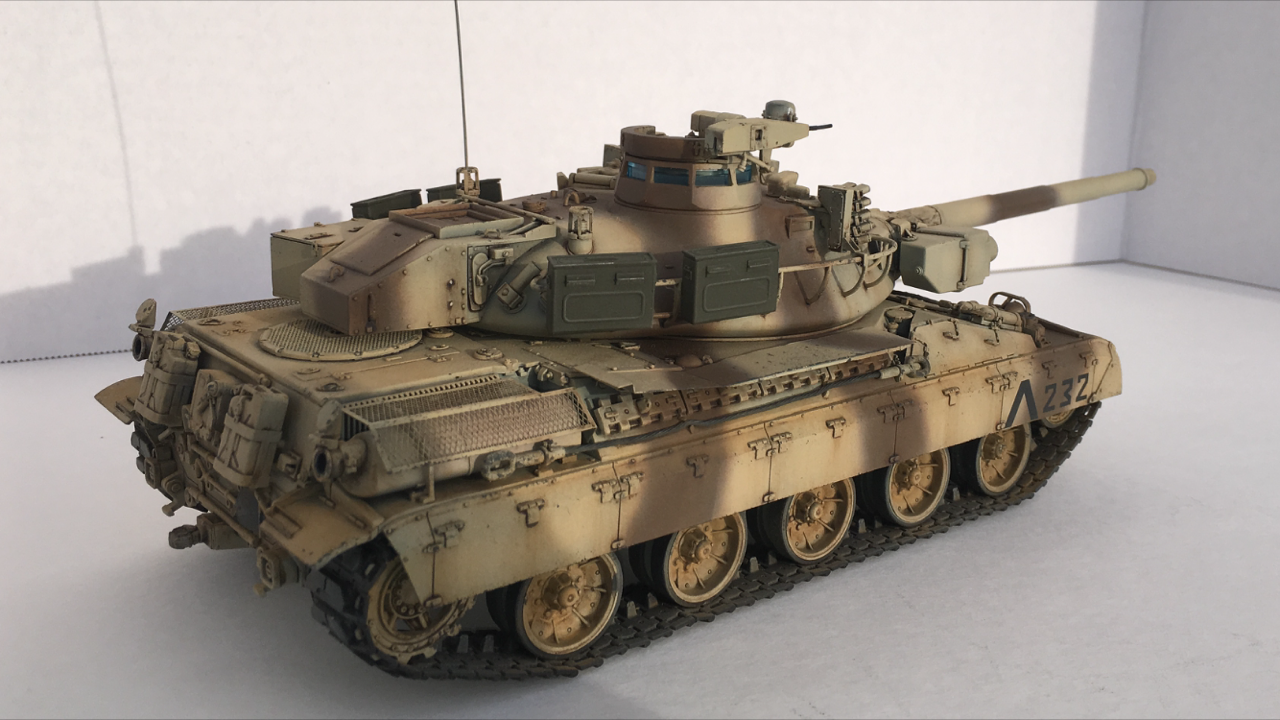
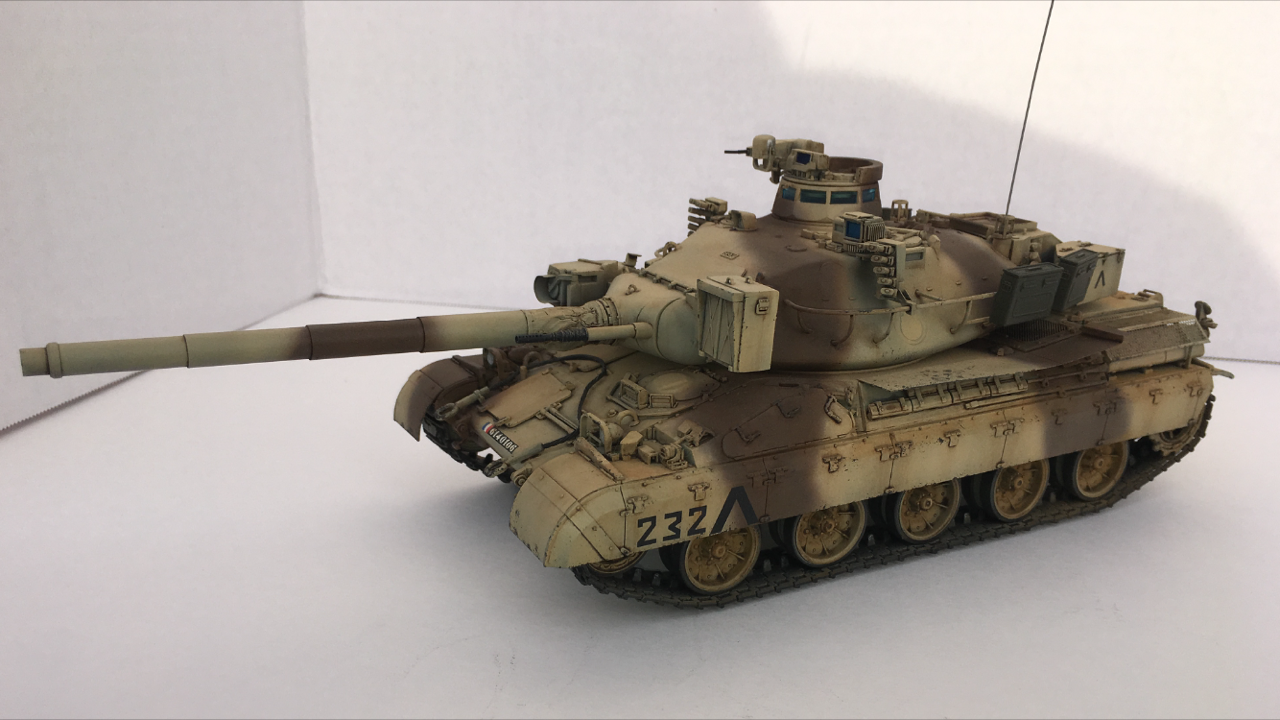
The model as it stands now. Wheels and turret are not glued yet.

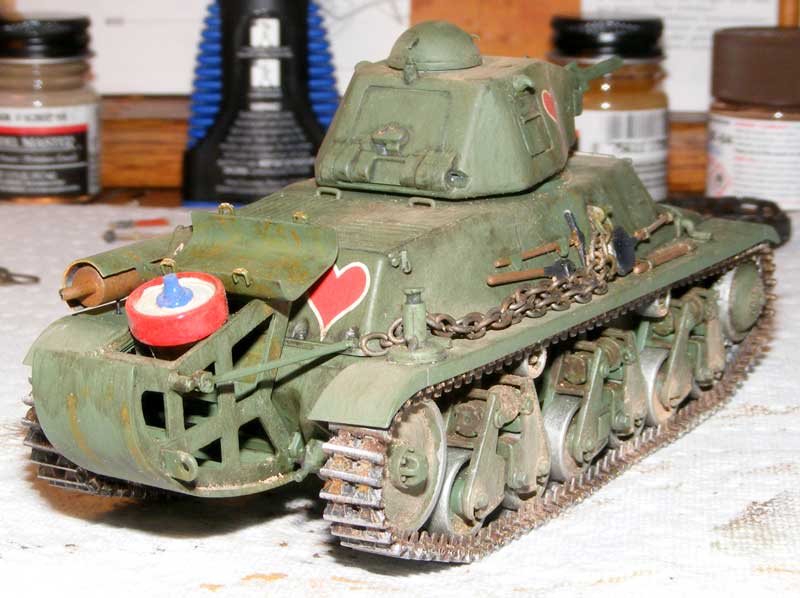
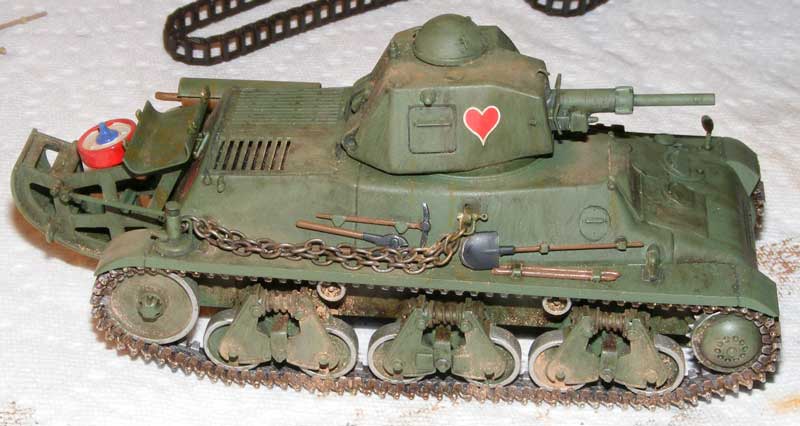
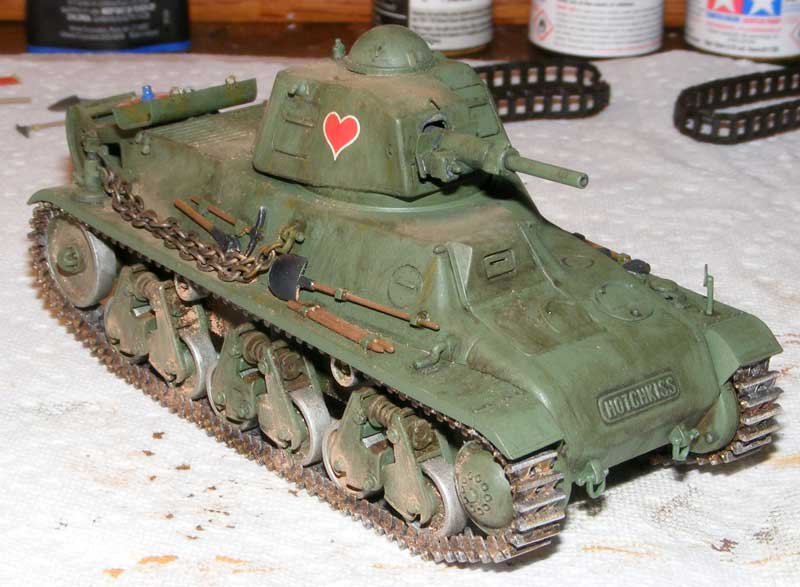
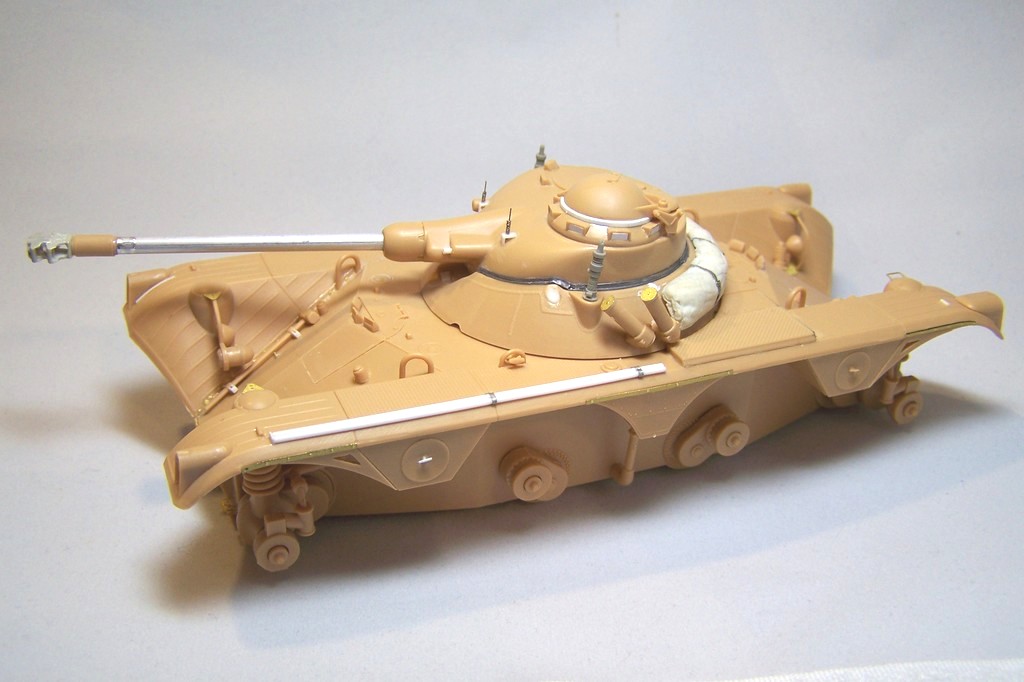
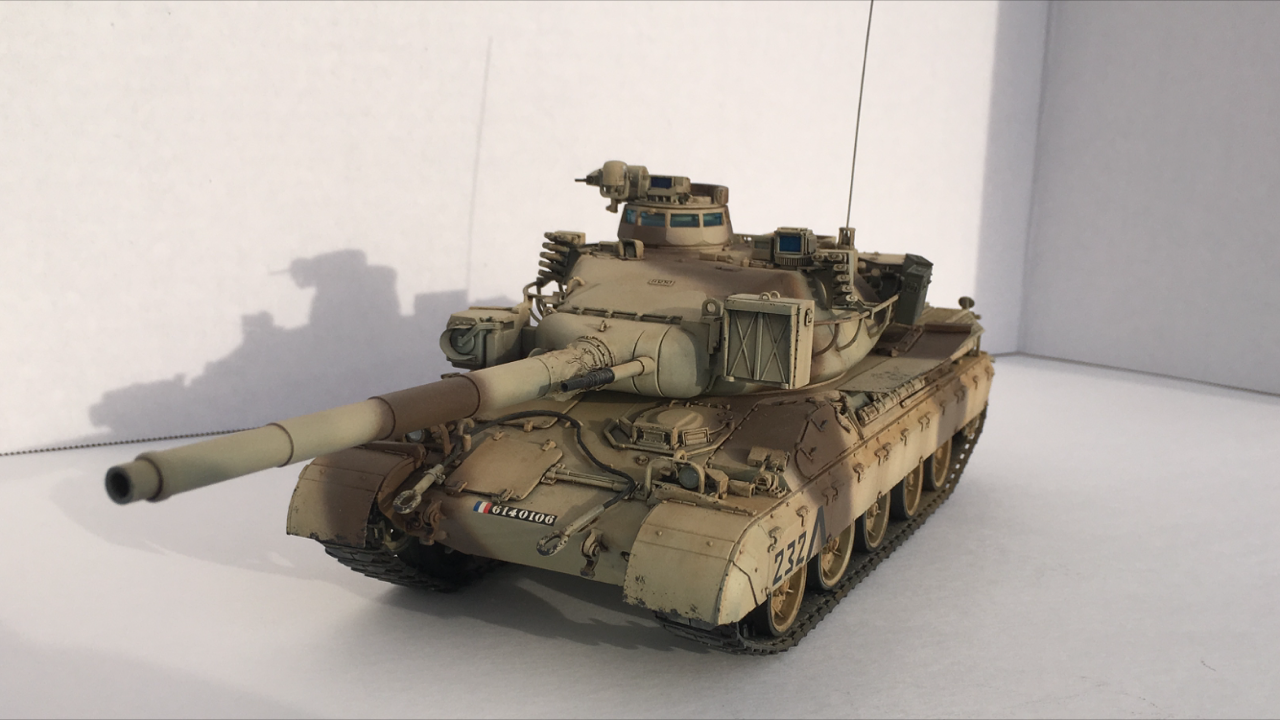
The next steps are some samding and some putty here and there, the installation of additional parts like fenders, some PE hinges, etc... and the vision slots. I made up my mind about other additions or modifications but opted to stay like this. Lets be honest: some things are simply to complicated to update and the questions remains if these would be worth it. It is and stays an old kit. So I hope that I will finish the build of the model this week to start painting.

Best Regards

Dennis
Hudson29
#460
Visit this Community
California, United States
Joined: September 16, 2014
KitMaker: 1,156 posts
Armorama: 1,024 posts
Posted: Tuesday, November 29, 2016 - 10:05 PM UTC
Dennis - Your Panhard is turning out very nicely, I'm much impressed by what you have been able to do with this old kit.

I also have a furry assistant who feels that cat hair is a required part of any model. Too bad she refuses to help locate tiny parts that find their way to the floor . . .
Chaman911
Visit this Community
United States
Joined: August 28, 2015
KitMaker: 319 posts
Armorama: 308 posts
Posted: Tuesday, November 29, 2016 - 10:12 PM UTC
Nice Hotchkiss Hudson. The tricolor wheel is a cool personal touch. Your weathering also looks good.
Olivier that EBR has to be getting close to done. That is one I will have to add to the stash. A very unique vehicle indeed.
DKdent, your scratch building has been very impressive! Keep that cat away from your finished models or a disaster could happen!

I did an oil wash on my 30B2 yesterday that came out well. I am going to try to complete a little weathering tonight and probably call it done. Will pics soon.
DKdent
Visit this Community
Rheinland-Pfalz, Germany
Joined: November 27, 2005
KitMaker: 182 posts
Armorama: 180 posts
Posted: Friday, December 02, 2016 - 01:26 AM UTC
Gentlemen,

thank you for your kind words. I am absolutely jealous about the progress everybody has achieved. I am still wrestling with this old dog, but at least some small progress has been made.


First I filled and sanded some gaps between the lower and upper hull. As the body has hundreds of rivets I used water-soluble Andrea Sculp to fill the gaps and cleaned excess putty with a moist brush. This way I could reduce the amount of sanding in the riveted areas. I also managed to join the turret halves and the fenders. Unfortunately these parts left some major gaps. The largest about 2mm. As this is not only a question of esthetics but also stability I will have to let everything dry very thouroughly before filling and sanding. Lets see if I can really start painting this weekend.

I also grabed two old figures which I bought with a lot of kits. The first owner unfortunately glued everything without cleaning the parts and painted them with strange colours. Lets see how much fun I will have sanding and filing the seams and removing the old colours. At least, I guess, they somewhat fit to the model....

Best Regards from Sandin` Dennis

Cheers
bison126
Visit this Community
Correze, France
Joined: June 10, 2004
KitMaker: 5,329 posts
Armorama: 5,204 posts
Posted: Friday, December 02, 2016 - 03:20 AM UTC
Hi all,
here are the latest pictures of the EBR. I'm calling this one done.


Olivier
Chaman911
Visit this Community
United States
Joined: August 28, 2015
KitMaker: 319 posts
Armorama: 308 posts
Posted: Friday, December 02, 2016 - 04:47 AM UTC
Looks great Olivier, good show. Thanks for answering all my questions!
DKdent that Panhard is looking pretty cool. I like the figures. I don't seem to see a lot of French figures in the shops.
I have made some progress myself. I need to get some pigments and dust/sand going, add the antenna, stowage boxes, and paint the periscopes. Hopefully next couple days call it done. I don't think I am going to do much chipping with this one.


I will work on brightening up the light for final photos.
bison126
Visit this Community
Correze, France
Joined: June 10, 2004
KitMaker: 5,329 posts
Armorama: 5,204 posts
Posted: Friday, December 02, 2016 - 01:18 PM UTC

Quoted Text

I don't think I am going to do much chipping with this one.


You're right. At the time the tanks were in the Gulf, the paint didn't wear that much. I have seen vehicles years later which still sported the camo without much chipping as well.

Thanks for the comment

Olivier
Chaman911
Visit this Community
United States
Joined: August 28, 2015
KitMaker: 319 posts
Armorama: 308 posts
Posted: Sunday, December 04, 2016 - 10:34 PM UTC
Ok I am calling this one done. I ended up doing a bit of chipping, hopefully not too much. weathered lightly with pigments and highly diluted Tamiya Buff and Desert Sand, also oils for streaking and highlighting. Hope you all like my work. If you have any critiques please offer them. It has been a pleasure to campaign with you guys. Thank you for helping me learn a bit about French armor.


bison126
Visit this Community
Correze, France
Joined: June 10, 2004
KitMaker: 5,329 posts
Armorama: 5,204 posts
Posted: Sunday, December 04, 2016 - 10:46 PM UTC
Your AMX 30 looks excellent Bryan. The weathering is not overdone.
But you've omitted to paint the vision block on the right side of the turret behind the smoke discharger

Olivier
Tojo72
Visit this Community
North Carolina, United States
Joined: June 06, 2006
KitMaker: 4,691 posts
Armorama: 3,509 posts
Posted: Sunday, December 04, 2016 - 10:55 PM UTC
Tomorrow's the last day of the campaign,and only four completes in the gallery ?

Nice builds all,but I guess we fell a little short on this one