Hosted by Richard S.
Poland 1939
Posted: Monday, July 17, 2017 - 05:09 AM UTC
Tat - Glad to see you with your armored car. These are certainly an interesting early war design and it is great to have two kits of it out. I look forward to seeing what you do with it.
Posted: Monday, July 17, 2017 - 05:11 AM UTC
Goof - we've still got better than a week to go if you care to have a try are the finish.
Posted: Monday, July 17, 2017 - 05:13 AM UTC
Lapman - Welcome aboard with your TriStar kit. Are you making good progress?
Posted: Monday, July 17, 2017 - 05:16 AM UTC
Stephan - Your Panzer II is looking good and the base is a pip. I added the Fruils to an Afrika Corps Tamiya II last year and it made a world of difference as it does on yours.
Posted: Monday, July 17, 2017 - 05:18 AM UTC
Tim - Welcome aboard with your armored car. We are certainly seeing some kits that are rarely built here and that is a treat on its own.
Posted: Tuesday, July 18, 2017 - 03:39 PM UTC
Quoted Text
Tat - Glad to see you with your armored car. These are certainly an interesting early war design and it is great to have two kits of it out. I look forward to seeing what you do with it.
Thanks Paul. Over the weekend I've finished the upper hull.
Since then I have married the upper and lower hulls, put on primer, and today sprayed it black all over. Hope to start on the base color by tomorrow.
Cheers,
Tat
alewar

Joined: December 27, 2006
KitMaker: 773 posts
Armorama: 765 posts

Posted: Tuesday, July 18, 2017 - 06:36 PM UTC
Posted: Tuesday, July 18, 2017 - 06:50 PM UTC
I'd say it looks outstanding as it is, Alvaro,I would vote leave it!!! 

TimReynaga

Joined: May 03, 2006
KitMaker: 2,500 posts
Armorama: 297 posts

Posted: Friday, July 21, 2017 - 05:25 AM UTC
I agree! Alvaro, your Panzer 1 looks just right! 

TimReynaga

Joined: May 03, 2006
KitMaker: 2,500 posts
Armorama: 297 posts

Posted: Friday, July 21, 2017 - 05:25 AM UTC
I’m no expert on Polish vehicle paints, but Tamiya XF-81 Dark Green 2 (RAF), Tamiya FF-64 Red Brown, and Tamiya XF-57 Buff with some XF-60 Dark Yellow seemed like reasonable matches for the colors.


I don't think these markings were tightly standardized, but I did my best to copy the scheme on the box.


I don't think these markings were tightly standardized, but I did my best to copy the scheme on the box.
TimReynaga

Joined: May 03, 2006
KitMaker: 2,500 posts
Armorama: 297 posts

Posted: Saturday, July 22, 2017 - 02:41 AM UTC
Here’s the assembled car with the tires and other details painted.

The camouflage paint job is just a bit rough, but I figure since the full sized vehicles were hand painted too, it might just work in this small scale.

The camouflage paint job is just a bit rough, but I figure since the full sized vehicles were hand painted too, it might just work in this small scale.
Posted: Saturday, July 22, 2017 - 03:40 AM UTC
Nice finish on that Pz I Alvaro -- I'd second Clayton the mud, let it stay. You just need to get it the ground color close to it if you are place it on a base.
Tim, your hand-painted camo looks fine.
Cheers,
Tat
Tim, your hand-painted camo looks fine.
Cheers,
Tat
Posted: Saturday, July 22, 2017 - 03:50 AM UTC
Yes, Tim, I'd say you nailed it!
TimReynaga

Joined: May 03, 2006
KitMaker: 2,500 posts
Armorama: 297 posts

Posted: Saturday, July 22, 2017 - 04:15 PM UTC
Posted: Sunday, July 23, 2017 - 12:01 AM UTC
Sweet! Cool kit!
alewar

Joined: December 27, 2006
KitMaker: 773 posts
Armorama: 765 posts

Posted: Sunday, July 23, 2017 - 03:51 AM UTC
Clayton,Tim,Tat thanks for yours comments.
I declare my Panzer I done, add some actual rust (from an old iron pipe), some chipping and add also the oil and gas stains. Bring some nude metal to the edges and tone down a bit the mud.
The actual oxide looks more strong in the pics that in person.
Thanks to all for the comments along the campaing, and now waiting for Poland 1944

Regards from the south
Álvaro


I declare my Panzer I done, add some actual rust (from an old iron pipe), some chipping and add also the oil and gas stains. Bring some nude metal to the edges and tone down a bit the mud.
The actual oxide looks more strong in the pics that in person.
Thanks to all for the comments along the campaing, and now waiting for Poland 1944

Regards from the south
Álvaro


Posted: Sunday, July 23, 2017 - 09:06 AM UTC
Progress update. 


Posted: Monday, July 24, 2017 - 04:06 AM UTC
Alvaro - I love your Panzer! It has many great touches that make it a convincing model including one I have not seen before - rust on the shovel. What a great idea, one I may "borrow" in future . . .
Great job!
Great job!
Posted: Monday, July 24, 2017 - 04:11 AM UTC
Tim - I like your armored car. I'm not sure what colors the Poles might have used in 1939 but yours look about right. I too tried to match artist's colors on my 7TP. One of the paint makers is selling Polish armor colors. It would be interesting to learn how they arrived at the hues they are selling.
Posted: Monday, July 24, 2017 - 04:12 AM UTC
Lap Man - Good progress on your Panzer. With an interior yet!
Posted: Monday, July 24, 2017 - 04:22 AM UTC
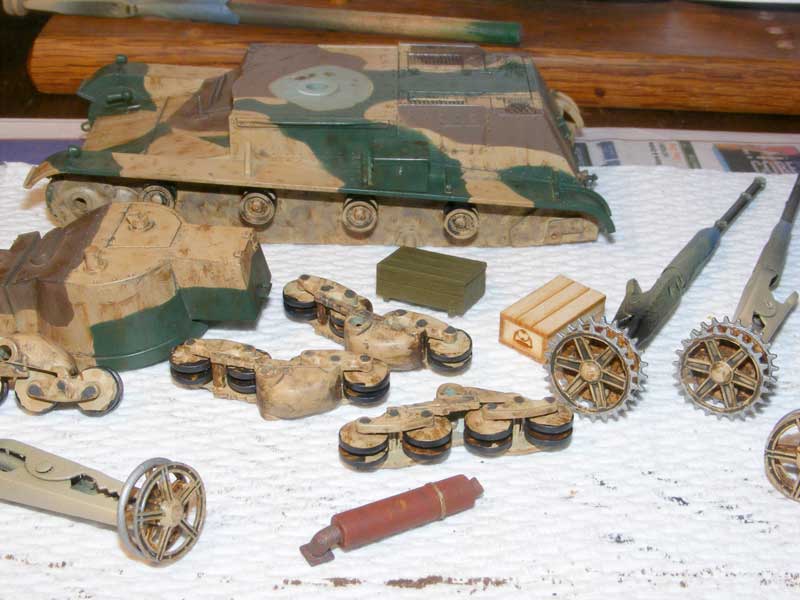
I have been making some progress on my own 7TP project. I shot it with a sandy tan color and used a masking material new to me called Panzer Putty that is a lot of fun to work with. My airbrush is still mad at me so I'm still using spray bombs. I can see that this new masking material would really would well with the airbrush. Here are a few pics:
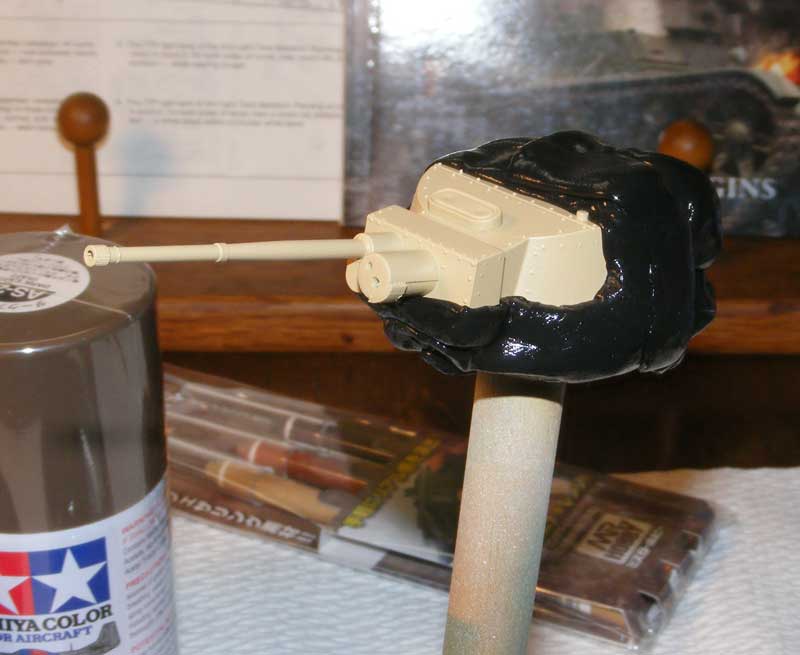
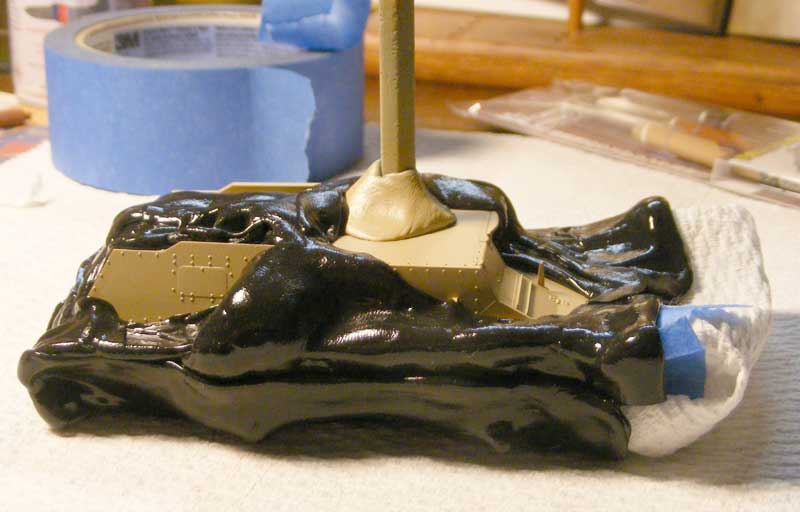
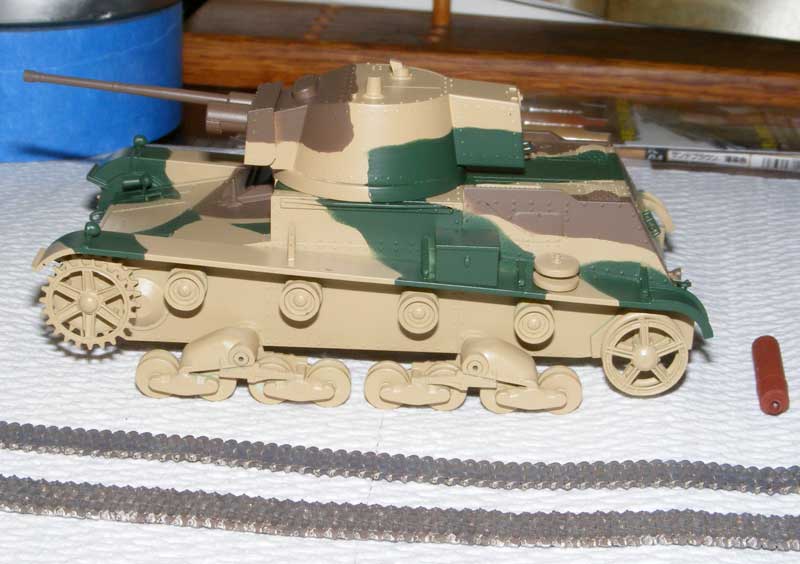
The lines came out harder than I would have liked. The colors were matched to illustrations in publications. Both the brown & the green came out darker that the cap on the can. We'll just have to see how they look after some further work . . .


The lines came out harder than I would have liked. The colors were matched to illustrations in publications. Both the brown & the green came out darker that the cap on the can. We'll just have to see how they look after some further work . . .
Posted: Monday, July 24, 2017 - 04:29 AM UTC
Here are more pics after some additional work to the model. I lost one of the spare road wheels that is supposed to be mounted to one of the fenders and decided to make up some wooden boxes to hide the missing bit and add some fun to the model. Stowage needs to be lashed down so some lead wire was pressed into service to act as rope.
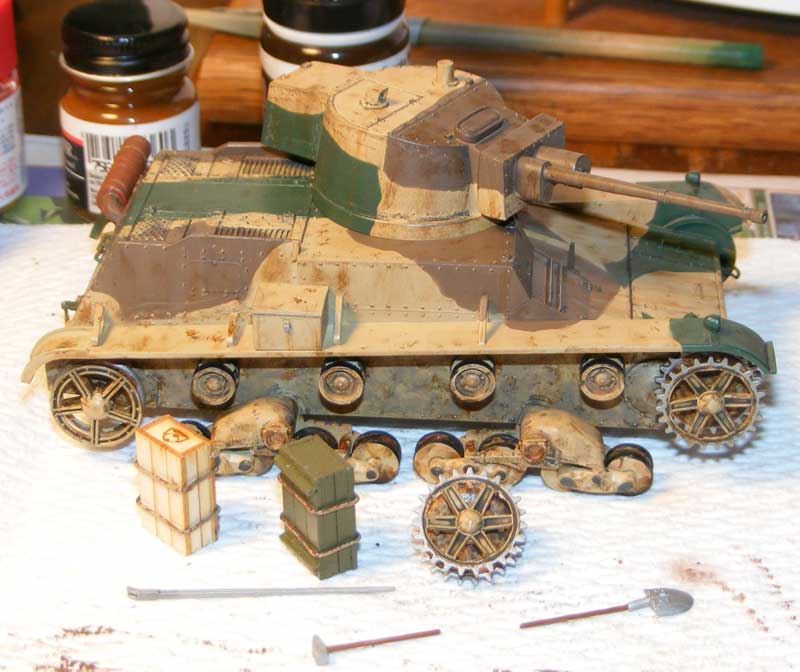
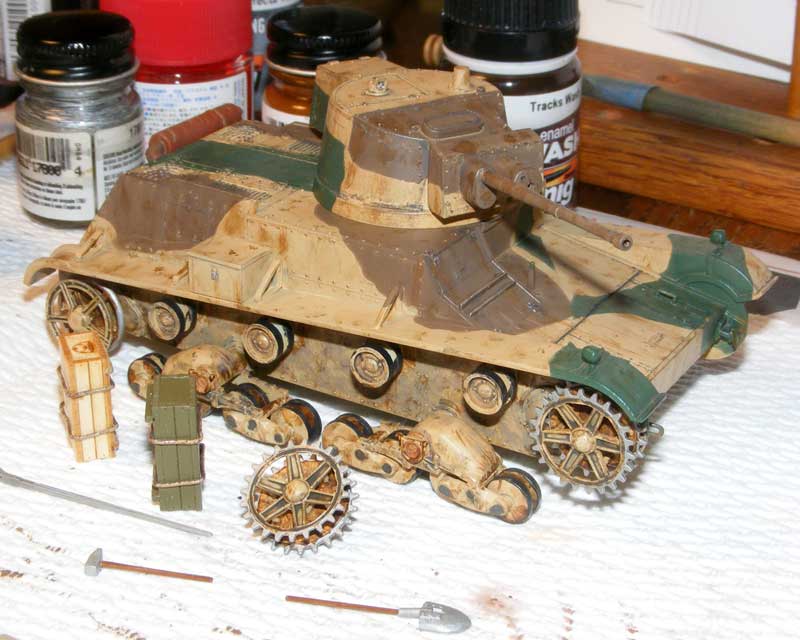
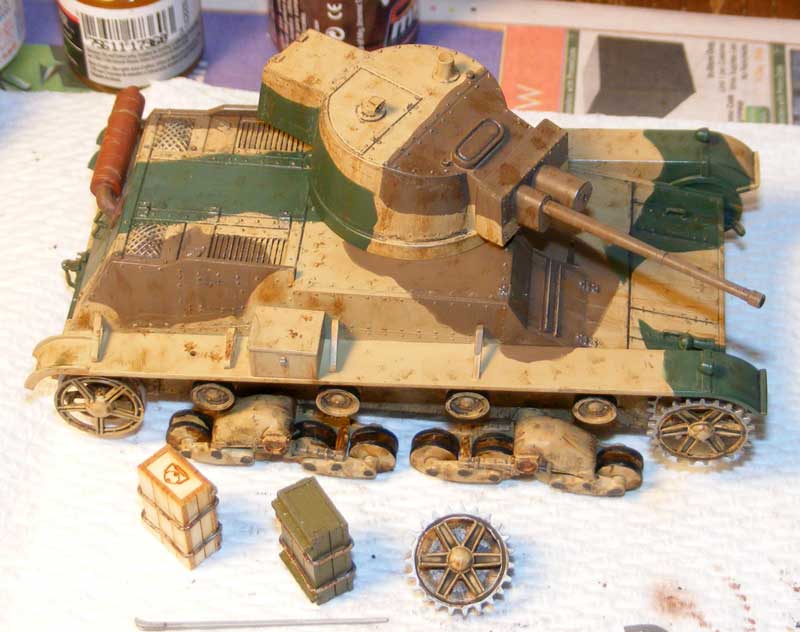
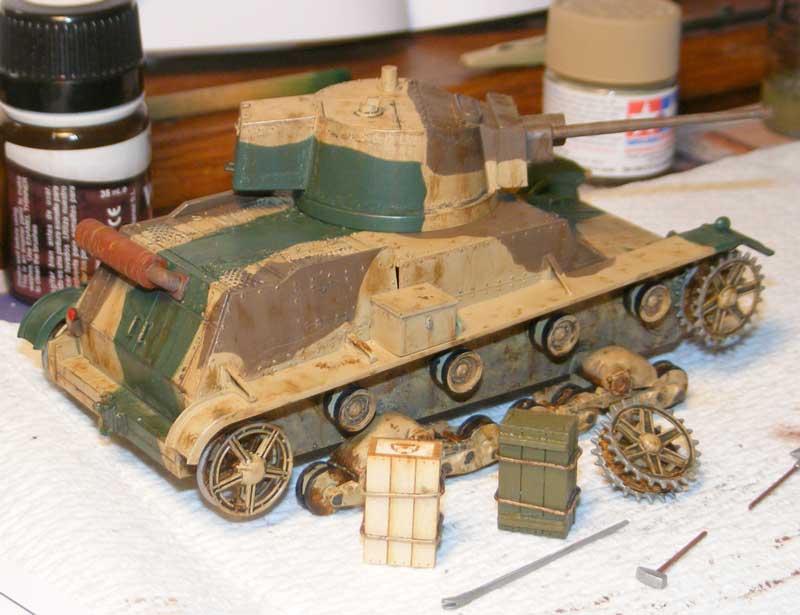
There is still more work to do but it is coming along.


There is still more work to do but it is coming along.
Posted: Monday, July 24, 2017 - 05:53 PM UTC
Nice camo job, Paul! What did you use to mask, and is it reusable?
alewar

Joined: December 27, 2006
KitMaker: 773 posts
Armorama: 765 posts

Posted: Monday, July 24, 2017 - 08:16 PM UTC
Thanks Paul, nice camo job!, like the colors that you use.Waiting for the end of the work.
Regards
Álvaro
Regards
Álvaro
Posted: Monday, July 24, 2017 - 09:02 PM UTC
I used a product called PANZER PUTTY that I found online someplace. It is odd stuff. You can cut it with scissors, pull it slowly & it stretches, pull it quickly & it breaks. Leave it and it slowly flows with gravity into corners & detail. Roll it into a snake and it can be positioned just as you like it. It is reuseable, does not stick to paint and is easy to remove.
You do need to play with it some to get used to the way it acts. Keep in mind that it is in constant motion so it should be applied shortly before shooting the paint.
You do need to play with it some to get used to the way it acts. Keep in mind that it is in constant motion so it should be applied shortly before shooting the paint.
 |


