#305
Christchurch, New Zealand
Joined: February 01, 2006
KitMaker: 1,673 posts
Armorama: 120 posts
Posted: Sunday, February 05, 2017 - 04:36 AM UTC
Missouri, United States
Joined: December 02, 2016
KitMaker: 38 posts
Armorama: 22 posts
Posted: Monday, February 06, 2017 - 07:18 AM UTC
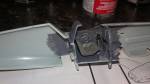
Finally got the cockpit done. This is one sow's ear that won't be made into a purse. The cockpit is very plan and the parts don't fit the fuselage. This is the left side panel.
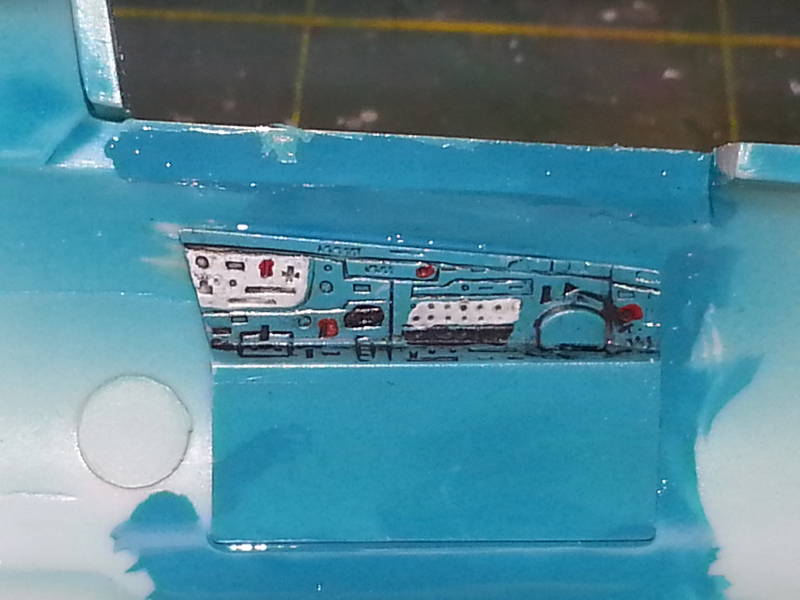
Had to add some plastic to raise the cockpit floor up and then had to sand down the bottom of the bang seat so it did not sit too high.
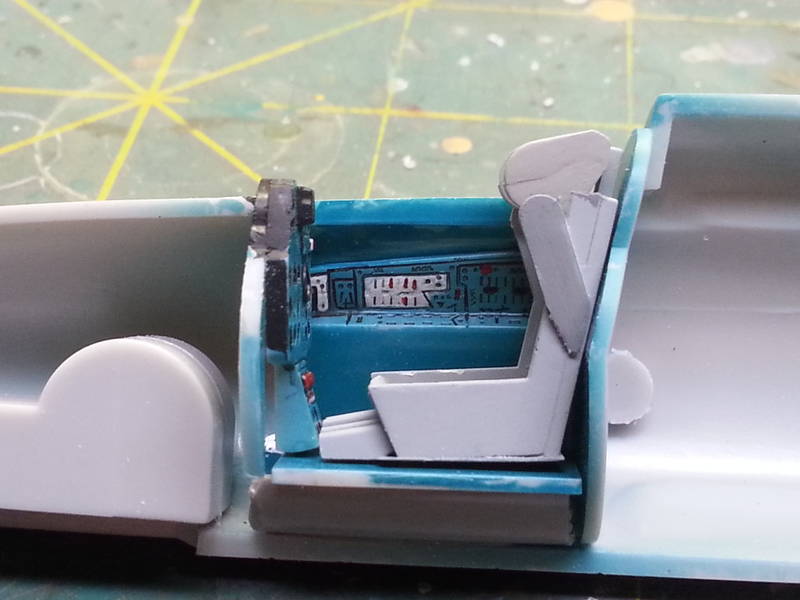
The instrument panel is there. It's an instrument panel.

Got the fuselage half's together and glued.
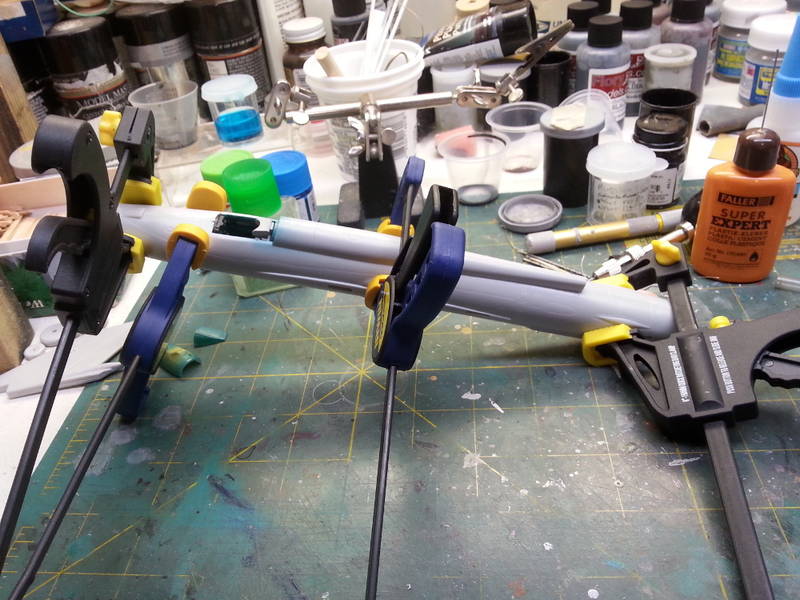
Hope the rest of the build goes together better.
#454
Georgia, United States
Joined: July 10, 2016
KitMaker: 1,273 posts
Armorama: 1,138 posts
Posted: Monday, February 06, 2017 - 08:30 PM UTC
Hang in there, Alan...remember, this is a FUN hobby!

"I can make armored cars, safe and unassailable...and behind these our infantry will be able to follow quite unharmed and without any opposition."
-Leonardo da Vinci, 1487
Noord-Holland, Netherlands
Joined: January 27, 2014
KitMaker: 200 posts
Armorama: 95 posts
Posted: Thursday, February 09, 2017 - 01:45 AM UTC
My entry a KP Kovozávody Prostejov 1:72 CS-199

Bought 30+ years ago i think, raised panel and rivets but actually a nice model of this unique version of the Bf-109
Interior has some detailing

i added a bit of straps and some other stuf not really visible on the picture

Hand painted in silver,..


Nou the big issue,..
30 year old kit,.. Yellow decals included

There is a trick but in winter time their is hardly any sunny days,.. so i wait (it seems to work,..slowly)

more to follow
Lego, building blocks for life
Namabiiru
 Associate Editor
#399
Rhode Island, United States
Joined: March 05, 2014
KitMaker: 2,888 posts
Armorama: 1,920 posts
Posted: Thursday, February 09, 2017 - 03:09 AM UTC
Nice entry, Jan!
You might want to also make sure to spray the decals with some clear spray (I use floor polish if you can get that). My experience has been that decals that old will fall apart once they come loose from the paper.
Good luck!

Noord-Holland, Netherlands
Joined: January 27, 2014
KitMaker: 200 posts
Armorama: 95 posts
Posted: Thursday, February 09, 2017 - 04:13 AM UTC
Thanks for the reminder Mark, i have clear and will use it
Lego, building blocks for life
Missouri, United States
Joined: December 02, 2016
KitMaker: 38 posts
Armorama: 22 posts
Posted: Monday, February 13, 2017 - 07:19 AM UTC
I had to do some surgery on the kit. The ring on the intake was missing. I decided to use the nozzle from the tail to cut a ring from.
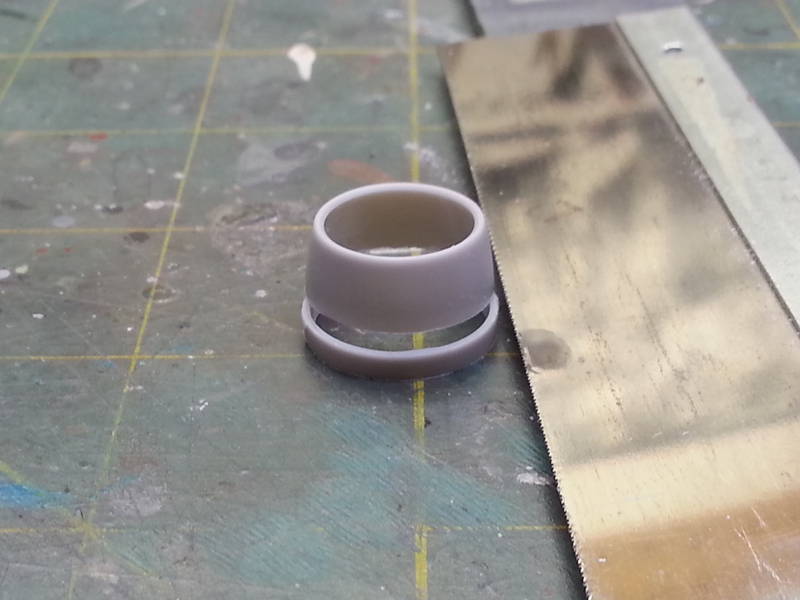
Glued and sanded to shape.
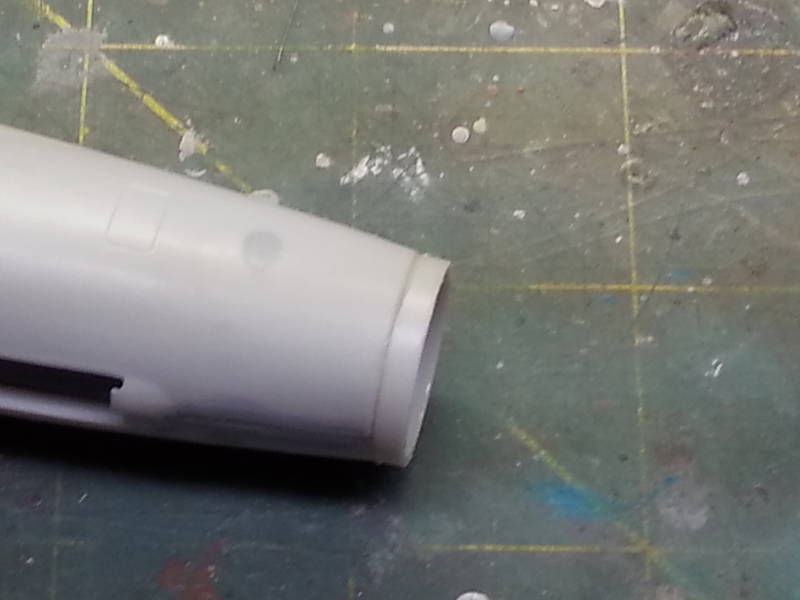
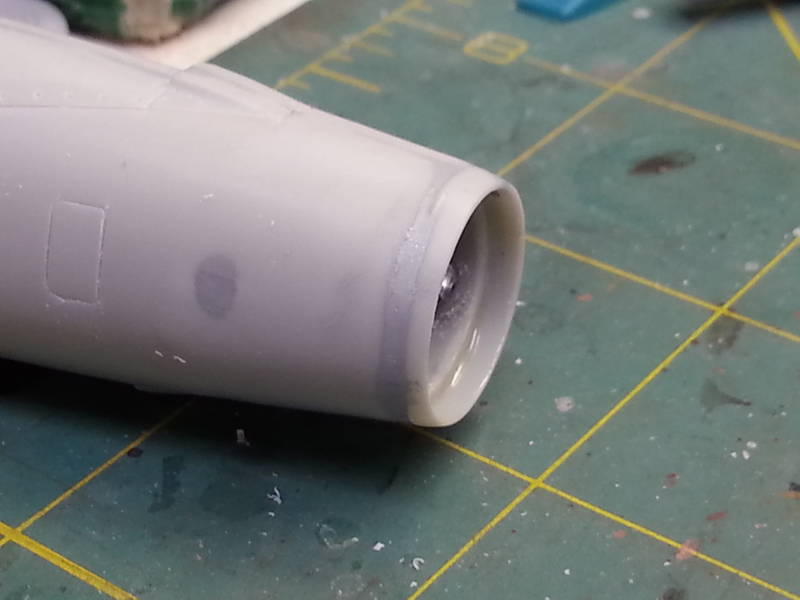
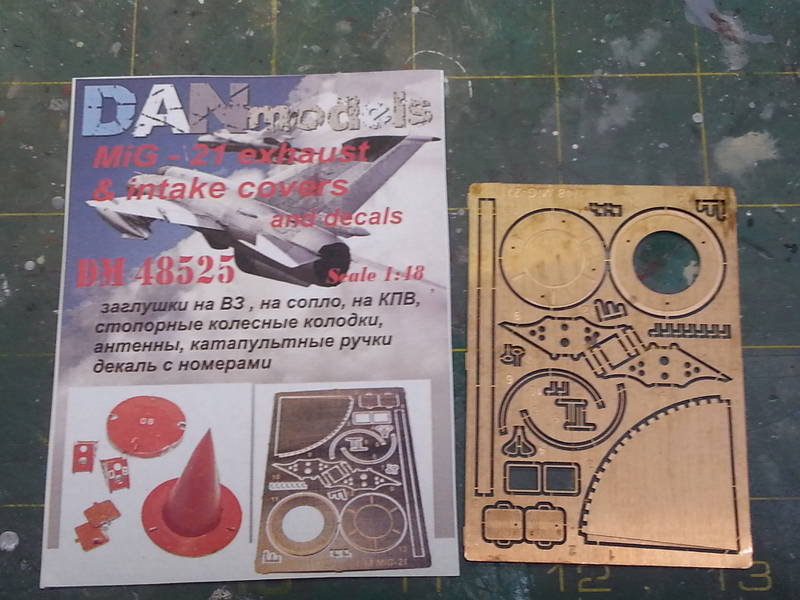
I'll be using an Intake and Exhaust PE set from DanModels to cover up the intake and exhaust.
The rivet is very shallow so I decided to use a punch and make all the rivet holes a little bigger. This took some time.

I also deepen the panel lines some more.
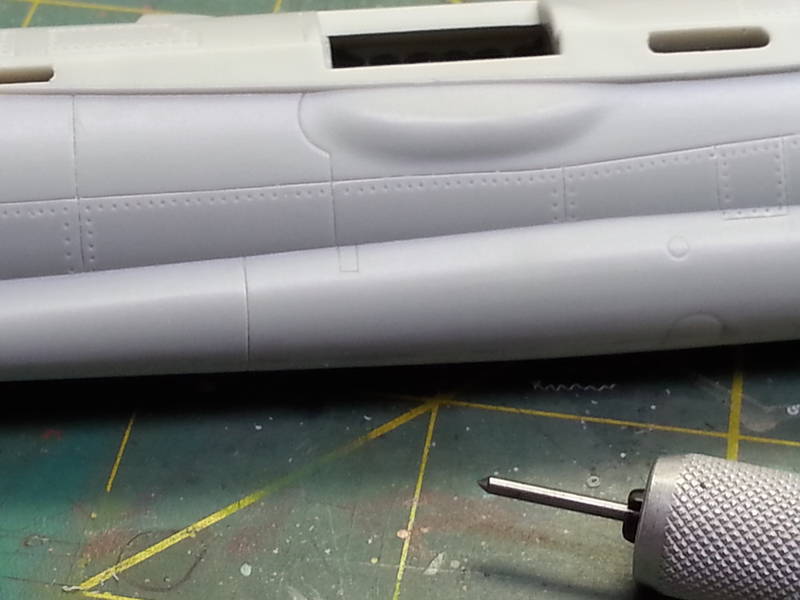
That's all for this update.
Namabiiru
Associate Editor #399
Rhode Island, United States
Joined: March 05, 2014
KitMaker: 2,888 posts
Armorama: 1,920 posts
Posted: Monday, February 13, 2017 - 06:53 PM UTC
That's going to look great when it's done, Alan!
Missouri, United States
Joined: December 02, 2016
KitMaker: 38 posts
Armorama: 22 posts
Posted: Tuesday, February 14, 2017 - 01:25 AM UTC
Quoted Text
That's going to look great when it's done, Alan!
Thanks Mark
Alan
Walloon Brabant, Belgium
Joined: August 13, 2016
KitMaker: 15 posts
Armorama: 14 posts
Posted: Wednesday, February 15, 2017 - 11:48 AM UTC
This is my entry : Miniart T-70.

Looks like a nice little kit.
Colorado, United States
Joined: December 25, 2004
KitMaker: 3,770 posts
Armorama: 2,263 posts
Posted: Friday, February 17, 2017 - 08:06 AM UTC
Small start on the ScaleLink Trench Mortar; removed the excess casting material from all the resin pieces. Next is to clean up the white metal parts. The instructions are mediocre at best - reference pictures are a MUST!

More to follow.
Mike

Colorado, United States
Joined: December 25, 2004
KitMaker: 3,770 posts
Armorama: 2,263 posts
Posted: Sunday, February 19, 2017 - 07:15 AM UTC
I began the assembly last night. As I said before, the instructions are pretty bad. It took me quite a bit to sort out how the parts go together.

All of the "wood" parts are primed and dry fitted there (except the two larger pieces that have the metal rods between each other). I picked up Vallejo's Wood and Leather paint set some time ago and I'm sold on it. I could go the easy way and paint EVERYTHING Green Moss like the picture from the museum...but that's boring. I'll use the Vallejo set and do the "wood" right. The mortar parts will be Green Moss, with the exception of the wood handles...those too will be painted like wood.
Really starting to look like something!

(bonus points - what is the white thing in the upper right corner?)
Oh, close up of the base and support:

Mike
California, United States
Joined: March 03, 2016
KitMaker: 142 posts
Armorama: 137 posts
Posted: Sunday, February 19, 2017 - 08:32 AM UTC
Some progress on my Panzer II D during the French Campaign, 1940.


" BORDER="0">

" BORDER="0">

" BORDER="0">

" BORDER="0">
The sprocket and road wheels are just tack. Next update ill have the road wheels, sprockets and the tracks painted.
Thanks
JohnA
Colorado, United States
Joined: December 25, 2004
KitMaker: 3,770 posts
Armorama: 2,263 posts
Posted: Sunday, February 19, 2017 - 09:38 AM UTC
Initial coat of paint on the "wooden parts." Vallejo has a wonderful Wood and Leather set.


Mike
Namabiiru
Associate Editor #399
Rhode Island, United States
Joined: March 05, 2014
KitMaker: 2,888 posts
Armorama: 1,920 posts
Posted: Sunday, February 19, 2017 - 05:03 PM UTC
Wow! That's going to be pretty sharp when it's done, mike, in spite of the instructions. Interested to see how your wood turns out (so to speak).
Colorado, United States
Joined: December 25, 2004
KitMaker: 3,770 posts
Armorama: 2,263 posts
Posted: Thursday, February 23, 2017 - 06:16 AM UTC
The mortar and base are done. Dirtied up a little bit.


Mike
Namabiiru
Associate Editor #399
Rhode Island, United States
Joined: March 05, 2014
KitMaker: 2,888 posts
Armorama: 1,920 posts
Posted: Thursday, February 23, 2017 - 06:46 AM UTC
That's incredible, Mike! The color and texture of the wood is fantastic!
#454
Georgia, United States
Joined: July 10, 2016
KitMaker: 1,273 posts
Armorama: 1,138 posts
Posted: Thursday, February 23, 2017 - 07:55 PM UTC
Yes, you nailed that base, very nice, Mike!
"I can make armored cars, safe and unassailable...and behind these our infantry will be able to follow quite unharmed and without any opposition."
-Leonardo da Vinci, 1487
Colorado, United States
Joined: December 25, 2004
KitMaker: 3,770 posts
Armorama: 2,263 posts
Posted: Friday, February 24, 2017 - 11:57 PM UTC
And for grins, the rounds.

Calling this build done.
Mike
Virginia, United States
Joined: February 26, 2002
KitMaker: 1,218 posts
Armorama: 401 posts
Posted: Saturday, February 25, 2017 - 12:35 AM UTC
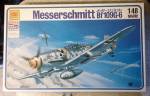
Hey there fellas... been away for a long time and just seen the campaign and figured that I would just jump right in with both feet...
I have decided to enter with a 1/48 oTAKI Bf109 G-6.
I'll post a few pics soon

Penny Pierce
"Give me a squadron of Spitfires" -- Adolf Galland
Namabiiru
Associate Editor #399
Rhode Island, United States
Joined: March 05, 2014
KitMaker: 2,888 posts
Armorama: 1,920 posts
Posted: Saturday, February 25, 2017 - 03:00 AM UTC
Welcome, Penny! Looking forward to seeing your build!
Virginia, United States
Joined: February 26, 2002
KitMaker: 1,218 posts
Armorama: 401 posts
Posted: Saturday, February 25, 2017 - 03:42 AM UTC
Well, here is a couple of pics so far....
Penny Pierce
"Give me a squadron of Spitfires" -- Adolf Galland
#305
Christchurch, New Zealand
Joined: February 01, 2006
KitMaker: 1,673 posts
Armorama: 120 posts
Posted: Saturday, February 25, 2017 - 01:55 PM UTC
Welcome Jenny great to see you "return" to our favourite addiction. I look forward to seeing your build, from what I remember the Otaki kits are usually accurate in outline but light on details?
Virginia, United States
Joined: February 26, 2002
KitMaker: 1,218 posts
Armorama: 401 posts
Posted: Saturday, February 25, 2017 - 07:52 PM UTC
Thanks for the welcome.... the kit is low on details but fits together well.
Penny Pierce
"Give me a squadron of Spitfires" -- Adolf Galland
#0
United States
Joined: July 31, 2011
KitMaker: 472 posts
Armorama: 453 posts
Posted: Friday, March 10, 2017 - 09:07 AM UTC
Time to actually post something. Here what I got so far.


painted the inside of the ports black since.

This is the easier part, just glue along the posts on the inside. The seam on the bottom of the craft didn't look so good, so I think I'm just going to fill it in.
And a mistake on my part is I put the wrong gun on the "top", well the instructions are simple pictures. The gun that was supposed to be up top is actually two parts, though the instructions don't mention this and show it as a single piece which lead to my confusion. Didn't catch it earlier, and can't do much now since the arts are all glued in place. So I can put that gun that doesn't mach the rest on the bottom, or I was thinking of adding antennas instead as a "comms port" or something.