

Hosted by Richard S.
Artillery Campaign 2017

Chaman911

Joined: August 28, 2015
KitMaker: 319 posts
Armorama: 308 posts
Posted: Tuesday, August 22, 2017 - 07:42 PM UTC
That is looking great Karl! The crew looks really natural in their poses.

erichvon

Joined: January 17, 2006
KitMaker: 1,694 posts
Armorama: 1,584 posts

Posted: Wednesday, August 23, 2017 - 06:45 AM UTC
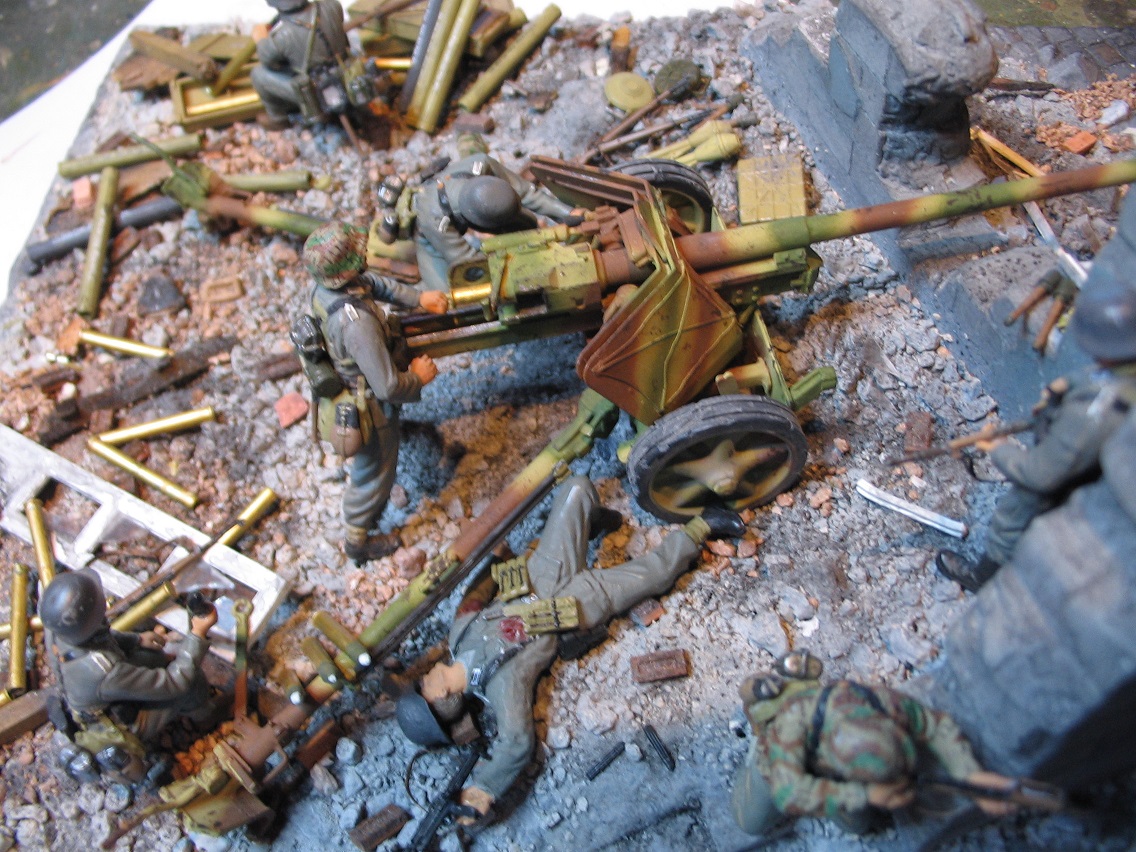
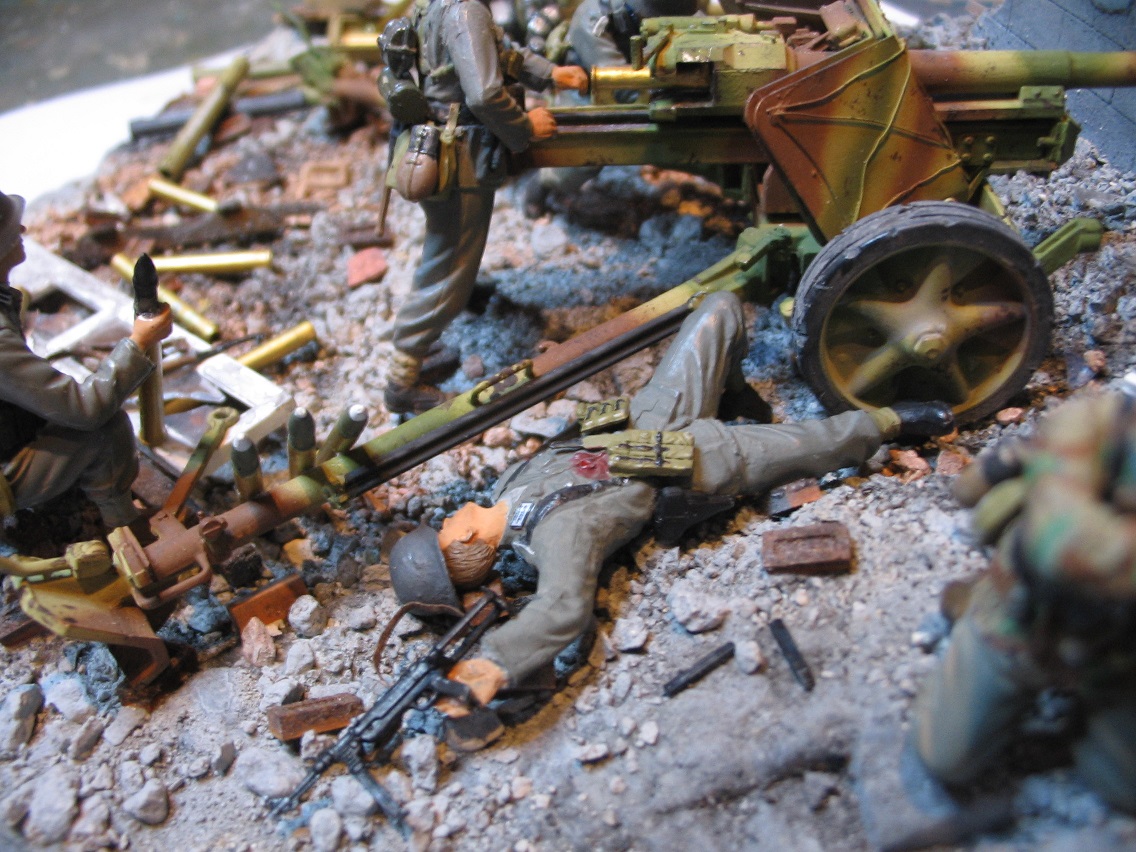
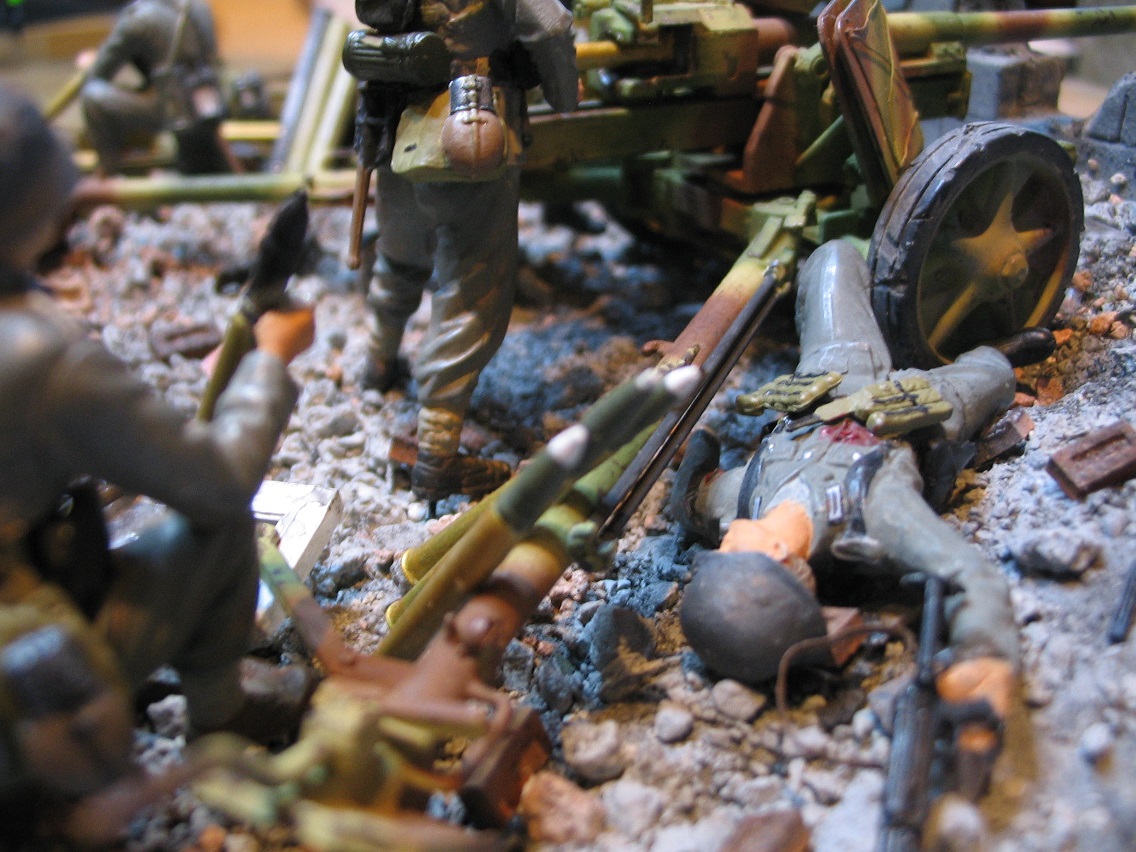
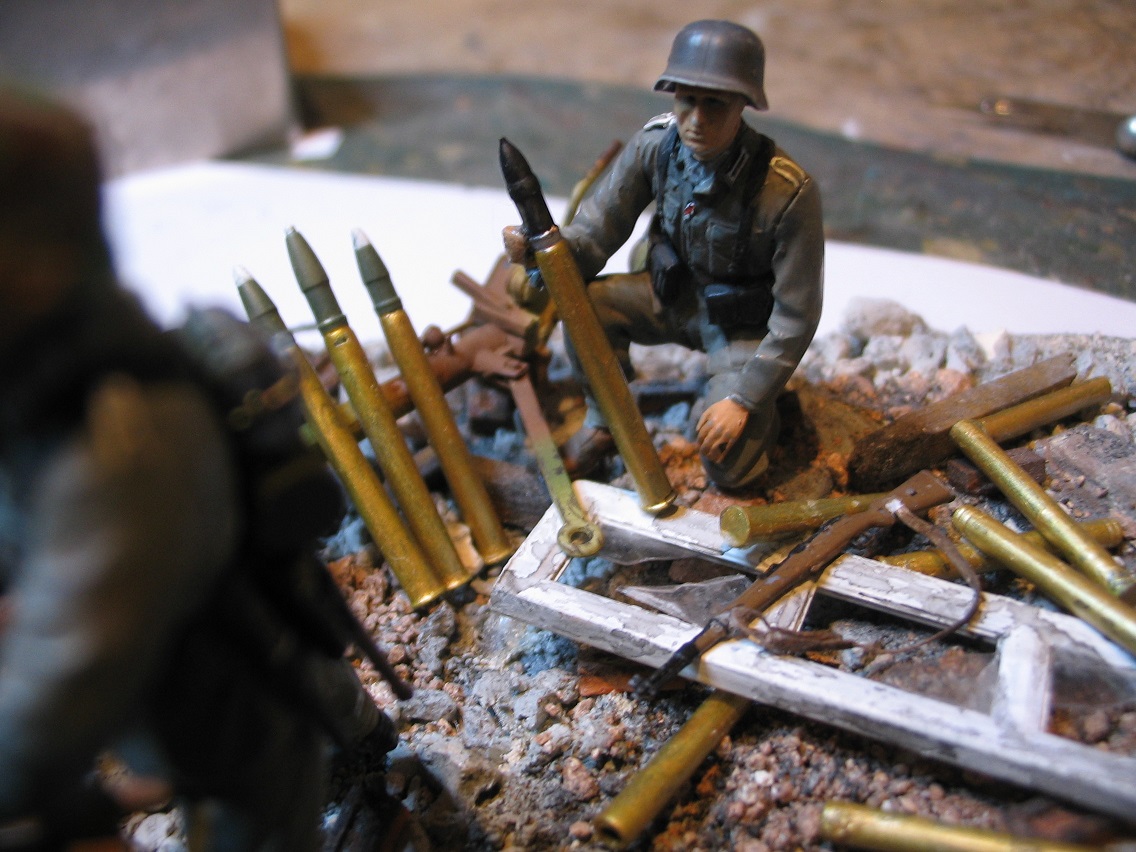
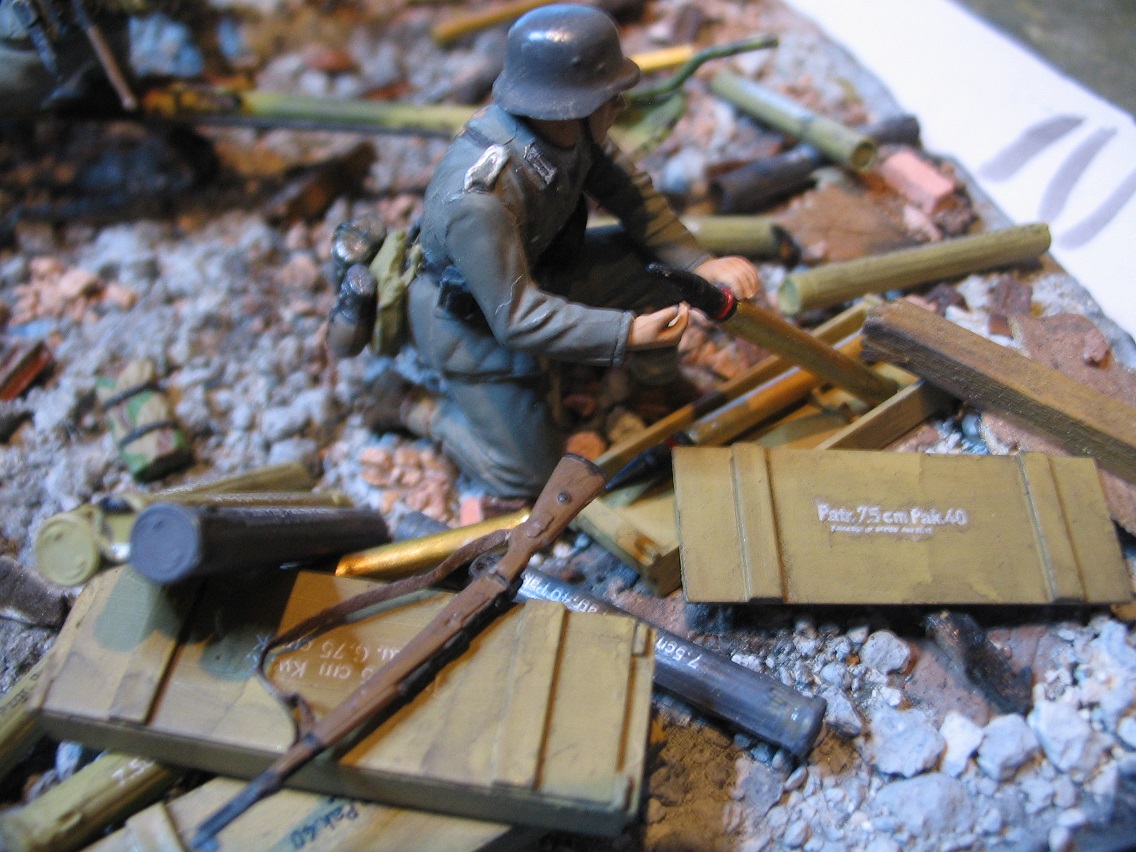
Thanks guys, glad you like them. I spent most of yesterday working on the other two crew members. Just a few finishing touches to do to them now and I can start work on the base. I've started painting the shells as well. I'm a little disappointed with them to be honest. While the live shells are nice, the spent ones are solid with no drilled out section so I'm going to have to do that before I can use them. Ironically while the Tamiya shells are quite featureless at least the empties have a hollow end! The boxes are a bit disappointing as well as it's only the lid that has a wood grain and there are no spacers provided should you choose to depict a box open. I've pinched a couple out of my Zis-3 ammo set and cut off one part to give me a 3 shell spacer. Should look okay once I've got some shells in there. I've gone for one of the crew lifting a shell out of the box rather than a tube just so I could have a few shells visible in a box lol. As the lid to the tubes is seperate I can have a few empties lying around.
Removed by original poster on 08/26/17 - 13:19:49 (GMT).

Mrclark7
Joined: June 04, 2017
KitMaker: 503 posts
Armorama: 477 posts
Posted: Sunday, August 27, 2017 - 08:20 AM UTC
Quoted Text
Beautiful work, Olivier, and the Campaign Gallery is at https://gallery.kitmaker.net/showgallery.php/cat/30694 !
I just looked at the gallery. Lots of nice work in there so far from you guys!
Mrclark7
Joined: June 04, 2017
KitMaker: 503 posts
Armorama: 477 posts
Posted: Monday, August 28, 2017 - 10:17 AM UTC
Might be able to be finished by this weekend.
The barrel is by far the worst fit yet I have ever had in a kit.


The barrel is by far the worst fit yet I have ever had in a kit.
LikesTanks

Joined: May 07, 2013
KitMaker: 242 posts
Armorama: 234 posts
Posted: Tuesday, August 29, 2017 - 07:21 AM UTC
Starter pic (somewhat delayed in posting)

erichvon
Joined: January 17, 2006
KitMaker: 1,694 posts
Armorama: 1,584 posts
Posted: Tuesday, August 29, 2017 - 11:05 AM UTC
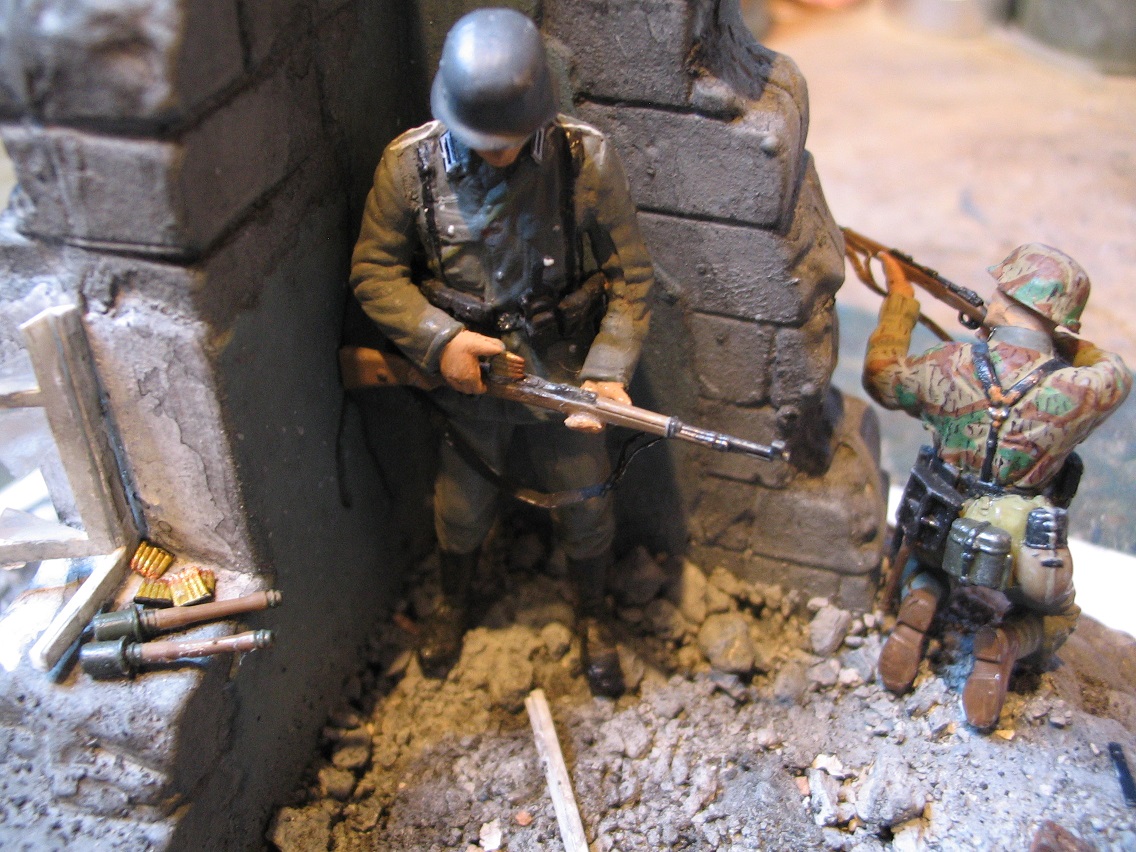
After a few days bashing away at this I've finally completed it which means I can finish off a Zis 3 dio I was working on which I put on one side so I could build my Pak 40 entry. Although the Miniart base has rudimentary surfacing on it it didn't have that blown up building look to it so I gave it a liberal application of cat litter then sprayed it the sane colour as I was planning on using for the masonry of the building.
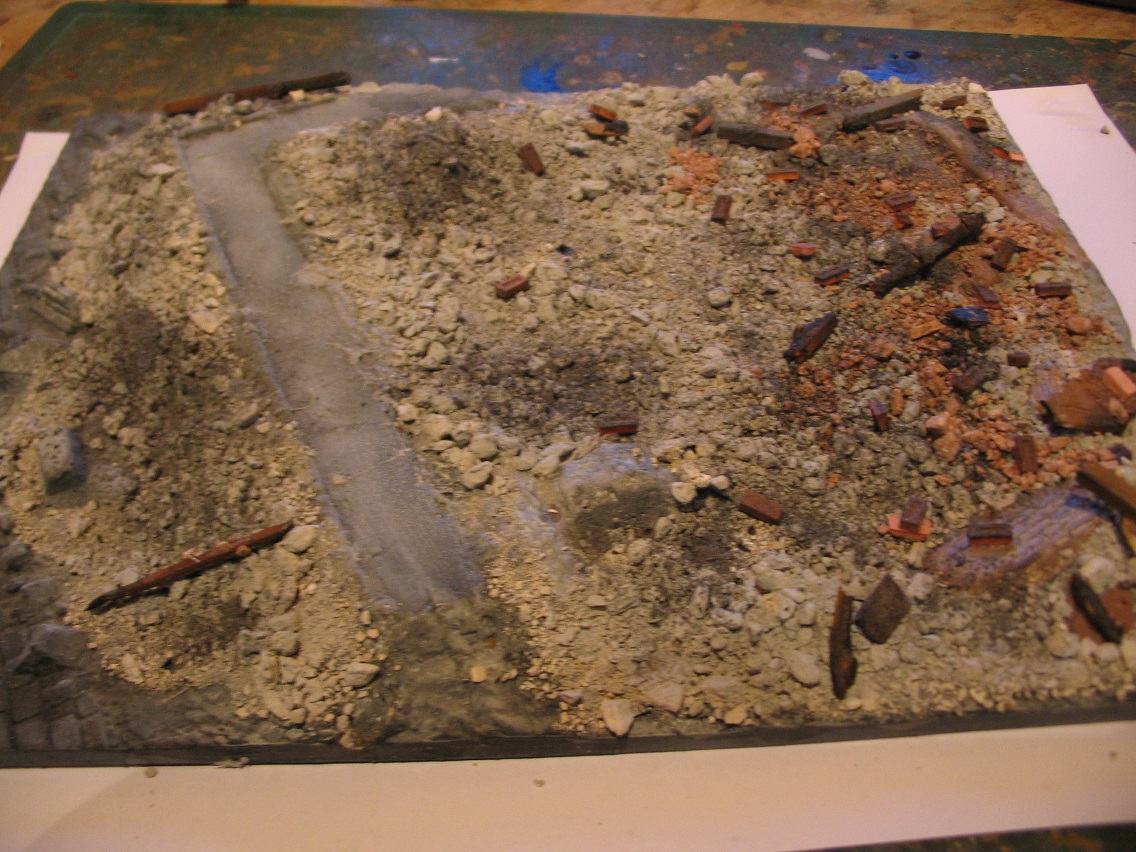
I've added some red brick at the back as that would be the inside walls. There are some moulded on chunks which prompted me.
Fast forward a couple of days...
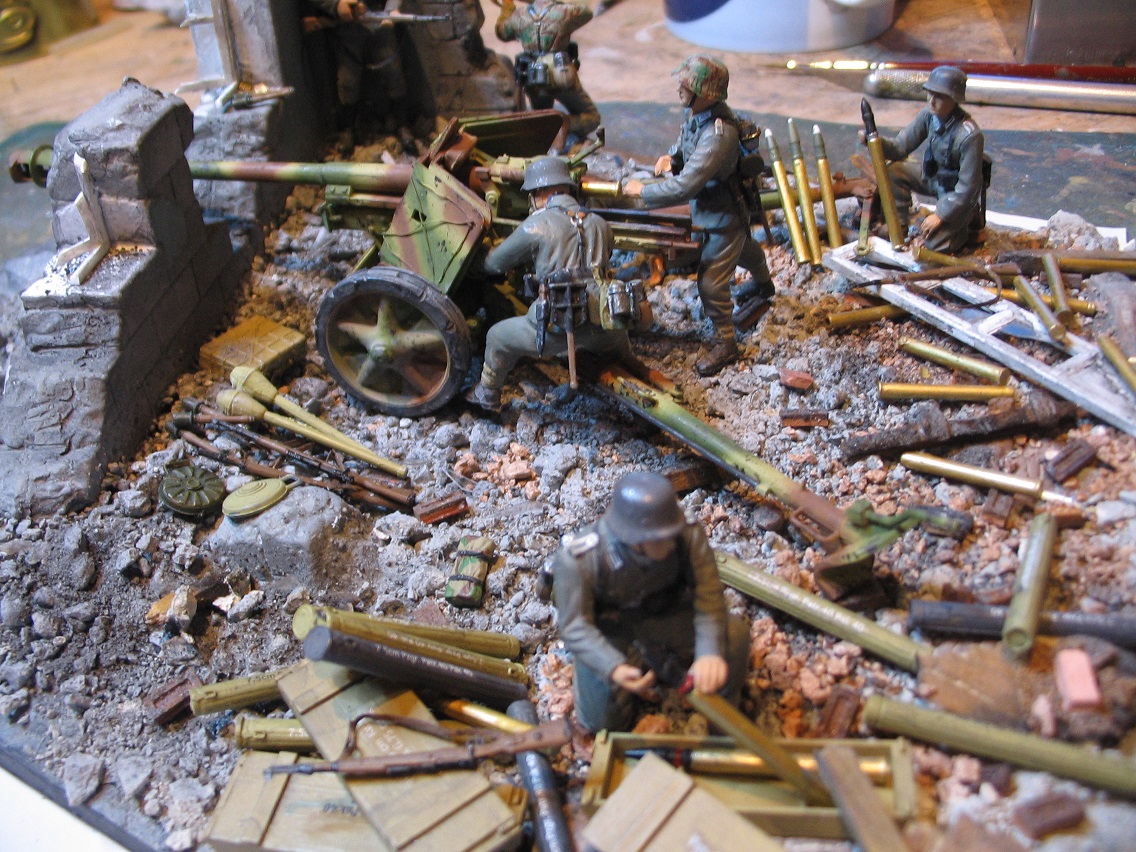
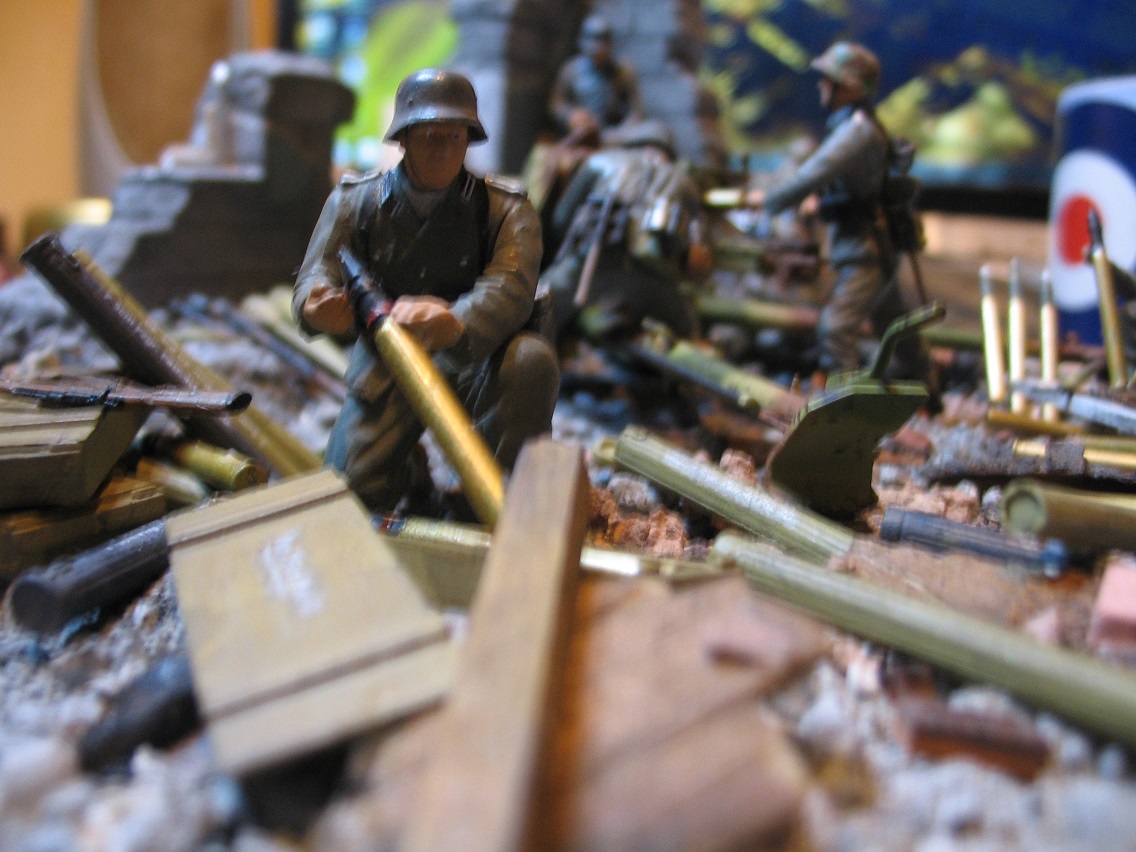
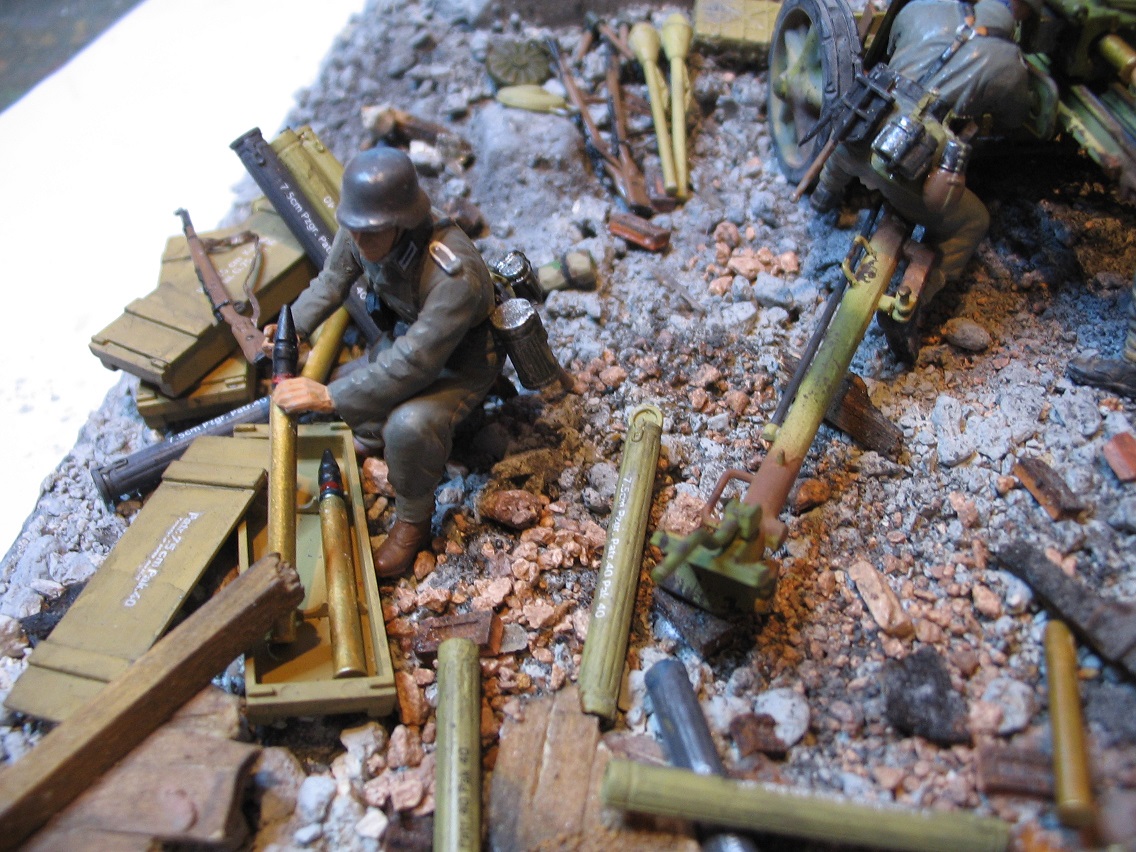
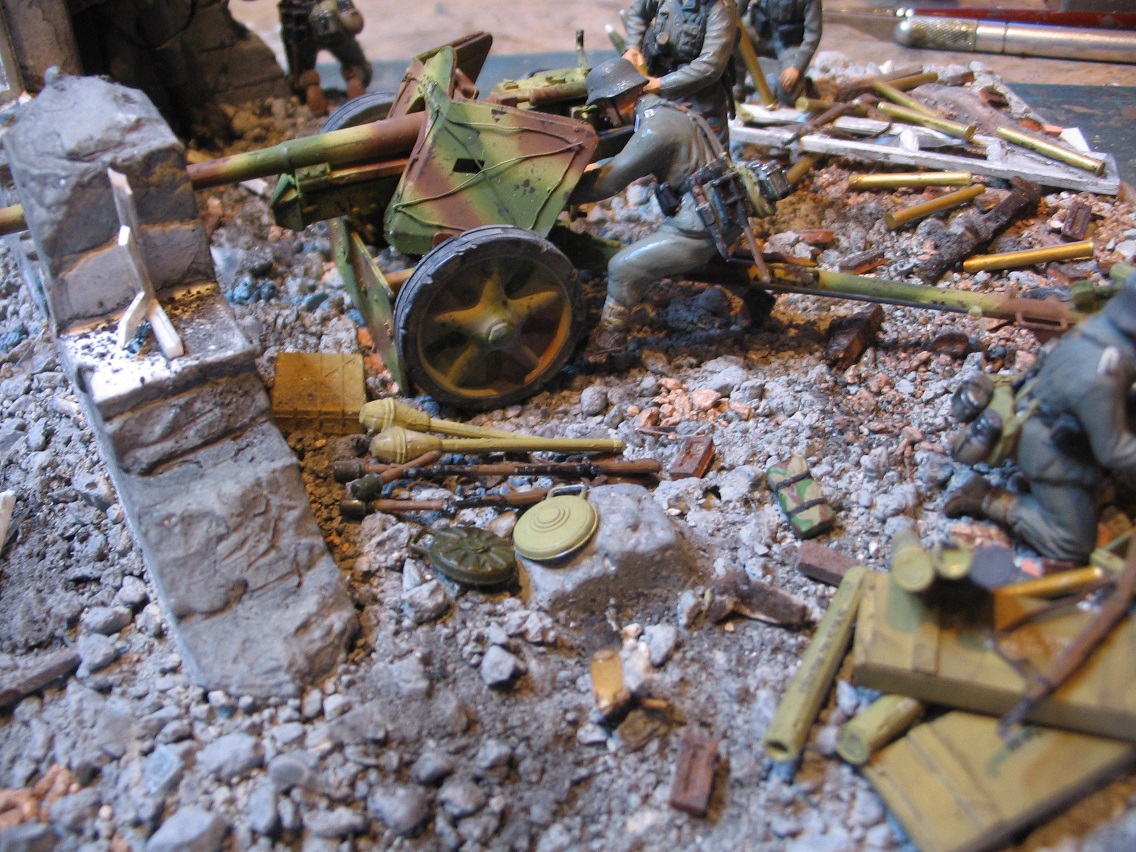

I've noticed one or two bits that need touching up but it's not turned out too bad. I think the Tamiya Pak 40 is just over a fiver ($6.46)to buy but I think it looks okay even though it's dirt cheap. I've not decided yet where to place the dio as I'd only got Dutch street signs but no posters on printer paper. I collect posters off the web for straightforward advertising-soap,drinks, chocolate etc as well as propaganda posters. I've built up quite a collection of German, Russian, Hungarian and Dutch posters so far and not the usual ones you get in the retail packs as there always seems to be the same Waffen SS recruiting poster appearing. I've actually found Waffen SS recruiting posters for most of the occupied territories so I can still have one if I want one lol. What I need to do is put them into a word document and give them to my dad to print off for me as the printer he's got gives fantastic results. He did some maps for me and the details just as good as one's for sale. Consequently I now have more maps than I can use in a lifetime. The posters are better on normal printer paper as they're thin, glue on easily with dilute PVA and are easily made tatty. Enamel signs? Photo paper for the sheen. As I'd not got anything suitable I'll have to wait until I've got matching street signs and posters as that piece of wall's begging for one lol. With the scene being a quite generic late war scene it could be France, Germany, Holland, Eastern Front in 1944 or 1945. I'll decide later. Well that's me done. I've noticed there's some really nice builds going on in here so I'll keep watching
I've added some red brick at the back as that would be the inside walls. There are some moulded on chunks which prompted me.
Fast forward a couple of days...
I've noticed one or two bits that need touching up but it's not turned out too bad. I think the Tamiya Pak 40 is just over a fiver ($6.46)to buy but I think it looks okay even though it's dirt cheap. I've not decided yet where to place the dio as I'd only got Dutch street signs but no posters on printer paper. I collect posters off the web for straightforward advertising-soap,drinks, chocolate etc as well as propaganda posters. I've built up quite a collection of German, Russian, Hungarian and Dutch posters so far and not the usual ones you get in the retail packs as there always seems to be the same Waffen SS recruiting poster appearing. I've actually found Waffen SS recruiting posters for most of the occupied territories so I can still have one if I want one lol. What I need to do is put them into a word document and give them to my dad to print off for me as the printer he's got gives fantastic results. He did some maps for me and the details just as good as one's for sale. Consequently I now have more maps than I can use in a lifetime. The posters are better on normal printer paper as they're thin, glue on easily with dilute PVA and are easily made tatty. Enamel signs? Photo paper for the sheen. As I'd not got anything suitable I'll have to wait until I've got matching street signs and posters as that piece of wall's begging for one lol. With the scene being a quite generic late war scene it could be France, Germany, Holland, Eastern Front in 1944 or 1945. I'll decide later. Well that's me done. I've noticed there's some really nice builds going on in here so I'll keep watching

LinusB

Joined: March 21, 2016
KitMaker: 247 posts
Armorama: 126 posts

Posted: Tuesday, August 29, 2017 - 11:26 AM UTC
Great work Karl.
Starting with Tamiya's Quad Tractor and 25 pdr.
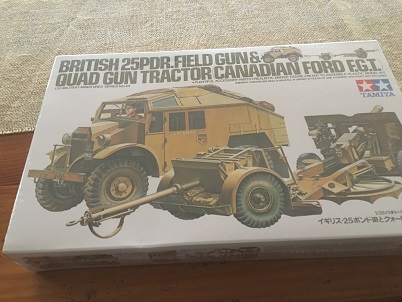
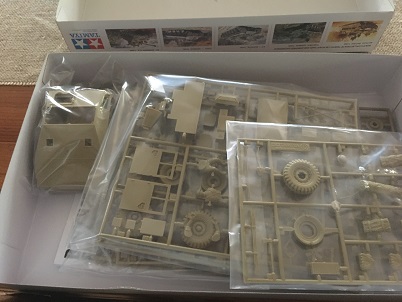
Starting with Tamiya's Quad Tractor and 25 pdr.

ClaytonFromEllijay

#454
Joined: July 10, 2016
KitMaker: 1,273 posts
Armorama: 1,138 posts
Posted: Tuesday, August 29, 2017 - 06:12 PM UTC
Wow, Karl, that's a GREAT dio! So much activity, it's like it's animated. Kudos, that's a super build! 
erichvon
Joined: January 17, 2006
KitMaker: 1,694 posts
Armorama: 1,584 posts
Posted: Wednesday, August 30, 2017 - 01:12 AM UTC
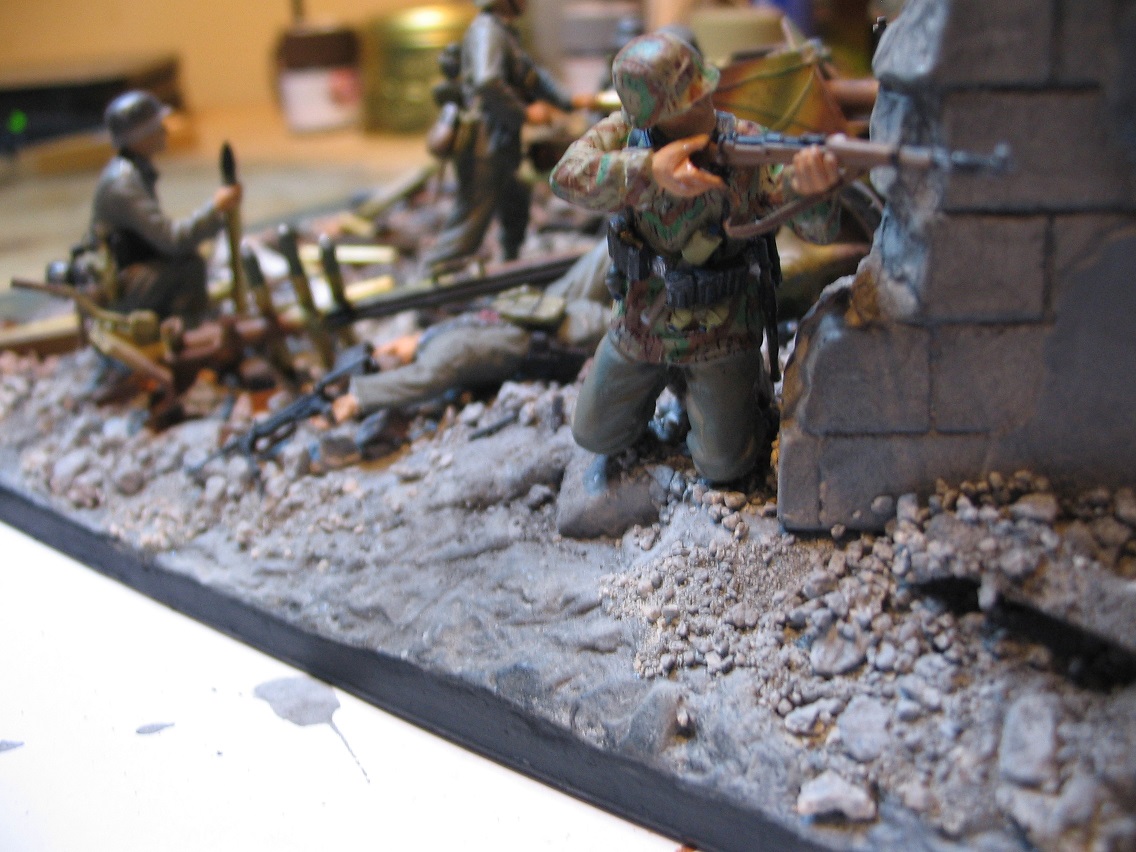
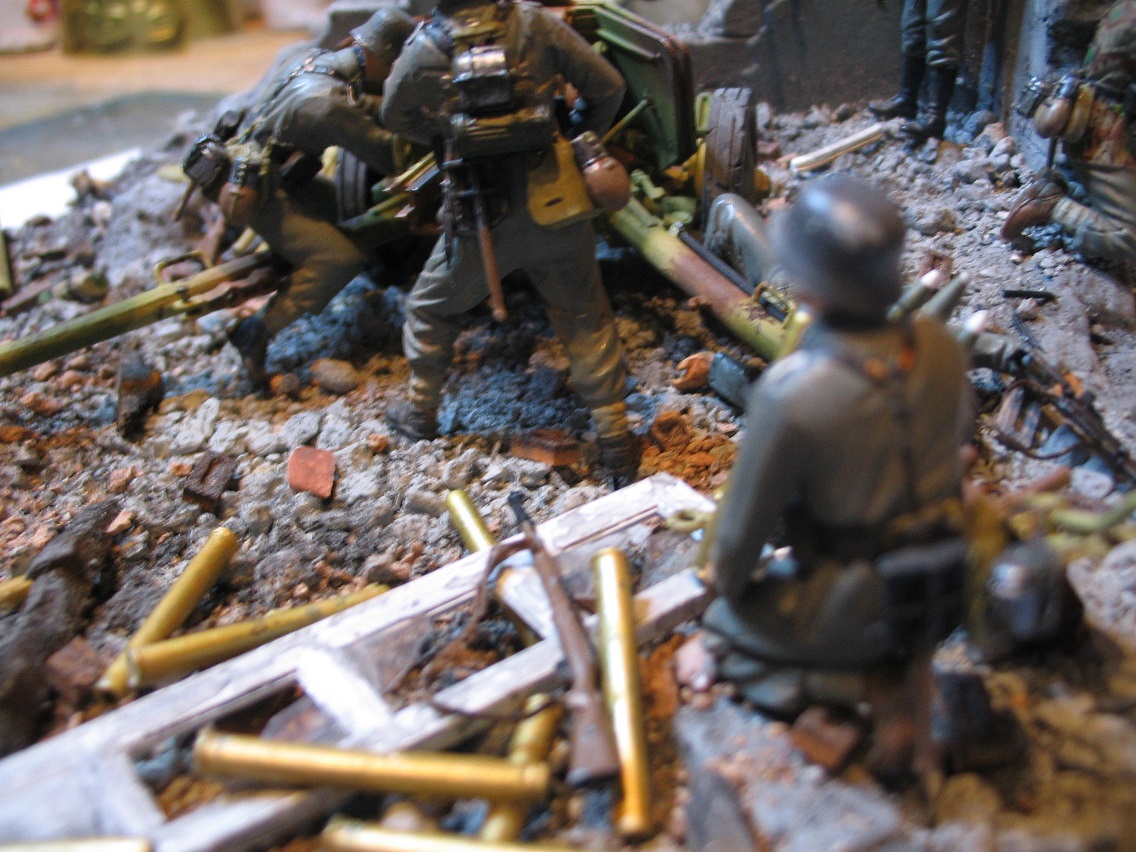
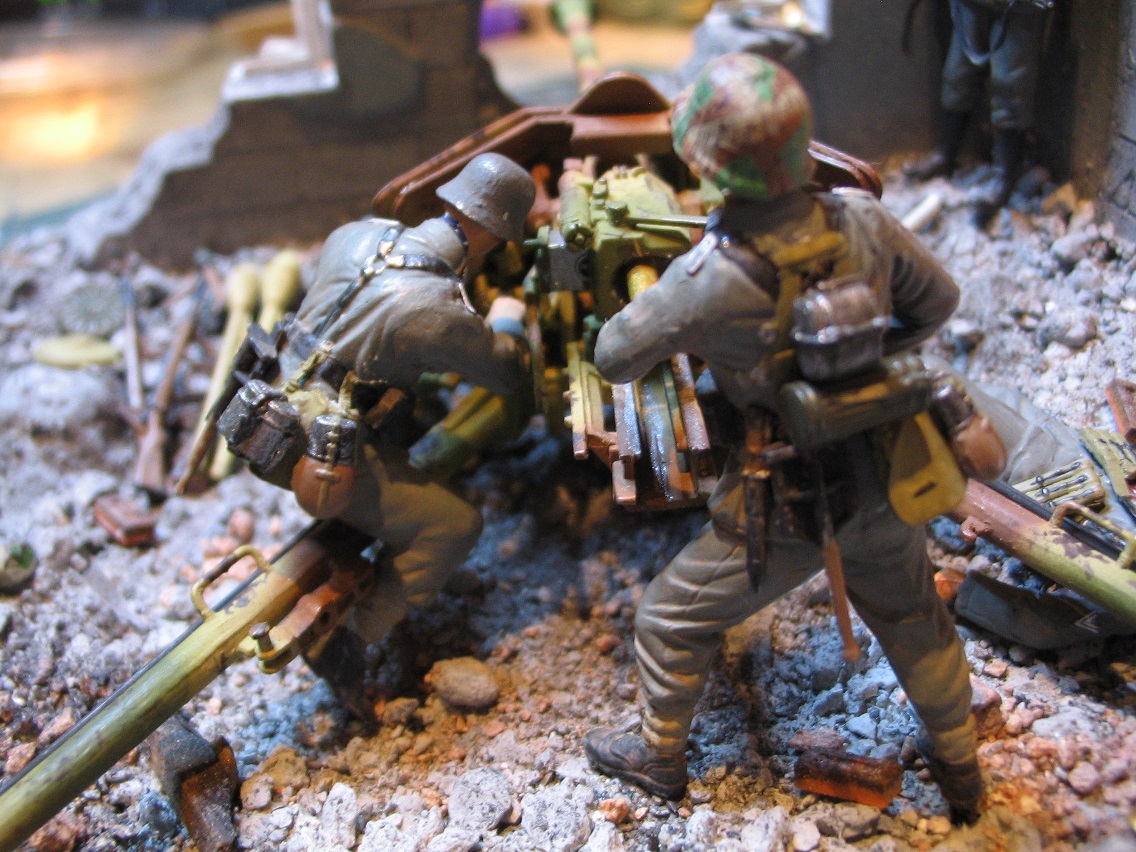
Clayton, many thanks for that. I'm glad you like it. I always try to get some movement in my dios and with this being a static position it was a little harder so took more thought. I'm happy with the guy ramming home the round into the breech as you don't see that very often. It's usually "holding the shell to go into the breech" rather than the movement of loading. The figure in the corner reloading is from one of Dragons very nondescript sets where noone is really doing anything and they're all different so you have to wait until you find a use for them type of sets. It made that much of an impression I can't remember which one it was lol. With a couple of tweaks like a Gen 2 rifle so I could have the bolt back and his spare ammo on the window sill. I think he works well reloading while his oppo covers the right flank. With the flank protection it was my aim to show infantry engaging enemy infantry hunting AT guns prior to armour moving into town as was often the case. Tanks cannot function without infantry due to AT artillery so the infantrymans main role is to neutralise all threats to the armour. Crap job really and spoken as an ex-infantryman lol. It's bloody hard work from what I remember of exercises in Germany clearing woods of AT positions! What makes it worse now is the AT role is an infantry role with man portable (allegedly) weapons systems so they move lol! I can finish off my Zis-3 dio now and then I'll think what to build next. As you know I've always got something on the go 

69mudbone
Joined: April 26, 2016
KitMaker: 362 posts
Armorama: 285 posts
Posted: Thursday, August 31, 2017 - 01:16 AM UTC
Hi Guys, what's a artillery campaign without a 12 lb Napoleon, so here is my entry. A nice change of pace if my eyes hold out

LikesTanks
Joined: May 07, 2013
KitMaker: 242 posts
Armorama: 234 posts
Posted: Thursday, August 31, 2017 - 04:36 AM UTC
Solid progress on my sFH.18 in the couple of months since I took the starter pic


Basically all sub-assemblies ready for paint
Basically all sub-assemblies ready for paint

165thspc

#521
Joined: April 13, 2011
KitMaker: 9,465 posts
Armorama: 8,695 posts
Posted: Thursday, August 31, 2017 - 02:25 PM UTC
Very nice detailing on the sFH 18 kit Richard. You're making me want to pull mine out of the stash and get started!

165thspc
#521
Joined: April 13, 2011
KitMaker: 9,465 posts
Armorama: 8,695 posts
Posted: Thursday, August 31, 2017 - 09:06 PM UTC
OK - Couldn't resist - I may be a late start but I'm in!
Pulled my sFH 18 out of the stash last night. Here is my starting photo. This will be a straight build (probably two color camo.) in the towed configuration to go with my venerable old Tamiya Sd.Kfz. 7 built years ago!
Not trying to steal Richard's thunder, however I already had the kit and have been wanting a reason to get started on it.
Love those big solid wheels and the heavy carriage!


Hudson29
#460
Joined: September 16, 2014
KitMaker: 1,156 posts
Armorama: 1,024 posts
Posted: Friday, September 01, 2017 - 12:04 AM UTC
You guys are inspiring me to start an artillery piece of my own. This is something new for me and I hope my modest skills which have been improving are now up to the more complicated kit with plenty of fiddly little parts. The Soviet T-35 for the Landship campaign is currently stalled by hot weather so this is a great time to jump into something new.
The kit is a Cold War Soviet D-74 122 mm Field gun. It has lots of tiny bits & PE and should be fun. I started it last night.
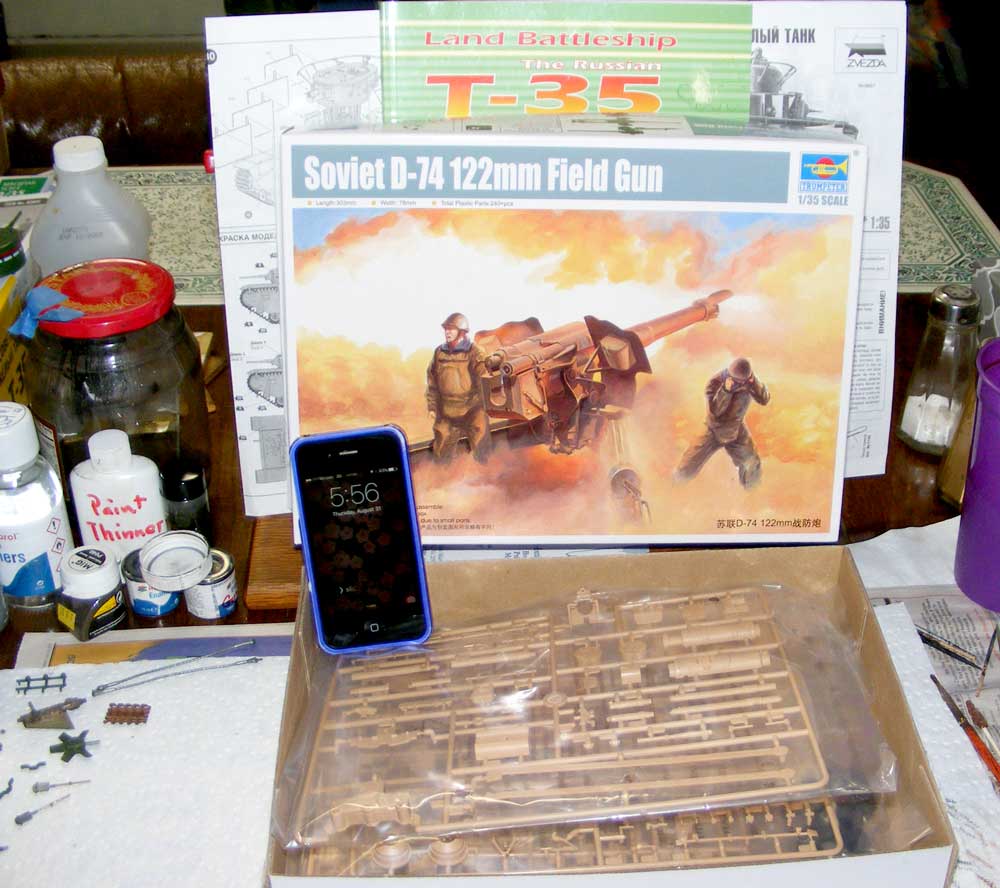
The kit is a Cold War Soviet D-74 122 mm Field gun. It has lots of tiny bits & PE and should be fun. I started it last night.
Klaus-Adler

Joined: June 08, 2015
KitMaker: 1,505 posts
Armorama: 840 posts
Posted: Friday, September 01, 2017 - 12:12 AM UTC
ok well here is my trumpeter grad bm21, im actually a bit further on than you can see in this picture but i am about to go on holiday so i will post more when i return.

165thspc
#521
Joined: April 13, 2011
KitMaker: 9,465 posts
Armorama: 8,695 posts
Posted: Friday, September 01, 2017 - 05:58 AM UTC
Regarding the Dragon sFH 18 Howitzer kit; I'm sure Richard is already well aware of this but I recommend that everyone use extreme caution when following the instruction sheet. The part number referred to in the instruction sheet as being the lefthand part is often actually the righthand part of the kit.
Also, GOOD LUCK figuring out that there are actually TWO step 13's on the instruction sheet and that the first is to be used for transport mode and the second for setting the gun in firing position!
This model is expertly engineered. It is a real shame that Dragon had a lesser engineer do the instructions.
165thspc
#521
Joined: April 13, 2011
KitMaker: 9,465 posts
Armorama: 8,695 posts
Posted: Friday, September 01, 2017 - 06:33 AM UTC
Burned some midnight (as well as mid-morning) oil on the sFH 18 in the last 24 hours.


brekinapez
Joined: July 26, 2013
KitMaker: 2,272 posts
Armorama: 1,860 posts
Posted: Friday, September 01, 2017 - 07:01 AM UTC
Quoted Text
OK - Couldn't resist - I may be a late start but I'm in!
Pulled my sFH 18 out of the stash last night. Here is my starting photo. This will be a straight build (probably two color camo.) in the towed configuration to go with my venerable old Tamiya Sd.Kfz. 7 built years ago!
Not trying to steal Richard's thunder, however I already had the kit and have been wanting a reason to get started on it.
Love those big solid wheels and the heavy carriage!
Heh, I actually finished my sFH18 a couple months back; just haven't uploaded gallery pics as I have been finishing some other builds in the meantime.
Mine is in two-tone (green on yellow). I think my posted shots disappeared in the Great Photobucket Massacre of 2017.
LikesTanks
Joined: May 07, 2013
KitMaker: 242 posts
Armorama: 234 posts
Posted: Friday, September 01, 2017 - 08:14 AM UTC
Ah yes, Dragon instructions - test fitting an absolute essential
165thspc
#521
Joined: April 13, 2011
KitMaker: 9,465 posts
Armorama: 8,695 posts
Posted: Friday, September 01, 2017 - 10:53 AM UTC
Shell, I don't think this is supposed to be a race. I was just saying that it is unfortunate that both Richard and I are at approximately the same place in our builds. We are therefore posting roughly the same progress shots.

sFH 18 towing limber.

sFH 18 towing limber.
165thspc
#521
Joined: April 13, 2011
KitMaker: 9,465 posts
Armorama: 8,695 posts
Posted: Friday, September 01, 2017 - 10:58 AM UTC
Current status, still a lot of detail to add to the trails.

Mine will be shown in travel mode so the recuperator rods will be detached and the barrel and breach pulled back out of battery.

Firing position.

Mine will be shown in travel mode so the recuperator rods will be detached and the barrel and breach pulled back out of battery.

Firing position.

27-1025
Joined: September 16, 2004
KitMaker: 1,281 posts
Armorama: 1,222 posts
Posted: Friday, September 01, 2017 - 08:39 PM UTC
Very late start. But will give this a shot.
Base kit

and whole lot of resin and PE

Base kit
and whole lot of resin and PE
165thspc
#521
Joined: April 13, 2011
KitMaker: 9,465 posts
Armorama: 8,695 posts
Posted: Saturday, September 02, 2017 - 10:00 AM UTC
sFH 18 - Physical Construction Complete:

I did manage to pin (hinge) the drawbar of the limber so it will swing up and down to match the height of whatever towing vehicle is being used. I have yet to build the sighting optics as that will require more research beforehand.


I did manage to pin (hinge) the drawbar of the limber so it will swing up and down to match the height of whatever towing vehicle is being used. I have yet to build the sighting optics as that will require more research beforehand.
LinusB
Joined: March 21, 2016
KitMaker: 247 posts
Armorama: 126 posts
Posted: Saturday, September 02, 2017 - 02:26 PM UTC
Some progress on my Quad.


 |

WEB HOSTING BY


Copyright ©2021 Armorama and Kitmaker Network, a subsidiary of Silver Star Enterprises
All Rights Reserved. Please read our Conditions of Use and Privacy Policy.
All Rights Reserved. Please read our Conditions of Use and Privacy Policy.