That damage looks very nice Colin!
Kind regards
Steven
Hosted by Richard S.
Big Cats Mk. V
Steven000
Antwerpen, Belgium
Joined: August 07, 2016
KitMaker: 191 posts
Armorama: 120 posts
Joined: August 07, 2016
KitMaker: 191 posts
Armorama: 120 posts
Posted: Sunday, October 01, 2017 - 03:11 AM UTC
Thirian24
Oklahoma, United States
Joined: September 30, 2015
KitMaker: 2,493 posts
Armorama: 2,344 posts
Joined: September 30, 2015
KitMaker: 2,493 posts
Armorama: 2,344 posts
Posted: Sunday, October 01, 2017 - 03:49 AM UTC
That looks really killer Colin!
Nito74
Lisboa, Portugal
Joined: March 04, 2008
KitMaker: 5,386 posts
Armorama: 4,727 posts
Joined: March 04, 2008
KitMaker: 5,386 posts
Armorama: 4,727 posts
Posted: Sunday, October 01, 2017 - 03:38 PM UTC
Thirian24
Oklahoma, United States
Joined: September 30, 2015
KitMaker: 2,493 posts
Armorama: 2,344 posts
Joined: September 30, 2015
KitMaker: 2,493 posts
Armorama: 2,344 posts
Posted: Sunday, October 01, 2017 - 11:16 PM UTC
Hey fellas! This is going to be my entry. I was going to start on a Panther last night but I messed up a suspension arm and I don't want to mess with trying to fix it right now. So this killer Leopard will do the trick.
https://imgur.com/gallery/DNS8r
Tojo72
North Carolina, United States
Joined: June 06, 2006
KitMaker: 4,691 posts
Armorama: 3,509 posts
Joined: June 06, 2006
KitMaker: 4,691 posts
Armorama: 3,509 posts
Posted: Monday, October 02, 2017 - 10:18 PM UTC
Blade48mrd
Washington, United States
Joined: September 03, 2004
KitMaker: 1,185 posts
Armorama: 810 posts
Joined: September 03, 2004
KitMaker: 1,185 posts
Armorama: 810 posts
Posted: Tuesday, October 03, 2017 - 12:39 AM UTC
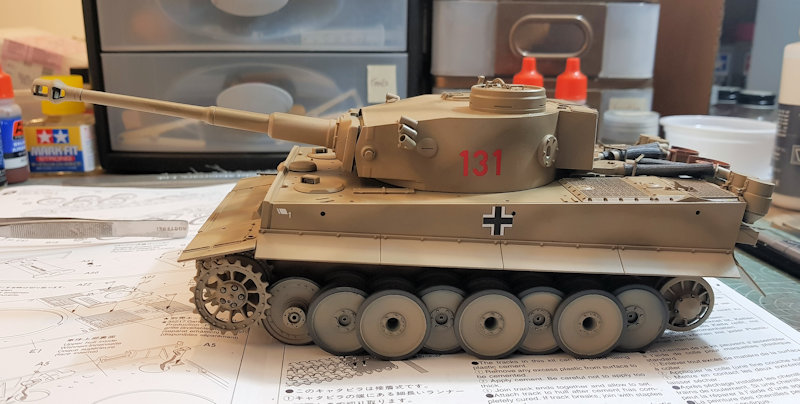
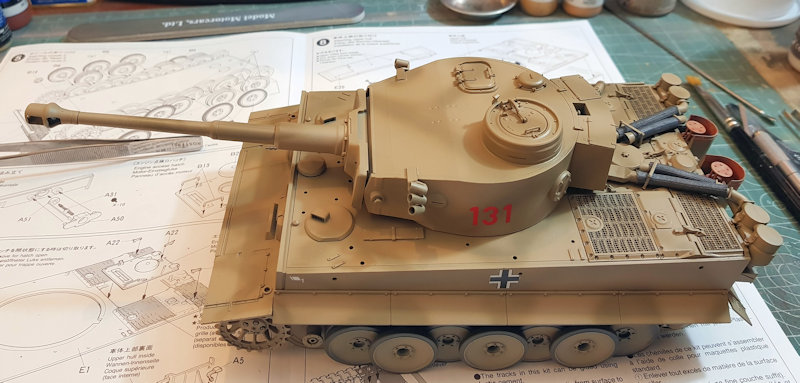
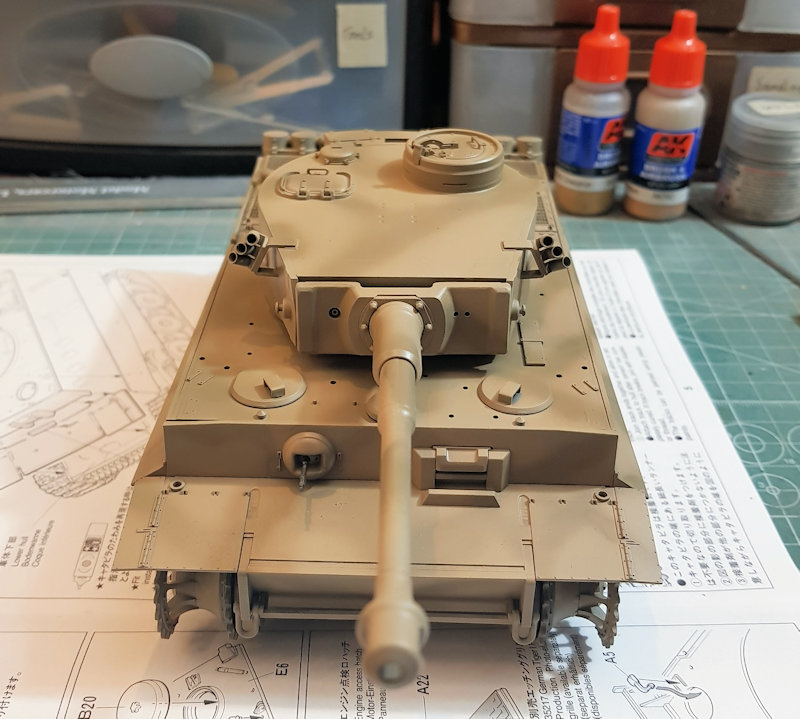
Progress has slowed somewhat. Spent extra time having to file holes in road wheels to get them to fit on swing arms. I've since learned that this is common on several of Dragon's KTs (though disappointing from a quality expectation for a Dragon kit). Finally managed to get lower and upper hulls done and a base coat started. Completing the turret and then tracks. Painting to commence soon and also start on Alpine tank commander figures.
Mike
Mike
Posted: Tuesday, October 03, 2017 - 07:58 PM UTC
Painting and decals are complete. Not perfect, but I'm happy with the results. Still have the tracks and the externals to finish.
Chaman911
United States
Joined: August 28, 2015
KitMaker: 319 posts
Armorama: 308 posts
Joined: August 28, 2015
KitMaker: 319 posts
Armorama: 308 posts
Posted: Tuesday, October 03, 2017 - 08:30 PM UTC
Looks good everyone. Hopefully tonight I will have time to get some work done on my KT. It looks like I have some catching up to do!
Posted: Wednesday, October 04, 2017 - 12:27 AM UTC
Really nice detailing and subtle camo job, Mark!
Thirian24
Oklahoma, United States
Joined: September 30, 2015
KitMaker: 2,493 posts
Armorama: 2,344 posts
Joined: September 30, 2015
KitMaker: 2,493 posts
Armorama: 2,344 posts
Posted: Wednesday, October 04, 2017 - 02:23 AM UTC
Love the Tiger! 131 is on my list too.
ColinEdm
Associate Editor
Alberta, Canada
Joined: October 15, 2013
KitMaker: 1,355 posts
Armorama: 1,229 posts
Joined: October 15, 2013
KitMaker: 1,355 posts
Armorama: 1,229 posts
Posted: Wednesday, October 04, 2017 - 08:08 AM UTC
Looking good guys.
Posted: Wednesday, October 04, 2017 - 11:27 AM UTC
Anthony, Mike,
Nice progress!
Mark,
I'm building the Dragon Tiger 131 which I'm going to build as Tiger 111. Your's looks great!
Gaz
Nice progress!
Mark,
I'm building the Dragon Tiger 131 which I'm going to build as Tiger 111. Your's looks great!
Gaz
Posted: Wednesday, October 04, 2017 - 12:46 PM UTC
Thanks for all the positive comments
Tickosity
Alabama, United States
Joined: July 29, 2017
KitMaker: 10 posts
Armorama: 10 posts
Joined: July 29, 2017
KitMaker: 10 posts
Armorama: 10 posts
Posted: Saturday, October 07, 2017 - 09:25 PM UTC
Looks like people are making good progress. Mine has slowed substantially. I'm waiting for paint to come in and trying to decide if I'm going to put zimm on or not. It's nice to see others making progress and it's keeping me more motivated to finish than I would otherwise be.
Bluestab
South Carolina, United States
Joined: December 03, 2009
KitMaker: 2,160 posts
Armorama: 1,906 posts
Joined: December 03, 2009
KitMaker: 2,160 posts
Armorama: 1,906 posts
Posted: Sunday, October 08, 2017 - 03:18 AM UTC
Time to post some work. As a refresher, I was given what I was told was a Testors re-box of Italeri's 1/35 Leopard 1a5. It was a sealed plastic bag with the sprues and tracks. The plan was to build it as a what-if Leopard 1 armed with the 120mm gun and with reactive armor. The Leo 1a5 was designed with a turret that could mount the bigger gun and equipped with the compatible fire control systems.
I build a series of what-if AFVs based on the premise of "mercenary-paramilitary forces" used by Nato and Warsaw Pact to fight proxy wars and avoid "direct conflict" to avoid things escalating to WW3. Think Megaforce but without the motorbikes and metallic jumpsuits. They are equipped with oddball variant weapons...like a scout recon vehicle using a Sheridan chassis with a Bradley turret or a M113 with a LAV-25 turret.
The Leo1 with the 120mm gun should have fit right in...I even had the backstory worked up for the upgunned Leo. Unfortunately the Leopard1a5 kit is actually a Leopard1a4. The 120mm gun is out. But I'll still go with the reative armor and some other bits that come to mind as I build.
The Leopard 1a4 is an old kit...initially released in 1977...but not a bad kit. It's been reboxed...mostly unchanged...for Testors, Tomy, and Revell. Vinyl tracks and dark green Italeri plastic. I've always found Italeri's styrene brittle and it ages badly.
I've decided to not show alot of the normal build aspects. I'm going to focus more on the what-if additions.
Let's get to cuttin' on some styrene...
I built the lower hull and suspension OOB. And that is the last time you'll see any OOB build with this. BTW, I would suggest scrapping the Testors instructions and print out a copy of Italeri's instructions instead.
I've never really liked how Leopard1s have their pioneer tools strapped to the sides. The Belgium Leos have side storage boxes, so I used those as inspiration. I scratched up some storage boxes to hold the majority of their tools. I used v-groove styrene sheet to give the boxes some surface detail.
I added a bustle rack to the rear of the turret. I used a variety of styrene strips. I was going to use styrene rod and bend it for the horizontal rails, but decided to use strips to give it a more rudimentary look. I'm not completely satisfied with it, so I might I'll add some mesh to the floor.
And that's where I am right now.
There's some neat tweaks on the design I hope to get in. The reactive armor is a big one. But I am also thinking about adding US MGs ...maybe including shields...for the commander and loader's hatches instead of the MG3. Maybe using different smoke launchers. And of course the camo scheme will be different than anything standard. But that's where the fun is in these style of builds.
Posted: Sunday, October 08, 2017 - 05:38 AM UTC
Some interesting conversions!
Posted: Sunday, October 08, 2017 - 10:55 AM UTC
Here is my Dragon Tunisian Tiger:
DS tracks, Painted with artist acrylics and highlighted with a silver BIC pen, then tied down with thread for sag. Some very limited interior details only painted buff and given a black wash.
Experimenting with using only oils for dust this time.
I'm quite amazed at the flexibility of the DS tacks and the way they hold the acrylic paint when flexed. They aren't as perfect a indi-link or Friuls... But they are supplied with the kit.
Mrclark7
Texas, United States
Joined: June 04, 2017
KitMaker: 503 posts
Armorama: 477 posts
Joined: June 04, 2017
KitMaker: 503 posts
Armorama: 477 posts
Posted: Monday, October 09, 2017 - 07:18 AM UTC
panzerIV
England - North West, United Kingdom
Joined: January 02, 2007
KitMaker: 781 posts
Armorama: 676 posts
Joined: January 02, 2007
KitMaker: 781 posts
Armorama: 676 posts
Posted: Tuesday, October 10, 2017 - 04:29 AM UTC
Mrclark7
Texas, United States
Joined: June 04, 2017
KitMaker: 503 posts
Armorama: 477 posts
Joined: June 04, 2017
KitMaker: 503 posts
Armorama: 477 posts
Posted: Tuesday, October 10, 2017 - 09:33 AM UTC
I am going to switch campaigns with this one. I'll get another entry to for this one.
Mrclark7
Texas, United States
Joined: June 04, 2017
KitMaker: 503 posts
Armorama: 477 posts
Joined: June 04, 2017
KitMaker: 503 posts
Armorama: 477 posts
Posted: Wednesday, October 11, 2017 - 08:18 AM UTC
Thirian24
Oklahoma, United States
Joined: September 30, 2015
KitMaker: 2,493 posts
Armorama: 2,344 posts
Joined: September 30, 2015
KitMaker: 2,493 posts
Armorama: 2,344 posts
Posted: Friday, October 13, 2017 - 05:30 AM UTC
Welcome aboard to the new entries.
Love seeing all the progress.
Work has me covered smooth up, so I'm sorry for the lack of my presence.
Love seeing all the progress.
Work has me covered smooth up, so I'm sorry for the lack of my presence.
Posted: Friday, October 13, 2017 - 12:07 PM UTC
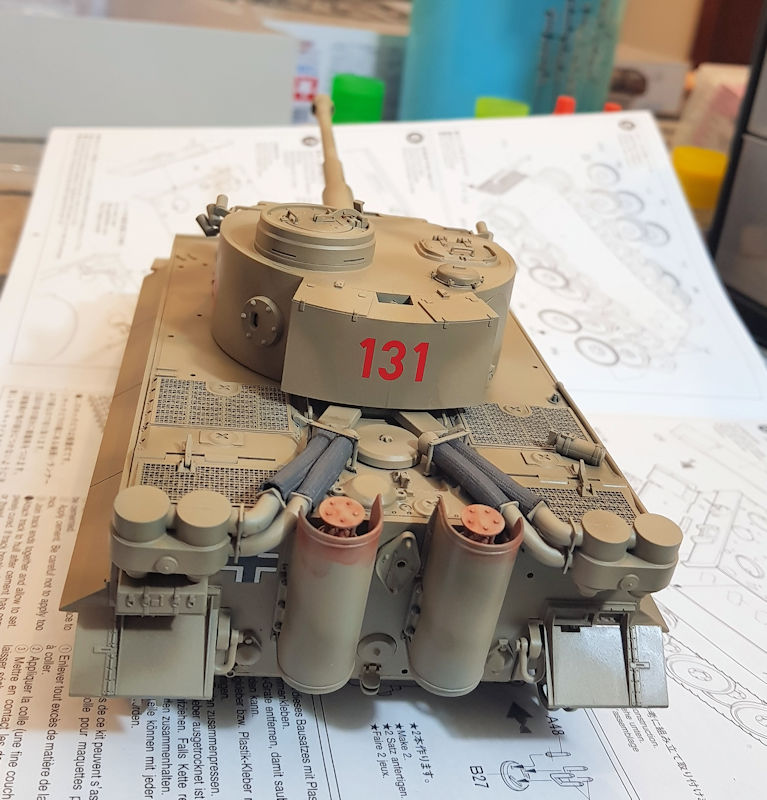
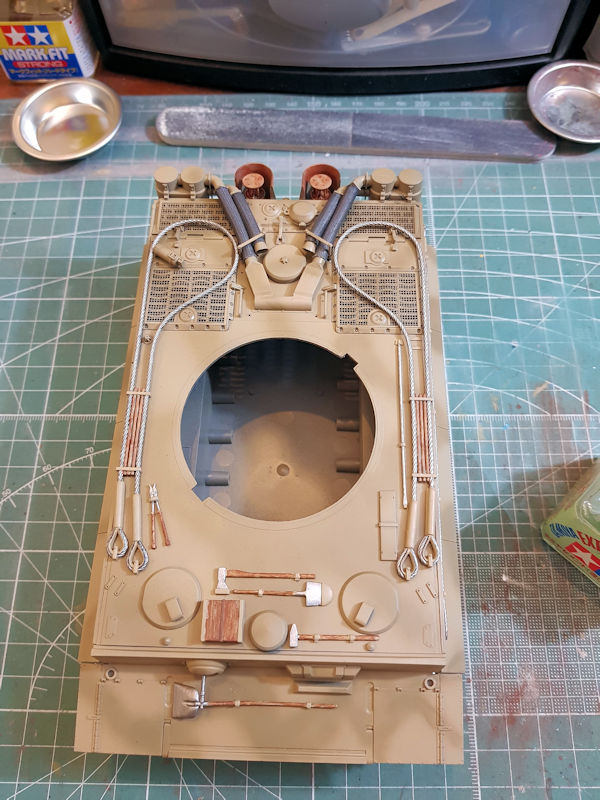
Finally got some time to get the equipment painted and installed. Next up will be the tracks.
Posted: Friday, October 13, 2017 - 01:17 PM UTC
Mark,
That looks great. I just glued on the Feifels today myself.
Posted: Friday, October 13, 2017 - 03:56 PM UTC
Quoted Text
Mark,
That looks great. I just glued on the Feifels today myself.
Looking forward to see updated pics of your build.