Hosted by Richard S.
Big Cats Mk. V
Chaman911

Joined: August 28, 2015
KitMaker: 319 posts
Armorama: 308 posts
Posted: Monday, November 06, 2017 - 06:13 AM UTC
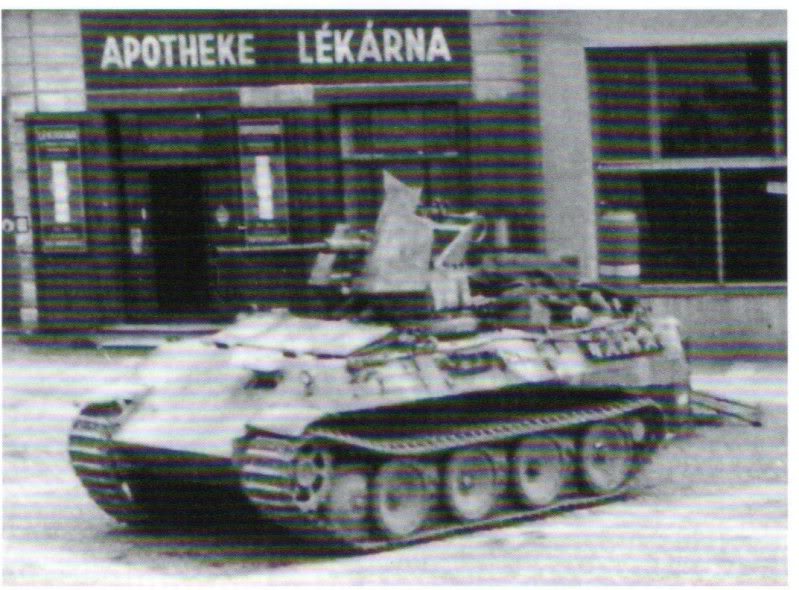
Now that is cool Linus! Was there really a flak panther?? That looks like a fun build.
brekinapez

Joined: July 26, 2013
KitMaker: 2,272 posts
Armorama: 1,860 posts

Posted: Monday, November 06, 2017 - 07:26 AM UTC
Quoted Text
Now that is cool Linus! Was there really a flak panther?? That looks like a fun build.
Not many, from what I understand. Another field mod, and not an official release.

LinusB

Joined: March 21, 2016
KitMaker: 247 posts
Armorama: 126 posts

Posted: Monday, November 06, 2017 - 07:33 AM UTC
Quoted Text
Quoted TextNow that is cool Linus! Was there really a flak panther?? That looks like a fun build.
Not many, from what I understand. Another field mod, and not an official release.
There is evidence of its existence in Czechoslovakia in '45.
Chaman911

Joined: August 28, 2015
KitMaker: 319 posts
Armorama: 308 posts
Posted: Monday, November 06, 2017 - 05:47 PM UTC
Neat pic. Looking forward to your build

LinusB

Joined: March 21, 2016
KitMaker: 247 posts
Armorama: 126 posts

Posted: Tuesday, November 07, 2017 - 07:08 AM UTC
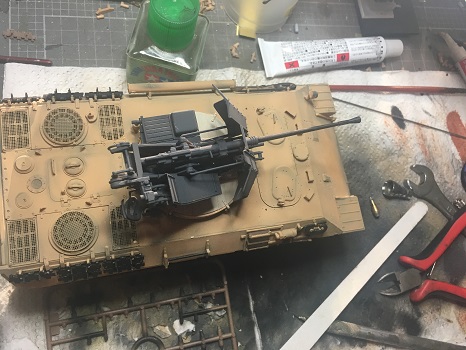
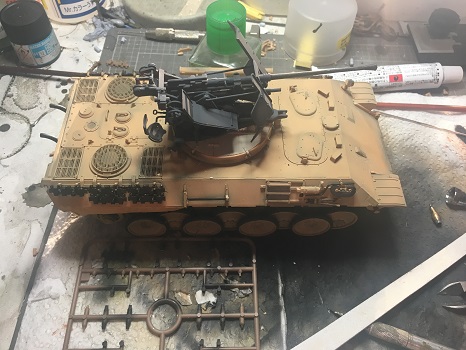
Progress on my Panther. I screwed up the tracks so am waiting on some Bronco replacements.


LikesTanks

Joined: May 07, 2013
KitMaker: 242 posts
Armorama: 234 posts

Posted: Tuesday, November 07, 2017 - 08:47 AM UTC
Nice contrast of dark gun on light hull Linus.
Time consuming part of build out of the way:

and the photo-etch zimmerit:

Time consuming part of build out of the way:

and the photo-etch zimmerit:

Posted: Tuesday, November 07, 2017 - 10:41 AM UTC
Linus,
That looks cool!
Richard,
chassis looks great, keep going!
Gaz
That looks cool!
Richard,
chassis looks great, keep going!
Gaz
Posted: Tuesday, November 07, 2017 - 11:16 AM UTC
Hello folk.
May I present my entry for this GB. My apologies for posting the start pictures so late. I took the pictures but before I could edit them and post it, my laptop gave up its ghost. I tried having it fixed but as the technician its time had come. May it Rust in Peace
So having just setup my new laptop, let me update you all on my progress
 Dragon 1/35 King Tiger Porsche turret by iflytb20, on Flickr
Dragon 1/35 King Kitty with Porsche turret and moulded Zimm
 Dragon 1/35 King Tiger Porsche turret by iflytb20, on Flickr
Also the day my laptop went pffttt
 Dragon 1/35 King Tiger Porsche turret by iflytb20, on Flickr
Lt Minion is happy
 Dragon 1/35 King Tiger Porsche turret by iflytb20, on Flickr
The kit is an old one so it still has the dragon goodies in it. Metal barrel, tons of PE, Magic Tracks etc
 Dragon 1/35 King Tiger Porsche turret by iflytb20, on Flickr
And speaking of PE.....
 Dragon 1/35 King Tiger Porsche turret by iflytb20, on Flickr
I coudn't see beyond 3 inches for an hour
 Dragon 1/35 King Tiger Porsche turret by iflytb20, on Flickr
I'm happy with my first time bending PE like David Beckham.
 Dragon 1/35 King Tiger Porsche turret by iflytb20, on Flickr
The planned scheme
 Dragon 1/35 King Tiger Porsche turret by iflytb20, on Flickr
Painted the turret to see if I can pull it off. Still needs a little touchup but what do you guys think?
Stay tuned for more update
Cheers
May I present my entry for this GB. My apologies for posting the start pictures so late. I took the pictures but before I could edit them and post it, my laptop gave up its ghost. I tried having it fixed but as the technician its time had come. May it Rust in Peace

So having just setup my new laptop, let me update you all on my progress

 Dragon 1/35 King Tiger Porsche turret by iflytb20, on Flickr
Dragon 1/35 King Kitty with Porsche turret and moulded Zimm
 Dragon 1/35 King Tiger Porsche turret by iflytb20, on Flickr
Also the day my laptop went pffttt
 Dragon 1/35 King Tiger Porsche turret by iflytb20, on Flickr
Lt Minion is happy
 Dragon 1/35 King Tiger Porsche turret by iflytb20, on Flickr
The kit is an old one so it still has the dragon goodies in it. Metal barrel, tons of PE, Magic Tracks etc
 Dragon 1/35 King Tiger Porsche turret by iflytb20, on Flickr
And speaking of PE.....
 Dragon 1/35 King Tiger Porsche turret by iflytb20, on Flickr
I coudn't see beyond 3 inches for an hour
 Dragon 1/35 King Tiger Porsche turret by iflytb20, on Flickr
I'm happy with my first time bending PE like David Beckham.
 Dragon 1/35 King Tiger Porsche turret by iflytb20, on Flickr
The planned scheme

 Dragon 1/35 King Tiger Porsche turret by iflytb20, on Flickr
Painted the turret to see if I can pull it off. Still needs a little touchup but what do you guys think?
Stay tuned for more update
Cheers

Posted: Wednesday, November 08, 2017 - 12:28 AM UTC
I think you are freakin' hilarious, Raj....oh, the tank is looking good, too! 


LinusB

Joined: March 21, 2016
KitMaker: 247 posts
Armorama: 126 posts

Posted: Wednesday, November 08, 2017 - 06:57 AM UTC
Hey Raj
Looking great, nice work on the turret. The size of that pe is making my eyes water!
Looking great, nice work on the turret. The size of that pe is making my eyes water!

ColinEdm


Joined: October 15, 2013
KitMaker: 1,355 posts
Armorama: 1,229 posts

Posted: Wednesday, November 08, 2017 - 10:59 PM UTC
Looking good guys, I love the flak BergPanther, and Raj, I remember that tiny PE when I did that exact kit, i couldn't see straight for a few days. Weathering is progressing on my knocked out Kassel Octopus Tiger, a bit more to go then I can do the fire damage. also working on the link and length tracks (not a fan), will need to get those on as well. I'm aiming for a look of abandonment on this, a few years after the war, everything useful picked over and stripped.
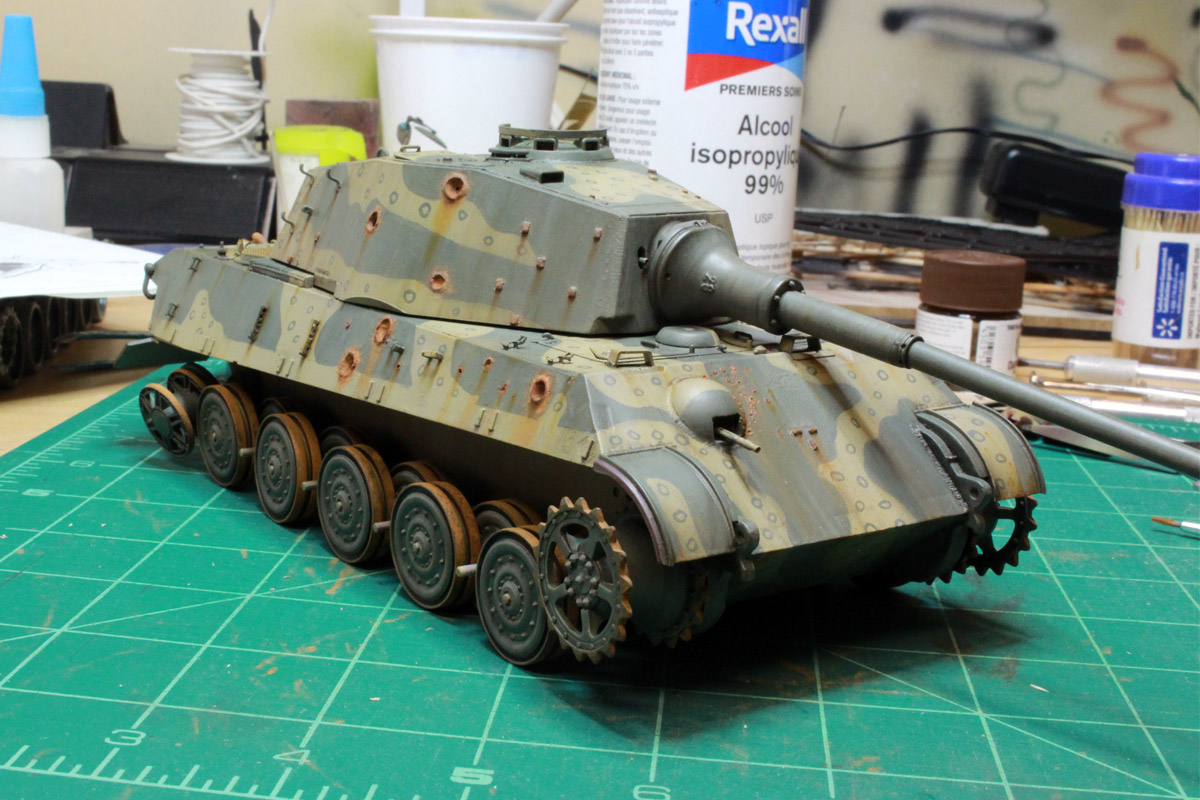
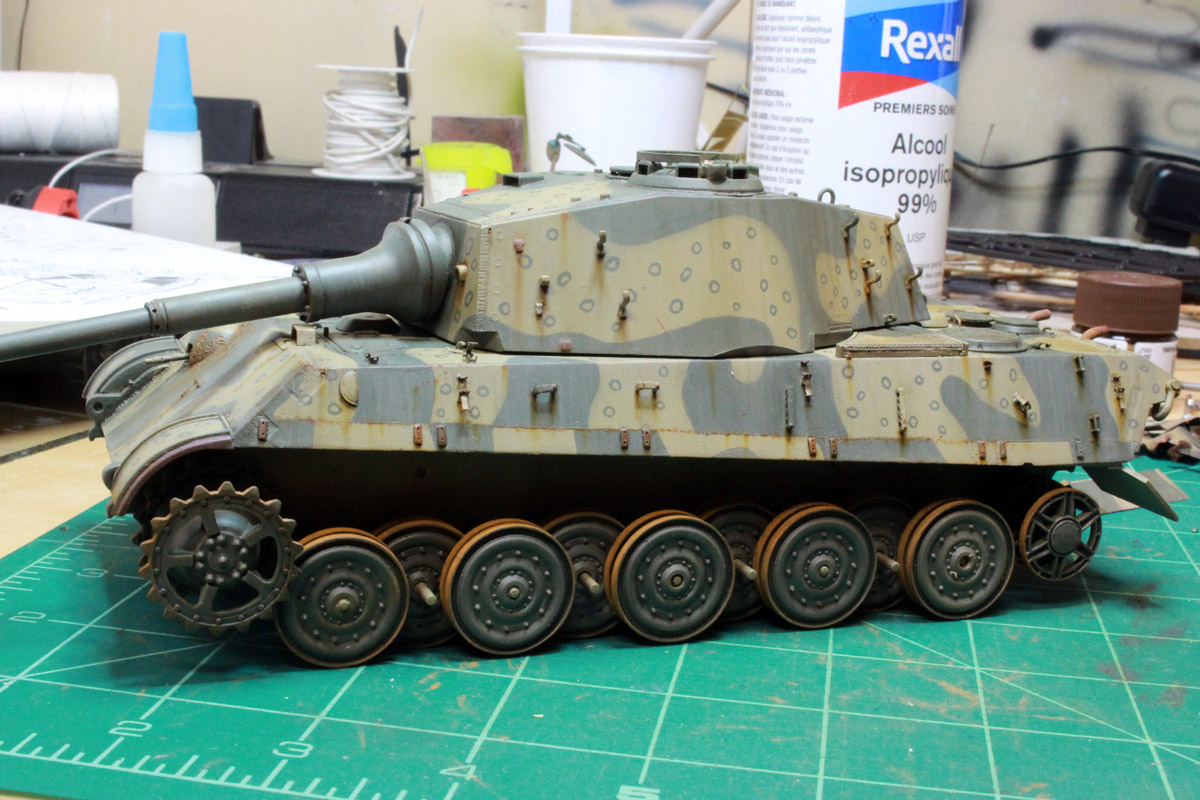
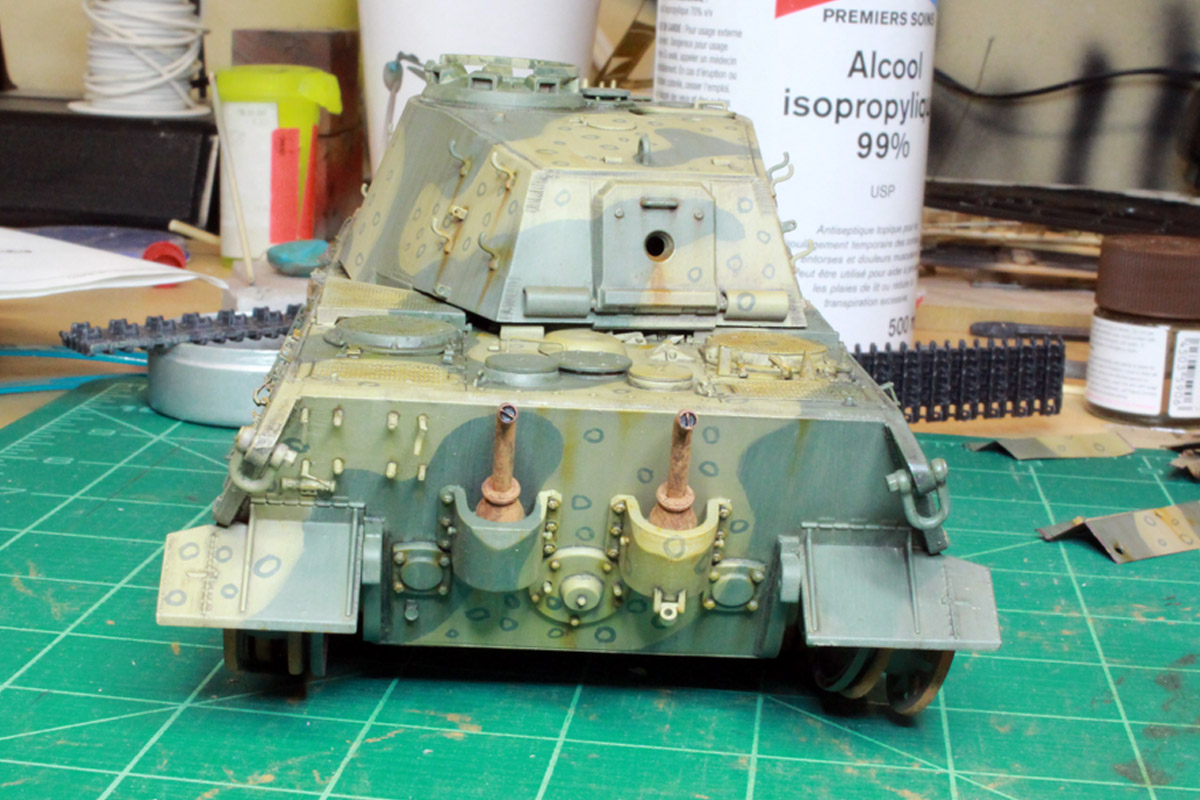
Think I need to drill out those exhaust pipes...


Think I need to drill out those exhaust pipes...
LikesTanks

Joined: May 07, 2013
KitMaker: 242 posts
Armorama: 234 posts

Posted: Wednesday, November 08, 2017 - 11:22 PM UTC
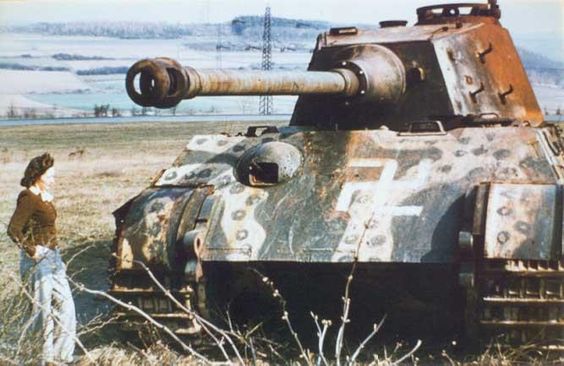
I like the weeping rust stains, but if you're going for the picked-over look then you might consider losing the bow machine gun as that seems to be the first thing that goes.

ColinEdm


Joined: October 15, 2013
KitMaker: 1,355 posts
Armorama: 1,229 posts

Posted: Thursday, November 09, 2017 - 01:06 AM UTC
Thought about that but this picture from after the war seems to show it still in place:

Posted: Thursday, November 09, 2017 - 02:03 AM UTC
Raj,
That;s some nice looking work! I wouldn't even try those little PE latches. My eyes and hands aren't up to it. Paint looks great!
Colin,
That looks really awesome. Love the believable rust.
Gaz
That;s some nice looking work! I wouldn't even try those little PE latches. My eyes and hands aren't up to it. Paint looks great!
Colin,
That looks really awesome. Love the believable rust.
Gaz
Posted: Thursday, November 09, 2017 - 07:10 PM UTC
My contribution to the campaign: A JagdPanther from Dragon.
I had earlier posted I was doing a Panther G but decided to go with the JagdPanther as I just like the look of it more.
I will be building this completely OOB as just lately I couldn't be bothered to deal with PE due to working on 1/350 ships with loads of it.
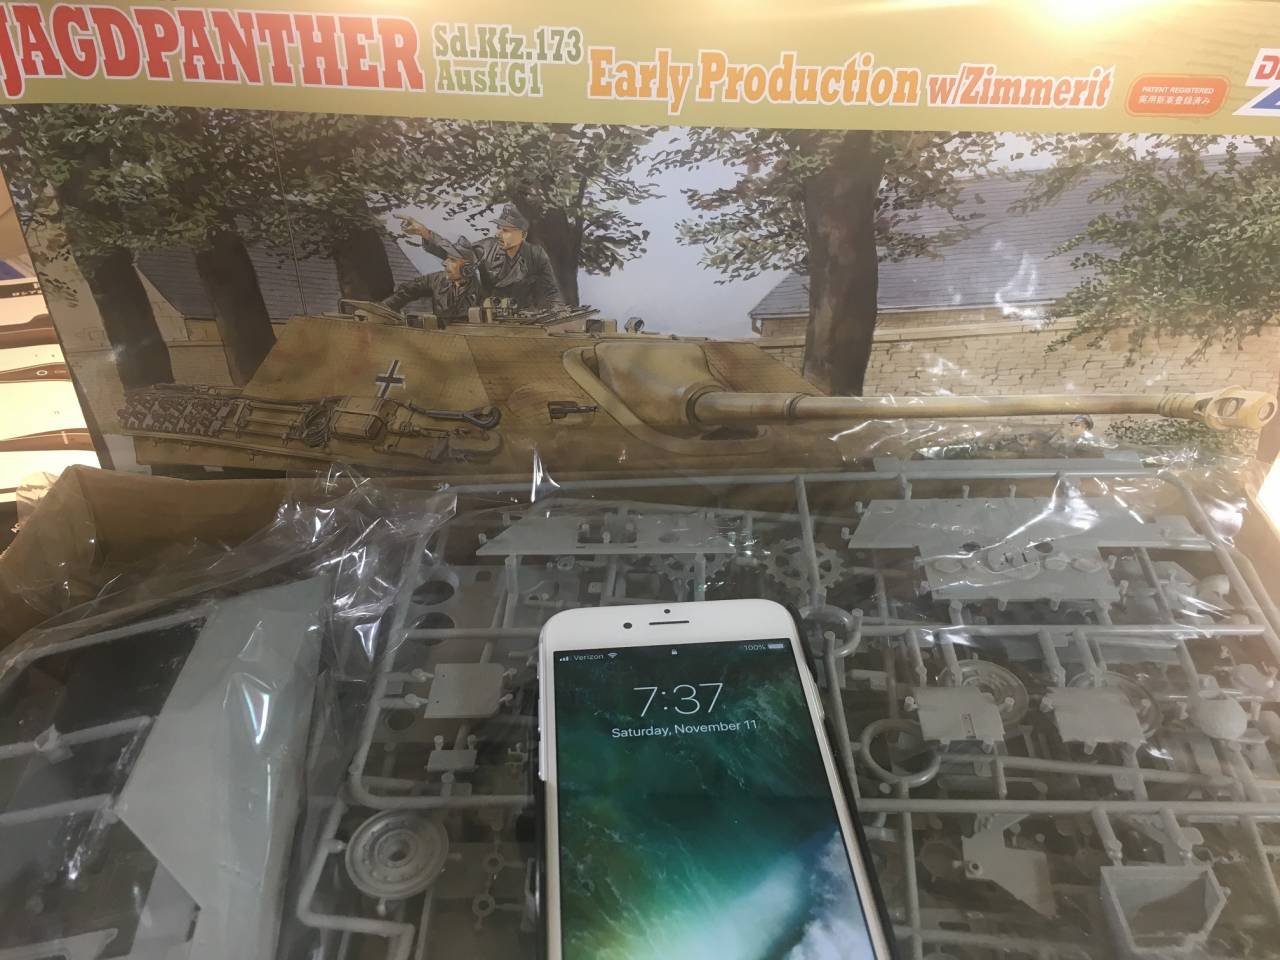
I had earlier posted I was doing a Panther G but decided to go with the JagdPanther as I just like the look of it more.
I will be building this completely OOB as just lately I couldn't be bothered to deal with PE due to working on 1/350 ships with loads of it.


Bluestab

Joined: December 03, 2009
KitMaker: 2,160 posts
Armorama: 1,906 posts

Posted: Friday, November 10, 2017 - 11:49 AM UTC
A quick update on alot of work.
As a refresher...I'm building a Testors boxing of the Italeri Leopard 1a4 as a what-if vehicle used by a "privateer" styled mercenary unit. The setting is a word where the West and Soviets have decided to focus on conventional proxy units to fight their wars to lessen the chances of nuclear war. To be fair, the superpowers use these privateers to test equipment and train.
The basic assembly is done. A quick review of the what-if additions to the Leo 1a4...the rest is pretty straightforward. This is a customized privateer styled force so I want a mixture of equipment. I was going to use a loader's 7.62mm MG from an old Tamiya M1 but went with a 50cal from a Trumpy JGSDF Command vehicle. I swapped out the kit's spotlight for a US version from the spares. The German smoke launchers were left off in favor of an armored set from the spares. I like to use the German style launchers on privateer M113s.
I was going to add reactive armor but it really didn't look right. The front of the turret just throws averything off. I did add some styrene armor to the gunner's sight and left off the kit's guards for it. I used the alternative front fender sections. I think they look "faster" than the larger sections you usually see.
Since I am using storage boxes instead of mouting all the tools to the side, I left alot of them off. You can assume they are in the storage boxes. I am going to mount some on the rear deck...tools that are too large for the boxes. I also put the gun cleaning rod on the rear of the turret.


Gray and dark green is the scheme I use for this unit. The lower hull and road-wheels are left dark green. The first coat is a light-med gray...which also serves as a primer coat. I masked it off and shot the dark green. And that's where she stands now...she's drying.

I still have to add the roadwheels and tracks, weather & drybrush it. Add stowage. Wire the spotlight. Add aerial mounts...the kit ones are garbage. I'll probably give the commander a M60. And of course the crew...if time allows. For markings, I have a set of Jolly Rogers and Skull & Crossbones made by Archer. I'll add some other markings...like vehicle numbers and maybe some art.
So the next update will probably be the last one.
As a refresher...I'm building a Testors boxing of the Italeri Leopard 1a4 as a what-if vehicle used by a "privateer" styled mercenary unit. The setting is a word where the West and Soviets have decided to focus on conventional proxy units to fight their wars to lessen the chances of nuclear war. To be fair, the superpowers use these privateers to test equipment and train.
The basic assembly is done. A quick review of the what-if additions to the Leo 1a4...the rest is pretty straightforward. This is a customized privateer styled force so I want a mixture of equipment. I was going to use a loader's 7.62mm MG from an old Tamiya M1 but went with a 50cal from a Trumpy JGSDF Command vehicle. I swapped out the kit's spotlight for a US version from the spares. The German smoke launchers were left off in favor of an armored set from the spares. I like to use the German style launchers on privateer M113s.
I was going to add reactive armor but it really didn't look right. The front of the turret just throws averything off. I did add some styrene armor to the gunner's sight and left off the kit's guards for it. I used the alternative front fender sections. I think they look "faster" than the larger sections you usually see.
Since I am using storage boxes instead of mouting all the tools to the side, I left alot of them off. You can assume they are in the storage boxes. I am going to mount some on the rear deck...tools that are too large for the boxes. I also put the gun cleaning rod on the rear of the turret.


Gray and dark green is the scheme I use for this unit. The lower hull and road-wheels are left dark green. The first coat is a light-med gray...which also serves as a primer coat. I masked it off and shot the dark green. And that's where she stands now...she's drying.

I still have to add the roadwheels and tracks, weather & drybrush it. Add stowage. Wire the spotlight. Add aerial mounts...the kit ones are garbage. I'll probably give the commander a M60. And of course the crew...if time allows. For markings, I have a set of Jolly Rogers and Skull & Crossbones made by Archer. I'll add some other markings...like vehicle numbers and maybe some art.
So the next update will probably be the last one.
Posted: Friday, November 10, 2017 - 12:50 PM UTC
cool concept, Alex!

ColinEdm


Joined: October 15, 2013
KitMaker: 1,355 posts
Armorama: 1,229 posts

Posted: Sunday, November 12, 2017 - 05:11 AM UTC
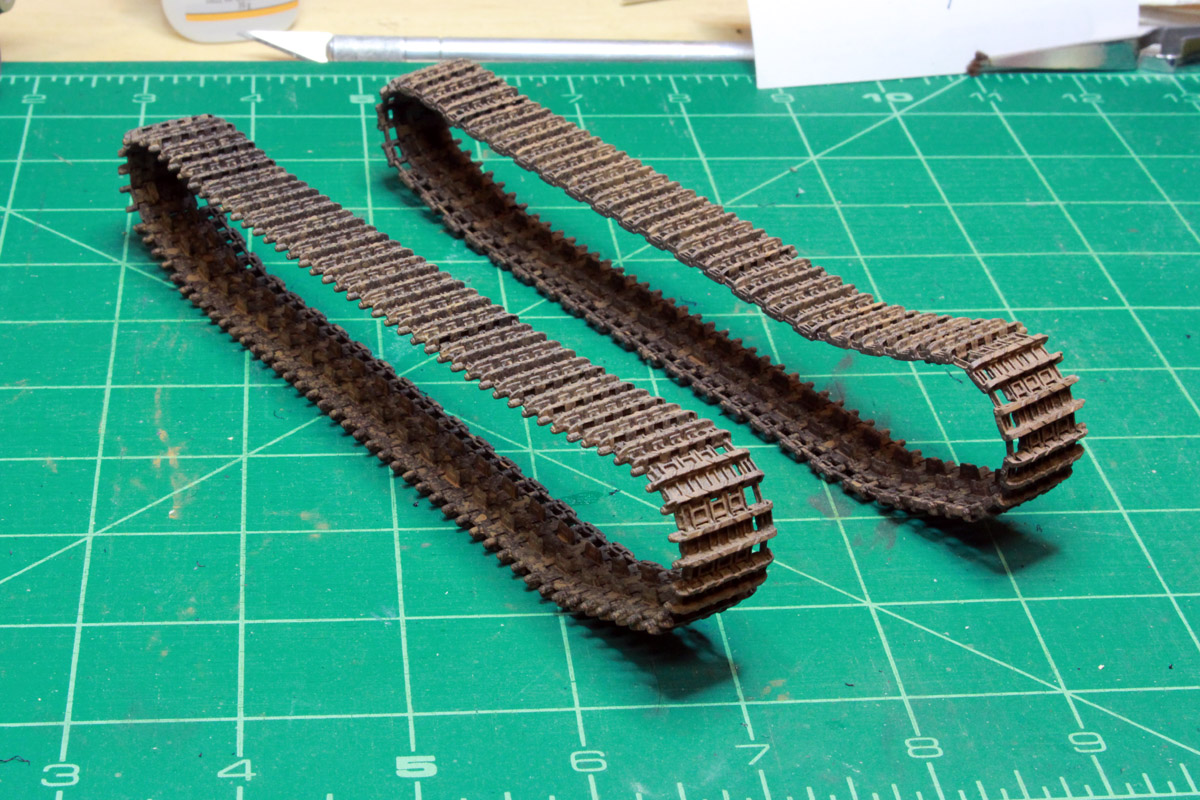
Some rusty tracks...

Thirian24

Joined: September 30, 2015
KitMaker: 2,493 posts
Armorama: 2,344 posts

Posted: Sunday, November 12, 2017 - 07:22 AM UTC
Looking gray fellas!
Colin, that Tiger is lookin sweet.
Colin, that Tiger is lookin sweet.
Posted: Sunday, November 12, 2017 - 08:08 PM UTC
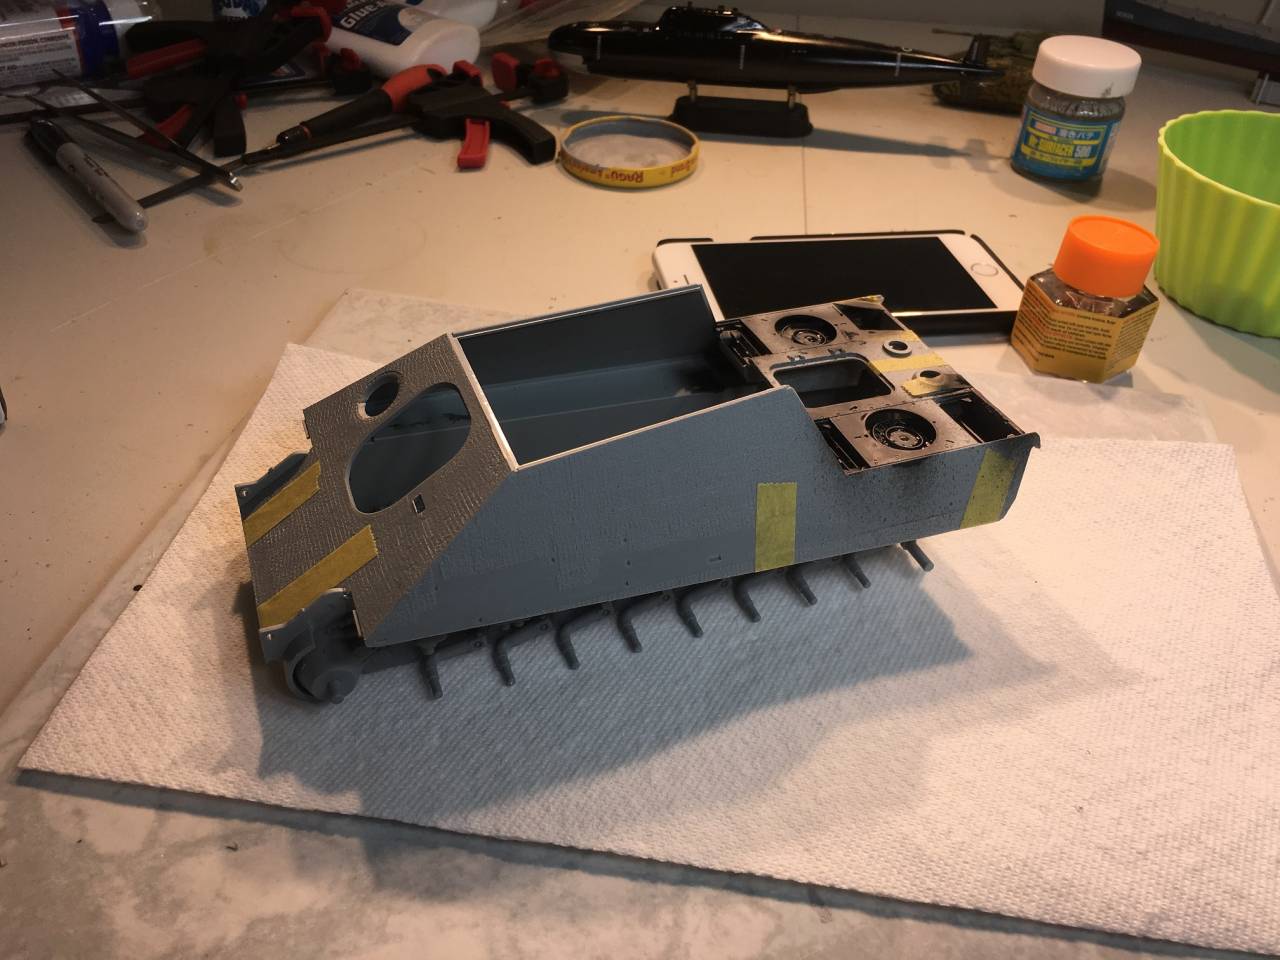
Work continues on the Jagdpanther. Suspension is done and hull has been put together.
I will say the instructions are not the best. Dragon would have you attach everything to the upper and lower hull first and then mate them together as almost the last step. This would be a terrible idea as given the issues I had getting the hull halves together, you would end up breaking all that detail right off.
As it is, apart from that, its going together very nicely.

Posted: Monday, November 13, 2017 - 04:36 PM UTC
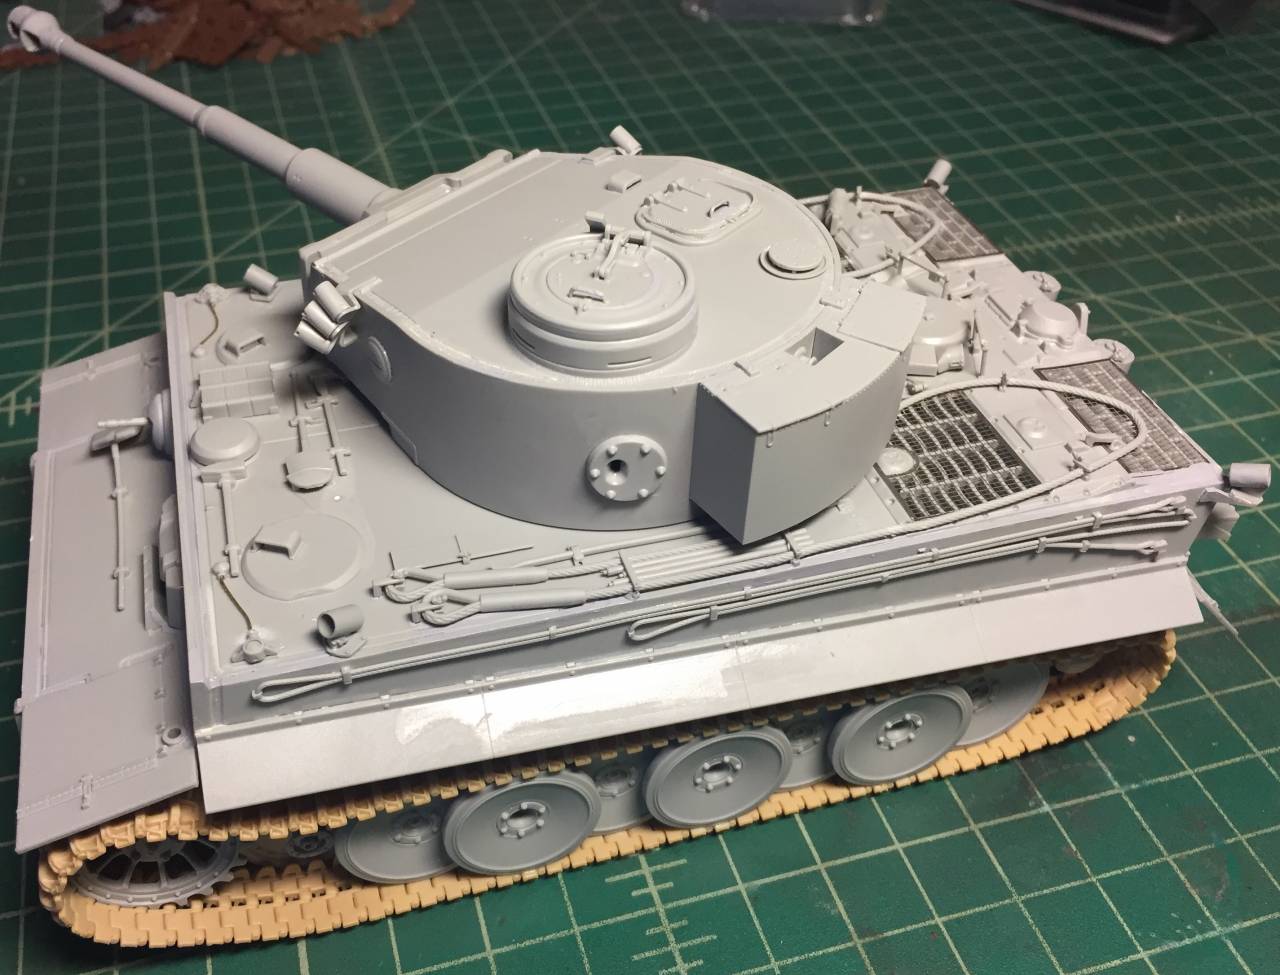
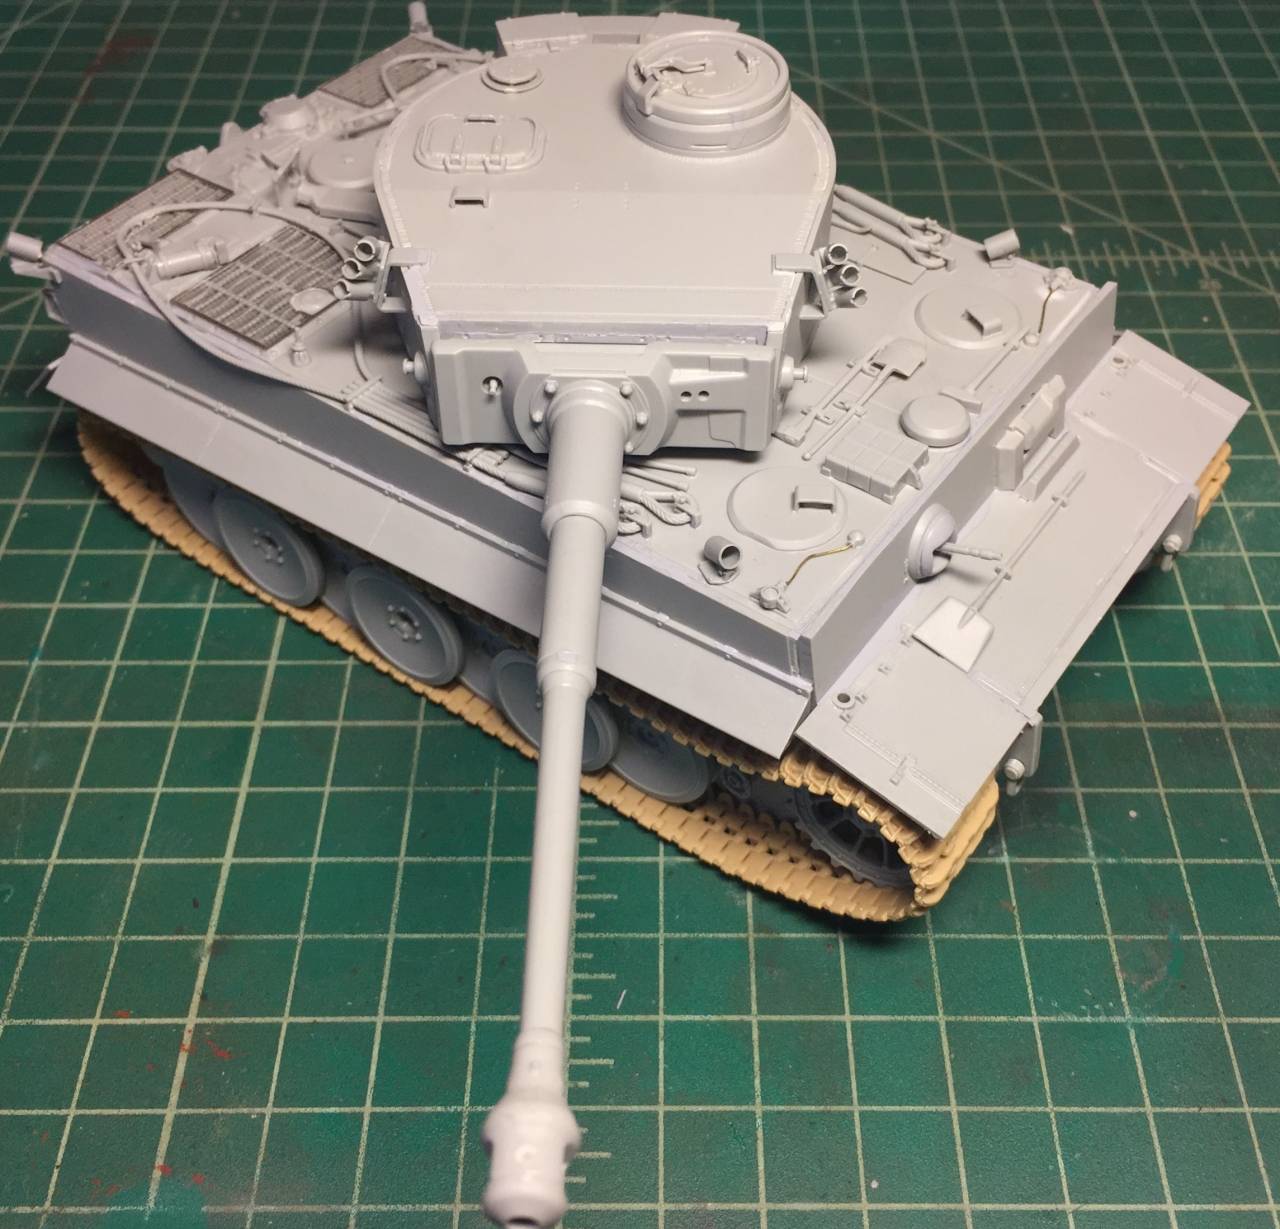
Finished the Girls and Panzer Tiger 1 over the long weekend. The instructions were terrible like a lot of Dragons kits and there were numerous mistakes and parts omitted. The kit is pretty much OOB except for the engine grills, headlight cables, and S Mine dischargers I should be able to get to painting it this weekend.


Posted: Wednesday, November 15, 2017 - 08:25 AM UTC
The bug has bitten me hard so I have had my nose to the grindstone.
A flurry of glue and plastic later I find myself at this stage:
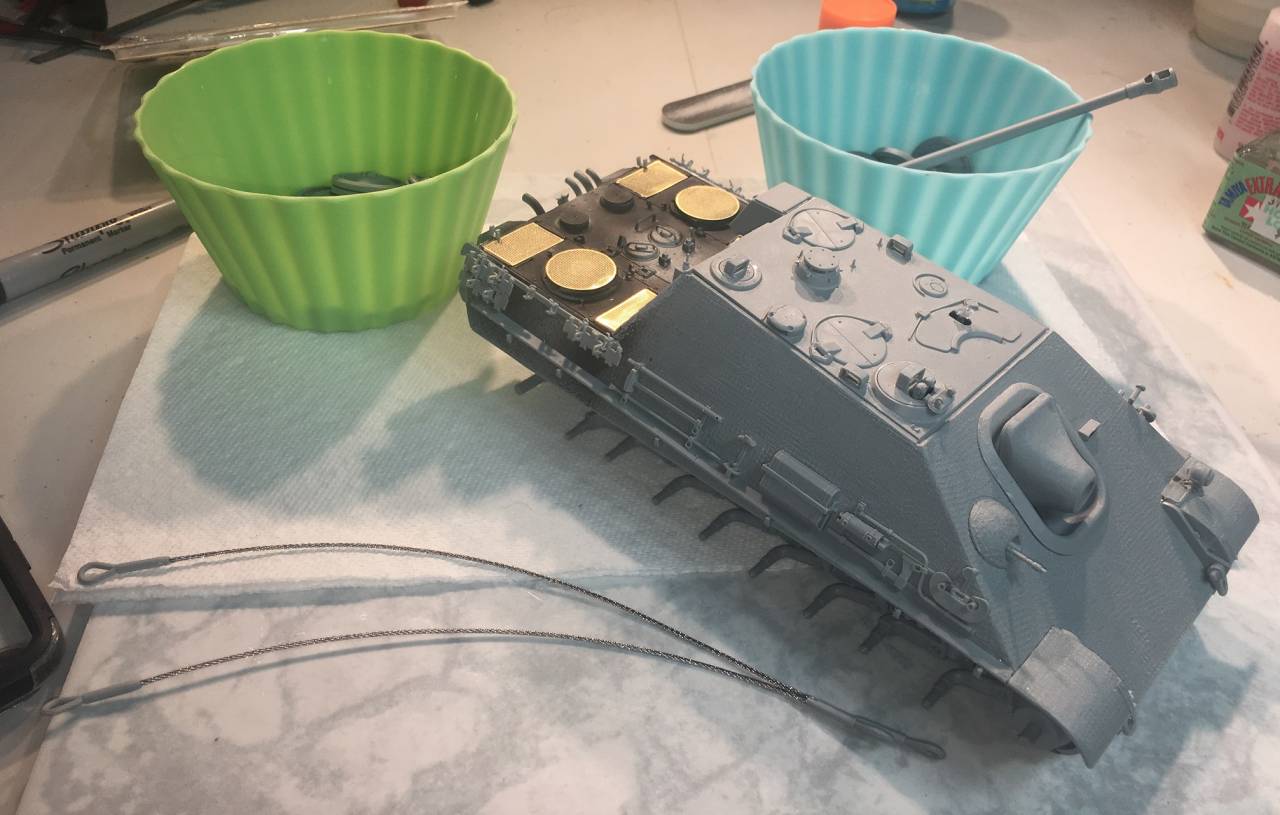
Now I am just trying to decide on a camo scheme. I found one I like but have yet to find historical evidence that it was ever actually applied to vehicle in the field.
A flurry of glue and plastic later I find myself at this stage:

Now I am just trying to decide on a camo scheme. I found one I like but have yet to find historical evidence that it was ever actually applied to vehicle in the field.

ColinEdm


Joined: October 15, 2013
KitMaker: 1,355 posts
Armorama: 1,229 posts

Posted: Thursday, November 16, 2017 - 10:54 AM UTC
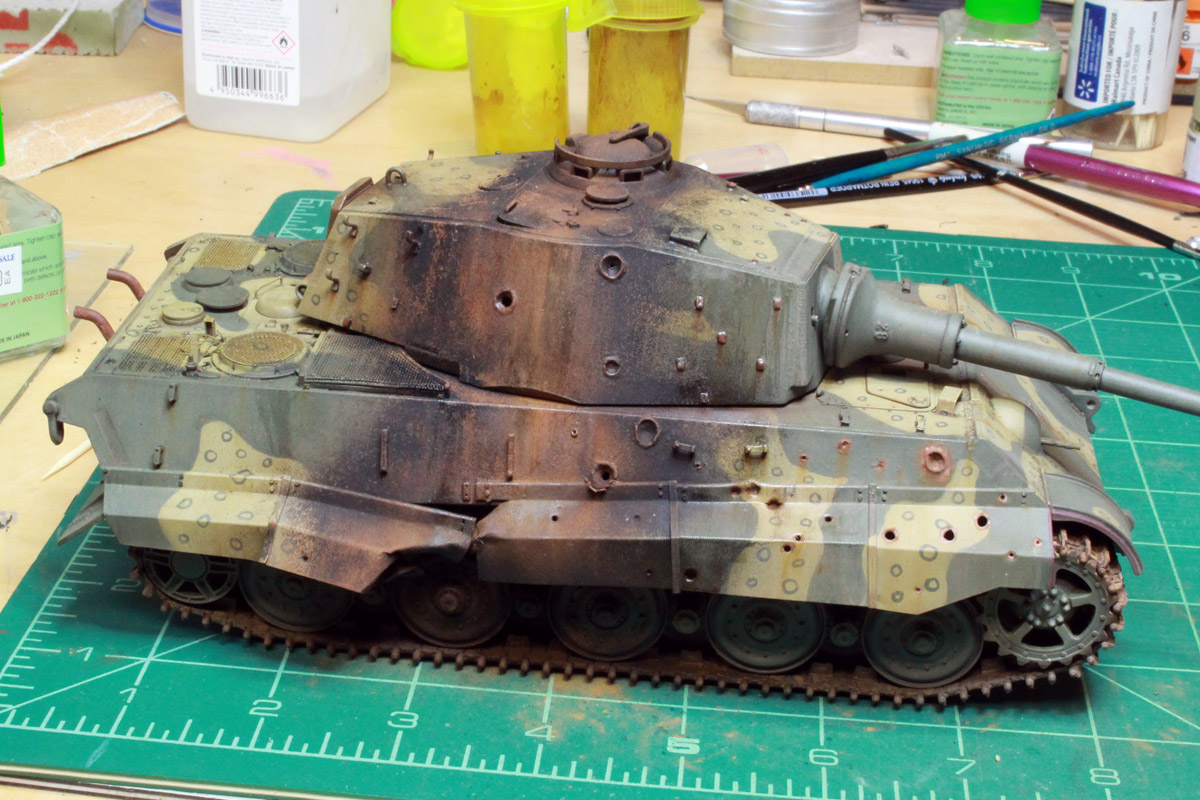
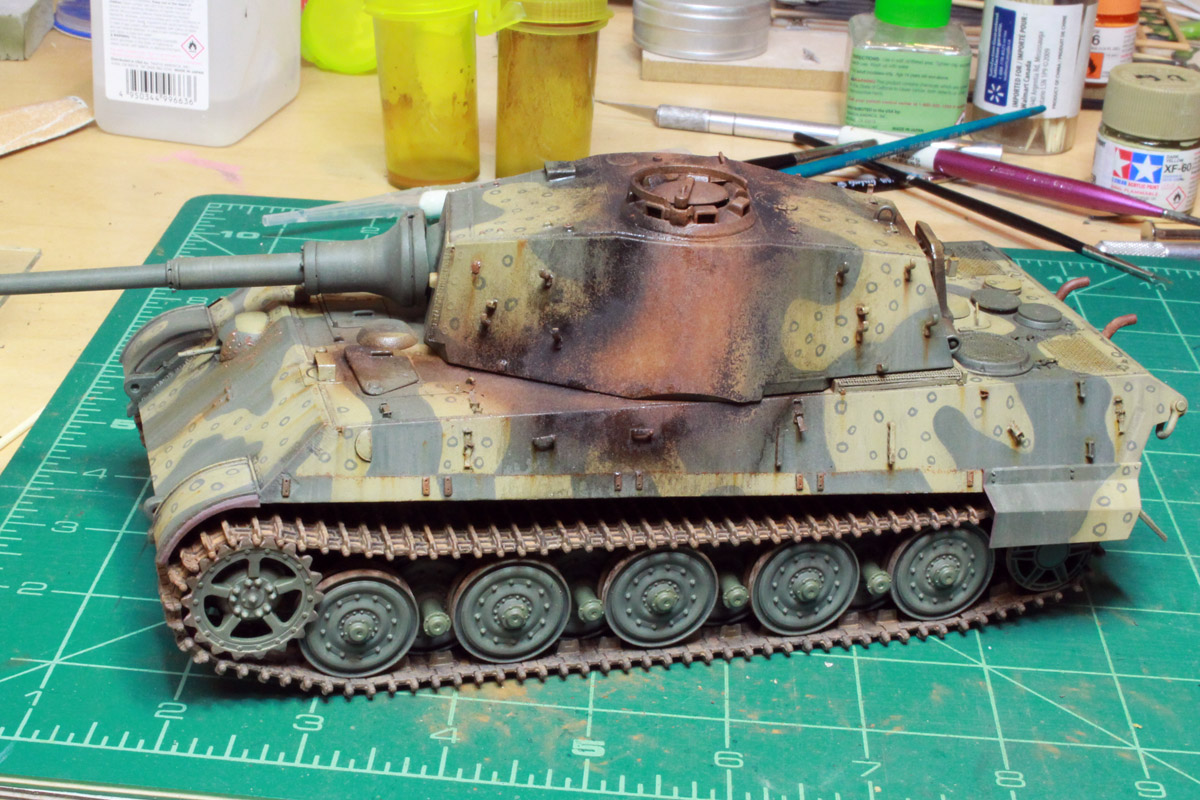
Looking good guys! Getting close to calling this one done, added the rusty and sooty areas from the fire damage:


Nito74

Joined: March 04, 2008
KitMaker: 5,386 posts
Armorama: 4,727 posts

Posted: Thursday, November 16, 2017 - 05:24 PM UTC
Very nice work Colin !
Thirian24

Joined: September 30, 2015
KitMaker: 2,493 posts
Armorama: 2,344 posts

Posted: Friday, November 17, 2017 - 03:10 AM UTC
Extremely nice job, Colin!
 |


