Hi all,
Dropping in with Tiger Model's T-90MS.
Lots of great looking MBT coming together.
-Nate
Campaigns: Active Campaigns
Campaigns that are either in planning or underway should be grouped here.
Hosted by Richard S.
MBT Campaign
Hangelafette
Pennsylvania, United States
Joined: April 22, 2012
KitMaker: 344 posts
Armorama: 315 posts
Joined: April 22, 2012
KitMaker: 344 posts
Armorama: 315 posts
Posted: Wednesday, February 20, 2019 - 03:53 AM UTC
agriamodeling
Budapest, Hungary
Joined: March 09, 2018
KitMaker: 206 posts
Armorama: 205 posts
Joined: March 09, 2018
KitMaker: 206 posts
Armorama: 205 posts
Posted: Wednesday, February 20, 2019 - 03:58 AM UTC
A bit update after some progress on my Trumpeter T-80B tank. I have glued many small PE bits and parts (mainly on the turrent) but still need to complete the hull (engine grille on the back side, also the unditching log and external fuel drums) before the painting process starts. Hope to finish assembly in the next 1-2 weeks as my Evolution gun is thirsty to some russian green.
IMG_6630
IMG_6630
agriamodeling
Budapest, Hungary
Joined: March 09, 2018
KitMaker: 206 posts
Armorama: 205 posts
Joined: March 09, 2018
KitMaker: 206 posts
Armorama: 205 posts
Posted: Wednesday, February 20, 2019 - 04:00 AM UTC
Posted: Thursday, February 21, 2019 - 05:14 AM UTC
Tamas, that's some beautiful PE work!
Igorbc
Croatia Hrvatska
Joined: December 11, 2015
KitMaker: 101 posts
Armorama: 95 posts
Joined: December 11, 2015
KitMaker: 101 posts
Armorama: 95 posts
Posted: Thursday, February 21, 2019 - 07:29 AM UTC
petbat
Queensland, Australia
Joined: August 06, 2005
KitMaker: 3,353 posts
Armorama: 3,121 posts
Joined: August 06, 2005
KitMaker: 3,353 posts
Armorama: 3,121 posts
Posted: Thursday, February 21, 2019 - 07:39 AM UTC
Very nice clean lines Tamas. A lot of tiny bits to accidentally knock off there, but they add a lot!
Nice Camo finish Igor. Looking real good.
agriamodeling
Budapest, Hungary
Joined: March 09, 2018
KitMaker: 206 posts
Armorama: 205 posts
Joined: March 09, 2018
KitMaker: 206 posts
Armorama: 205 posts
Posted: Saturday, February 23, 2019 - 10:23 PM UTC
Thank you Peter!
It is a massive job to add the PE stuff as the Voyager set is full of tiniest parts everywhere. Although I try to detail up as much as possible, I select only what adds interest details to the model - and still can keep safe with my tweezers.
agriamodeling
Budapest, Hungary
Joined: March 09, 2018
KitMaker: 206 posts
Armorama: 205 posts
Joined: March 09, 2018
KitMaker: 206 posts
Armorama: 205 posts
Posted: Saturday, February 23, 2019 - 10:26 PM UTC
Some progress yesterday evening: the toughest part (engine cover) is finished now. The pics were taken during assy because finished after midnight and had no chance to make any good photo.
I expect finishing the assy in the next 2 weeks.
T80B_engine_02 by Tamas Erdosi, on Flickr
T80B_engine_01 by Tamas Erdosi, on Flickr
I expect finishing the assy in the next 2 weeks.
T80B_engine_02 by Tamas Erdosi, on Flickr
T80B_engine_01 by Tamas Erdosi, on Flickr
agriamodeling
Budapest, Hungary
Joined: March 09, 2018
KitMaker: 206 posts
Armorama: 205 posts
Joined: March 09, 2018
KitMaker: 206 posts
Armorama: 205 posts
Posted: Saturday, February 23, 2019 - 10:30 PM UTC
Very nice looking tank Igor!
I have the Meng AMX-30B2 with extra Voyager PE set in the stash, hope I can achieve similar amazing result.
Tamas
I have the Meng AMX-30B2 with extra Voyager PE set in the stash, hope I can achieve similar amazing result.
Tamas
Igorbc
Croatia Hrvatska
Joined: December 11, 2015
KitMaker: 101 posts
Armorama: 95 posts
Joined: December 11, 2015
KitMaker: 101 posts
Armorama: 95 posts
Posted: Saturday, February 23, 2019 - 10:58 PM UTC
I am pleased to read good comments.
Thank you very much.
Igorbc
Croatia Hrvatska
Joined: December 11, 2015
KitMaker: 101 posts
Armorama: 95 posts
Joined: December 11, 2015
KitMaker: 101 posts
Armorama: 95 posts
Posted: Monday, February 25, 2019 - 09:56 PM UTC
petbat
Queensland, Australia
Joined: August 06, 2005
KitMaker: 3,353 posts
Armorama: 3,121 posts
Joined: August 06, 2005
KitMaker: 3,353 posts
Armorama: 3,121 posts
Posted: Tuesday, February 26, 2019 - 08:50 PM UTC
Excellent Igor. very well done indeed.
MichaelSatin
Campaigns Administrator
Colorado, United States
Joined: January 19, 2008
KitMaker: 3,909 posts
Armorama: 510 posts
Joined: January 19, 2008
KitMaker: 3,909 posts
Armorama: 510 posts
Posted: Wednesday, February 27, 2019 - 12:05 AM UTC
Really well done Igor! You're looking good there too, Tamas!
Michael
Michael
agriamodeling
Budapest, Hungary
Joined: March 09, 2018
KitMaker: 206 posts
Armorama: 205 posts
Joined: March 09, 2018
KitMaker: 206 posts
Armorama: 205 posts
Posted: Friday, March 01, 2019 - 08:53 AM UTC
Hi Igor,
Nice camouflage on the AMX. I also planned this onto my Tamiya Leclerc. What colours you used?
May I also ask about the grille over the exhaust? Are some those tiny holes closed by the paint?
Tamás
Nice camouflage on the AMX. I also planned this onto my Tamiya Leclerc. What colours you used?
May I also ask about the grille over the exhaust? Are some those tiny holes closed by the paint?
Tamás
agriamodeling
Budapest, Hungary
Joined: March 09, 2018
KitMaker: 206 posts
Armorama: 205 posts
Joined: March 09, 2018
KitMaker: 206 posts
Armorama: 205 posts
Posted: Friday, March 01, 2019 - 08:55 AM UTC
Thank you Michael!
Tamás
Tamás
Igorbc
Croatia Hrvatska
Joined: December 11, 2015
KitMaker: 101 posts
Armorama: 95 posts
Joined: December 11, 2015
KitMaker: 101 posts
Armorama: 95 posts
Posted: Saturday, March 02, 2019 - 06:25 AM UTC
I have used Vallejo German grey Vallejo Golden brown and Ammo of Mig Pale Green since french colours are brighter then standard Nato scheme. Grille is cloged due to paint accumulation and have to be cleaned.
5 3rd bank near me
5 3rd bank near me
MichaelSatin
Campaigns Administrator
Colorado, United States
Joined: January 19, 2008
KitMaker: 3,909 posts
Armorama: 510 posts
Joined: January 19, 2008
KitMaker: 3,909 posts
Armorama: 510 posts
Posted: Saturday, March 02, 2019 - 08:02 AM UTC
Looks great Igor!
Michael
Michael
Posted: Sunday, March 03, 2019 - 12:58 AM UTC
Okay, playing catch up again (usual for me) means lots of individual comments (sorry if I‘ve missed anyone):
Igor, both your AMX-30 and your T-80U turned out great!
Michael, looking forward to further developments with your Magach - I have this one in the stash.
Norman, love the Cent!
Tamas, nice progress on your T-80B - your photoetch skills are admirable, that exhaust grill looks like murder.
Pawel, your Leo 2 is excellent, the camo turned out well - I haven‘t seen too many of those built as Polish vehicles.
Rory, fantastic job on the old Dragon Abrams - when I built mine, the stowage basket and the rails on the side of the turret were so brittle and had so many attachment points that it drove me to distraction - so, hats off!
Ken, very cool-looking interior in your T-54-2. Last year I finished building Miniart‘s T-54-3 without an interior, and even those are not easy builds, so, great job!
Richard, good progress on your T-72, nice reworking of the surface texture.
Scott and Nate, looking forward to your builds!
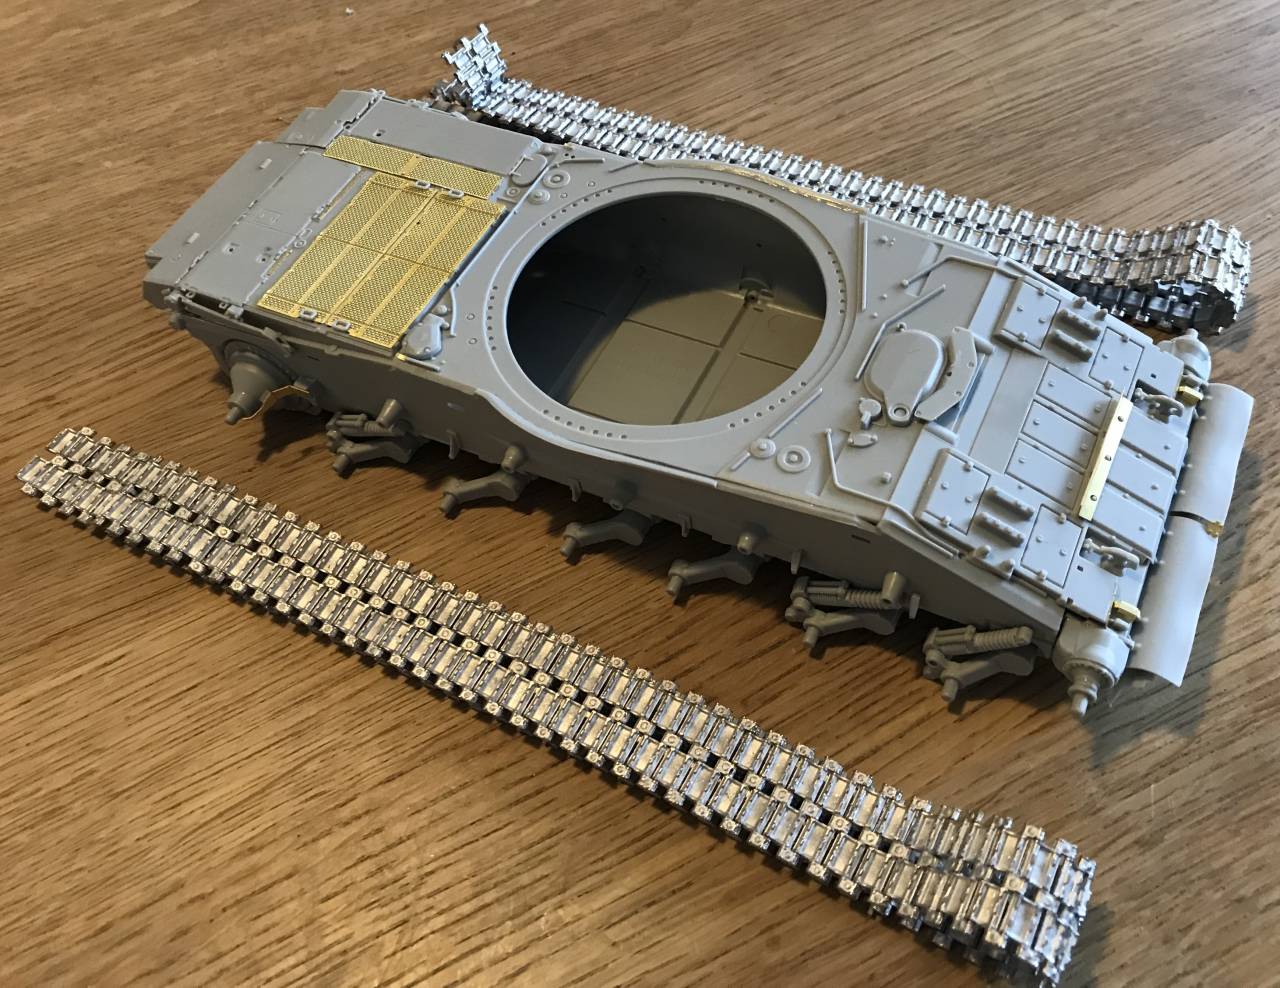
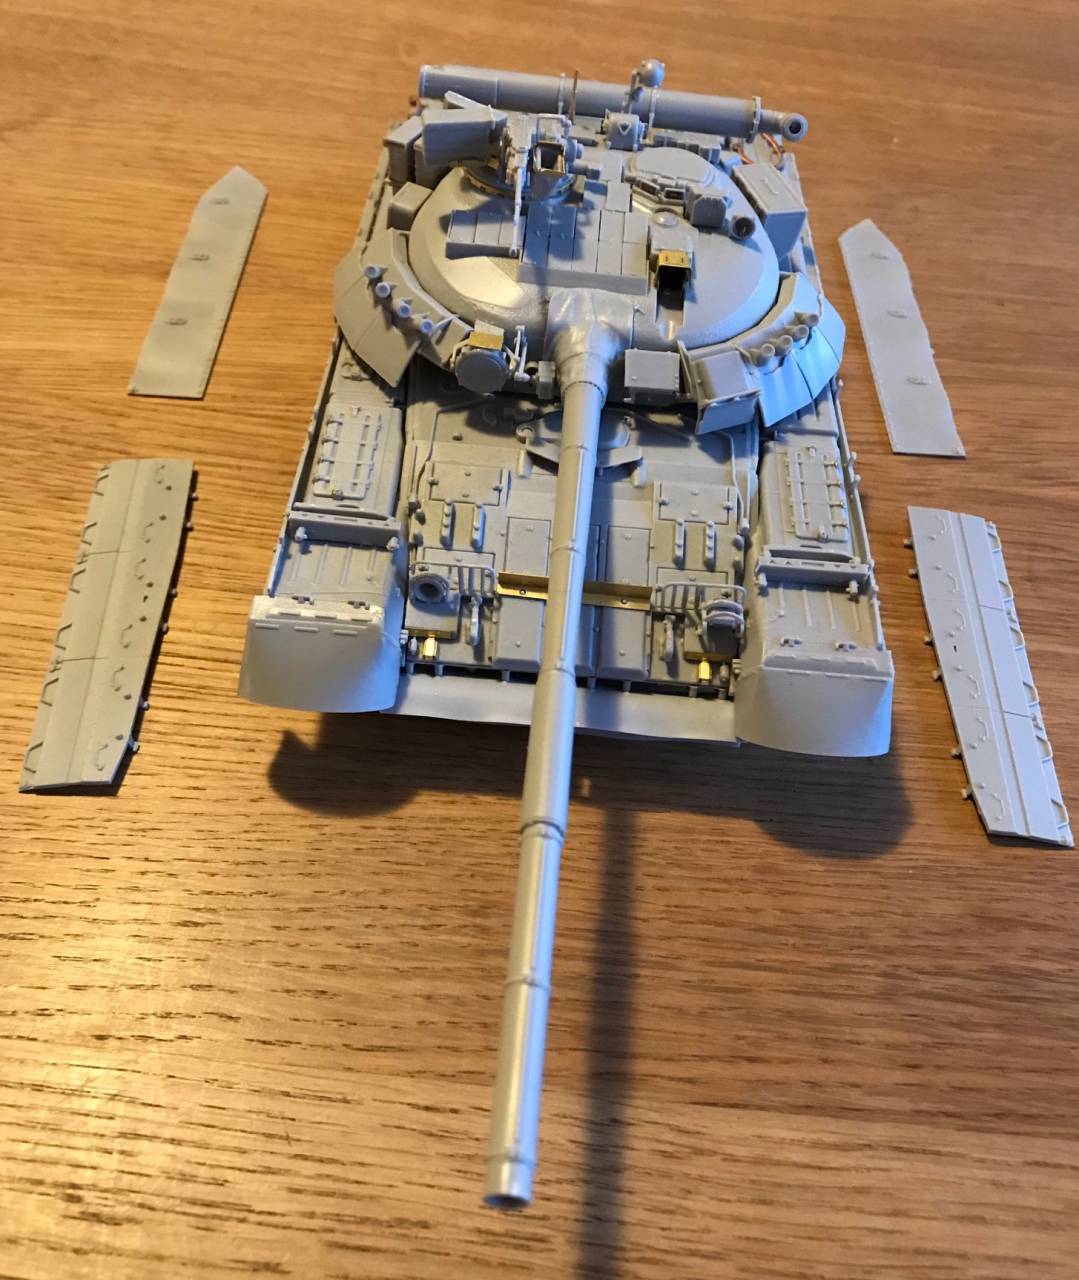
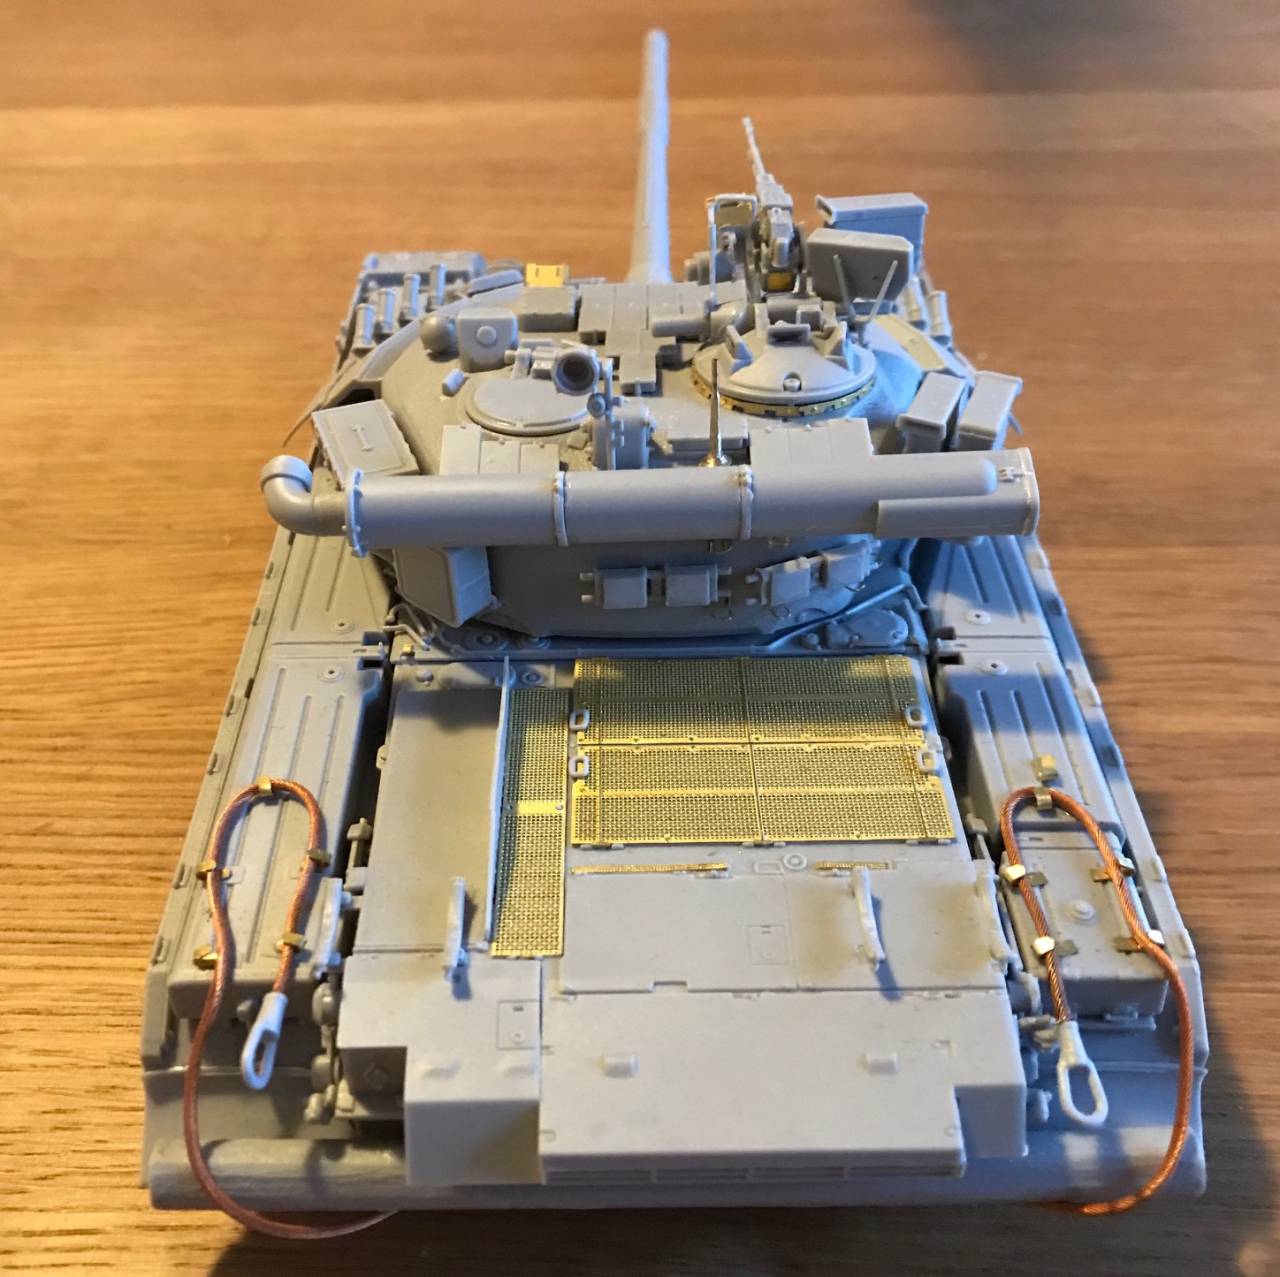
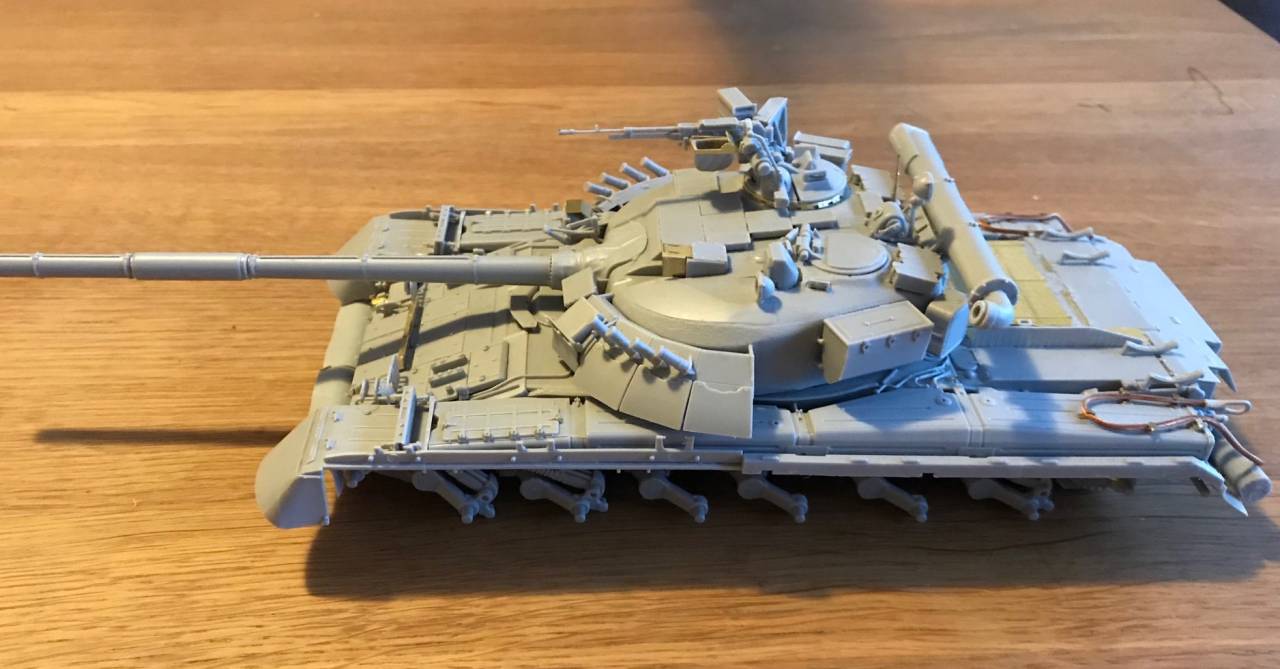
Here are some progress pics of my T-80UD, which is ready for paint. I even went ahead and assembled the tracks first (a first for me - I usually have to force myself to do it kicking and screaming when the rest of the vehicle is painted and ready to weather...):
Because the BM-27 I have going for the Launchers campaign is pretty time-consuming, progress will be slow but steady on this.
Happy modeling, everyone!
Jerry
Igorbc
Croatia Hrvatska
Joined: December 11, 2015
KitMaker: 101 posts
Armorama: 95 posts
Joined: December 11, 2015
KitMaker: 101 posts
Armorama: 95 posts
Posted: Sunday, March 03, 2019 - 06:21 PM UTC
I would like to thank you all for good comments about my work here.
Regarding T 80 U I wish I have used Friul tracks instead Trumpeter workable styrene which proved itself as very hard to deal with and time consuming.
petbat
Queensland, Australia
Joined: August 06, 2005
KitMaker: 3,353 posts
Armorama: 3,121 posts
Joined: August 06, 2005
KitMaker: 3,353 posts
Armorama: 3,121 posts
Posted: Sunday, March 03, 2019 - 08:13 PM UTC
Coming along very nicely Jerry.
Posted: Sunday, March 03, 2019 - 09:04 PM UTC
Peter, thanks! It was a fun little kit to put together.
Igor, I have my own T-80 track story with this one, too. I wanted to avoid the plastic tracks because I didn‘t feel like cleaning up and gluing on all the guide horns, so I went with Masterclub clickable resin tracks. They‘re beautifully detailed, but almost all of them broke along one of the joints between the track pad and the guide horn assembly when I was putting them together, so I switched to the Masterclub metal ones - several of them broke, too, but it was otherwise no problem getting my two track runs together quickly.
Jerry
agriamodeling
Budapest, Hungary
Joined: March 09, 2018
KitMaker: 206 posts
Armorama: 205 posts
Joined: March 09, 2018
KitMaker: 206 posts
Armorama: 205 posts
Posted: Monday, March 04, 2019 - 06:21 PM UTC
Hi Igor,
The best tool I have found so far to clean up the clogged grilles (very typical issue for me, too) is the ball-end of electric guitar strings. I have an Ibanez RG-560 with double locking tremolo, so I alwas cut off the last 2 cm of the string where the ball is. This length is enough to provide safe handling and the std e or H strings are narrow enough to opn up the clogged grille. Care must be taken as the tiny and thin grilles (Voyager or ET model for example) can be easily damaged but after a good 40-50 minutes the result is satisfactory.
No need to say, the old, used strings are perfect antennas on tanks after removed from the guitar. The new ones are never straight enough.
But your AMX looks amazing, congratulation!
Tamas
agriamodeling
Budapest, Hungary
Joined: March 09, 2018
KitMaker: 206 posts
Armorama: 205 posts
Joined: March 09, 2018
KitMaker: 206 posts
Armorama: 205 posts
Posted: Monday, March 04, 2019 - 06:28 PM UTC
Hi Jerry,
That T-80 looks superb. Very nice clean assembly work, really great job. I follow with interest your paint job and colour/camo choosen.
Tamas
Tamas
That T-80 looks superb. Very nice clean assembly work, really great job. I follow with interest your paint job and colour/camo choosen.
Tamas
Tamas
Posted: Tuesday, March 05, 2019 - 11:54 PM UTC
Hi Tamas,
Thanks a lot! I‘m really looking forward to the further progress of your T-80B and observing your proficiency with PE.
Jerry
P.S. Thanks as well for the tip about using old guitar strings for antennas - that will come in useful.
Thanks a lot! I‘m really looking forward to the further progress of your T-80B and observing your proficiency with PE.
Jerry
P.S. Thanks as well for the tip about using old guitar strings for antennas - that will come in useful.
Bluestab
South Carolina, United States
Joined: December 03, 2009
KitMaker: 2,160 posts
Armorama: 1,906 posts
Joined: December 03, 2009
KitMaker: 2,160 posts
Armorama: 1,906 posts
Posted: Sunday, March 10, 2019 - 07:06 AM UTC
Some nice builds.
Time for an update of my own build. It's been a while so a refresher...I'm building Trumpeter's M1a1/A2 5-in-1 kit. I planned on building it as a M1a2 in the sand/white winter scheme, possibly with the mine roller.
The winter scheme is a no-go. The picture I have shows an Abrams with the un-armored smoke launchers and the TUSK cupola. This isn't a kit I want to invest added money in so I'll just build it as a Iraq theater Abrams. I paid $23 for the kit and bought it mainly for the mine roller...so I'm looking to keep this build casual.
I had started with the lower hull and suspension. I went ahead and pre-painted the lower hull with rattle-can. I painted the roadwheels. They are held on with poly center caps. It was pretty normal
The rear...again not alot of special here. I included this shot for one reason...the kit calls for this APU. This works for the M1a1, but for the M1a2 you'd want the stowage rack version. The it includes this version but refers to it as a tool box. So if you follow the directions you'll have two APUs on the A2.
Upper hull is pretty simple. One thing Trumpy did here was mold the side skirts to the upper hull. Academy did this with their K1a1. I don't hate it, but it throws off how I typically build. I usually add skirts last.
Some turret details...the 120mm gun (the kit has two versions), turret storage boxes, and turret APU. There's also four ammo stowage cases.
More turret stuff. The stowage boxes are placed according to the mounts you attach. There's some variance in this so you kind of have to work with it. Mine are off a bit.This bit definitely needed location pins and holes.
The kit comes with open vision blocks. They want you to insert punched clear sheeting. The kit provides two sheets but it's that oily type Trumpy has always included.
Turret with more details added. The stowage rack was a bit warped. They want you to use nylon mesh for the bottom. As an aside, the antenna mounts are horrible. I'll see if I can find replacements in the spares.
Oh yeah, the smoke grenade boxes are crooked if you go with the kit's location holes.
The kit comes with length&link as well as rubberband track sets. Both have the same solid rubber pad pattern. I should have went with the L&L tracks but at this point I wanted to get this one done. Most of the track isn't going to be visible anyway and I have a use for the L&L set for another build.
The rubberband tracks are too long and fit really loose. I tightened them by two lengths, and stapled them. The staples will be hidden behind the skirts.
By the way, the drive sprockets fit badly. I had to drill them out to get them to fit.
The weather was nice so I went ahead and painted the base coats of paint. I went grey primer with three light coats of sand.
After sitting overnight I went ahead and added the tracks and cemented the upper and lower hulls. I probably should have waited on that...it'll make painting the tracks a bit more of a pain.
I still have to finish up, weather it, etc. but I can say that this kit isn't great. It's a collection of bits from several of their Abrams kits...which go back to 2003. Parts of this kit were used for Hobbycraft's Abrams.
It's typical of those early Trumpy kits but it also shows promise...sort of. I'm trying to be positive, but it's sort of a mediocre kit. There are parts that just don't look right. I put it up next to two other Abrams (Academy & Dragon) and they are all different.
The kit does come with alot of extra parts...which seems right for a 5-in-1 kit. I build alot of what-if so I'll use these. And I might be setting myself up for disappointment, but the plow and mine roller both look promising.
So next update will probably be the last. I've got to dig out some stowage to mask some of the turret fit issues. Besides... like a Sherman,an Abrams doesn't look right without stowage. And of course, finishing the paint.
Time for an update of my own build. It's been a while so a refresher...I'm building Trumpeter's M1a1/A2 5-in-1 kit. I planned on building it as a M1a2 in the sand/white winter scheme, possibly with the mine roller.
The winter scheme is a no-go. The picture I have shows an Abrams with the un-armored smoke launchers and the TUSK cupola. This isn't a kit I want to invest added money in so I'll just build it as a Iraq theater Abrams. I paid $23 for the kit and bought it mainly for the mine roller...so I'm looking to keep this build casual.
I had started with the lower hull and suspension. I went ahead and pre-painted the lower hull with rattle-can. I painted the roadwheels. They are held on with poly center caps. It was pretty normal
The rear...again not alot of special here. I included this shot for one reason...the kit calls for this APU. This works for the M1a1, but for the M1a2 you'd want the stowage rack version. The it includes this version but refers to it as a tool box. So if you follow the directions you'll have two APUs on the A2.
Upper hull is pretty simple. One thing Trumpy did here was mold the side skirts to the upper hull. Academy did this with their K1a1. I don't hate it, but it throws off how I typically build. I usually add skirts last.
Some turret details...the 120mm gun (the kit has two versions), turret storage boxes, and turret APU. There's also four ammo stowage cases.
More turret stuff. The stowage boxes are placed according to the mounts you attach. There's some variance in this so you kind of have to work with it. Mine are off a bit.This bit definitely needed location pins and holes.
The kit comes with open vision blocks. They want you to insert punched clear sheeting. The kit provides two sheets but it's that oily type Trumpy has always included.
Turret with more details added. The stowage rack was a bit warped. They want you to use nylon mesh for the bottom. As an aside, the antenna mounts are horrible. I'll see if I can find replacements in the spares.
Oh yeah, the smoke grenade boxes are crooked if you go with the kit's location holes.
The kit comes with length&link as well as rubberband track sets. Both have the same solid rubber pad pattern. I should have went with the L&L tracks but at this point I wanted to get this one done. Most of the track isn't going to be visible anyway and I have a use for the L&L set for another build.
The rubberband tracks are too long and fit really loose. I tightened them by two lengths, and stapled them. The staples will be hidden behind the skirts.
By the way, the drive sprockets fit badly. I had to drill them out to get them to fit.
The weather was nice so I went ahead and painted the base coats of paint. I went grey primer with three light coats of sand.
After sitting overnight I went ahead and added the tracks and cemented the upper and lower hulls. I probably should have waited on that...it'll make painting the tracks a bit more of a pain.
I still have to finish up, weather it, etc. but I can say that this kit isn't great. It's a collection of bits from several of their Abrams kits...which go back to 2003. Parts of this kit were used for Hobbycraft's Abrams.
It's typical of those early Trumpy kits but it also shows promise...sort of. I'm trying to be positive, but it's sort of a mediocre kit. There are parts that just don't look right. I put it up next to two other Abrams (Academy & Dragon) and they are all different.
The kit does come with alot of extra parts...which seems right for a 5-in-1 kit. I build alot of what-if so I'll use these. And I might be setting myself up for disappointment, but the plow and mine roller both look promising.
So next update will probably be the last. I've got to dig out some stowage to mask some of the turret fit issues. Besides... like a Sherman,an Abrams doesn't look right without stowage. And of course, finishing the paint.