Lap Man, Fantastic result! Congratulations! I'm very impressed with your weathering and level of detail.
Wow!
GAz
Campaigns: Active Campaigns
Campaigns that are either in planning or underway should be grouped here.
Campaigns that are either in planning or underway should be grouped here.
Hosted by Richard S.
Bury My Heart at Stalingrad
Posted: Sunday, August 11, 2019 - 03:55 PM UTC
Posted: Sunday, August 11, 2019 - 03:57 PM UTC
Holy smokes everyone! We're steaming at high speed to the finish! September 1 is our deadline. Time to start speaking up if we need to make an extension!
Posted: Wednesday, August 21, 2019 - 09:33 PM UTC
Only a week to go, friends... anyone want an extension?
Posted: Thursday, August 22, 2019 - 12:01 AM UTC
Hi Gaz,
Sorry, I somehow missed your first extension announcement a couple of weeks ago. My STZ T-34 is coming along fine - progress pics coming later today or tomorrow - and I‘ll try to get done by the 1st, but because I have a fair bit of other things to take care of in between, a one-week extension wouldn‘t be a bad idea, just in case. Thanks!
Jerry
Posted: Thursday, August 22, 2019 - 04:05 AM UTC
Hey gang,
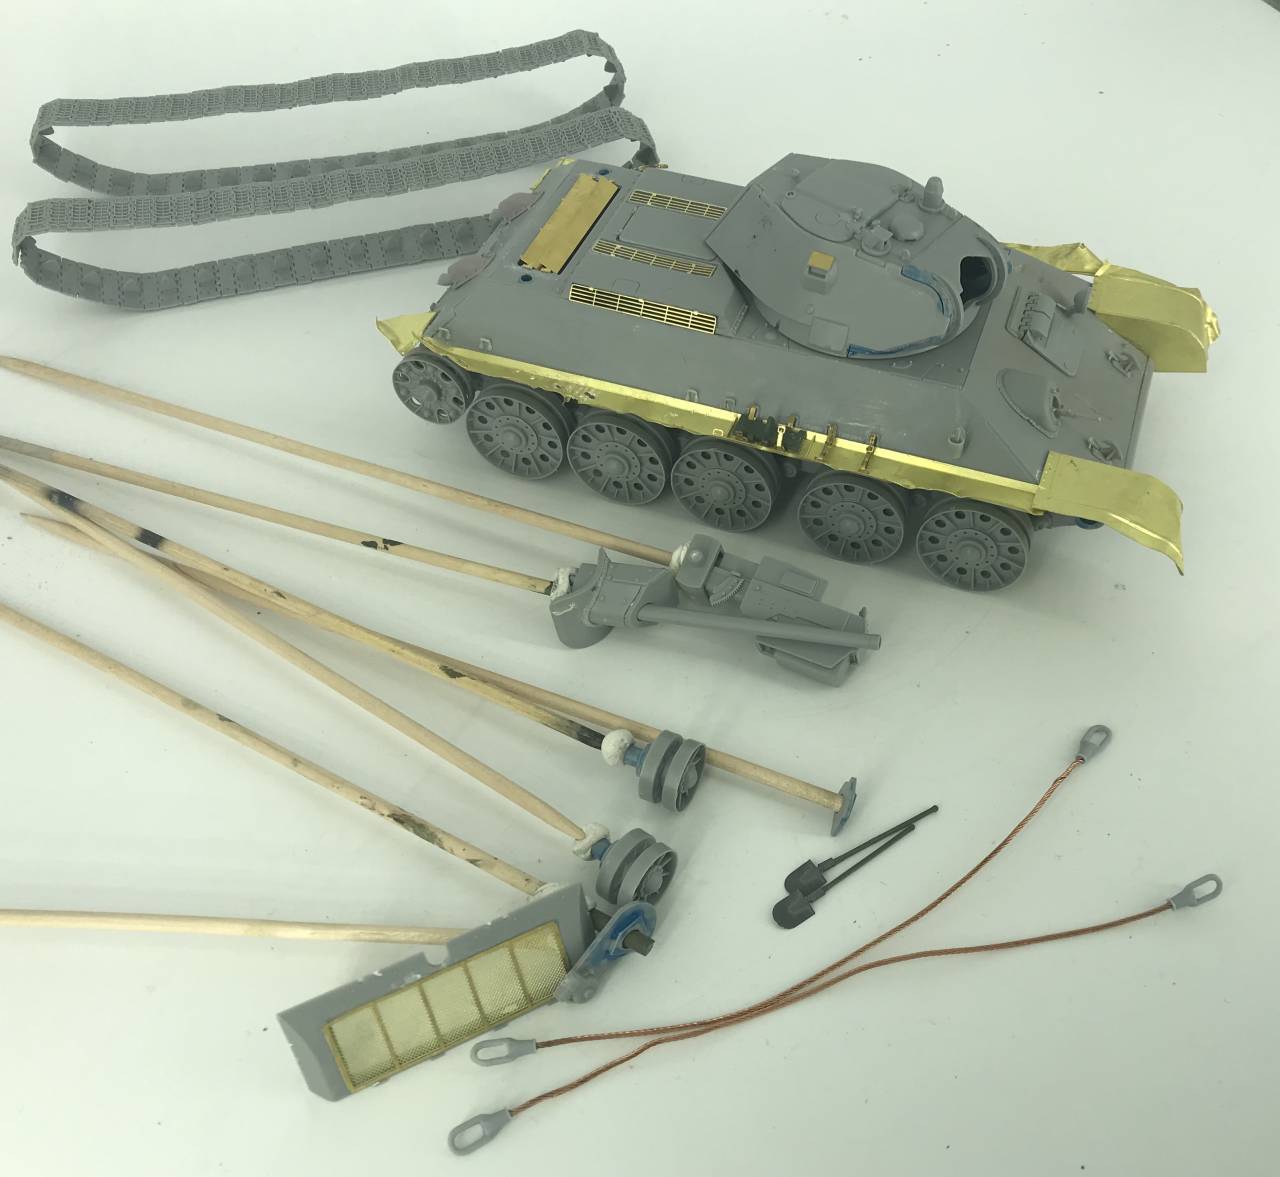
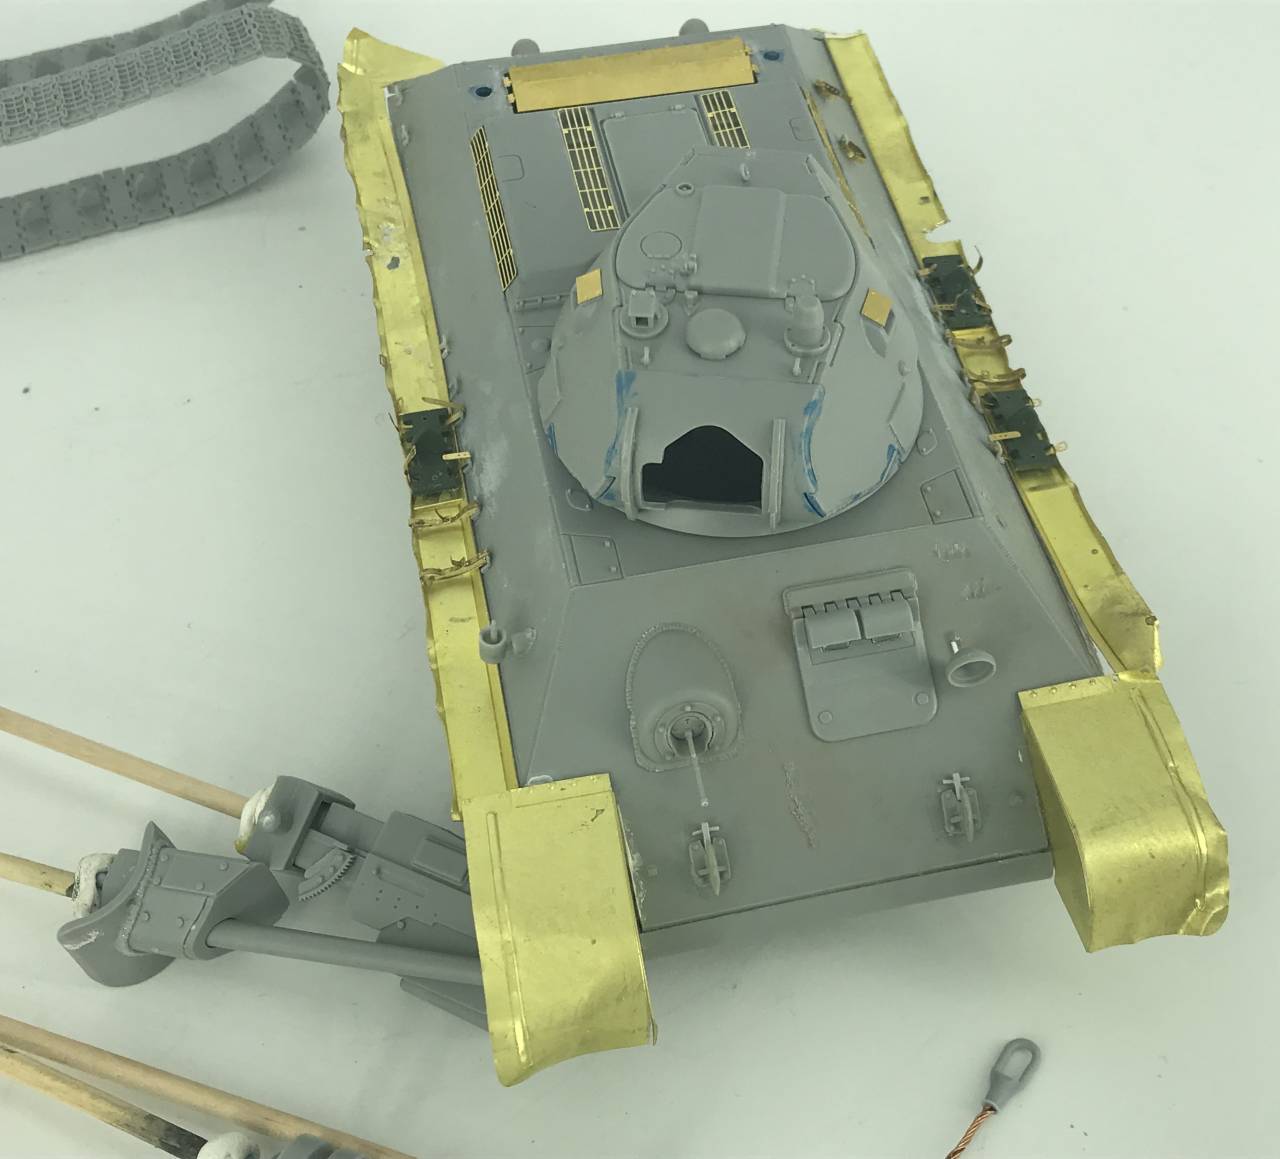
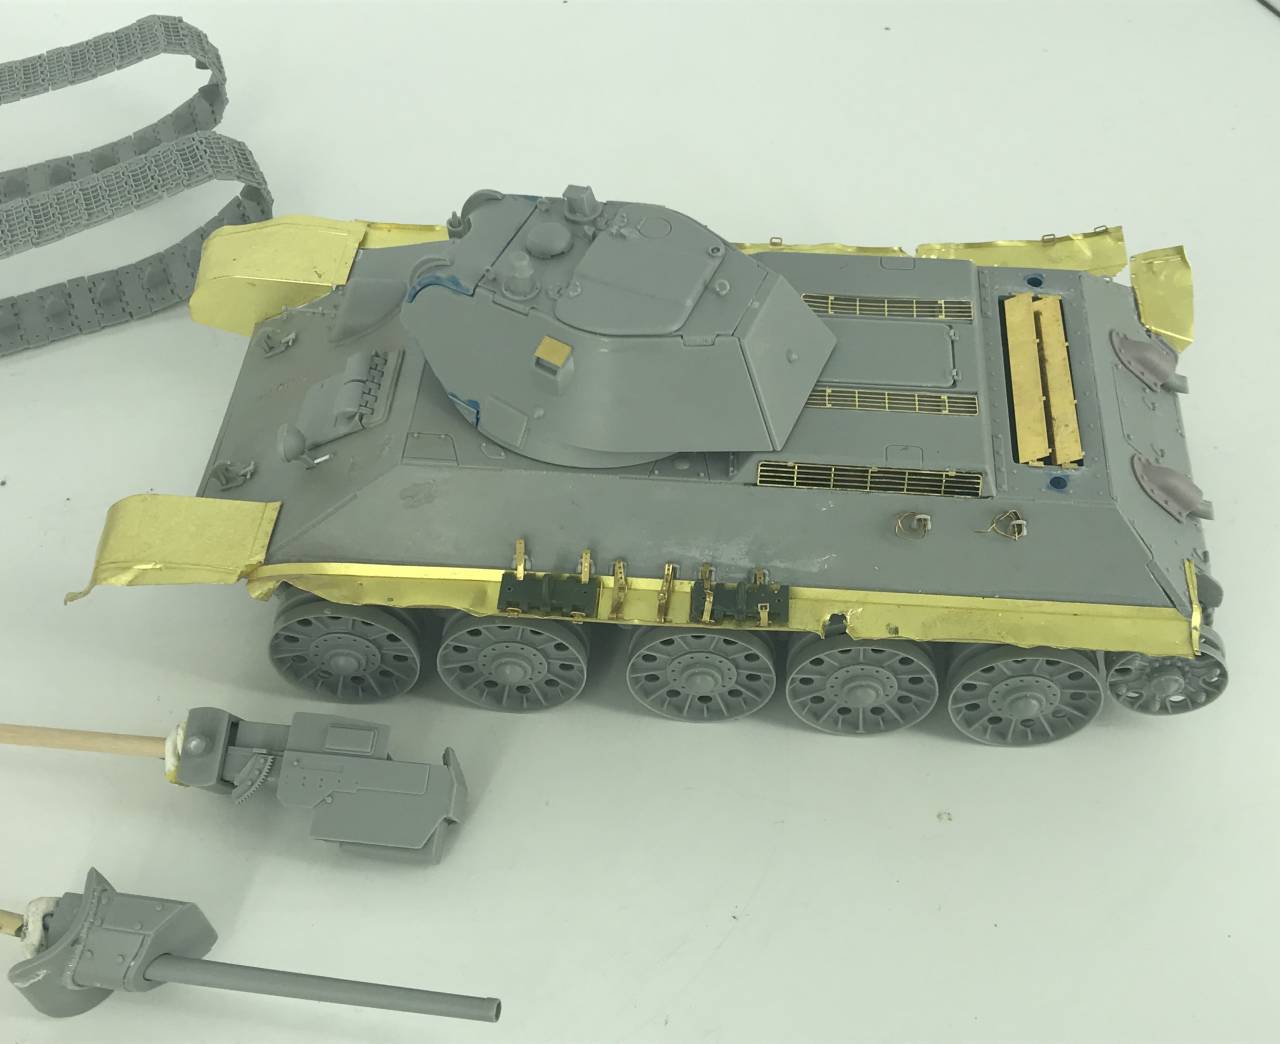
As promised, some progress pics for ya.....here‘s my finished build with the fenders all beat up and some battle damage. The main gun and mantlet aren‘t mounted in these pictures because I needed to paint the inside of the turret first - the turrets of all T-34/76 variants are too tight of a fit to get a paintbrush/airbrush in there after assembly. How anyone managed to fight in the actual turrets, much less in heavy winter clothing, is beyond me, but maybe that‘s just my claustrophobia talking....
Like Gaz said, this was a great kit to put together. The only problem was that the back plate was a couple of millimeters too long and didn‘t fit:
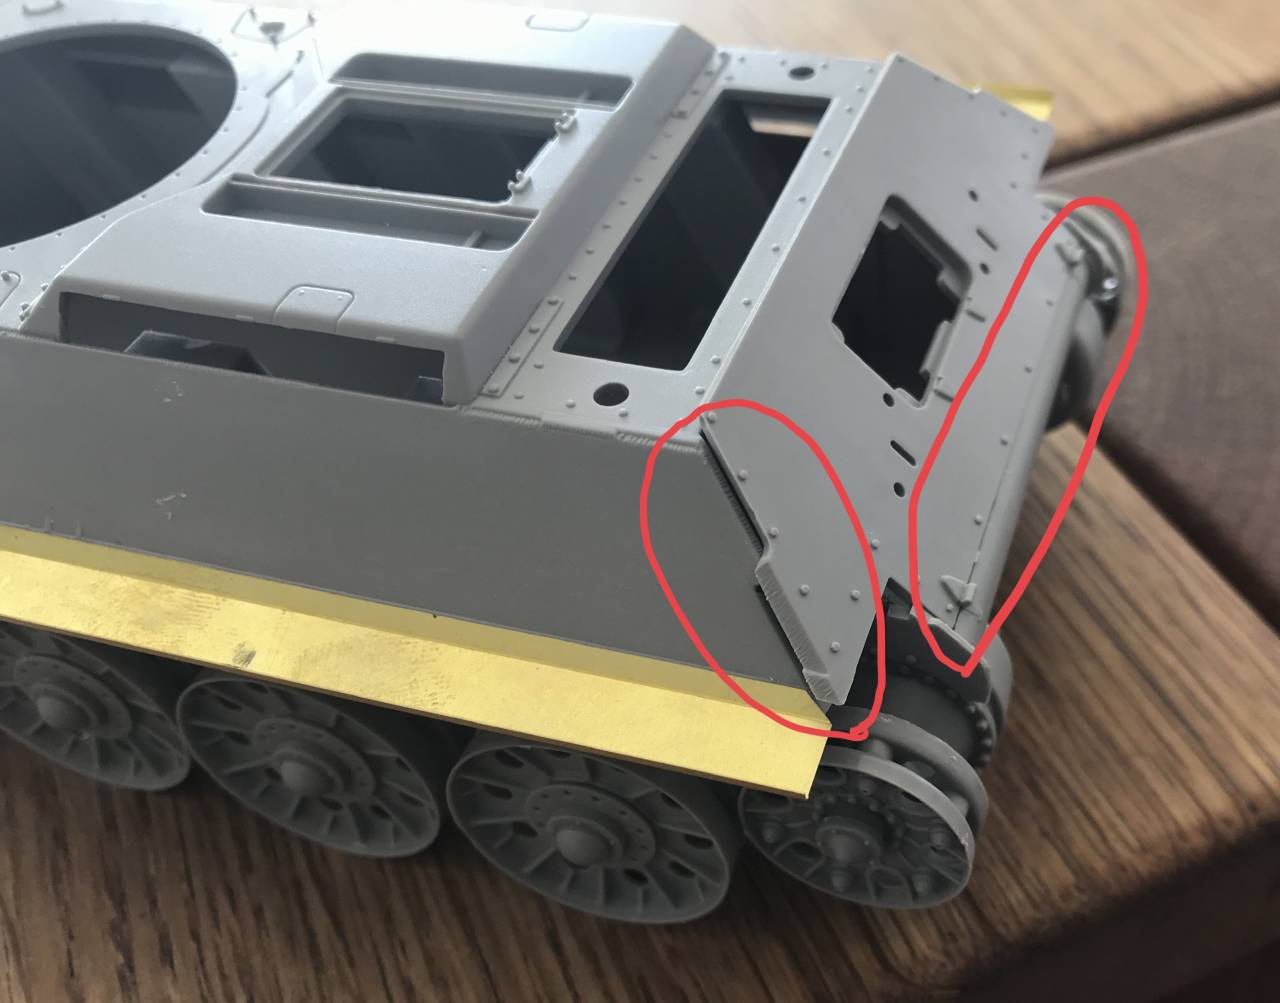
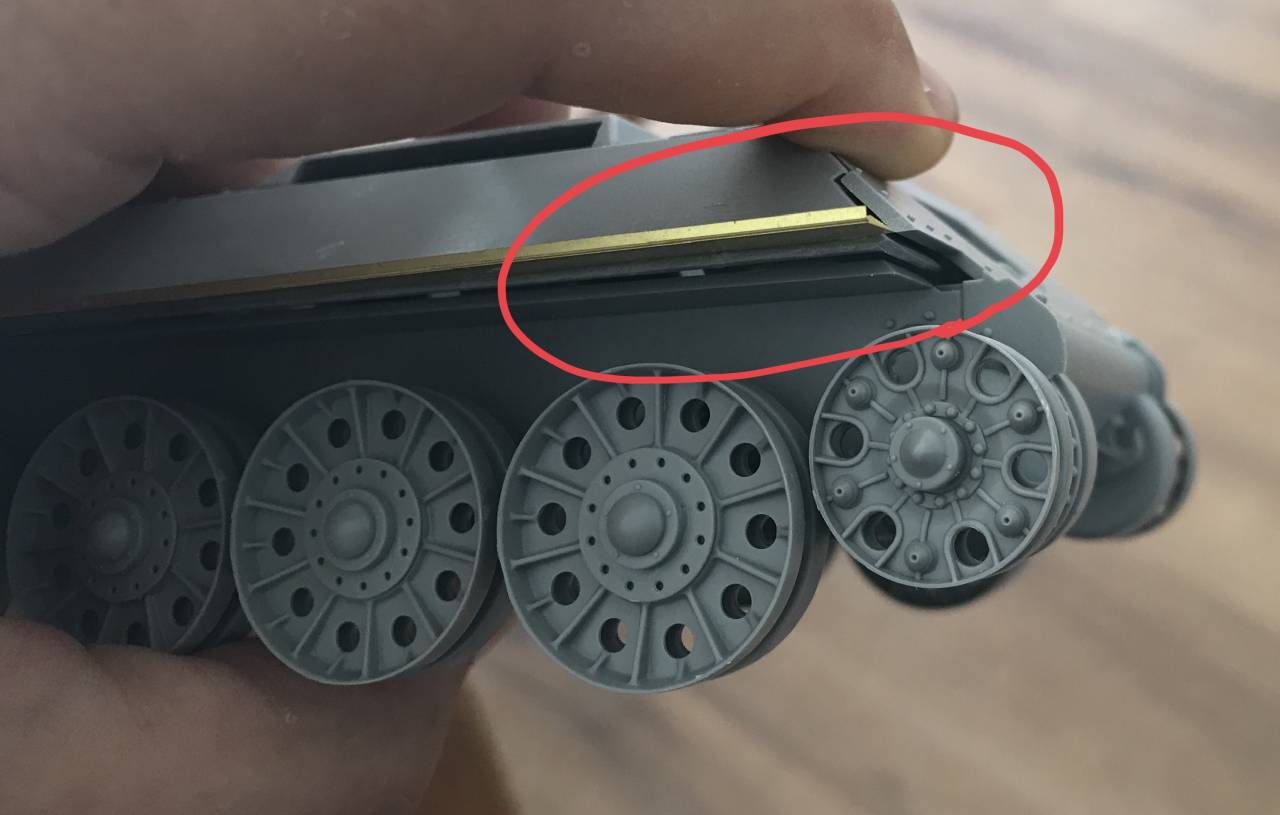
This is something that Terry Ashley warned us about in his review of the base kit on his PMMS site, so I was expecting it, and shaving off the bolt and hinge detail, shortening the plate, and re-adding the detail was easy, but it is annoying that DML allowed such sloppiness to intrude on an otherwise excellent kit.
Anyway, I have the base coat on already, and am just painting some details at the moment - I‘ll post some more pictures before I start the weathering process.
Jerry
As promised, some progress pics for ya.....here‘s my finished build with the fenders all beat up and some battle damage. The main gun and mantlet aren‘t mounted in these pictures because I needed to paint the inside of the turret first - the turrets of all T-34/76 variants are too tight of a fit to get a paintbrush/airbrush in there after assembly. How anyone managed to fight in the actual turrets, much less in heavy winter clothing, is beyond me, but maybe that‘s just my claustrophobia talking....


Like Gaz said, this was a great kit to put together. The only problem was that the back plate was a couple of millimeters too long and didn‘t fit:


This is something that Terry Ashley warned us about in his review of the base kit on his PMMS site, so I was expecting it, and shaving off the bolt and hinge detail, shortening the plate, and re-adding the detail was easy, but it is annoying that DML allowed such sloppiness to intrude on an otherwise excellent kit.
Anyway, I have the base coat on already, and am just painting some details at the moment - I‘ll post some more pictures before I start the weathering process.
Jerry
Posted: Thursday, August 22, 2019 - 10:37 AM UTC
Jerry,
I’ll extend the Campaign for a week to help out.
Your model is looking great! Love the battered fenders!
Gaz
I’ll extend the Campaign for a week to help out.
Your model is looking great! Love the battered fenders!
Gaz
brekinapez

Joined: July 26, 2013
KitMaker: 2,272 posts
Armorama: 1,860 posts

Posted: Thursday, August 22, 2019 - 12:13 PM UTC
So, September 8 now?
petbat

Joined: August 06, 2005
KitMaker: 3,353 posts
Armorama: 3,121 posts

Posted: Friday, August 23, 2019 - 05:31 PM UTC
Will help me out too Gaz. Thanks.
Posted: Saturday, August 24, 2019 - 01:45 AM UTC
Thanks, Gaz, that gives me some breathing room. And glad you like the fenders!
Jerry
Jerry
petbat

Joined: August 06, 2005
KitMaker: 3,353 posts
Armorama: 3,121 posts

Posted: Saturday, August 24, 2019 - 07:07 PM UTC
Wow Jerry, that is a huge mistake Dragon made. Glad you could fix it.
In progress Pic of the Marder 2 D

Have laid some black pre shade down since this pic. Need to do some Panzer Grey then some weathering before I can assemble the major components to paint the exterior.
In progress Pic of the Marder 2 D

Have laid some black pre shade down since this pic. Need to do some Panzer Grey then some weathering before I can assemble the major components to paint the exterior.
brekinapez

Joined: July 26, 2013
KitMaker: 2,272 posts
Armorama: 1,860 posts

Posted: Sunday, August 25, 2019 - 06:27 AM UTC
Okay. I am stopping here. I was considering doing a whitewash but I won't have time to do that before time is up and I really would rather do a base for it as I really hate weathering my vehicles without a base to show context. So, I have left this one in what I would call, "museum-ready finish".
Kit is OOB, markings painted instead of using the decals. Paint is Tamiya with some touch-up done with Vallejo MC. Fit was generally okay but the casement does not quite line up with the fenders as it should. This seems to be a common issue as I have seen other builds with a similar gap situation on the left side.


Kit is OOB, markings painted instead of using the decals. Paint is Tamiya with some touch-up done with Vallejo MC. Fit was generally okay but the casement does not quite line up with the fenders as it should. This seems to be a common issue as I have seen other builds with a similar gap situation on the left side.


petbat

Joined: August 06, 2005
KitMaker: 3,353 posts
Armorama: 3,121 posts

Posted: Sunday, August 25, 2019 - 10:44 AM UTC
Really Nice Shell. Great to see you have not gone for the aesthetic light grey most modellers do and went with the real life dark colour.
One thing you may want to consider, if you haven't done it and the pics just don't show it, is wear on the metal plate inside the road wheels. The track guide horns are polished by rubbing up against these disks so are equally worn and shiny ...


One thing you may want to consider, if you haven't done it and the pics just don't show it, is wear on the metal plate inside the road wheels. The track guide horns are polished by rubbing up against these disks so are equally worn and shiny ...


brekinapez

Joined: July 26, 2013
KitMaker: 2,272 posts
Armorama: 1,860 posts

Posted: Sunday, August 25, 2019 - 12:57 PM UTC
Thanks, Petbat.
I just went with my standby: Tamiya German Grey. The way I weather, it usually ends up darker so I find it a good base.
No, I didn't do the interiors of the road wheels as I thought I was going to be clumping snowy mud all over everything and didn't want to put the energy into it. Out of sight, out of mind.
Posted: Sunday, August 25, 2019 - 07:18 PM UTC
Shell,
Excellent job! Congratulations on finishing Sturm...33. I've only seen one pic of one in the snow of Stalingrad. It didn't have any whitewash on it. Please don't forget to get a photo into the Gallery.
Gaz
Excellent job! Congratulations on finishing Sturm...33. I've only seen one pic of one in the snow of Stalingrad. It didn't have any whitewash on it. Please don't forget to get a photo into the Gallery.
Gaz
brekinapez

Joined: July 26, 2013
KitMaker: 2,272 posts
Armorama: 1,860 posts

Posted: Monday, August 26, 2019 - 10:12 AM UTC
Already done.
Posted: Monday, August 26, 2019 - 02:01 PM UTC
Quoted Text
Already done.
Hah! I finally figured it out. Somehow we ended up with a Stalingrad Campaign and a Bury My Heart as Stalingrad Campaign photo galleries. So, entries have been split between the two.
Gaz
brekinapez

Joined: July 26, 2013
KitMaker: 2,272 posts
Armorama: 1,860 posts

Posted: Monday, August 26, 2019 - 02:36 PM UTC
I was wondering why there was only one other person's pics uploaded.
Posted: Monday, August 26, 2019 - 03:44 PM UTC
Quoted Text
I was wondering why there was only one other person's pics uploaded.
I'm just glad I did a little more digging before asking an unfortunate question...lol
Gaz
Posted: Thursday, August 29, 2019 - 04:01 AM UTC
Peter, good work so far on your Marder, looking forward to further progress.
Shell, great job on your StuIG33B! I agree with Peter, many Panzer Gray builds you see are too light (especially the highlights) and yours is properly dark.
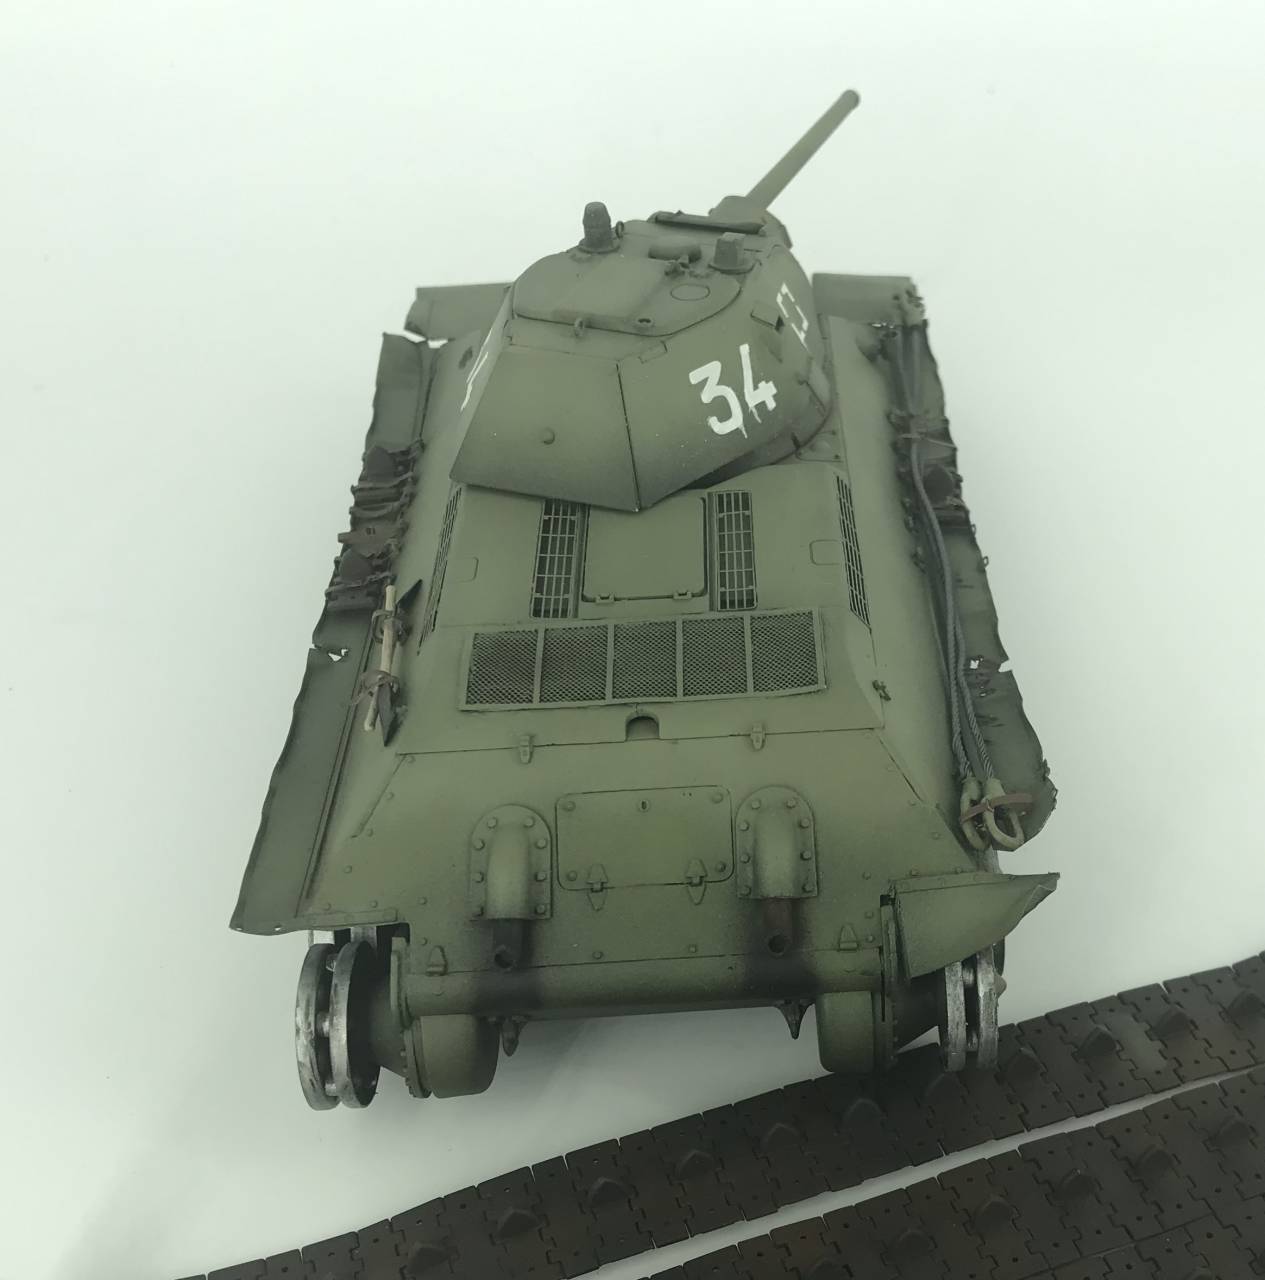
Here is my T-34 prior to weathering, something I should be able to take care of in the next week. A minor disaster hit yesterday when one of the decals for the bort numbers on the left side of the turret crumpled up, which was bad enough, but when I attempted to remove it, the Micro Sol I was using softened up the paint (which had two clear coats over it) to the extent that I took off chunks of it as well.
I hope I've touched it up well enough. The numbers on that side of the turret are noticeably lower than on the other side - one number slipped down and I didn't dare move it and have more damage - but maybe I can "sell" it to you guys by mentioning the desparate nature of the fighting in Stalingrad - they had more important things on their minds than how evenly numbers were painted on vehicles. Well, the Soviets anyway - not too sure about the Germans neglecting such matters, even under those conditions.
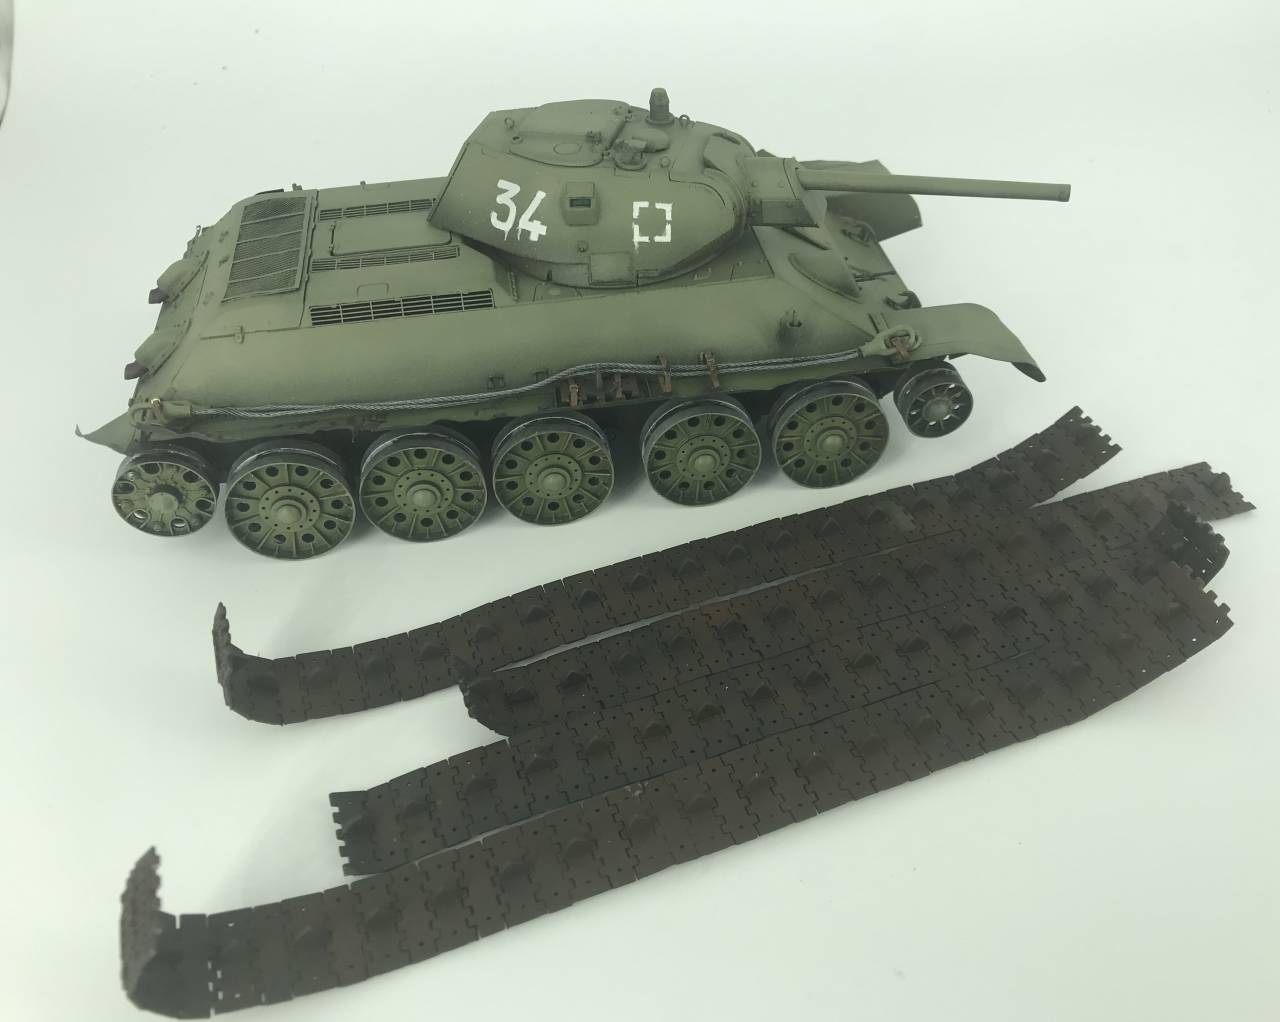
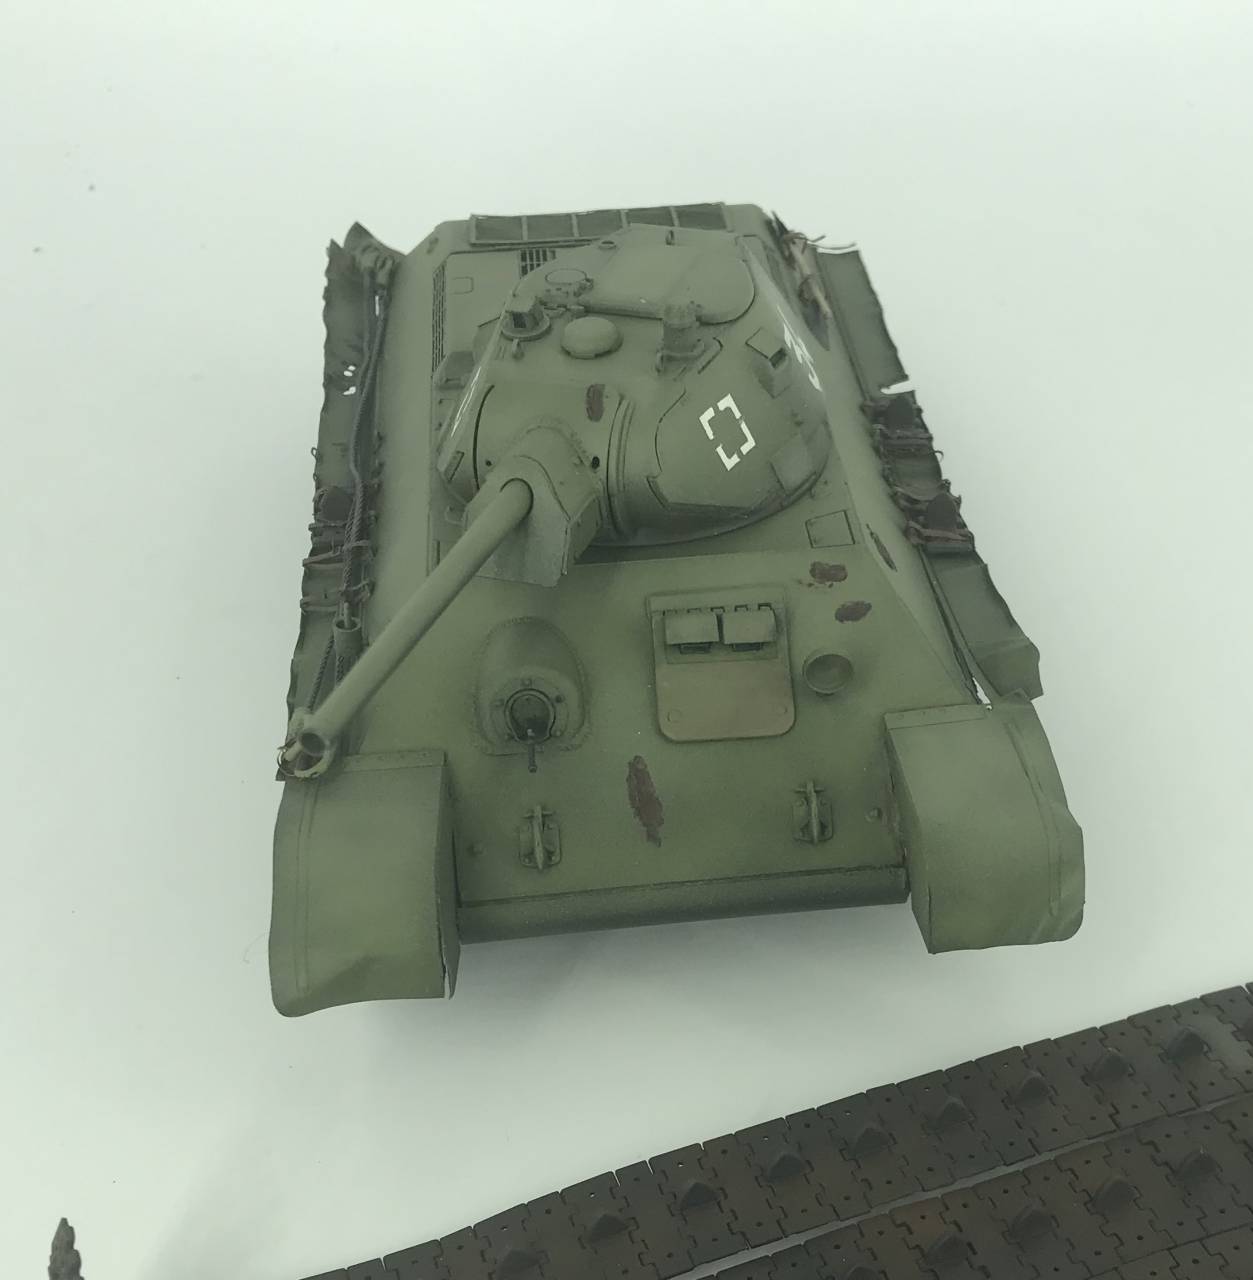
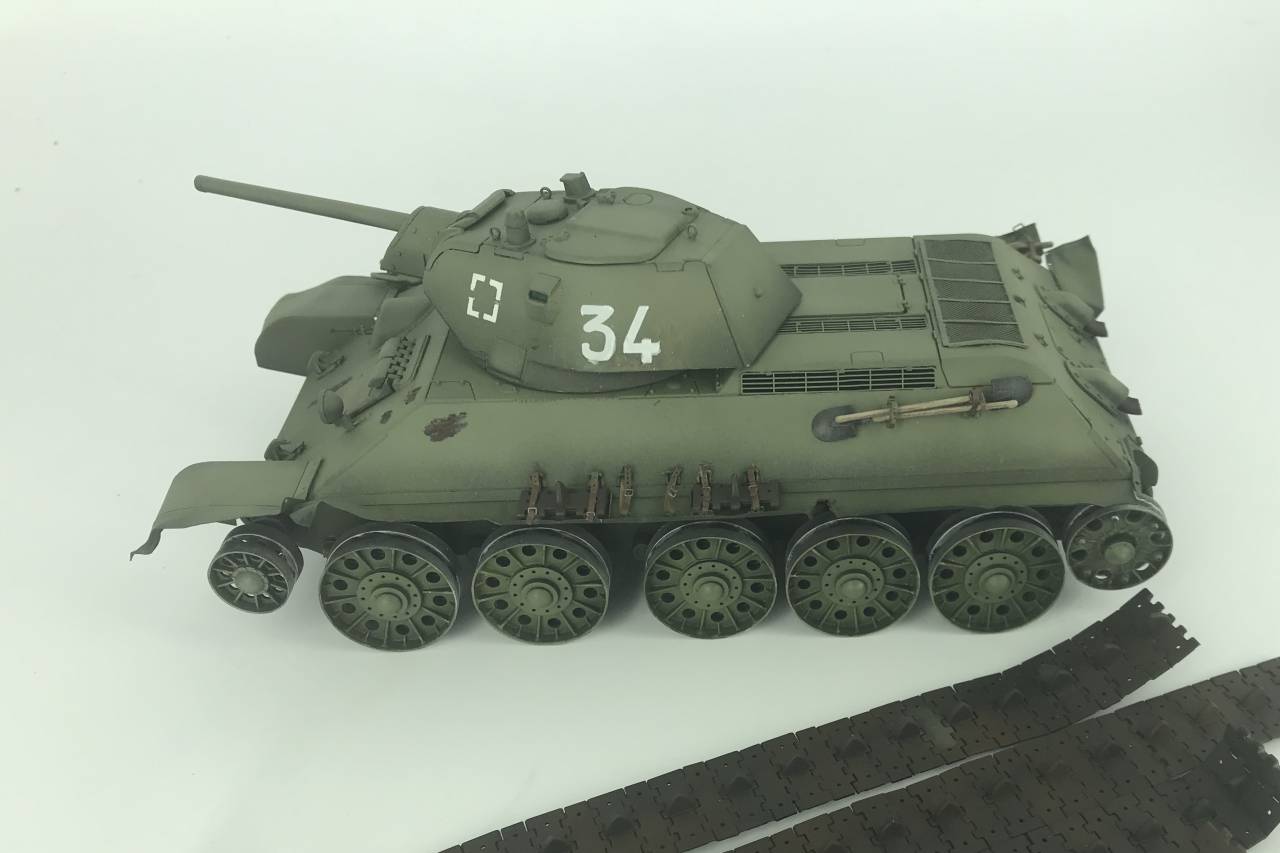
Jerry
Shell, great job on your StuIG33B! I agree with Peter, many Panzer Gray builds you see are too light (especially the highlights) and yours is properly dark.
Here is my T-34 prior to weathering, something I should be able to take care of in the next week. A minor disaster hit yesterday when one of the decals for the bort numbers on the left side of the turret crumpled up, which was bad enough, but when I attempted to remove it, the Micro Sol I was using softened up the paint (which had two clear coats over it) to the extent that I took off chunks of it as well.

I hope I've touched it up well enough. The numbers on that side of the turret are noticeably lower than on the other side - one number slipped down and I didn't dare move it and have more damage - but maybe I can "sell" it to you guys by mentioning the desparate nature of the fighting in Stalingrad - they had more important things on their minds than how evenly numbers were painted on vehicles. Well, the Soviets anyway - not too sure about the Germans neglecting such matters, even under those conditions.


Jerry
petbat

Joined: August 06, 2005
KitMaker: 3,353 posts
Armorama: 3,121 posts

Posted: Thursday, August 29, 2019 - 07:50 AM UTC
Very nice Jerry, especially the fix on the rear hull panel. You'd never know the issue from this pic.
Posted: Thursday, August 29, 2019 - 01:41 PM UTC
Jerry,
Your t34 looks excellent! I love the paint runs!
Your t34 looks excellent! I love the paint runs!
NemetskyCzar

Joined: June 08, 2011
KitMaker: 9 posts
Armorama: 9 posts

Posted: Thursday, August 29, 2019 - 09:34 PM UTC
Gazza,
I'm late as ever.
May I throw a Dushka at this ?
Nothing like a pressing deadline to motivate.
I'm late as ever.
May I throw a Dushka at this ?
Nothing like a pressing deadline to motivate.
Posted: Thursday, August 29, 2019 - 11:49 PM UTC
Jerry,
Very nice work. Really liking how you damaged the front and rear fenders.
Mark
Very nice work. Really liking how you damaged the front and rear fenders.
Mark

FirstSergeant

Joined: January 02, 2012
KitMaker: 139 posts
Armorama: 65 posts

Posted: Friday, August 30, 2019 - 08:12 AM UTC
Greetings,
These are my final build photos. I will post them in the campaign gallery.


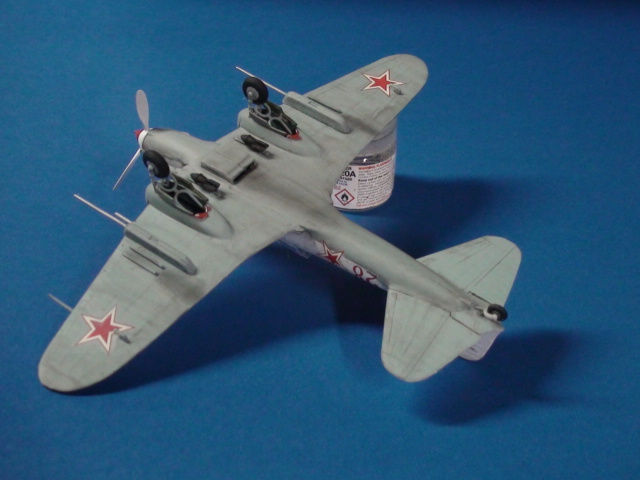
Thanks Gary for the cool campaign. I've enjoyed checking in on everyone's great builds.
Cheers,
Firstsergeant


These are my final build photos. I will post them in the campaign gallery.
Thanks Gary for the cool campaign. I've enjoyed checking in on everyone's great builds.
Cheers,
Firstsergeant


Posted: Friday, August 30, 2019 - 09:42 AM UTC
Ian,
Go for it!
Gaz
Go for it!
Gaz
 |


