

Don,
Thanks for sharing. A lot of great pictures and posts. I am watching with interest.
Hosted by Darren Baker
Building Trumpeters 1/16th Panther G

Totalize

Joined: February 04, 2009
KitMaker: 743 posts
Armorama: 549 posts
Posted: Thursday, January 10, 2019 - 03:06 PM UTC

Kaktusas

Joined: April 12, 2017
KitMaker: 196 posts
Armorama: 196 posts
Posted: Thursday, January 10, 2019 - 07:01 PM UTC
Nice looking engine, but this is no race car. Air filters shouldn't be shiny.

OldWarloke

Joined: October 14, 2012
KitMaker: 2,663 posts
Armorama: 2,649 posts
Posted: Thursday, January 10, 2019 - 10:24 PM UTC
Quoted Text
Nice looking engine, but this is no race car. Air filters shouldn't be shiny.
Just bare metal, didn't get around to dirtying them up yet
Donald
Kaktusas
Joined: April 12, 2017
KitMaker: 196 posts
Armorama: 196 posts
Posted: Thursday, January 10, 2019 - 10:43 PM UTC
They should have been painted. Engine block might be cast, and left untreated, but everything from sheet metal, including air filters were supposed to be painted. In many KT/panther books, where engine is shown, filters appear to be painted light color (elfenbein?) on red primer. Primer is for corrosion prevention, and light coat is for easier cleanup, as all grit and grime contrasts well.
This is book page picture from one webshop:
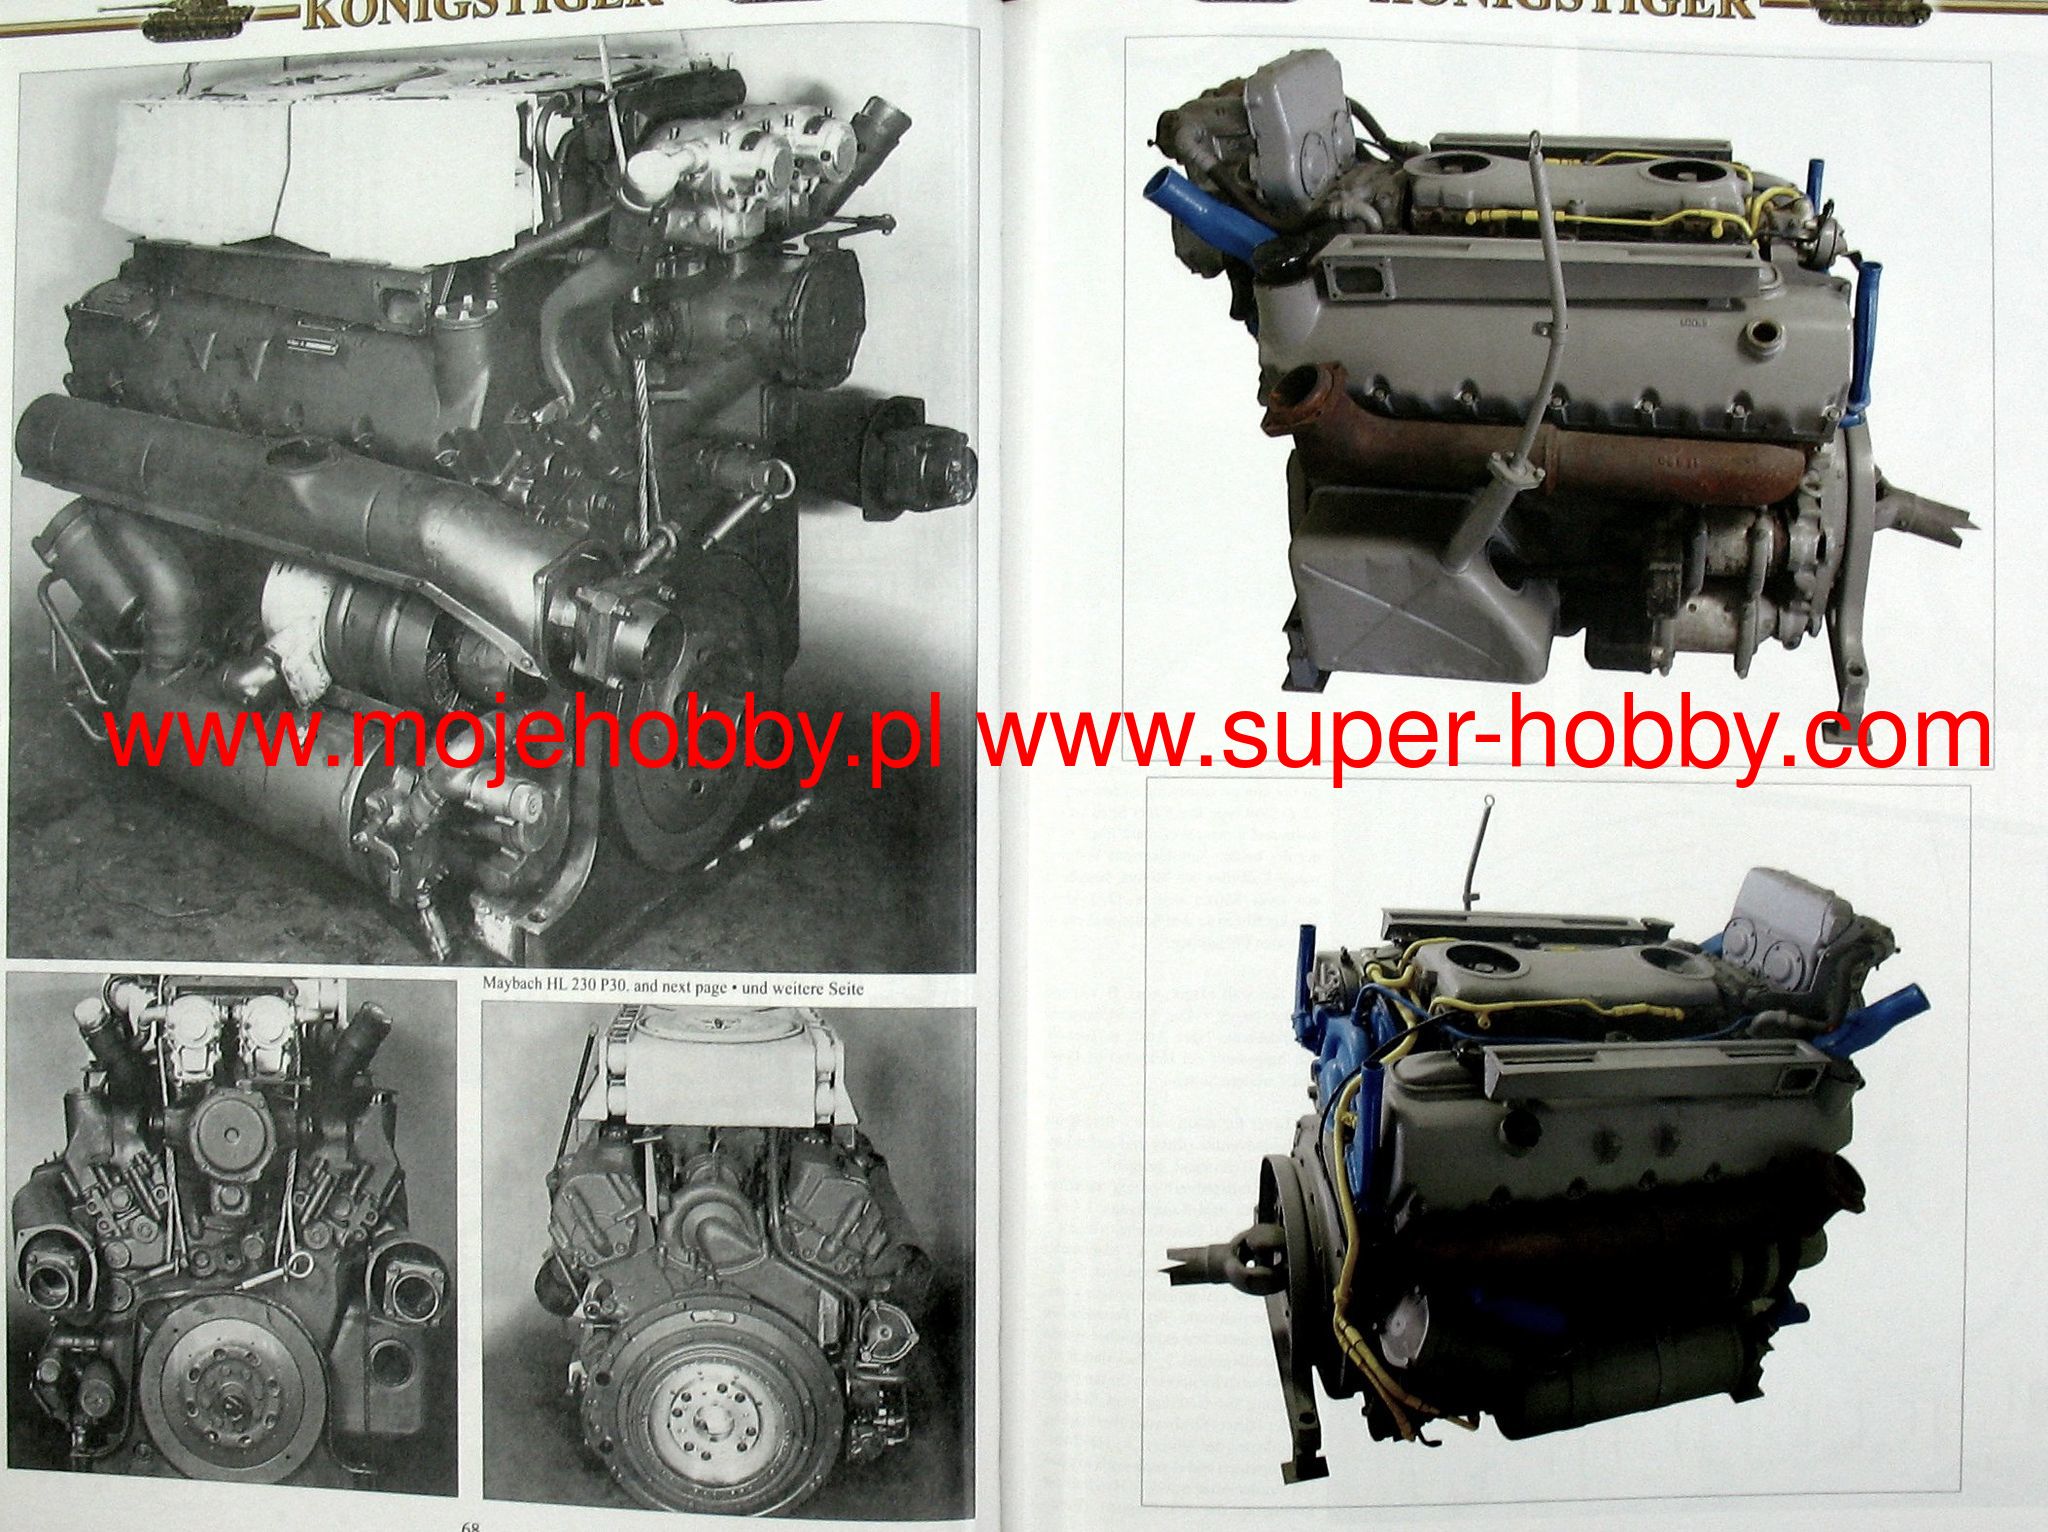
This is book page picture from one webshop:
OldWarloke
Joined: October 14, 2012
KitMaker: 2,663 posts
Armorama: 2,649 posts
Posted: Thursday, January 10, 2019 - 10:52 PM UTC
Thanks for the pics. I could have used them earlier but I think they will help others building this kit.
A little masking and the air cleaners can be repainted as the engine is not installed in the hull yet.
Once again THANK YOU.
Regards.
Donald
A little masking and the air cleaners can be repainted as the engine is not installed in the hull yet.
Once again THANK YOU.
Regards.
Donald
OldWarloke
Joined: October 14, 2012
KitMaker: 2,663 posts
Armorama: 2,649 posts
Posted: Friday, January 11, 2019 - 09:10 AM UTC
Ok now this is how I installed the Engine and most of the fittings.
I tried to keep the comments on the pics. so they will be available later.


I tried to keep the comments on the pics. so they will be available later.
OldWarloke
Joined: October 14, 2012
KitMaker: 2,663 posts
Armorama: 2,649 posts
Posted: Friday, January 11, 2019 - 09:16 AM UTC
OldWarloke
Joined: October 14, 2012
KitMaker: 2,663 posts
Armorama: 2,649 posts
Posted: Friday, January 11, 2019 - 09:21 AM UTC
Finished for now.
Donald
OldWarloke
Joined: October 14, 2012
KitMaker: 2,663 posts
Armorama: 2,649 posts
Posted: Saturday, January 12, 2019 - 09:44 AM UTC
I have the rest of the hoses hooker up .


OldWarloke
Joined: October 14, 2012
KitMaker: 2,663 posts
Armorama: 2,649 posts
Posted: Saturday, January 12, 2019 - 09:48 AM UTC
Finished for today
Donald
47jw66
Joined: January 16, 2014
KitMaker: 23 posts
Armorama: 22 posts
Posted: Saturday, January 12, 2019 - 10:05 AM UTC
Donald,
Enjoy watching your builds and especially like the way you explain what you are doing and why you did it that way. It makes it easier for a novice like me to follow and maybe someday build my Panther.
John
Enjoy watching your builds and especially like the way you explain what you are doing and why you did it that way. It makes it easier for a novice like me to follow and maybe someday build my Panther.
John
OldWarloke
Joined: October 14, 2012
KitMaker: 2,663 posts
Armorama: 2,649 posts
Posted: Saturday, January 12, 2019 - 09:59 PM UTC
Quoted Text
Donald,
Enjoy watching your builds and especially like the way you explain what you are doing and why you did it that way. It makes it easier for a novice like me to follow and maybe someday build my Panther.
John
That's why I do it, I'm not perfect. some times I screw it up like the install of the Transmission on this build.
Donald
OldWarloke
Joined: October 14, 2012
KitMaker: 2,663 posts
Armorama: 2,649 posts
Posted: Sunday, January 13, 2019 - 08:05 AM UTC
Here is how I installed the Track Tension adjusters & Rear Armor Plate.


OldWarloke
Joined: October 14, 2012
KitMaker: 2,663 posts
Armorama: 2,649 posts
Posted: Sunday, January 13, 2019 - 08:10 AM UTC
OldWarloke
Joined: October 14, 2012
KitMaker: 2,663 posts
Armorama: 2,649 posts
Posted: Sunday, January 13, 2019 - 08:18 AM UTC
I'll be working on the Radiators next.
Donald
OldWarloke
Joined: October 14, 2012
KitMaker: 2,663 posts
Armorama: 2,649 posts
Posted: Monday, January 14, 2019 - 07:20 AM UTC
I have the Radiators and Fans assembled, here is how I did it.
First off install the plate over the Track Tensioner, You could leave the Tensioner off as it doesn't do anything and can't be seen.


First off install the plate over the Track Tensioner, You could leave the Tensioner off as it doesn't do anything and can't be seen.
OldWarloke
Joined: October 14, 2012
KitMaker: 2,663 posts
Armorama: 2,649 posts
Posted: Monday, January 14, 2019 - 07:25 AM UTC
Now to paint them.
Donald
OldWarloke
Joined: October 14, 2012
KitMaker: 2,663 posts
Armorama: 2,649 posts
Posted: Tuesday, January 15, 2019 - 06:56 AM UTC
Here are the upper Fuel Tanks , I filled and sanded the tops and the small upper end. The rest go against the armor plates and can't be seen.

The parts for the Radiator Intakes.

Be shure to clean the oblong holes so the Vanes fit right.


The parts for the Radiator Intakes.
Be shure to clean the oblong holes so the Vanes fit right.
OldWarloke
Joined: October 14, 2012
KitMaker: 2,663 posts
Armorama: 2,649 posts
Posted: Tuesday, January 15, 2019 - 07:05 AM UTC
To install I first first lightly glued the bottom edge of the side part. Then while still soft I inserted the vanes one at a time working from bottom to top. Then glued everything, while making shure there were no gaps. It's fairly simple.


It's Painting time again.
Donald
It's Painting time again.
Donald
OldWarloke
Joined: October 14, 2012
KitMaker: 2,663 posts
Armorama: 2,649 posts
Posted: Wednesday, January 16, 2019 - 07:08 AM UTC
I just finished painting and installing the Radiators, Duct work and upper Fuel Tanks. Here is how I did it.
So I try again.


here we go again

So I try again.
here we go again
OldWarloke
Joined: October 14, 2012
KitMaker: 2,663 posts
Armorama: 2,649 posts
Posted: Wednesday, January 16, 2019 - 08:12 AM UTC
OldWarloke
Joined: October 14, 2012
KitMaker: 2,663 posts
Armorama: 2,649 posts
Posted: Wednesday, January 16, 2019 - 08:19 AM UTC
OldWarloke
Joined: October 14, 2012
KitMaker: 2,663 posts
Armorama: 2,649 posts
Posted: Wednesday, January 16, 2019 - 08:26 AM UTC
Here is what the King Tigers engine looks like. Pretty similar.
It looks just like the Panther Engine.
Donald
OldWarloke
Joined: October 14, 2012
KitMaker: 2,663 posts
Armorama: 2,649 posts
Posted: Thursday, January 17, 2019 - 07:54 AM UTC
Some of the detail parts are added on the rear Armor Plate.
My refrences indicate that the Square cover was usually used on the Ausf.G

A lot of push pins to fill on the rear cover. (do this before adding the other parts.


My refrences indicate that the Square cover was usually used on the Ausf.G
A lot of push pins to fill on the rear cover. (do this before adding the other parts.
OldWarloke
Joined: October 14, 2012
KitMaker: 2,663 posts
Armorama: 2,649 posts
Posted: Thursday, January 17, 2019 - 07:58 AM UTC
That's all for now.
Donald
 |

WEB HOSTING BY


Copyright ©2021 Armorama and Kitmaker Network, a subsidiary of Silver Star Enterprises
All Rights Reserved. Please read our Conditions of Use and Privacy Policy.
All Rights Reserved. Please read our Conditions of Use and Privacy Policy.