Campaigns
Where Armorama group builds can be discussed, organized, and updates posted.
Where Armorama group builds can be discussed, organized, and updates posted.
Hosted by Darren Baker, Richard S.
Stryker-Chariots of Fire
gamodelmaker

Joined: May 07, 2008
KitMaker: 186 posts
Armorama: 129 posts

Posted: Wednesday, October 01, 2008 - 03:26 PM UTC
i have finally gotten my stryker started late this afternoon. i have done steps 1 thru 4 all ready with no problems at all. i hope to get a lot more done tomorrow but no more modeling tonight i have to stop and cheer on the BOSTON RED SOXS i cant model and do both at the same time. 

tread_geek

Joined: March 23, 2008
KitMaker: 2,847 posts
Armorama: 2,667 posts

Posted: Saturday, October 04, 2008 - 06:02 AM UTC
Greetings fellow campaigners!
Not a lot of progress so far but at least I finally got started on my build. I had to mull over just what I wanted to do as far as OOB or some minor modifications. I've settled on the latter.
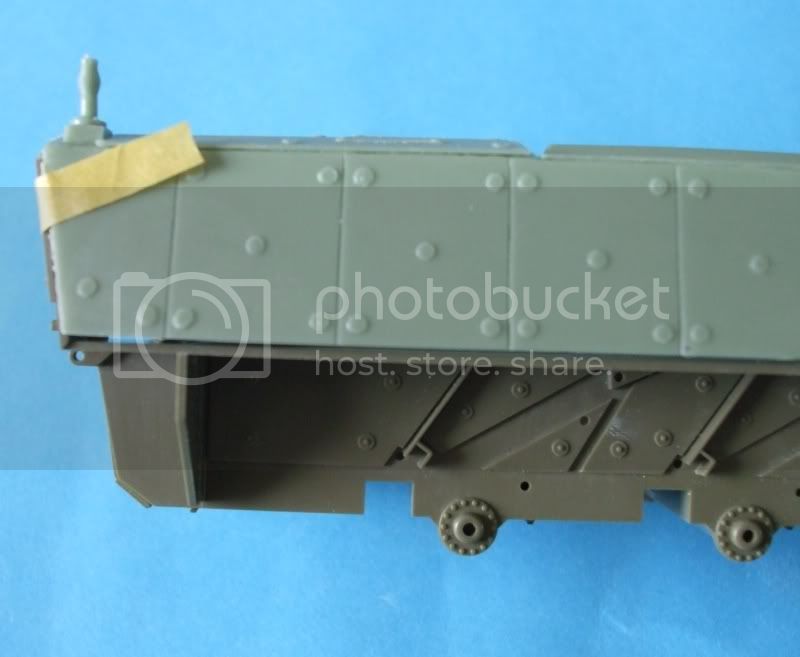
The first couple of shots have very little kit parts added but I drilled out the lifting rings and fashioned some brass handles in the doors on the hulls left side. As simple as the handles appear it took quite a bit of effort and experimentation to get them bent just right.


This next picture is of a few more parts added. Except for the wheels the lower hull and suspension is complete. Some filling and sanding was required on the sponsoons at the back of the hull.

The kit is surprisingly detailed and except for a bit of flash on the odd part goes together quite nicely. My only complaint is that I wish the doors and hatchers weren't moulded on.
Cheers!
Jan
Not a lot of progress so far but at least I finally got started on my build. I had to mull over just what I wanted to do as far as OOB or some minor modifications. I've settled on the latter.
The first couple of shots have very little kit parts added but I drilled out the lifting rings and fashioned some brass handles in the doors on the hulls left side. As simple as the handles appear it took quite a bit of effort and experimentation to get them bent just right.


This next picture is of a few more parts added. Except for the wheels the lower hull and suspension is complete. Some filling and sanding was required on the sponsoons at the back of the hull.

The kit is surprisingly detailed and except for a bit of flash on the odd part goes together quite nicely. My only complaint is that I wish the doors and hatchers weren't moulded on.

Cheers!
Jan

Tankleader

Joined: April 29, 2003
KitMaker: 718 posts
Armorama: 684 posts

Posted: Saturday, October 04, 2008 - 06:36 AM UTC
Jan,
Keep going, I understand the frustrations that can come about bending rod, but in my case it's soldering photo etch. I've made a little progress on the Canadain LAVIII side mounted bustle racks. Hope to post a few pictures a little later on.
Tanks
Andy
Keep going, I understand the frustrations that can come about bending rod, but in my case it's soldering photo etch. I've made a little progress on the Canadain LAVIII side mounted bustle racks. Hope to post a few pictures a little later on.
Tanks
Andy
tread_geek

Joined: March 23, 2008
KitMaker: 2,847 posts
Armorama: 2,667 posts

Posted: Saturday, October 04, 2008 - 07:58 AM UTC
Quoted Text
Jan,
Keep going, I understand the frustrations that can come about bending rod, but in my case it's soldering photo etch. I've made a little progress on the Canadain LAVIII side mounted bustle racks. Hope to post a few pictures a little later on.
Thanks for the encouragement, Andy. More than anything I never realized that most of my tools are just too big for working in 1/72 scale. I'm having to modify what I can and scratch build jigs to assist in the bending. As this is only my second build after a long absence from the hobby, I don't think my skills are up to messing with small scale photo etch.

Good Luck!
Jan
gamodelmaker

Joined: May 07, 2008
KitMaker: 186 posts
Armorama: 129 posts

Posted: Saturday, October 04, 2008 - 04:26 PM UTC
well steps 5 thur 11 have been done, and so far not a single problem at all. and i got my panting suppiles in for the stryker and i can get it all done before the deadline. was wondering about this how many of the strykers does afv club plan to make? i see that trump is turning them out faster than i can keep up with, and with trump turning them out so fast which one is the best? 

Nito74

Joined: March 04, 2008
KitMaker: 5,386 posts
Armorama: 4,727 posts

Posted: Monday, October 06, 2008 - 03:17 AM UTC
I started mine yesterday, a 1126 from Trumpeter, I guess it isn't the most accurate, but I could not find the AFV at the LHS...
Anyway not much done, gear boxes only.
I have another from Trump's a 1127 and a 1130 AFV's, but I won't have time until the end of the campaign... one of them will go to the "Wheeled AFV's Tracked APC's" Campaign !!!
Edited:
Progress so far:

Anyway not much done, gear boxes only.
I have another from Trump's a 1127 and a 1130 AFV's, but I won't have time until the end of the campaign... one of them will go to the "Wheeled AFV's Tracked APC's" Campaign !!!

Edited:
Progress so far:

gamodelmaker

Joined: May 07, 2008
KitMaker: 186 posts
Armorama: 129 posts

Posted: Saturday, October 11, 2008 - 12:26 PM UTC
well this is were i am at with the stryker. so far a nice clean build. steps 1 thru 15 have been done, ihavent touched it in the last few days but i hope to get some work done on it this week.


Tankleader

Joined: April 29, 2003
KitMaker: 718 posts
Armorama: 684 posts

Posted: Saturday, October 11, 2008 - 12:36 PM UTC
Great to see those in progress shots coming. I'm working on getting the hull primed at the moment.
Tanks
Andy
Tanks
Andy
Nito74

Joined: March 04, 2008
KitMaker: 5,386 posts
Armorama: 4,727 posts

Posted: Wednesday, October 15, 2008 - 01:32 AM UTC
Some updates:


bulivyf
Vendor

Joined: April 03, 2006
KitMaker: 2,450 posts
Armorama: 2,409 posts

Posted: Wednesday, October 15, 2008 - 03:41 AM UTC
[quote][quote]


Hi all,
I look on your build, all is very good. Only one is problem.
Only Bob cut off casting block on hull correct. For that he donīt have problem with hull.
Andy and next cut off block at add-on armor tightly. I have the same problem. I this deal with one
Evergreen 1x1 mm. Only for this problem donīt fit hull.
Here is good look white Evergreen on my LAV III.
Miloslav

PS. Old Czech proverb:
Double measure and only one cut


Quoted Text
This is what I'm talking about:


Hi all,
I look on your build, all is very good. Only one is problem.
Only Bob cut off casting block on hull correct. For that he donīt have problem with hull.
Andy and next cut off block at add-on armor tightly. I have the same problem. I this deal with one
Evergreen 1x1 mm. Only for this problem donīt fit hull.
Here is good look white Evergreen on my LAV III.
Miloslav

PS. Old Czech proverb:
Double measure and only one cut


Tankleader

Joined: April 29, 2003
KitMaker: 718 posts
Armorama: 684 posts

Posted: Wednesday, October 15, 2008 - 03:51 AM UTC
Quoted Text
Hi all,
I look on your build, all is very good. Only one is problem.
Only Bob cut off casting block on hull correct. For that he donīt have problem with hull.
Andy and next cut off block at add-on armor tightly. I have the same problem. I this deal with one
Evergreen 1x1 mm. Only for this problem donīt fit hull.
Here is good look white Evergreen on my LAV III.
Miloslav
PS. Old Czech proverb:
Double measure and only one cut


Miloslav,
My problem wasn't the height of the hull but of the rear ramp that had to be cut to fit the upper left and right angles of the hull. There is a difference in overall height of the rear hulls between the Canadian LAVIII's and the US Stryker variants, since the donor kit is based on the Stryker Hull this problem translated at well. I will try and get some new images posted on my progress in the next couple of days.
Tanks
Andy

bulivyf
Vendor

Joined: April 03, 2006
KitMaker: 2,450 posts
Armorama: 2,409 posts

Posted: Wednesday, October 15, 2008 - 04:46 AM UTC
OK Andy, I have the same problem. I you understand. I think that rear hull are problematic.
Now I wait on your finish.
Miloslav

Now I wait on your finish.
Miloslav


dsailors

Joined: September 03, 2008
KitMaker: 20 posts
Armorama: 19 posts

Posted: Sunday, October 19, 2008 - 01:39 PM UTC
I finished the build of my Trumpeter Styrker. I did some kitbashing from the AFV Stryker and Edward PE set I have in my stash to upgrade the lame Trumpeter RWS. It turned out pretty good I think. Now for the paint.
Photo skills need work, I know.
Happy Modeling,
Duncan


Photo skills need work, I know.
Happy Modeling,
Duncan


Removed by original poster on 10/20/08 - 00:54:21 (GMT).
Nito74

Joined: March 04, 2008
KitMaker: 5,386 posts
Armorama: 4,727 posts

Posted: Monday, October 20, 2008 - 01:18 AM UTC
My 1126 got a coat of Primer this weekend.
Just left the sided toolbox before the painting stage.
Was hoping to get the AFV weapon station but I won't get it before the deadline, so it will be a OOB build.
Just left the sided toolbox before the painting stage.
Was hoping to get the AFV weapon station but I won't get it before the deadline, so it will be a OOB build.

Tankleader

Joined: April 29, 2003
KitMaker: 718 posts
Armorama: 684 posts

Posted: Monday, October 20, 2008 - 02:07 PM UTC
I finally got some parts that I needed to finish my build so hopefully I can update my blog and show some additional photos this weekend.
Tanks
Andy
Tanks
Andy

jccraemer

Joined: December 24, 2007
KitMaker: 462 posts
Armorama: 262 posts

Posted: Thursday, October 23, 2008 - 05:58 AM UTC
i just have some extra work to do the RSW, atteaneas, Stowage, and weathering once thats all done post pic after this weekend got the kinder this weekend
Nito74

Joined: March 04, 2008
KitMaker: 5,386 posts
Armorama: 4,727 posts

Posted: Thursday, October 23, 2008 - 06:57 AM UTC
Update:
- wheels painted , toolbox in progress.
- This weekend will start painting ..
Was hoping to get some pimped RWS or a Legend stowage set but I'm running out of time to finish the campaign, and I guess the items won't be here on time, so it will be a completly OOB build.
- wheels painted , toolbox in progress.
- This weekend will start painting ..
Was hoping to get some pimped RWS or a Legend stowage set but I'm running out of time to finish the campaign, and I guess the items won't be here on time, so it will be a completly OOB build.

35th-scale

Joined: November 21, 2007
KitMaker: 3,212 posts
Armorama: 2,807 posts

Posted: Thursday, October 23, 2008 - 08:38 AM UTC
Got my AFV 1128 & Trump 1127 last week. Major components of the 1128 being built at present and will post pic shortly. However, both AFV ^ Trumpeter give different base colors. So question: what is the closest Humbrol enamel color for a Stryker?
Thanks,
Sean
Thanks,
Sean

jccraemer

Joined: December 24, 2007
KitMaker: 462 posts
Armorama: 262 posts

Posted: Thursday, October 23, 2008 - 12:20 PM UTC

if it doessn't work i'll try later
Removed by original poster on 10/24/08 - 03:50:58 (GMT).
Posted: Thursday, October 23, 2008 - 08:43 PM UTC
Andreas, what a very nice Stryker! Super details. I am looking forward to see it with some colour on it.
John, that is very strange. I tried to post your picture as well. No luck for me either

John, that is very strange. I tried to post your picture as well. No luck for me either


Nito74

Joined: March 04, 2008
KitMaker: 5,386 posts
Armorama: 4,727 posts

Posted: Friday, October 24, 2008 - 12:11 AM UTC
What is the colour for the 4 jerrycans in the back of the 1126 ?
Should I paint it the same green colour or some light khaki/buff colour ?
Thanks !
Should I paint it the same green colour or some light khaki/buff colour ?
Thanks !

marsiascout

Joined: March 24, 2008
KitMaker: 1,247 posts
Armorama: 913 posts

Posted: Friday, October 24, 2008 - 01:39 AM UTC
Buff/Khaki. I also saw some in Black.
Lars
Lars
Nito74

Joined: March 04, 2008
KitMaker: 5,386 posts
Armorama: 4,727 posts

Posted: Friday, October 24, 2008 - 06:15 AM UTC
Thanks Lars !
I found the AFV RWS at my local store...and couldn't resist...
I found the AFV RWS at my local store...and couldn't resist...

 |


