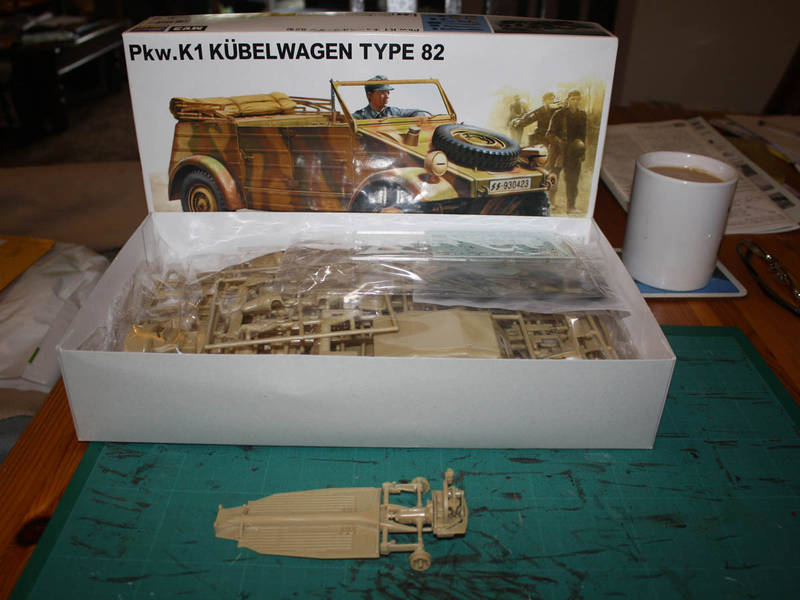
Hi folks,
where I'm at now.
Al
Campaigns
Where Armorama group builds can be discussed, organized, and updates posted.
Hosted by Darren Baker, Richard S.
Soft skinned
Posted: Monday, May 30, 2011 - 08:06 AM UTC
Bigrip74
Texas, United States
Joined: February 22, 2008
KitMaker: 5,026 posts
Armorama: 1,604 posts
Joined: February 22, 2008
KitMaker: 5,026 posts
Armorama: 1,604 posts
Posted: Monday, May 30, 2011 - 08:22 AM UTC
Alan, I like the looks of that kit just wish that it was readily available here across the pond.
Bob
Bob
ltb073
New York, United States
Joined: March 08, 2010
KitMaker: 3,662 posts
Armorama: 3,078 posts
Joined: March 08, 2010
KitMaker: 3,662 posts
Armorama: 3,078 posts
Posted: Monday, May 30, 2011 - 09:28 AM UTC
Quoted Text
Alan, I like the looks of that kit just wish that it was readily available here across the pond.
Bob
Can't agree more with ya on that one Bob
hondacivic
Ho Chi Minh City, Vietnam
Joined: September 01, 2007
KitMaker: 90 posts
Armorama: 89 posts
Joined: September 01, 2007
KitMaker: 90 posts
Armorama: 89 posts
Posted: Tuesday, May 31, 2011 - 03:44 AM UTC
hi all,
Some new pics
Hope you enjoy,
Dung Lam
Some new pics
Hope you enjoy,
Dung Lam
Middle_Franconian
Bayern, Germany
Joined: January 02, 2011
KitMaker: 279 posts
Armorama: 30 posts
Joined: January 02, 2011
KitMaker: 279 posts
Armorama: 30 posts
Posted: Thursday, June 02, 2011 - 05:18 AM UTC
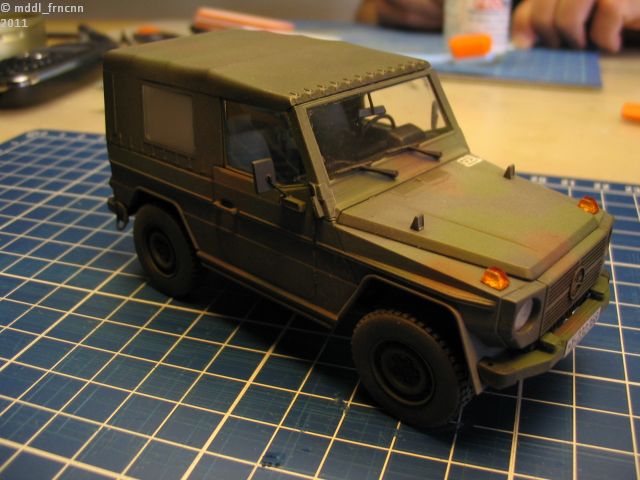
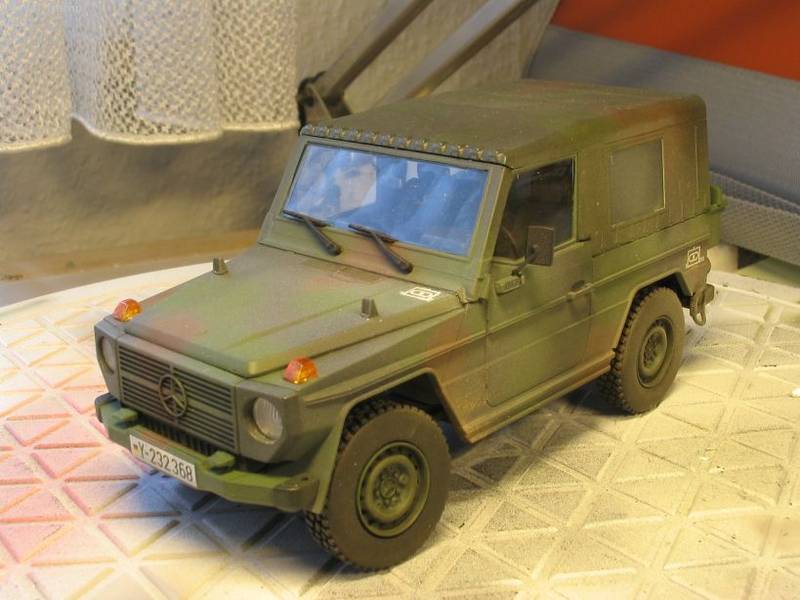
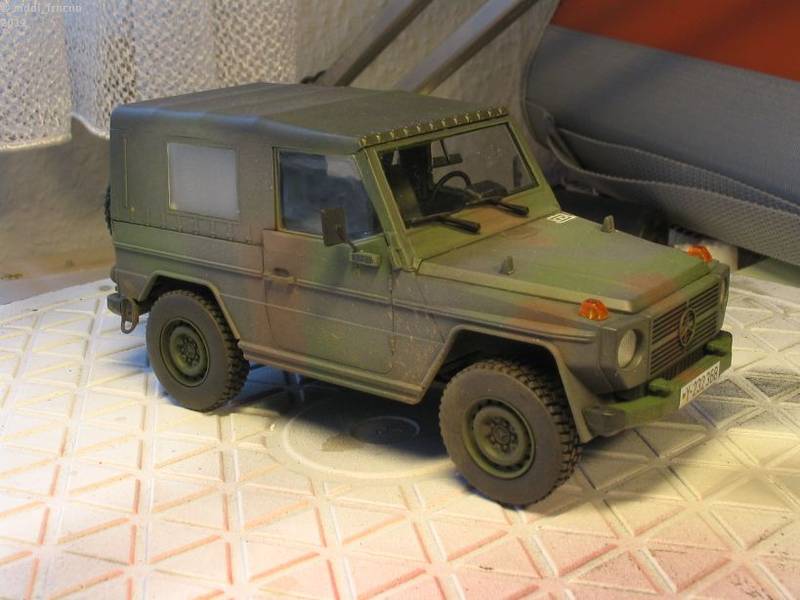
Hello all,
some update from my MB Wolf. Almost finished. I have started to put on the small parts and applying the decals.
@Dung: Of course I enjoy your model pics. Really excellent work and a very nice finish.
Servus,
Sebastian
some update from my MB Wolf. Almost finished. I have started to put on the small parts and applying the decals.
@Dung: Of course I enjoy your model pics. Really excellent work and a very nice finish.
Servus,
Sebastian
Posted: Thursday, June 02, 2011 - 06:01 AM UTC
Hi Bob and Sal,
Yes, More plastic Briti trucks are badly needed.
Sebastian, nice work.
Al
Yes, More plastic Briti trucks are badly needed.
Sebastian, nice work.
Al
Bigrip74
Texas, United States
Joined: February 22, 2008
KitMaker: 5,026 posts
Armorama: 1,604 posts
Joined: February 22, 2008
KitMaker: 5,026 posts
Armorama: 1,604 posts
Posted: Thursday, June 02, 2011 - 07:05 AM UTC
Sebstian, this is the link to the gallery incase it did not go through in the PM.
http://gallery.kitmaker.net/showgallery.php/cat/26004
Bob
http://gallery.kitmaker.net/showgallery.php/cat/26004
Bob
Bigrip74
Texas, United States
Joined: February 22, 2008
KitMaker: 5,026 posts
Armorama: 1,604 posts
Joined: February 22, 2008
KitMaker: 5,026 posts
Armorama: 1,604 posts
Posted: Thursday, June 02, 2011 - 11:37 AM UTC
Posted: Friday, June 03, 2011 - 10:21 PM UTC
Hi folks,
I was looking in the gallery at the completed kits, terrific range of excellent subjects. Impressive list Bob - a really enjoyable campaign.
Well I've reached the poiint where I'm going to call the Humber done. I need to add a Divisional Decal, but I'm going to wait out on that until I deicde what unit I want to match the figuers to.
Cheers
Al
Big-John
Ohio, United States
Joined: August 12, 2010
KitMaker: 731 posts
Armorama: 711 posts
Joined: August 12, 2010
KitMaker: 731 posts
Armorama: 711 posts
Posted: Saturday, June 04, 2011 - 12:34 AM UTC
Here is the Volkswagen base coated. I tried Tamiya acrylics for the first time and it didn’t come out like I had wanted it to. I may have had my paint to thin and air pressure to high.
Not to mention the paint kept drying and building up on my air brush.
hondacivic
Ho Chi Minh City, Vietnam
Joined: September 01, 2007
KitMaker: 90 posts
Armorama: 89 posts
Joined: September 01, 2007
KitMaker: 90 posts
Armorama: 89 posts
Posted: Saturday, June 04, 2011 - 06:07 AM UTC
I've just finished my M1114, here are the new pics of the interior
hondacivic
Ho Chi Minh City, Vietnam
Joined: September 01, 2007
KitMaker: 90 posts
Armorama: 89 posts
Joined: September 01, 2007
KitMaker: 90 posts
Armorama: 89 posts
Posted: Saturday, June 04, 2011 - 04:29 PM UTC
Hi all,
I update some new pics, and will post in the gallery soon. Cheers!
DungLam
I update some new pics, and will post in the gallery soon. Cheers!
DungLam
Middle_Franconian
Bayern, Germany
Joined: January 02, 2011
KitMaker: 279 posts
Armorama: 30 posts
Joined: January 02, 2011
KitMaker: 279 posts
Armorama: 30 posts
Posted: Saturday, June 04, 2011 - 08:19 PM UTC
Hi!
My Wolf is finished and parked in the gallery:
To me, the Wolf turned out a little bit too dusty. I have tried a new technique with white tinted clear cote to simulate a fade-out effect, but I am not convinced. Nevertheless buiding the Wolf was great fun.
@ Dung: I am speechless... This Humvee is excellent!!!
Keep on posting!
Servus,
Sebastian
Posted: Sunday, June 05, 2011 - 08:17 AM UTC
Thought I'd show some progress. But first things first, some great builds in here!
Alan, as usal, very unusual subject and british of course... Those AA kits sure build up nicely!
John, the camo looks good to me, though from what you describe I'd say your paint was a bit on the thick side. I can recommend Isopropylalcohol for thining of Tamiya Acrylics. Been using it for a while now and have had no problems ever.
Hondacivic, great detail on the hummer!
Sebastian, the Wilf looks good and reminds me of the Puchs we had in the Army...
So, here goes. At some point I thought this little thing was going to drive me crazy with all the tiny parts, but I made it to the finish line. Now some detail painting and the figures for the final pic of this campaign.First, all the parts before painting:
test fit of the fiugures:
Almost finished bike:
I noticed the side rail is crooked, will correct. Hope to finish it this month!
Cheers!
Stefan
Bigrip74
Texas, United States
Joined: February 22, 2008
KitMaker: 5,026 posts
Armorama: 1,604 posts
Joined: February 22, 2008
KitMaker: 5,026 posts
Armorama: 1,604 posts
Posted: Sunday, June 05, 2011 - 10:25 AM UTC
@ Alan: another nice build and a diorama which I have still yet to try.
@ John: It looks pretty good for free hand ( much better than mine) I too have just learned about low psi to be able to paint those little squiggles, another new item was the retarder for Tamiya it slows down the drying. These tips are from those more knowlegable than I here on Armorama/Aeroscale. The retarder really does the job some use windex.
@ Dung: your HUMVEE is coming right along, that is an expensive soft skinned vehicle with all of the P/E and after market.
@ Sebastian: they can never be too dusty in the feild, nice job on the camo.
@ Stefan: I would hate to try and build that bike with all of those fiddelly little parts that I could not see much less use my tree stub fingers in trying to hold without them flying off to that carpet monster. Nice job on a bike that I would like to have in 1:1 scale.
Bob
35th-scale
Kildare, Ireland
Joined: November 21, 2007
KitMaker: 3,212 posts
Armorama: 2,807 posts
Joined: November 21, 2007
KitMaker: 3,212 posts
Armorama: 2,807 posts
Posted: Wednesday, June 08, 2011 - 12:49 AM UTC
Some lovely stuff here so far....
As for my WMIK progress is slow....it's amazing how life can get in the way of a good build ;-)
Anyway, so far it's all put together although the cage is not fixed in place yet. Just need to start weathering and detailing with bits from the spares box.
The bits I've done different to the instructions are:
Spare wheel will go on the side of the cage, not on the hood. Tried making a basket for the hood but it looked all wrong...I'll put some sore of camo roll on it though.
The SA80s are now stored vertically, not poinging out from the top of the cage (?)
Made sure the seat-belt receivers are on the insides of the seats, not both on the right. Sounds simple but I was quite pleased at how the surgery I had to do came out. Guess I'll have to fit actual seat belts now though....
Moved the seat in the rear to the correct side and build a radio table. The radio is from a humvee...not sure if it's right, but better than nothing...
So, some quick photos for now:
Thanks for looking and all comments welcomed
Sean
Posted: Wednesday, June 08, 2011 - 06:05 AM UTC
Hi Dung and Sabestian, nice work guys.
Stefan the bike is looking cool, nive work.
I just realised I have the LHS indicator to add, missed it completely , but it's on now just have to re-attatch the doors lol, lol.
Al
Stefan the bike is looking cool, nive work.
I just realised I have the LHS indicator to add, missed it completely , but it's on now just have to re-attatch the doors lol, lol.
Al
Middle_Franconian
Bayern, Germany
Joined: January 02, 2011
KitMaker: 279 posts
Armorama: 30 posts
Joined: January 02, 2011
KitMaker: 279 posts
Armorama: 30 posts
Posted: Saturday, June 11, 2011 - 06:39 AM UTC
@ Stefan: Thanks! I remember I saw Swiss Puchs sometimes on the Swiss Autobahn when travelling for my company. It would be also possible to make a Puch G out of that Revell kit, but unfortunately there are no Swiss decals. Is there any company which makes decals for Swiss military vehicles? Maybe you know?
BTW, what kind of color do they have?
@ Sean: Cool looking WMIK!
Servus,
Sebastian
BTW, what kind of color do they have?
@ Sean: Cool looking WMIK!
Servus,
Sebastian
35th-scale
Kildare, Ireland
Joined: November 21, 2007
KitMaker: 3,212 posts
Armorama: 2,807 posts
Joined: November 21, 2007
KitMaker: 3,212 posts
Armorama: 2,807 posts
Posted: Friday, June 17, 2011 - 01:08 AM UTC
Thanks Sebantian.
Just a quick update...haven't had much time at the bench lately.
Started weathering and picking bits of gear from the spares box:
Just a quick update...haven't had much time at the bench lately.
Started weathering and picking bits of gear from the spares box:
Posted: Friday, June 17, 2011 - 05:08 AM UTC
Looking good Sean.
Al
Al
Posted: Saturday, June 18, 2011 - 05:42 AM UTC
Wow! There are some really great-looking builds here! I've been ghosting on this campaign for far too long, so time to put my cards (or sprues) on the table.
Bob, when next you update the spreadsheet, I'm doing a 1:24 Hasegawa Kubelwagen that I got as a gift a few years back. I started it a couple weeks ago at a club night, and here's a pic:
Since then I've built up the body and chassis, but it is in big lumps getting ready for paint. I'll have to grab some more pics.
It surprised me how well it goes together. And the diorama possibilities are endless thanks to the level of detail inside and out.
Tom
Bigrip74
Texas, United States
Joined: February 22, 2008
KitMaker: 5,026 posts
Armorama: 1,604 posts
Joined: February 22, 2008
KitMaker: 5,026 posts
Armorama: 1,604 posts
Posted: Saturday, June 18, 2011 - 06:49 AM UTC
Tom, nice to hear from you and I will be waiting for the photos on this giant build. Could you place a ruler next to the kit when you have the body attached?
Bob
Bob
Posted: Saturday, June 18, 2011 - 08:26 AM UTC
Ya mean a mug of tea in the background isn't an international scale in photos?
Sure, I'll get some good ruler shots next time, and maybe some 1:35 kit alongside for size comparison. I'd say at the moment that it'll be at least the length & width of a 1:35 Panzer II. It's the first time I've built in this scale since I did AMT muscle cars as a teenager!
Tom
Sure, I'll get some good ruler shots next time, and maybe some 1:35 kit alongside for size comparison. I'd say at the moment that it'll be at least the length & width of a 1:35 Panzer II. It's the first time I've built in this scale since I did AMT muscle cars as a teenager!
Tom
Bigrip74
Texas, United States
Joined: February 22, 2008
KitMaker: 5,026 posts
Armorama: 1,604 posts
Joined: February 22, 2008
KitMaker: 5,026 posts
Armorama: 1,604 posts
Posted: Saturday, June 18, 2011 - 10:11 AM UTC
Quoted Text
Ya mean a mug of tea in the background isn't an international scale in photos?
Tom I am from TEXAS. A cup of tea is gallon sized down there greeat idea regarding the 1/35 to 1/24 comparison.
Bob
Herchealer
Indiana, United States
Joined: July 31, 2003
KitMaker: 1,523 posts
Armorama: 710 posts
Joined: July 31, 2003
KitMaker: 1,523 posts
Armorama: 710 posts
Posted: Sunday, June 19, 2011 - 09:29 AM UTC
Here is a WIP post for my entry.
This is what I am Going to go with. Havent seen anyone post one of these for this campaign yet!
And here are some pics of the build so far. It will be strictly OOB.
Well, I will post some more as I progress. As Always comments are welcome.
Herky
This is what I am Going to go with. Havent seen anyone post one of these for this campaign yet!
And here are some pics of the build so far. It will be strictly OOB.
Well, I will post some more as I progress. As Always comments are welcome.
Herky