Woah. Not even close.
We're both swamped and miles away from finishing.
Never thought we'd smack into the deadline that hard.
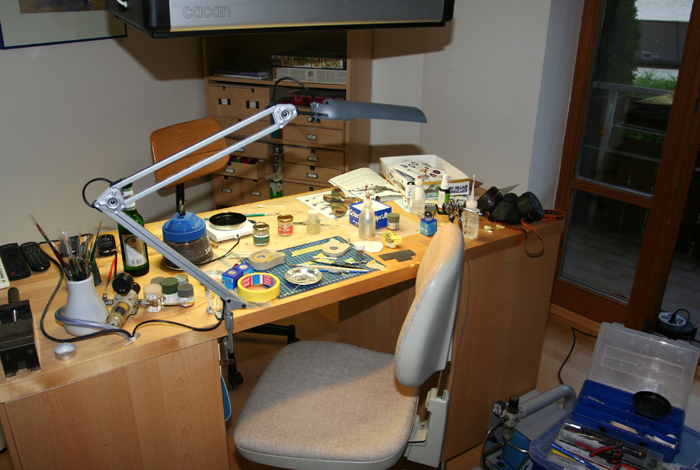
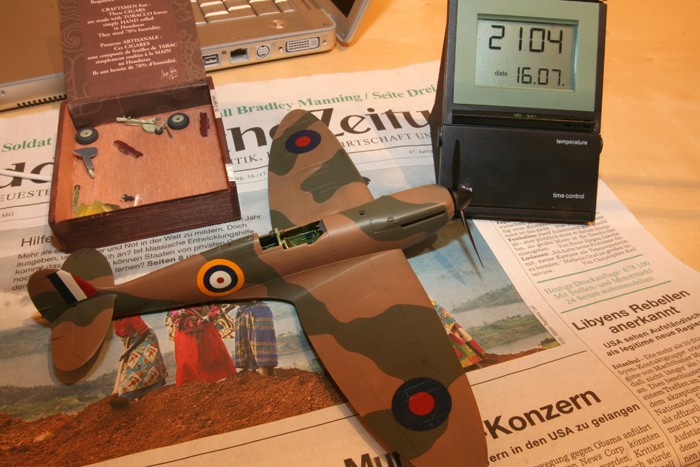
Here's were I am:
The battlefield at cease of hostilities:
We'll call it a day. Food now. Maybe some easy modelling into the small hours and then to bed.
I'll finish this the usual way in the following weeks.
See ya all. Thanks for watching.
Out.
Campaigns
Where Armorama group builds can be discussed, organized, and updates posted.
Hosted by Darren Baker, Richard S.
Total Tamiya campaign
Posted: Saturday, July 16, 2011 - 08:12 AM UTC
Nito74
Lisboa, Portugal
Joined: March 04, 2008
KitMaker: 5,386 posts
Armorama: 4,727 posts
Joined: March 04, 2008
KitMaker: 5,386 posts
Armorama: 4,727 posts
Posted: Sunday, July 17, 2011 - 04:08 AM UTC
Some progress on the Hetzer:
- White wash in progress, wheels and tracks will be next.
Next week photo update...
- White wash in progress, wheels and tracks will be next.
Next week photo update...
mpatman
New South Wales, Australia
Joined: March 09, 2006
KitMaker: 248 posts
Armorama: 6 posts
Joined: March 09, 2006
KitMaker: 248 posts
Armorama: 6 posts
Posted: Tuesday, July 19, 2011 - 07:21 PM UTC
Hi all,
I have made a start on my entry it will be a 1/48 P-47 Razorback. Still working out what markings I want to do as I have a hundred or so options....
I will post some pics later once the wife returns home with the camera.
Mark
I have made a start on my entry it will be a 1/48 P-47 Razorback. Still working out what markings I want to do as I have a hundred or so options....
I will post some pics later once the wife returns home with the camera.
Mark
CaptainA
Indiana, United States
Joined: May 14, 2007
KitMaker: 3,117 posts
Armorama: 564 posts
Joined: May 14, 2007
KitMaker: 3,117 posts
Armorama: 564 posts
Posted: Wednesday, July 20, 2011 - 05:35 AM UTC
I'm in with a 32nd sclale Spitfire IXc.
It is to hot today to do anything. Temp is 98 with a heat index of 113. I don't know what that is in celcius, but it is way to hot to even go out to water. So, I started this morning. Got some of the interior sprayed. Now it is time to watch a little baseball on TV.
Great kit.
It is to hot today to do anything. Temp is 98 with a heat index of 113. I don't know what that is in celcius, but it is way to hot to even go out to water. So, I started this morning. Got some of the interior sprayed. Now it is time to watch a little baseball on TV.
Great kit.
panzerIV
England - North West, United Kingdom
Joined: January 02, 2007
KitMaker: 781 posts
Armorama: 676 posts
Joined: January 02, 2007
KitMaker: 781 posts
Armorama: 676 posts
Posted: Wednesday, July 20, 2011 - 06:30 AM UTC
hi there
so ive had a change of heart on my project im going to do
as i was in my local modelzone earlier this week and saw tamiya tiger ( early production ) and thought why not ive not really done any german armour for a very long time now! ive made a start this week and will be putting my progress pics up tonight
this version of the tiger is for the russian campaign with three different colour schemes i may try my hand at white wash
panzerIV
England - North West, United Kingdom
Joined: January 02, 2007
KitMaker: 781 posts
Armorama: 676 posts
Joined: January 02, 2007
KitMaker: 781 posts
Armorama: 676 posts
Posted: Wednesday, July 20, 2011 - 02:38 PM UTC
hi guys heres my progress for the week. my original project would have been bren carrier and brit troops marching by but i saw tiger and thought armour not done some german armour for a while so here we go
only alil part done but as i dont get much time after work to do much after finishing how work and i finish at 9pm but heres main part of body
will update more hopefully at weekend if can get more done
tony
only alil part done but as i dont get much time after work to do much after finishing how work and i finish at 9pm but heres main part of body
will update more hopefully at weekend if can get more done
tony
ltb073
New York, United States
Joined: March 08, 2010
KitMaker: 3,662 posts
Armorama: 3,078 posts
Joined: March 08, 2010
KitMaker: 3,662 posts
Armorama: 3,078 posts
Posted: Wednesday, July 20, 2011 - 02:53 PM UTC
Anthony, I just picked up that kit so i will be following your build, post lots of photos
ltb073
New York, United States
Joined: March 08, 2010
KitMaker: 3,662 posts
Armorama: 3,078 posts
Joined: March 08, 2010
KitMaker: 3,662 posts
Armorama: 3,078 posts
Posted: Thursday, July 21, 2011 - 04:48 AM UTC
I finished up the Officer for my Mobelwagen and mounted him to the rear of the crew
He is there to oversee the use and demonstration of this proto-type vehicle that is why he is in the uniform of the General Staff
Gotta love these old Tamiya kits no fit problems quick builds and just enough detail to look decent Everything here is Tamaya including most of the paint Now I need to get a decent photo for the gallery
17741907
Istanbul, Turkey / Türkçe
Joined: December 05, 2007
KitMaker: 953 posts
Armorama: 705 posts
Joined: December 05, 2007
KitMaker: 953 posts
Armorama: 705 posts
Posted: Thursday, July 21, 2011 - 12:49 PM UTC
Looking good Sal.....Well done......
GregCloseCombat
California, United States
Joined: June 30, 2008
KitMaker: 2,408 posts
Armorama: 2,394 posts
Joined: June 30, 2008
KitMaker: 2,408 posts
Armorama: 2,394 posts
Posted: Thursday, July 21, 2011 - 01:14 PM UTC
Congrats Sal, it came out terrific.
panzerIV
England - North West, United Kingdom
Joined: January 02, 2007
KitMaker: 781 posts
Armorama: 676 posts
Joined: January 02, 2007
KitMaker: 781 posts
Armorama: 676 posts
Posted: Thursday, July 21, 2011 - 01:27 PM UTC
hi sal
just seen your update!
nice job on the mobelwagen
ill try and post as many pics of tiger as i can!
im doing little bits by little bits atm as im doing research aswell as its my 1st tiger! im thinking of doing it in the russian front january 1944 tank no. S04 sPzAbt 101 which is white wash. never done a white wash but ill give anything a try . will you be doing a build log on your tiger? maybe could help each other out with any info we can find...
tony
Nito74
Lisboa, Portugal
Joined: March 04, 2008
KitMaker: 5,386 posts
Armorama: 4,727 posts
Joined: March 04, 2008
KitMaker: 5,386 posts
Armorama: 4,727 posts
Posted: Saturday, July 23, 2011 - 08:49 AM UTC
I finished my Hetzer, will post some pics tomorrow, it's getting dark.
The Tamyia Hetzer is a sweet kit, I truly recommend .
flyboy92187
Wisconsin, United States
Joined: March 30, 2011
KitMaker: 199 posts
Armorama: 32 posts
Joined: March 30, 2011
KitMaker: 199 posts
Armorama: 32 posts
Posted: Sunday, July 24, 2011 - 06:11 AM UTC
Well, I signed up for this campaign, and originally could not find where it was on the site! I know its armorama, but usually I do wingy things. I picked up this Tamiya 1/48 MkI Spit from a local store that was going out of business, so I got this and some other kits. Dont worry, I have a Bradley from the sale in the stash! But for me this was what many would call; a therapy kit. Sometimes it is nice to have a kit that is not a pain with assembly, but you can enjoy the painting and weathering, and that was precisely what this one was. I kept the latter to a basic, and used my recently aquired Pro Modeler wash. (I like it a ton better then using oils!) Included are my progress pics, as well as finished pics. I lack a good camera, so they were taken off my android, but I did find a cool vintage photo app, and this really made the spit more gorgeous. (Those are in my gallery)
GregCloseCombat
California, United States
Joined: June 30, 2008
KitMaker: 2,408 posts
Armorama: 2,394 posts
Joined: June 30, 2008
KitMaker: 2,408 posts
Armorama: 2,394 posts
Posted: Sunday, July 24, 2011 - 06:18 AM UTC
Michael - that was fast. It looks well finished. cool
flyboy92187
Wisconsin, United States
Joined: March 30, 2011
KitMaker: 199 posts
Armorama: 32 posts
Joined: March 30, 2011
KitMaker: 199 posts
Armorama: 32 posts
Posted: Sunday, July 24, 2011 - 06:31 AM UTC
Well, it took a week, but I could not find the campaign in aeroscale! I usually get ample time to work on my kits, as I wake up early specifically to squeeze it in before work!!! I Built this one up early july-ish, but just found the right stream.
Nito74
Lisboa, Portugal
Joined: March 04, 2008
KitMaker: 5,386 posts
Armorama: 4,727 posts
Joined: March 04, 2008
KitMaker: 5,386 posts
Armorama: 4,727 posts
Posted: Sunday, July 24, 2011 - 06:48 AM UTC
Here's the finished Hetzer:
MAMOOTH
Yucatan, Mexico
Joined: January 16, 2011
KitMaker: 45 posts
Armorama: 43 posts
Joined: January 16, 2011
KitMaker: 45 posts
Armorama: 43 posts
Posted: Sunday, July 24, 2011 - 05:42 PM UTC
imransz
Singapore / 新加坡
Joined: July 10, 2007
KitMaker: 38 posts
Armorama: 37 posts
Joined: July 10, 2007
KitMaker: 38 posts
Armorama: 37 posts
Posted: Tuesday, July 26, 2011 - 12:16 AM UTC
Hi guys,i will be participating using this kit.It is in1/48 scale.
panzerIV
England - North West, United Kingdom
Joined: January 02, 2007
KitMaker: 781 posts
Armorama: 676 posts
Joined: January 02, 2007
KitMaker: 781 posts
Armorama: 676 posts
Posted: Wednesday, July 27, 2011 - 09:06 AM UTC
some very nice updates here
im currently doing work on my tiger not been able to all week
days off rule XD
Mamooth - in regards to your question of priming it can vary really on what colour the vehcile is! i normally use black as my colour primer as i tend to do dark colour vehciles in olive etc plus with a black primer you can see the little mistakes like where pieces have gone together properly and if doing a chipping method i tend to scratch the olive drab off and the black is underneath showing then. but thats what i do! maybe some one can give another option for you!
MAMOOTH
Yucatan, Mexico
Joined: January 16, 2011
KitMaker: 45 posts
Armorama: 43 posts
Joined: January 16, 2011
KitMaker: 45 posts
Armorama: 43 posts
Posted: Wednesday, July 27, 2011 - 11:52 AM UTC
I apreciate your coment Anthony.
Nito74
Lisboa, Portugal
Joined: March 04, 2008
KitMaker: 5,386 posts
Armorama: 4,727 posts
Joined: March 04, 2008
KitMaker: 5,386 posts
Armorama: 4,727 posts
Posted: Wednesday, July 27, 2011 - 03:44 PM UTC
I might do a 2nd build for this Campaign...
a Panzer II (OOB)or a Panzer IV J (w/ATAK Zimm & Voyager PE & Resin stowage)
Damn I'm addicted to Plastic again ....
a Panzer II (OOB)or a Panzer IV J (w/ATAK Zimm & Voyager PE & Resin stowage)
Damn I'm addicted to Plastic again ....
ppawlak1
Victoria, Australia
Joined: March 14, 2006
KitMaker: 1,973 posts
Armorama: 1,843 posts
Joined: March 14, 2006
KitMaker: 1,973 posts
Armorama: 1,843 posts
Posted: Saturday, July 30, 2011 - 12:40 AM UTC
Just an easy OOTB build for me on an OLD Tamiya kit. I'll add a Legends NATO tank Crew also.
I'll use this to try out some new painitng techniques
Here's the kit :
Paul
I'll use this to try out some new painitng techniques
Here's the kit :
Paul
BunkerBoys
Canada
Joined: May 23, 2011
KitMaker: 28 posts
Armorama: 27 posts
Joined: May 23, 2011
KitMaker: 28 posts
Armorama: 27 posts
Posted: Saturday, July 30, 2011 - 05:16 AM UTC
@Paul - I'm interested in how well that kit goes together. I waqs looking at one in my LHS for $10 last week. Until I turned around and saw bin after bin of Verlinden figures for $2.99. Needliess to say, I came home with a bag full of mini-men.
Update on the M-41. Haven't been working on it much. Fighting off some kind of killer cough and I've been falling asleep watching TV after work. Managed to get in a little detail painting last night.
Mario_HR
Croatia Hrvatska
Joined: June 28, 2006
KitMaker: 376 posts
Armorama: 303 posts
Joined: June 28, 2006
KitMaker: 376 posts
Armorama: 303 posts
Posted: Monday, August 01, 2011 - 08:22 PM UTC
I'm really starting to hate macro mode I did the heat exchanger leaflets on the MCD and while to the naked eye they seem to be aligned in macro you get this. They are minute and very thin so tamiya's extra thin dissolves them fast and deforms the tiny pieces. I will see if it looks better under a coat of paint so I might redo them if necessary.
The slave cable receptacle needs a hole drilled out and a connector wire added to link it to the MCD
the cable conduit for the APU cable is also done
I drilled a few holes (really small diameter) here, one still to go
A tow bar is added on the side of the turret since I saw that on a pic of the tank I will be doing (Valhalla)
A shackle is replaced with this thingy as per the reference I got
And replacement sprockets with the correct lightening holes
The turret finally got it's barrel. It's RBmodels and I wouldn't recommend it. The resin part (middle) had miss-aligned hole drilled out and I had to putty it with epoxy putty and drill a new one.
Here's how it looks like now
That's it for now. There's still lots to do, so little time
GregCloseCombat
California, United States
Joined: June 30, 2008
KitMaker: 2,408 posts
Armorama: 2,394 posts
Joined: June 30, 2008
KitMaker: 2,408 posts
Armorama: 2,394 posts
Posted: Sunday, August 07, 2011 - 04:25 PM UTC
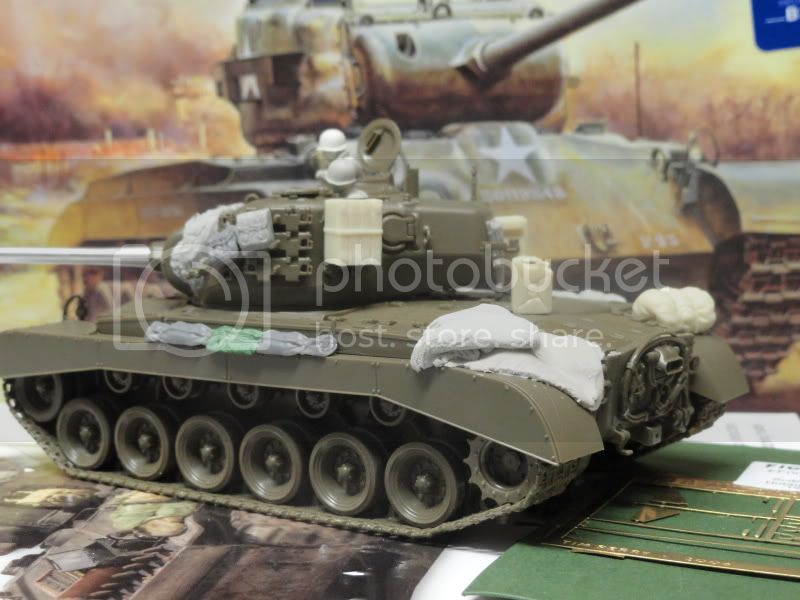
Here are my results of my first experiment making a mantlet cover and using Magic Sculpt on my Pershing. After taking the pic and seeing it enlarged on the computer, I ran back outside to trim mostly the sides down some. So when I get more pics, it should look a little smaller. I think the grey Magic sculpt worked better then my early attempts at using Squadron putty. I'm going to add PE guards and MG next. Suggestions welcomed always