Campaigns
Where Armorama group builds can be discussed, organized, and updates posted.
Tiger Campaign
Matt182
Visit this Community
United Kingdom
Joined: May 20, 2010
KitMaker: 269 posts
Armorama: 243 posts
Posted: Wednesday, June 29, 2011 - 10:36 AM UTC

Quoted Text


I see 2 round hatches on the lower hull through the plastikbag. Your hull is correct! I´m building that kit right now..
This is an early/middle style hull which is right for the Kursk and DAK Tigers.


Hi ejasonk,

Although the hull bottom details are correct it has the moulded on zimmerit. I am having to send the kit back as they have no replacement parts

Matt,

Sounds like the tracks are rather good. Do they have hollow guide horns?

As I have to send the tiger back i am now going to build the tamiya 1/48 king tiger with voyager photo etch and warriors crew, plus a little scratch building to bring it up to scratch.

Made some more progress on the Trumpy King Tiger


More details in my build log here:

https://armorama.kitmaker.net/forums/176584&page=1
BigSmitty
Visit this Community
Minnesota, United States
Joined: October 01, 2008
KitMaker: 597 posts
Armorama: 439 posts
Posted: Wednesday, June 29, 2011 - 03:57 PM UTC
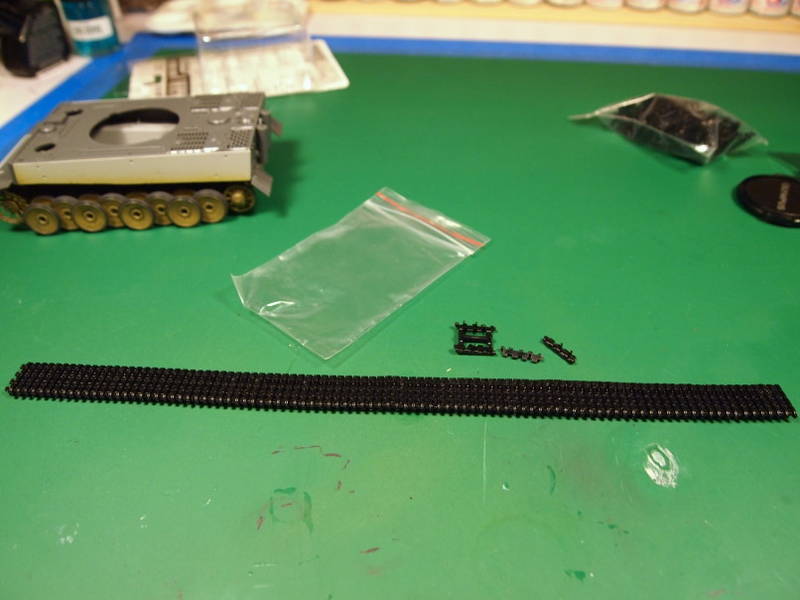
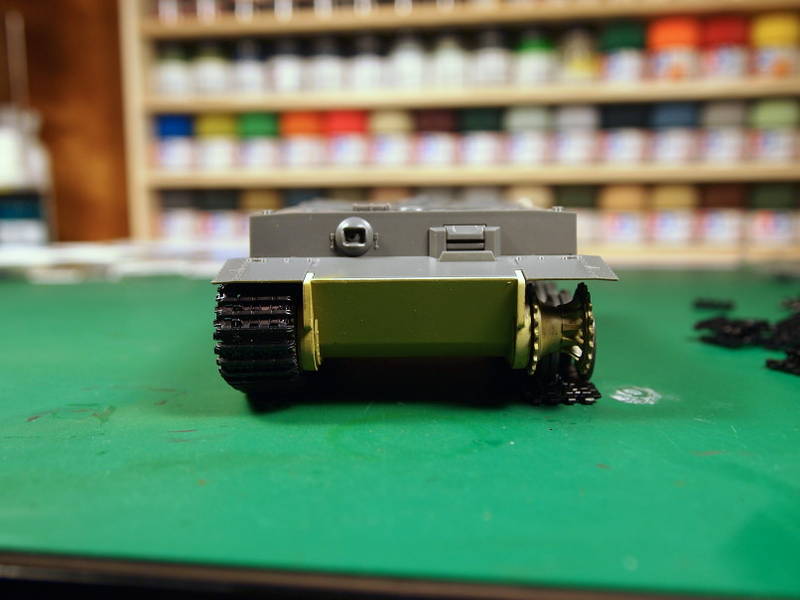
Just did a little work (about 10 min) and got this section done on the AFV Club tracks. The little pins that hold the tracks together are pretty fragile, so I'd call them "semi workable".


Guide horns are solid, which is a bummer, but they are pretty nicely detailed for 1/48 plastic tracks.
BigSmitty
Visit this Community
Minnesota, United States
Joined: October 01, 2008
KitMaker: 597 posts
Armorama: 439 posts
Posted: Wednesday, June 29, 2011 - 05:05 PM UTC
Waited to long to edit my last post, so I'll add this one. You don't have much room for error with these tracks... one run done, and only four spare links left... yikes!


On to the other side...
Matt182
Visit this Community
United Kingdom
Joined: May 20, 2010
KitMaker: 269 posts
Armorama: 243 posts
Posted: Thursday, June 30, 2011 - 07:59 AM UTC
Looking good Matt. Those tracks will really enhance your tiger.

Shame about the guide horns but still a huge improvments over the kit tracks.
BigSmitty
Visit this Community
Minnesota, United States
Joined: October 01, 2008
KitMaker: 597 posts
Armorama: 439 posts
Posted: Thursday, June 30, 2011 - 11:34 AM UTC
Matt,

I hear ya, but the only set I found with hollow guide horns were some resin 1/48 tracks that run around $40. A bit too much for me, especially for 1/48 scale.

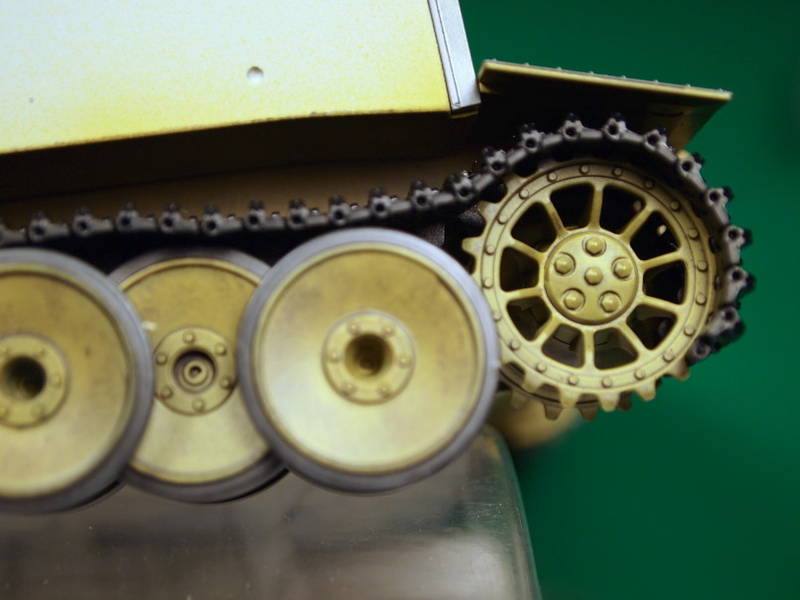
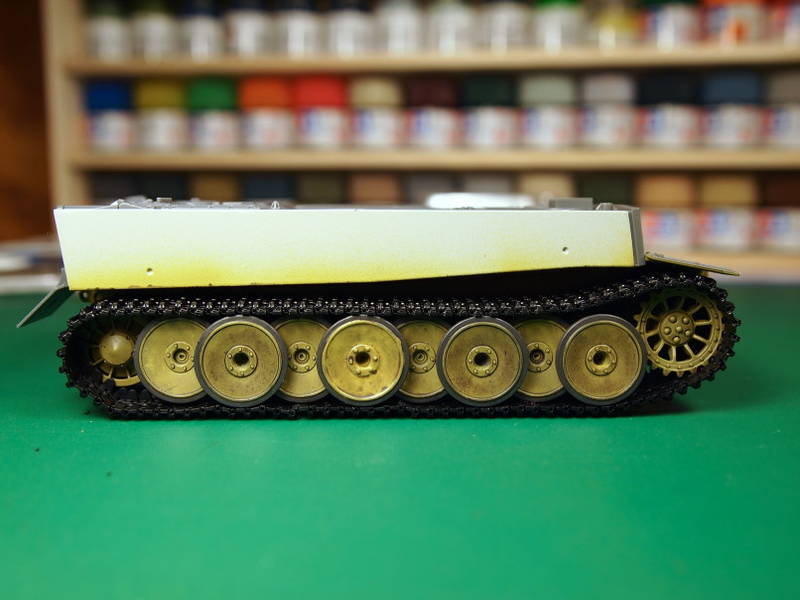
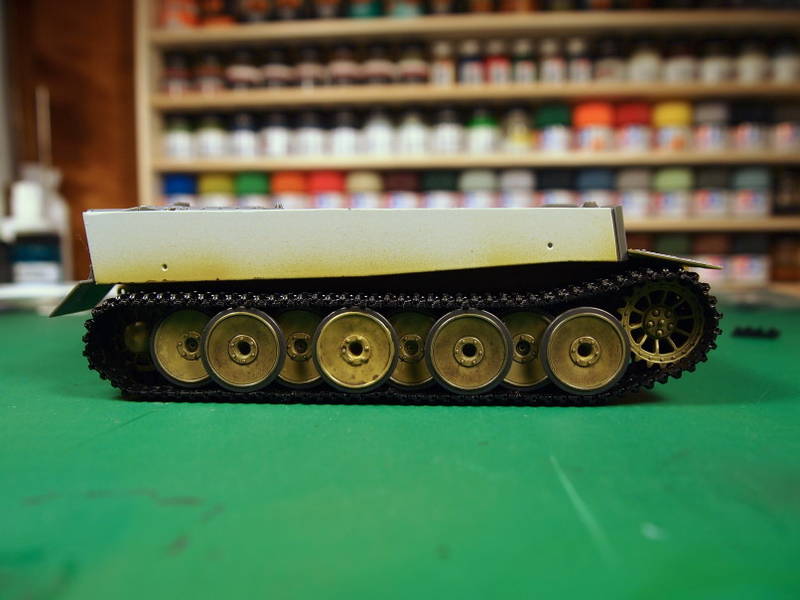
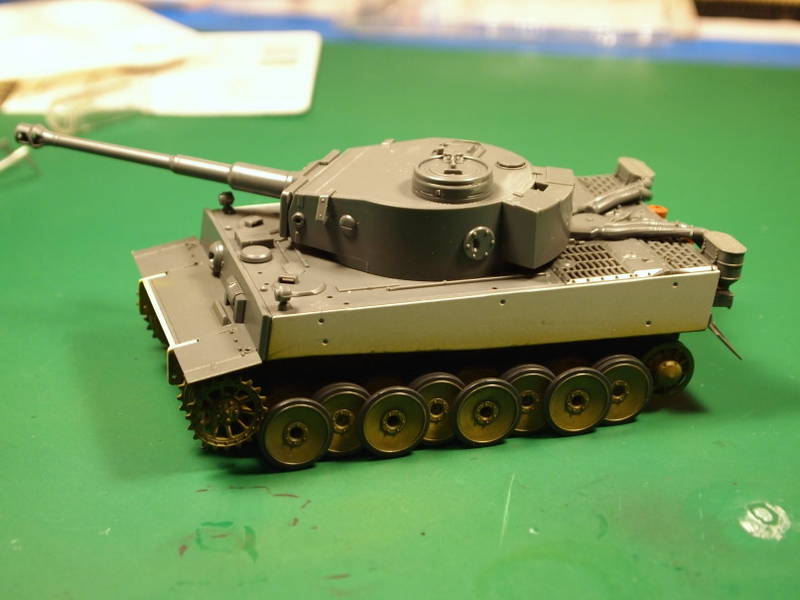
I ran the full length (93 links, I found three on the floor from last night) and this is how it sits.


The red wheel is now the lightest of the dark yellow wheels, still need to touch up the rubber a bit. As far as how the track sits, I think this is about right. Totally blows away the kit tracks. However, I will have a use for the straight sections...gotta make some track marks in the base I'm going to have for this puppy...
BigSmitty
Visit this Community
Minnesota, United States
Joined: October 01, 2008
KitMaker: 597 posts
Armorama: 439 posts
Posted: Thursday, June 30, 2011 - 05:17 PM UTC
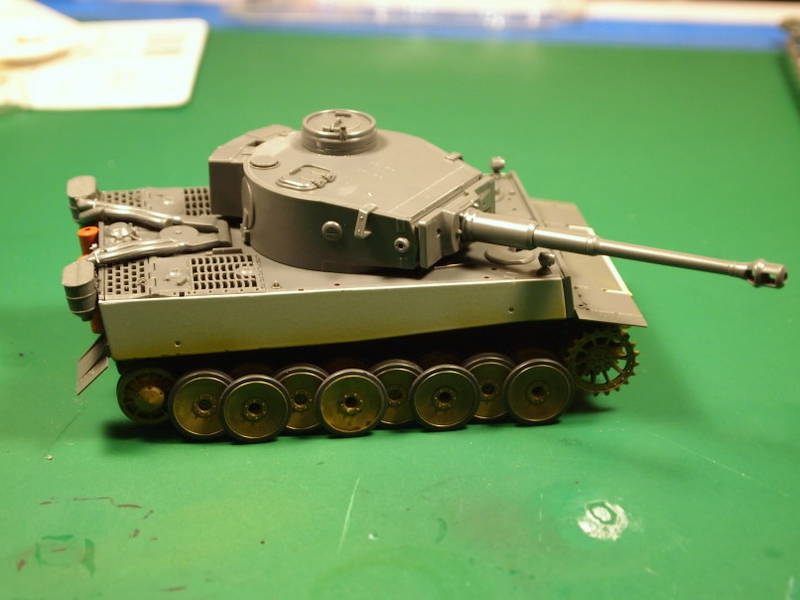
Getting closer to the finish, as the turret interior is bare, but I do have a TC that I will have in the hatch. Gotta use those Tamiya 1/48 figure sets for something, I guess.


Basic construction is about 90% complete. I went ahead and painted the exhausts before closing them up with the guarding. Also leaving the commander's cupola blu tac'd in place for the camo. Letting the tracks dry overnight from the first spray. Will probably be shooting the green basecoat tomorrow. I plan on using really thin rolls of blu tac to mask the green and then shoot the dark yellow "basecoat" as I don't really trust my freehand on squiggle camo quite yet.

Since we have a nice long weekend here in the States coming up, should be able to put quite a dent in this one by the end.
BigSmitty
Visit this Community
Minnesota, United States
Joined: October 01, 2008
KitMaker: 597 posts
Armorama: 439 posts
Posted: Saturday, July 02, 2011 - 05:07 PM UTC
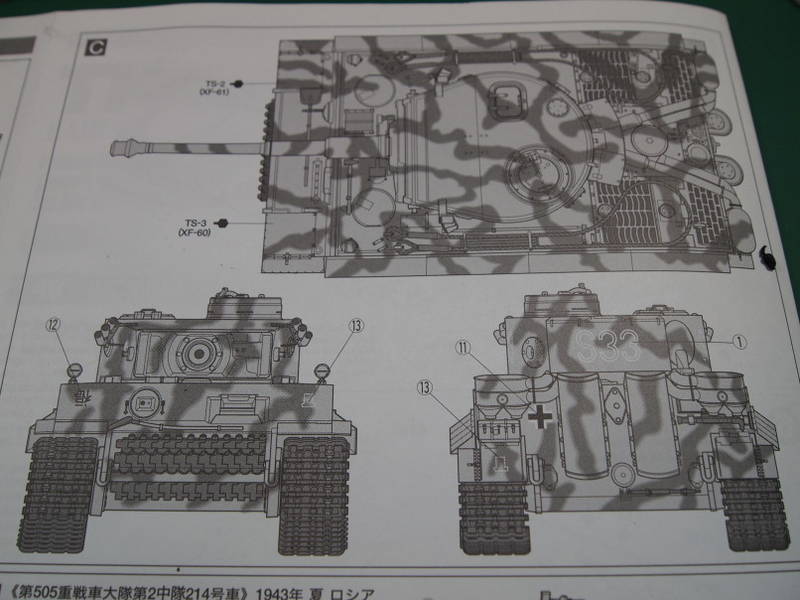
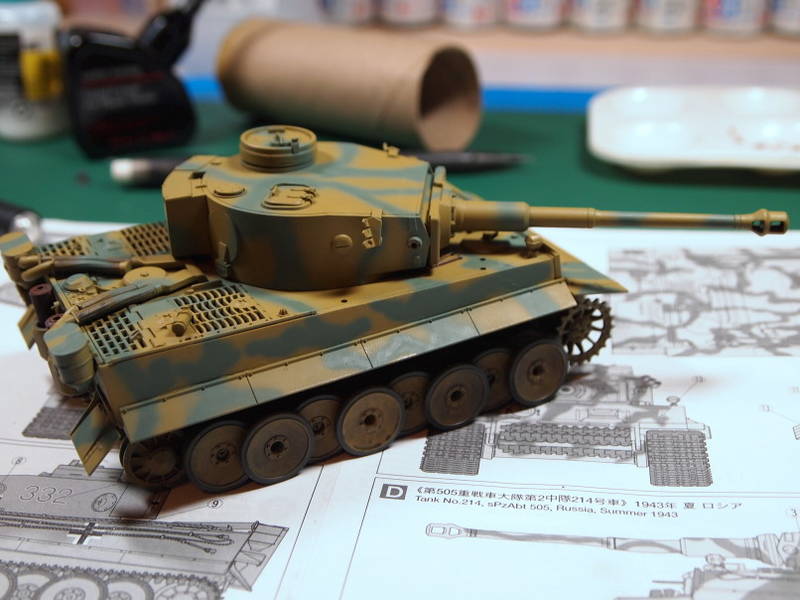
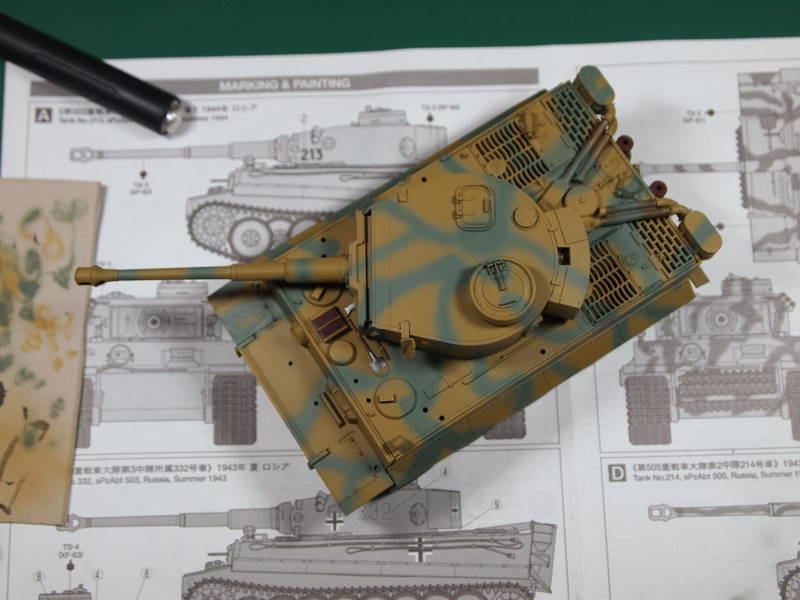
I decided after practicing with my airbrush today that I am secure enough in my skills to attempt the two tone camo scheme as seen here:


So I went ahead and gave the Tiger two coats of Dark Yellow last night and this afternoon.


I was able to get down to about a 1mm line at 20 PSI with the needle crown off on some scrap.

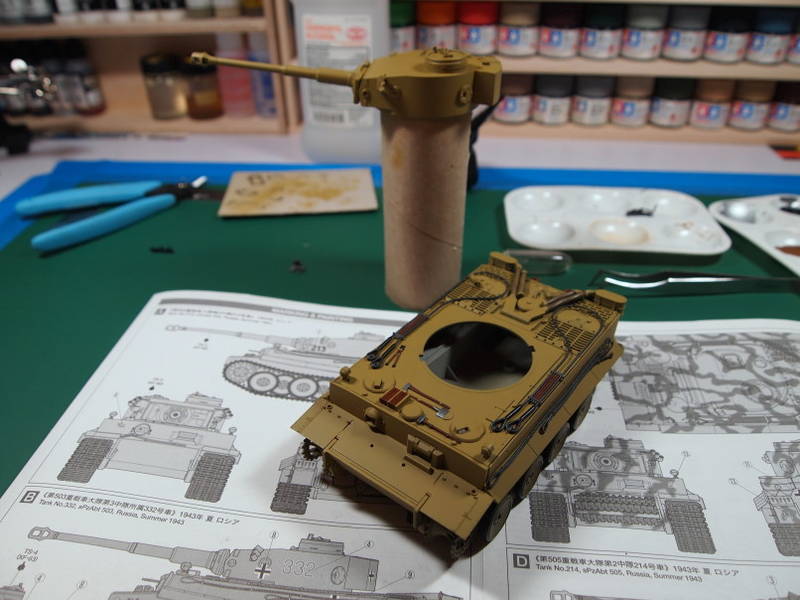
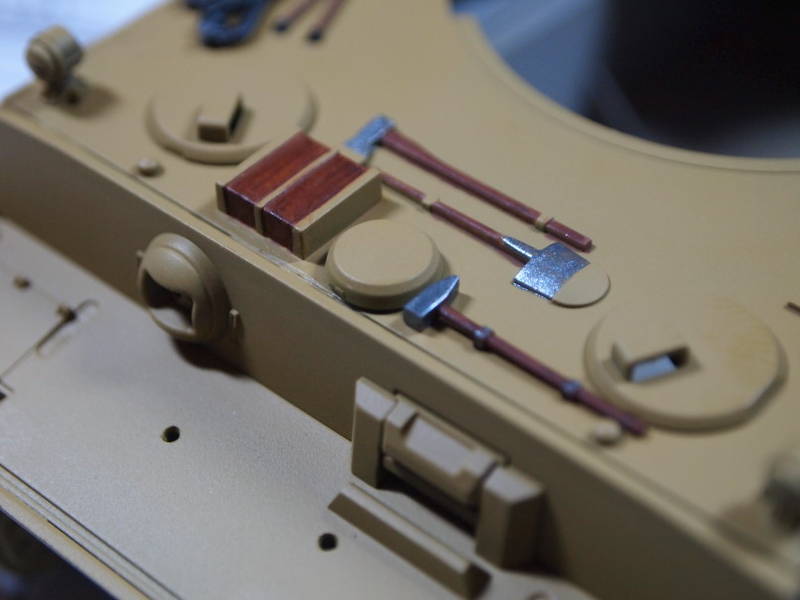
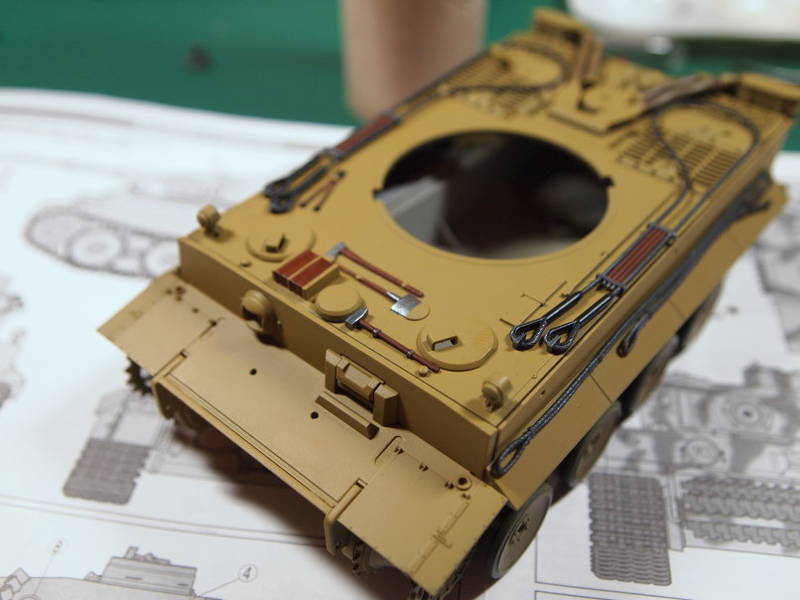
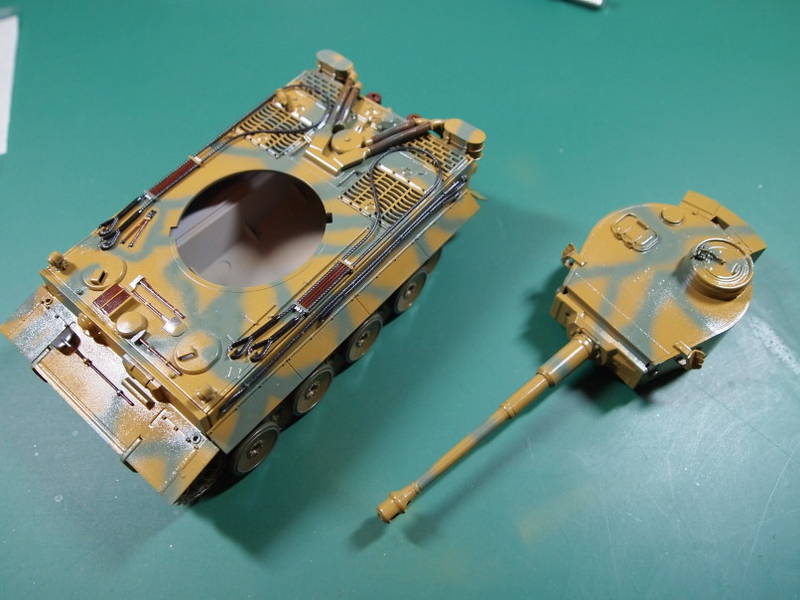
Before I get the green on, I decided to paint the tools and chains. Why Tamiya molds HALF the tools to the upper hull is beyond me. Here are the results, the axe, shovel and jack block are molded on, the sledge hammer is not.


Here's a close up of the front upper hull. I still have a bit of touch up around the tools. Easier to touch up the dark yellow with a 10/0 brush than try to recreate the wood on the handles.


All the tools, chains, etc are just on for placement and to see how it looks together. They will be pulled off (or masked for the molded on tools) prior to shooting the dark green squiggles.

Hope everyone is enjoying the weekend!
Matt182
Visit this Community
United Kingdom
Joined: May 20, 2010
KitMaker: 269 posts
Armorama: 243 posts
Posted: Sunday, July 03, 2011 - 01:17 AM UTC
Looking very nice Matt. I am curious as to why you painted the tools first?

Its interesting to see how people build in different ways.

My 1/48 King Tiger has arrived. On Reviewing the kit there will be lots of work to detail it. Just waiting for the PE to arrive before I start. I also got to about 99% complete on Building the Trumpy King Tiger.


rebelsoldier
Visit this Community
Arizona, United States
Joined: June 30, 2004
KitMaker: 1,336 posts
Armorama: 757 posts
Posted: Sunday, July 03, 2011 - 03:54 AM UTC
great work on the tools, and can't wait to see your camo job, i'm sure it will be fine for you. lovely kink kitty there! i know those are a lot of work!

reb
BigSmitty
Visit this Community
Minnesota, United States
Joined: October 01, 2008
KitMaker: 597 posts
Armorama: 439 posts
Posted: Sunday, July 03, 2011 - 01:10 PM UTC
Quick update again:

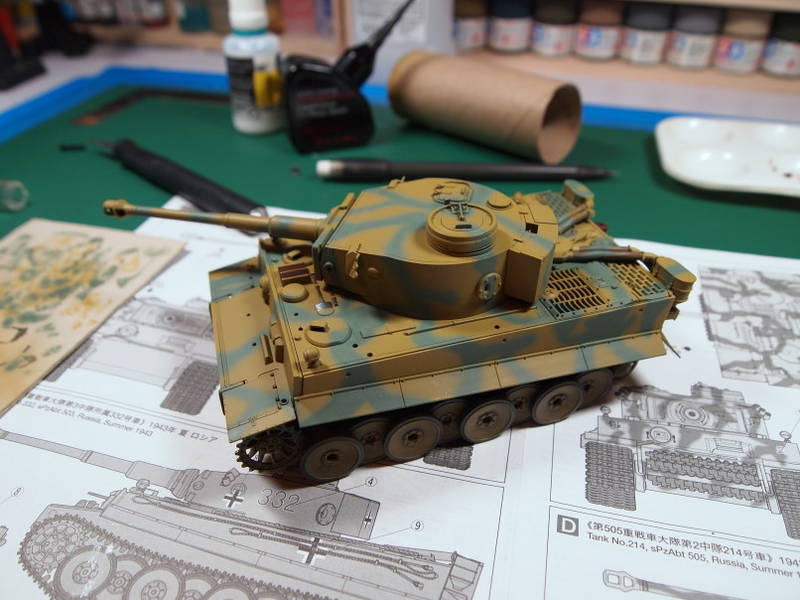
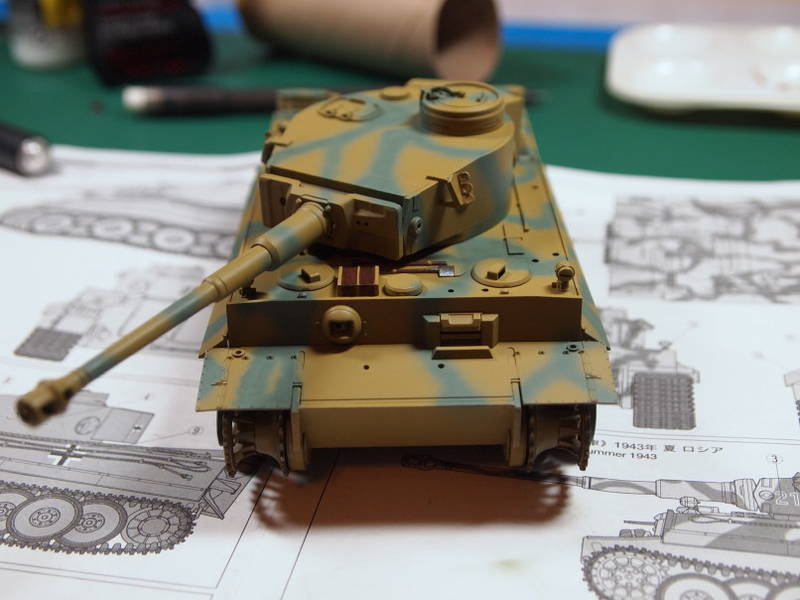
I tried to draw the approximate green camo lines, but found that eyeballing it with the drawings were the best way to go. I am not completely happy with the result, and I'll probably go in with the dark yellow to thin out a couple of areas.


Even though the spare track holder will go in front, there were still a couple of areas that should have been sprayed green. Have to fix that as well...


Off to watch some loud and colorful explosions tonight...
Matt182
Visit this Community
United Kingdom
Joined: May 20, 2010
KitMaker: 269 posts
Armorama: 243 posts
Posted: Monday, July 04, 2011 - 11:00 AM UTC
Well I started on the King Tiger. Built the rear plate, attached the hull top and filled out the sponsons. I also had an attempt to make my own zimmerit.

I was quite happy with how the rear turned out but the front didn't go so well. I think I might redo it


BigSmitty
Visit this Community
Minnesota, United States
Joined: October 01, 2008
KitMaker: 597 posts
Armorama: 439 posts
Posted: Monday, July 04, 2011 - 01:16 PM UTC
Matt,

Awesome job on the homemade zimm...looks better than I did with the ATAK resin zimm on the original campaign Tiger!

Small update:

Laid on some Future (Pledge, whatever) with the AB last night, and let it sit for most of the day today, covered.


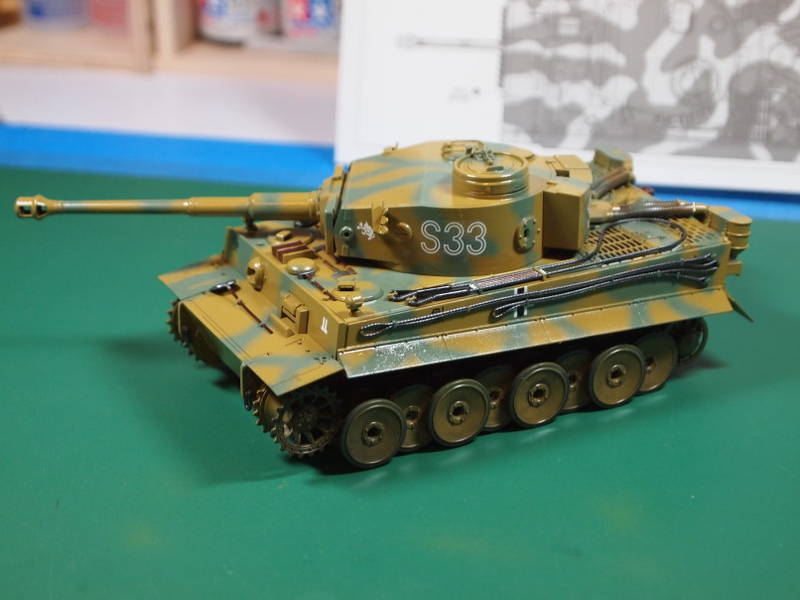
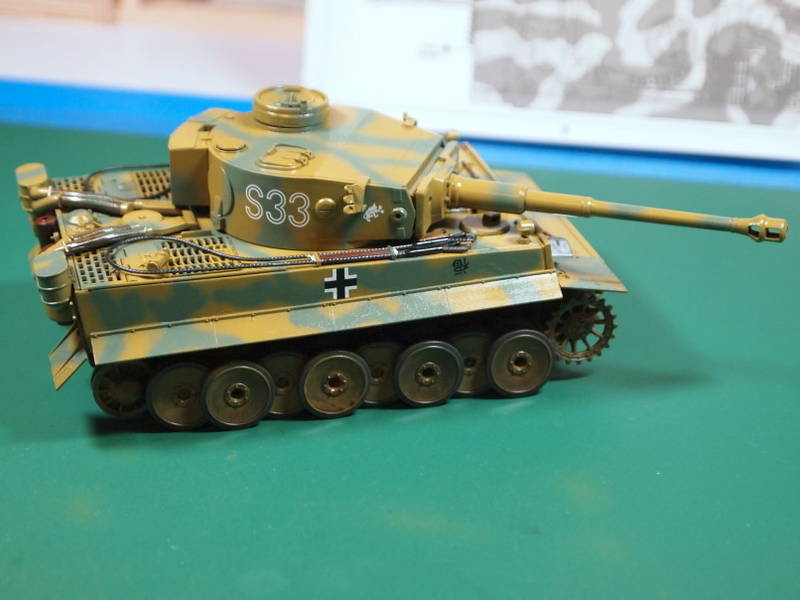
After taking an eternity to digest the day's foods (started at 9:45 this morning) I got the decals on. Completely forgot that I had two decals on the left side of the hull UNDER the tow chain, so that got interesting, but they did get placed in the right spots.


Another gloss coat, then some washes and subtle weathering, and getting the tracks finished up, and this Tiger will be ready for the display cabinet!
Empire95
Visit this Community
Zuid-Holland, Netherlands
Joined: September 07, 2010
KitMaker: 78 posts
Armorama: 75 posts
Posted: Wednesday, July 06, 2011 - 07:02 PM UTC
@ Matt182
Very nice zimmerit mate

@bigSmitty
That's is such a pretty looking tiger!
GregCloseCombat
Visit this Community
California, United States
Joined: June 30, 2008
KitMaker: 2,408 posts
Armorama: 2,394 posts
Posted: Wednesday, July 06, 2011 - 07:25 PM UTC
Keep going guys. very nice stuff!
Matt182
Visit this Community
United Kingdom
Joined: May 20, 2010
KitMaker: 269 posts
Armorama: 243 posts
Posted: Friday, July 08, 2011 - 07:13 AM UTC
Matt, i'm liking the camo on your tiger. Looking forward to seeing how you weather it. Looks like you masked those tools well too

I got a fair amount of work done on my tiger II today. I built the road wheels and tracks and built the turret. I then applied the zimmerit. It is almost done needs some tidying. I also redid the front again.

So far my mods to the kit have been:

Add the sponson
Add cast texture to the exhaust guards
Add zimmerit
Add periscopes

Once the zimmerit is done I will start detailing it with the voyager PE set and more scratch building. I also have a new barrel on the way


Cheers

GregCloseCombat
Visit this Community
California, United States
Joined: June 30, 2008
KitMaker: 2,408 posts
Armorama: 2,394 posts
Posted: Friday, July 08, 2011 - 01:25 PM UTC
The zim on the front and all around is looking good - keep it up!
Recon
Visit this Community
Wisconsin, United States
Joined: October 19, 2002
KitMaker: 1,571 posts
Armorama: 764 posts
Posted: Friday, July 08, 2011 - 02:03 PM UTC
Sign me up. I have one to build.
Mike
stansmith
Visit this Community
England - North West, United Kingdom
Joined: July 18, 2010
KitMaker: 611 posts
Armorama: 584 posts
Posted: Sunday, July 10, 2011 - 01:00 AM UTC
finished.


thanks
GregCloseCombat
Visit this Community
California, United States
Joined: June 30, 2008
KitMaker: 2,408 posts
Armorama: 2,394 posts
Posted: Sunday, July 10, 2011 - 05:26 AM UTC
That's a fun dio Stan. Very nice work on it, especially destruction creativity.


Here's another update on my other group project (which happens to have a Tiger) with the 1/48 Evolution figures almost done and then just some mud.


stansmith
Visit this Community
England - North West, United Kingdom
Joined: July 18, 2010
KitMaker: 611 posts
Armorama: 584 posts
Posted: Sunday, July 10, 2011 - 05:47 AM UTC
that looks really good greg!
Matt182
Visit this Community
United Kingdom
Joined: May 20, 2010
KitMaker: 269 posts
Armorama: 243 posts
Posted: Monday, July 11, 2011 - 09:40 AM UTC
Stan,

Great dio, and very well built. Great painting on the KT

Greg,

Those figures look brilliant. looks like a very promising dio.

Well I pretty much finished the tiger II, lots of fun working with tiny PE parts! Just the fenders left to do.


GregCloseCombat
Visit this Community
California, United States
Joined: June 30, 2008
KitMaker: 2,408 posts
Armorama: 2,394 posts
Posted: Monday, July 11, 2011 - 03:43 PM UTC
You are more of a man then I am doing pe that small. I know my limits

Very good looking KT - going fast too.
Matt182
Visit this Community
United Kingdom
Joined: May 20, 2010
KitMaker: 269 posts
Armorama: 243 posts
Posted: Monday, July 11, 2011 - 10:50 PM UTC
Thanks Greg,

Yeah the PE can be difficult in this scale, just takes lots of patience and some good tweezers. The voyager PE is quite impressive with plenty of detail included. Theres loads of parts left on the frets which I won't use though. You should give it a go on your next 1/48 build, it really adds to these tamiya kits.

I think I have found my new calling. Tamiya 1/48 kits + voyager PE + plastic card and fuse wire = FUN! And its cost effective and still gives you a very detailed model.
Matt182
Visit this Community
United Kingdom
Joined: May 20, 2010
KitMaker: 269 posts
Armorama: 243 posts
Posted: Tuesday, July 12, 2011 - 08:09 AM UTC
Well I got the basic painting done today.

First off I base coated it in Tamiya hull red. I then decided to have a go add the salt shipping method so I added some salt.


The whole model was then coated in Vajello dark yellow, then a coat of lighten dark yellow. I then added some light brown camo stripes free hand with the airbrush.


Then the dark green camo was sprayed on


I then removed most of the salt to check out the chipping. I'm quite happy with it for a first attempt. I should of let it dry for longer though as some of the colour has mixed. I sure I can sort this out during weathering etc.


What do you think of the chipping?

Matt182
Visit this Community
United Kingdom
Joined: May 20, 2010
KitMaker: 269 posts
Armorama: 243 posts
Posted: Friday, July 15, 2011 - 09:24 AM UTC
Well I got the basic detail painting down. I will add more detail to the tools/cable later on in the build. I have done the main gun in black as it will be a replacement barrel. It will be more dark grey when done.