#136
Distrito Federal, Mexico
Joined: April 06, 2002
KitMaker: 437 posts
Armorama: 391 posts
Posted: Monday, September 12, 2011 - 09:26 AM UTC

Thanks friend!
@ Bill, your kingtiger looks excellent!.
Thanks for your kind comments friends!
First pics of my work!
Preparing the way for applying the Zimmerit. I will use the tools and the Polyester Putty of Tamiya , both are an excellent resource.
 Filling the holes before to assemble the tools with Photoetched.
Regards,
Rodolfo
Current Project:
I am building a Kingtiger Ausf. B, Version: March 1945 - AMMO/MIG, 1/35
Cordoba, Argentina
Joined: September 02, 2011
KitMaker: 13 posts
Armorama: 9 posts
Posted: Monday, September 12, 2011 - 10:46 AM UTC
Thanks for the data Sal... it seems I can participate after all... its an ACADEMY TIGER-1 Early Production Model, 1-35 scale.
I hope I can finish before the campaign ends.
See you around.
Best Regards

#186
Texas, United States
Joined: May 24, 2006
KitMaker: 771 posts
Armorama: 750 posts
Posted: Monday, September 12, 2011 - 03:56 PM UTC
Well I finally have an update to post. As I tried to plan assembly and painting of this kit it became clear I needed to do the tracks. I like to paint the tracks, lower hull, and road wheels seperately and then assemble the painted parts. The tracks for this kit are beautiful, but require a ton of work to snip them from the sprue and then clean up. LOTS of parts! I used a "blue Tac" type product from Office Depot to secure the road wheels and sprokets. I then assembled each track and fitted it to the tank while the glue was still drying.

Once the glue was dry I removed the road wheels and slid the finished track off. Now its ready for paint!

I'm hoping to start painting on the tracks and hull this weekend.

#136
Distrito Federal, Mexico
Joined: April 06, 2002
KitMaker: 437 posts
Armorama: 391 posts
Posted: Tuesday, September 13, 2011 - 07:58 PM UTC
Current Project:
I am building a Kingtiger Ausf. B, Version: March 1945 - AMMO/MIG, 1/35

#136
Distrito Federal, Mexico
Joined: April 06, 2002
KitMaker: 437 posts
Armorama: 391 posts
Posted: Thursday, September 15, 2011 - 01:04 PM UTC

Hello friends!
More updates!
Working the box of the turret. I will detail the damage. 


Regards,
Rodolfo
Current Project:
I am building a Kingtiger Ausf. B, Version: March 1945 - AMMO/MIG, 1/35

#136
Distrito Federal, Mexico
Joined: April 06, 2002
KitMaker: 437 posts
Armorama: 391 posts
Posted: Friday, September 16, 2011 - 05:57 AM UTC
Current Project:
I am building a Kingtiger Ausf. B, Version: March 1945 - AMMO/MIG, 1/35
Quebec, Canada
Joined: November 15, 2002
KitMaker: 3,960 posts
Armorama: 3,579 posts
Posted: Friday, September 16, 2011 - 10:24 AM UTC
good job so far Rudolfo, Zimmerit looks good..Just one little thing ..Your mantelet is upside down...

#136
Distrito Federal, Mexico
Joined: April 06, 2002
KitMaker: 437 posts
Armorama: 391 posts
Posted: Friday, September 16, 2011 - 12:51 PM UTC

Thanks friend!. No problem, the mantelet is not glued yet, before I need to make another hole.
Regards,
Rodolfo
Current Project:
I am building a Kingtiger Ausf. B, Version: March 1945 - AMMO/MIG, 1/35
Izmir, Turkey / Türkçe
Joined: June 11, 2004
KitMaker: 1,426 posts
Armorama: 464 posts
Posted: Monday, September 19, 2011 - 08:00 AM UTC
Hi dear friends,
I joined the campaign too late

My model is Trumpeter 1/72 scale Sturmtiger .

I started on 31 July 2011 and build in our local forum model Izmir
http://www.modelizmir.com/forum/index.php?topic=2654.0 vinyl track are not good, I don't like to deal with them. But I love modeling


All of them Braille Scale...
Izmir, Turkey / Türkçe
Joined: June 11, 2004
KitMaker: 1,426 posts
Armorama: 464 posts
Posted: Monday, September 19, 2011 - 08:13 AM UTC
All of them Braille Scale...

#136
Distrito Federal, Mexico
Joined: April 06, 2002
KitMaker: 437 posts
Armorama: 391 posts
Posted: Monday, September 19, 2011 - 08:30 AM UTC

Nice work friend!
More updates!
Working hatches, handles and support of machine gun (movable).


Regards,
Rodolfo
Current Project:
I am building a Kingtiger Ausf. B, Version: March 1945 - AMMO/MIG, 1/35

#136
Distrito Federal, Mexico
Joined: April 06, 2002
KitMaker: 437 posts
Armorama: 391 posts
Posted: Tuesday, September 20, 2011 - 03:56 PM UTC

Hello friends!
More updates!
Working the tracks and support for the turret. The tracks will be placed after of painting the turret.


Regards,
Rodolfo
Current Project:
I am building a Kingtiger Ausf. B, Version: March 1945 - AMMO/MIG, 1/35

#136
Distrito Federal, Mexico
Joined: April 06, 2002
KitMaker: 437 posts
Armorama: 391 posts
Posted: Thursday, September 22, 2011 - 08:35 AM UTC

Hello friends!
More updates!
Welding the turret using "Lead wire" of Plusmodel; 0.2mm in zone of hooks and 0.4mm in the rest.


Regards,
Rodolfo
Current Project:
I am building a Kingtiger Ausf. B, Version: March 1945 - AMMO/MIG, 1/35
Izmir, Turkey / Türkçe
Joined: June 11, 2004
KitMaker: 1,426 posts
Armorama: 464 posts
Posted: Thursday, September 22, 2011 - 09:06 AM UTC
All of them Braille Scale...

#020
Illinois, United States
Joined: December 28, 2006
KitMaker: 278 posts
Armorama: 231 posts
Posted: Thursday, September 22, 2011 - 09:18 AM UTC
Rodolfo,
What material are you using for the zimmerit?
"The price of freedom is eternal vigilance."
- Thomas Jefferson
New Jersey, United States
Joined: November 02, 2009
KitMaker: 609 posts
Armorama: 433 posts
Posted: Thursday, September 22, 2011 - 11:20 PM UTC
Rodolfo - Really cool way to replicate weld beads. I haven't seen lead wire used before. Can you tell us more about how you did this? Did you simply attach the lead wire with CA and use the hobby knife to create the marks?

#020
Illinois, United States
Joined: December 28, 2006
KitMaker: 278 posts
Armorama: 231 posts
Posted: Friday, September 23, 2011 - 12:08 PM UTC
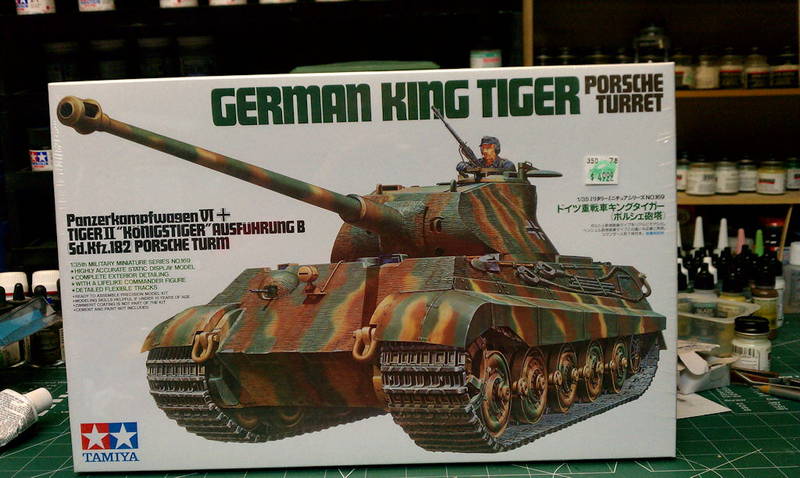
Here is the model I will be building for the campaign.
Box cover!
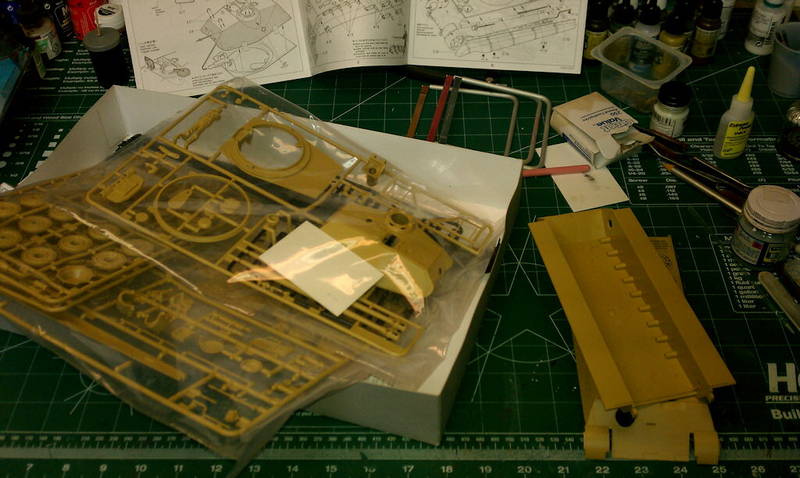
Shot of the plastic spruce!
"The price of freedom is eternal vigilance."
- Thomas Jefferson

#136
Distrito Federal, Mexico
Joined: April 06, 2002
KitMaker: 437 posts
Armorama: 391 posts
Posted: Friday, September 23, 2011 - 03:37 PM UTC

Thanks friends!
@ erhntly.- Thanks for your comments friend. Your big cat looks great!
Quoted Text
Rodolfo,
What material are you using for the zimmerit?
@ Michael. I Used Polyester Putty of Tamiya:
http://rtvmodelismo.com/Project/Tiger-I-Michael/S7300300.JPGNice choice of your Tiger!
Quoted Text
Rodolfo - Really cool way to replicate weld beads. I haven't seen lead wire used before. Can you tell us more about how you did this? Did you simply attach the lead wire with CA and use the hobby knife to create the marks?
@ Bill. Yes, I used CA and the hobby knife. This cable can be re - worked many times in order to adjust it!
Regards,
Rodolfo
Current Project:
I am building a Kingtiger Ausf. B, Version: March 1945 - AMMO/MIG, 1/35

#136
Distrito Federal, Mexico
Joined: April 06, 2002
KitMaker: 437 posts
Armorama: 391 posts
Posted: Friday, September 23, 2011 - 06:14 PM UTC
Quoted Text
Rodolfo - Really cool way to replicate weld beads. I haven't seen lead wire used before. Can you tell us more about how you did this? Did you simply attach the lead wire with CA and use the hobby knife to create the marks?
@ Bill. Sorry, I am using a scriber instead of knife for mark the welding.
Regards,
Rodolfo
Current Project:
I am building a Kingtiger Ausf. B, Version: March 1945 - AMMO/MIG, 1/35
England - West Midlands, United Kingdom
Joined: May 23, 2010
KitMaker: 642 posts
Armorama: 593 posts
Posted: Monday, September 26, 2011 - 08:40 AM UTC

#136
Distrito Federal, Mexico
Joined: April 06, 2002
KitMaker: 437 posts
Armorama: 391 posts
Posted: Monday, September 26, 2011 - 11:48 AM UTC

Nice work Paul!
More updates!
The turret are ready! (after of this pics I added the seats). I will add the spare tracks after of painting and adding the decals.


Regards,
Rodolfo
Current Project:
I am building a Kingtiger Ausf. B, Version: March 1945 - AMMO/MIG, 1/35

#020
Illinois, United States
Joined: December 28, 2006
KitMaker: 278 posts
Armorama: 231 posts
Posted: Monday, September 26, 2011 - 04:15 PM UTC
I am going to build the Tamiya German King Tiger with Porsche Turret. It will pretty much be a OOB Build with just a few things added that I can make myself. I will also be adding zimmerit.


"The price of freedom is eternal vigilance."
- Thomas Jefferson

#016
England - East Anglia, United Kingdom
Joined: March 18, 2009
KitMaker: 142 posts
Armorama: 138 posts
Posted: Monday, September 26, 2011 - 09:07 PM UTC
well i have made some progress on my jagdtiger. i have been trying to recreate jagdtiger 331, have done my best to recreate the damage and camo on the tank
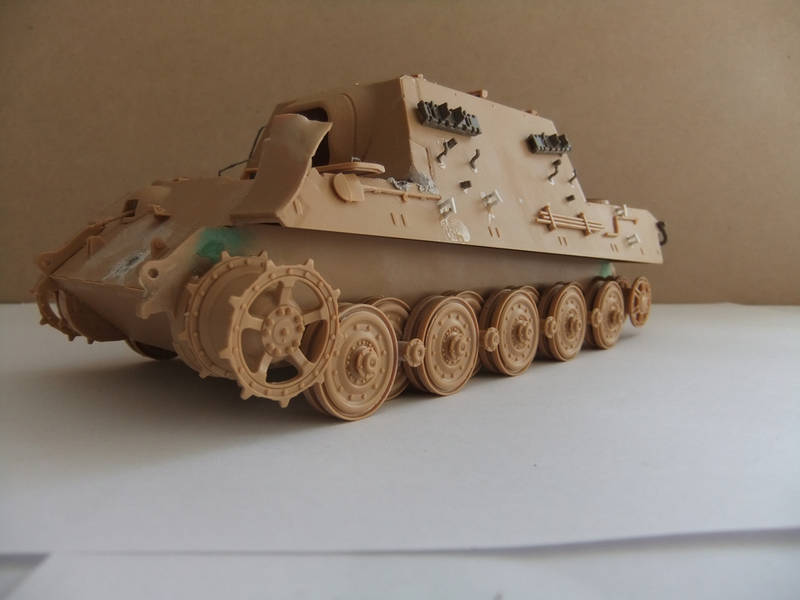
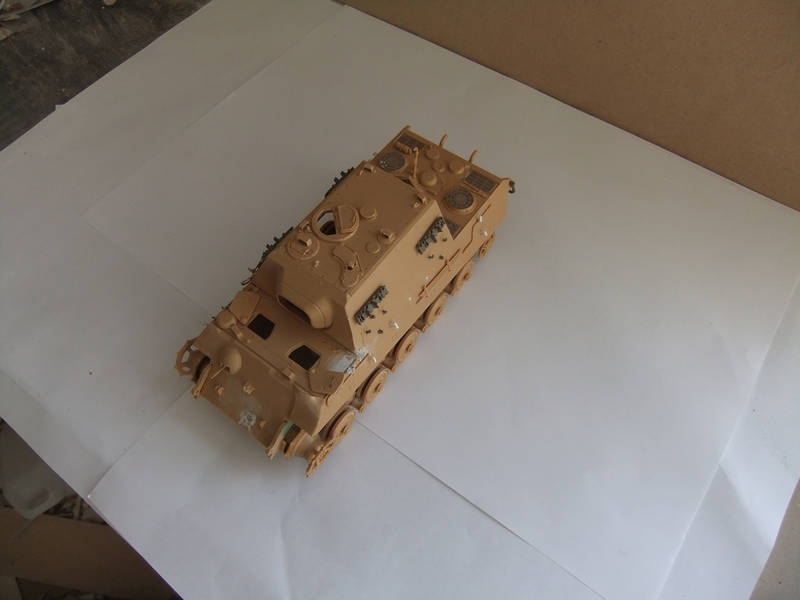
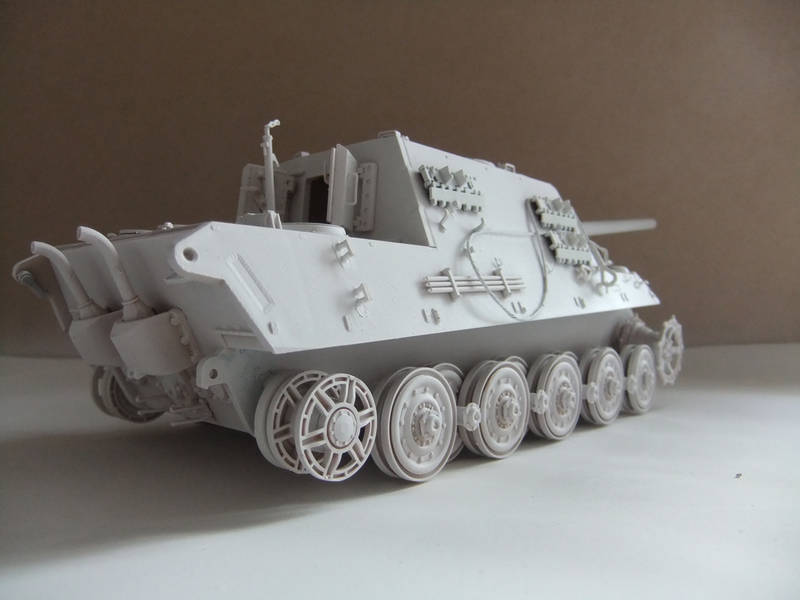
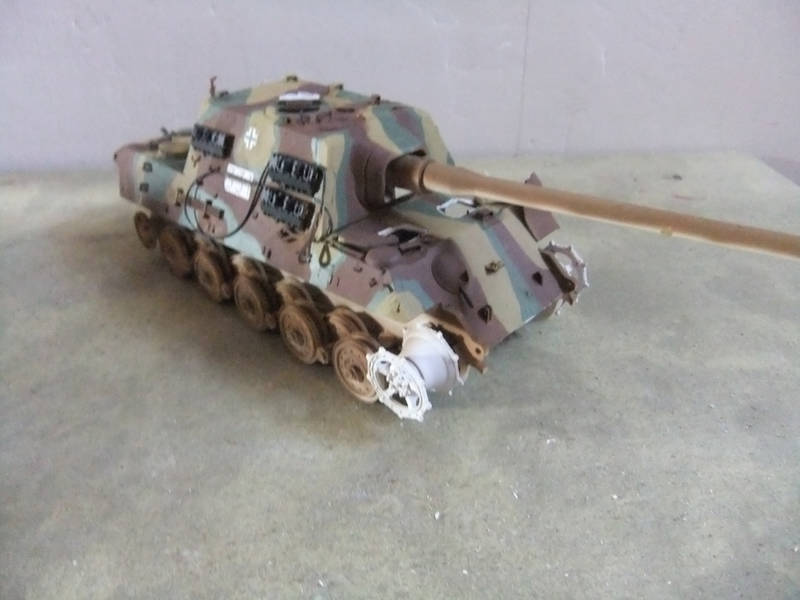
still have some painting to do on the hull and gun but am quite please.
some fantastic work going on
love the king tiger Bill
and fantastic detail rtvmodeler
also like the little brumbar
keep up the good work
dave
Zuid-Holland, Netherlands
Joined: September 07, 2010
KitMaker: 78 posts
Armorama: 75 posts
Posted: Tuesday, September 27, 2011 - 08:11 PM UTC
Good job done so far Gents!

#136
Distrito Federal, Mexico
Joined: April 06, 2002
KitMaker: 437 posts
Armorama: 391 posts
Posted: Thursday, September 29, 2011 - 07:37 AM UTC
Current Project:
I am building a Kingtiger Ausf. B, Version: March 1945 - AMMO/MIG, 1/35
 Thanks friend!


