Campaigns
Where Armorama group builds can be discussed, organized, and updates posted.
Panther Campaign
Petr82
Visit this Community
Moscow, Russia
Joined: November 19, 2011
KitMaker: 2 posts
Armorama: 2 posts
Posted: Friday, November 18, 2011 - 08:59 PM UTC
Hello
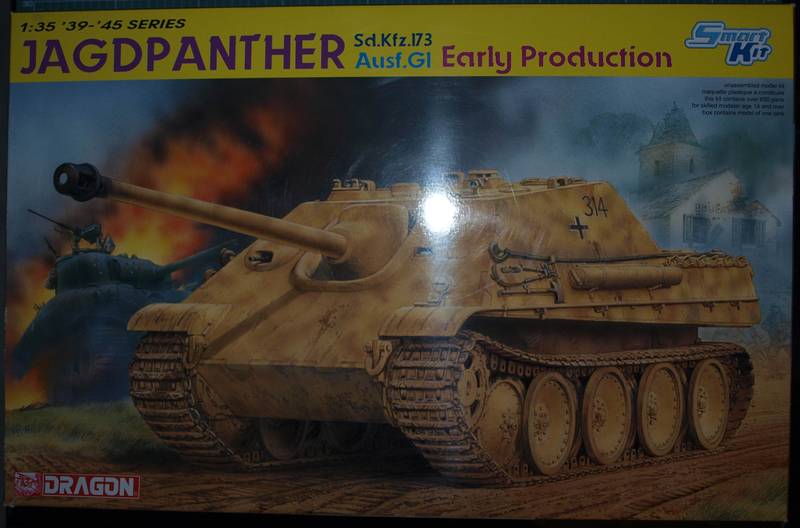
It is my kit for this campaign

cacciacarri
Visit this Community
Rimini, Italy
Joined: March 18, 2007
KitMaker: 91 posts
Armorama: 88 posts
Posted: Saturday, November 19, 2011 - 06:56 AM UTC
Hi everyone,
here are my Panther kit & ' friends ' .

cheers
Antonio
bizzychicken
Visit this Community
Wales, United Kingdom
Joined: September 06, 2008
KitMaker: 967 posts
Armorama: 842 posts
Posted: Saturday, November 19, 2011 - 07:36 AM UTC
Hi Darren I'm a little confused hear. I thought the campaign did'nt start till Jan 2012. looking at all this activity ( and Good it is) it looks like its started. Have I missed something. I'm new to campaigning so can you help me out on whats happening. Also how do you get the Panther Campaign Picture on the bottom of your page. Cheers Geraint
GaryKato
Visit this Community
California, United States
Joined: December 06, 2004
KitMaker: 3,694 posts
Armorama: 2,693 posts
Posted: Saturday, November 19, 2011 - 08:58 AM UTC

Quoted Text

Hi Darren I'm a little confused hear. I thought the campaign did'nt start till Jan 2012. looking at all this activity ( and Good it is) it looks like its started. Have I missed something. I'm new to campaigning so can you help me out on whats happening. Also how do you get the Panther Campaign Picture on the bottom of your page. Cheers Geraint


The campaign started November 1.

You can read about banners in the campaign tutorial thread.

TUTORIAL: Armorama Campaigns
Braille
#135
Visit this Community
California, United States
Joined: August 05, 2007
KitMaker: 1,501 posts
Armorama: 1,485 posts
Posted: Saturday, November 19, 2011 - 01:55 PM UTC
@bizzychicken – Geraint,

I don't see your banner? Have you read through Gary Koto's Campaign Tutorial page? OK, I’ll walk you through this;

Go to page two (2) of this campaign thread. There just below the top of the page you will find a post by Darren Baker ‘CMOT’ with three Panther Campaign banners. With your mouse right click on the banner of your choice and copy the URL.

Now click on the ‘setting’ at the top of the page, next to your Callsign, this will take you to your account control panel page. Click on the ‘modify profile’ icon and that will take you to your personal information page.

There you can paste your chosen URL link provided by the Campaign host (Darren Baker) in the banner section. Don’t forget to click on the ‘SAVE CHANGES’ button at the bottom of the page when you’ve finished. That’s it!

Hope this helps you out?
~ Eddy
Braille
#135
Visit this Community
California, United States
Joined: August 05, 2007
KitMaker: 1,501 posts
Armorama: 1,485 posts
Posted: Saturday, November 19, 2011 - 02:00 PM UTC
Panthoholics,

It’s Novem-beer , the wife’s at work, the two bitty Chihuahuas are feed and fast asleep, and I’ve cleared the workstation in my man-corner. That’s right, man-corner! Not a dedicated room for my hobby (man-cave) or sizable basement (man-bunker / dungeon) or attic (man-loft) not even a garage (man-shed), simply a corner in our one bedroom apartment! Armed with a cold beer in hand, some tortilla chips ‘n salsa, I’m ready to indulge myself with another one of the finer things in life, the opening of a new model kit! And not just any model kit but a Panther model kit, and a Panther F model kit at that, how sweet is that?

What I’m going to do here is try and model an end of war Panther F late version commander’s tank as it may have been produced if things had gone according to plan and the war lasting another year. The idea here is to arrive with a vehicle approaching something authentic not a ‘what if’, built with parts that would have been available and based on documents according to Thomas L. Jentz & Hilary L. Doyle.

What I am proposing here is a Panther F fitted with a sectional 7.5 cm Kw.K.44/2 L/70 gun in the Panther – Schmalturm – (roaring small mouse head – that’s my translation and I’m sticking to it!) planetary gear final drive, staggered pairs of steel-tired rubber cushioned road wheels and powered by the new Maybach HL 243 fuel injected engine (only showing the modified engine deck hatch?). I had intended to go for an 8.8 cm Kw.K44 L71 gun tank but I’ll save that instead for an E50 build I have in mind.

Over the course of waiting for the campaign to launch I bought all of the items pictured below on sale here and there on the Internet.


Here it is the familiar and ever popular model building project the Panther F mit Gummigedämpften Stahllaufrollen – (rhinosores body with small mouse head – sounds good to me).
Cyber-Hobby / Dragon Smart Kit
6403


Great Wall Hobby
L3515 (Infrared Night-Vision Devices)


Photo-etch sets, guarantees I’ll be running into the night screaming my head off in beautiful downtown Reseda-Ville!
Griffon Model
L35A003 (AFV Tool Holders)
L35A014 (Side Armor Skirts – Final Type)
L35A048 (On-Vehicle-Tool Racks)
L35A049 (Rear Storage Bins)
Voyager Model
PE 34144 (Panther Ausf. F/ II)
PEA 139 (Panther F Anti Aircraft Armour)


Resin wheels, tracks and metal barrel and accessories.
Panzer Art
RE35-095 (Panther Drive Wheels – Final Model)
RE35-098 (Panther Idler Wheels – Late Model)
RB Models
35A02 (2m Antenna)
35A03 (1.4m Antenna)
35A15 (Arial Mounts) X2
35B38 (MG 34 – coaxial) As this piece is only the gun muzzle it will suffice for the coaxial MG 43.
35B107 (7.5 cm Kw.K.44 L70)
077 8244 (Tow Shackles)
WWII Productions
35001 (Panther Six Chevron Tracks)


Fire extinguisher placards (I can’t write it in paint that small) resin casting marks and Panther exterior stencils.
Alliance Modelworks
LW35067 (Fire Extinguisher Placards)
Archer
AR88007 (Resin Casting Marks)
AR35350 (Panther Exterior Stencils)


Referances No, I’m not applying for a job!
Panther Tank The Quest For Combat Supremacy by Thomas L. Jentz & Hilary L. Doyle
Panzer Tracts No. 5 - 3 Panther Ausf. G by Thomas L. Jentz & Hilary L. Doyle
Panzer Tracts No. 5 - 4 Panther II and Panther Ausf. F by Thomas L. Jentz & Hilary L. Doyle
Panther In Detail by Uwe Feist & Bruce Culver
PzKpfw. V Panther Vol. 1 by Waldemar Trojca
Panther by Thomas Anderson & Vincent Wai
Oh! I forgot to include Panther in Action by Bruce Culver and Don Greer, an oldie but goodie and one of my favorites, with some really good camouflage color plates!

As a side note I hope that the Panther experts / enthusiasts lurking by or already enlisted in this campaign will chime in and correct, advice and post their opinion / views on the builds to help all of us here participating in this campaign as we all stand to learn something about these vehicles, there role in history and the crews that manned them. This I’m certain would be much appreciated and welcomed by all concerned.

Well its time to open the kit box and take a deep whiff of the light gray Chinese plastic, fondle the parts and get my contribution started in this awesome campaign.
~ Eddy
imatanker
Visit this Community
Maine, United States
Joined: February 11, 2011
KitMaker: 1,654 posts
Armorama: 1,565 posts
Posted: Saturday, November 19, 2011 - 03:14 PM UTC
Eddy,Dude,It's not a rhino with a mouse head,it means Rubber-damped steel casters,which is almost as funny as your translation I'm doing this kit for another campaign,and it's pretty sweet.You have very big, ah-hem, ""things" to be tackling all that PE.Good luck ,J.T.
CMOT
Staff MemberEditor-in-Chief
ARMORAMA
Visit this Community
England - South West, United Kingdom
Joined: May 14, 2006
KitMaker: 10,954 posts
Armorama: 8,571 posts
Posted: Sunday, November 20, 2011 - 12:15 AM UTC
I am sorry I have not been around monitoring the campaign as I should but I have been a little tied up with my duties here and real life. The campaign started on November 1st as some requested an earlier start date however it will still run until Decemeber 31st 2012 unless everyone is finished by then. the only change is that due to the extended time the campaign will run over there will not be an extension.
Tojo72
Visit this Community
North Carolina, United States
Joined: June 06, 2006
KitMaker: 4,691 posts
Armorama: 3,509 posts
Posted: Tuesday, November 22, 2011 - 05:28 AM UTC
I managed to get started this week,here are just a few shots of step #1,#2,and #3 except for all the roadwheels which I will tackle later in the project.Not much to report,no fit issues,just have to pay attention to which arms to use and to get the correct placement.The arms fit into place so you don't have to worry about balancing them as they all line up almost automatically.


ltb073
Visit this Community
New York, United States
Joined: March 08, 2010
KitMaker: 3,662 posts
Armorama: 3,078 posts
Posted: Wednesday, November 23, 2011 - 09:39 AM UTC
Wow Eddie we are building the same kit but my is OOB not with all those goodies you have there
Anthony nice clean start looks familiar
Ok here is my progress, Step 11 left side of the hull
Photobucket
step 12 was the barrel
Photobucket
Step 13 - 16 was the turret
Photobucket
I thought I lost 1 of the 3 tie down that go on the top of the turret but I found it today and it is now in place
Step 17 and 18 was the rest of the hull
Photobucket
and it was off to get primed
Photobucket
Photobucket
many parts are just dry fit like the drive sprockets and the hull I was able to get a coat of Tamiya xf-60 on it today and should get some more photos soon then I have to work on the tracks
Happy Turkey day everybody
CMOT
Staff MemberEditor-in-Chief
ARMORAMA
Visit this Community
England - South West, United Kingdom
Joined: May 14, 2006
KitMaker: 10,954 posts
Armorama: 8,571 posts
Posted: Wednesday, November 23, 2011 - 10:13 AM UTC
I see you are taking your time with that build Sal

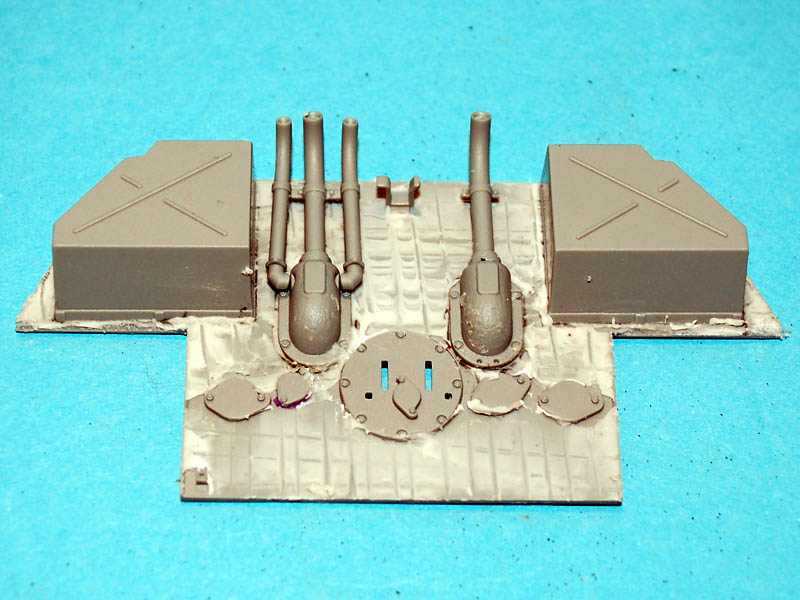
I have been playing with the Zimmerit for only the second time in my X numbers of years, and this time around rather than being the type applied with a comb it is a free hand square pattern. The back plate shown here I am not really happy with but it may grow on me, the side portion I have completed I will post up at the weekend ish. The zimmerit I have made is done with painters caulk. I smooth on a thin layer using a Stanley blade and then scribe it with a thin metal ruler. I hope you like the next installment if not this one. The parts on the back plate are not secured so I can remove the caulk as long as I do not leave it more than a week to dry rock hard.
Tojo72
Visit this Community
North Carolina, United States
Joined: June 06, 2006
KitMaker: 4,691 posts
Armorama: 3,509 posts
Posted: Wednesday, November 23, 2011 - 12:27 PM UTC
Section #4 and #5 complete,I will leave the jack and the light lens till after painting.The damaged tool boxes that come with the kit are made of the DS material and look pretty cool.


PantherF
Visit this Community
Indiana, United States
Joined: June 10, 2005
KitMaker: 6,188 posts
Armorama: 5,960 posts
Posted: Wednesday, November 23, 2011 - 01:44 PM UTC
Do like those boxes! I've seen them mangled up one way or another and always thought they would look good that way for one of our kits.

I need to get some brass units for my 1/16 Panther and smash the he ...


~ Jeff
Serlone
Visit this Community
Utrecht, Netherlands
Joined: February 23, 2011
KitMaker: 74 posts
Armorama: 68 posts
Posted: Thursday, November 24, 2011 - 02:48 PM UTC
hi there, decided to join you all in your german tracked cat expedition, my build wont be as fancy as some i've seen in some other posts, but will try to make something nice out of it. although your posts have driven me to buy a panther f earlier today, thats not what i will be building for this campaign.

here i will be building dml 6164 panther D
added to this will be an armor scale 75mm kwk42 l/70 for panther D or early A and an aber set of grills for panther ausf D or A.


PantherF
Visit this Community
Indiana, United States
Joined: June 10, 2005
KitMaker: 6,188 posts
Armorama: 5,960 posts
Posted: Thursday, November 24, 2011 - 06:58 PM UTC
Welcome aboard Serlone! Looks like your Panther D has some fancy parts there, so have fun!


~ Jeff
atoplu
Visit this Community
Ontario, Canada
Joined: August 17, 2003
KitMaker: 753 posts
Armorama: 107 posts
Posted: Thursday, November 24, 2011 - 08:01 PM UTC
THis is my kit.


Aftermarket products.

Panther A/G Pz.Rgt.26 Anti Aircraft Armor


Voyager Panther G Set


7,5cm KwK 42L/70 - Panther - 1:72
atoplu
Visit this Community
Ontario, Canada
Joined: August 17, 2003
KitMaker: 753 posts
Armorama: 107 posts
Posted: Thursday, November 24, 2011 - 08:04 PM UTC
I added some scratch parts to my model. Bending PE is done.


atoplu
Visit this Community
Ontario, Canada
Joined: August 17, 2003
KitMaker: 753 posts
Armorama: 107 posts
Posted: Thursday, November 24, 2011 - 08:06 PM UTC
Painting progress starting.
First I sprayed tamiya flat black to model.


atoplu
Visit this Community
Ontario, Canada
Joined: August 17, 2003
KitMaker: 753 posts
Armorama: 107 posts
Posted: Thursday, November 24, 2011 - 08:06 PM UTC
Some filters and washing.


atoplu
Visit this Community
Ontario, Canada
Joined: August 17, 2003
KitMaker: 753 posts
Armorama: 107 posts
Posted: Thursday, November 24, 2011 - 08:07 PM UTC
And some chipping and more washes.


PantherF
Visit this Community
Indiana, United States
Joined: June 10, 2005
KitMaker: 6,188 posts
Armorama: 5,960 posts
Posted: Thursday, November 24, 2011 - 09:43 PM UTC
STUNNING WORK!!! And all in 1/72 scale too.


~ Jeff
Tojo72
Visit this Community
North Carolina, United States
Joined: June 06, 2006
KitMaker: 4,691 posts
Armorama: 3,509 posts
Posted: Friday, November 25, 2011 - 08:38 AM UTC
Outstanding contribution,Ayhan Love all that brass
imatanker
Visit this Community
Maine, United States
Joined: February 11, 2011
KitMaker: 1,654 posts
Armorama: 1,565 posts
Posted: Friday, November 25, 2011 - 09:59 AM UTC
Ayhan,I have a hard time with 1/35 scale PE I can't even thinks about 1/72. Outstanding,J.T.
MSGsummit
Visit this Community
Tennessee, United States
Joined: November 16, 2002
KitMaker: 751 posts
Armorama: 545 posts
Posted: Friday, November 25, 2011 - 02:26 PM UTC
So......I received the Cavalier Zim for this build and it was a total disappointment! It looked really cool and everything, but I must have received a set from a bad batch that must have shifted when it was being cast/molded. Nothing lined up correctly.

I decided to attempt the Zim on my own using milliput. This is my 2nd time ever doing this as the below pics will show my inexperience making Zimmerit.

The milliput after I got it spread out. This took me a while and I just couldn't seem to get it to an even thickness.


After getting it spread I then attempted to inlay the pattern. I got really frustrated with this but couldn't stop and walk away from it as I was afraid the putty would harden and then I would really be screwed. So, pissed off and getting in a hurry resulted in the picture below. Oh well.

MSGsummit
Visit this Community
Tennessee, United States
Joined: November 16, 2002
KitMaker: 751 posts
Armorama: 545 posts
Posted: Saturday, November 26, 2011 - 03:29 AM UTC
Got up early this morning and decided to continue on with the milliput Zimmerit. My experience wasn't nearly so bad this time around.

I also salvaged some of the cavalier zim. In particular the rear hatches.

The results: