CMOT
 Editor-in-Chief
England - South West, United Kingdom
Joined: May 14, 2006
KitMaker: 10,954 posts
Armorama: 8,571 posts
Posted: Tuesday, November 08, 2011 - 03:49 PM UTC
Quoted Text
Where would you know where to install MA30? Diagram is poor, J10 is the only help but the mounting point is for J10 not MA30


Any help would be appreciated, thx.
Tim these are optional parts (photo etch rather than plastic) and so the photo etched parts go in the same place as the plastic parts would have gone, or have I misunderstood the question?
Pennsylvania, United States
Joined: May 17, 2006
KitMaker: 370 posts
Armorama: 368 posts
Posted: Wednesday, November 09, 2011 - 02:46 AM UTC
Well I believe you have misunderstood. I know the PE replaces the plastic its just that the diagram that shows the buildup of the mounting brkt for the jack does not show where to install it. The diagram for the plastic parts shows the parts already installed, the mounting points for the PE are not wellsuited for the PE, they are better designed for the plastic. Any ideas on the other items I listed?

#135
California, United States
Joined: August 05, 2007
KitMaker: 1,501 posts
Armorama: 1,485 posts
Posted: Wednesday, November 09, 2011 - 02:56 AM UTC
@CMOT - Darren,
Like what you've done with the wear and tear on the wheels. This is an often overlooked modeled feature of a light to heavily used tank (depending on the landscape) with rubber road wheels. I've seen WWII photographs with the entire rubber tire missing on the rim and in some cases a few tires missing.
I'll be using steel road wheels and these are usually modeled without any damage but these also get beat up too, just not as heavily as the rubber tires do.
~ Eddy

If you absolutely must have a city completely destroyed overnight . . . call the MARINES
Currently on the bench:
1:12 Bandia Star Wars K-2SO
1:35 Takom T-54B Late

#152
Texas, United States
Joined: December 07, 2002
KitMaker: 487 posts
Armorama: 441 posts
Posted: Wednesday, November 09, 2011 - 08:34 AM UTC
Quoted Text
fireontheway;
Absolutely none of my reference pictures/photos are any of these shown. My guess is that it's an anomaly in the moulding.
TMoon;
What Atak zimm kit are you using to have work on the 1/16 Jagd? I want to make mine a mid so I'll be interest to see your build!
~ Jeff
Jeff,
I must apologize, as the set I just received from ATAK was for the 1/16 Pz IV ausf J.
Tom
Long time modeller. Starting when I was a teenager, then I found out about girls and college and work and kids. But now that I have one girl, no school, no work and the kids are grown, I'm back to full time modelling. My prime area of interest is armor, b

#152
Texas, United States
Joined: December 07, 2002
KitMaker: 487 posts
Armorama: 441 posts
Posted: Wednesday, November 09, 2011 - 08:38 AM UTC
Quoted Text
Tom the idea behind this thread is to have fun while at the same time building a a Panther and Jagdpanther ref area, I mean by this that your build is updated on the site in stages pointing out any problem areas such as misnumbered or poor fit issues.
Darren,
This kind of build is fun for me! My question is "Since I don't have the picture of the Box, can I still participate?
Thanks
Tom Moon
Long time modeller. Starting when I was a teenager, then I found out about girls and college and work and kids. But now that I have one girl, no school, no work and the kids are grown, I'm back to full time modelling. My prime area of interest is armor, b
CMOT
 Editor-in-Chief
England - South West, United Kingdom
Joined: May 14, 2006
KitMaker: 10,954 posts
Armorama: 8,571 posts
Posted: Wednesday, November 09, 2011 - 05:41 PM UTC
Tom that is fine but if you can get a picture so much the better.
Tim please let me have a better look on Saturday evening and I will see what I can find to help youi out ref wise.

#152
Texas, United States
Joined: December 07, 2002
KitMaker: 487 posts
Armorama: 441 posts
Posted: Thursday, November 10, 2011 - 01:58 PM UTC
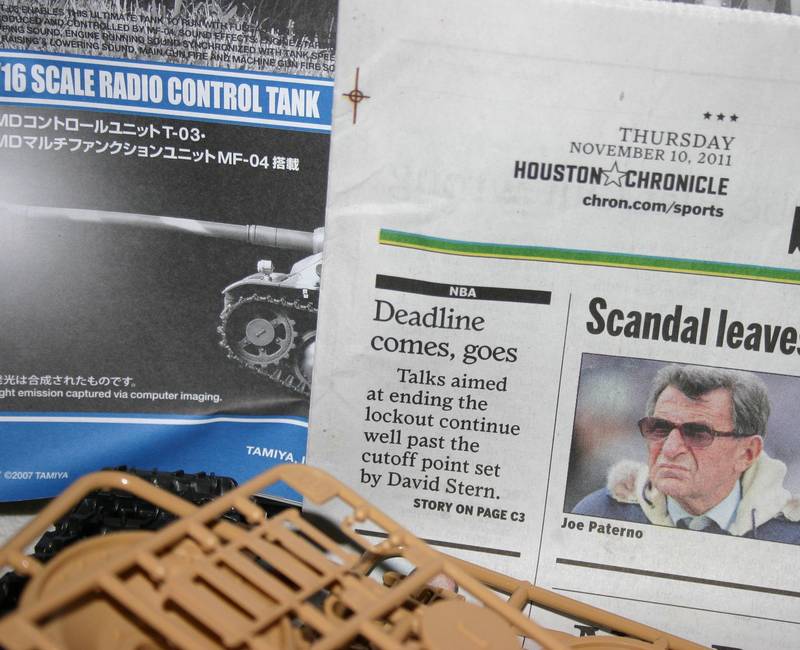
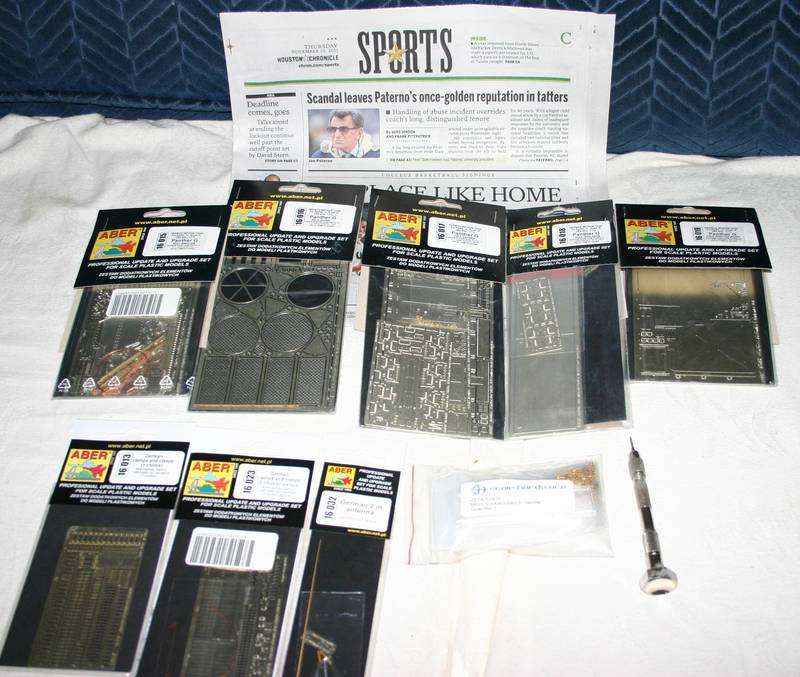
Here are the start up photos for my 1/16 Tamiya Jagdpanther

Unstarted Kit

Start date Photo

AfterMarket PE

Long time modeller. Starting when I was a teenager, then I found out about girls and college and work and kids. But now that I have one girl, no school, no work and the kids are grown, I'm back to full time modelling. My prime area of interest is armor, b
Indiana, United States
Joined: June 10, 2005
KitMaker: 6,188 posts
Armorama: 5,960 posts
Posted: Thursday, November 10, 2011 - 02:17 PM UTC
Did he leave you with any gearboxes or something to bolt the sprockets to?
I just finished my 'rolling chassis' on the 1/16 Panther 2nite. Cutting out all the rubber tires and slipping them over the rims is fun.
~ Jeff

#152
Texas, United States
Joined: December 07, 2002
KitMaker: 487 posts
Armorama: 441 posts
Posted: Thursday, November 10, 2011 - 03:53 PM UTC
Quoted Text
Did he leave you with any gearboxes or something to bolt the sprockets to?
I just finished my 'rolling chassis' on the 1/16 Panther 2nite. Cutting out all the rubber tires and slipping them over the rims is fun.
~ Jeff
Yes, the gearboxes are there. It has everything necessary to mount the drive sprocket and idlers and have them as a "rolling chassis". I am looking forward to your posting your in progess photos. Any warnings about problems will be welcomed.
Tom Moon
Long time modeller. Starting when I was a teenager, then I found out about girls and college and work and kids. But now that I have one girl, no school, no work and the kids are grown, I'm back to full time modelling. My prime area of interest is armor, b
North Carolina, United States
Joined: June 06, 2006
KitMaker: 4,691 posts
Armorama: 3,509 posts
Posted: Friday, November 11, 2011 - 02:19 AM UTC
looks like a great project Tom
Indiana, United States
Joined: June 10, 2005
KitMaker: 6,188 posts
Armorama: 5,960 posts
Posted: Friday, November 11, 2011 - 09:14 PM UTC
No problems as of yet Tom, just a build that can be tedious.
I need to break away from mine this weekend and make a start on my campaign build before the year is up!!!

It looks like mine will be a fun kit and project but I need to get some AM tracks like the Bronco's.
~ Jeff
Maine, United States
Joined: February 11, 2011
KitMaker: 1,654 posts
Armorama: 1,565 posts
Posted: Friday, November 11, 2011 - 10:16 PM UTC
So Darren,What's up with your avatar image in your profile header?I'm getting the red x where your pic is supossed to be.Is it my pc or what?J.T.
The building lamp is lit.Build'em if you got'em.
Tennessee, United States
Joined: November 16, 2002
KitMaker: 751 posts
Armorama: 545 posts
Posted: Saturday, November 12, 2011 - 04:54 AM UTC
So....
Finally decided what I would build for this campaign.

I have ordered the Cavalier Zimmerit for this. Hopefully it will be here in a few days. For those not familiar with this kit, it is DML's Imperial series re-box of the Gunze Jagdpanther. This particular kit is the 60th anniversary set which includes an aluminum barrel, and phoot-etched screens for the back deck.
Anyway, looks like this is going to be a killer campaign!
CMOT
 Editor-in-Chief
England - South West, United Kingdom
Joined: May 14, 2006
KitMaker: 10,954 posts
Armorama: 8,571 posts
Posted: Saturday, November 12, 2011 - 04:57 AM UTC
I do not have an avatar selected.
Maine, United States
Joined: February 11, 2011
KitMaker: 1,654 posts
Armorama: 1,565 posts
Posted: Saturday, November 12, 2011 - 08:35 AM UTC
Quoted Text
I do not have an avatar selected.
Thank goodness,I thought maybe you had been sucked up into cyberspace

J.T.
The building lamp is lit.Build'em if you got'em.
Tennessee, United States
Joined: November 16, 2002
KitMaker: 751 posts
Armorama: 545 posts
Posted: Saturday, November 12, 2011 - 08:39 AM UTC
Even though I need to wait for the Cavalier Zim before I can get down to some serious work on my Jagdpanther, I couldn't resist doing just a little.
I decided to go ahead a add the back deck photo -etch.


Before I added the screen I had to remove the bolt detail in the corners

Then I decided since it will be a few days before the Zim gets here I may as well start cleaning up the indy tracks. The tracks will take a little time as there is an ejector pin mark dead center in the cleat of each tack piece as well as the two attachment points that will need to be cleaned up.

Thats it for now.
Vestfold, Norway
Joined: November 27, 2005
KitMaker: 5 posts
Armorama: 4 posts
Posted: Sunday, November 13, 2011 - 09:11 AM UTC
I will be building Tamiya Jagdpanther for this campaign.

I have had the kit for 4 or 5 years and I know of at least two guys that has owned it before me. I'll use aftermarket rear stowage boxes and side skirts. And as one half of the gun barrel is broken I will need a replacement, which is ordered aand on the way. And I think I saw some Friulls somewhere in the stash.
So far the most boring task has been done, cleaning and assembling road wheels.

Vermont, United States
Joined: July 21, 2002
KitMaker: 3,569 posts
Armorama: 2,070 posts
Posted: Sunday, November 13, 2011 - 11:39 AM UTC
Got on a roll this afternoon, sister-in-law's wedding festivities and assorted obligations discharged, there was bench time! (and there was much rejoicing)
Did you ever have one of those bench days where everything goes smoothly?
Nothing dropped or broken, no tools to go search for, and most importantly, no interruptions?
I had an afternoon like that today.
No pics yet, will have to get them uploaded tomorrow, but the lion's share of the drivers comp interior is in place and airbrushed primer red.
I had to mix up a batch from some Tamiya Hull Red and X7 red as I was out of the Poly S airbrush thinner and it reacts poorly to both the well water here and rubbing alc.
So far the Tank workshop interior is fitting like a dream. a little fiddly with the height of the transmission but in the end ok.
Pics and detail painting the interior tomorrow.
If you can keep your head when all about you are losing theirs,
perhaps you've misunderstood the situation.
North Carolina, United States
Joined: June 06, 2006
KitMaker: 4,691 posts
Armorama: 3,509 posts
Posted: Sunday, November 13, 2011 - 12:59 PM UTC
Have fun Art,cleaning up those old indie tracks is murder

I just got done doing indies on the old panzer III G kit.thank god for magic tracks or Friuls
Loks good though
New York, United States
Joined: March 08, 2010
KitMaker: 3,662 posts
Armorama: 3,078 posts
Posted: Sunday, November 13, 2011 - 04:15 PM UTC
Hey guys, Thanks to Jeff my light bracket is now in the proper place

Step 6&7 was the front of the hull

step 8 these sub assemblies

Step 9 some confusion comes in with the vents the instructions are not that clear so I hope I got it correct

Step 10 rt side of hull

and to answer my earlier question "early" means production and "Late" means proto type
Active Campaigns on the bench:
Operation Fall Gelb - Pz.Kpfw. IV Ausf. C
Engineering the Future - M-26 Recovery Vehicle
115 Campaigns completed
North Carolina, United States
Joined: June 06, 2006
KitMaker: 4,691 posts
Armorama: 3,509 posts
Posted: Monday, November 14, 2011 - 01:37 AM UTC
Sal,all the brass is looking good !!
Tennessee, United States
Joined: November 16, 2002
KitMaker: 751 posts
Armorama: 545 posts
Posted: Monday, November 14, 2011 - 01:39 AM UTC
Anthony- You ain't kiddin, brother! I just can't sit and clean them all in one sitting! So now I clean-up, 5 or 6 links, then select a part off the ol' sprue, clean it up, glue it down, then repeat the proccess.
Vestfold, Norway
Joined: November 27, 2005
KitMaker: 5 posts
Armorama: 4 posts
Posted: Monday, November 14, 2011 - 05:05 AM UTC
Got a little done on the Jagdpanther today.

Lower hull

Upper hull
I also got the first paint on, in the air intakes and on the inside of the hull. Hull red and white respectively.
Tennessee, United States
Joined: November 16, 2002
KitMaker: 751 posts
Armorama: 545 posts
Posted: Monday, November 14, 2011 - 02:19 PM UTC
Just a quick update.....
In between cleaning up the indy tracks, I decided to tackle the mantlet. This thing had 5 very prominate knock out marks on the inside and trying to get them cleaned out really took a toll on the molded cast texture.

My solution to the problem was some Mr.Surfacer 500, thinned with a little testors liquid cement and stipled into the manlet.

Hopefully it will look better with some light sanding.
Removed by original poster on 11/19/11 - 08:56:34 (GMT).


