Sturmgeschütz Brigade Build
Pennsylvania, United States
Joined: April 22, 2012
KitMaker: 344 posts
Armorama: 315 posts
Posted: Monday, October 01, 2012 - 09:51 AM UTC
The figure in question is obviously about enjoy a hearty meal of toe cheese, something of a delicacy among the Wehrmacht, a tradition tracing back to at least the 18th century. In his eagerness to feast after a hard day of fighting, he has temporarily dislocated his knee, (remember he was an Aryan superman!) enabling him to nibble the culinary delight right off his toes.
Speaking of tradition, as a descendant of a Hessian solder, if you ever wondered why we Pennsylvanians have the best cheesesteaks and scrapple 'Pon Haus', well there is this secret ingredient...

Nate
Pennsylvania, United States
Joined: April 22, 2012
KitMaker: 344 posts
Armorama: 315 posts
Posted: Monday, October 01, 2012 - 09:55 AM UTC
I'm not a very flexible guy, but if toe cheese is on the menu...
Just sayin'
Nate
Quebec, Canada
Joined: November 19, 2011
KitMaker: 1,389 posts
Armorama: 1,388 posts
Posted: Tuesday, October 02, 2012 - 01:49 AM UTC
Goood God... just got up and i'm reading this...

Anyways fellers, I've got some progres done the figures are in place and I must say I do suck at painting figures! But there is hope, Gary pointed me some good tutorials and next one will be better. I think I'm calling this one done because i'm doing more harm than good for the last two days so I think it is time to call quits. Here is some pics.
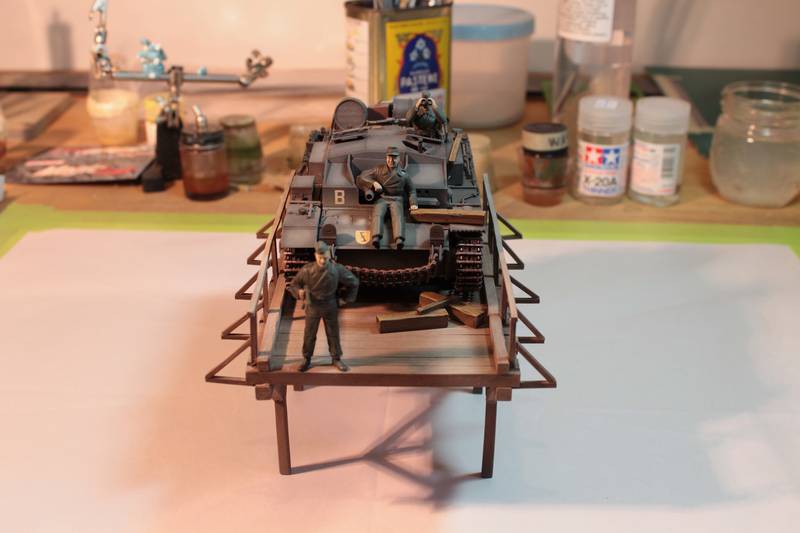
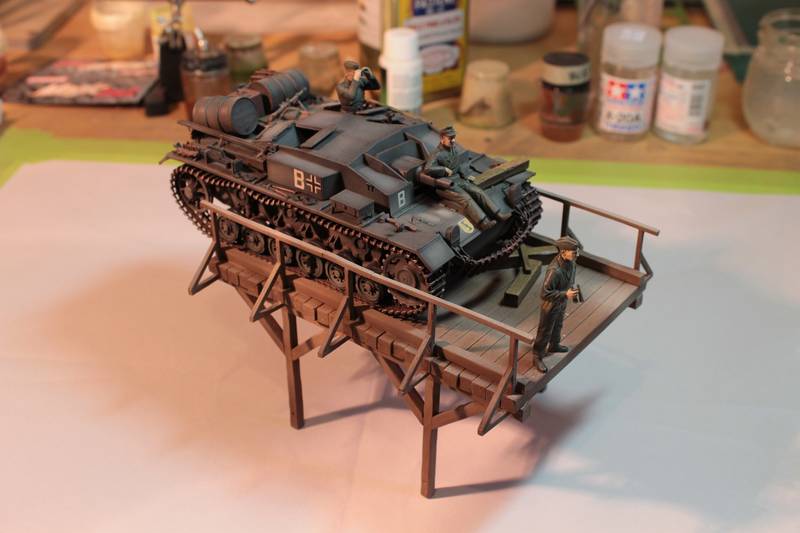
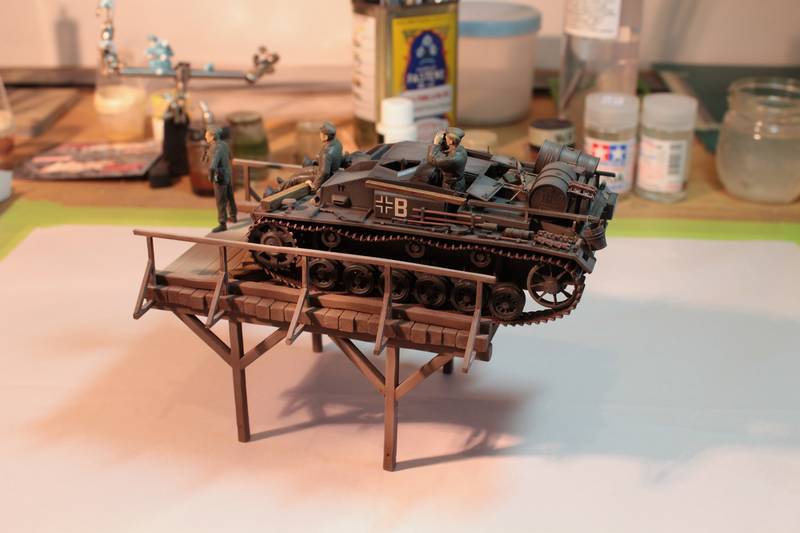
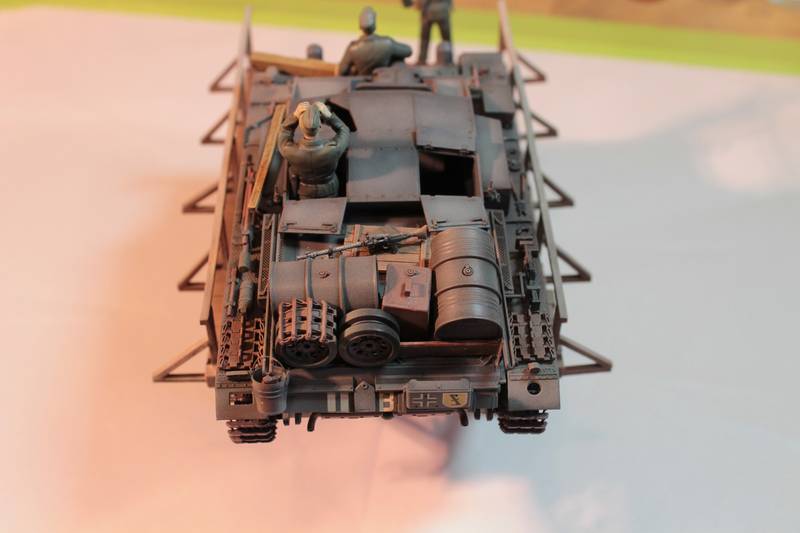
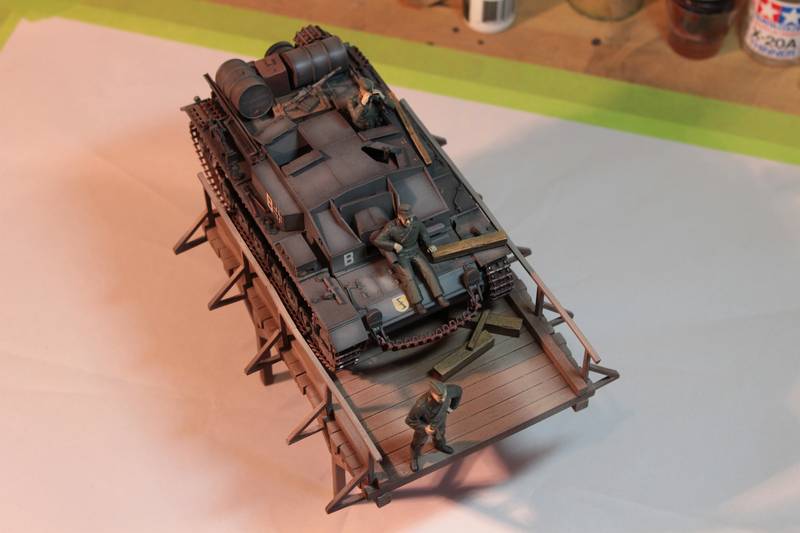
I'll surely come back to it adding dirt on the bridge...but this StuG is ready for battle.
Thanks for watching.
Phil.

Modeling...
I rest my case.
Victoria, Australia
Joined: August 06, 2011
KitMaker: 1,314 posts
Armorama: 1,217 posts
Posted: Wednesday, October 03, 2012 - 09:10 AM UTC
Hi Phil,
Simply stunning looking dio & idea their sir!! And don't sweat the figures look how long it took Michealanglo to do the Sistine Chapell
Thanks for sharing a fantastic build
Cheers Mike

On the work bench: To many started & nothing finished!!
T55 ( Libyan)
S-Boat
BRDM 2 (Syrian)
BM21-Grad (Iraqi)
Texas, United States
Joined: March 08, 2010
KitMaker: 2,465 posts
Armorama: 2,383 posts
Posted: Wednesday, October 03, 2012 - 11:47 AM UTC
HOLY COW Nathan!!! You did all the foot cheese homework for me...THANKS!!!


Thats too funny Nathan.

Phil - Congrats on an oustanding build my friend! I luv it bro!!

Gary
Quebec, Canada
Joined: November 19, 2011
KitMaker: 1,389 posts
Armorama: 1,388 posts
Posted: Wednesday, October 03, 2012 - 12:16 PM UTC
Mike
Thanks a lot mate! It has been a thrill to be a part of this saaweeet campaign

Ill be following those great builds.
Gary my Jedi Master!
Thanks bro! glad you love it. Nd thanks for the links on figures painting I've learned a lot in one hour this morning hehe. Almost got late to work looking at these links

Jeff
THANK YOU For an awesome campaign hope to join you on your next

Phil.

Modeling...
I rest my case.
Pennsylvania, United States
Joined: April 22, 2012
KitMaker: 344 posts
Armorama: 315 posts
Posted: Wednesday, October 03, 2012 - 12:57 PM UTC
Phil and Gary - Those short barrel StuGs look awesome, excellent work on the stowage and the paint graduation.
Phil - I like the composition of the diorama and figure poses as is, but if you are ever feeling really ambitious, adding some ground work under the bridge would make for a truly epic scene.

Nate
Quebec, Canada
Joined: November 15, 2002
KitMaker: 3,960 posts
Armorama: 3,579 posts
Posted: Wednesday, October 03, 2012 - 06:58 PM UTC
Nice job on your Stug Phil..I thought I might have seen it at the show in Montreal last weekend .
Quebec, Canada
Joined: November 19, 2011
KitMaker: 1,389 posts
Armorama: 1,388 posts
Posted: Thursday, October 04, 2012 - 12:09 AM UTC
Quoted Text
Nice job on your Stug Phil..I thought I might have seen it at the show in Montreal last weekend .
WHAT!!!
There was a show in Monteal?!!!Where?
Richard, do you have a schedule for those? I would apreciate some info on what is happening in Montréal modeling wise

thanks
Phil.

Modeling...
I rest my case.
Indiana, United States
Joined: June 10, 2005
KitMaker: 6,188 posts
Armorama: 5,960 posts
Posted: Saturday, October 06, 2012 - 06:27 AM UTC
Just for those who cannot find it...
...
http://gallery.kitmaker.net/showgallery.php/cat/27609 the
OFFICIAL CAMPAIGN GALLERY. 
~ Jeff
Texas, United States
Joined: March 08, 2010
KitMaker: 2,465 posts
Armorama: 2,383 posts
Posted: Saturday, October 06, 2012 - 12:47 PM UTC
Hello Gentlemen,
I made some good progress on the figs today. Im nearly finished with the standing fig, a couple facial details and then shoulder boards and collars and the like. Also nearly finished with the haed of the sitting fig. Anyways, heres what i got today.


Thanks fellas!

Gary
Massachusetts, United States
Joined: February 08, 2012
KitMaker: 1,271 posts
Armorama: 1,253 posts
Posted: Saturday, October 06, 2012 - 01:48 PM UTC
Gary what primer do you use? I need a good primer, Tamiya brush-on primer, well, sucks.
I'm doin' stuff. Lotta stuff.
Texas, United States
Joined: March 08, 2010
KitMaker: 2,465 posts
Armorama: 2,383 posts
Posted: Saturday, October 06, 2012 - 02:35 PM UTC
Quoted Text
Gary what primer do you use? I need a good primer, Tamiya brush-on primer, well, sucks.
Hello Conor,
I use Tamiya primer and paint for airbrushing exclusively. I thin it with Lacquer thinner only. Tamiya Acrylics are not really for brushing. I use Vallejo for brushing. Do you use an airbrush? If not you can use a quality rattle can primer.
Hope thats helpful man.

Gary
Massachusetts, United States
Joined: February 08, 2012
KitMaker: 1,271 posts
Armorama: 1,253 posts
Posted: Saturday, October 06, 2012 - 02:55 PM UTC
It's very helpful hahaha. This just proves that I need a spray can primer and vallejo paints. Thanks man

-Conor
I'm doin' stuff. Lotta stuff.
Connecticut, United States
Joined: November 02, 2003
KitMaker: 984 posts
Armorama: 846 posts
Posted: Saturday, October 06, 2012 - 03:36 PM UTC
All righty then.
Did some work since my last update.
First i tried to do a color modulation, but kind of failed.
I made the paint too light and i need to get some new airbrush parts, mainly needles and tips. The paint also wasn't thin enough. Live and learn.
Tonight i put the wheels and treads on. I took apart my assembled wheels and only put the inside halves on, then the treads. (sprockets and idlers wheels went on fully assembled). I forgot who posted that tip, but it made it sooo much easier to put them on.
The wheels are gloss coated, and have the original base coat, Hence the color difference.
Of course, i did have to break on antenna guard off.


Quebec, Canada
Joined: November 19, 2011
KitMaker: 1,389 posts
Armorama: 1,388 posts
Posted: Sunday, October 07, 2012 - 02:39 AM UTC
Gary, well....I bow to your figures painting skills.
Marc, Keep it up, looking good.
Phil.

Modeling...
I rest my case.
Connecticut, United States
Joined: November 02, 2003
KitMaker: 984 posts
Armorama: 846 posts
Posted: Sunday, October 07, 2012 - 11:56 AM UTC
Well, I got all the bits and pieces on (well almost, but i can continue)

Gloss coat coming up soon!


#275
Alberta, Canada
Joined: March 01, 2006
KitMaker: 174 posts
Armorama: 141 posts
Posted: Sunday, October 07, 2012 - 01:51 PM UTC
Richard the Stug Iv early is the kit that I just finished. The only problem I had with it is that the fittings that the tow cables fit around is way too weak. I thought "I'll be careful this time" but still broke one during the painting stage. Replaced than with brass rod to give them more strength. The foliage on my Stug IV are Aber oak leaves glued to thin sticks from the garden.
Auckland, New Zealand
Joined: June 01, 2011
KitMaker: 1,716 posts
Armorama: 1,638 posts
Posted: Sunday, October 07, 2012 - 11:10 PM UTC
I know the voices ain't real but they do come up with some great ideas
Never trust a man who left alone with a tea cozy and doesn't try it on ( Billy Connolly )
Overkill is often very understated
England - East Anglia, United Kingdom
Joined: March 21, 2012
KitMaker: 1,673 posts
Armorama: 1,640 posts
Posted: Monday, October 08, 2012 - 02:15 AM UTC
@Mark: coming along nicely mate keep it up

@Philippe: nice one I like it, nice piece of beef with not
to much bread around it

@Gary E: stop showing off with those fantastic figures will you

I´ll never get thet good

@Phill: nicely finished mate, I like the unconventional stowage you´ve added. Especially the tire, is that for R and R purposes when they pull up next to river and have some fun with a swing

Seriously, cool ending I like the spokes on the bike.

Paul
"Lord Raglan wishes the cavalry to advance rapidly to the front, follow the enemy & try to prevent the enemy carrying away the guns. Troop horse artillery may accompany. French cavalry is on your left. Immediate. R Airey."
Texas, United States
Joined: March 08, 2010
KitMaker: 2,465 posts
Armorama: 2,383 posts
Posted: Monday, October 08, 2012 - 02:44 AM UTC
Marc - Your build is comin' along nicely man.

Phil - Lookin' great bud! Was your bike a BIT*H to paint? I do not know why i had such a hard time painting the darn wheels and tires - touch ups constantly!!!


Paul - Thanks man!

I watched the new MXpression DVD and utilized the technique just as he did...well as close as i could anyways, but i cant argue with the results.

I replaced the Barbed wire on the StuG with some rope. I also built a fence with Bass wood and sealed the base for further ground work.


Once the foam board is glued and dry ill shave some height off it. Thanks for looking fellas!

Gary
Quebec, Canada
Joined: November 19, 2011
KitMaker: 1,389 posts
Armorama: 1,388 posts
Posted: Monday, October 08, 2012 - 02:57 AM UTC
GO Gary!!!!
I love it, man this dio is going to kick some butts!

Phil.

Modeling...
I rest my case.
Massachusetts, United States
Joined: February 08, 2012
KitMaker: 1,271 posts
Armorama: 1,253 posts
Posted: Monday, October 08, 2012 - 03:18 AM UTC
It's October 8th, I have no school, and I suppose I'll get a (very) late start on my Stug IV. Right after my camera charges

BTW, anyone have any experience with this?

-Conor
I'm doin' stuff. Lotta stuff.
South Carolina, United States
Joined: December 03, 2009
KitMaker: 2,160 posts
Armorama: 1,906 posts
Posted: Monday, October 08, 2012 - 04:48 AM UTC
Phill, Looks good. Gotta ask about the tire though. And nice use of the "hands-in-pockets crewman".
Phillipe, Nice.
Gary, Nice work as always. Kind of geeked to see how you do your base.
Connecticut, United States
Joined: November 02, 2003
KitMaker: 984 posts
Armorama: 846 posts
Posted: Monday, October 08, 2012 - 08:17 AM UTC
Gloss coat is on.
I will update after i get my washes on.


 Nate
Nate


