Ontario, Canada
Joined: March 25, 2010
KitMaker: 514 posts
Armorama: 261 posts
Posted: Saturday, August 24, 2013 - 02:44 PM UTC
Møre og Romsdal, Norway
Joined: December 03, 2012
KitMaker: 300 posts
Armorama: 285 posts
Posted: Saturday, August 24, 2013 - 07:32 PM UTC
Nice kit, Trevor. Looks like we are building similar kits, but your pictures are very out of focus. Doesn't look like your camera likes being placed that close to the intended object.
Try taking the pictures a bit further back, like how you did the first picture in your previous post.
New York, United States
Joined: March 08, 2010
KitMaker: 3,662 posts
Armorama: 3,078 posts
Posted: Sunday, August 25, 2013 - 02:06 AM UTC
Active Campaigns on the bench:
Operation Fall Gelb - Pz.Kpfw. IV Ausf. C
Engineering the Future - M-26 Recovery Vehicle
115 Campaigns completed
Ontario, Canada
Joined: March 25, 2010
KitMaker: 514 posts
Armorama: 261 posts
Posted: Sunday, August 25, 2013 - 02:31 AM UTC
Yes the camera that I borrow does not like close-ups, yet it allows me to get that close. Despise autos for that. The previous photo set was done the same way, still slightly out of focus. I need to find another way of doing close ups. I could be doing the same design. Still have to decide how I want to pose the guns since they just sit flush with the turret. THe red oxide is just a rr red oxide. A series that testors will alter soon. They make a good faded black that I use.
Møre og Romsdal, Norway
Joined: December 03, 2012
KitMaker: 300 posts
Armorama: 285 posts
Posted: Sunday, August 25, 2013 - 07:34 AM UTC
@Trevor: Looks like the camera is simply too close to the object for it to automatically acquire focus. Try taking pictures further back and crop the picture. Better to do that, than getting blurry close-ups.
Progress update on my Coelian, pre-shaded hull using Vallejo Rotbraun primer and Model Air Black (which was surprisingly thick and causing problems with my airbrush):
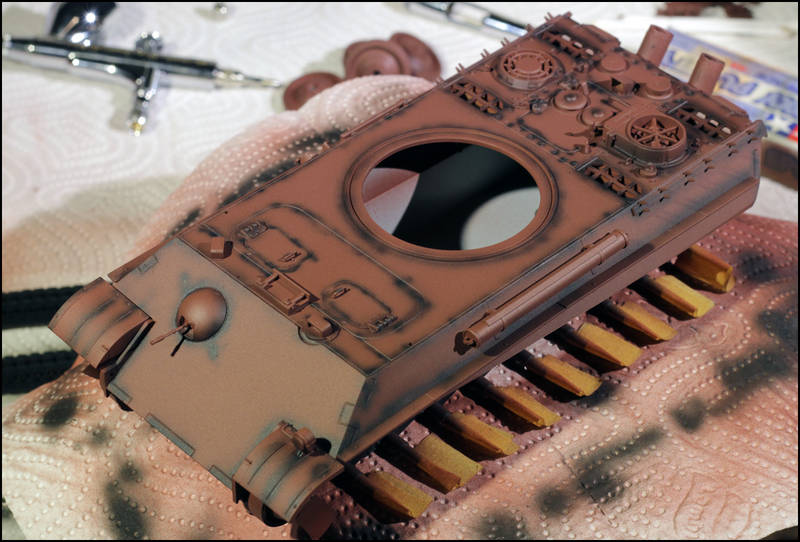
I then decided to try the AK Dunkelgelb II as base color:
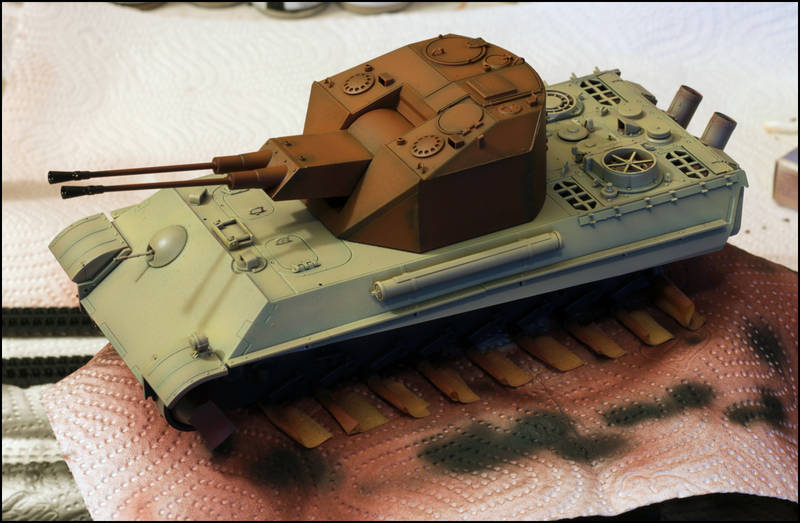
Regretting the choice of primer though, as I've used over half the bottle of Dunkelgelb and I'm still not satisfied with the base coat. Thinking I should have used white or grey primer.
Michigan, United States
Joined: March 24, 2009
KitMaker: 312 posts
Armorama: 296 posts
Posted: Sunday, August 25, 2013 - 09:58 AM UTC
Nice job so far on the flakpanzer V. I think that dunkelgelb s good to go a is but that's up to you. My Gepard will be done hopefully by the end of next week.
'United States Army Special Forces! When you care enough to send the very best'
New York, United States
Joined: March 08, 2010
KitMaker: 3,662 posts
Armorama: 3,078 posts
Posted: Thursday, August 29, 2013 - 12:00 PM UTC
Some progress

Started to get some paint on my build

more soon i hope

Active Campaigns on the bench:
Operation Fall Gelb - Pz.Kpfw. IV Ausf. C
Engineering the Future - M-26 Recovery Vehicle
115 Campaigns completed
Kildare, Ireland
Joined: November 21, 2007
KitMaker: 3,212 posts
Armorama: 2,807 posts
Posted: Friday, August 30, 2013 - 05:18 AM UTC
Møre og Romsdal, Norway
Joined: December 03, 2012
KitMaker: 300 posts
Armorama: 285 posts
Posted: Sunday, September 01, 2013 - 04:05 AM UTC
A new picture of my Flakpanther:
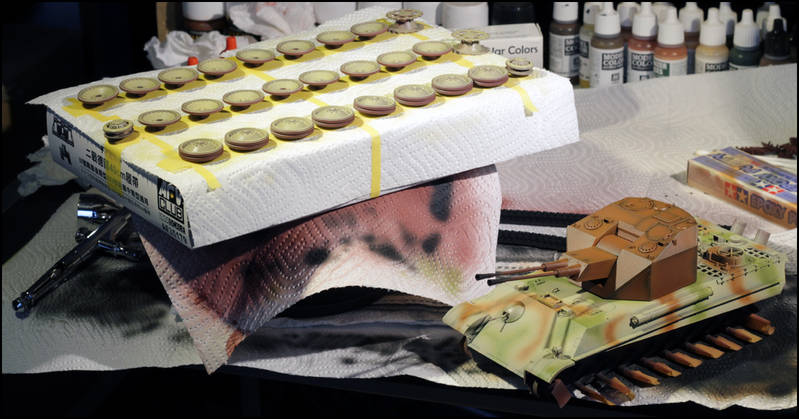
Soft edge camo made with AK colors. Started painting dunkelgelb on the road wheels, which will get the same camo as the hull. I was considering a hard edge camo, but couldn't get the masking right.
New York, United States
Joined: March 08, 2010
KitMaker: 3,662 posts
Armorama: 3,078 posts
Posted: Wednesday, September 04, 2013 - 01:20 PM UTC
Thanks Sean, I'm sure you meant great

My creativeness got working on this build and I started going through the spare parts box to liven it up a bit

This is what it looks like now

the hood trap is from a Tamiya Universal Carrier and the driver is an Italeri figure

The guy in the rear is a Tamiya figure

and the rear gear is a mix

need to do a lot more but I hope to have this 1 wrapped up by the weekend


Comments and suggestions are always welcome

Active Campaigns on the bench:
Operation Fall Gelb - Pz.Kpfw. IV Ausf. C
Engineering the Future - M-26 Recovery Vehicle
115 Campaigns completed
Kildare, Ireland
Joined: November 21, 2007
KitMaker: 3,212 posts
Armorama: 2,807 posts
Posted: Wednesday, September 04, 2013 - 08:45 PM UTC
Coming along nicely Sal but would a Yank have a Bren gun?
Utah, United States
Joined: May 27, 2003
KitMaker: 1,026 posts
Armorama: 654 posts
Posted: Wednesday, September 04, 2013 - 10:25 PM UTC
After returning from a three week business trip I'm back on the Gepard.
Experimented with artists oils on the road wheel rubber...one advantage: any excess that gets on the rim can be wiped off!

Lots of superb work and major progress going on in this campaign, too many to comment on.
Keith
Build 'em better than the box art!
New York, United States
Joined: March 08, 2010
KitMaker: 3,662 posts
Armorama: 3,078 posts
Posted: Wednesday, September 04, 2013 - 11:03 PM UTC
Quoted Text
Coming along nicely Sal but would a Yank have a Bren gun?
Sean, this is a French vehicle, note the markings, so I figured that they would have a mix of equipment

I did find 1 picture that had an M-1carbine strapped to the front

Active Campaigns on the bench:
Operation Fall Gelb - Pz.Kpfw. IV Ausf. C
Engineering the Future - M-26 Recovery Vehicle
115 Campaigns completed
Kildare, Ireland
Joined: November 21, 2007
KitMaker: 3,212 posts
Armorama: 2,807 posts
Posted: Thursday, September 05, 2013 - 12:06 AM UTC
Sorry, I suppose that explains the American helmets too....

New York, United States
Joined: March 08, 2010
KitMaker: 3,662 posts
Armorama: 3,078 posts
Posted: Thursday, September 05, 2013 - 08:11 AM UTC
Active Campaigns on the bench:
Operation Fall Gelb - Pz.Kpfw. IV Ausf. C
Engineering the Future - M-26 Recovery Vehicle
115 Campaigns completed
Ontario, Canada
Joined: March 25, 2010
KitMaker: 514 posts
Armorama: 261 posts
Posted: Thursday, September 05, 2013 - 08:49 AM UTC
Indiana, United States
Joined: June 10, 2005
KitMaker: 6,188 posts
Armorama: 5,960 posts
Posted: Thursday, September 05, 2013 - 09:00 AM UTC
Just checkin' in. Man Trevor, I like that turret!
I would place the guns at a 45 degree angle if it were me.
Everyone has done really great!

Jeff
Nordrhein-Westfalen, Germany
Joined: October 22, 2008
KitMaker: 1,280 posts
Armorama: 1,015 posts
Posted: Saturday, September 07, 2013 - 11:42 AM UTC
This is my entry, build in parallel with the FV107 for "Rapid Recon"


Free men are their own masters. If you are not - you are a slave.
Møre og Romsdal, Norway
Joined: December 03, 2012
KitMaker: 300 posts
Armorama: 285 posts
Posted: Tuesday, September 10, 2013 - 05:29 AM UTC
It's been a bit slow lately, but I've made progress on the road wheels for my Flakpanther Coelian:
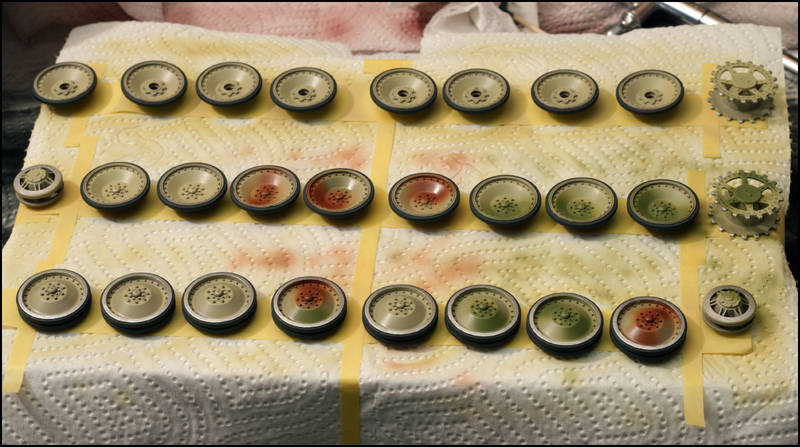
AKI colors for the camo and Vallejo Model Air Steel on the weathered metal areas.
South Carolina, United States
Joined: December 03, 2009
KitMaker: 2,160 posts
Armorama: 1,906 posts
Posted: Tuesday, September 10, 2013 - 06:58 AM UTC
Great work.
I haven't updated in a while...mainly because this one has been on the back-burner. Anyway, here is a picture of the Ozelot basically assembled and ready for paint.

Once I get a couple other projects caught up I'll start on wrapping this one up.
Louisiana, United States
Joined: May 19, 2007
KitMaker: 459 posts
Armorama: 421 posts
Posted: Monday, September 16, 2013 - 12:04 PM UTC
I'll be building the flak panzer IA

Utah, United States
Joined: May 27, 2003
KitMaker: 1,026 posts
Armorama: 654 posts
Posted: Thursday, September 19, 2013 - 06:00 AM UTC
Very, very minor progress to report...road wheels for a Gepard.

Keith
Build 'em better than the box art!
Møre og Romsdal, Norway
Joined: December 03, 2012
KitMaker: 300 posts
Armorama: 285 posts
Posted: Saturday, September 21, 2013 - 08:47 AM UTC
Added tools and spare tracks, rusted the exhausts and painted the MG barrel in the front.
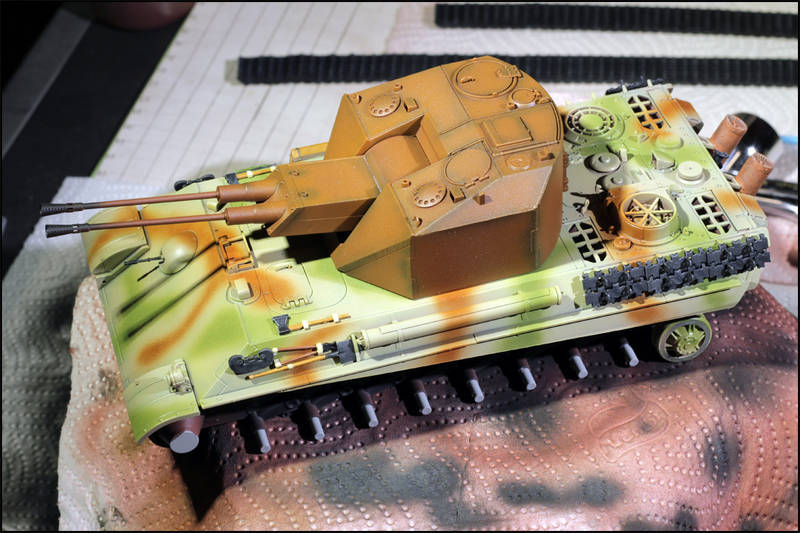
Realized I had forgotten to fill two small holes on the front deck. Didn't want to use putty and repainting those bits, so I just placed tools over each hole.
Plus points for remembering the right color for the bakelite handles!
EDIT: Messed up the white balance in this photo. Way too bright as well. Aaargh..
Michigan, United States
Joined: March 24, 2009
KitMaker: 312 posts
Armorama: 296 posts
Posted: Saturday, September 21, 2013 - 10:34 AM UTC
Still looks great as do the rest!!
'United States Army Special Forces! When you care enough to send the very best'
South Carolina, United States
Joined: December 03, 2009
KitMaker: 2,160 posts
Armorama: 1,906 posts
Posted: Monday, September 23, 2013 - 06:56 AM UTC
Quick update.
Time for paint. I masked off the parts I wanted to stay green. I shot the black, then the brown. I managed to knock another roadwheel off, as well as an idler.


She's drying in the next room and I hope to wrap this one up in the next week or so.


