Campaigns
Where Armorama group builds can be discussed, organized, and updates posted.
Anti-Aircraft
panzerbob01
Visit this Community
Louisiana, United States
Joined: March 06, 2010
KitMaker: 3,128 posts
Armorama: 2,959 posts
Posted: Tuesday, November 19, 2013 - 08:20 AM UTC
Andy;

By "bonnet interior" I take it you refer to what us yanquis call the "hood"...

Rot-oxide primer under there? Nooooooo! That would have been a classical automotive sheet-metal part, not some piece of heavy plate steel or other stuff like that. It would certainly have been "dipped" in some finish color (recall that, unless this were a replacement "hood", it was made and installed on the original track and was almost certainly a fully-finished item up to automotive manufacturing standards). (This is the same response one would get from me if for instance they were thinking of painting the underside of their Opel Blitz or Steyr or Mercedes truck bonnet in red primer. Same thing, done the same way. Very most likely a fully-painted, finished item. An auto part. NOT like a late-war StuG or tank, or the later-added armored cab of your track, where heavy metal was welded together, primed, and in some cases, painted or not with base coat and camo.)

Now, if you were talking about those cast service hatch-covers on panzers... I suspect that those were red primer inside, specially so on later tanks!

Bob
Blackstoat
Visit this Community
England - East Anglia, United Kingdom
Joined: October 15, 2012
KitMaker: 568 posts
Armorama: 561 posts
Posted: Tuesday, November 19, 2013 - 09:11 AM UTC
Thanks Bob.

I'll give it a toot of darkened dunkelgelb then.

While we're on the subject I was going to give the fenders, hood, and cab a light hairspray chipping to reveal red oxide, is that a no - no too? I'm guessing if I extend your logic red oxide chipping would be ok on the armoured cab, but not the doors,front fenders etc? If its not red oxide what is the underlying colour?

(Or was red oxide still the primer colour for automotive parts)

You may have guessed I've only done armour before.

Thanks for your help on this, don't worry about telling me what might seem obvious, chances are I might have realised!

Any
Gorizont
Visit this Community
Sachsen, Germany
Joined: November 28, 2007
KitMaker: 1,462 posts
Armorama: 1,289 posts
Posted: Tuesday, November 19, 2013 - 09:29 AM UTC
Very nice builds, as I see until now!

I also would like to join, but: building and show my kits - thatīs not possible.
I have 3 (three) kits of the russian "2S6M Tunguska".
One in scale 1/72 (styrene - Military Wheels), one in 1/35 (styrene - Panda) and one in 1/35 (resin - Jadar).
But also I have some "targets" in my stash.
I havenīt started one of them.

The reason:
Since some months I have a very "strong" problem... the "burn-out-syndrome".
Thus, I have no quiet hands for glueing and painting... but the most important... I have no interest on all my hobbies - including building model-kits.

That sounds very strange, but this is my actual situation.

But I try to follow this campaign, since I pulled back my entrance in an earlier campaign. ("Atlantik-Wall")

greetings...
Soeren
panzerbob01
Visit this Community
Louisiana, United States
Joined: March 06, 2010
KitMaker: 3,128 posts
Armorama: 2,959 posts
Posted: Tuesday, November 19, 2013 - 02:16 PM UTC

Quoted Text

Thanks Bob.

I'll give it a toot of darkened dunkelgelb then.

While we're on the subject I was going to give the fenders, hood, and cab a light hairspray chipping to reveal red oxide, is that a no - no too? I'm guessing if I extend your logic red oxide chipping would be ok on the armoured cab, but not the doors,front fenders etc? If its not red oxide what is the underlying colour?

(Or was red oxide still the primer colour for automotive parts)

You may have guessed I've only done armour before.

Thanks for your help on this, don't worry about telling me what might seem obvious, chances are I might have realised!

Any


Andy;

I'm sure you would be A-OK to chip and reveal red oxide on at least the heavier metal, parts - gun shields, armor cab, etc. Probably even on that chassis and MAYBE on the sheet metal. I'm saying that there would not likely have been any primer LEFT EXPOSED in the original track structure - red oxide probably went onto the chassis members and maybe even the sheet metal back during original manufacture. But it was all painted over on the finished vehicle.

What might be cool in a chipping and wear scenario would be for some of the dunkelgelb and camo applied to the cab chipped to reveal red oxide and bare metal (rusty, maybe) - but maybe some chipping and wear on the track chassis to reveal the industrial black enamel usually applied to German truck chassis as a routine pre-war and early-war finish, and maybe also to chip the body paint to reveal... dunkelgrau! IF you posit this to have been a pre-1943 built original track, that would have been originally painted dunkelgrau, and repainted later with dunkelgelb and camo.

Sounds like you have choices and opportunities, friend!

Bob
35th-scale
Visit this Community
Kildare, Ireland
Joined: November 21, 2007
KitMaker: 3,212 posts
Armorama: 2,807 posts
Posted: Wednesday, November 20, 2013 - 07:57 AM UTC
Given all the fantastic builds in this campaign I'm rather embarrassed with my humble build. The gun is complete, but I hope to add it to a diorama next year, maybe even with a crew...


Lonewolf7usa
Visit this Community
Michigan, United States
Joined: March 24, 2009
KitMaker: 312 posts
Armorama: 296 posts
Posted: Wednesday, November 20, 2013 - 08:13 AM UTC
Nothing to be embarrassed about! Nice job on the paint work!
Blackstoat
Visit this Community
England - East Anglia, United Kingdom
Joined: October 15, 2012
KitMaker: 568 posts
Armorama: 561 posts
Posted: Wednesday, November 20, 2013 - 09:27 AM UTC
Nice work Sean, hope mine turns out as well when I get to it.

Thanks for your help Bob, decided to do cab interior in red oxide as you suggested. I've painted the chassis in red primer and hairsprayed it. Tomorrow I'll apply some dunkelgelb to the chassis then paint the details like drive train etc. Then I'll chip the main structural chassis parts. Still not sure about the automotive parts, I'm tempted to chip dunkelgelb to grey as you suggested, but I'm thinking the colour variation might be too diverse.

I always have my backup plan, if anything goes horribly wrong (as it's inclined to with my limited experience), I'll do a winter whitewash on it.

Thanks for your help.

Andy
nng-nng
Visit this Community
Bayern, Germany
Joined: October 22, 2013
KitMaker: 380 posts
Armorama: 376 posts
Posted: Wednesday, November 20, 2013 - 10:04 AM UTC
Hi Sean,

Quoted Text

Given all the fantastic builds in this campaign I'm rather embarrassed with my humble build.


Itīs the Tamiya Flak isnīt it? You canīt really compare them with the newer ones (like my Tristar single 20mm), but you had a nice and straight forward build (unlike me) and you fun... (at least I hope so ) and thats all whatīs modelling really about
Removed by original poster on 11/21/13 - 02:17:34 (GMT).
Removed by original poster on 11/21/13 - 02:18:49 (GMT).
Removed by original poster on 11/21/13 - 02:26:17 (GMT).
Removed by original poster on 11/21/13 - 02:28:05 (GMT).
Removed by original poster on 11/21/13 - 02:39:16 (GMT).
35th-scale
Visit this Community
Kildare, Ireland
Joined: November 21, 2007
KitMaker: 3,212 posts
Armorama: 2,807 posts
Posted: Wednesday, November 20, 2013 - 08:29 PM UTC
Thanks Andy & MS. It's brush painted with Humbrol enamels and weathered with Tamiya powders ( those make-up like little trays) and Citadel Nunn-oil.


Quoted Text


Itīs the Tamiya Flak isnīt it? You canīt really compare them with the newer ones (like my Tristar single 20mm), but you had a nice and straight forward build (unlike me) and you fun... (at least I hope so ) and thats all whatīs modelling really about


Hi Fabian. Yes, it was fun! And my first WWII ground based subject. I think I'll be adding to it. I have seen your single barrel flak. Looks very nice....but I think my next will be an 88

Cheers
Sean
clayocker
Visit this Community
New South Wales, Australia
Joined: February 01, 2005
KitMaker: 69 posts
Armorama: 59 posts
Posted: Wednesday, November 20, 2013 - 10:38 PM UTC
Beautiful work. Inspirational
Cobrahistorian
Visit this Community
Oklahoma, United States
Joined: November 11, 2006
KitMaker: 710 posts
Armorama: 553 posts
Posted: Thursday, November 21, 2013 - 01:15 AM UTC
Well, I spent a very frustrating four hours on the workbench last night.

My Legend M39 conversion arrived yesterday and of course, I wanted to dive right in and get rolling on it. I started by test fitting the upper hull to the lower hull. It's supposed to be a drop-in fit, since it replaces the entire upper hull piece from the AFV Club kit.

Wrong.

It was about 2mm too short and 3mm too narrow and from the end of the superstructure aft, there was a slight symmetrical downward warp on both sides. Ok. Not a huge deal, I can handle this.

Well, the more I test fit, the more I had to modify. 1.5mm plastic off of the sponson undersides to narrow it to the upper hull shape, some plastic off of the rear crew compartment wall... you get the idea.

So, I get it to where I think it'll work, and the front is just not cooperating. The upper glacis is still nearly 3mm too narrow and it's throwing everything off. Back to the drawing board.

I'd already cut out the space for the crew compartment on the kit upper hull, so I pulled it out. The front still mated up nicely, but I had to finagle the rear panel, since I'd taken a 3mm slice out of it. Again, not the worst thing in the world. But now I've pulled 1.5mm off of each sponson underside, so the kit upper hull doesn't have anything to rest on! Out came the sheet plastic and I was able to adjust that too.

At this point I was so beyond frustrated that I almost called it quits. However, there are usable parts of the upper hull, so I cut off the front of the superstructure, cut the sidewalls off and then removed the kit sidewalls, grafting in the resin between the driver's compartment and the engine deck.

I'm finally happy with how it is coming out, but it was really touch and go for a bit there. The conversion was supposed to be a drop-in fit, at least on the upper hull. The crew compartment floor is great, and it's got some good detail, but honestly, there's nothing in the conversion that I couldn't have scratchbuilt myself. I should have gone with my gut and saved myself $55 and four hours of frustration...

clayocker
Visit this Community
New South Wales, Australia
Joined: February 01, 2005
KitMaker: 69 posts
Armorama: 59 posts
Posted: Thursday, November 21, 2013 - 10:20 AM UTC
My turn to weigh in. This is the first campaign I have entered in. Looking forward to being part of the process.
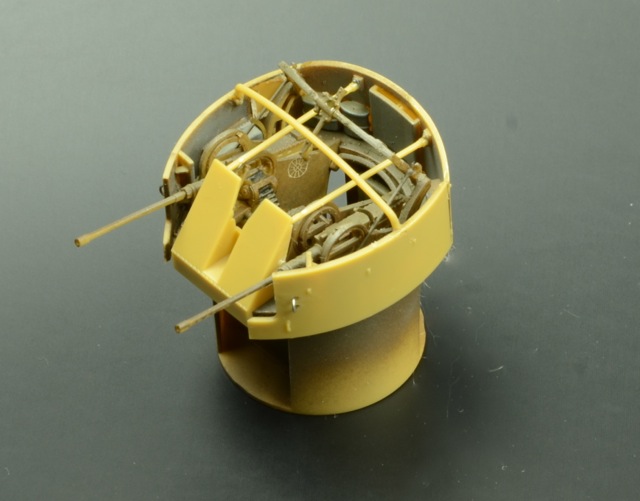
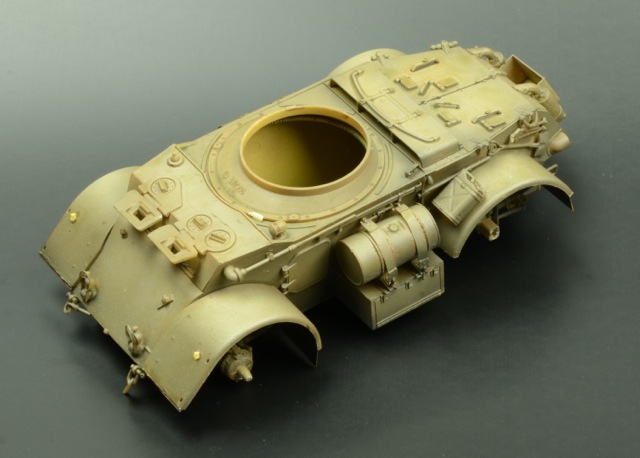
This is the 1/48 AA Staghound from Bronco. It is a very detailed kit. It isn't something that I would usually build but thought I would give it a go as a local model competition had it as a featured kit etc etc... anyway... didn't end up entering and saw this campaign and thought it gave me the perfect excuse to finish it off.
Here is a couple of working shots. The assembly of the guns and the turret were 'interesting' to say the least... Looking pretty ugly still, but thought I would get these up as progress shots.. more to follow in the next few weeks. It all comes together in the end.

gcdavidson
Visit this Community
Ontario, Canada
Joined: August 05, 2003
KitMaker: 1,698 posts
Armorama: 1,563 posts
Posted: Friday, November 22, 2013 - 09:54 AM UTC
Going to try this one:

gcdavidson
Visit this Community
Ontario, Canada
Joined: August 05, 2003
KitMaker: 1,698 posts
Armorama: 1,563 posts
Posted: Friday, November 22, 2013 - 10:13 AM UTC
chop chop


Cobrahistorian
Visit this Community
Oklahoma, United States
Joined: November 11, 2006
KitMaker: 710 posts
Armorama: 553 posts
Posted: Friday, November 22, 2013 - 06:53 PM UTC
Well, the M39 is coming along. I got rid of the kit walls and redid them in sheet styrene. Considering the amount of cutting that had to go into it, I'm pretty happy with the outcome so far. Still have a ways to go on it, but the plan is to have it done by Monday night.


woltersk
Visit this Community
Utah, United States
Joined: May 27, 2003
KitMaker: 1,026 posts
Armorama: 654 posts
Posted: Saturday, November 23, 2013 - 10:30 AM UTC
Wow! Still lots of great work going on in this campaign. Glad to see I'm not alone as we head into the final month.

Did some more experimenting, tried my hand at 'water run-off' weathering marks down the front sides of the turret using oils. As I get to the rest of the vehicle I think it needs some of the base color added and less if the white, black, and gray. Let me know what you think.


Keith
TMoon
#152
Visit this Community
Texas, United States
Joined: December 07, 2002
KitMaker: 487 posts
Armorama: 441 posts
Posted: Monday, November 25, 2013 - 01:09 PM UTC
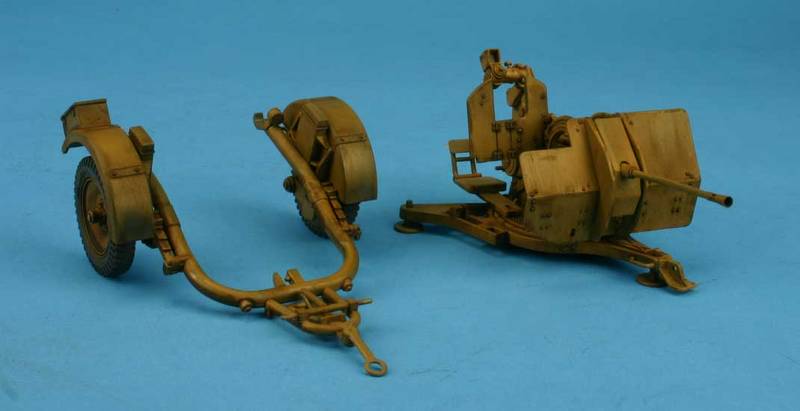
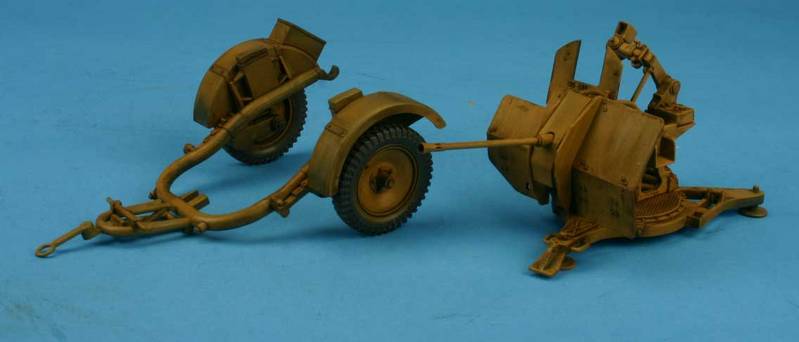
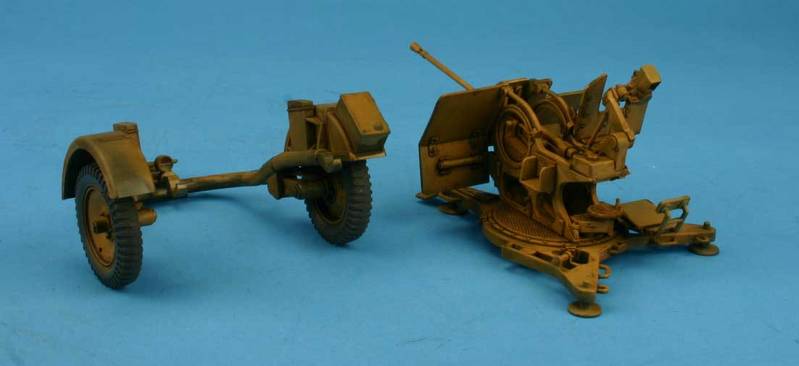
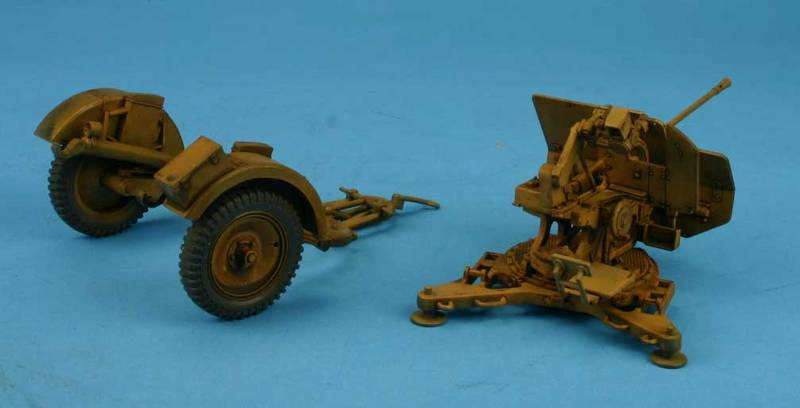
Here are my finished Photos of the Tamiya 20mm FlaK gun.
These are also in the campaign gallery.


There are a lot of great models in this campaign. I'm happy just to be a small part of it.
Tom
reb3times
Visit this Community
North Carolina, United States
Joined: December 06, 2012
KitMaker: 33 posts
Armorama: 32 posts
Posted: Monday, November 25, 2013 - 02:36 PM UTC
reb3times
Visit this Community
North Carolina, United States
Joined: December 06, 2012
KitMaker: 33 posts
Armorama: 32 posts
Posted: Monday, November 25, 2013 - 02:55 PM UTC
Im having all kinds of problems uploading the rest of the pics of my M16 Quad 50 Halftrack. I hate photobucket.
reb3times
Visit this Community
North Carolina, United States
Joined: December 06, 2012
KitMaker: 33 posts
Armorama: 32 posts
Posted: Monday, November 25, 2013 - 02:55 PM UTC