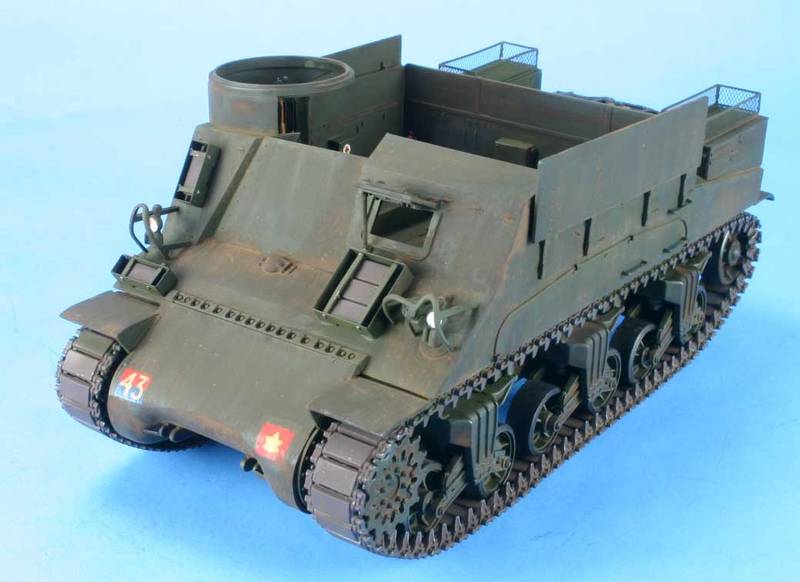
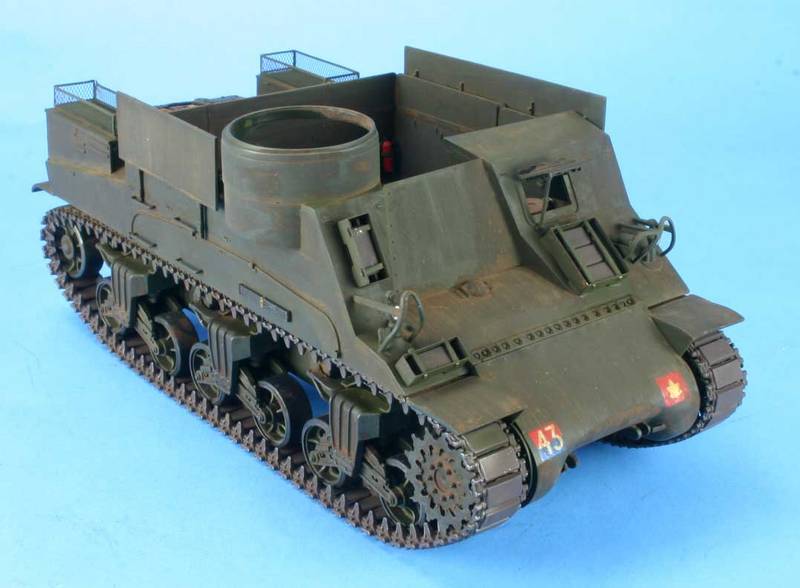
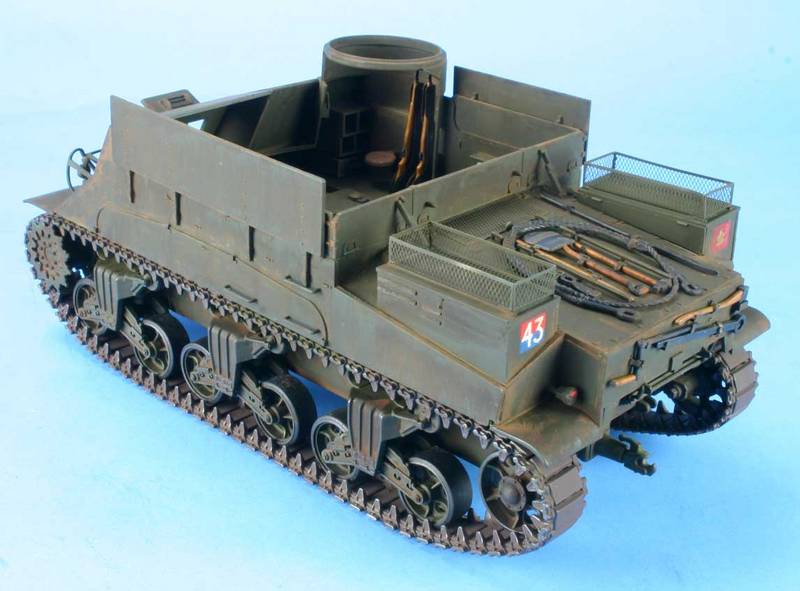
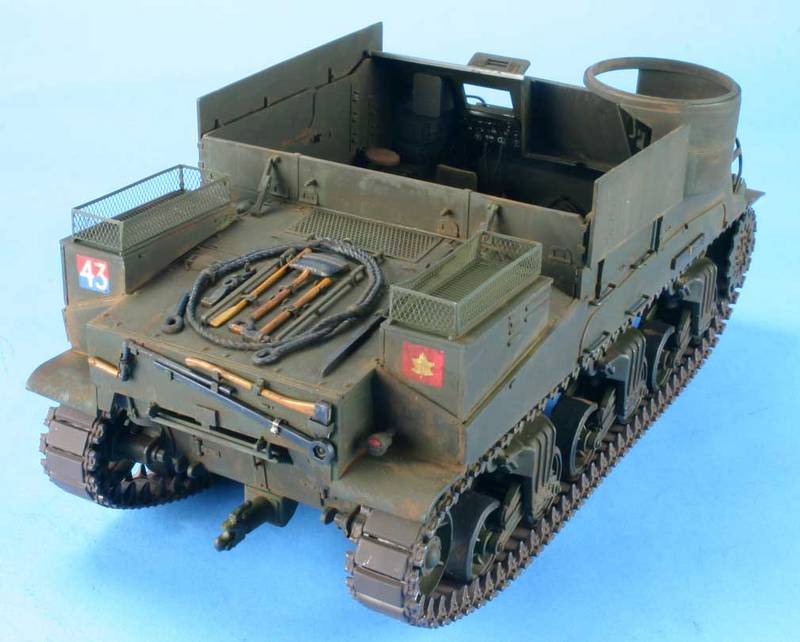
Ian - Nice looking Firefly, markings look real good.
Campaigns
Where Armorama group builds can be discussed, organized, and updates posted.
Where Armorama group builds can be discussed, organized, and updates posted.
Hosted by Darren Baker, Richard S.
Commonwealth Thunder!
Posted: Friday, December 13, 2013 - 02:46 PM UTC

SaxonTheShiba

Joined: February 01, 2009
KitMaker: 1,233 posts
Armorama: 557 posts

Posted: Friday, December 13, 2013 - 04:18 PM UTC
Thanks Kevin!

ColinEdm


Joined: October 15, 2013
KitMaker: 1,355 posts
Armorama: 1,229 posts

Posted: Saturday, December 14, 2013 - 06:39 AM UTC
Wow, the short barrel camo had me fooled for bit, coming along nicely Ian!
Posted: Saturday, December 14, 2013 - 12:55 PM UTC
Howdy
and Kudos to my fellow builders out there.
Colin, that Firefly looks great. I'm working on my weathering at the moment, and I'm looking close, btw what did you use for your fuel spill on the sides?
Cam the stowage on that Cromwell really gives interest to your build.
John so far so good on that Achilles, will await the finished results.. :>
Ian, I've been watching your firefly build too and I agree just sitting on the desk you can see why the crews painted their barrels that way...
One of my problem areas in model building is AFV headlights, how to get them looking good with out going the aftermarket route. This time I tried something new.
I used the silver pigment from the Tamiya weathering Master C to coat the lights, then I used a drop of testors clear parts cement on top to simulate lens, as this dries clear. here are the results

due to lighting and size I had to use 2 different photos to show each head light..
I'd be interested in knowing what everyone thinks of the results of this method..
Thanks
Delbert
and Kudos to my fellow builders out there.
Colin, that Firefly looks great. I'm working on my weathering at the moment, and I'm looking close, btw what did you use for your fuel spill on the sides?
Cam the stowage on that Cromwell really gives interest to your build.
John so far so good on that Achilles, will await the finished results.. :>
Ian, I've been watching your firefly build too and I agree just sitting on the desk you can see why the crews painted their barrels that way...
One of my problem areas in model building is AFV headlights, how to get them looking good with out going the aftermarket route. This time I tried something new.
I used the silver pigment from the Tamiya weathering Master C to coat the lights, then I used a drop of testors clear parts cement on top to simulate lens, as this dries clear. here are the results

due to lighting and size I had to use 2 different photos to show each head light..
I'd be interested in knowing what everyone thinks of the results of this method..
Thanks
Delbert

Removed by original poster on 12/18/13 - 22:11:34 (GMT).
Nito74

Joined: March 04, 2008
KitMaker: 5,386 posts
Armorama: 4,727 posts

Posted: Saturday, December 14, 2013 - 03:02 PM UTC
Looks great !
I'll have to try that out
I'll have to try that out

ColinEdm


Joined: October 15, 2013
KitMaker: 1,355 posts
Armorama: 1,229 posts

Posted: Saturday, December 14, 2013 - 04:33 PM UTC
Delbert, those headlights turned out great, i will have to try that method.
For my fuel spill I just mixed up some black paint and thinner, more paint than for a wash and used a brush to apply it, took a few applications to build up enough colour. I was thinking for a "wet" or "fresh" spill you could mix some paint and gloss coat with thinner.
For my fuel spill I just mixed up some black paint and thinner, more paint than for a wash and used a brush to apply it, took a few applications to build up enough colour. I was thinking for a "wet" or "fresh" spill you could mix some paint and gloss coat with thinner.
Removed by original poster on 12/18/13 - 22:12:04 (GMT).

SaxonTheShiba

Joined: February 01, 2009
KitMaker: 1,233 posts
Armorama: 557 posts

Posted: Sunday, December 15, 2013 - 10:51 AM UTC

ColinEdm


Joined: October 15, 2013
KitMaker: 1,355 posts
Armorama: 1,229 posts

Posted: Sunday, December 15, 2013 - 12:20 PM UTC
Looking good Ian!

SaxonTheShiba

Joined: February 01, 2009
KitMaker: 1,233 posts
Armorama: 557 posts

Posted: Sunday, December 15, 2013 - 12:32 PM UTC
Thanks Colin!
Posted: Monday, December 16, 2013 - 01:12 PM UTC
Ian, thanks for the info, I'm going to do some fuel spillage, just not 100% which technique I'll use...
Anyways, I've been working on the M-10 Achilles tonight and I think I'm getting lost in the details.. LOL but I'm pretty sure I'll make a finish...
here are the drive sprokets Olive drab, lightly weathered.. AK Interactive Dark steel used for wear...
I'll be doing more weathering to dull it down a bit once its on the vehicle with the tracks.

And I wasn't happy with my wooden tool handles, I thought they were too light and wanted a darker wood look so I used a very light drybrush of AK Interactive Track wash on them..

to me this is a much better look.. laters everyone..

Anyways, I've been working on the M-10 Achilles tonight and I think I'm getting lost in the details.. LOL but I'm pretty sure I'll make a finish...
here are the drive sprokets Olive drab, lightly weathered.. AK Interactive Dark steel used for wear...
I'll be doing more weathering to dull it down a bit once its on the vehicle with the tracks.

And I wasn't happy with my wooden tool handles, I thought they were too light and wanted a darker wood look so I used a very light drybrush of AK Interactive Track wash on them..

to me this is a much better look.. laters everyone..

IrishGreek

Joined: October 17, 2010
KitMaker: 627 posts
Armorama: 571 posts

Posted: Monday, December 16, 2013 - 03:40 PM UTC
Delbert,
She is looking mighty fine! Thanks for the inspiration!
John
She is looking mighty fine! Thanks for the inspiration!
John
Posted: Wednesday, December 18, 2013 - 09:43 AM UTC
Me again, with more photos..
I've used pigments in the past, but only to lightly weather, I've been a bit timid in making dirtier vehicles.
With this one I thought I'd try to do a bit more with pigments..
the splatters were done with an airbrush blowing damp pigment/plaster mixture off of a paintbrush.
I'm sure the flat coat will dull down the dust streaking.
I'm using Ak Interactives Europeon Earth pigment to add character.


thanks for looking
Delbert
I've used pigments in the past, but only to lightly weather, I've been a bit timid in making dirtier vehicles.
With this one I thought I'd try to do a bit more with pigments..
the splatters were done with an airbrush blowing damp pigment/plaster mixture off of a paintbrush.
I'm sure the flat coat will dull down the dust streaking.
I'm using Ak Interactives Europeon Earth pigment to add character.


thanks for looking
Delbert
Posted: Sunday, December 22, 2013 - 09:25 AM UTC
Here is another photo..
I'm at that point where I am just ready to finish it up and get it done with..

Delbert
I'm at that point where I am just ready to finish it up and get it done with..

Delbert

ColinEdm


Joined: October 15, 2013
KitMaker: 1,355 posts
Armorama: 1,229 posts

Posted: Sunday, December 22, 2013 - 10:06 AM UTC
Looks sharp Delbert!
Posted: Sunday, December 22, 2013 - 01:36 PM UTC
Progress update, started to apply decals and weathering. 


Posted: Tuesday, December 24, 2013 - 04:07 AM UTC
Here are my finished Photos of the Kangaroo in Canadian Service.
Same photos are in the Gallery.


Merry Christmas and may you all get THE kit you have been wanting forever!
Tom
Same photos are in the Gallery.


Merry Christmas and may you all get THE kit you have been wanting forever!
Tom
IamTJones

Joined: May 12, 2013
KitMaker: 128 posts
Armorama: 125 posts

Posted: Tuesday, December 24, 2013 - 01:50 PM UTC
Loving the Achillies Delbert, she looks great.
I'm currently in a mad dash to finish the bishop, I finaly got over the giant hurdle that was the build phase and am now enjoying the painting.


Here as it stands right now, I've laid down base coats on the interior and upper hull. Will apply decals and start weathering soon.
The roof will remain unglued because after the hours i've spent fiddling in the interior I want to be able to see it from time to time haha.
Cheers, and merry christmas everyone
Tristan
I'm currently in a mad dash to finish the bishop, I finaly got over the giant hurdle that was the build phase and am now enjoying the painting.


Here as it stands right now, I've laid down base coats on the interior and upper hull. Will apply decals and start weathering soon.
The roof will remain unglued because after the hours i've spent fiddling in the interior I want to be able to see it from time to time haha.
Cheers, and merry christmas everyone
Tristan

SaxonTheShiba

Joined: February 01, 2009
KitMaker: 1,233 posts
Armorama: 557 posts

Posted: Wednesday, December 25, 2013 - 06:45 AM UTC
Beautiful models everybody. Really a great variety of projects in this thread and I enjoyed building with all of you. My Polish Firefly Ic (Hybrid) is done and posted up in the gallery. I added a Legends resin stowage set and used MIG and CMK pigments for weathering. Best wishes and Merry Christmas, Happy Holidays and a Great New Year!!
Ian
Ian


Ian
Ian


thebear

Joined: November 15, 2002
KitMaker: 3,960 posts
Armorama: 3,579 posts

Posted: Saturday, December 28, 2013 - 03:22 AM UTC
Nice work guys .. Is it only me or are others having trouble loading their pictures to the gallery ? I do everything and it says it is processing and I've successfully downloaded the picture , then it goes to the gallery and nothing??? Wouldn't want to miss out on my campaign ribbon  .
.
Rick
 .
.Rick

SaxonTheShiba

Joined: February 01, 2009
KitMaker: 1,233 posts
Armorama: 557 posts

Posted: Saturday, December 28, 2013 - 04:01 AM UTC
Richard, it did that with me on my first try. I thought Photobucket had resized it enough but that was not the case. I just resized it again and it went in the gallery fine.
Ian
Ian
thebear

Joined: November 15, 2002
KitMaker: 3,960 posts
Armorama: 3,579 posts

Posted: Saturday, December 28, 2013 - 09:23 PM UTC
Thanks Ian ... Got it 

Posted: Sunday, December 29, 2013 - 12:43 AM UTC
British Infantry Tank Mk.II Matilda finished. 


Posted: Sunday, December 29, 2013 - 01:04 AM UTC
Hi folks,
I never got off the starting block for this one.
Just got a moment to look through the thread Excellent builds Gentlemen, inspiring stuff.
Cheers
Al

I never got off the starting block for this one.
Just got a moment to look through the thread Excellent builds Gentlemen, inspiring stuff.
Cheers
Al


 |


