The style of uniforms worn would lend itself for the time period summer of '44 so it could be Normandy or during the Operation Bagration period in the east. Maybe Wiking in Poland ? Or Totenkopf further south ?
J
Hosted by Darren Baker
Sdkfz 250/251 Campaign
jrutman

Joined: April 10, 2011
KitMaker: 7,941 posts
Armorama: 7,934 posts

Posted: Friday, November 25, 2016 - 12:02 AM UTC
DaGreatQueeg

Joined: August 01, 2005
KitMaker: 1,049 posts
Armorama: 841 posts

Posted: Friday, November 25, 2016 - 03:25 AM UTC
erichvon

Joined: January 17, 2006
KitMaker: 1,694 posts
Armorama: 1,584 posts

Posted: Saturday, November 26, 2016 - 11:38 PM UTC
Jerry, that's what I was thinking re the Eastern Front angle. Now I need to decide urban or rural but it's one for the future as I've nade a start on stuff for the Hungary dio.
Brent, considering just how small that is it's coming on really nicely!
Brent, considering just how small that is it's coming on really nicely!
Posted: Sunday, November 27, 2016 - 02:12 AM UTC
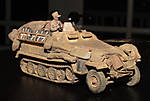
Been travelling a lot for work which is killing my bench time. Calling this one done, although I may do some more on it in the future. Nice kit, although the rear armored extensions on the hull were a bit "fiddly".


erichvon

Joined: January 17, 2006
KitMaker: 1,694 posts
Armorama: 1,584 posts

Posted: Sunday, November 27, 2016 - 02:26 AM UTC
Guy, that's a really nice build. Unusual as well as I'm more used to seeing 251's with an AT gun on top. I may have a look for one of those as it looks great built up. Nice three colour cam too.
DaGreatQueeg

Joined: August 01, 2005
KitMaker: 1,049 posts
Armorama: 841 posts

Posted: Sunday, November 27, 2016 - 02:44 AM UTC
jrutman

Joined: April 10, 2011
KitMaker: 7,941 posts
Armorama: 7,934 posts

Posted: Sunday, November 27, 2016 - 07:25 PM UTC
Two really nice 250s ! Early and late. I am also one of those that was not aware of a 75mm being mounted on a 250.
J
J
Posted: Sunday, November 27, 2016 - 07:38 PM UTC
Karl, Brent, and Jerry,
Thanks guys. The funny thing is that's a 50mm not a 75mm. On the small frame of a 250 it looks huge! It had to make the vehicle top heavy as can be. This was a Cyber hobby white box kit, but I believe it's still available. Some really nice builds on here. Great job guys.
Thanks guys. The funny thing is that's a 50mm not a 75mm. On the small frame of a 250 it looks huge! It had to make the vehicle top heavy as can be. This was a Cyber hobby white box kit, but I believe it's still available. Some really nice builds on here. Great job guys.
Removed by original poster on 11/28/16 - 14:39:55 (GMT).
Posted: Sunday, November 27, 2016 - 07:41 PM UTC
Brent, that Rubicon kit came out nice! Great paint job! 

Posted: Monday, November 28, 2016 - 01:07 AM UTC
I got a lot of work done over the weekend but can tell now that I'm not gunna make the deadline. There was some talk about an extension. I would be grateful for another two weeks if that is possible. If some extension is not in the cards, I'll have to withdraw.
Decals should go on this evening, more progress pictures later.
Decals should go on this evening, more progress pictures later.
TankManNick

Joined: February 01, 2010
KitMaker: 551 posts
Armorama: 543 posts

Posted: Monday, November 28, 2016 - 08:40 AM UTC
Here's the second wee entry - Sdkfz 251/1. Took a couple of quick shots to get them in by the deadline. Also posted to campaign gallery. Hope you like it! Hope you all had fun! This is the Revell 1/72 item plus an AB figure. There is also another figure in the passenger seat which of course you can't see. I had to cut so much plastic off to fit him in - makes you wonder however a real human fit in these things!
Pictures are small because I had to use the gallery. You can view bigger ones there (I guess you can just click the pic), or, if my frickin' web host can get it's act together I can load them there...


Pictures are small because I had to use the gallery. You can view bigger ones there (I guess you can just click the pic), or, if my frickin' web host can get it's act together I can load them there...


DaGreatQueeg

Joined: August 01, 2005
KitMaker: 1,049 posts
Armorama: 841 posts

Posted: Monday, November 28, 2016 - 11:21 AM UTC
erichvon

Joined: January 17, 2006
KitMaker: 1,694 posts
Armorama: 1,584 posts

Posted: Monday, November 28, 2016 - 12:54 PM UTC
Paul, don't worry about time. I don't know who to contact re an official extension so I'm giving till the 15th of Dec as an extension awards wise. I have to sort through who's qualified anyway so my cut off is the 15th now. Two weeks should be enough hopefully for those who are a bit behind.
erichvon

Joined: January 17, 2006
KitMaker: 1,694 posts
Armorama: 1,584 posts

Posted: Monday, November 28, 2016 - 12:55 PM UTC
Brent, that looks superb. Hard to believe it's that small with the way you've detailed it.
Posted: Monday, November 28, 2016 - 05:48 PM UTC
Quoted Text
Here's the second wee entry - Sdkfz 251/1. Took a couple of quick shots to get them in by the deadline. Also posted to campaign gallery. Hope you like it! Hope you all had fun! This is the Revell 1/72 item plus an AB figure. There is also another figure in the passenger seat which of course you can't see. I had to cut so much plastic off to fit him in - makes you wonder however a real human fit in these things!
Pictures are small because I had to use the gallery. You can view bigger ones there (I guess you can just click the pic), or, if my frickin' web host can get it's act together I can load them there...
Nick,
You can get the full-sized photos to appear in your post by copying in the link for the photo instead of the link for the thumbnail. Just click on the icon to the right of the linked thuimbnail URL and another box will appear with the URL for the photo. Just copy that and paste it into your post and you'll be good to go.

Posted: Monday, November 28, 2016 - 09:55 PM UTC
Quoted Text
Paul, don't worry about time. I don't know who to contact re an official extension so I'm giving till the 15th of Dec as an extension awards wise. I have to sort through who's qualified anyway so my cut off is the 15th now. Two weeks should be enough hopefully for those who are a bit behind.
Thanks Karl, that's just what the doctor ordered. I got decals on last night and a sealing coat will go on this evening. We are getting there!
Templario

Joined: August 16, 2005
KitMaker: 42 posts
Armorama: 37 posts

Posted: Monday, November 28, 2016 - 10:48 PM UTC
Hello, two week is very good for my.
Regards
Regards
LikesTanks

Joined: May 07, 2013
KitMaker: 242 posts
Armorama: 234 posts

Posted: Tuesday, November 29, 2016 - 09:40 AM UTC
Procrastination is a terrible thing and has already meant I failed to finish the 500+ campaign. As the starter pic shows I've been meaning to post for some time 
A Revell rebox of the Dragon Greif


For ease of painting (such as I can do)I haven't quite followed the build steps.
As I ran out of grey primer this has been done in a lurid red oxide car primer
 .
.
Painting in the unheated garage in sub-zero temperatures left an extremely grainy surface which gentle sand-papering improved where I could reach
 .
.
Camo colours, tools, decals and dirt to go but the two weeks will see me through.

A Revell rebox of the Dragon Greif


For ease of painting (such as I can do)I haven't quite followed the build steps.
As I ran out of grey primer this has been done in a lurid red oxide car primer
 .
.Painting in the unheated garage in sub-zero temperatures left an extremely grainy surface which gentle sand-papering improved where I could reach
 .
.Camo colours, tools, decals and dirt to go but the two weeks will see me through.
LikesTanks

Joined: May 07, 2013
KitMaker: 242 posts
Armorama: 234 posts

Posted: Tuesday, November 29, 2016 - 10:01 AM UTC
Forgot to include the dry-fit finished build pic


Posted: Tuesday, November 29, 2016 - 11:30 PM UTC
Wow Richard, you are making rapid progress! I too have this kit but in the Dragon boxing, glad to see it looks so nice.
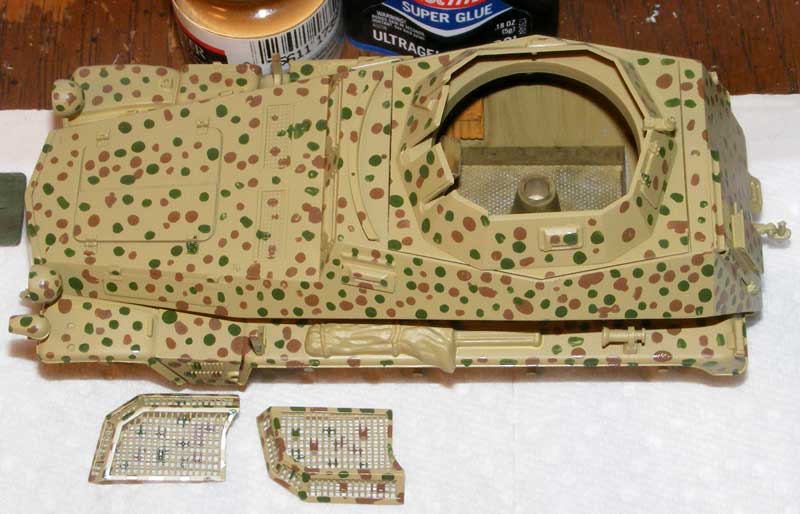
I have been beavering away on my project Tamiya 250/9 and have some progress to show:


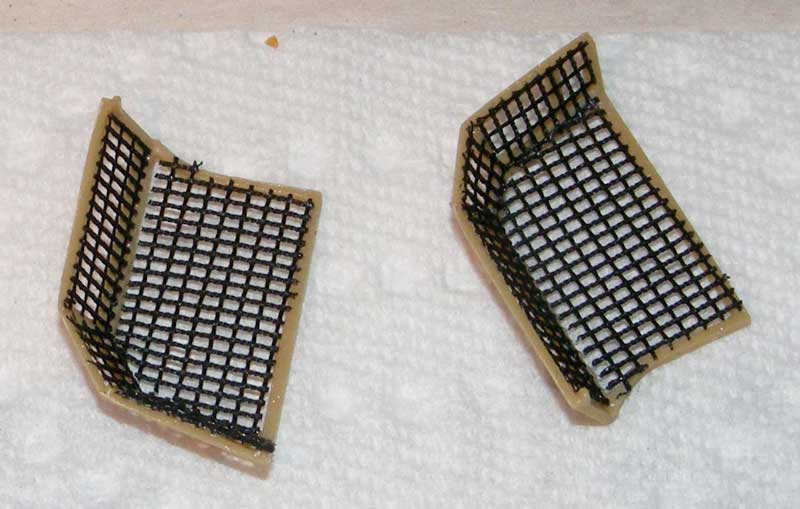
My project had a couple of late in the game changes. First, the Eduard PE set arrived and its a pip, no less than 3 fret of parts, many for the interior and will never be seen as the gun & screens completely block most of it. I had bought it for the screens and found that the Eduard screens (which are MUCH nicer than the kit parts) would not fit the kit frame. Eduard provide a new frame which has to be folded up. Given that and that the set was so nice I decided to save it for a future build and bite the bullet and use the fussy and somewhat rough kit parts.
The other setback was the Archer Dry Transfers. They were for a 250/9 but for a B model which is quite different from the Tamiya kit. So - we were back to the kit decals which were poorly printed with bad white/black alignment. The decal dungeon provided some additional markings and they are on the kit now.
With the demise of the Archer Elfi markings for this project an option of markings that was not depicted in the instructions was selected as it allowed me to create a paint scheme close to one I had seen in the Tank Power book on the 251. I have no idea if it is correct but it allows me some freedom to try something new.
I have been beavering away on my project Tamiya 250/9 and have some progress to show:


My project had a couple of late in the game changes. First, the Eduard PE set arrived and its a pip, no less than 3 fret of parts, many for the interior and will never be seen as the gun & screens completely block most of it. I had bought it for the screens and found that the Eduard screens (which are MUCH nicer than the kit parts) would not fit the kit frame. Eduard provide a new frame which has to be folded up. Given that and that the set was so nice I decided to save it for a future build and bite the bullet and use the fussy and somewhat rough kit parts.
The other setback was the Archer Dry Transfers. They were for a 250/9 but for a B model which is quite different from the Tamiya kit. So - we were back to the kit decals which were poorly printed with bad white/black alignment. The decal dungeon provided some additional markings and they are on the kit now.
With the demise of the Archer Elfi markings for this project an option of markings that was not depicted in the instructions was selected as it allowed me to create a paint scheme close to one I had seen in the Tank Power book on the 251. I have no idea if it is correct but it allows me some freedom to try something new.
sneakypete

Joined: June 10, 2006
KitMaker: 149 posts
Armorama: 73 posts

Posted: Wednesday, November 30, 2016 - 03:40 AM UTC
erichvon

Joined: January 17, 2006
KitMaker: 1,694 posts
Armorama: 1,584 posts

Posted: Wednesday, November 30, 2016 - 09:04 AM UTC
I've awarded the first lot of campaign ribbons having gone through the gallery and the thread in case I'd missed anyone. For those who've not finished yet don't forget you've got until 14th Dec to get your half track finished so you've still got time. To all of those who finished on time congratulations. There have been some fantastic builds in here and hope that you've all enjoyed the build. I chose the subject as there is so much choice in variant for two vehicles and we've certainly seen that reflected in the choices made. Top work chaps.
Going through the thread I realised I'd started a 251/7C which I appear to have half done and lost so I'll have to dig that out and finish it lol.
Going through the thread I realised I'd started a 251/7C which I appear to have half done and lost so I'll have to dig that out and finish it lol.
DaGreatQueeg

Joined: August 01, 2005
KitMaker: 1,049 posts
Armorama: 841 posts

Posted: Wednesday, November 30, 2016 - 04:05 PM UTC
Thanks Karl, although I added my 250 lateish, throughout all the postings it was a great campaign. And thanks especially to you for supporting everyone with positive comments and encouragement. Props to all who built ... and even those not quite finished 
cheers
Brent

cheers
Brent
Posted: Wednesday, November 30, 2016 - 05:20 PM UTC
Fun campaign! Thanks, Karl!


 |


