

1⁄35M113 TUA Conversion Set
6
Comments
Conclusion
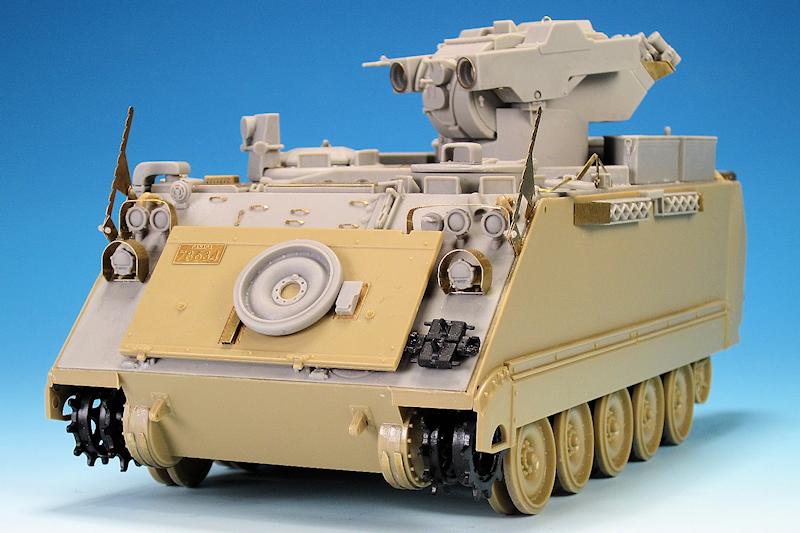
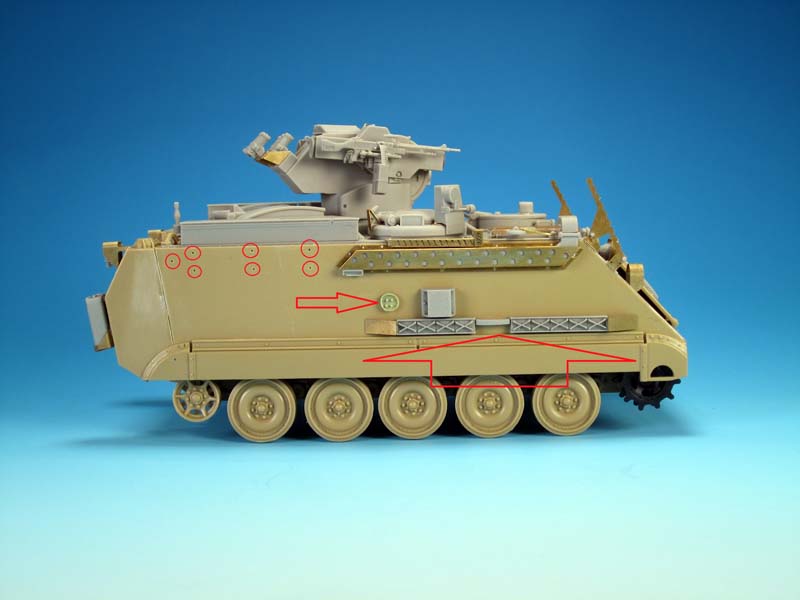
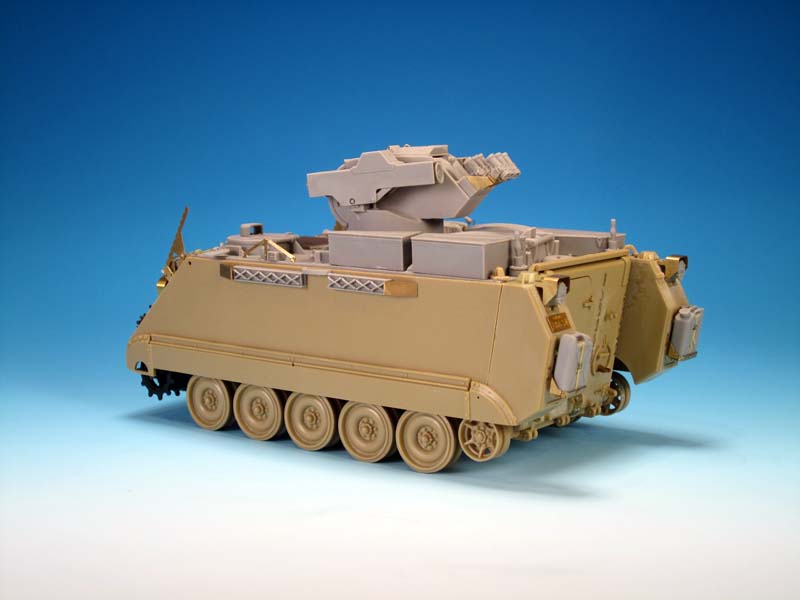
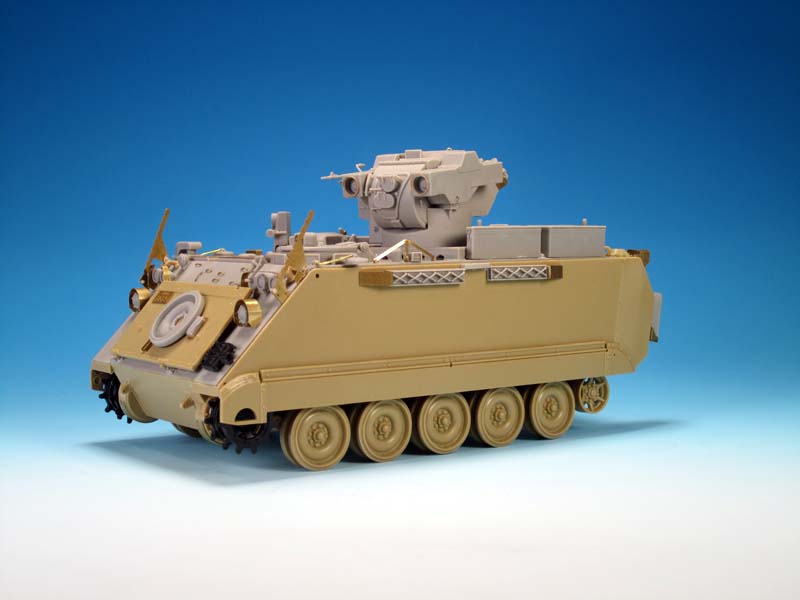
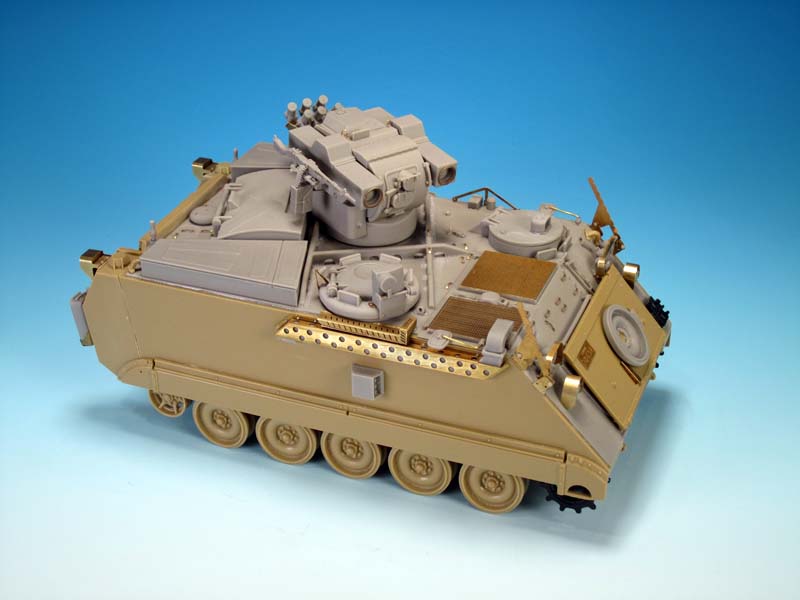
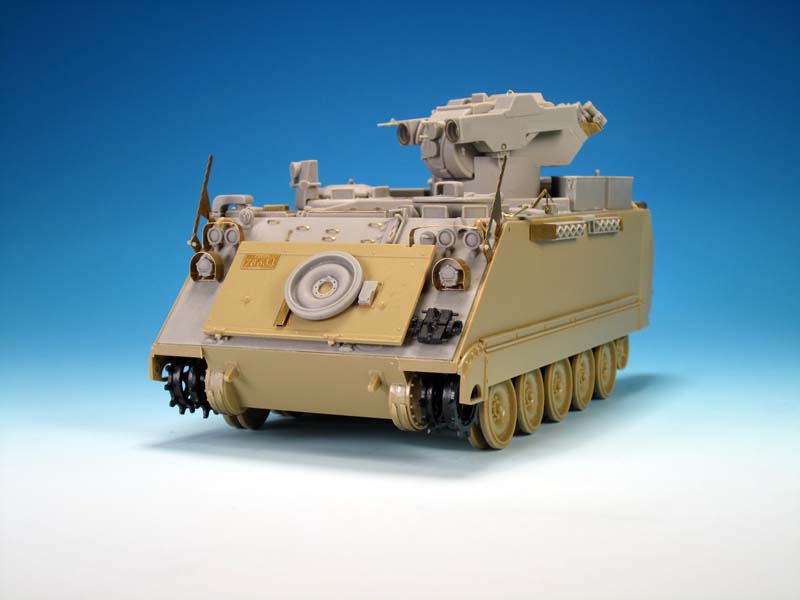
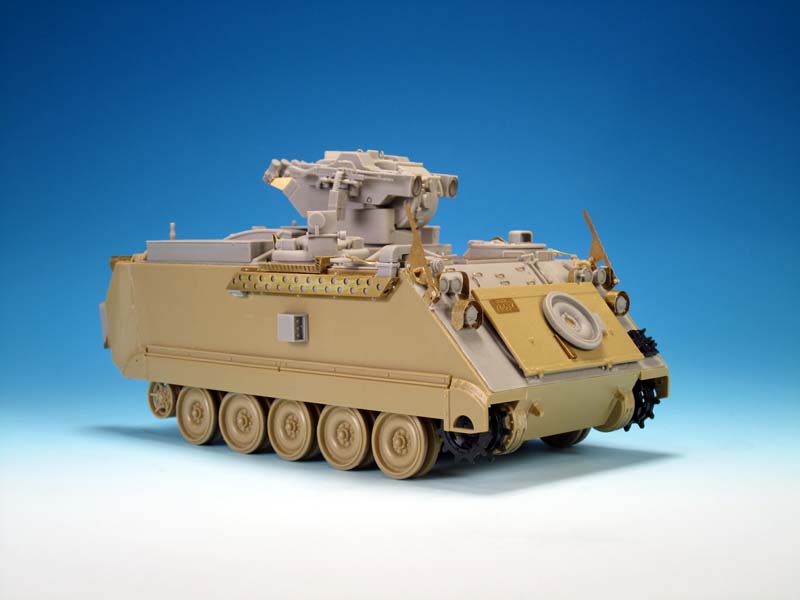
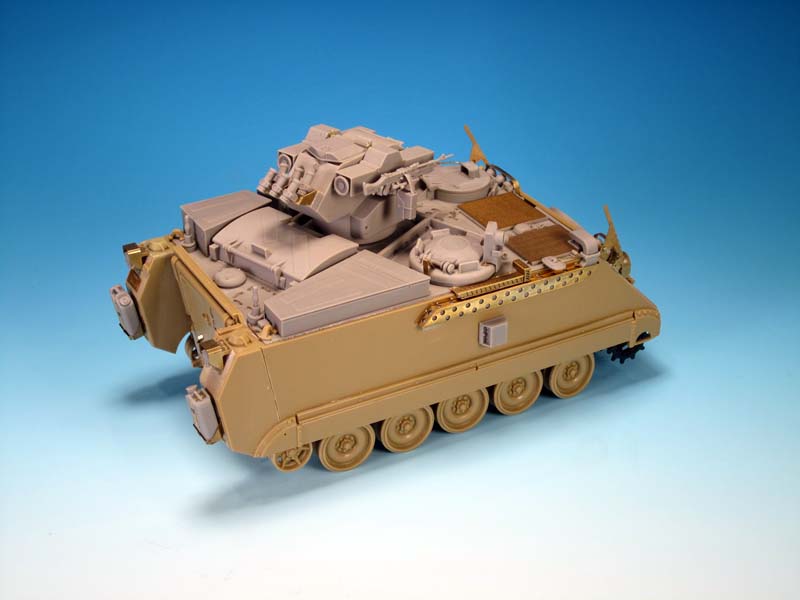
The Legend Productions M113A2 Tow Under Armour conversion is overall very impressive. The casting detail is top notch and the level of accuracy is very high. There are some details either lacking or inaccurate, as I have pointed out in this article, but this conversion is heads and shoulders above the old Verlinden offering. I am very impressed that Legend Productions took on the project. The TUA is a very unique vehicle with lots of potential for further detail and configurations. Ive included some additional images showing alternate arrangements for the grousers. This image shows the grousers moved to the right hull side with both TCCCS components fitted. The grousers sit literally on the upper rail of the side skirts, with only a small gap above and below. I have also added the circular communications component to the TCCCS. This is an old Maple Leaf Models part and not included in the conversion. Finally I have provided the bolt holes in the right side hull. As I mentioned before this was for attaching the hull length exhaust shroud. There is another configuration for the grousers on the right hull side. If the TCCCS components are not fitted, then the grouser racks could be positioned along the same line as the TCCCS box, with the forward edge of the deflection guard just slightly back from the angled edge of the glacis plate.summary of TUA modifications
1989-1991: No CCTAS mounted on the cupola, no external exhaust or crew heater shroud, no C6 GPMG mount, short or long antenna on the turret, antenna mount on right rear hull, no GPS antenna (may have a standard antenna mount in its place), may have a raised exhaust, pop on / pop off sight covers. NATO three colour camouflage. UNPROFOR 1992-1994: External exhaust and crew heater shrouds, no GPS antenna, no TCCCS components, CCTAS fitted on cupola, short antenna on the turret, no grouser racks fitted. White overall with C6 GPMG mount NATO green, missile launcher interior NATO green. IFOR 1995-1996: Same modifications as UNPROFOR TUAs, as they were simply repainted in overall NATO green. From IFOR onwards the use of the side skirts was limited. SFOR 1996-2003/2004: In addition to UNPROFOR/IFOR modifications, the grouser racks were added (left or right side), TCCCS components added to right hull side, GPS antenna added. NATO three colour camouflage or overall NATO green. During the SFOR mission wire cutters were added to the turrets. Either a single wire cutter, similar to the wire cutter on the LAV III TUA turret was added on the centre of the turret in front of the gunner's hatch, or dual vertical wire cutters were added on the outside of the turret lifting rings. KFOR 1999-2000: Same modifications as IFOR TUAs. Mostly overall NATO green. When the launchers were elevated or depressed, the white paint from UNPROFOR could be seen on the turret sides and trunnion. The TUAs did not receive external add-on armour as seen on the sides, front, or rear of other Canadian M113s. However, with the side skirts removed, appliqué armour is visible attached to the hull sponson above the 1st, 2nd, and 3rd road wheels. That being said, there were variations on the grouser racks, and even TUAs into the 2000s, before retirement, could be seen without grouser racks, in overall green, in NATO camouflage, and even with the extended exhaust, but without the perforated exhaust shroud. If you are looking to further detail your TUA, I suggest the following: 1. Base kit or aftermarket tow cable for the ramp. 2. Wiring for headlights, horn, and signal lights. 3. Wiring for the C6 GPMG solenoid. 4. There is also a visible cable that can be added on the underside of each launcher running to the turret base below the launchers (difficult to see). 5. Add the six bolts holes on the right hull side. 6. Add the grenade tube cap retaining chains. 7. Add four tie downs along the upper right hull side on the edge along the length of the stowage bin. 8. Add six tie downs along the upper left hull side on the edge along the length of the two left stowage bins. 9. Add the four spare track mounts on the left lower glacis plate. 10. Add an angled tubular guard to the side of the perforated crew heater shroud. 11. Add thin styrene support strips to the rear upper hull to eliminate the overhang of the lifting eyes. 12. Depending on version, add an antenna mount to the turret. Bear in mind this is a conversion and not a kit; you have to expect to put in extra work. I applaud Legend Productions for creating this unique M113 variant. A great combination of high quality resin and PE parts. Have fun with your Canadian M113A2 Tow Under Armour build using the Legend Productions conversion!
About the Author


Comments

As always Jason nice and precise work and assessment on this product and a good finished product.
NOV 29, 2014 - 08:00 PM
Excellent article, thank you for the detailed build information and great photos.
NOV 30, 2014 - 07:42 AM

A perfect example how the build article should look like. Thanks Jason for all the info provided and absolutely great photos.
Mario
NOV 30, 2014 - 01:21 PM


I just got mine and it's a great conversion. Wish they hadn't molded the TOW tubes sloped down though.
MAY 08, 2015 - 07:31 AM

Copyright ©2021 by Jason Bobrowich. Images and/or videos also by copyright holder unless otherwise noted. The views and opinions expressed herein are solely the views and opinions of the authors and/or contributors to this Web site and do not necessarily represent the views and/or opinions of Armorama, KitMaker Network, or Silver Star Enterrpises. All rights reserved. Originally published on: 2014-11-30 04:47:45. Unique Reads: 19130

WEB HOSTING BY


Copyright ©2021 Armorama and Kitmaker Network, a subsidiary of Silver Star Enterprises
All Rights Reserved. Please read our Conditions of Use and Privacy Policy.
All Rights Reserved. Please read our Conditions of Use and Privacy Policy.