

1⁄35M113 TUA Conversion Set
6
Comments

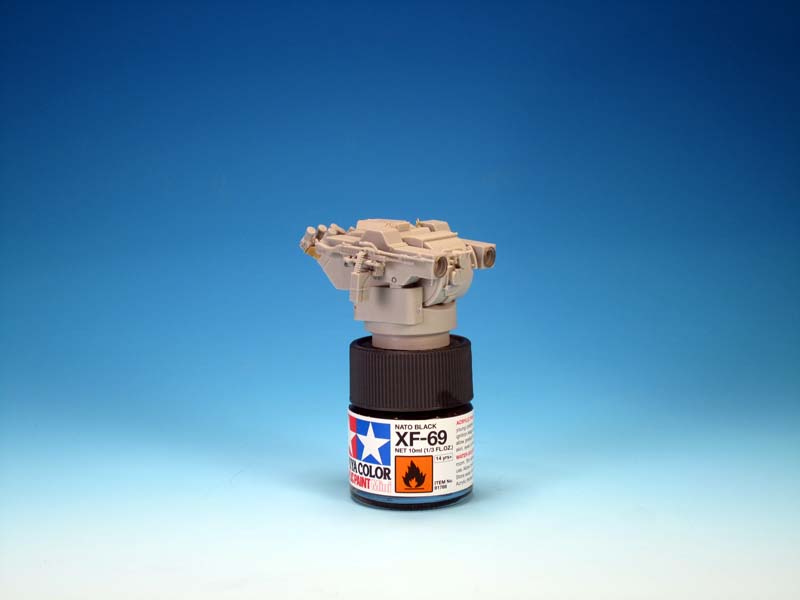
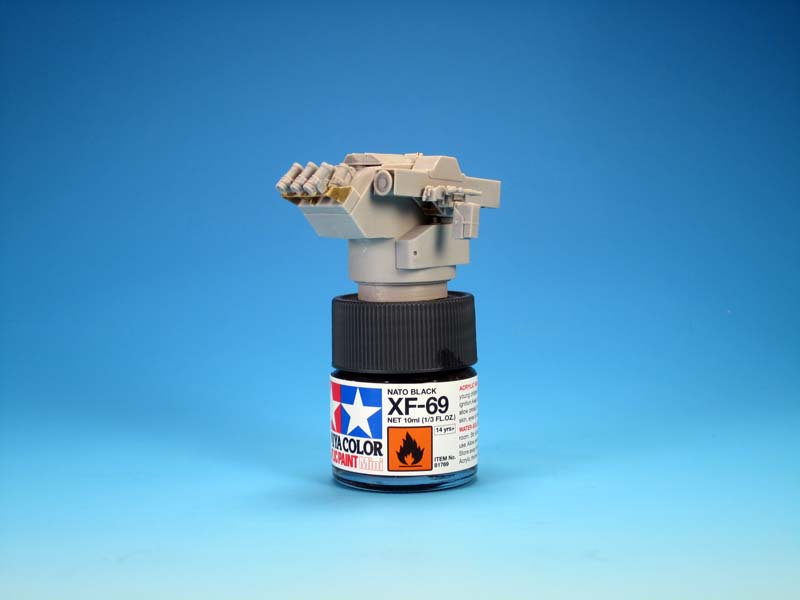
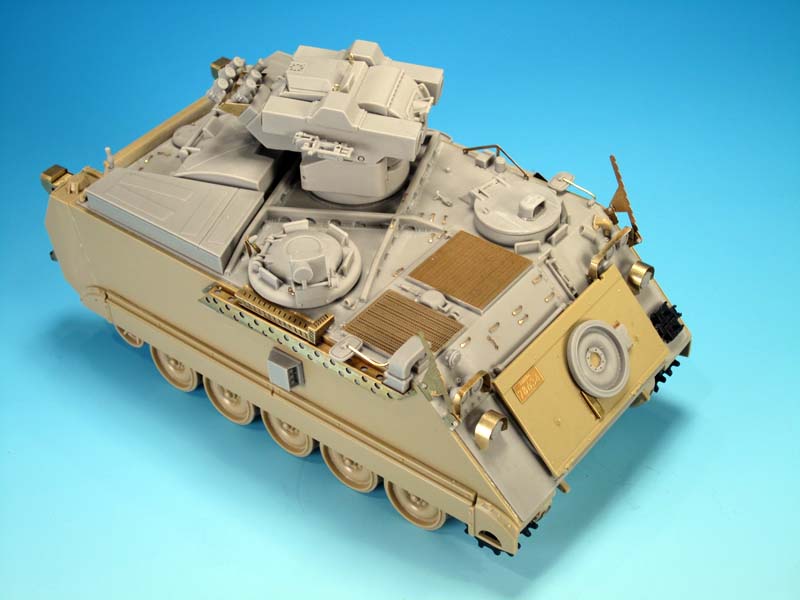
On the TUA there are two banks of six launch tubes. In a unique two-tiered mount they are angled outward to provide an arced dispersion. The mount is quite simple. The bottom launch tubes are attached to the rear base of the turret. There is a "table" with three support legs welded over the bottom row. On the top row another three launch tubes are attached. The bottom row all angle to the left and the top row all angle to the right. There are slight changes in the placement angle on the far left tube on the bottom row and the far right tube on the top row. The instructions show the placement of the tubes, but there are no placement indicators on the resin or PE parts. Keep in mind on the bottom row that there should be a bigger gap between the left tube and the centre tube. This is accurate and required for the centre support arm placement.
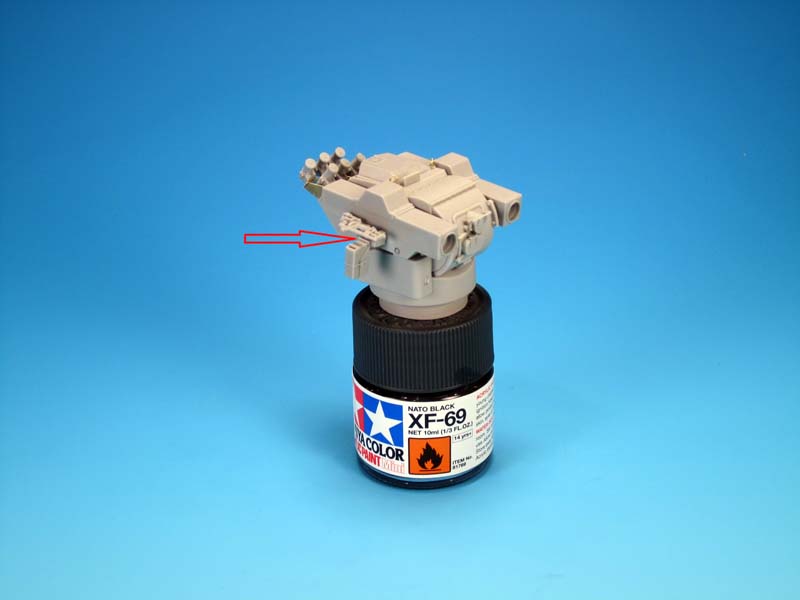
Once the bottom row are attached, the PE parts are added to build the support legs. At first it appears that double the required number of PE parts are provided, but you actually double up each PE part to create thicker support arms and the upper base plate. This is a unique approach to getting a realistic thickness on the parts. The three support arms are placed on the resin base. The outer left and right support arms should be right on the edge. The centre support arm is place in the larger gap between the left and centre launch tubes.
The top mount also doubles up on the PE parts. Attaching the upper row of tubes is simple enough using the instructions. Note that the front edge of the base of the tubes should be back from the edge of the base by about 1 mm. Missing from the launch tubes are the cap retaining chains. This is a prominent detail and could have easily been included by Legend. There is no external wiring visible on the launch tubes or the mounts.
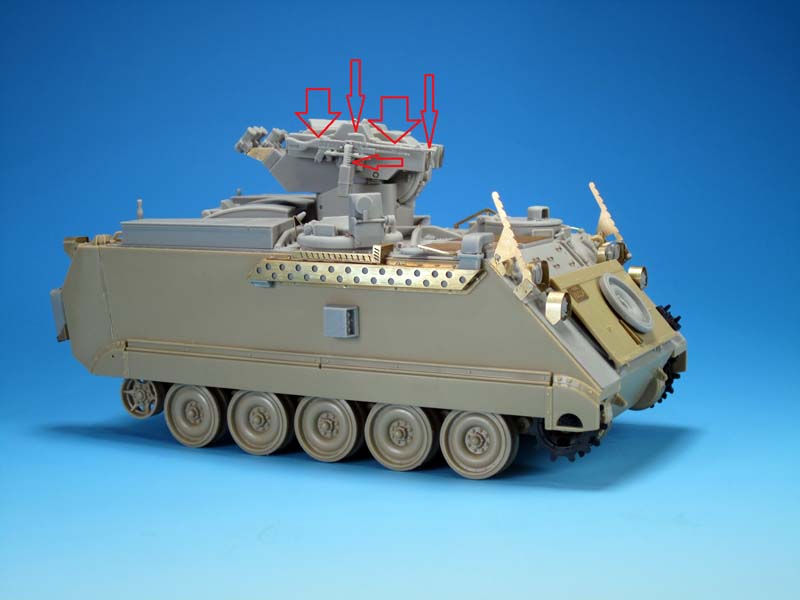
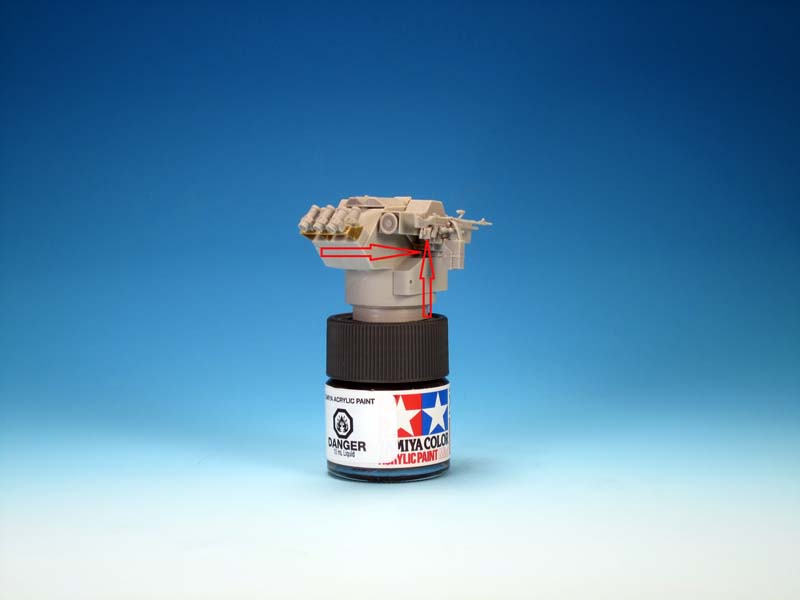
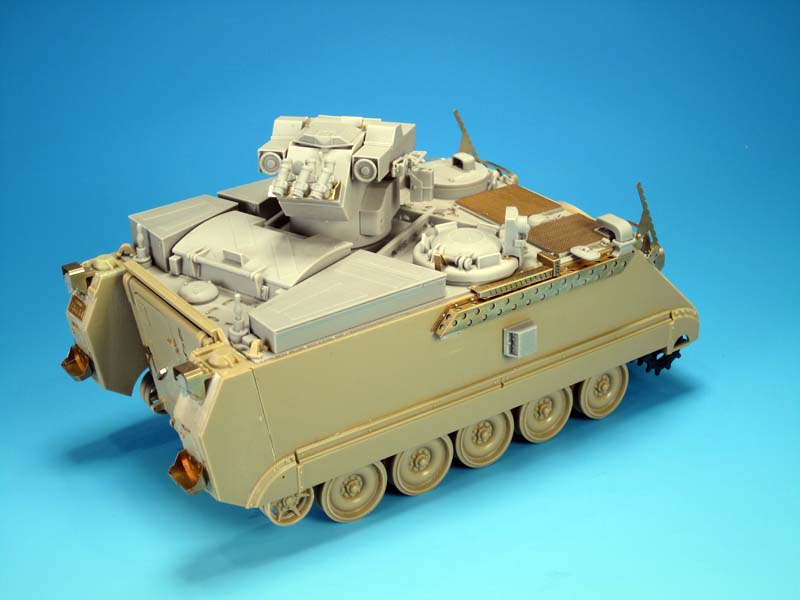
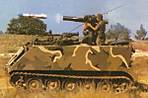
The final sub-assembly of the turret was the attachment of the C6 and associated mount to the right launcher. If you are building a TUA between 1989 and early 1992 do not add the C6 or the mount. The C6 was not added until the UNPROFOR mission in the Balkans. This was a result of the crews needing an intermediate level of protection above their personal weapons and below a TOW missile. The Rules of Engagement during UNPROFOR would not have permitted firing a TOW missile at a soldier with a rifle as a defensive measure.
The C6 mount consisted of three main components. The first was a metal U-shaped mount welded on to the launcher. The next was the machine gun mount. This was simply a Leopard coaxial machine gun mount adapted for attachment on the TUA. The third component was a vertically mounted ammunition box cradle. In the conversion the launcher mount and the co-ax mount are cast as one piece. Take the time to look at the instructions so you know what to remove and what to keep. The ammunition box is an easy clean-up.
The C6 GPMG is provided in four resin parts. The receiver with butt stock, the barrel and gas tube, the carrying handle, and the muzzle. These parts are fragile and a sharp blade and patience should be used to clean up parts and attach them to create a straight and aligned C6. The casting detail is good... but
and this is a big but... the C6 is inaccurate. 99% of the time this C6 would have worked for another project, but on the TUA the C6 is a right-hand feed as noted by the position of the ammunition box. Legend failed to modify the C6 in the conversion. Modifying the C6 would be a major cutting and rebuilding job.
The TUA C6 mount could be fired electrically via a solenoid or manually with a firing plunger at the rear of the mount. There is no mention of the electrical solenoid cable running from the rear bottom of the mount to the underside of the right side launcher. The manual firing plunger is visible, but in my opinion it should be a bit bigger and extend further from the rear of the mount. On the real TUA the main sight was aligned with the Missile Guidance System, and in turn the thermal sight was then adjusted to the main sight's point of aim. The C6 mount was then adjusted manually like it would be in a tank, with the main sight at a range of between 500 and 600 metres. The gunner could then use the same crosshairs for the main sight, the thermal sight, and the C6 GPMG.
A resin 7.62 mm ammunition belt is included to run from the ammunition box to the right side of the C6. The belt must be cut and bent to fit. I found the resin belt very fragile and a dip in hot water to bend it made it even more fragile. This image shows the mount attached to the right launcher. Note the centre of the mount lines up with the recessed bolt on the launcher. The mount is attached just slightly above the recessed bolt. When attaching the mount, ensure it follows the same angle as the launcher in the slightly depressed angle.
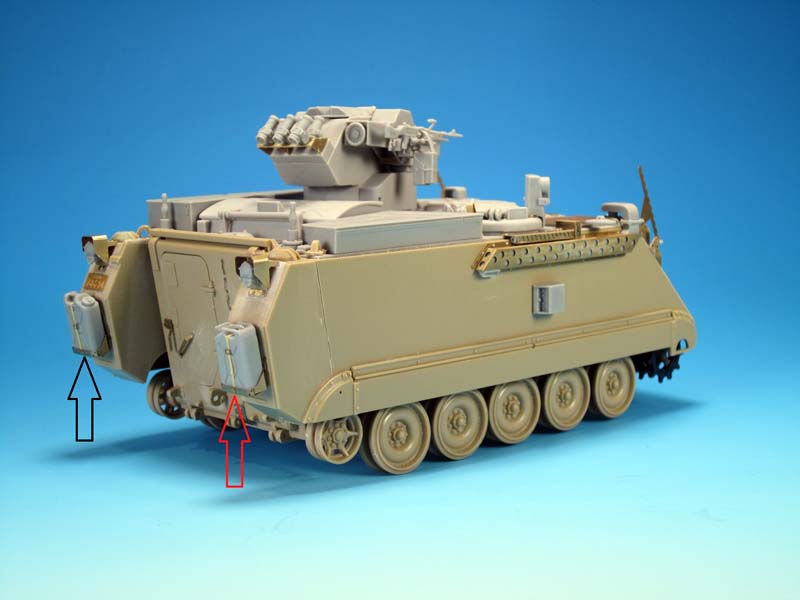
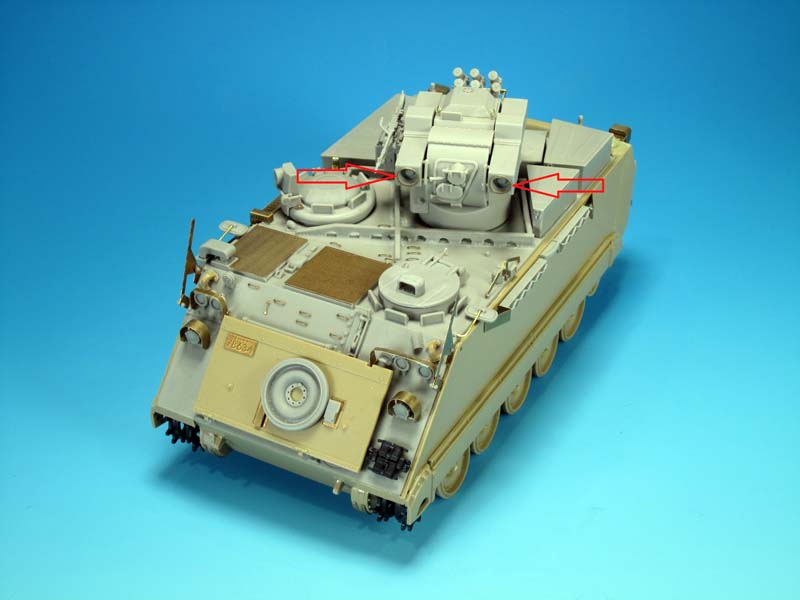
The missile launcher ends were fitted with very fine circular PE rings. The instructions don't point out these parts at all, and you won't find them on the build images on the Legend Productions site. They are none the less a nice detail that help to define the ends of the launchers. The final detail I added to the OOB build was the buckles and straps on the water can and the fuel jerry cans. The PE buckles are tiny so I used thinly cut strips of Tamiya tape to create the straps.

About the Author


Comments

As always Jason nice and precise work and assessment on this product and a good finished product.
NOV 29, 2014 - 08:00 PM
Excellent article, thank you for the detailed build information and great photos.
NOV 30, 2014 - 07:42 AM

A perfect example how the build article should look like. Thanks Jason for all the info provided and absolutely great photos.
Mario
NOV 30, 2014 - 01:21 PM


I just got mine and it's a great conversion. Wish they hadn't molded the TOW tubes sloped down though.
MAY 08, 2015 - 07:31 AM

Copyright ©2021 by Jason Bobrowich. Images and/or videos also by copyright holder unless otherwise noted. The views and opinions expressed herein are solely the views and opinions of the authors and/or contributors to this Web site and do not necessarily represent the views and/or opinions of Armorama, KitMaker Network, or Silver Star Enterrpises. All rights reserved. Originally published on: 2014-11-30 04:47:45. Unique Reads: 19130

WEB HOSTING BY


Copyright ©2021 Armorama and Kitmaker Network, a subsidiary of Silver Star Enterprises
All Rights Reserved. Please read our Conditions of Use and Privacy Policy.
All Rights Reserved. Please read our Conditions of Use and Privacy Policy.