

1⁄35M113 TUA Conversion Set
6
Comments
prepping and fitting to the hull
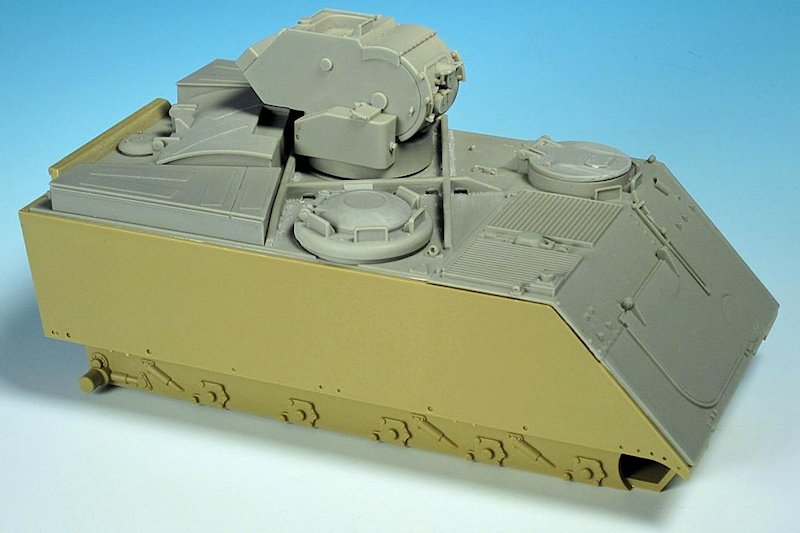
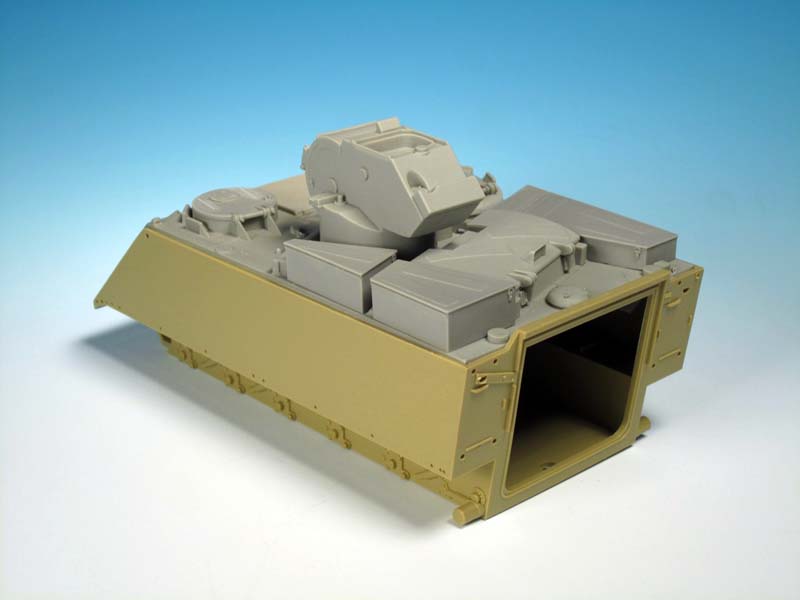
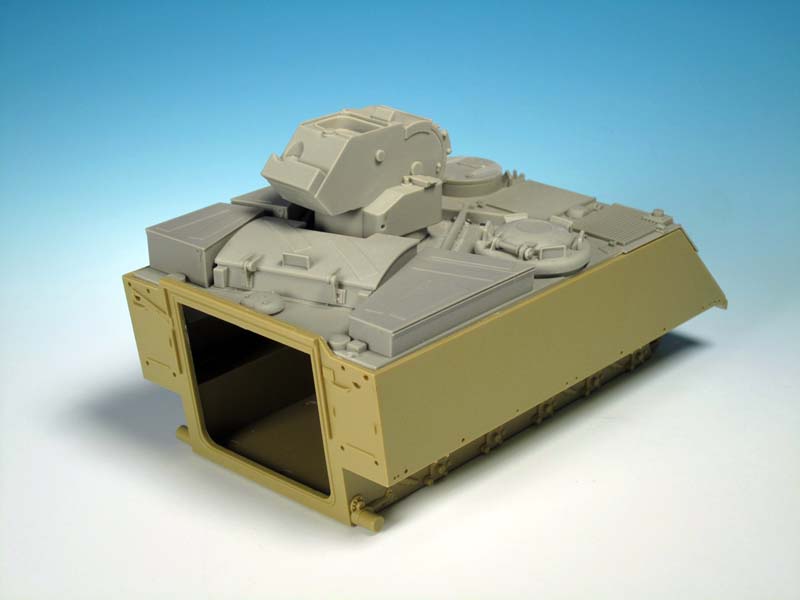
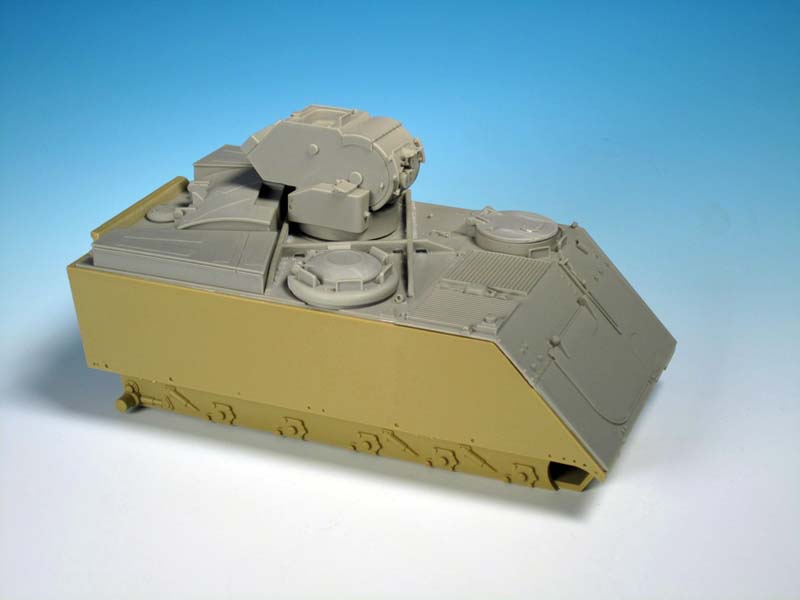
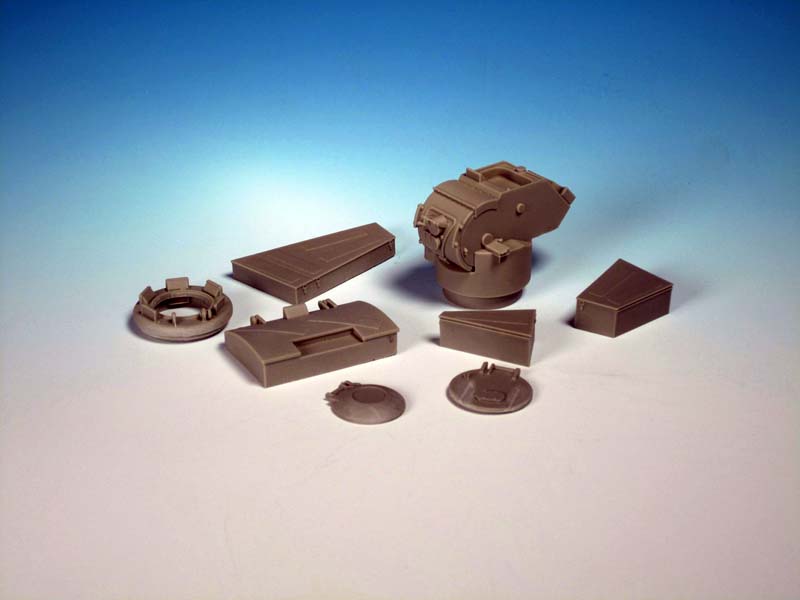
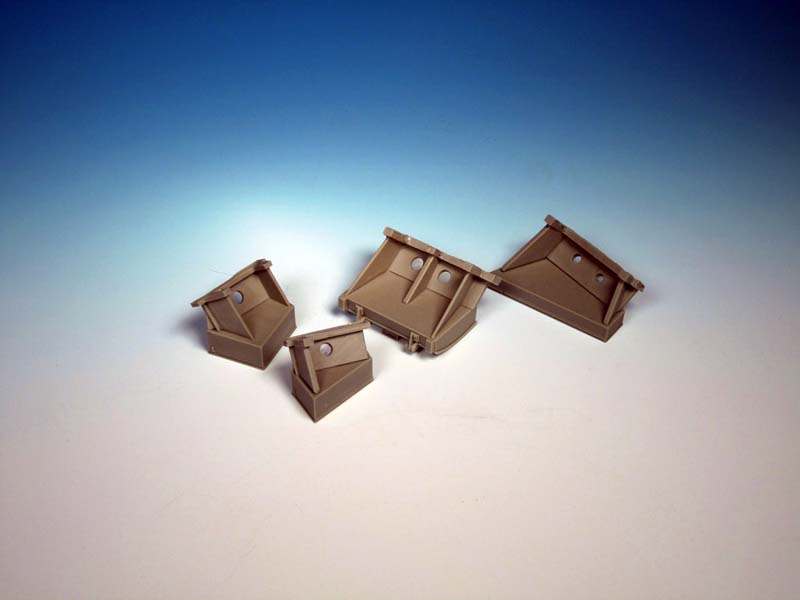
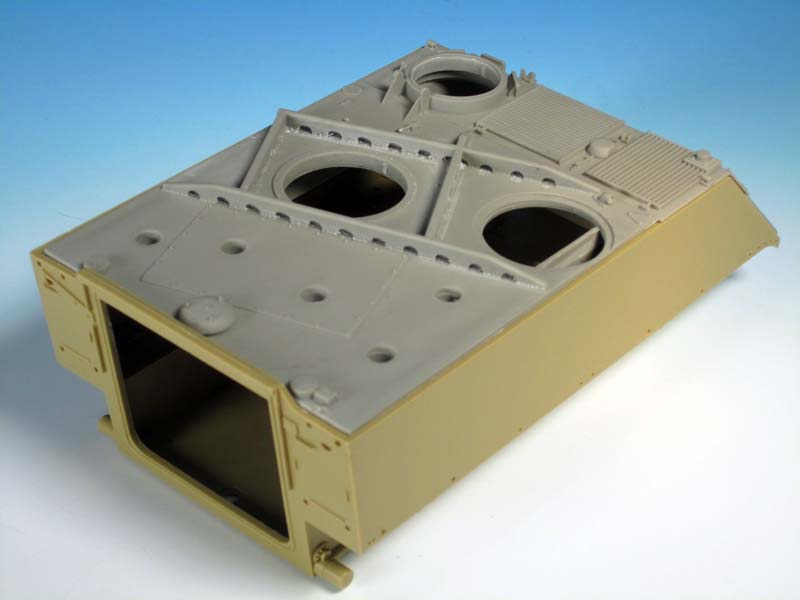
The donor kit used is the Academy M113A2. This is a great kit and will provide an excellent base for the conversion. The kit hull needs a bit of prep. This results in removing about 2 mm of the inside hull in order for the resin hull top to fit properly. The instructions indicate only removing plastic from the right interior but I removed it from both sides. With the hull ready I test fitted the resin upper hull and realized it did not fit properly. There was an unnatural overbite on the front of the hull. Examining the parts I realized a couple of things. The first was that Legend Productions did an excellent job on reinforcing the bottom of the resin part in order to prevent warping. The resin upper hull in my review sample is straight as a board. The excess resin on the bottom of the part interferes with the part fitting properly. In order to get the parts fitting properly I trimmed and sanded away the resin reinforcement ribs. The upper hull now was a close fit for the lower hull but not what I wanted. In looking at the lower and upper hull I saw that the lower hull has a small angle while the Legend Production part after my sanding did not. A bit more sanding created the reverse angle I was looking for and test fitting resulted in a very nice tight fit even without glue. The upper hull has a great deal of accuracy but needs a bit of tweaking. Running criss-cross on the upper hull are reinforcing ribs. On the real vehicle there are half-moon openings along all ribs. Legend Productions has reproduced the ribs and openings faithfully but the holes need to be opened up. With some careful drill and blade work all the holes were opened up in under an hour. The turret bins and main turret structure were cleaned up and test fitted. The holes on the hull top don't pertain to any alignment lugs on the bottom of the bins. You will need to refer to the instructions or seek out reference material for the exact placement of the bins. You can see from the first image the amount of resin pour plugs that need to be removed. A razor saw, clippers, hobby blade, and some sand paper were all that was required. Take your time and the cleanup is fairly easy. All in all the clean-up took me about an hour. I have not modified the three stowage bins for the review however on the real vehicle the outer and inner edges are slightly rounded. The end edges are flat. On the Legend Productions' bins there are strips of anti-slip. Depending on the TUA there were either strips of anti-slip or the entire top surface was covered with anti-slip. Test fittings of the three stowage bins, the missile loading hatch, the turret structure, the driver's hatch, the commander's cupola, and the commander's hatch were flawless. The parts mate very well with the resin upper hull. You will note that both the commander's cupola and the turret have slight risers and do not sit flush on the hull top...this is 100% correct.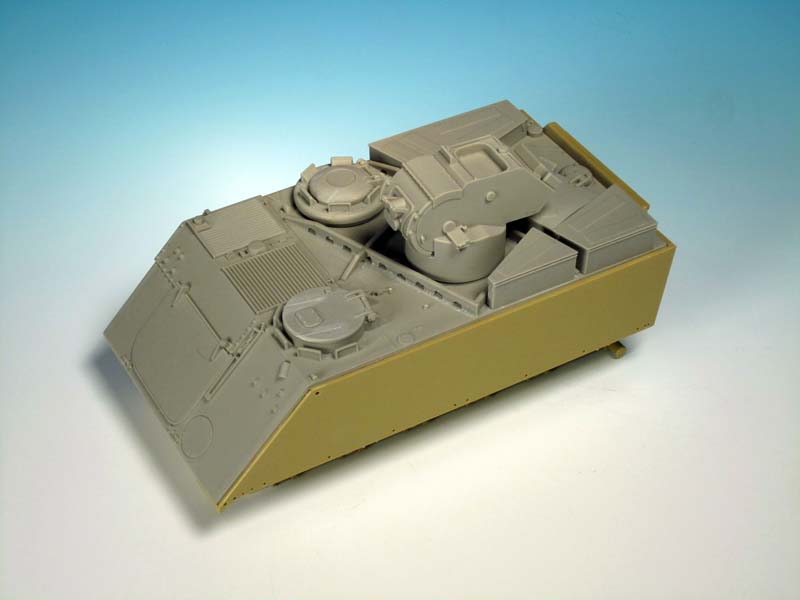

About the Author


Comments

As always Jason nice and precise work and assessment on this product and a good finished product.
NOV 29, 2014 - 08:00 PM

Excellent article, thank you for the detailed build information and great photos.
NOV 30, 2014 - 07:42 AM

A perfect example how the build article should look like. Thanks Jason for all the info provided and absolutely great photos.
Mario
NOV 30, 2014 - 01:21 PM


I just got mine and it's a great conversion. Wish they hadn't molded the TOW tubes sloped down though.
MAY 08, 2015 - 07:31 AM

Copyright ©2021 by Jason Bobrowich. Images and/or videos also by copyright holder unless otherwise noted. The views and opinions expressed herein are solely the views and opinions of the authors and/or contributors to this Web site and do not necessarily represent the views and/or opinions of Armorama, KitMaker Network, or Silver Star Enterrpises. All rights reserved. Originally published on: 2014-11-30 04:47:45. Unique Reads: 19130

WEB HOSTING BY


Copyright ©2021 Armorama and Kitmaker Network, a subsidiary of Silver Star Enterprises
All Rights Reserved. Please read our Conditions of Use and Privacy Policy.
All Rights Reserved. Please read our Conditions of Use and Privacy Policy.