1/35 Scale Rail Gun Dora in Progress
Rhode Island, United States
Joined: May 10, 2002
KitMaker: 3,581 posts
Armorama: 2,782 posts
Posted: Saturday, August 04, 2007 - 06:07 PM UTC
The spring is to force the toothed segment out to engage the toothed parts already installed on the trunnion section.
As for the n2 walkway,there must be room so that the ladder could fit between the upper screen and the center spacer box. I am centering mine.
Tom if you or anyone builds the gun loading,I hope they left the breechblock movable to be in the open position.

England - South West, United Kingdom
Joined: August 07, 2004
KitMaker: 6,391 posts
Armorama: 4,258 posts
Posted: Saturday, August 04, 2007 - 06:46 PM UTC
That loader is not going to push the round into the breech, as the piston is already fully extended...


The early bird may catch the worm, but the second mouse gets the cheese...
Wales, United Kingdom
Joined: April 04, 2007
KitMaker: 152 posts
Armorama: 137 posts
Posted: Saturday, August 04, 2007 - 07:19 PM UTC
TankCarl you had shots of all the germans looking up at it i have found the videos?! just scroll all the way to the bottom and your see videos there are two of the doras AND THERE HUGH
http://tanxheaven.com/referencepictures.htmthanks to someone for giving me that site
I am building:
1. Challenger 2 Enhanced Armor - Eduard PE upgraded slat armor - Complete
2.Tiger 1 with Pz III - Leningrad Dio
Queensland, Australia
Joined: October 03, 2006
KitMaker: 353 posts
Armorama: 134 posts
Posted: Saturday, August 04, 2007 - 07:43 PM UTC
Quoted Text
That loader is not going to push the round into the breech, as the piston is already fully extended...
The push rod is 2 stage.
Kobenhavn, Denmark
Joined: November 18, 2005
KitMaker: 8 posts
Armorama: 5 posts
Posted: Saturday, August 04, 2007 - 08:12 PM UTC
[
[/quote]
I have reviewed the instructions and the photos.
1. the Step 18 boxes are two pieces and that goes with photo 3 on page five.
2. The boxes are probably misshaped and should be of trapizoid instead of rectangular.
3. Step 20 box is one piece and corresponds to Photo 2 on page 5.
So i'm going to assemble as the instructions call for.
If you have additional information that could change my opinion please post it.
Regards,
Tom Moon[/quote]
Hi
Step 20 was a 2 piece part in real life, just as step 18.
/Clavs
England - South West, United Kingdom
Joined: August 07, 2004
KitMaker: 6,391 posts
Armorama: 4,258 posts
Posted: Sunday, August 05, 2007 - 04:31 AM UTC
Quoted Text
That loader is not going to push the round into the breech, as the piston is already fully extended...
The push rod is 2 stage.
Ahh, thanks Kym. That makes sense.
The early bird may catch the worm, but the second mouse gets the cheese...

#152
Texas, United States
Joined: December 07, 2002
KitMaker: 487 posts
Armorama: 441 posts
Posted: Sunday, August 05, 2007 - 02:59 PM UTC
Here are some additional Photos of this weekends work.
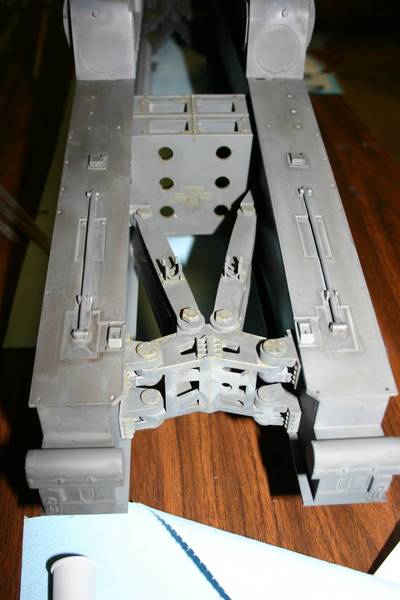
This photo is from the front end looking toward the rear. The spider leg crossmember is now complete with wash and dry brushing.
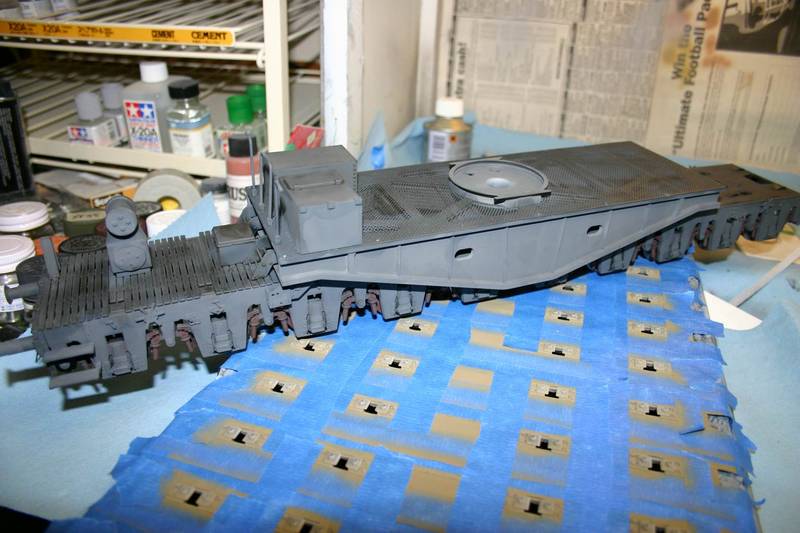
This a photo of the lead rail car without any side railings. I have finished the base coat of paint and now I'm waiting on some Archer Dry Transfers to simulate the German Railroad markings. I'm going to use some decals from a Karl Morser kit to subsitute for the roman numeral that matched the railcar to the support flange.
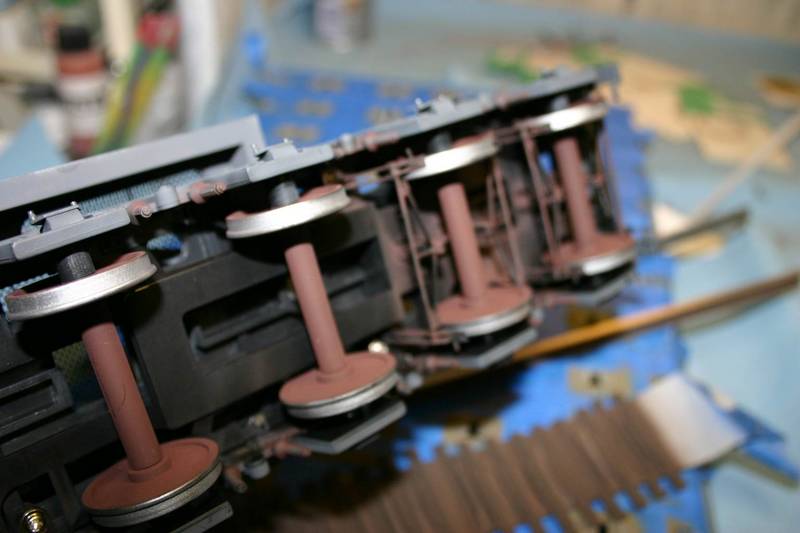
This photo is of the undercarraige of the rail car.
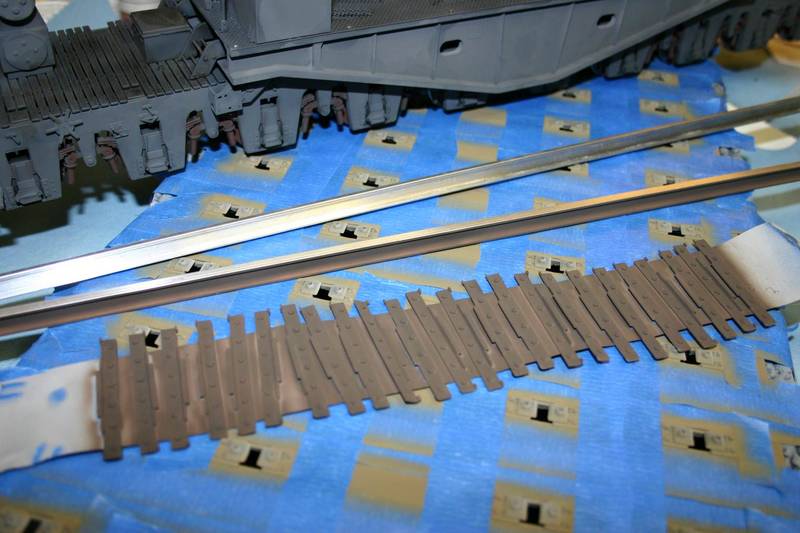
This is a photo of the track bed with masking for the ties. I painted the gravel a neutral grey somewhat lightly. This allowed the original black to show thru in the recesses. I will do a black wash after I finish painting the rail plates with a mixture I used of Tamiya paints to mimic the out of production Humbrol Track Color.

This photo shows the original rail (back piece) and the painted rail and rail joiners painted with the track color.
I hope to have this part completed by Tuesday or Wednesday. and I will post some new photos to invite your comments.
Tom Moon
Long time modeller. Starting when I was a teenager, then I found out about girls and college and work and kids. But now that I have one girl, no school, no work and the kids are grown, I'm back to full time modelling. My prime area of interest is armor, b
Manitoba, Canada
Joined: August 13, 2006
KitMaker: 1,021 posts
Armorama: 805 posts
Posted: Sunday, August 05, 2007 - 06:58 PM UTC
Wowza. Keep it up. Really amazing seeing such a mammoth creature come together.
It seemed she viewed guys on the same level as potatoes.
-Kyon
North Carolina, United States
Joined: February 22, 2002
KitMaker: 11,718 posts
Armorama: 7,138 posts
Posted: Sunday, August 05, 2007 - 10:21 PM UTC
Nice painting job so far.
So, the way the spider legs look like they work does this thing 'articulate' (in real life)? Do the left and right sides shift as it goes around a turn? That would add a whole new level of enginering to the whole gun.
Rhode Island, United States
Joined: May 10, 2002
KitMaker: 3,581 posts
Armorama: 2,782 posts
Posted: Monday, August 06, 2007 - 04:59 AM UTC
Scott,
Right,as the gun was on 2 curving sets of rails,the inner radius would be a shorter distance.
Tom,I am going to post pictures of how I will paint my roadbed/ties.I made a simple cardboard cut out to mask around 1 tie at a time.FOr me using low pressure for the tie color in my AB makes it easier to move a single position mask.I plan on a darker than neutral grey for the ballast color,than a neutral grey for a drybrush.

Hamilton, New Zealand
Joined: April 26, 2007
KitMaker: 24 posts
Armorama: 16 posts
Posted: Thursday, August 09, 2007 - 07:15 PM UTC
Quoted Text
TankCarl you had shots of all the germans looking up at it i have found the videos?! just scroll all the way to the bottom and your see videos there are two of the doras AND THERE HUGH
http://tanxheaven.com/referencepictures.htm
thanks to someone for giving me that site
Just watched the two videos....interesting to note that the powder bags are separate and not a single piece as provided in the kit. Won't be too hard to modify it to be separate pieces...
Georgia, United States
Joined: May 24, 2006
KitMaker: 2,106 posts
Armorama: 1,116 posts
Posted: Thursday, August 09, 2007 - 11:56 PM UTC
I found a possible source for decals for the Dora. I havent yet receievd a response from him of what all you get, but I will post the news as soon as I hear back from him.
http://www.DisplayStandsDirect.com/
Queensland, Australia
Joined: October 03, 2006
KitMaker: 353 posts
Armorama: 134 posts
Posted: Friday, August 10, 2007 - 01:23 AM UTC
Quoted Text
I found a possible source for decals for the Dora. I havent yet receievd a response from him of what all you get, but I will post the news as soon as I hear back from him.
Now that is great news! I hope it pans out.
Rhode Island, United States
Joined: May 10, 2002
KitMaker: 3,581 posts
Armorama: 2,782 posts
Posted: Friday, August 10, 2007 - 04:53 AM UTC
Good news about possible decals.I will hope they are avaialable and easy to ship...

Rhode Island, United States
Joined: May 10, 2002
KitMaker: 3,581 posts
Armorama: 2,782 posts
Posted: Saturday, August 11, 2007 - 05:48 PM UTC
Big bits

Almost time to do some subassembly painitng


#152
Texas, United States
Joined: December 07, 2002
KitMaker: 487 posts
Armorama: 441 posts
Posted: Sunday, August 12, 2007 - 08:01 AM UTC
Here are the latest photos. I'm on the last leg now!
The track bed is completely painted, washed, drybrushed, and dullcoted.
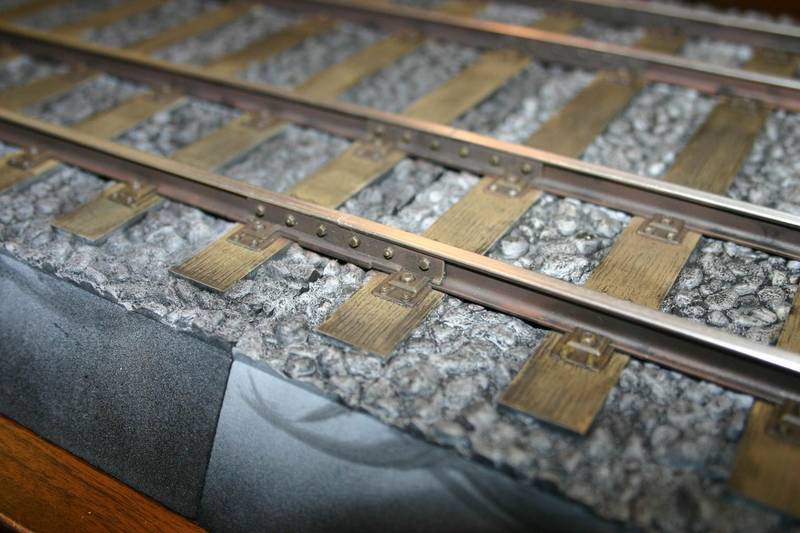
The rest of the photos are of the dry fit assembly of all the modules except for the barrel. I'm close to trapping the barrel between the two mainframes and would like to hear from anyone who has done this step and would like to learn from their experiences.
Most of this is dry fit except for the rail cars.
Close up of rail car
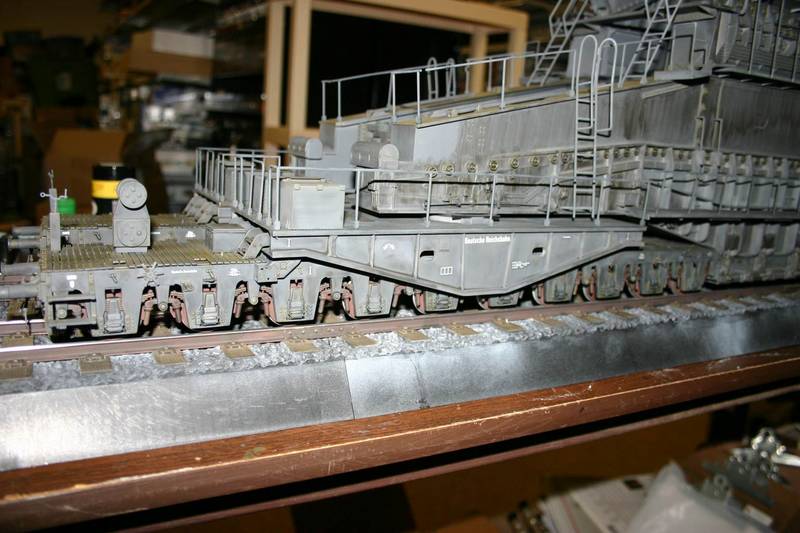
Right side front view
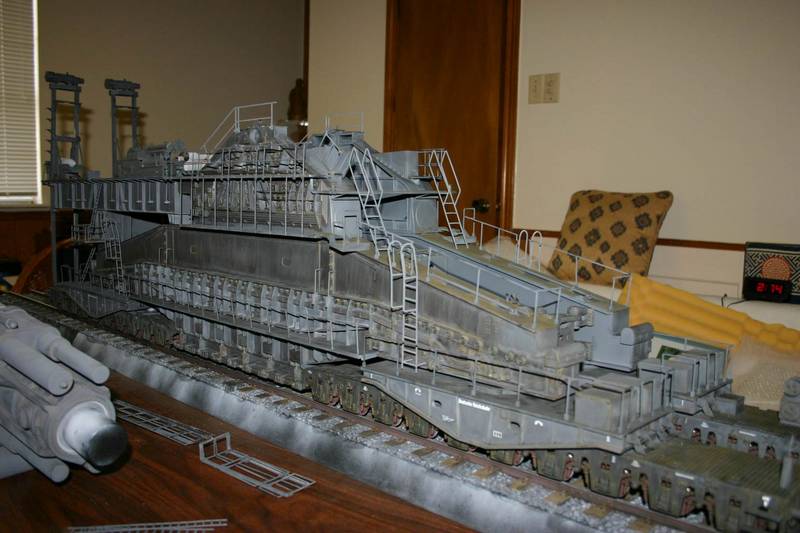
Rear view - remember that this is dry fit and adjustments are still to be made.
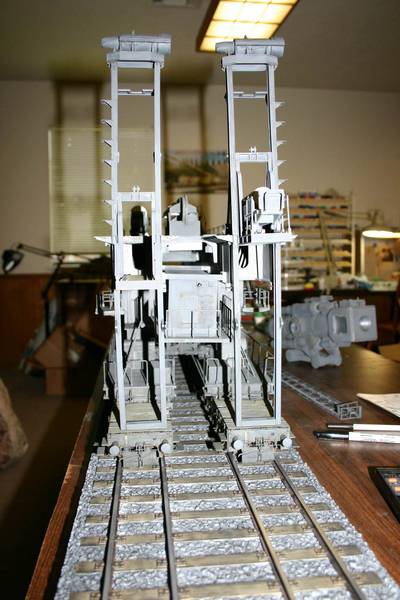
Left Front view
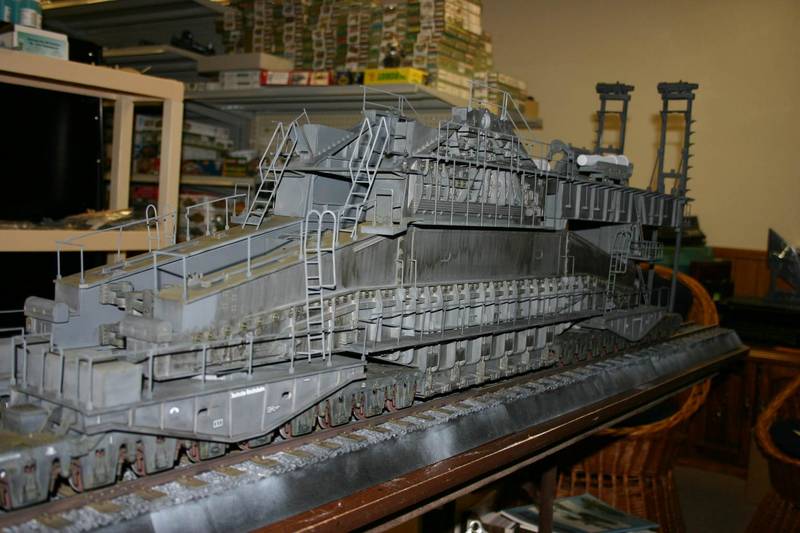
Left rear view
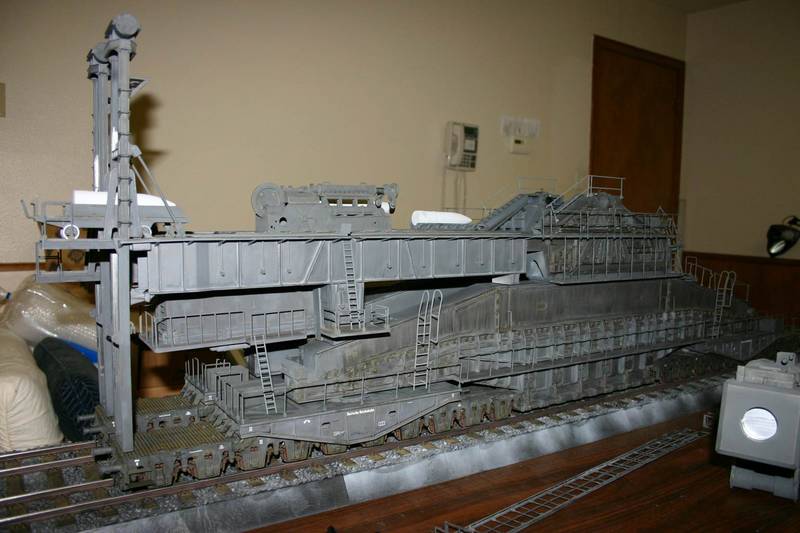
Will have more photos, probably a complete model by Sunday next week.
Tom Moon
Long time modeller. Starting when I was a teenager, then I found out about girls and college and work and kids. But now that I have one girl, no school, no work and the kids are grown, I'm back to full time modelling. My prime area of interest is armor, b
Rhode Island, United States
Joined: May 10, 2002
KitMaker: 3,581 posts
Armorama: 2,782 posts
Posted: Sunday, August 12, 2007 - 09:51 AM UTC
Looks good Tom.What did you do for weathering on the main sides? Simulating rain streaked dust?
Also,are you staying with the 2 pipe tread for stairs on the bridge units ( P-16,P-15) on the rail cars? Looking at the wartime pictures,those cast a solid shadow.I am intending on making a simple solid tread to place on top.


#152
Texas, United States
Joined: December 07, 2002
KitMaker: 487 posts
Armorama: 441 posts
Posted: Sunday, August 12, 2007 - 10:09 AM UTC
Quoted Text
Looks good Tom.What did you do for weathering on the main sides? Simulating rain streaked dust?
Also,are you staying with the 2 pipe tread for stairs on the bridge units ( P-16,P-15) on the rail cars? Looking at the wartime pictures,those cast a solid shadow.I am intending on making a simple solid tread to place on top. 
This build is for a Out of the Box contest so I'm not making any modifications.
The streaks are just a black wash (a little thick) and using down strokes of the brush to simulate the rain/dust streaks.
I'm working on a 4 rope pully layout for the ammo hoists. The mock up looks good. Will send photos during the week.
Tom
Long time modeller. Starting when I was a teenager, then I found out about girls and college and work and kids. But now that I have one girl, no school, no work and the kids are grown, I'm back to full time modelling. My prime area of interest is armor, b
Kuala Lumpur, Malaysia
Joined: December 08, 2004
KitMaker: 145 posts
Armorama: 63 posts
Posted: Sunday, August 12, 2007 - 01:37 PM UTC
Tom,
I'm not sure if this of much help, but i did try 'tapping' the barrel between the 2 halves. When you 'attempt' to 'trap' the barrel,
Here's what i did. Go as the instructions by positioning the barrel between the halves then inserting the huge pin. You'll find that the spring will want to push the two halves apart and 'spring' the barrel loose. So what i did was to hold the who halves together with the barrel in place and at the same time place the back superstructure. The weight and the four locating positions on the back superstructure and the two halves will hold the barrel in place. Even without the screws, they lock in pretty well.
Jeremy

#152
Texas, United States
Joined: December 07, 2002
KitMaker: 487 posts
Armorama: 441 posts
Posted: Monday, August 13, 2007 - 03:17 PM UTC
Here are some photos of the Ammo Hoists.
I have added rigging to simulate an 8 wire hoist.
These were rough painted tonight. Will do more detail work tommorrow.
Right side hoist with platform level with the loading area.
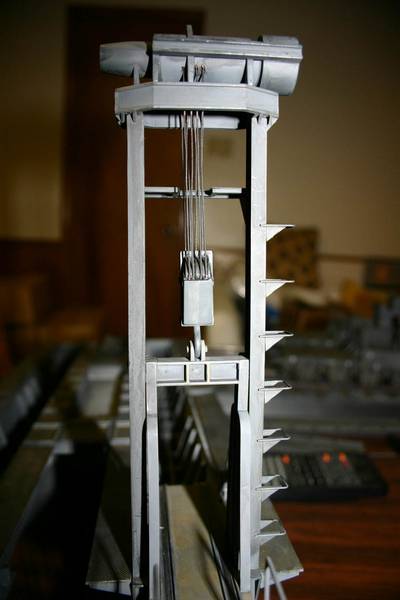
Close up of Travel Block

Left side hoist.
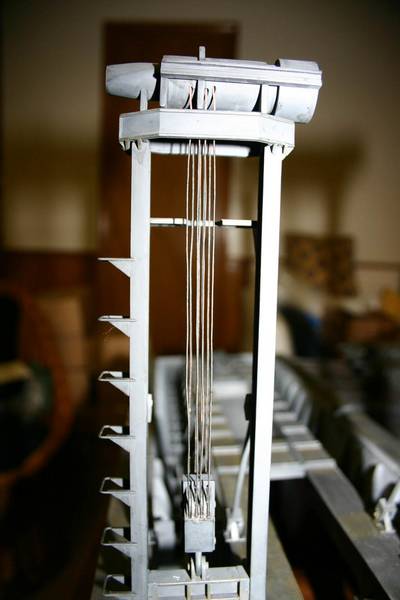
Happy Modelling
Tom Moon
Long time modeller. Starting when I was a teenager, then I found out about girls and college and work and kids. But now that I have one girl, no school, no work and the kids are grown, I'm back to full time modelling. My prime area of interest is armor, b
Rhode Island, United States
Joined: May 10, 2002
KitMaker: 3,581 posts
Armorama: 2,782 posts
Posted: Monday, August 13, 2007 - 03:31 PM UTC
Good work on the rigging.I take it the fixed end of the wire would be up in the lift motor,rather than on top of the hook?

Indiana, United States
Joined: August 07, 2007
KitMaker: 4 posts
Armorama: 3 posts
Posted: Monday, August 13, 2007 - 05:14 PM UTC
hey tom how much is that kit
that kit looks soo kool
Cote-d`Or, France
Joined: September 04, 2006
KitMaker: 2 posts
Armorama: 1 posts
Posted: Monday, August 13, 2007 - 10:29 PM UTC
Hello Tom,
I follow your work with a great interest. Very nice weathering too.
Just for information, the ladders of the ammo hoists should be monted looking at each other not in opposition ( at the exterior of the gun).
Look at the last pic at the bottom left of this web page
http://html2.free.fr/canons/doramt.htmZimbabwe
Joined: July 03, 2007
KitMaker: 3,529 posts
Armorama: 588 posts
Posted: Tuesday, August 14, 2007 - 01:20 AM UTC
Everytime I check out the progress I am amazed at the shear size of that monster. It looks great up to this point.


#152
Texas, United States
Joined: December 07, 2002
KitMaker: 487 posts
Armorama: 441 posts
Posted: Tuesday, August 14, 2007 - 02:13 PM UTC
Quoted Text
Hello Tom,
I follow your work with a great interest. Very nice weathering too.
Just for information, the ladders of the ammo hoists should be monted looking at each other not in opposition ( at the exterior of the gun).
Look at the last pic at the bottom left of this web page
http://html2.free.fr/canons/doramt.htm
Oh Pooh! Silly me! I mounted them according to the instructions. Even though their photo on the front of the instructions have them according to your reference photos. Thanks for the info, but you were 24 hours too late. I had already glued them down.
Well, this just goes to show that you need your reference photos along with the kit instructions.
Tom
Long time modeller. Starting when I was a teenager, then I found out about girls and college and work and kids. But now that I have one girl, no school, no work and the kids are grown, I'm back to full time modelling. My prime area of interest is armor, b


