1/35 Scale Rail Gun Dora in Progress
Rhode Island, United States
Joined: May 10, 2002
KitMaker: 3,581 posts
Armorama: 2,782 posts
Posted: Wednesday, August 15, 2007 - 04:49 AM UTC
I haven't used a maginifyer on the pictures,but it looks like only a 4 part line to the block lifting the hoists.
Great picture site,too,thanks Fred C

Scotland, United Kingdom
Joined: May 25, 2005
KitMaker: 2,218 posts
Armorama: 1,050 posts
Posted: Wednesday, August 15, 2007 - 12:16 PM UTC
Quoted Text
Everytime I check out the progress I am amazed at the shear size of that monster. It looks great up to this point.

It is pretty incredible isn't it! SWMBO would divorce me if I turned up with that!
Attica, Greece / Ελλάδα
Joined: November 19, 2006
KitMaker: 58 posts
Armorama: 54 posts
Posted: Thursday, August 16, 2007 - 12:19 AM UTC
Ok, she is HUGE!!!!!!!!!!!!

#152
Texas, United States
Joined: December 07, 2002
KitMaker: 487 posts
Armorama: 441 posts
Posted: Saturday, August 18, 2007 - 01:22 AM UTC
I've been out of town for a few days and will work to complete the Dora by Tuesday.
Now down to the last bits of painting and assembly.
See you in a few days.
Tom Moon
Long time modeller. Starting when I was a teenager, then I found out about girls and college and work and kids. But now that I have one girl, no school, no work and the kids are grown, I'm back to full time modelling. My prime area of interest is armor, b
Ohio, United States
Joined: June 04, 2005
KitMaker: 627 posts
Armorama: 455 posts
Posted: Saturday, August 18, 2007 - 10:32 AM UTC
Sure is looking good!!!
Gary


#152
Texas, United States
Joined: December 07, 2002
KitMaker: 487 posts
Armorama: 441 posts
Posted: Sunday, August 19, 2007 - 03:18 PM UTC
As most of the people here in the States have already guessed that I was building this railgun for the IPMS Nationals in California. Well I was preparing to airfreight this model and I had been taking measurements and comparing them to the box I was going to use. Well I forgot to include the loading platform extension in my measurements and the box is 11 inches too short. I can't get a new box for a resonable cost and time (Must ship by Tuesday). So I'm kind of unhappy right now.
So I completed the model with all the handrails and have started some photos that give better field of depth using time exposures.
Over the next few days I'll include close ups and overall views.
As always any constructive comments welcome.
Photo of the Breech Block area
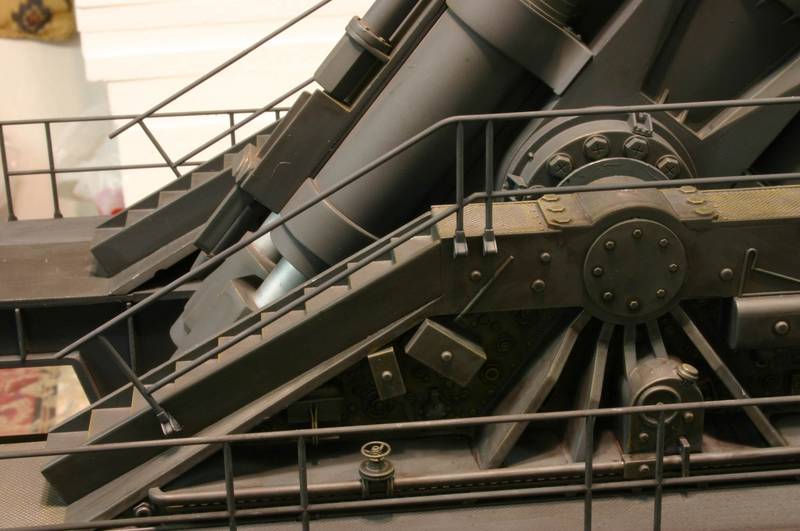
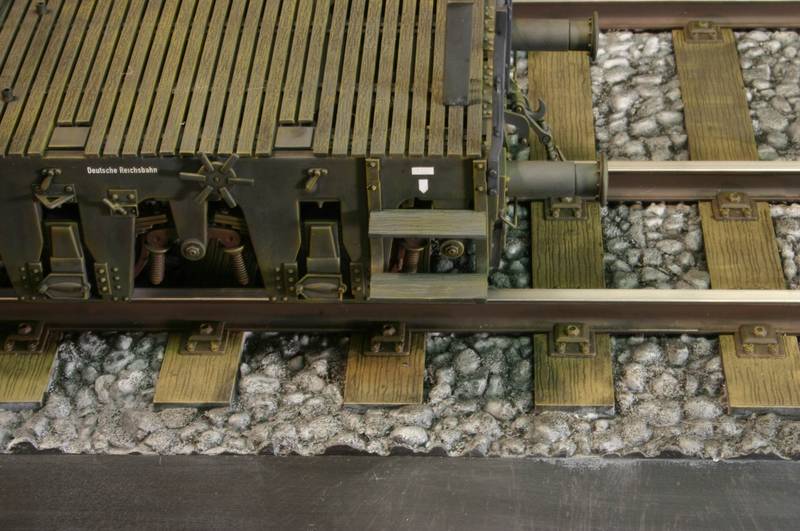
Photo of Railcar and track bed
View of travel block with 8 wire ropes added.

View of rear rail cars with loading platforms installed.
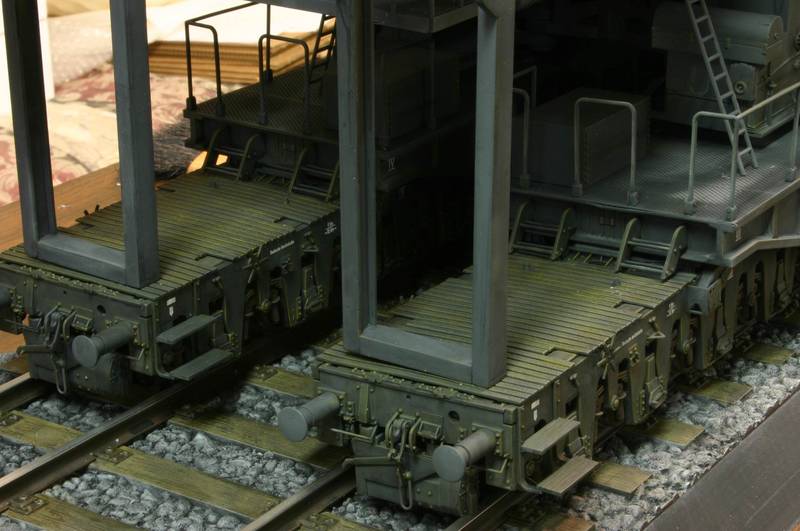
Wider view of the Front rail cars
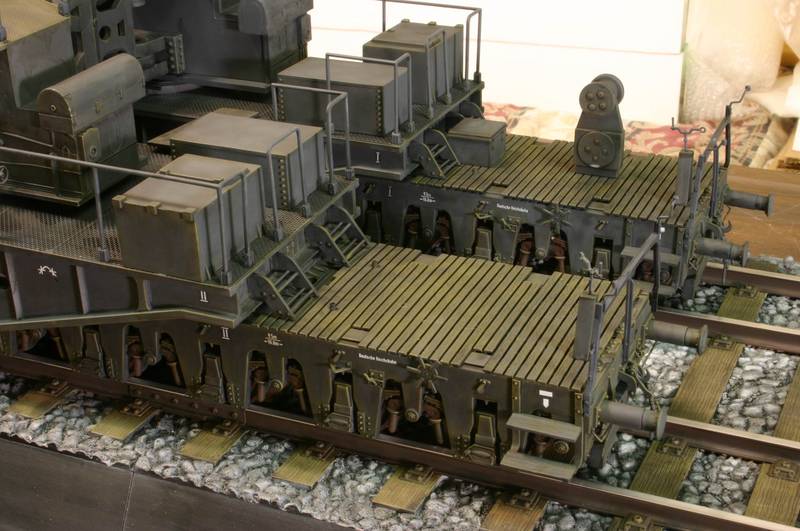
Overall View from Front Right
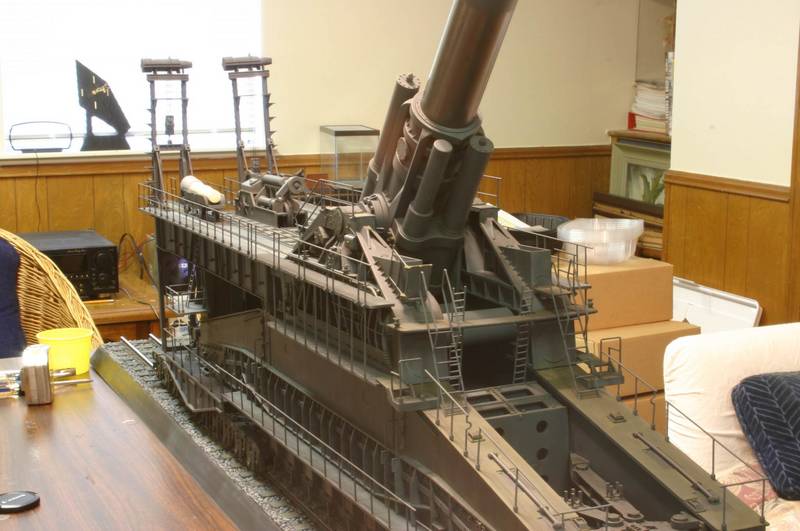
I'm going to the Nationals anyway.
Tom Moon
Houston, Texas
Long time modeller. Starting when I was a teenager, then I found out about girls and college and work and kids. But now that I have one girl, no school, no work and the kids are grown, I'm back to full time modelling. My prime area of interest is armor, b
Rhode Island, United States
Joined: May 10, 2002
KitMaker: 3,581 posts
Armorama: 2,782 posts
Posted: Monday, August 20, 2007 - 01:57 AM UTC
Well done,Tom.I did notice the bottoms of the shell/powder bag hoist assemblies weren't flush on the rail car decks.Was everything glued/screwed together,or just palced in location? I am planning on doing a worn paint over wood coloring on my rail car decks.


#152
Texas, United States
Joined: December 07, 2002
KitMaker: 487 posts
Armorama: 441 posts
Posted: Monday, August 20, 2007 - 04:11 AM UTC
Quoted Text
Well done,Tom.I did notice the bottoms of the shell/powder bag hoist assemblies weren't flush on the rail car decks.Was everything glued/screwed together,or just palced in location? I am planning on doing a worn paint over wood coloring on my rail car decks. 
Everything is screwed and glued together. With a little more sanding and cutting the Hoist assembly would probably fit down onto the rail car. The tight spot is the hook that fits into the tie down assembly on the floor of the loading platfom. It did not want to set down completely. I did not want to force it.
Plan on spending some time making sure that the hoist assemblies are vertical. Again I believe that it has something to do with the above mentioned hook.
About the worn wood area. Just remember that this gun was used once and the rest of the time was just moving from one location to another or sitting. If I were going that way I would go towards the light wear end, but plenty of fading due to just sitting around.
Tom
Long time modeller. Starting when I was a teenager, then I found out about girls and college and work and kids. But now that I have one girl, no school, no work and the kids are grown, I'm back to full time modelling. My prime area of interest is armor, b
Rhode Island, United States
Joined: May 10, 2002
KitMaker: 3,581 posts
Armorama: 2,782 posts
Posted: Monday, August 20, 2007 - 04:58 AM UTC
And it gets better.
On Missing Link,there is a discussion that there were 5 axle railtrucks paired to make the long units we built.That would explain the bearing plates on each bogie,and a separate bearing plate on the center bridge looking section.
Rhode Island, United States
Joined: May 10, 2002
KitMaker: 3,581 posts
Armorama: 2,782 posts
Posted: Monday, August 20, 2007 - 01:17 PM UTC
More progress.Actually some pre painting is in order,the ladder and platform are loose,so i can paint them off the kit,and avoid missing spots.

I am almost there,page 29


#152
Texas, United States
Joined: December 07, 2002
KitMaker: 487 posts
Armorama: 441 posts
Posted: Monday, August 20, 2007 - 02:18 PM UTC
Looking Good!
Keep the progress and Photos going.
Tom Moon
Long time modeller. Starting when I was a teenager, then I found out about girls and college and work and kids. But now that I have one girl, no school, no work and the kids are grown, I'm back to full time modelling. My prime area of interest is armor, b
Manitoba, Canada
Joined: August 13, 2006
KitMaker: 1,021 posts
Armorama: 805 posts
Posted: Monday, August 20, 2007 - 03:16 PM UTC
Well if you do ever send your models by airmail please, please ,please, go overboard when packaging them. Packages can get tossed around pretty good. And people don't always pay attention to those fragile tags. I know this cause I load and un-load planes for a living. Yes I am a "ramp rat". So take care of those models and use lots of foam and bubble wrap.
It seemed she viewed guys on the same level as potatoes.
-Kyon
Rhode Island, United States
Joined: May 10, 2002
KitMaker: 3,581 posts
Armorama: 2,782 posts
Posted: Tuesday, August 21, 2007 - 01:57 AM UTC
I am driving to the show in Danbury,and posssibly Granitecon.

England - South East, United Kingdom
Joined: August 21, 2007
KitMaker: 2 posts
Armorama: 1 posts
Posted: Tuesday, August 21, 2007 - 09:25 AM UTC
Hi Guys
That model is amazing. I made a trip to my local model shop last week and as I walked in the door I was confronted with the biggest box I have seen with Dora printed on the side. I had to buy it as I couldn't stand to leave it there!
I was wondering if anyone (Tom in particular) would mind giving away some trade secrets regarding weathering. In the early photos it is one grey colour then later on it magically turns into a work of art. What do you use to achieve this finish? Do you use pastels, Pigments, Oil paints?
I have built mainly aircraft kits in the past so understand the basics of washes and airbrush shading but most planes don't get in the same sort of condition as armoured vehicles do.
I would like to build the Dora now, but I am afraid of spoiling it by not doing a very good job when painting it.
Thanks for your help.
Craig.
Rhode Island, United States
Joined: May 10, 2002
KitMaker: 3,581 posts
Armorama: 2,782 posts
Posted: Tuesday, August 21, 2007 - 11:31 AM UTC
Since you have done shading and drybrushing,this is just a larger area to work on. This was pulled around to sites on rails.imagine dust coming up form the rails.think of where the assembly crew and gun crew would walk and wear .


#152
Texas, United States
Joined: December 07, 2002
KitMaker: 487 posts
Armorama: 441 posts
Posted: Tuesday, August 21, 2007 - 12:57 PM UTC
Here are some photos of various areas.
Shell Loading area
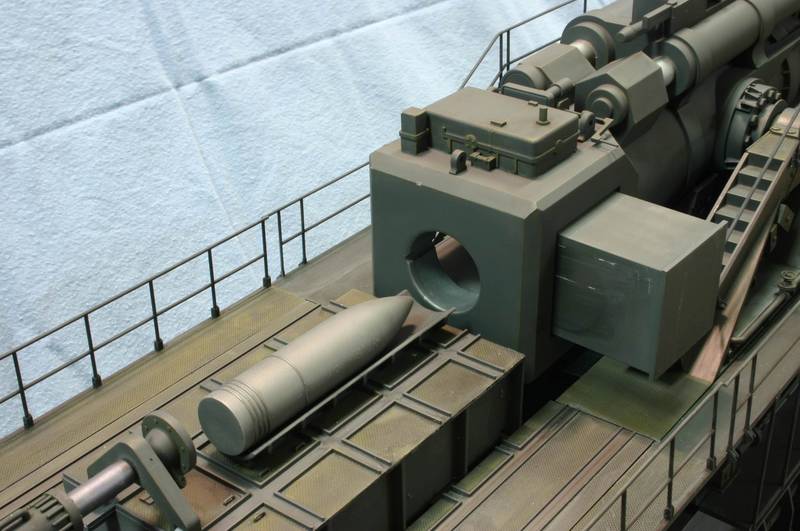
Recoil area, this was done with a primacolor pencil and buffed with a plain klenex tissue
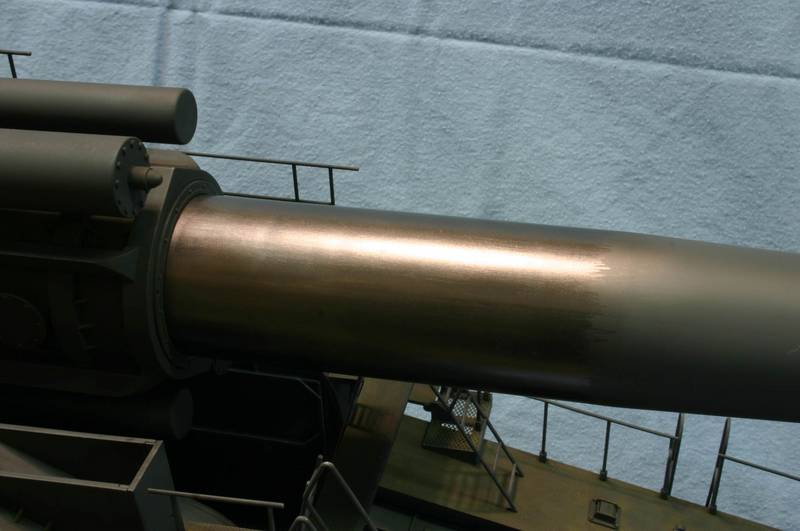
General View of Breech Block
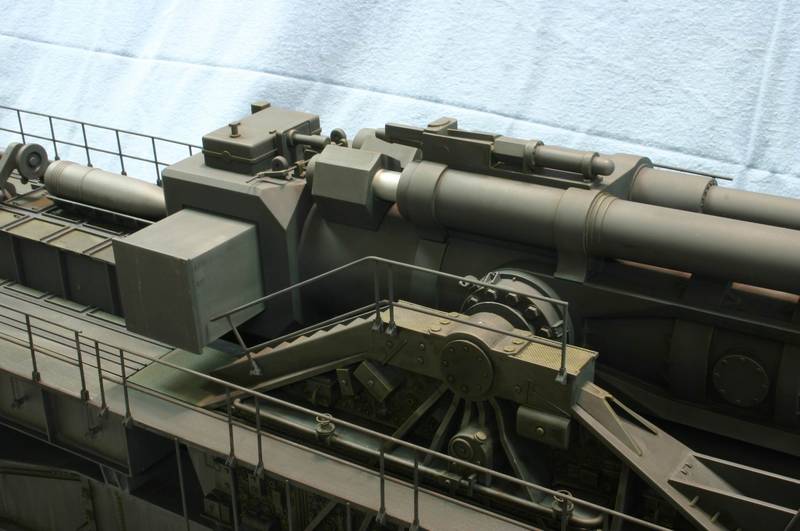
Business end
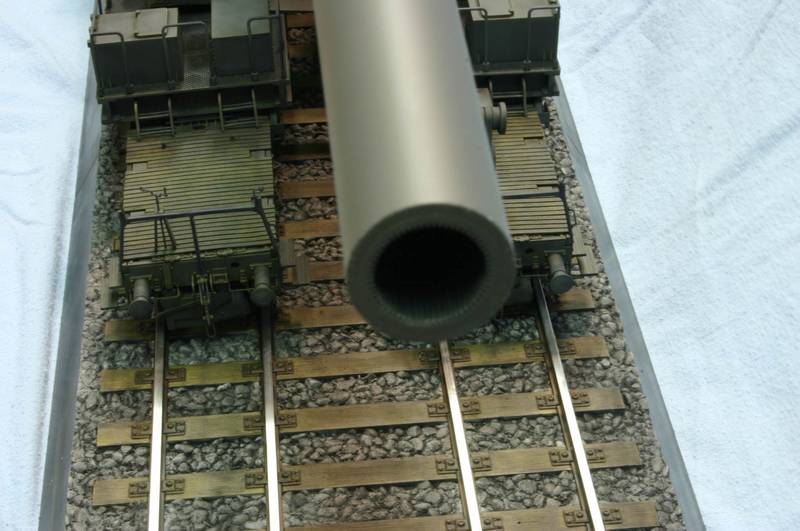
General Wide view
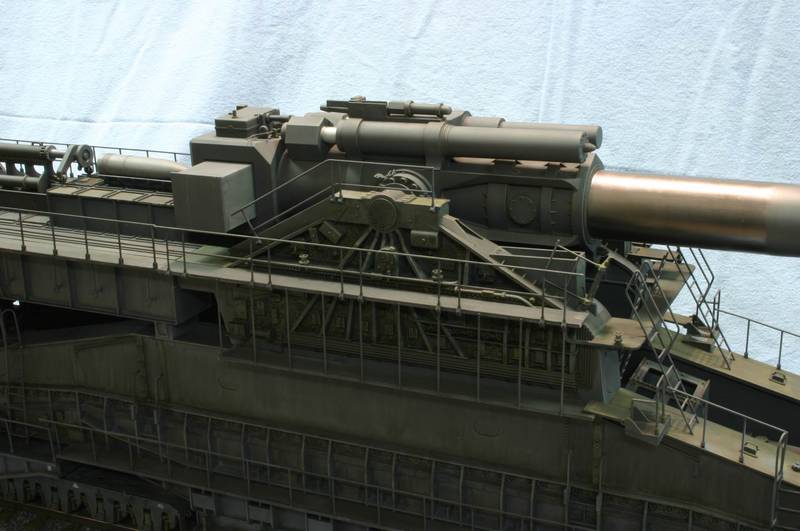
If you have a particular part of the model you want photographed, please let me know via this forum.
I will be at the IPMS Nationals Thursday Aug 23 thru Sunday August 26 and will not have access to the internet. So I will respond starting Monday of next week.
Remember Modelling is FUN!!!!
Tom Moon
Long time modeller. Starting when I was a teenager, then I found out about girls and college and work and kids. But now that I have one girl, no school, no work and the kids are grown, I'm back to full time modelling. My prime area of interest is armor, b
Rhode Island, United States
Joined: May 10, 2002
KitMaker: 3,581 posts
Armorama: 2,782 posts
Posted: Wednesday, August 22, 2007 - 02:26 PM UTC
England - East Anglia, United Kingdom
Joined: June 06, 2006
KitMaker: 315 posts
Armorama: 232 posts
Posted: Thursday, August 23, 2007 - 06:49 AM UTC
HI guys,
Been following the builds on this lovely kit but some thing bothers me about it. A couple of things come to mind,firstly, where do you put it when it`s finished ?.Secondly,how do you follow up something like this ?,is`nt every other kit that gets looked at gonna seem second rate,coz very little is ever gonna match it. !!
"No Battle Plan Ever Survives Contact With The Enemy."
Napolean Bonarparte.
"I Do Not Know What Weapons Will Be Used In A Third World War But I Know In A Fourth World War It Will Be Sticks And Stones"
Winston Churchill.
Hamilton, New Zealand
Joined: April 26, 2007
KitMaker: 24 posts
Armorama: 16 posts
Posted: Thursday, August 23, 2007 - 07:58 AM UTC
Quoted Text
Secondly,how do you follow up something like this ?,
Easy...build the self-propelled tracked version...

Georgia, United States
Joined: May 24, 2006
KitMaker: 2,106 posts
Armorama: 1,116 posts
Posted: Thursday, August 23, 2007 - 08:33 AM UTC
Quoted Text
If you have a particular part of the model you want photographed, please let me know via this forum.
yes, a photo of this sitting in my living room would be great! let me know when your done with it, I got a nice home for it

joking aside, its looking great, nice idea on the barrel too. I was contemplating on how to get that effect.
http://www.DisplayStandsDirect.com/
Rhode Island, United States
Joined: May 10, 2002
KitMaker: 3,581 posts
Armorama: 2,782 posts
Posted: Thursday, August 23, 2007 - 01:09 PM UTC
How to display it.
Well,I have a room with a wall which is long enough.I will hang 4 shelf brackets along the length of the display case i plan on making,and can mount it there.
Tom,looking at the "swing" room of the 2 handles above the breech,I may lengthen them so they clear that cut off corner on the breechblock.
Ohio, United States
Joined: June 04, 2005
KitMaker: 627 posts
Armorama: 455 posts
Posted: Thursday, August 23, 2007 - 02:58 PM UTC
Can't tell you enough how enjoyable it is seeing the progress you are making on this monster!!!
Thanks,
Gary


Zimbabwe
Joined: July 03, 2007
KitMaker: 3,529 posts
Armorama: 588 posts
Posted: Thursday, August 23, 2007 - 11:17 PM UTC
Thanks so much for sharing this build. It is great. Enjoy the show.

Ontario, Canada
Joined: August 26, 2007
KitMaker: 56 posts
Armorama: 10 posts
Posted: Sunday, August 26, 2007 - 06:40 AM UTC
Wow:
I am learning a great deal from your build on line... Really appreciated. I have just finished the cabinet that will house this beast in my model room and I am going to star building soon. your experiences are very helpful.
Have you found a source for decals or transfers for the model yet?
Thanks
LJ

Rhode Island, United States
Joined: May 10, 2002
KitMaker: 3,581 posts
Armorama: 2,782 posts
Posted: Sunday, August 26, 2007 - 10:16 AM UTC
Rumor was some are under development.I am waiting to hear something more definitive.


