Dioramas: Water Effects
Water! A sometimes intimidating effect.
Hosted by Darren Baker
Galilée WIP
jba
Visit this Community
Rhone, France
Joined: November 04, 2005
KitMaker: 1,845 posts
Armorama: 777 posts
Posted: Thursday, July 03, 2008 - 08:24 PM UTC
...
Can you hear this silence? that's the sound of the forums in the summer, a perfect time to settle here with something with NO panzer in it

Well I have another giant project en marche for quite a few months now -but then I am at the very boring stage of riveting, riveting and riveting again. I am getting tired and bored and as i will have one month with very few to do, i will try to cram most a new project here -hopefully.

I start this blog as a motivation for me to fill it. I will also probably mirror it elsewhere I don't know yet.

It will not be much blah blah, mostly pictures so here we are.
Look at this beauty.

She's the French cruiser Galilée -now don't believe i will model a part of it because i am French and I desperately need to honour my country by modelling its history -I don't give a damn about the French army.
I will model this ship (sort of) because she is good looking, because she makes me think about those trolls in harry potter, very huge body and very small head on the top.
Actually it's not the Galilée i will model but it's close parent the Protet.
But Protet sounds bad while Galilée sounds good.
the Protet's head is even smaller as a matter of fact. she just looks like some big banana with a spot on the front. And then I have the plans and they really look very good.

Something interesting about the Protet is the fact that she was scrapped only 12 years (ish) after being built in 1896 -she didn't even see First World War.
I guess she wasn't a complete success.
There is very few Protet pictures existing and virtually nothing about her history -except that she was there when there was some incident in Panama at the turn of the XXth century.

Anyway, everything tends to say she was a real failure, and I really like this

I will model a part of her troll head, heavily damaged


let's start by the armoured bunker (in blue)

barbacanosa
Visit this Community
Baleares, Spain / España
Joined: August 09, 2005
KitMaker: 296 posts
Armorama: 250 posts
Posted: Thursday, July 03, 2008 - 10:35 PM UTC
Knowing your work is that this will be something very special.
As always unite technical perfection with a special atmosphere.

We look forward to more progress and you say that I will keep all

greetings
Domi
slodder
Visit this Community
North Carolina, United States
Joined: February 22, 2002
KitMaker: 11,718 posts
Armorama: 7,138 posts
Posted: Friday, July 04, 2008 - 12:05 AM UTC
I just found my summer entertainment. Watching this diorama come together. This will be fun.
Drader
Visit this Community
Wales, United Kingdom
Joined: July 20, 2004
KitMaker: 3,791 posts
Armorama: 2,798 posts
Posted: Friday, July 04, 2008 - 01:03 AM UTC
Amazing what you can find cluttering up the internet

http://query.nytimes.com/mem/archive-free/pdf?_r=1&res=9B05EFDA1230E733A2575AC0A9629C946397D6CF&oref=slogin

Looking forward to this, as usual with your creations, there's something unique about French ship design in the late 19th and early 20th centuries.

David
jba
Visit this Community
Rhone, France
Joined: November 04, 2005
KitMaker: 1,845 posts
Armorama: 777 posts
Posted: Friday, July 04, 2008 - 09:24 AM UTC
thanks for the support my friends
-Domi i will try to be worth what you say
-Scott, you are perectly right! it HAS to be entertaining!
-David, thanks a lot for finding that out! I know i read the same story a few months back but without the details so thanks for providing those.
Alternatively as I know you are really good at history (an euphemism) here's what i suppose those ships like the Galilée or the Protet were: British commerce raiders. When the threat began to come from Germany and after the French thanks to the Etente Cordiale agreed with the British that the British alone would protect French northern coasts, those ships began kinda useless.
But then most of the other ships of this kind (including the Galilée) were scrapped during the twenties, and I really can't explain to myself such a small operational life. She must have been a really crap boat
I hope to find the truth in French forums.

Anyway, as I couldn't get to the computer and verify some stuff, i had to work on the stanchions this evening.
They're done out of solder!!
I have been struggling for 2 bloody years to find a good way to do the stanchions, and I finally found out that solder trick -and it works too.
Those french stanchions don't have any "bowl" at the top, but rather a long sheet of metal that join them all.


that's all for today!


Grumpyoldman
Staff MemberConsigliere
KITMAKER NETWORK
Visit this Community
Florida, United States
Joined: October 17, 2003
KitMaker: 15,338 posts
Armorama: 7,297 posts
Posted: Friday, July 04, 2008 - 10:01 AM UTC
Certainly is an interesting looking vessel.
Belt_Fed
Visit this Community
New Jersey, United States
Joined: February 02, 2008
KitMaker: 1,388 posts
Armorama: 1,325 posts
Posted: Friday, July 04, 2008 - 10:27 AM UTC
looks to me like you have got ALOT of work on your hands
jba
Visit this Community
Rhone, France
Joined: November 04, 2005
KitMaker: 1,845 posts
Armorama: 777 posts
Posted: Friday, July 04, 2008 - 08:42 PM UTC
Hi Dave, nice from you to drop by On the Service Historique site, i found at least 4 or 5 different cruisers that looked more or less the same. the thing is -they don't have *all* precise plans available at the same time for each boat..
Well, Jon, not too much as the secret for building big boats in 1/35 is certainly to cut them right.
here i will only work the cabin basically!
more stuff this evening or tomorrow morning
roudeleiw
Visit this Community
Luxembourg
Joined: January 19, 2004
KitMaker: 2,406 posts
Armorama: 2,224 posts
Posted: Friday, July 04, 2008 - 08:47 PM UTC
This is going to be a great scratchbuilding tutorial !

Cheers to you JBA and have fun

Claude
barbacanosa
Visit this Community
Baleares, Spain / España
Joined: August 09, 2005
KitMaker: 296 posts
Armorama: 250 posts
Posted: Friday, July 04, 2008 - 09:17 PM UTC
Hola JBA.
Very good technique for building poles,
with soft metal that can represent perfectly blows on them.
With your permission I try to use in any work.
Certainly this tool you use to make the hole appears to be a true age Is that the case?

And this is only the beginning.
I will learn many things!

Domi
Plasticbattle
#003
Visit this Community
Donegal, Ireland
Joined: May 14, 2002
KitMaker: 9,763 posts
Armorama: 7,444 posts
Posted: Friday, July 04, 2008 - 09:19 PM UTC
Hello Jean-Bernard. When I saw the image in your first post, I was already hooked. Considering some of your latest models, this should be something, really worth tuning in for. Looking forward to each and every installment. And even though I love the panzers ... it is great to see a scene with no panzers as well.
cheyenne
Visit this Community
New Jersey, United States
Joined: January 05, 2005
KitMaker: 2,185 posts
Armorama: 1,813 posts
Posted: Saturday, July 05, 2008 - 03:15 AM UTC
Hi Jean, nice summer project. I like the sodder method, I'll have to try that out.
I've searched my old photo files and found these. They are of the armored cruiser Amiral Aube, Gloire class 1902 - 1922. The Amiral Aube seems to have the similar bridge structure as the Protet.
I'm sure you' ve referenced this already but if not ..........
The Galilee and Protet are protected cruisers from different ship classes.
The Galilee from the Linois class and the Protet from the Catinat class.
Alot of the French protected cruisers are very similar. I've found alot of similar things on both the protected and armored cruisers from the late 1800's and very early 1900's builds.
I'll keep searching, though most of my antique photos are of pre and Dreadnaught battleships.
Nice work already as always and I'm looking foward to more progress !!!
Glenn


seb43
Visit this Community
Paris, France
Joined: August 30, 2005
KitMaker: 2,315 posts
Armorama: 2,158 posts
Posted: Saturday, July 05, 2008 - 05:26 AM UTC
JBA
This is gonna be an outstanding post for sure
I will follow it.
Ça va encore déchirer grave.
a+
seb
youngc
Visit this Community
Western Australia, Australia
Joined: June 05, 2007
KitMaker: 2,166 posts
Armorama: 1,080 posts
Posted: Saturday, July 05, 2008 - 10:51 AM UTC
Stunning work so far. Looks like the beginnings of another interesting project. Keep going mate.

Chas
Henk
Visit this Community
England - South West, United Kingdom
Joined: August 07, 2004
KitMaker: 6,391 posts
Armorama: 4,258 posts
Posted: Saturday, July 05, 2008 - 06:53 PM UTC
I'll be following this one with much interest J-B. Your work has given me much inspiration, and has actually caused me to buy a plastic ship model, which I'm working on in between other projects. Let's just say, that it won't be a 'classically' displayed ship....

Henk
roudeleiw
Visit this Community
Luxembourg
Joined: January 19, 2004
KitMaker: 2,406 posts
Armorama: 2,224 posts
Posted: Saturday, July 05, 2008 - 08:36 PM UTC
Glenn, you are always amazing me with your database. You seem to have reference pictures for everything!

Cheers to you all

Claude
jba
Visit this Community
Rhone, France
Joined: November 04, 2005
KitMaker: 1,845 posts
Armorama: 777 posts
Posted: Saturday, July 05, 2008 - 10:05 PM UTC
Thanks for the interest my friends!
-Domi I feel flattered that you consider using the trick! to do the hole, i simply used a compass. The trick is to really target well the center of the solder wire. You are right about the soft metal being good to reproduce blows -those stanchions were made in hollow metal tube!

-Frank thanks don't get me wrong, I really like panzers too, a good half of my diorama ideas are panzer related, but there are a few things I take in consideration these days. First I would have to make more efforts towards accuracy that i am usually doing in my dioramas and then it seems that although I have quite a few friends that are doing armour, all the grumpies and evils in model making are also having an appointment in armour related forums, so I mostly stay away for the time being

Glenn, I am like Claude, totally flabbergasted at the extent of your knowledge and picture collection!!
I didn't have those fantastic pictures of Amiral Aube (another good sounding french boat) and they will happily rejoin my reference stash. indeed the cabin is made of wood.
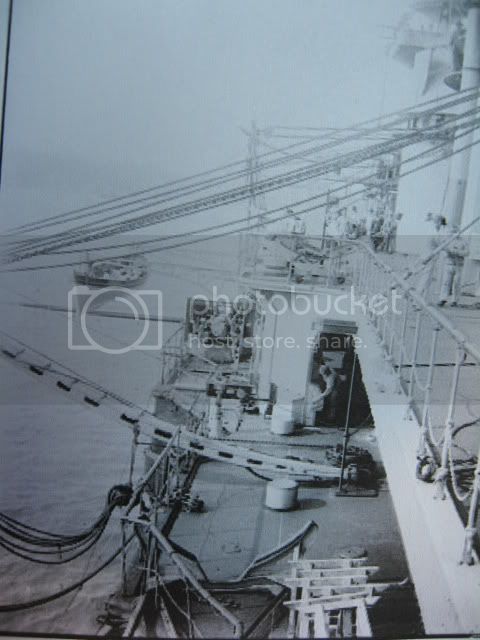
Actually i am reminded of some of the wooden construction in my grandma's house when i was a kid and it certainly has to do something with me choosing one of those to represent
To be honest, i had seen something like that about the different classes -probably on Wikipedia or somewhere else, but soon forgot it Incidentially i am indeed also using the plans of the catinat for doublecrossing some details but the differences with this cabin are too massive. And the plans are less good too.
Anyway thanks again

Seb je vais faire de la photodécoupe soonish

Chas your own car with harbour diorama I wait to see!

Henk can't wait your boat diorama too!

So here's what i have been doing yesterday evening. okay so i should start and od the bunker BUT I spent some time doublecrossing, checking and all, and there seems to be NO light opening in the bunker, even though there is an order transmission wheel in it.. So i will trust the plans and just do a massive plastic cylinder.. i found one or 2 pics of the protet on internet and really couldn't find any evidence of anything so..
In the meantime I did the support for the left bridge out of plastic, brass and lead foil. The pics are rather self explanatory.
I have been using some of the photoetch I had left from the Sokol. And I still have to add a few plastic rivets on the fixations.
Anyway thanks again for viewing


1969
Visit this Community
England - East Midlands, United Kingdom
Joined: December 16, 2005
KitMaker: 2,864 posts
Armorama: 303 posts
Posted: Sunday, July 06, 2008 - 12:25 AM UTC
Exellent start to another exiting project my friend.
I admire the way you manage to reproduce each item but even more the fact you manage to portray the method to others in a simple clear manner.

looking forward to seeing more,

Steve
koenele
Visit this Community
Oost-Vlaanderen, Belgium
Joined: January 17, 2006
KitMaker: 4,194 posts
Armorama: 408 posts
Posted: Sunday, July 06, 2008 - 12:13 PM UTC
very nice project,

i'm following this one,
masterpiece in the making!

keep them updates coming

koen
jba
Visit this Community
Rhone, France
Joined: November 04, 2005
KitMaker: 1,845 posts
Armorama: 777 posts
Posted: Sunday, July 06, 2008 - 08:09 PM UTC
Steve my friend thanks for the compliments
Koen, nice to see you there too!

Here we go again. i started working on the gun yesterday evening.
A bit of 1.2mm (?) brass tubing cut a the right dimensions, with a small photoetch round sheet at the end. Then roll a bit of magic sculp cautiously so that you shape the gun.

then -one tricky thing - to make the gun's round axis. I cut 2 1.2mm width brass tubing, 1.5 mm wdth and rolled carefully a small Magic Sculp lump around.
On the last of the 3 pics you can see the work completed. i will sand it cautiously when it's dry

Then time to work the lower part of the axis of the gun. I rolled a magic Sculp small lump on a round surface and let dry


As I had a bit of time left, i started wood cutting on the cabin! that's balsa wood -indeed I strongly believe that ideally you would have to use the real material in scale. i never used plastic to represent wood. more ojn that later


Finally,i spent some time to design the first of the 2 photoetching frets I will need for the work: these are the little pieces you('ve got below the cabin and under the bunker. more on that later too!


slodder
Visit this Community
North Carolina, United States
Joined: February 22, 2002
KitMaker: 11,718 posts
Armorama: 7,138 posts
Posted: Monday, July 07, 2008 - 12:13 AM UTC
jba - are you going to use the same Fret making technique you used in Sokol?

So far so good, great soldering.
jba
Visit this Community
Rhone, France
Joined: November 04, 2005
KitMaker: 1,845 posts
Armorama: 777 posts
Posted: Monday, July 07, 2008 - 01:12 AM UTC
Thanks Scott -nah using the same technique to do photoetch as I did with Sokol is really too risky. That was really blind driving; i have been building 2 quite efficient machines to help for the job and I will be using them!
here's the "big" fret (15 cm width)


seb43
Visit this Community
Paris, France
Joined: August 30, 2005
KitMaker: 2,315 posts
Armorama: 2,158 posts
Posted: Monday, July 07, 2008 - 03:20 AM UTC
It gonna be a great PE work
dont have the guts so fare to go into this business
Good Luck
Seb
jba
Visit this Community
Rhone, France
Joined: November 04, 2005
KitMaker: 1,845 posts
Armorama: 777 posts
Posted: Monday, July 07, 2008 - 07:53 PM UTC
Seb you should, it's all a matter of building a handful of useful machine before diving in it -and also to really have the need.
Well as a matter of fact I DO have the need.
If you spot well the frets above you will see several rounds or square, stuff thatI should have easely scratch build, so why didn't i uised a bit of plastic instead?
hey that's because the bests cratchbuilt works may be destroyed if you can't cut plastic straight.. i remember a GREAT work on another forum from a guy that scratch built a torpedoboat in 1/72 or 1/48 can't remembe
r. And though the job was great, my eye was invariable attracted by the openings on the cabin which were simply not cut that straight.

I don't like cutting plastic because I can't cut it neatly, i am too nervous for that, so I use photoetch instead
Anyway, here'sthe process: so first cutting out the print and make a sandwich with both parts so that you will hold the photoresist coated metal between

Then sunbath the brass in my machine (2 special neon tubes)

develop the stuff in some revelant + water

here's what it's like once developed, looks okay for the moment.

put it in the homemade photoetch tank -control every 2 mn to see if the Fl2 etc burns the metal okay

ah ah now -and I am surprised nobody noticed - I didn't ATTACH any of the pieces I have been doing to the fret. there is no fixations between the outer borders and the pieces.
hey that's because I hate trimming photoetch, so i prefer to let them loose in the ferric oxyde and filter the stuff afterwards!
Not very hard to filter anyway as the metal stuff stays at the bottom of the tank.
Anyway, after a water bath, time to go fishing for the pieces...

time taken: 2 hours and the complete metal pieces done


slodder
Visit this Community
North Carolina, United States
Joined: February 22, 2002
KitMaker: 11,718 posts
Armorama: 7,138 posts
Posted: Monday, July 07, 2008 - 10:57 PM UTC
Your opinions on PE are dead on. Scratching with plastic is rougher than metal. With some PE experience under your belt it's an easy decision.
Your 'no-trim' PE is great! Could you build in a small grill almost like a 'reverse coffee press'? That way no lost parts and easy 'fishing'.

Just think how much faster this project is going than the last. I remember the PE experiments gone wrong that chewed up so much time. You're flying this time.