German WWII railway depot dio part I
Clare, Ireland
Joined: December 30, 2008
KitMaker: 952 posts
Armorama: 834 posts
Posted: Wednesday, July 08, 2009 - 10:28 AM UTC
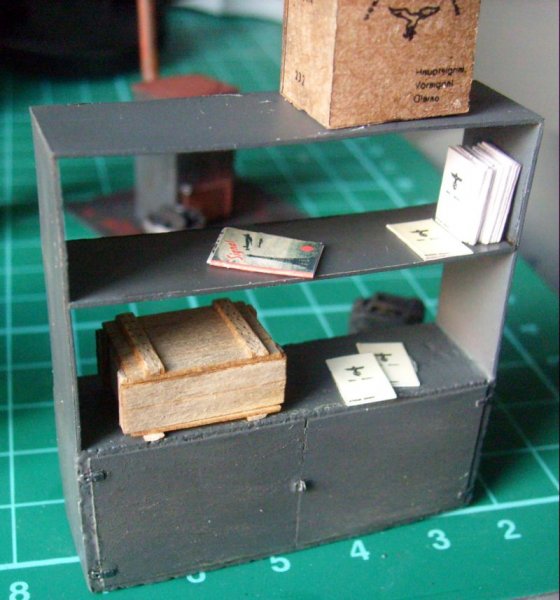
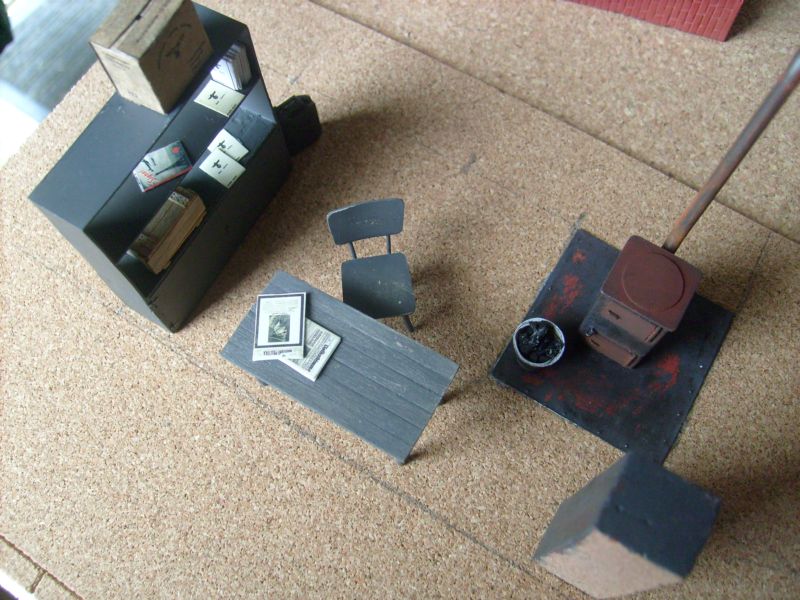
Most paint work done, I will continue with rest of the interior and finishing touch at the end.
Thanks for looking
Libor
www.mymodelplace.eu
www.LZmodels.com
Clare, Ireland
Joined: December 30, 2008
KitMaker: 952 posts
Armorama: 834 posts
Posted: Friday, July 10, 2009 - 09:45 AM UTC
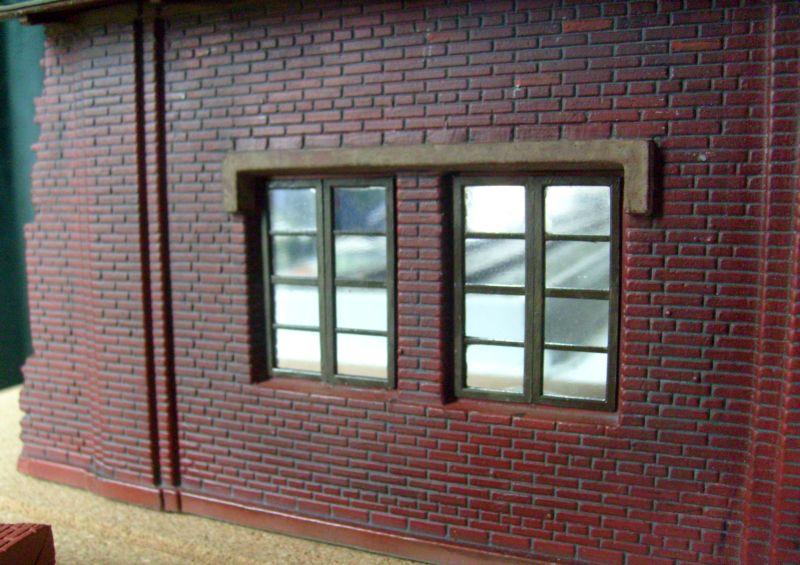
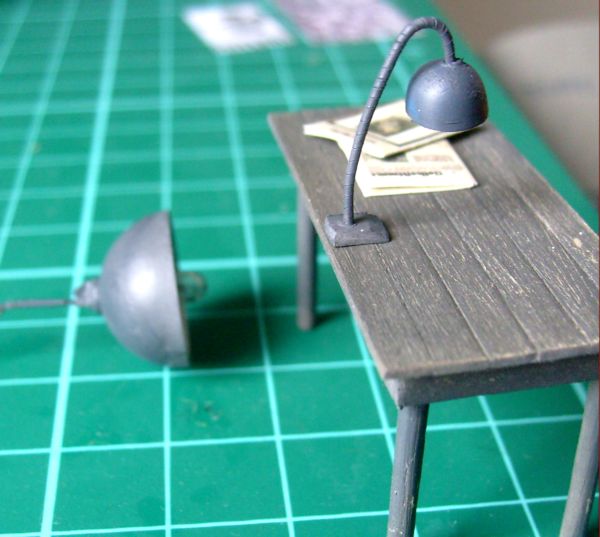
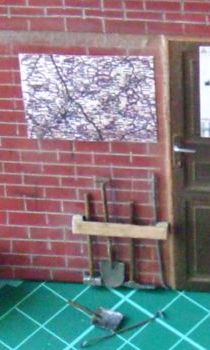
I have windows on, even glassed in. Also lamp and working hang light finished. Now I will focus on the walls and floor. Pigments and washes will be done later, when the interior is completed. Weathering from outside much later, when everything is set up, glued, painted - still too far from now.
Cheers
Libor

www.mymodelplace.eu
www.LZmodels.com
Clare, Ireland
Joined: December 30, 2008
KitMaker: 952 posts
Armorama: 834 posts
Posted: Sunday, July 12, 2009 - 09:11 AM UTC
Hi, all,
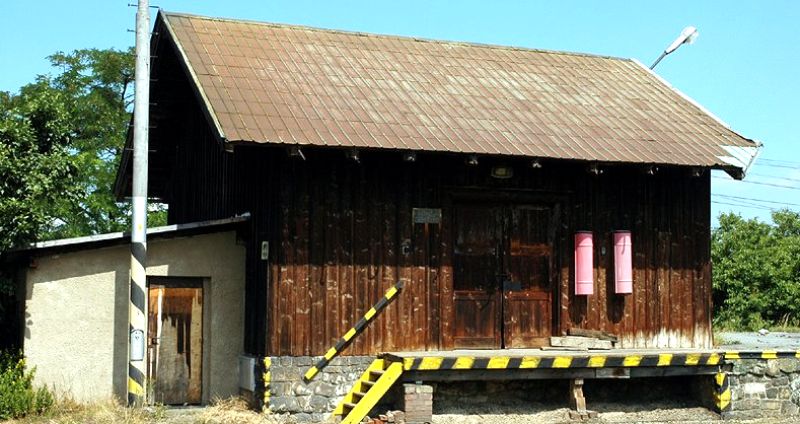
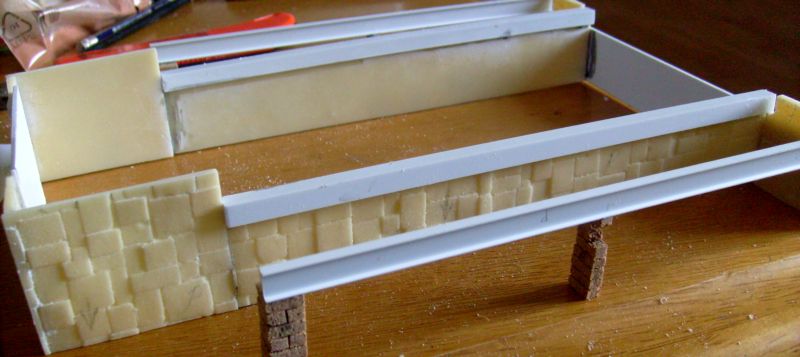
I have made another progress, but not pictures yet. Currently I am getting ready drawings for next scratch build, warehouse with ramp, located in the centre of my diorama. The final result should be close to this, with different roof and some adds. More pictures soon.
Cheers
Libor
www.mymodelplace.eu
www.LZmodels.com
Clare, Ireland
Joined: December 30, 2008
KitMaker: 952 posts
Armorama: 834 posts
Posted: Monday, July 13, 2009 - 02:51 AM UTC
A few more adds for the interior, the walls painted. Bricks inside do not look good, I will check their appearance through windows, and kind of plaster might be applied, if necessary.
Cheers
Libor
www.mymodelplace.eu
www.LZmodels.com
Clare, Ireland
Joined: December 30, 2008
KitMaker: 952 posts
Armorama: 834 posts
Posted: Tuesday, July 14, 2009 - 02:03 AM UTC
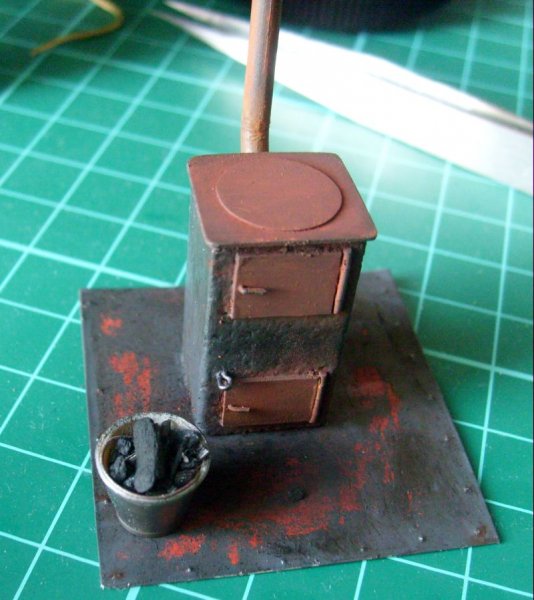
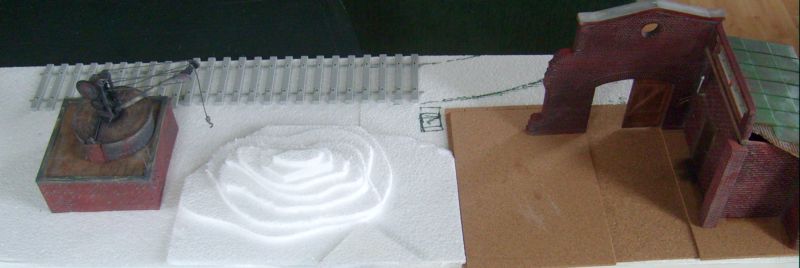
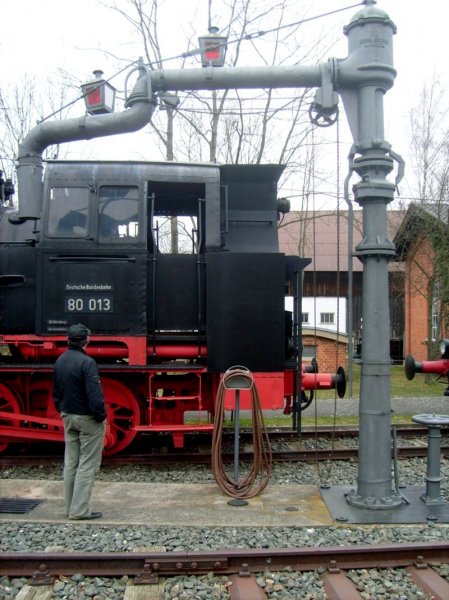
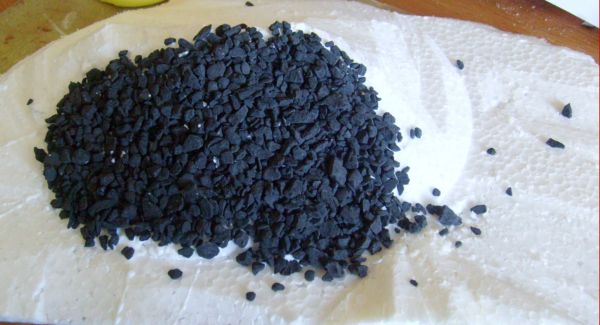
Building glued together, the interior looks good and some pictures will come, when the light inside works.Upper window frames will be added soon, with some broken glass, sheet metal will be used to close damaged roof, and the remaining parts, edges and floors, will be painted. The picture taken in German museum will be a lead for water crane scratchbuilding. Base for coal supply done, I will cut it to required appearance and cover it with coal.
Thanks for looking
Libor
www.mymodelplace.eu
www.LZmodels.com
Clare, Ireland
Joined: December 30, 2008
KitMaker: 952 posts
Armorama: 834 posts
Posted: Wednesday, July 15, 2009 - 03:20 AM UTC
Building of the warehouse is going ahead, also coaling started.
Cheers
Libor
www.mymodelplace.eu
www.LZmodels.com
Clare, Ireland
Joined: December 30, 2008
KitMaker: 952 posts
Armorama: 834 posts
Posted: Thursday, July 16, 2009 - 11:03 PM UTC
Coaling job is over, also outbuilding almost done. The loading ramp is next target and wooden warehouse when ordered balsa comes.

More details at my web:
dio Cheers
Libor
www.mymodelplace.eu
www.LZmodels.com
Jakarta Raya, Indonesia
Joined: November 19, 2007
KitMaker: 10 posts
Armorama: 9 posts
Posted: Thursday, July 16, 2009 - 11:22 PM UTC
Quoted Text
Building of the warehouse is going ahead, also coaling started.
Cheers
Libor
Hi Libor,
Very nice build so far! What a big project you're making

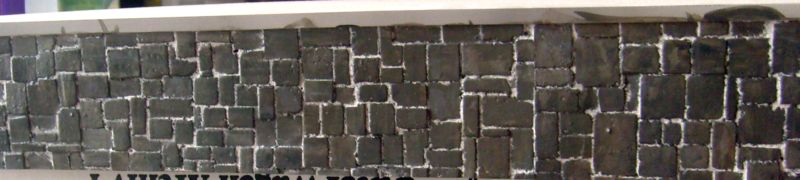
I'd like to know what brand you use on stone wall above? Do you make one yourself?
I'll watch your progress clesely.
Clare, Ireland
Joined: December 30, 2008
KitMaker: 952 posts
Armorama: 834 posts
Posted: Friday, July 17, 2009 - 12:20 AM UTC
Thank you, Harmawan,
for stone and brick surfaces I made simple latex rubber moulds, and now I cast thin resin sheets for my builds. They are cut easily by knife or modelling saw.
Libor
www.mymodelplace.eu
www.LZmodels.com
Clare, Ireland
Joined: December 30, 2008
KitMaker: 952 posts
Armorama: 834 posts
Posted: Monday, July 20, 2009 - 10:07 PM UTC
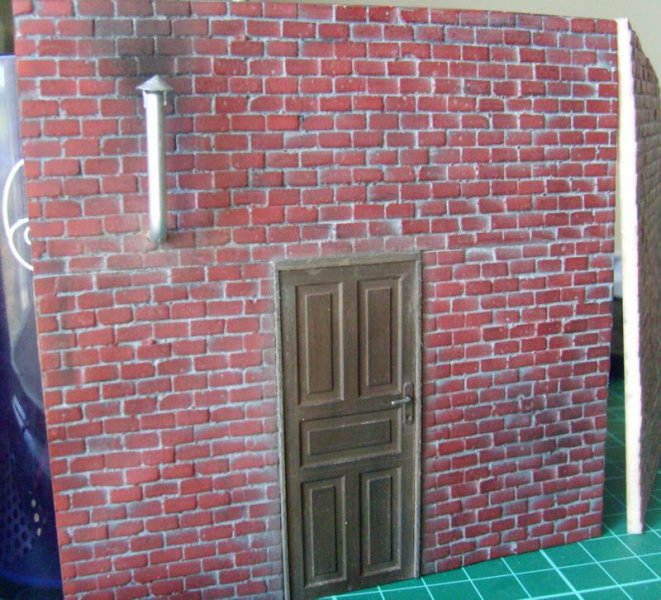
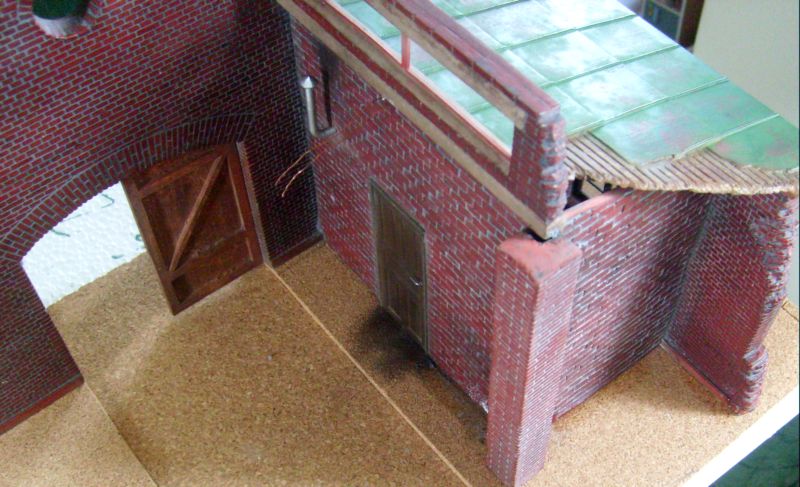
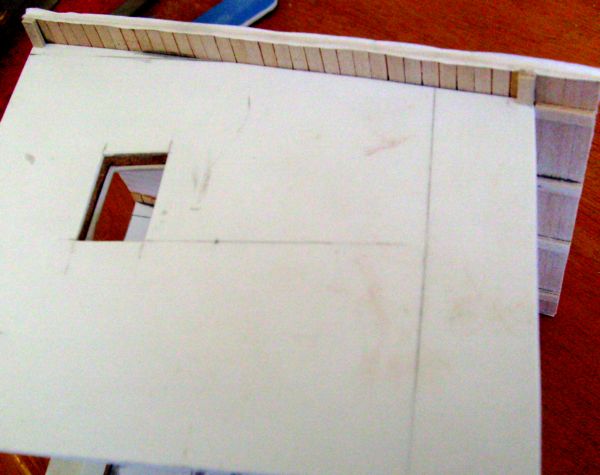
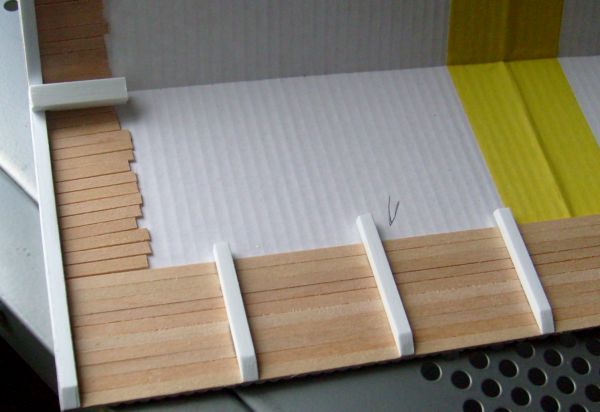
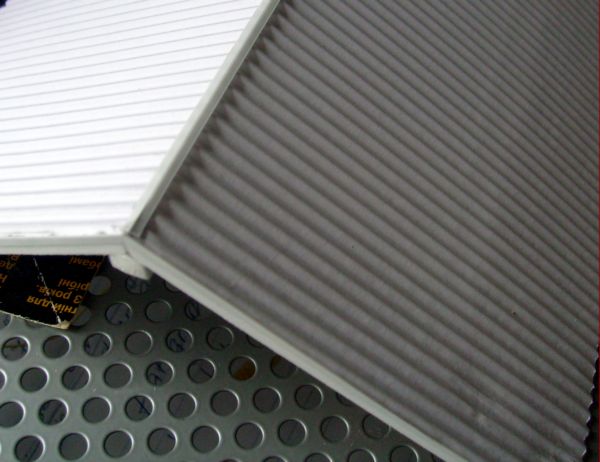
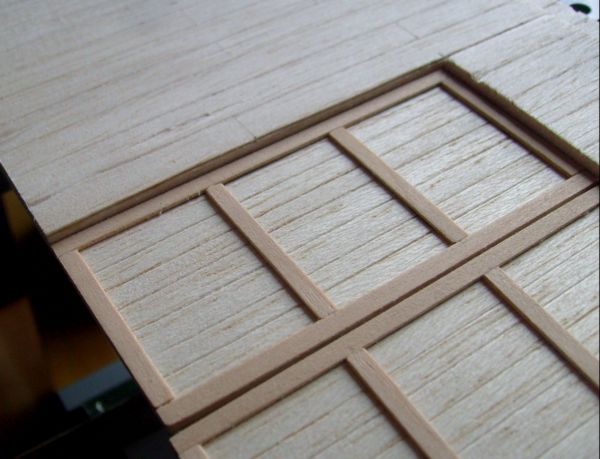
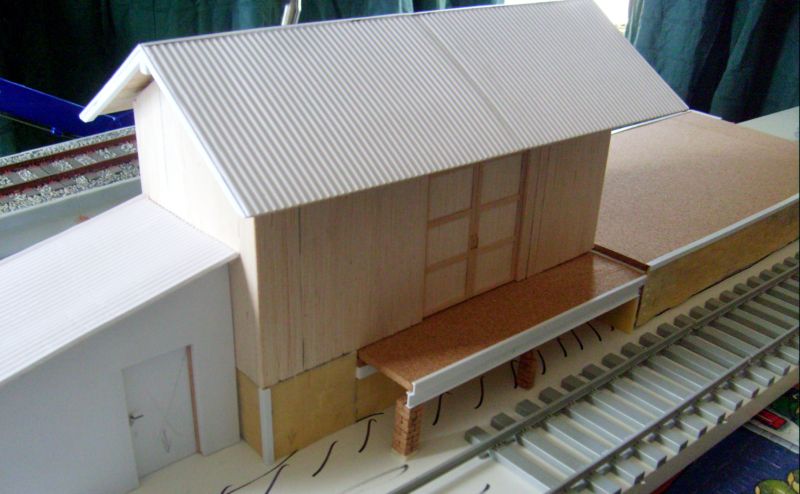
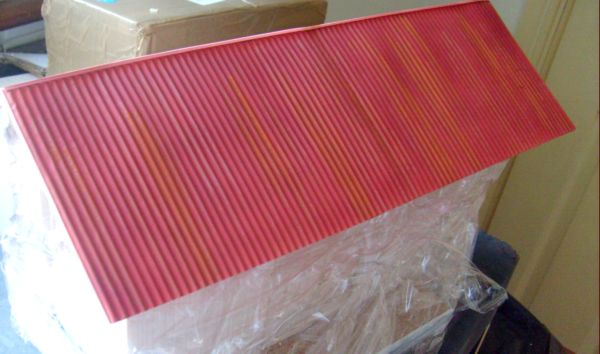
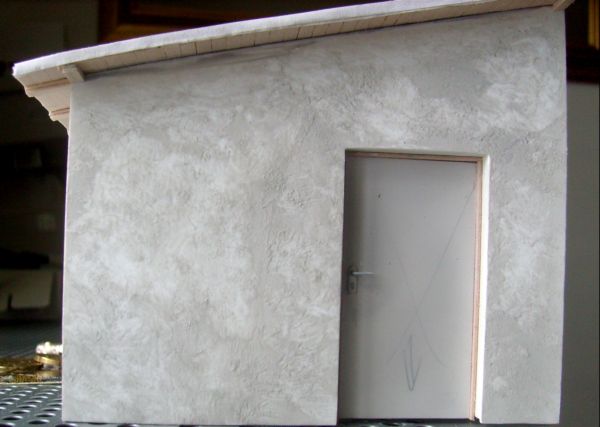
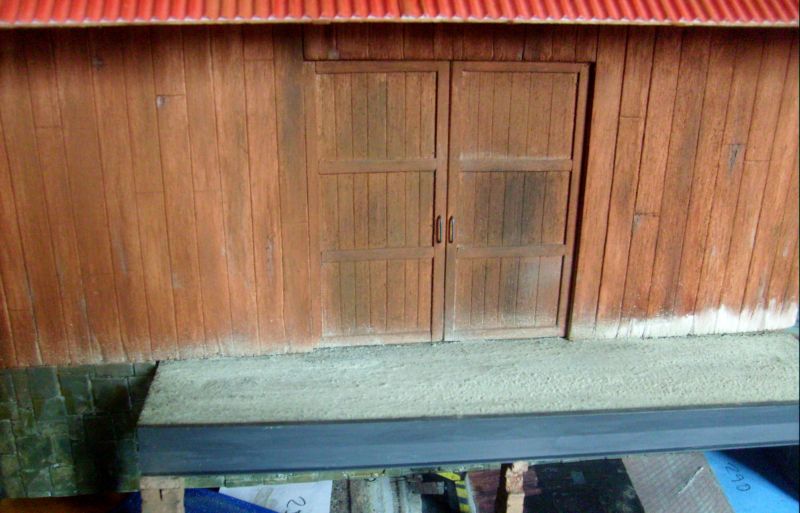
Now I have finished roof for the warehouse, gutter channels left for later, and also two walls with their doors done.
Cheers
Libor
www.mymodelplace.eu
www.LZmodels.com
New South Wales, Australia
Joined: June 03, 2007
KitMaker: 162 posts
Armorama: 139 posts
Posted: Tuesday, July 21, 2009 - 12:29 AM UTC
thats bloody unreal mate, keep up the good work!

#003
Donegal, Ireland
Joined: May 14, 2002
KitMaker: 9,763 posts
Armorama: 7,444 posts
Posted: Tuesday, July 21, 2009 - 12:42 AM UTC
Good progress Libor. Enjoying this blog, and the structural work.

IPMS Stockholm
"The problem with common sense, is that it is not that common"
Clare, Ireland
Joined: December 30, 2008
KitMaker: 952 posts
Armorama: 834 posts
Posted: Tuesday, July 21, 2009 - 04:13 AM UTC
Thank you, guys, for the kind comments.
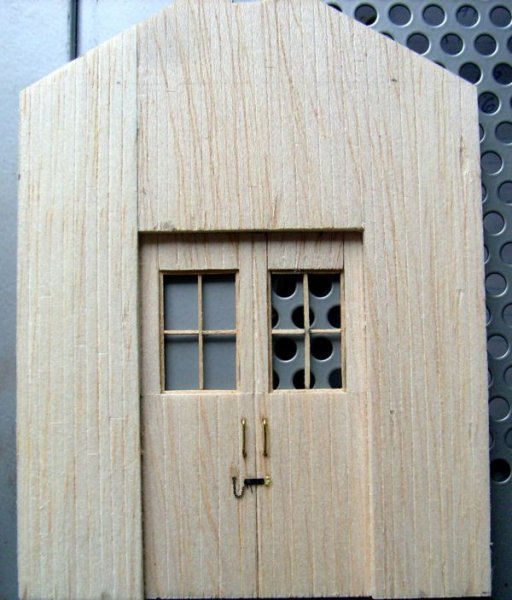
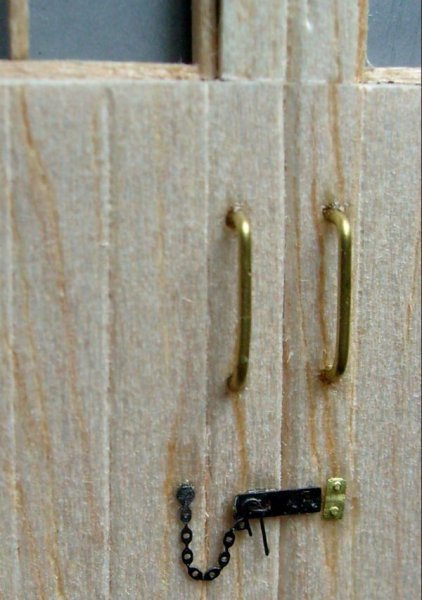
Front wall completed as well, I have added window frames (glass after painting) and a latch. Time has come to glue all the walls together.
Thanks for looking
Libor
www.mymodelplace.eu
www.LZmodels.com
North Carolina, United States
Joined: June 26, 2007
KitMaker: 2,116 posts
Armorama: 1,080 posts
Posted: Tuesday, July 21, 2009 - 05:55 AM UTC
I am finding your builds Interesting and imformative, ( lots of COOL Detailing). Great Work ! milvehfan
Clare, Ireland
Joined: December 30, 2008
KitMaker: 952 posts
Armorama: 834 posts
Posted: Tuesday, July 21, 2009 - 06:21 AM UTC
Thank you, buddy,
that is the coolist thing, if my work can be handy for some else.
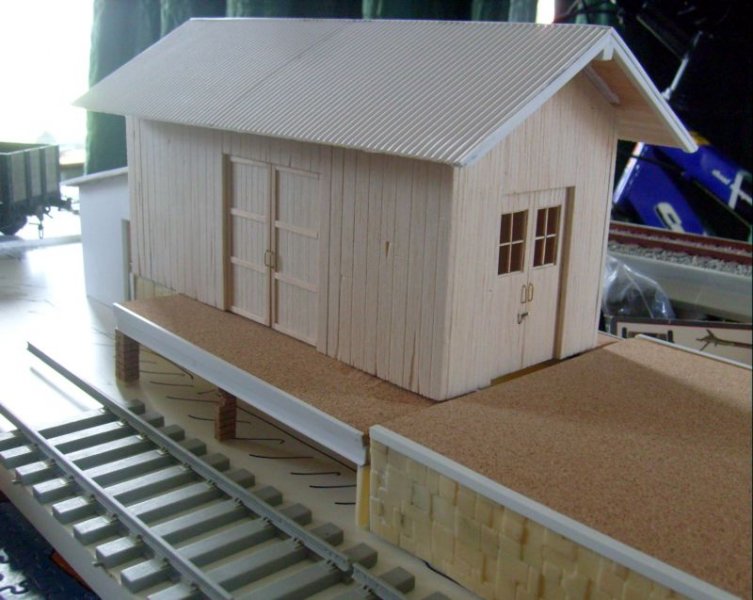
A few more pictures, I glued the walls and checked all together. Small inaccuracies to be fixed when main building is done. So far I am very happy with my progress.
Libor
www.mymodelplace.eu
www.LZmodels.com
Clare, Ireland
Joined: December 30, 2008
KitMaker: 952 posts
Armorama: 834 posts
Posted: Wednesday, July 22, 2009 - 02:18 AM UTC
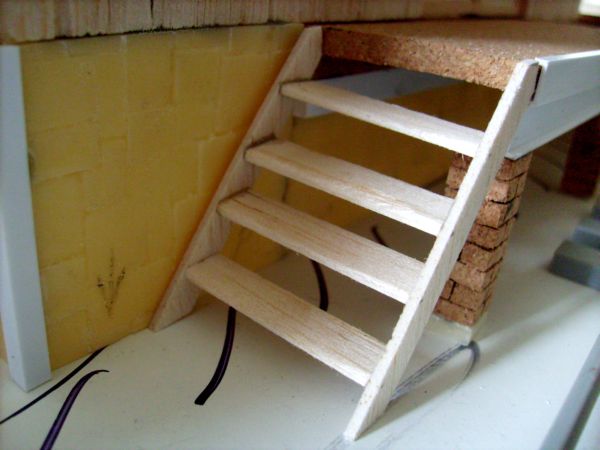
Another bit done, the stairs came out and paint job started. Once again my painting goes the hair spray technique way. After priming the resin parts I have airbrushed the roof with red base with some rusty spots. A shadow of grey wil by next, when varnish coat is on. I have also tried plaster texture on outbuilding walls.
Thanks for looking
Libor
www.mymodelplace.eu
www.LZmodels.com
Clare, Ireland
Joined: December 30, 2008
KitMaker: 952 posts
Armorama: 834 posts
Posted: Thursday, July 23, 2009 - 11:50 PM UTC
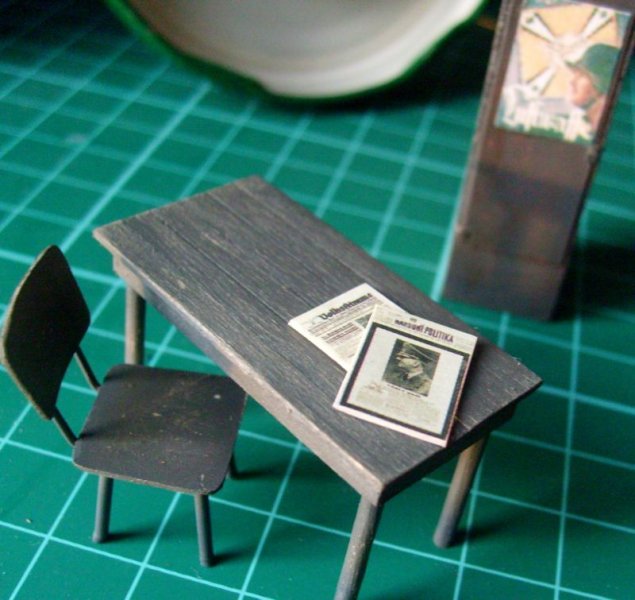
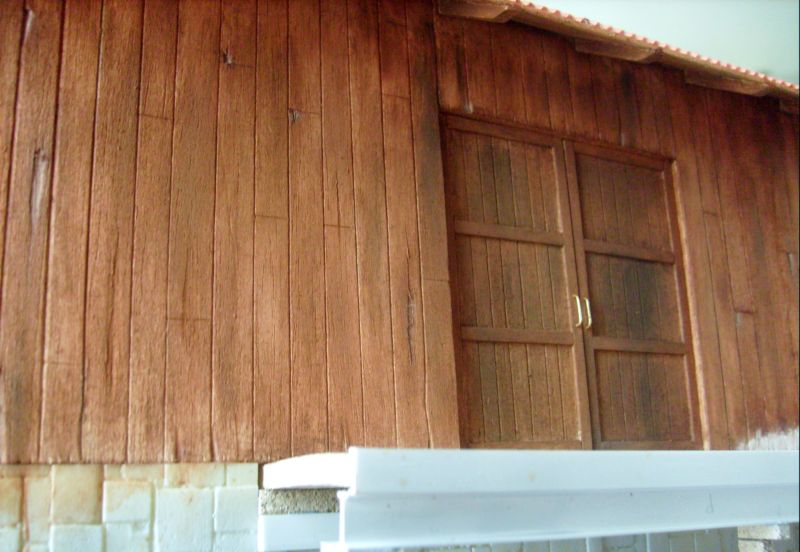
The wood painting started with using Mig pigments and thinner. Darker wash and some dust will be added at the end.
Libor
www.mymodelplace.eu
www.LZmodels.com
#041
Kobenhavn, Denmark
Joined: July 20, 2006
KitMaker: 10,069 posts
Armorama: 4,677 posts
Posted: Friday, July 24, 2009 - 12:35 AM UTC
Very nice progress, Libor.
Looking forward to see more

Campaign'oholic - 252+ campaigns completed
England - West Midlands, United Kingdom
Joined: September 12, 2007
KitMaker: 1,548 posts
Armorama: 1,407 posts
Posted: Friday, July 24, 2009 - 01:39 AM UTC
North Carolina, United States
Joined: June 26, 2007
KitMaker: 2,116 posts
Armorama: 1,080 posts
Posted: Friday, July 24, 2009 - 03:33 AM UTC
HOW DO YOU DO IT ???? My Wood, (Real or Plastic )never turns out looking so good. Keep the installments coming, enjoying your railway dio work. milvehfan
Indiana, United States
Joined: August 19, 2007
KitMaker: 2,184 posts
Armorama: 1,468 posts
Posted: Friday, July 24, 2009 - 04:11 AM UTC
Libor, excellent job going on there. Makes mine look like some small guage side track, well it is. Question for you. What are you using for track? I had used some large guage flex track and had to cut down on the width of r/r car. Got ahold of some C.D. track and am not happy with them. And here I am in the middle of R/R country and the R/R guy's can't tell or even stear me in the right direction.
There is no return policy on time spent
England - East Anglia, United Kingdom
Joined: August 12, 2005
KitMaker: 14,499 posts
Armorama: 11,675 posts
Posted: Friday, July 24, 2009 - 05:08 AM UTC
Hi Libor,
Excellent stuff, looking good.
Al
'Action this Day'
Winston Spencer Churchill
Clare, Ireland
Joined: December 30, 2008
KitMaker: 952 posts
Armorama: 834 posts
Posted: Friday, July 24, 2009 - 08:58 AM UTC
Thank you, all, for the kind comments.
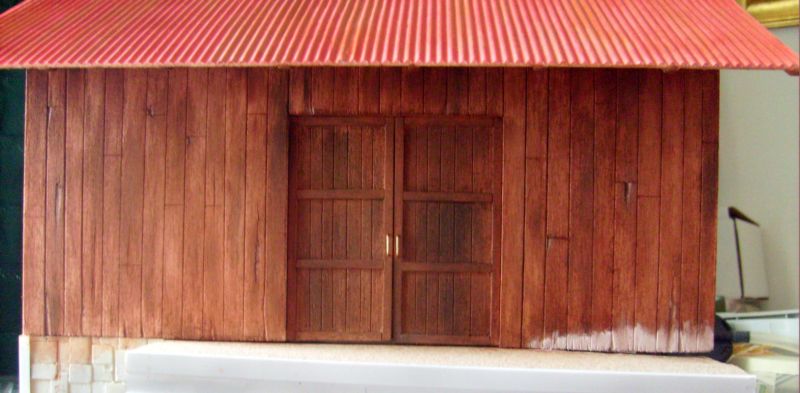
milvehfan, this was actually easy, just 3 different Mig pigments and thinner for washes, started with ligter shadows and continued to darker ones. Then fixed a bit with their fixer, I did not want to use varnish this time. I will use later dark wash to get it even darker, according to my reference picture (which is too dark, I´d say, but I do not want to follow it exactly, using different roof and so))
Bob, in my 1/35 scale I can simply use Trumpeter´s tracks sold separately , which are good enough, I mean nice made wood and good looking metal parts after some work with putty and sandpaper. The bolts and shins look very authentically. The other parts, like switches and so, I will again scratch build. I´ll keep going with the stone walls now and some pictures will come out soon.
Thanks for looking
Libor
www.mymodelplace.eu
www.LZmodels.com
Clare, Ireland
Joined: December 30, 2008
KitMaker: 952 posts
Armorama: 834 posts
Posted: Tuesday, July 28, 2009 - 01:09 AM UTC
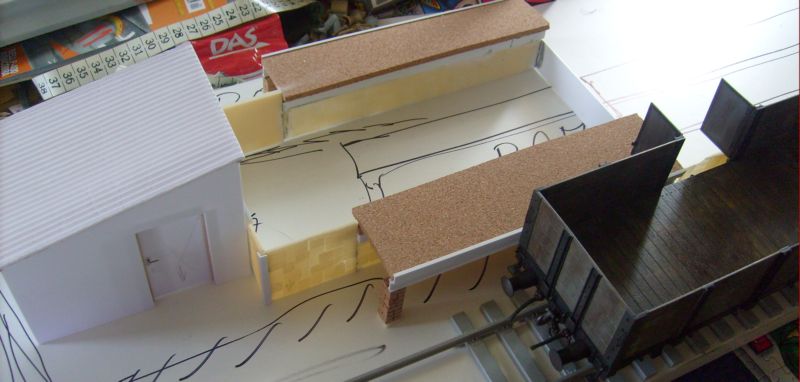
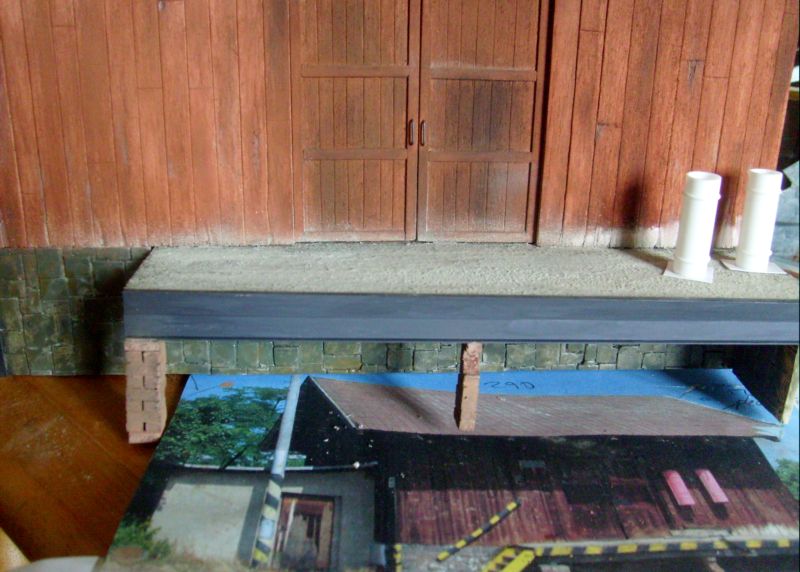
The floor finished and some dust added on the building walls. I have begun painting of the stone base, and scratch building of the containers. Stone walls of the extended ramp almost done, once again wash and pigments will be used when iron angles are painted.
More soon
Libor
www.mymodelplace.eu
www.LZmodels.com
United Kingdom
Joined: December 05, 2006
KitMaker: 2,208 posts
Armorama: 2,152 posts
Posted: Tuesday, July 28, 2009 - 02:29 AM UTC
The quality of your work is impressive, both painting and scratch building, well done.
May I suggest you put the buildings and track at an angle to the edges of the diorama? Things never look as good if they are all lined up with the edges.
Keep up the good work,
James