

Ok! to date there has been:
1) 10,026 hits.
2) 199 replies.
3) 5 finished / gallery posted entrants.
Meaty Hellhound
HARV
Itb 073
Retired Yank
Big Rip74
Whats up with everyone else so far?
Bob
Campaigns
Where Armorama group builds can be discussed, organized, and updates posted.
Where Armorama group builds can be discussed, organized, and updates posted.
Hosted by Darren Baker, Richard S.
Blitz 3: Italy

Bigrip74

Joined: February 22, 2008
KitMaker: 5,026 posts
Armorama: 1,604 posts

Posted: Sunday, January 23, 2011 - 08:05 PM UTC

mopnglo
Joined: January 07, 2006
KitMaker: 452 posts
Armorama: 271 posts

Posted: Monday, January 24, 2011 - 04:00 AM UTC
I'm making slow progress on my M3 GMC build. I finished spraying the base coat this weekend, so now I'll move on to detail painting. This is my first Dragon halftrack kit, and so far I've struggled to figure out a good build process.
I'll try to snap a few photos tonight.
I'll try to snap a few photos tonight.

Marnix

Joined: July 29, 2008
KitMaker: 799 posts
Armorama: 63 posts
Posted: Monday, January 24, 2011 - 07:56 AM UTC
Hi Bob
I've finished the turret of my Panther, the suspension is well underway, currently working on the hull. I am working with a lot of PE and have to add zimmerit, so the building will take quite a while... I hope to be able to finish the build in a couple of weeks. That seems an appropriate moment to post pictures!
Greetings,
Max
Quoted Text
Whats up with everyone else so far?
I've finished the turret of my Panther, the suspension is well underway, currently working on the hull. I am working with a lot of PE and have to add zimmerit, so the building will take quite a while...
I hope to be able to finish the build in a couple of weeks. That seems an appropriate moment to post pictures!Greetings,
Max

muttley

Joined: January 10, 2005
KitMaker: 251 posts
Armorama: 202 posts
Posted: Monday, January 24, 2011 - 12:40 PM UTC
WIP of my Panzer IV-H, again another nostalgia kit from Monogram in 1/32 scale. I had to scratchbuild those schurzen side skirt brackets from a piece of window vinyl blinds 
Model is built and ready for painting....but lo and behold its minus 20 degrees over here in Ontario and my air compressor in the garage is FROZEN!
Like Barbarosa, this project has come to a halt due to winter ggggrrrrrrraaaaagggghhhhh!!!!!!!

Model is built and ready for painting....but lo and behold its minus 20 degrees over here in Ontario and my air compressor in the garage is FROZEN!
Like Barbarosa, this project has come to a halt due to winter
ggggrrrrrrraaaaagggghhhhh!!!!!!!Bigrip74
Joined: February 22, 2008
KitMaker: 5,026 posts
Armorama: 1,604 posts
Posted: Monday, January 24, 2011 - 01:23 PM UTC
Way to go guys, I guess everyone is enjoying their favorite passtime ( enlisted in too many campaigns like me ) ..
Bob
) ..Bob
SGTJKJ

#041

Joined: July 20, 2006
KitMaker: 10,069 posts
Armorama: 4,677 posts

Posted: Tuesday, January 25, 2011 - 06:18 AM UTC
Tough luck on the weather, Rei. Those brackets look very nice. Nice to go with a nostalgia project. Just like me. 
I have finished my 1/76 Matchbox Panther. I have build it like a Pz. Rgt. 26 Panther with extra top turret armour.
I used the Matchbox base but added mud and some new trees as the tree included in the kit is flat to say the least.
I tried a new technique to make the "sprayed on" camouflage with a brush . I am not really satisfied with the result, so next time I will use the airbrush despite the small scale.
Comments welcome.


spongya


Joined: February 01, 2005
KitMaker: 2,365 posts
Armorama: 1,709 posts

Posted: Monday, January 31, 2011 - 11:17 AM UTC
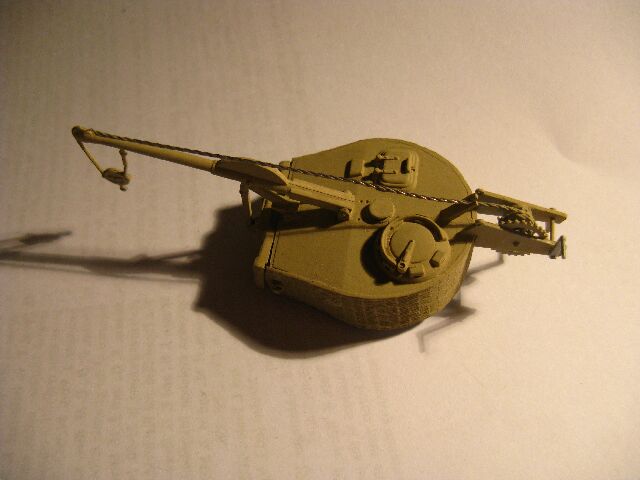

I'm building this Tiger for the Italy campaign... If I'm not mistaken these tanks were used only on the Italian front. (For who knows what.)

Mobious
Joined: May 18, 2008
KitMaker: 210 posts
Armorama: 126 posts
Posted: Monday, January 31, 2011 - 01:25 PM UTC
Andras, the device was a field modification designed as a mine clearing device by members of sPzAbt. 508.
Tailor

Joined: May 26, 2008
KitMaker: 1,168 posts
Armorama: 256 posts

Posted: Tuesday, February 01, 2011 - 04:49 AM UTC
Gentlemen-
It has been taking me a while to get here, but finally I can join the fray. Tonight I''ll finish my Red Baron Albatross for the TV&Movie campaign over at The Auto Modeller and then I'll embark on The Blitz 3.
This is going to be my first serious attempt do do a tank. Of cause I have put myself way too much on the platter for such a first try:

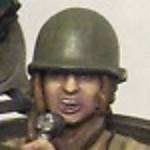
I will be doing a M18 from the 805th TD Btn. It'll be kind like this:

However instead of the "3-1" I will be doing the "2-2" vehicle on the suburban streets of what I think is Verona. I have a picture, but I'll have to be doing a bit of research still to validate the location. This time I'll try to make historically viable diorama, which is another first for me outside of building ship models.
Cheers,
Guido
It has been taking me a while to get here, but finally I can join the fray. Tonight I''ll finish my Red Baron Albatross for the TV&Movie campaign over at The Auto Modeller and then I'll embark on The Blitz 3.
This is going to be my first serious attempt do do a tank. Of cause I have put myself way too much on the platter for such a first try:
I will be doing a M18 from the 805th TD Btn. It'll be kind like this:
However instead of the "3-1" I will be doing the "2-2" vehicle on the suburban streets of what I think is Verona. I have a picture, but I'll have to be doing a bit of research still to validate the location. This time I'll try to make historically viable diorama, which is another first for me outside of building ship models.
Cheers,
Guido
Bigrip74
Joined: February 22, 2008
KitMaker: 5,026 posts
Armorama: 1,604 posts
Posted: Wednesday, February 02, 2011 - 04:18 PM UTC
@ Guido: nice set of goodies that you have there. Hope all goes well with your Red Baron Albatross for the TV&Movie campaign
@ Andras: that is a unique looking device. At first I thought that it was an armor retrieval system, but Mobious describes it as a field modification designed as a mine clearing device by members of sPzAbt. 508.
Bob
@ Andras: that is a unique looking device. At first I thought that it was an armor retrieval system, but Mobious describes it as a field modification designed as a mine clearing device by members of sPzAbt. 508.
Bob
spongya
Joined: February 01, 2005
KitMaker: 2,365 posts
Armorama: 1,709 posts
Posted: Thursday, February 03, 2011 - 04:41 AM UTC
I've read all sorts of things, but how exactly would you clear mines with it? A hook at the end of a small wrench does not really do the trick...
The hand-wrench makes it improbable to use it for vehicles (unless an exceptionally strong soldier mans it, but then why need a modified tank? he can just pick them up). So far the most convincing theory was to help place explosive charges in front of an obstacle, but then again: the winch operator would have to be terribly exposed (along with the explosive in question).
So it's an enigma.

bellers

Joined: September 30, 2008
KitMaker: 253 posts
Armorama: 218 posts

Posted: Thursday, February 03, 2011 - 06:40 AM UTC
hi guys some nice builds going on and some nice finished ones too. hopefully will have some pics of my stug to post soon.not getting alot of time at the mo 
Mobious
Joined: May 18, 2008
KitMaker: 210 posts
Armorama: 126 posts
Posted: Thursday, February 03, 2011 - 10:12 AM UTC
Quoted Text
I've read all sorts of things, but how exactly would you clear mines with it? A hook at the end of a small wrench does not really do the trick...
The hand-wrench makes it improbable to use it for vehicles (unless an exceptionally strong soldier mans it, but then why need a modified tank? he can just pick them up). So far the most convincing theory was to help place explosive charges in front of an obstacle, but then again: the winch operator would have to be terribly exposed (along with the explosive in question).
So it's an enigma.
Just happened to be looking over "Tigers at the Front" by T. Jentz and there is a photo of a captured/abandoned vehicle in question. The caption states that explosives were lowered to detonate mines. Evidently the tank was for protection. Not the flail system used by the Allies probably not very effective either. As for removing obstacles, it is possible. That would be some serious explosives if they need to be craned into position! It is an unusual subject nonetheless as are many field modified variants and I'll be following your progress.
Tailor
Joined: May 26, 2008
KitMaker: 1,168 posts
Armorama: 256 posts
Posted: Friday, February 04, 2011 - 01:43 AM UTC
Gentlemen-
I got started with my Hellcat M-18 build for this campaign. As far as I can make out on the photo in the Allied-Axis Issue No. 4, tank 2-2 of the 805th Tank Destroyer Btn. was dubbed Crock of Cognac by its crew. If anybody can share some information on that particular tank with me, I would be very grateful.
I am quite a lazy modeller so I expect to tire form the project as soon as the tank is finished, so I chose hopefully wisely to make the base first, then finish the figures while the tank is still under construction, so I just have to merge everything in the end to leave no end untied.
So, I got started by placing the MiniArt base No. 36003 Street w/ Park Wall open a fitting 2cm board of plywood cut to size and run through my trusty router. The wooden parts of the base will stay under protective tape until being finished as a final move of this project.

I filled the void underneath the MiniArt base with some ready-to-use plaster to provide some stability. The assembly was pretty straight forward. The wall did not quite fit the system of cobblestones on the sidewalk, so I had to cover some of that pattern around the columns with putty. All gaps around the pillars are filled up with white glue. The tops of the walls were sanded and then covered with a thin layer of putty. I used a sponge to dap at the surface to make spreading streaks and the gluing seam disappear.

Instead of just gluing the cast-iron fences on the wall, I connected the pillars with 2 horizontal girders, which allowed me to glue the fences into place using spacers underneath. It has a lot more depth to it like this.

I added shorter ends of twisted brass rods to either side of the wall to aid the impression of it being damaged on both ends.

As a second variation of the MiniArt kit, I replaced the pole of the street light with a brass rod to create a simpler lamp design.
So far I have invested about 5 hours. Now the whole thing needs painting. For that I need to search the net to find some nice pictures of suburban cobblestone streets in Italy.
Thats it for today. Constructive criticism is highly welcome!
Cheers,
Guido
I got started with my Hellcat M-18 build for this campaign. As far as I can make out on the photo in the Allied-Axis Issue No. 4, tank 2-2 of the 805th Tank Destroyer Btn. was dubbed Crock of Cognac by its crew. If anybody can share some information on that particular tank with me, I would be very grateful.
I am quite a lazy modeller so I expect to tire form the project as soon as the tank is finished, so I chose hopefully wisely to make the base first, then finish the figures while the tank is still under construction, so I just have to merge everything in the end to leave no end untied.
So, I got started by placing the MiniArt base No. 36003 Street w/ Park Wall open a fitting 2cm board of plywood cut to size and run through my trusty router. The wooden parts of the base will stay under protective tape until being finished as a final move of this project.
I filled the void underneath the MiniArt base with some ready-to-use plaster to provide some stability. The assembly was pretty straight forward. The wall did not quite fit the system of cobblestones on the sidewalk, so I had to cover some of that pattern around the columns with putty. All gaps around the pillars are filled up with white glue. The tops of the walls were sanded and then covered with a thin layer of putty. I used a sponge to dap at the surface to make spreading streaks and the gluing seam disappear.
Instead of just gluing the cast-iron fences on the wall, I connected the pillars with 2 horizontal girders, which allowed me to glue the fences into place using spacers underneath. It has a lot more depth to it like this.
I added shorter ends of twisted brass rods to either side of the wall to aid the impression of it being damaged on both ends.
As a second variation of the MiniArt kit, I replaced the pole of the street light with a brass rod to create a simpler lamp design.
So far I have invested about 5 hours. Now the whole thing needs painting. For that I need to search the net to find some nice pictures of suburban cobblestone streets in Italy.
Thats it for today. Constructive criticism is highly welcome!
Cheers,
Guido

warreni

Joined: August 14, 2007
KitMaker: 5,926 posts
Armorama: 712 posts

Posted: Saturday, February 05, 2011 - 07:56 PM UTC
Hi Everyone.
I thought I better post some progress shots before I finished the kit...
It is Dragon's 1/35 75mm GMC which will be finished in a scheme used by either Polish troops or British or US troops in Italy.
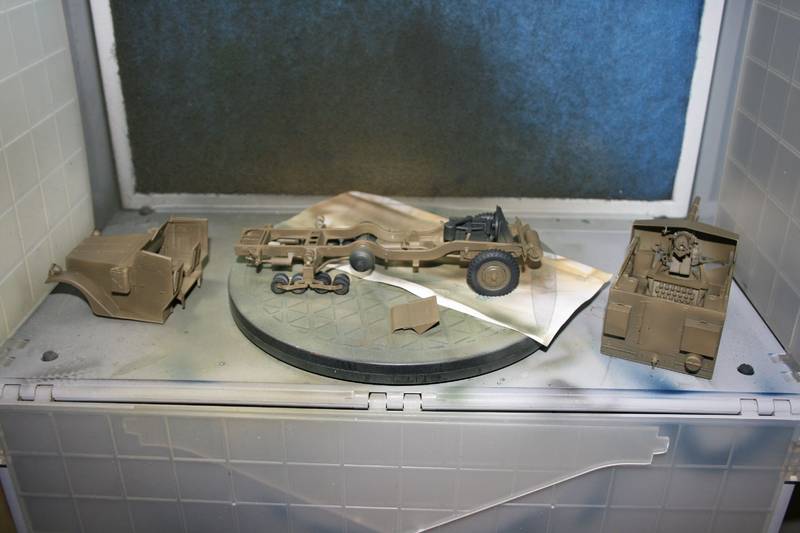
Yes, I know, boring old OD.. But I like OD so I am happy!
Time for some washes etc after I put the decals on.
I thought I better post some progress shots before I finished the kit...
It is Dragon's 1/35 75mm GMC which will be finished in a scheme used by either Polish troops or British or US troops in Italy.
Yes, I know, boring old OD.. But I like OD so I am happy!
Time for some washes etc after I put the decals on.
Tailor
Joined: May 26, 2008
KitMaker: 1,168 posts
Armorama: 256 posts
Posted: Saturday, February 05, 2011 - 08:06 PM UTC
Nice one, Warren!
Pardon my ignorance... What is "OD"?
CHeers,
Guido
PS.: I got meself the same spray booth only two weeks ago. Are you satisfied with it? I thought it was was a great investment at some 60 + shipping.
Pardon my ignorance... What is "OD"?
CHeers,
Guido
PS.: I got meself the same spray booth only two weeks ago. Are you satisfied with it? I thought it was was a great investment at some 60 + shipping.
Bigrip74
Joined: February 22, 2008
KitMaker: 5,026 posts
Armorama: 1,604 posts
Posted: Saturday, February 05, 2011 - 08:12 PM UTC
Warren, "DITTO" what Guido stated regarding the paint booth. And I love OD it just goes with any and everything 
Bob
Bob

KAYELL

Joined: February 16, 2008
KitMaker: 107 posts
Armorama: 81 posts

Posted: Sunday, February 06, 2011 - 08:13 AM UTC
Hi Folks,
Finally completed my entry to the campaign. Tamiya M5A1 Stuart with verlinden sandbags.I had originally intended to use the Academy traacks but after a week trying to get them to go on I gave up and went back to the kit tracks.


Better get started on my next campaign entry.
Cheers
Keith
Finally completed my entry to the campaign. Tamiya M5A1 Stuart with verlinden sandbags.I had originally intended to use the Academy traacks but after a week trying to get them to go on I gave up and went back to the kit tracks.
Better get started on my next campaign entry.
Cheers
Keith

ltb073
Joined: March 08, 2010
KitMaker: 3,662 posts
Armorama: 3,078 posts
Posted: Sunday, February 06, 2011 - 08:44 AM UTC
Some nice looking builds going on here
@ Guido, welcome to the armor side, your park wall is looking great
@ Keith, tracks on the Stuart look fine nice job on that 1
@ Guido, welcome to the armor side, your park wall is looking great
@ Keith, tracks on the Stuart look fine nice job on that 1


vonHengest
Joined: June 29, 2010
KitMaker: 5,854 posts
Armorama: 4,817 posts

Posted: Sunday, February 06, 2011 - 09:53 AM UTC
Guys, I completely forgot what I was going to build for this campaign...
Let me have a look tonight and see if I can jog my memore...
Let me have a look tonight and see if I can jog my memore...

HARV
#012
Joined: November 07, 2003
KitMaker: 3,098 posts
Armorama: 1,236 posts
Posted: Sunday, February 06, 2011 - 10:02 AM UTC
Quoted Text
Pardon my ignorance... What is "OD"?
Olive Drab
Randy

Tailor
Joined: May 26, 2008
KitMaker: 1,168 posts
Armorama: 256 posts
Posted: Sunday, February 06, 2011 - 08:44 PM UTC
Thanks, Sal and Randy!
Nice Stuart, Keith!
I continued painting the base and made good progress. Will post pictures tonight. I started to assemble the tank crew and found that The Legend figures are almost 10% smaller than the Verlinden figures. Looks a bit like grown-ups and teenagers when placed together. Not really satisfied with that.
Cheers,
Guido
bellers
Joined: September 30, 2008
KitMaker: 253 posts
Armorama: 218 posts
Posted: Monday, February 07, 2011 - 11:03 AM UTC
hi guys finaly some work done 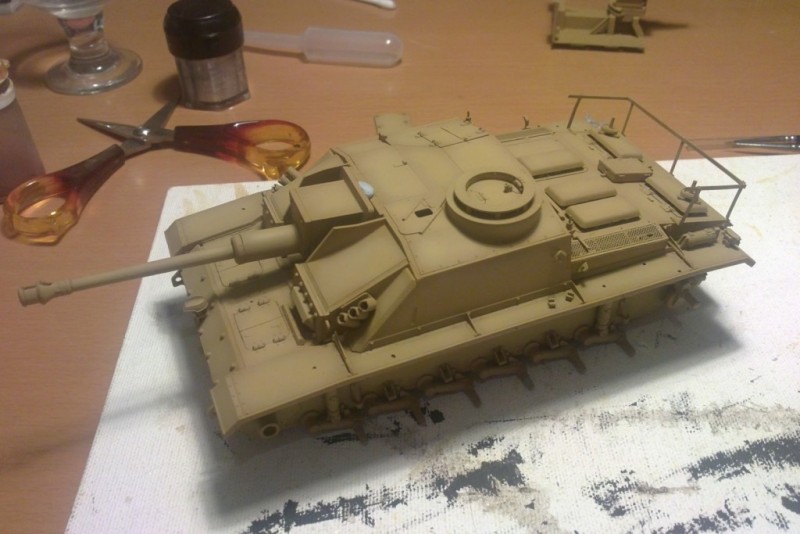
bellers
Joined: September 30, 2008
KitMaker: 253 posts
Armorama: 218 posts
Posted: Monday, February 07, 2011 - 11:10 AM UTC
tryed to get abit of shadeing on this build 
bellers
Joined: September 30, 2008
KitMaker: 253 posts
Armorama: 218 posts
Posted: Monday, February 07, 2011 - 11:19 AM UTC
then finished off the periscopes in the commanders hatch 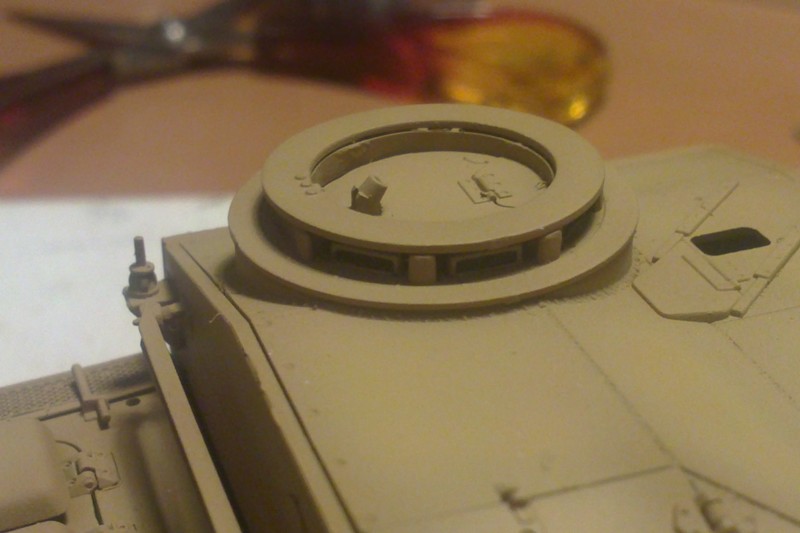 hope you like keep up the good work everyone
hope you like keep up the good work everyone  |

WEB HOSTING BY


Copyright ©2021 Armorama and Kitmaker Network, a subsidiary of Silver Star Enterprises
All Rights Reserved. Please read our Conditions of Use and Privacy Policy.
All Rights Reserved. Please read our Conditions of Use and Privacy Policy.