

Well, it's June 1st, and the campaign has officially begun.
I'm a new armor modeler having come over from military aircraft subjects, new to Armorama, (so I don't know a sole here), and of course this is my 1st campaign. So what does one do now? Do I just start my M4A1 DV, or do I post pictures of the box and sprue's somewhere? Thanks for any information and pointing me into the right direction.
Campaigns
Where Armorama group builds can be discussed, organized, and updates posted.
Where Armorama group builds can be discussed, organized, and updates posted.
Hosted by Darren Baker, Richard S.
All American Tracks
Joel_W

Joined: December 04, 2010
KitMaker: 11,666 posts
Armorama: 1,143 posts
Posted: Wednesday, June 01, 2011 - 12:58 AM UTC


BigSmitty
Joined: October 01, 2008
KitMaker: 597 posts
Armorama: 439 posts

Posted: Wednesday, June 01, 2011 - 03:09 AM UTC
Think I'm going to go with Tamiya's 1/35 M2A2 ODS Bradley. That acceptable? It's got tracks, armor, and a little pew pew gun, but at least has a pair of TOW missiles. I also have the M2 Bradley from 1985 with the full interior, so I may use the interior as a basis for the ODS version and fill in the missing pieces.
I don't do much modern armor, so for my current projects I'm doing the Bradley for this campaign and the Leopard 2A6 for the Total Tamiya campaign. A nice break from WWII subjects. It's too bad Tamiya doesn't do more of the modern stuff in their 1/48 line. My display cabinet likes those little guys.
I don't do much modern armor, so for my current projects I'm doing the Bradley for this campaign and the Leopard 2A6 for the Total Tamiya campaign. A nice break from WWII subjects. It's too bad Tamiya doesn't do more of the modern stuff in their 1/48 line. My display cabinet likes those little guys.

ltb073
Joined: March 08, 2010
KitMaker: 3,662 posts
Armorama: 3,078 posts
Posted: Wednesday, June 01, 2011 - 07:28 PM UTC
Quoted Text
Well, it's June 1st, and the campaign has officially begun.
I'm a new armor modeler having come over from military aircraft subjects, new to Armorama, (so I don't know a sole here), and of course this is my 1st campaign. So what does one do now? Do I just start my M4A1 DV, or do I post pictures of the box and sprue's somewhere? Thanks for any information and pointing me into the right direction.
Joel, I'm not the campaign manager but most people will post a picture of their box contents in the tread here and then some progress shots as they go.

Welcome to the armor side of things


Joel_W
Joined: December 04, 2010
KitMaker: 11,666 posts
Armorama: 1,143 posts
Posted: Thursday, June 02, 2011 - 10:02 AM UTC
Well, looks like I'm the 1st one to post box shots of my Dragon 1/35 scale M4A1 DV entry in the campaign, which is my 1st one.


Bigrip74
Joined: February 22, 2008
KitMaker: 5,026 posts
Armorama: 1,604 posts

Posted: Thursday, June 02, 2011 - 12:14 PM UTC
I was so bored last night so I played with this until 3:00 am. Here is my entry.


Bob


Bob
Joel_W
Joined: December 04, 2010
KitMaker: 11,666 posts
Armorama: 1,143 posts
Posted: Thursday, June 02, 2011 - 01:00 PM UTC
Bob, Nice to see someone else has started their tank. I was beginning to think that I posted in the wrong thread.
Just started my build. Do you post pictures of your build as you go along, or just at the end with the finished model to receive your ribbon?
Just started my build. Do you post pictures of your build as you go along, or just at the end with the finished model to receive your ribbon?
ltb073
Joined: March 08, 2010
KitMaker: 3,662 posts
Armorama: 3,078 posts
Posted: Thursday, June 02, 2011 - 01:15 PM UTC
Quoted Text
Bob, Nice to see someone else has started their tank. I was beginning to think that I posted in the wrong thread.
Just started my build. Do you post pictures of your build as you go along, or just at the end with the finished model to receive your ribbon?
I agree Bob nice start, I need a night where I can sit up to 3 and build but work comes 1st, this way I can afford more kits

@Joel, you can post as you make progress, it also helps other guys if you describe any problems or new techniques that you will be using, with your post

Joel_W
Joined: December 04, 2010
KitMaker: 11,666 posts
Armorama: 1,143 posts
Posted: Thursday, June 02, 2011 - 01:30 PM UTC
Quoted Text
I agree Bob nice start, I need a night where I can sit up to 3 and build but work comes 1st, this way I can afford more kits
@Joel, you can post as you make progress, it also helps other guys if you describe any problems or new techniques that you will be using, with your post
I'd doing a strictly OOB for my 2nd tank ever, and 1st campaign. Considering the model is a Dragon kit, I would be very surprised if I ran into any problems unless I caused them.

GaryKato
Joined: December 06, 2004
KitMaker: 3,694 posts
Armorama: 2,693 posts

Posted: Thursday, June 02, 2011 - 02:01 PM UTC
You have to pay attention to the instructions in Dragon kits. Sometimes they get the part numbers wrong or confuse the part numbers for the left and right sides.
Bigrip74
Joined: February 22, 2008
KitMaker: 5,026 posts
Armorama: 1,604 posts
Posted: Thursday, June 02, 2011 - 02:08 PM UTC
Joel, just to add to what Sal stated we all gain from the photos posted. Discussion along with the photos give everyone a chance to see someone elses approach to an assemmly or a problem and then that little switch goes off (in my head at least to HEY that is how it is done). I have been playing with these toys since 1957 and I am still learning how to do this or that. Hey Joel great to have you here with the others.
@ Sal: As to the fast build and 3:00 am I just did not have it in me to do any more studying for school. At least some of us need to work so the others can play
Bob
@ Sal: As to the fast build and 3:00 am I just did not have it in me to do any more studying for school. At least some of us need to work so the others can play
Bob
Joel_W
Joined: December 04, 2010
KitMaker: 11,666 posts
Armorama: 1,143 posts
Posted: Thursday, June 02, 2011 - 02:21 PM UTC
Gary,
Hi.
I have found the Dragon instructions confusing at times. Those pesky arrows at times just seem to point to a general area, and the rest is left up to me.
Hi.
I have found the Dragon instructions confusing at times. Those pesky arrows at times just seem to point to a general area, and the rest is left up to me.

Sudzonic

Joined: December 07, 2007
KitMaker: 2,096 posts
Armorama: 1,983 posts

Posted: Thursday, June 02, 2011 - 11:16 PM UTC
Great start Joel and Bob, keep us all posted on your builds it will be interesting to see how you both progress with your builds.
Joel welcome to your first campaign good to have you on board for this one, I hope this is the first many campaigns that you enlist for .
I still don't have anything for this campaign but I am away over the weekend so I will hopefully pick something up? I also need to get a few for other campaigns as well.
Joel_W
Joined: December 04, 2010
KitMaker: 11,666 posts
Armorama: 1,143 posts
Posted: Friday, June 03, 2011 - 05:29 AM UTC
As a genuine armor Newbie, I've heard about the great cast molding effect that Dragon has developed. Well, I was just blown away with it on the hull. Outstanding.

Sudzonic
Joined: December 07, 2007
KitMaker: 2,096 posts
Armorama: 1,983 posts
Posted: Wednesday, June 08, 2011 - 02:49 AM UTC
Graet start guys, I was looking threw my stash and found a tamiya M2 bradley so i will finish it for the campaign.
Here is where I am at so far.

Here is where I am at so far.
BigSmitty
Joined: October 01, 2008
KitMaker: 597 posts
Armorama: 439 posts
Posted: Wednesday, June 08, 2011 - 03:00 AM UTC
Scott,
Is that the old (1985) M2 Bradley with the interior or the newer M2A2 ODS release from Tamiya? I have both in my stash and was really leaning heavy towards using one of them for this campaign originally, but I have some very sad Shermans looking at me as well. Looks really sharp.
Is that the old (1985) M2 Bradley with the interior or the newer M2A2 ODS release from Tamiya? I have both in my stash and was really leaning heavy towards using one of them for this campaign originally, but I have some very sad Shermans looking at me as well. Looks really sharp.
Joel_W
Joined: December 04, 2010
KitMaker: 11,666 posts
Armorama: 1,143 posts
Posted: Wednesday, June 08, 2011 - 03:15 AM UTC
Scott, Great start to the M2 Bradley. Looks great.
Joel_W
Joined: December 04, 2010
KitMaker: 11,666 posts
Armorama: 1,143 posts
Posted: Wednesday, June 08, 2011 - 04:00 AM UTC
Well, I got through the basic OOB build in a weeks time. Fit of the kit was near perfect. I only had problems with that pesky seem on the back of the turret. I ended up putting it as there is a seam already there that represents the casting seam.
I had a lot of trouble with the front PE fenders. Not having worked with PE much, it's an area out of my comfort zone. I CCA glued the fenders on. The fit to he side of the hull was fine, but from the transmission housing up to the top of the fender had gaps that I ended up filling with CCA glue. Would have been a lot easier if I had the Gel type, but of course I never bothered to buy some. I'm quite sure that the fit issues were strictly mine, not Dragon's.
Looking forward to starting the painting & decaling process, then moving on to the weathering, which will be used but not abused.
Lost a lot of parts to the carpet again for numerous issues, like hands fall asleep & pins & needles, tweezers snaping closed and launching parts to who knows where, etc. You'll see some black grab handles. Those are my home made replacements. Made one or two out of sprue to see which way is easier. Like bending up metal way more.
Here's some pictures of the build to date.
Sudzonic
Joined: December 07, 2007
KitMaker: 2,096 posts
Armorama: 1,983 posts
Posted: Wednesday, June 08, 2011 - 05:12 AM UTC
Graet start Joel, you are off to a flyer looking forward to seeing to some paint on this build well done.
ltb073
Joined: March 08, 2010
KitMaker: 3,662 posts
Armorama: 3,078 posts
Posted: Wednesday, June 08, 2011 - 05:24 PM UTC
@Joel, nice start on that Sherman
I got stated today on my Academy M-10 Duckbill with full Interior today and this is what it looked like before I started cutting into it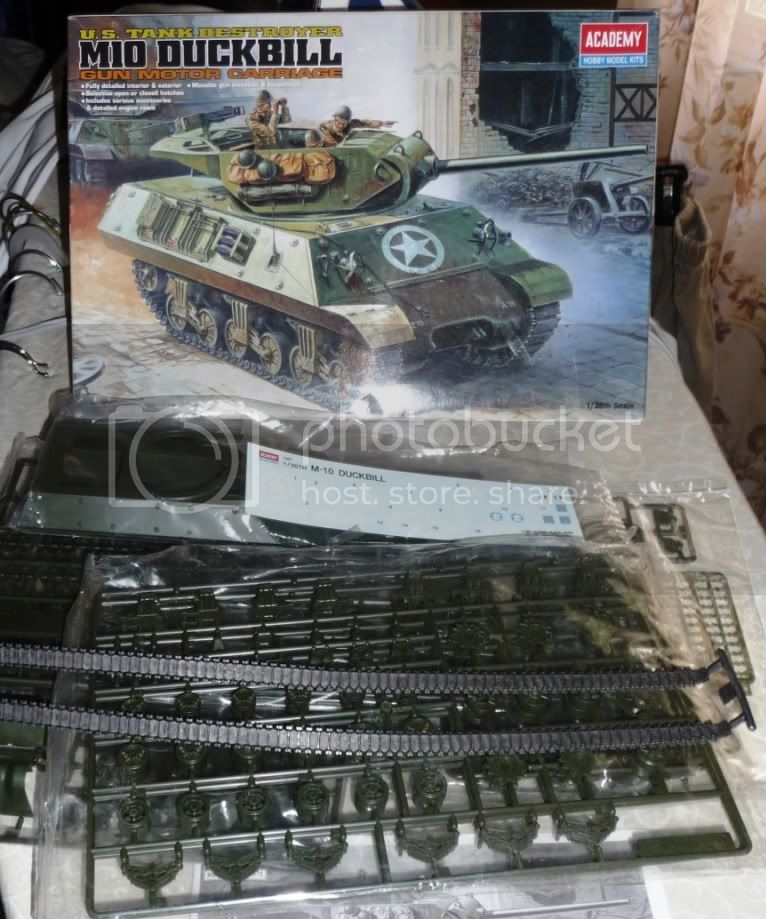
And here is what it looks like now with the bogies built and transmission in
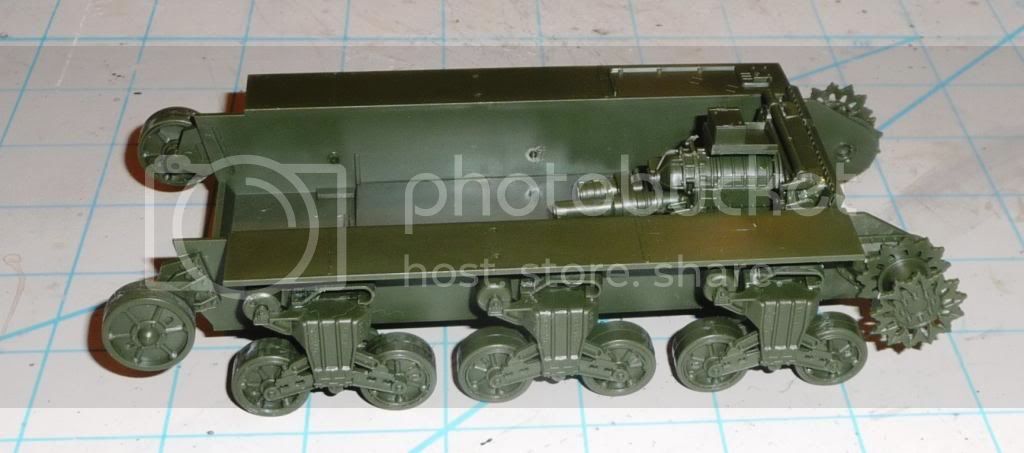 Its not much but its a start
I got stated today on my Academy M-10 Duckbill with full Interior today and this is what it looked like before I started cutting into it

And here is what it looks like now with the bogies built and transmission in
 Its not much but its a start
 Joel_W
Joined: December 04, 2010
KitMaker: 11,666 posts
Armorama: 1,143 posts
Posted: Thursday, June 09, 2011 - 09:14 AM UTC
Sal,nice start to the M10. Looking forward to following your build, especially the interior and engine compartments. Both are equally weak areas of my modeling expertise.
Sudzonic
Joined: December 07, 2007
KitMaker: 2,096 posts
Armorama: 1,983 posts
Posted: Thursday, June 09, 2011 - 09:20 AM UTC
Good to see you starting Sal looking forward to seeing more of your build.

vonHengest
Joined: June 29, 2010
KitMaker: 5,854 posts
Armorama: 4,817 posts

Posted: Thursday, June 09, 2011 - 11:18 AM UTC
Kickin' fellas, I need to get started on my Abrams soon 
Joel_W
Joined: December 04, 2010
KitMaker: 11,666 posts
Armorama: 1,143 posts
Posted: Thursday, June 09, 2011 - 01:32 PM UTC
I realized when I got a pm from a friend that I had omitted rolling the front fenders to conform to the side plates, I rolled them the best I could. It sure would have been a lot easier done off the model. But at least I got them done.
I then primed the Sherman with my favorite primer; Tamiya's Grey primer sealer, which is a lacquer based primer.
Right now I'm still debating to either paint it with Model Master enamels or MM acrylics. And since I'm going to use the two tone sand/OD camo scheme from the Sicily campaign, I yet to decide on the proper color sand to use.
Here's some pictures of where I'm at.
Bigrip74
Joined: February 22, 2008
KitMaker: 5,026 posts
Armorama: 1,604 posts
Posted: Thursday, June 09, 2011 - 01:58 PM UTC
Joel,
Your Sherman is looking good, how did you apply what glue to the PE?
Bob
Your Sherman is looking good, how did you apply what glue to the PE?
Bob
Joel_W
Joined: December 04, 2010
KitMaker: 11,666 posts
Armorama: 1,143 posts
Posted: Thursday, June 09, 2011 - 02:14 PM UTC
Quoted Text
Joel,
Your Sherman is looking good, how did you apply what glue to the PE?
Bob
Bob, used Gorilla CCA glue to tack the fenders to the hull once the glue got tacky. Then I came back and using a toothpick I spread a nice bead of the same glue along the hull and transmission joints. I used the same CCA glue to fill th gaps since I didn't have any CCA Gel. Today on the way home from work I picked up a tube of Locktite Gel CCA.
Once I rolled the fenders so that they layed at right angles to the side panels, I used a bead of CCA to hold the rolled fenders in place. Once dry, I layered in a over coat of CCA Gel to re-enforce the joints.
 |

WEB HOSTING BY


Copyright ©2021 Armorama and Kitmaker Network, a subsidiary of Silver Star Enterprises
All Rights Reserved. Please read our Conditions of Use and Privacy Policy.
All Rights Reserved. Please read our Conditions of Use and Privacy Policy.