Armor/AFV
For discussions on tanks, artillery, jeeps, etc.
Sherman firefly 1c hybrid hull
BBD468
Visit this Community
Texas, United States
Joined: March 08, 2010
KitMaker: 2,465 posts
Armorama: 2,383 posts
Posted: Saturday, May 12, 2012 - 12:09 PM UTC
Hey Phil,

Ya gotta love those Dragon instructions! They make a pretty great product but i wonder if they outsource the instruction design and printing.

Gary
asmodeuss
Visit this Community
Quebec, Canada
Joined: November 19, 2011
KitMaker: 1,389 posts
Armorama: 1,388 posts
Posted: Saturday, May 12, 2012 - 01:11 PM UTC
I think they celebrate the creation of a new kit by getting drunk and doing the instructions!

Phil.
Braille
#135
Visit this Community
California, United States
Joined: August 05, 2007
KitMaker: 1,501 posts
Armorama: 1,485 posts
Posted: Saturday, May 12, 2012 - 07:25 PM UTC

Quoted Text

I think they celebrate the creation of a new kit by getting drunk and doing the instructions!

Phil.


LOL You’ve just given away one of their most valuable model assembly instructions trademark secrets, now everybody knows!

~ Eddy
asmodeuss
Visit this Community
Quebec, Canada
Joined: November 19, 2011
KitMaker: 1,389 posts
Armorama: 1,388 posts
Posted: Sunday, May 13, 2012 - 02:53 AM UTC
Lets hope they don't sue my ass! Or if we keep this to ourselves and ask for kits in exchange for our silence...hmmm

Phil
asmodeuss
Visit this Community
Quebec, Canada
Joined: November 19, 2011
KitMaker: 1,389 posts
Armorama: 1,388 posts
Posted: Sunday, May 13, 2012 - 04:43 AM UTC
Hi guys! I was doing the staring game on different hulls of shermies and I came to realize that they almost all got the spring opening hatches like those one there:

http://data3.primeportal.net/tanks/greg_smith/m4a1/images/m4a1_01_of_18.jpg

Soooo, would it be accurate to replicate those hatch opening device?

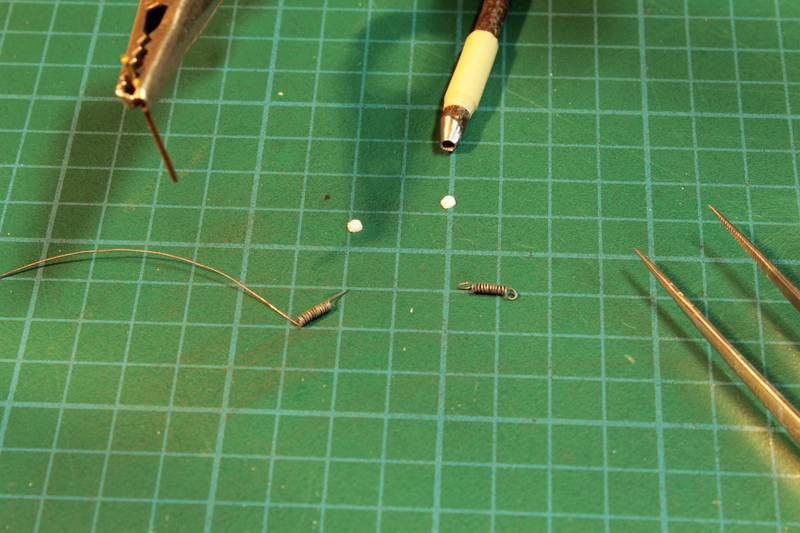
Here I've scratch the two spring and the upper attachement point(with my super nail/circle punch!)


What says you?
I'll wait for advice before installing them.

Phil.
exer
Visit this Community
Dublin, Ireland
Joined: November 27, 2004
KitMaker: 6,048 posts
Armorama: 4,619 posts
Posted: Sunday, May 13, 2012 - 08:27 AM UTC
Phil I'm not 100% sure but I think these are not present on Large hatch hulls such as yours
asmodeuss
Visit this Community
Quebec, Canada
Joined: November 19, 2011
KitMaker: 1,389 posts
Armorama: 1,388 posts
Posted: Sunday, May 13, 2012 - 08:37 AM UTC
Haha that is what I wanted to ear! or read actually.
I havent saw it on large hatch... in fact I have trouble finding pictures of firefly with those large hatches.
If anyone got one please share.

Thanks mate much appreciated.

Phil.
asmodeuss
Visit this Community
Quebec, Canada
Joined: November 19, 2011
KitMaker: 1,389 posts
Armorama: 1,388 posts
Posted: Sunday, May 13, 2012 - 08:47 AM UTC
Pat thanks man! I found a pic of a firefly 1c hybrid with the large hatch and you were right! no such spring.
You can see it on this page:
http://ww2armor.jexiste.fr/Files/Allies/Allies/4-Infos/USA/Galleries/Mons04/Mons04-pg1.htm

Phil
asmodeuss
Visit this Community
Quebec, Canada
Joined: November 19, 2011
KitMaker: 1,389 posts
Armorama: 1,388 posts
Posted: Sunday, May 13, 2012 - 10:03 AM UTC
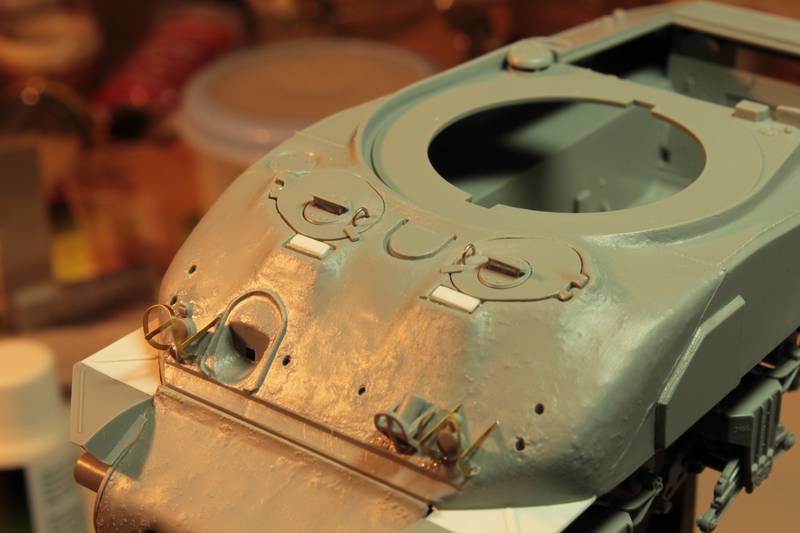
Based on my new found pics I decied to go this way:


Hows it looks?

Phil
BBD468
Visit this Community
Texas, United States
Joined: March 08, 2010
KitMaker: 2,465 posts
Armorama: 2,383 posts
Posted: Sunday, May 13, 2012 - 11:29 AM UTC
Hi Phil,

Dude, i know you cant use those springs on the hatches but man, they look awesome! You didnt find any correct parts for the periscope? You did a nice job on the covers. I hope you dont run into any more parts issues bro. She's looking good Phil!

Gary
asmodeuss
Visit this Community
Quebec, Canada
Joined: November 19, 2011
KitMaker: 1,389 posts
Armorama: 1,388 posts
Posted: Monday, May 14, 2012 - 01:45 AM UTC
. I've put my tiny spring in the small part box... they will serve one day...or not. I could have used periscope in the holes in front of the hatches but on pics they were seldomly up and i wanted to build some cover...was in a scratchy mood.
Next step I'm moving to the rear of the hull.
Thank you all for following.

Phil.
pseudorealityx
Visit this Community
Georgia, United States
Joined: January 31, 2010
KitMaker: 2,191 posts
Armorama: 1,814 posts
Posted: Monday, May 14, 2012 - 02:08 AM UTC
Looking good Phil. Periscope covers are nice. Amazing that Dragon didn't supply any in the kit.

Be wary of the bolt stripe between the hull and transmission case. Every Dragon Sherman I've built... it never fits right without some work.

asmodeuss
Visit this Community
Quebec, Canada
Joined: November 19, 2011
KitMaker: 1,389 posts
Armorama: 1,388 posts
Posted: Monday, May 14, 2012 - 02:13 AM UTC

Quoted Text

Looking good Phil. Periscope covers are nice. Amazing that Dragon didn't supply any in the kit.

Be wary of the bolt stripe between the hull and transmission case. Every Dragon Sherman I've built... it never fits right without some work.


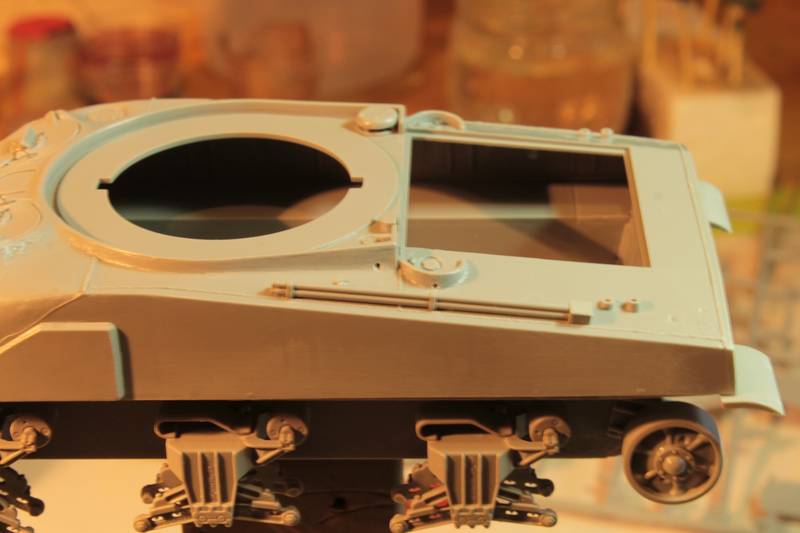
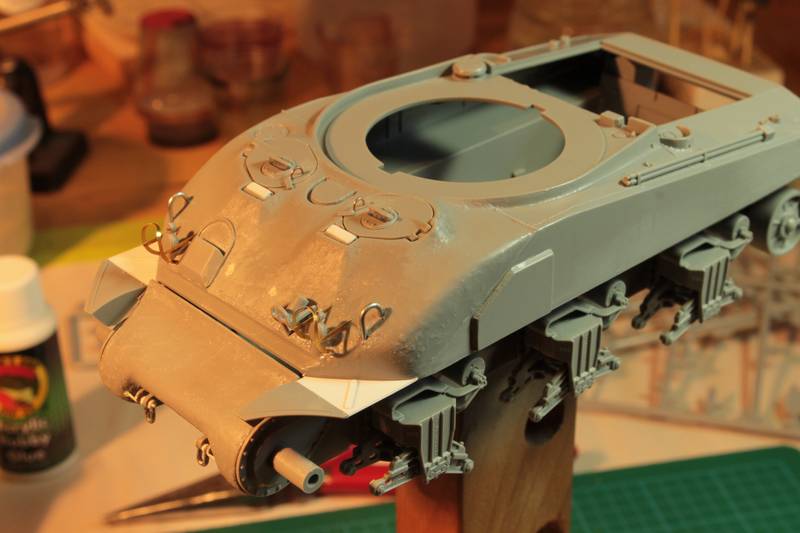
Thanks Jesse! Yes a couple of pieces missing in this kit!(and fitting issues). About the bolt stripe, it does looks like it wont fit great... How did you overcome this issue with your previous builds? I wanted to wait t'ill i fit the upperhull to the lower before putting that piece on.

Thanks again for the heads up.

Phil.
asmodeuss
Visit this Community
Quebec, Canada
Joined: November 19, 2011
KitMaker: 1,389 posts
Armorama: 1,388 posts
Posted: Wednesday, May 16, 2012 - 01:42 AM UTC
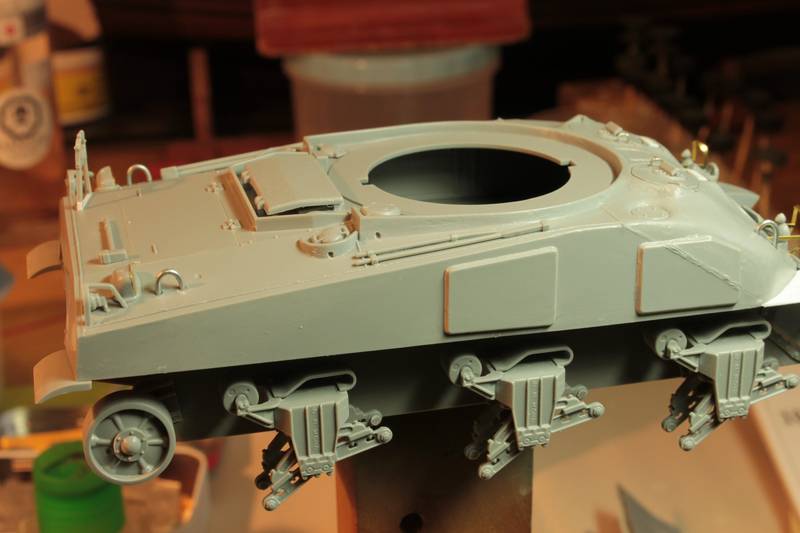
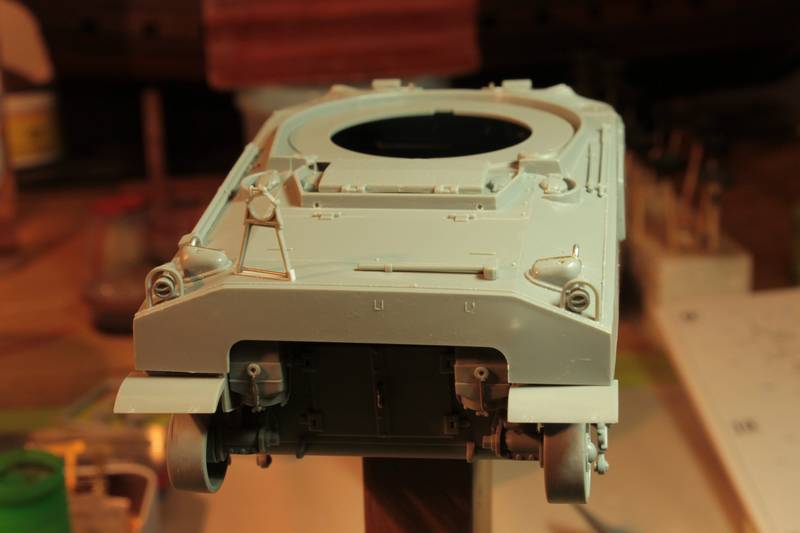
Not a big amount of progress these days. Workworkwork..you all know that. I've pluged the holes for the gun support since i'll be putting it on the engine bay. Amazingly I got two different gun support in the kit! So I wont have to scratch that one. Replaced the hatches opening tab by some wire handles(it was ridiculous...serioulsly) and the lift loops. Drainage holes have been done. If I missed some please tell me.


If someone as idea on details that could be added feel free to tell me!

Thanks for watching and following.

Phil.
BBD468
Visit this Community
Texas, United States
Joined: March 08, 2010
KitMaker: 2,465 posts
Armorama: 2,383 posts
Posted: Wednesday, May 16, 2012 - 01:37 PM UTC
Hey Phil,

Your doing a great job Phil. I will point out, if i may, your hatch grab handles are rounded instead of squared, if thats something you want to address. Model on my brother!!!

Gary
pseudorealityx
Visit this Community
Georgia, United States
Joined: January 31, 2010
KitMaker: 2,191 posts
Armorama: 1,814 posts
Posted: Wednesday, May 16, 2012 - 01:46 PM UTC

Quoted Text


Quoted Text

Looking good Phil. Periscope covers are nice. Amazing that Dragon didn't supply any in the kit.

Be wary of the bolt stripe between the hull and transmission case. Every Dragon Sherman I've built... it never fits right without some work.


Thanks Jesse! Yes a couple of pieces missing in this kit!(and fitting issues). About the bolt stripe, it does looks like it wont fit great... How did you overcome this issue with your previous builds? I wanted to wait t'ill i fit the upperhull to the lower before putting that piece on.

Thanks again for the heads up.

Phil.


Trial and error honestly. On the last one, I had to shim it a little to get it to sit right.

On the one before that, I probably ignored it since it got covered up with extra armor, see?

http://armorama.kitmaker.net/forums/177009#1485863

caryl576
Visit this Community
United Kingdom
Joined: April 23, 2011
KitMaker: 173 posts
Armorama: 165 posts
Posted: Thursday, May 17, 2012 - 12:37 AM UTC
Enjoying your build, which has inspired be to restart a stalled one of the original Ic Hybrid kit,

One of the annoyances that looks like it's still there is the hollow backs of the idler wheels

(now they gave us inserts for the bogie wheels you don't see, but didn't bother with the idlers you do... there's clever!)

You can always buy an aftermarket replacement, but you can make your own relativly simply.


It's not perfect, as the rim is too thick, but painted up it's far nicer than a hollow back.

Just take a spare cast roadwheel (hopefully there are extras in the box since Dragon mix & match older sprues),

shave off the tyre, and 'side' to leave a flat disc which can be let into the back of the idler

either sand the disc thin, or trim down the peg hole in the idler to get it to fit, then trim the flange round the centre of the wheel, drill the centre hole to the correct size, and fill and gaps in the rim with putty

job done
asmodeuss
Visit this Community
Quebec, Canada
Joined: November 19, 2011
KitMaker: 1,389 posts
Armorama: 1,388 posts
Posted: Thursday, May 17, 2012 - 01:02 AM UTC
Thanks Anthony, I'll try to fix my lazy job on the iddler wheels....Thanks for the motivation hehe needed that.!
@Gary, The handle where done round base on a pic I saw,(I've posted the link up there) but maybe it is to round, i'll tone it down fore sure.
@Jesse, Your sherman looks awesome, The OD mix is quite on the spot my friend! thanks for sharing with us. Just to know, you remember those proportions on the mix?

Thanks all, update soon with some correction and progres.

Phil.
pseudorealityx
Visit this Community
Georgia, United States
Joined: January 31, 2010
KitMaker: 2,191 posts
Armorama: 1,814 posts
Posted: Thursday, May 17, 2012 - 02:17 AM UTC
Haha... no idea on the mix. That and the lighting is off in the photos. It's not quite as green.

My typical OD mixture is Tamiya OD mixed with some dark yellow. But the color changes a bit once all the weathering is finished.
asmodeuss
Visit this Community
Quebec, Canada
Joined: November 19, 2011
KitMaker: 1,389 posts
Armorama: 1,388 posts
Posted: Monday, May 21, 2012 - 03:11 AM UTC
Thanks Jesse! I'll try some mix based on that!
I'll post some progres tonight

Phil.
asmodeuss
Visit this Community
Quebec, Canada
Joined: November 19, 2011
KitMaker: 1,389 posts
Armorama: 1,388 posts
Posted: Tuesday, May 22, 2012 - 01:16 AM UTC
Hi guys!
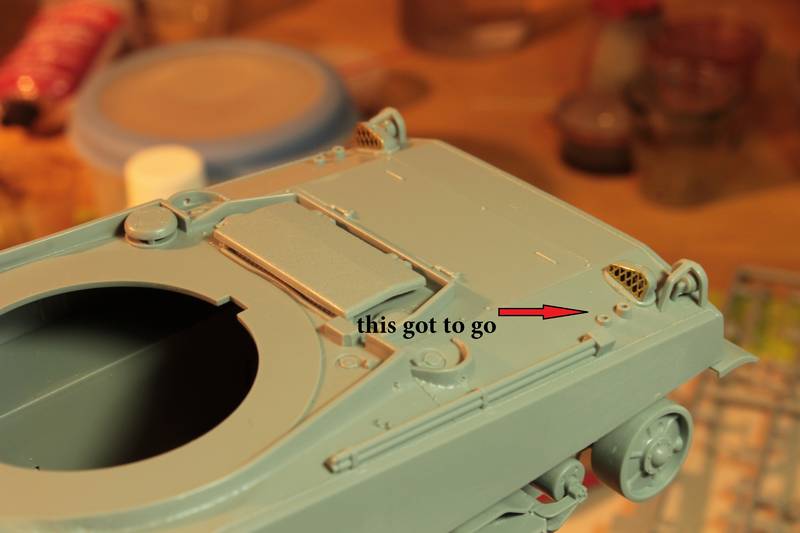
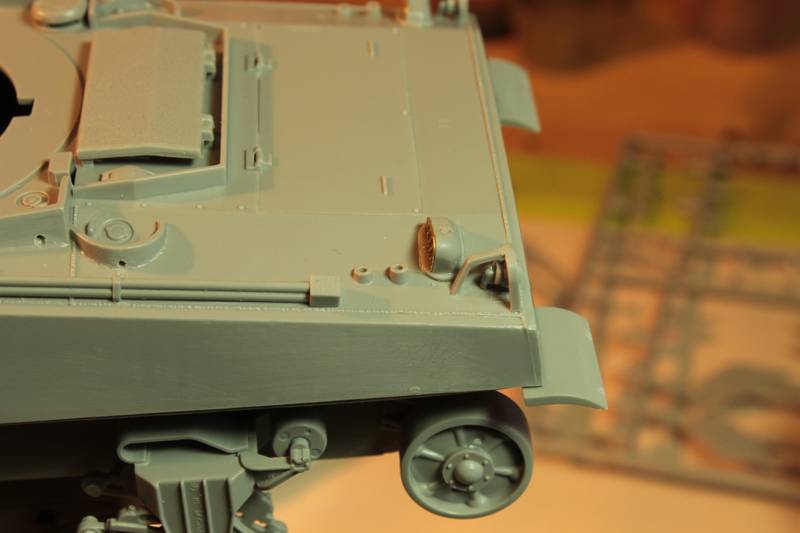
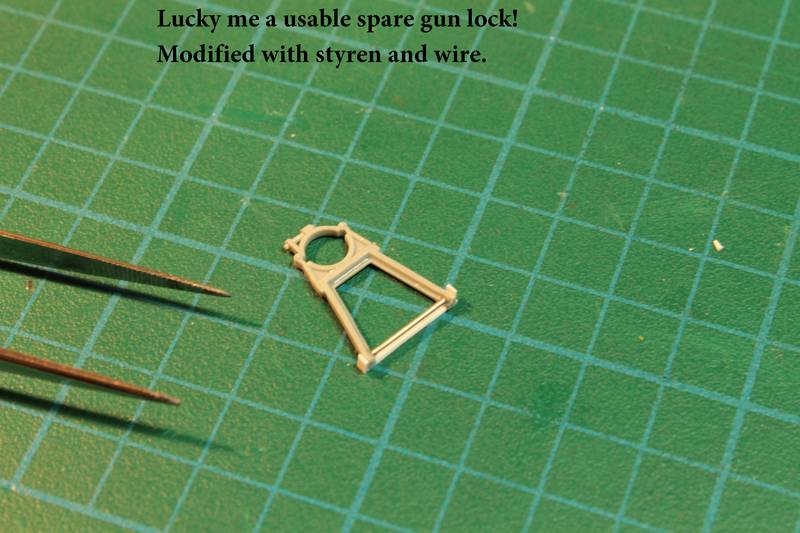
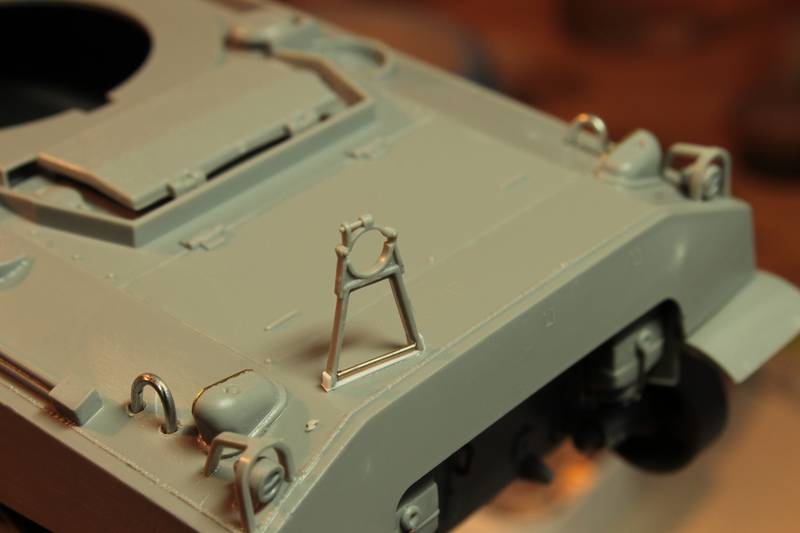
I've manage to get some progres on this weird pieces missing kit. Still I've got to putty around the lift loops near the engine bay and add some details on the rear gun lock. Speaking of witch... Oddly, there was one extra in the kit, maybe to make up for the missing pieces and plan steps It was almost good to go, only had to cut the base of it and scratch a new one so it would look right when in the upright position. Feel free to comment.


Sorry if the progres is slow but here in Québec when the sun and heat comes out you got to enjoy it before the winter
Actually it is not THAT bad but couldn't stay in.

Thanks for watching
Phil.
BBD468
Visit this Community
Texas, United States
Joined: March 08, 2010
KitMaker: 2,465 posts
Armorama: 2,383 posts
Posted: Tuesday, May 22, 2012 - 03:44 AM UTC
Hey Phil,

Your gun lock is nicely done as well as the lifting eyes.
Are you going to creat weld beads around the base of the eyes? Looking good bro!

Gary
asmodeuss
Visit this Community
Quebec, Canada
Joined: November 19, 2011
KitMaker: 1,389 posts
Armorama: 1,388 posts
Posted: Tuesday, May 22, 2012 - 01:43 PM UTC
Thanks Gary! I going to make welds around the hooks indeed but i'm not sure how i'm going to make those... milliput maybe or melted styrene rod. What do tou think would be the best? I'll have some progress pics for the rest tomorow.

Phil.
btw, congrats again for the medals and nice scratch on the greif man! loving it!
asmodeuss
Visit this Community
Quebec, Canada
Joined: November 19, 2011
KitMaker: 1,389 posts
Armorama: 1,388 posts
Posted: Wednesday, May 23, 2012 - 01:30 AM UTC
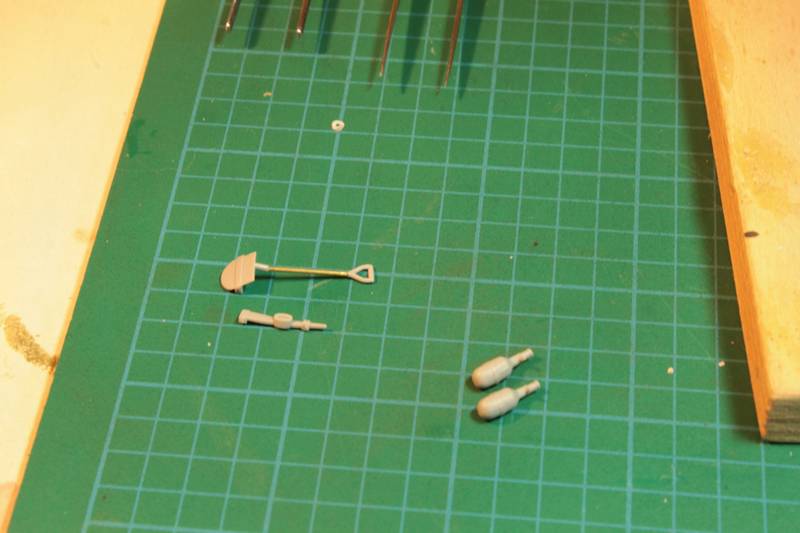
Why are there positioning pin on every part but no positioning hole at all?....hehehe I had to replace the shovel handle, it was attached at 3 point on the sprue, i imagine because of it being so thin but on the other hand cleaning it up.... i broke it. Not to much progress but here is some pics of the pioneer tools and more drainage holes.


Thanks for watching.

Phil
BBD468
Visit this Community
Texas, United States
Joined: March 08, 2010
KitMaker: 2,465 posts
Armorama: 2,383 posts
Posted: Wednesday, May 23, 2012 - 03:17 AM UTC

Quoted Text

Thanks Gary! I going to make welds around the hooks indeed but i'm not sure how i'm going to make those... milliput maybe or melted styrene rod. What do tou think would be the best? I'll have some progress pics for the rest tomorow.

Phil.
btw, congrats again for the medals and nice scratch on the greif man! loving it!


Hi Phil,

Everythings looking great bro. Nice save on the shovel. IMO, the milliput would be a bit easier to do around the base of the lifting eye. Model on Phil!!!

Gary