Phil,
If you glued the tool box on the back with tamiya extra thin cement you very well might be able to get it off.
I have had similar problems before and what I do is drench the glued area in Tamiya Lacquer thinner. Do this a few times and you might be able to pop it off, the Lacquer seems to dissolve the glue and weaken the bond between the two plastic parts. If you start to pry and you feel it coming off in some areas then there is a good chance you can get it off. Just keep dousing it in Lacquer thinner. However if after doing this for about an hour and nothing starts to give I would just leave it.
Armor/AFV
For discussions on tanks, artillery, jeeps, etc.
For discussions on tanks, artillery, jeeps, etc.
Hosted by Darren Baker, Mario Matijasic
Sherman firefly 1c hybrid hull
Totalize

Joined: February 04, 2009
KitMaker: 743 posts
Armorama: 549 posts

Posted: Tuesday, June 05, 2012 - 02:28 AM UTC
ericadeane

Joined: October 28, 2002
KitMaker: 4,021 posts
Armorama: 3,947 posts

Posted: Tuesday, June 05, 2012 - 03:16 AM UTC
Hi Phil: Sorry that I hadn't been following this thread earlier. As for the periscope, I see that both of your hull hatches have the periscope attached. What I'm saying is that the right side hatch would not have had this. It's cover would be down as no crew member sat in that seat for Fireflies. HOpe that makes sense.
Rgrds,
Rgrds,
pseudorealityx

Joined: January 31, 2010
KitMaker: 2,191 posts
Armorama: 1,814 posts

Posted: Tuesday, June 05, 2012 - 03:32 AM UTC
Here's your photo from before.... 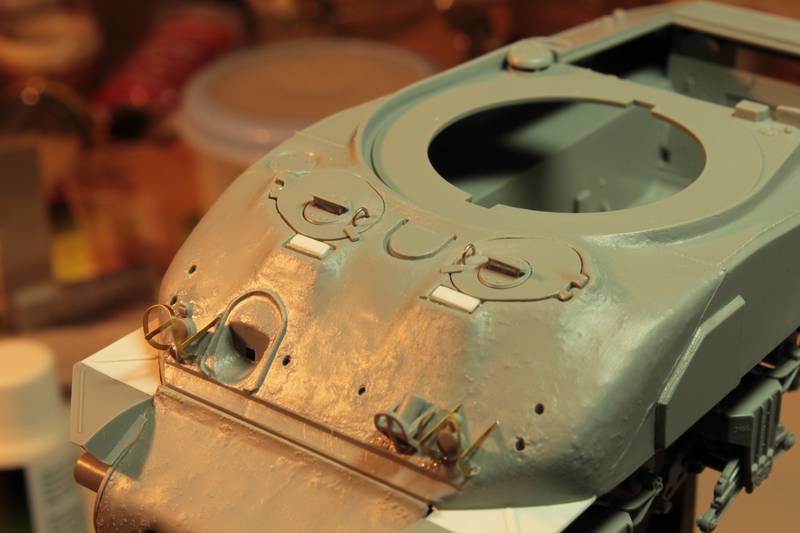
Remember you built these little periscope covers? Well, see how the hatches' have their periscopes 'up'? The one on the radio operator/hull MG side should be 'down', like the ones you scratched.

Remember you built these little periscope covers? Well, see how the hatches' have their periscopes 'up'? The one on the radio operator/hull MG side should be 'down', like the ones you scratched.
pseudorealityx

Joined: January 31, 2010
KitMaker: 2,191 posts
Armorama: 1,814 posts

Posted: Tuesday, June 05, 2012 - 03:33 AM UTC
Quoted Text
Phil,
If you glued the tool box on the back with tamiya extra thin cement you very well might be able to get it off.
I have had similar problems before and what I do is drench the glued area in Tamiya Lacquer thinner. Do this a few times and you might be able to pop it off, the Lacquer seems to dissolve the glue and weaken the bond between the two plastic parts. If you start to pry and you feel it coming off in some areas then there is a good chance you can get it off. Just keep dousing it in Lacquer thinner. However if after doing this for about an hour and nothing starts to give I would just leave it.
I've had success using 'more' Tamiya extra thin. All you're trying to do it soften that bond. Once it's soft, you can pry it off, and then clean up the scar.

Totalize

Joined: February 04, 2009
KitMaker: 743 posts
Armorama: 549 posts

Posted: Tuesday, June 05, 2012 - 04:35 AM UTC
Phil,
If you wish to modify the shell ejector port here's an example of how I did mine on my M4A3. The Taniya kits suffer from the same problem as The DML ones.

If you wish to modify the shell ejector port here's an example of how I did mine on my M4A3. The Taniya kits suffer from the same problem as The DML ones.


asmodeuss

Joined: November 19, 2011
KitMaker: 1,389 posts
Armorama: 1,388 posts

Posted: Thursday, June 07, 2012 - 12:46 AM UTC
Hey guys! It is nice to see you all coming to my rescue
I've already tried to remove the stowage box earlyer because i found it a little crooked. drenched it in cement...not good. since I can't get my hands on laquer thiner(got to order some) it wont be on this one I try this technique.
Rob and Jesse, thanks for the heads up on the periscope, now I get it! I'll shut that one down.
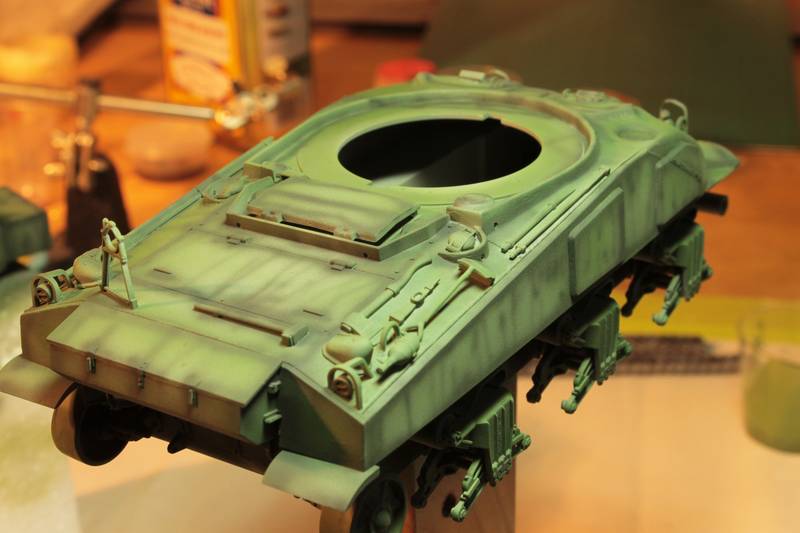
Dave, i've used putty to tone down the ejection hatch but i went with a little less than you did on your build(wich looks really great...Any pics of the finished product?).
here is a pic of the ejection hatch and the base coat.
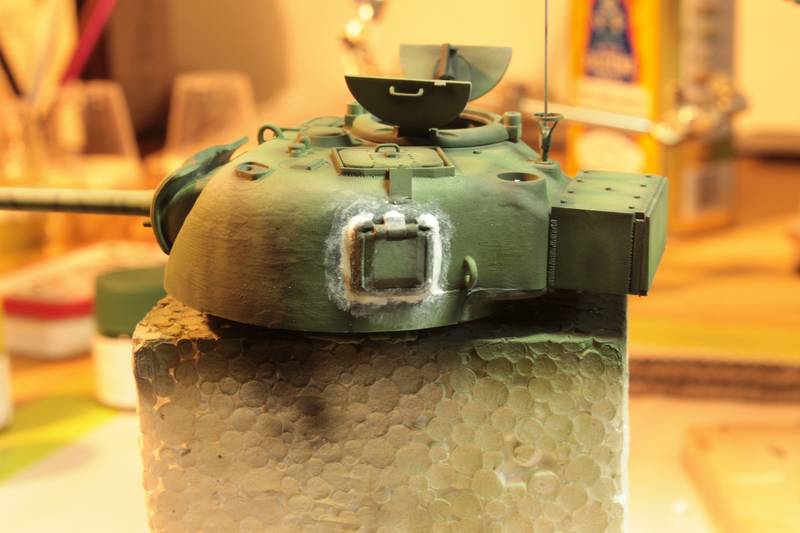
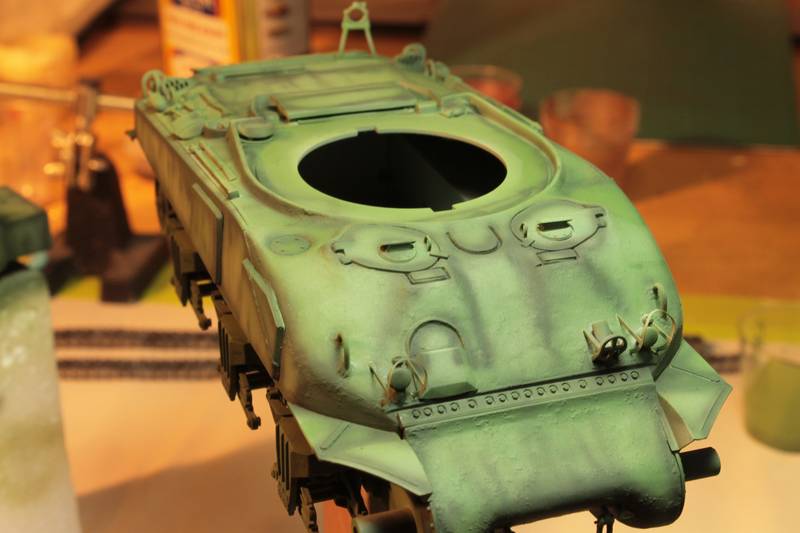
The periscope issue will be dealt with later this week.
I can,t thank you enough for the help guys. Feel free to give me more insight.
Phil.
I've already tried to remove the stowage box earlyer because i found it a little crooked. drenched it in cement...not good. since I can't get my hands on laquer thiner(got to order some) it wont be on this one I try this technique.
Rob and Jesse, thanks for the heads up on the periscope, now I get it!
 I'll shut that one down.
Dave, i've used putty to tone down the ejection hatch but i went with a little less than you did on your build(wich looks really great...Any pics of the finished product?).
here is a pic of the ejection hatch and the base coat.


The periscope issue will be dealt with later this week.
I can,t thank you enough for the help guys. Feel free to give me more insight.
Phil.

pseudorealityx

Joined: January 31, 2010
KitMaker: 2,191 posts
Armorama: 1,814 posts

Posted: Thursday, June 07, 2012 - 12:51 AM UTC

asmodeuss

Joined: November 19, 2011
KitMaker: 1,389 posts
Armorama: 1,388 posts

Posted: Thursday, June 07, 2012 - 01:16 AM UTC
Thanks Jesse!

BBD468

Joined: March 08, 2010
KitMaker: 2,465 posts
Armorama: 2,383 posts

Posted: Thursday, June 07, 2012 - 02:13 AM UTC
Hi Phil,
Man i love the initial base coat! So whats the next paint step for you? Looking forward to your next update bro.
Gary
Man i love the initial base coat! So whats the next paint step for you? Looking forward to your next update bro.

Gary

asmodeuss

Joined: November 19, 2011
KitMaker: 1,389 posts
Armorama: 1,388 posts

Posted: Thursday, June 07, 2012 - 10:53 AM UTC
Hi Gary! next step is closing that infamous periscope and a thin coat of xf-58 olive green. Then I'll see how the base coat looks. Still I want to maybe get a wood plank on the front glacis and some stowage.... we'll see about that later on if I can get my hands on bass wood.
Cheers mate!
Phil.
Cheers mate!
Phil.


Totalize

Joined: February 04, 2009
KitMaker: 743 posts
Armorama: 549 posts

Posted: Thursday, June 07, 2012 - 11:10 AM UTC
Thanks Jesse.

asmodeuss

Joined: November 19, 2011
KitMaker: 1,389 posts
Armorama: 1,388 posts

Posted: Monday, June 11, 2012 - 02:17 AM UTC
ok I'll have a update for you guys tonight!
i've put a second coat of olive green and a third of yellow green (all Tam colors) The problem now is that im going to have to reprime the wheels because they are too dark. And the patching of the ejection port is showing... I'll trouble shoot those matters after a good night sleep!
Phil.
i've put a second coat of olive green and a third of yellow green (all Tam colors) The problem now is that im going to have to reprime the wheels because they are too dark. And the patching of the ejection port is showing... I'll trouble shoot those matters after a good night sleep!
Phil.


asmodeuss

Joined: November 19, 2011
KitMaker: 1,389 posts
Armorama: 1,388 posts

Posted: Monday, June 11, 2012 - 12:24 PM UTC
Here it goes!
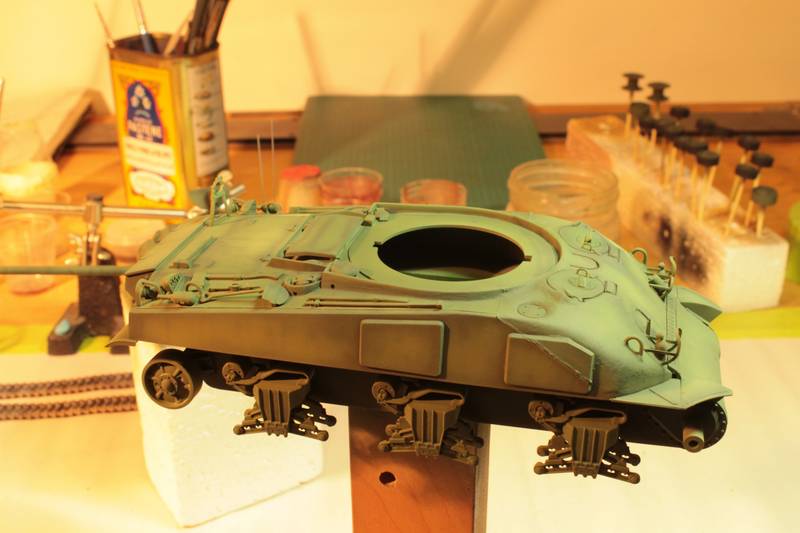
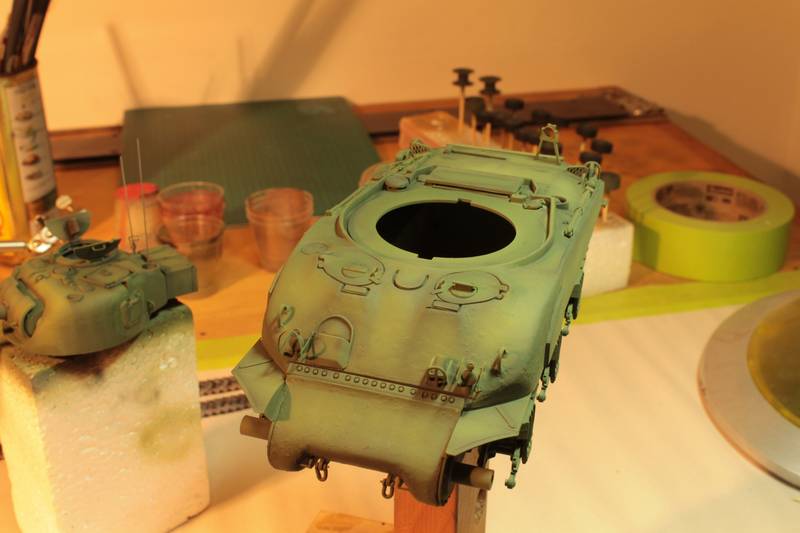
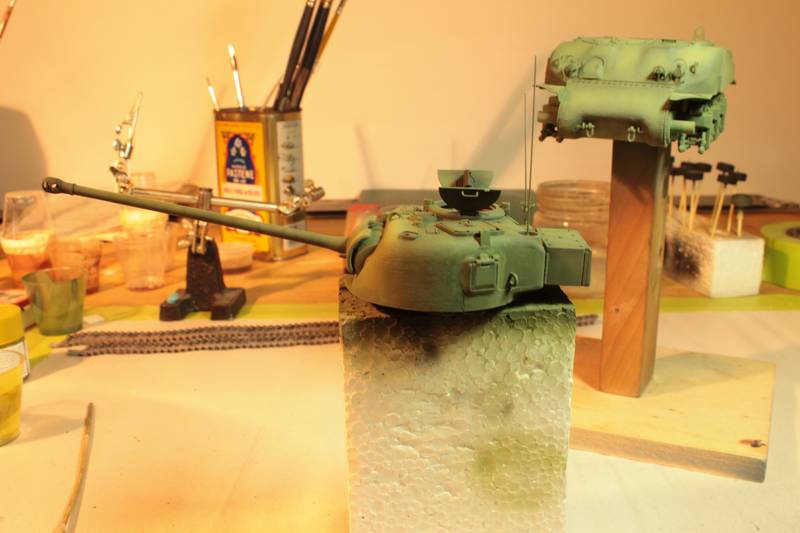
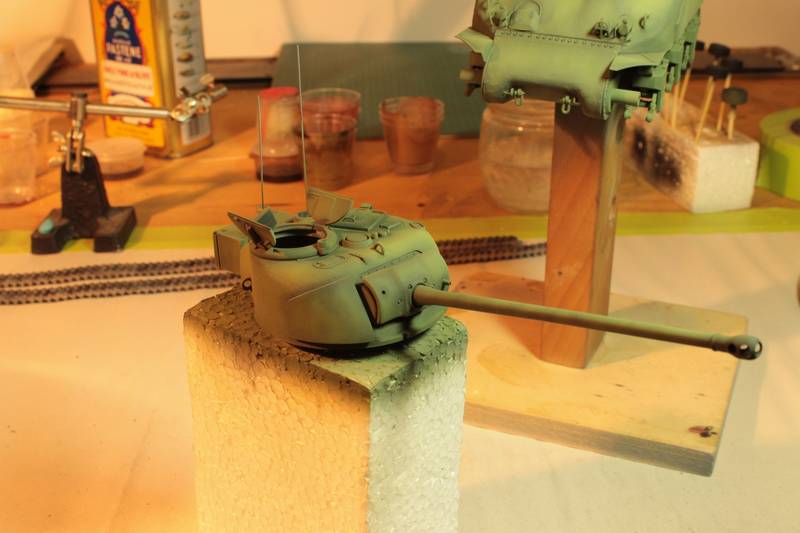
The ejection hatch need some toning. And I was woundering f I shold spray a mist of field grey... the color is imo nice. Or should I wait fter the clear, the pinwash and all. Adding the field grey as a dust/shading. what do you think?
Thanks for watching!
Phil.


The ejection hatch need some toning. And I was woundering f I shold spray a mist of field grey... the color is imo nice. Or should I wait fter the clear, the pinwash and all. Adding the field grey as a dust/shading. what do you think?
Thanks for watching!
Phil.


BBD468

Joined: March 08, 2010
KitMaker: 2,465 posts
Armorama: 2,383 posts

Posted: Monday, June 11, 2012 - 01:12 PM UTC
Hey Phil,
Very nice color tone bro. Looks awesome! Im not sure what you mean on your Q? As far as the color you have now, i think its a great base color for filters, washes and the like. Youll get some nice tone variations IMO. Well done Phil.
Gary
Very nice color tone bro. Looks awesome!
 Im not sure what you mean on your Q? As far as the color you have now, i think its a great base color for filters, washes and the like. Youll get some nice tone variations IMO. Well done Phil.
Gary

PantherF

Joined: June 10, 2005
KitMaker: 6,188 posts
Armorama: 5,960 posts

Posted: Monday, June 11, 2012 - 02:24 PM UTC
Looking good Phil! 
Better pump it up so we can have all of you on the 15th!
~ Jeff

Better pump it up so we can have all of you on the 15th!

~ Jeff

AgentG

Joined: December 21, 2008
KitMaker: 1,109 posts
Armorama: 1,095 posts

Posted: Monday, June 11, 2012 - 04:14 PM UTC
Quoted Text
Hey Phil,
Very nice color tone bro. Looks awesome!Im not sure what you mean on your Q? As far as the color you have now, i think its a great base color for filters, washes and the like. Youll get some nice tone variations IMO. Well done Phil.

Gary
DittoX2
With a nice umber filter this should be spot on for color.
G
Posted: Monday, June 11, 2012 - 06:22 PM UTC
Hi PHIL
I HAVE BEEN FOLLOWING YOUR FIREFLY BUILD AND REALLY ENJOYING IT!!.i HAVE A FEW EARLY DRAGON SHERMANS that i find great for superdetailing.When i do my british fireli 1c i will substitute the 17 pouder gun for a 75mm and do a British hybrid 75mm instead.
Keep up the great work.
All the best from Richard.

U2FanNick

Joined: December 21, 2011
KitMaker: 36 posts
Armorama: 34 posts

Posted: Tuesday, June 12, 2012 - 12:54 AM UTC
I think you should give the paint another pass with the airbrush on the front of the hull. IMO 


asmodeuss

Joined: November 19, 2011
KitMaker: 1,389 posts
Armorama: 1,388 posts

Posted: Tuesday, June 12, 2012 - 01:40 AM UTC
Hi all thanks for the kind words and advices!
@ Gary, the Q is should i go now with filters?
@Jeff S, Man I'm going to work on this all week end, so I can join the fun on the 15th! Can't wait to start this bad boy and put it on the verliden bridge that i bought.
@Wayne, Umber filter seems like a good idea i'll keep that in mind, maybe followed by a yellow one it could really give some depth.
@Richard, Man thanks for the good words! 75mil substitue looks like a great plan, be sure to keep me posted on that one! Will you go metal barrel on that?
@Nick, Indeed the paint is still a little translucent, I am not sure about going for another pass...I want to avoid losing the preshade, since there will be filters and mist and weathering...but you are right in a way. there is some place that i wil give a little spray.
Thank you all again for watching, it's always a pleasure to read you guys
Phil
@ Gary, the Q is should i go now with filters?
@Jeff S, Man I'm going to work on this all week end, so I can join the fun on the 15th! Can't wait to start this bad boy and put it on the verliden bridge that i bought.
@Wayne, Umber filter seems like a good idea i'll keep that in mind, maybe followed by a yellow one it could really give some depth.
@Richard, Man thanks for the good words! 75mil substitue looks like a great plan, be sure to keep me posted on that one! Will you go metal barrel on that?
@Nick, Indeed the paint is still a little translucent, I am not sure about going for another pass...I want to avoid losing the preshade, since there will be filters and mist and weathering...but you are right in a way. there is some place that i wil give a little spray.
Thank you all again for watching, it's always a pleasure to read you guys

Phil


asmodeuss

Joined: November 19, 2011
KitMaker: 1,389 posts
Armorama: 1,388 posts

Posted: Friday, June 15, 2012 - 01:16 AM UTC
Hi everyone! 
I've manage to lighten the color on the wheels whitout having to reprime! I've put them on and voila! here is a couple of pics prior to he last coat. the turret is on for your viewing pleasure
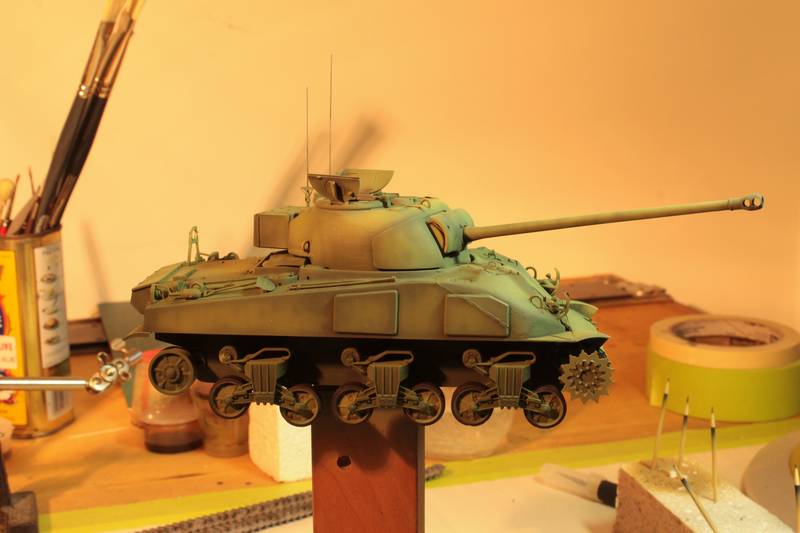
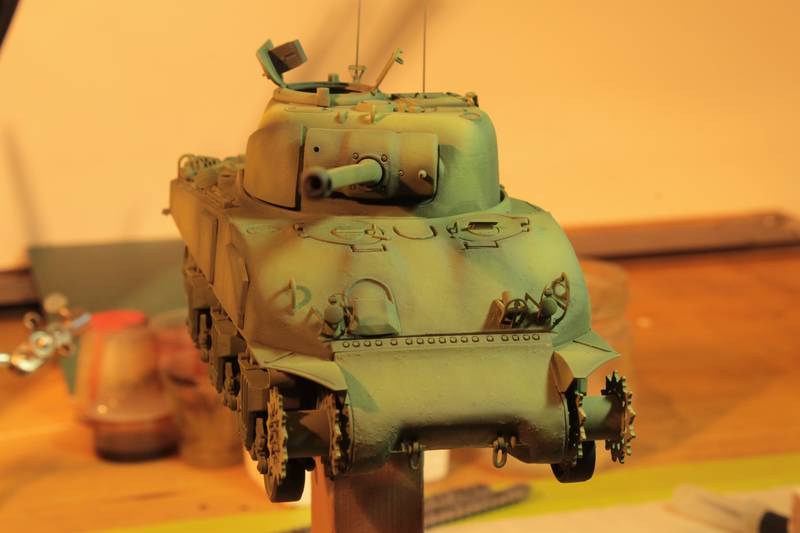
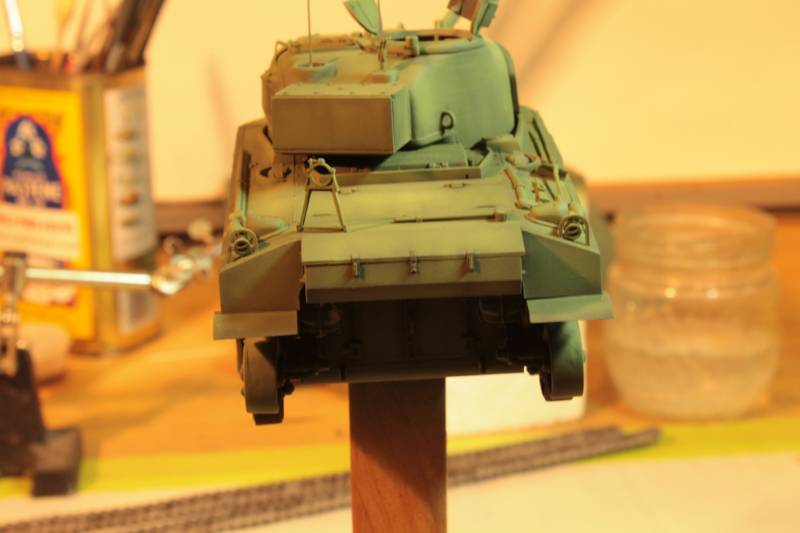
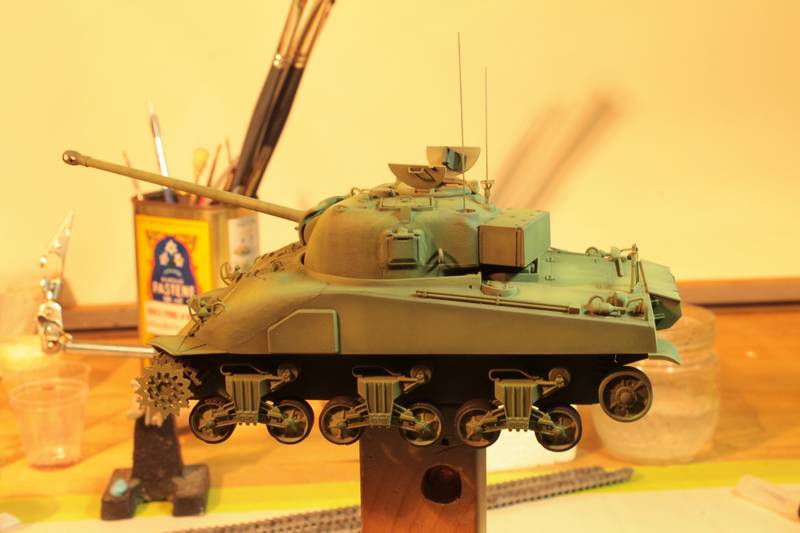
as you can see there is some touch up to do around the ejection port.
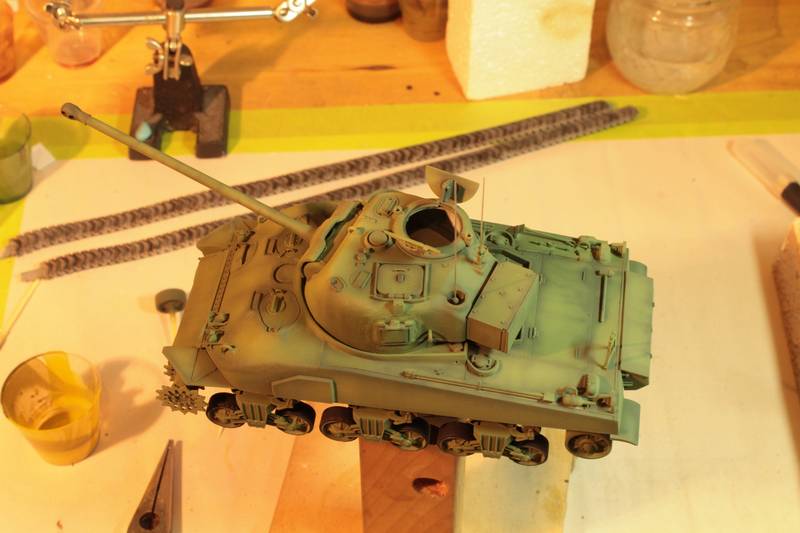
I have a queston: What is the correct color for me to use inside the turret? I'm having trouble finding good intel on that.
any comments are welcomed.
Thanks fr watching guys!
Phil.

I've manage to lighten the color on the wheels whitout having to reprime! I've put them on and voila! here is a couple of pics prior to he last coat. the turret is on for your viewing pleasure


as you can see there is some touch up to do around the ejection port.

I have a queston: What is the correct color for me to use inside the turret? I'm having trouble finding good intel on that.
any comments are welcomed.
Thanks fr watching guys!

Phil.
pseudorealityx

Joined: January 31, 2010
KitMaker: 2,191 posts
Armorama: 1,814 posts

Posted: Friday, June 15, 2012 - 01:57 AM UTC
Flat white inside the turret. The inside of hatches would typically still be your exterior color.

BBD468

Joined: March 08, 2010
KitMaker: 2,465 posts
Armorama: 2,383 posts

Posted: Friday, June 15, 2012 - 02:43 AM UTC
Phil, I love the color man. I can see a hint of preshade too. Well done bro! 
Gary

Gary


asmodeuss

Joined: November 19, 2011
KitMaker: 1,389 posts
Armorama: 1,388 posts

Posted: Saturday, June 16, 2012 - 12:59 AM UTC
Quoted Text
Flat white inside the turret. The inside of hatches would typically still be your exterior color.
Thanks Jesse! I ll be working on that as soon as stop procrastinating in bed with the i pad.


asmodeuss

Joined: November 19, 2011
KitMaker: 1,389 posts
Armorama: 1,388 posts

Posted: Saturday, June 16, 2012 - 11:41 AM UTC
There is the day's progres.
I've paint the turret interior with flat white and a drop of yellow green.
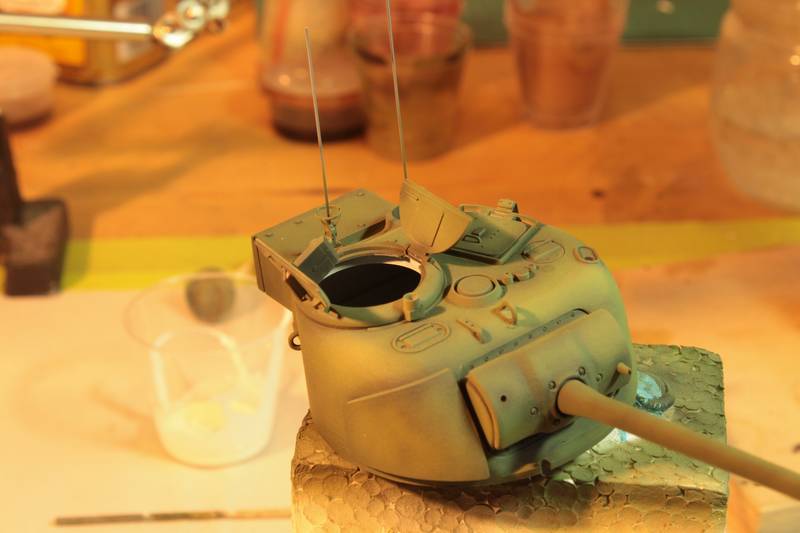
The tracks had a two pass spray.
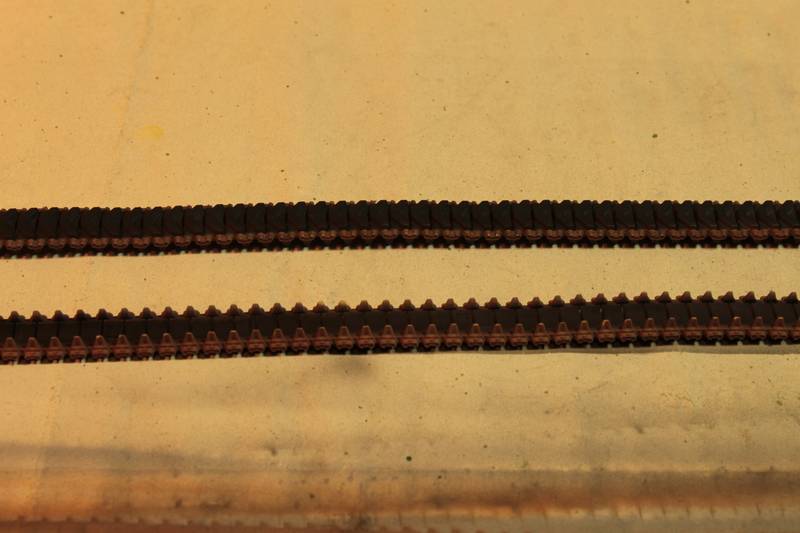
Then the clear coat.
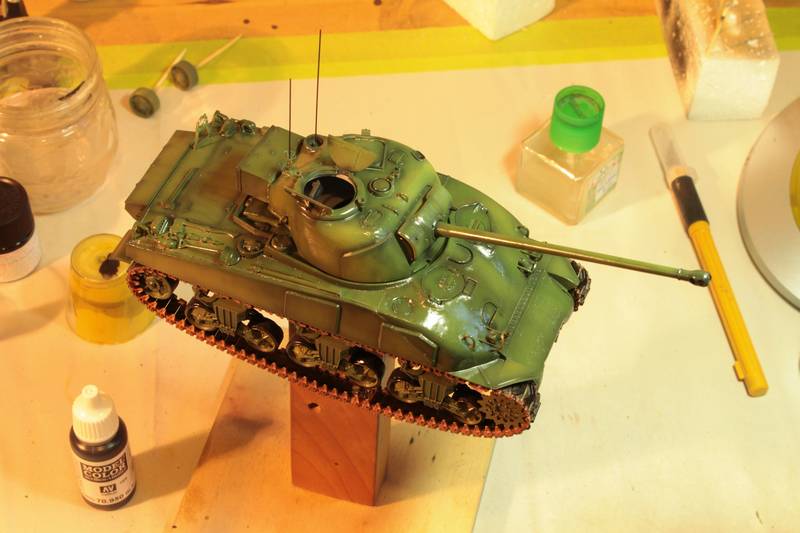
Decals... not lots of them.
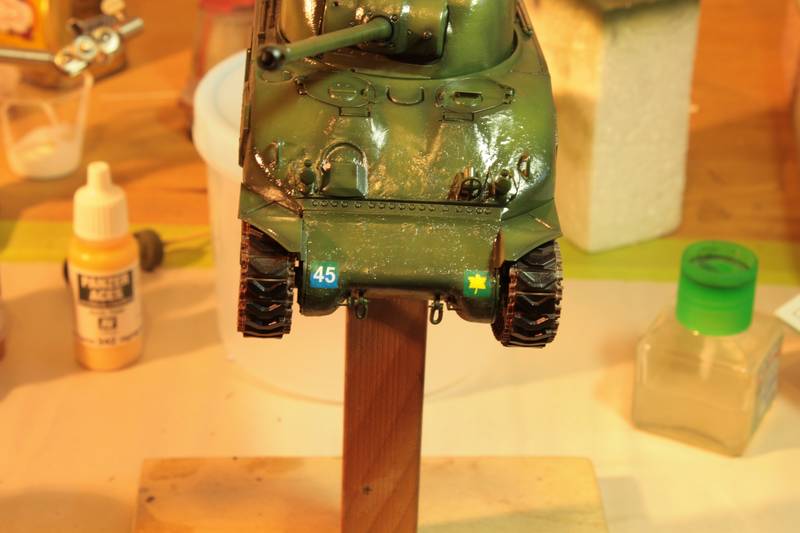
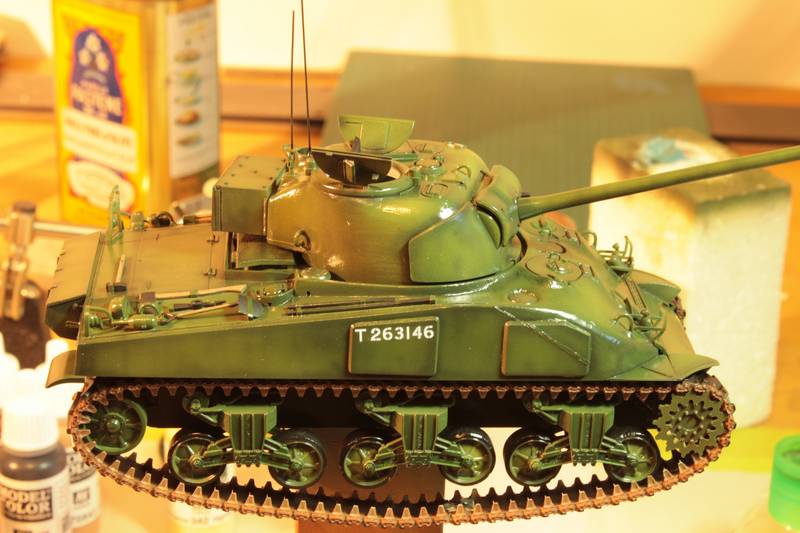
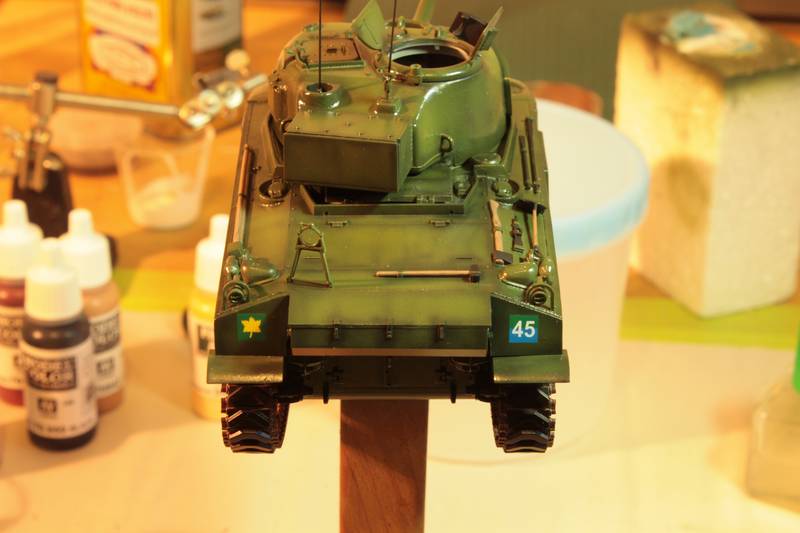
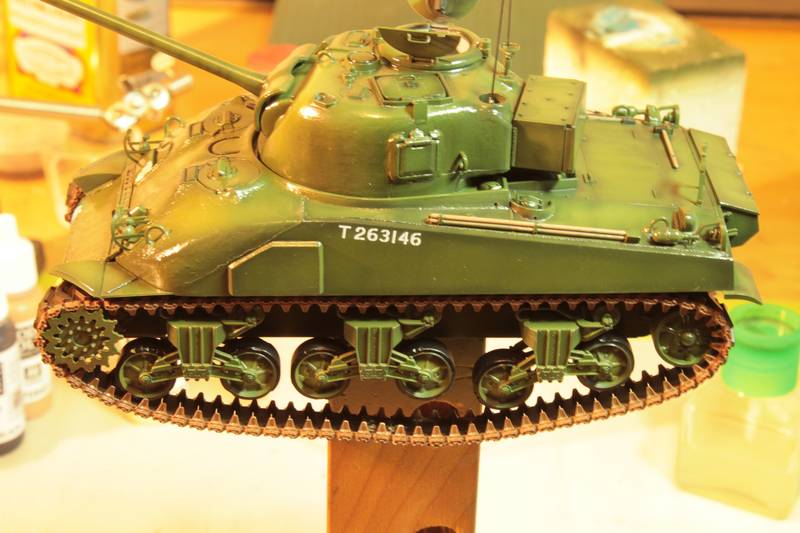
The ds tracks are very good looking but they seem rather long.... Anyone knows a good way to shorten them? It looks just wrong! I really should have try them on before

Thaks for watching.
Phil.
I've paint the turret interior with flat white and a drop of yellow green.

The tracks had a two pass spray.

Then the clear coat.

Decals... not lots of them.


The ds tracks are very good looking but they seem rather long.... Anyone knows a good way to shorten them? It looks just wrong! I really should have try them on before

Thaks for watching.
Phil.

pseudorealityx

Joined: January 31, 2010
KitMaker: 2,191 posts
Armorama: 1,814 posts

Posted: Saturday, June 16, 2012 - 12:23 PM UTC
You can carefully slice 1 link off. I use a thin strip of styrene on the inside that holds them securely in place, and if painted black or rubber color, it's hard to see unless you flip the model over.
 |


