Armor/AFV
For discussions on tanks, artillery, jeeps, etc.
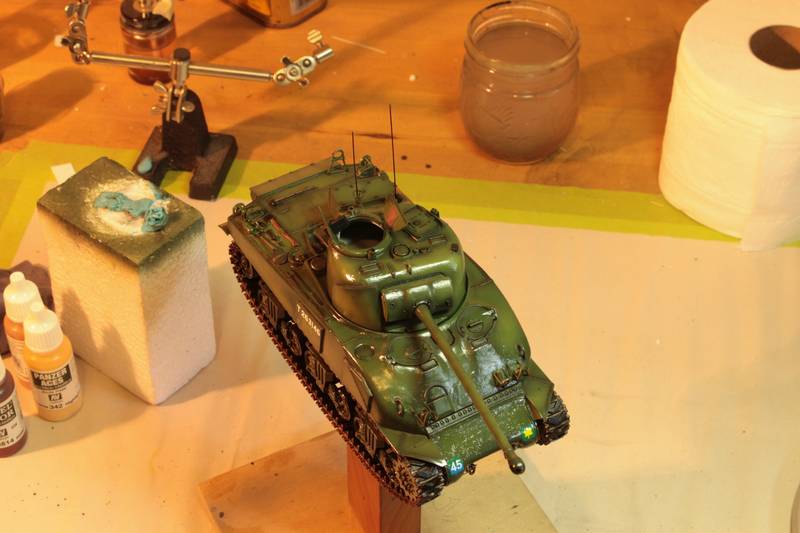
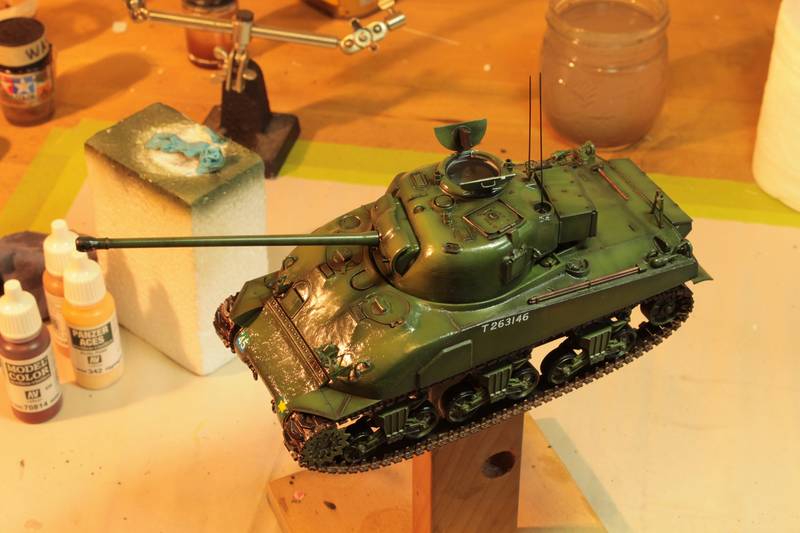
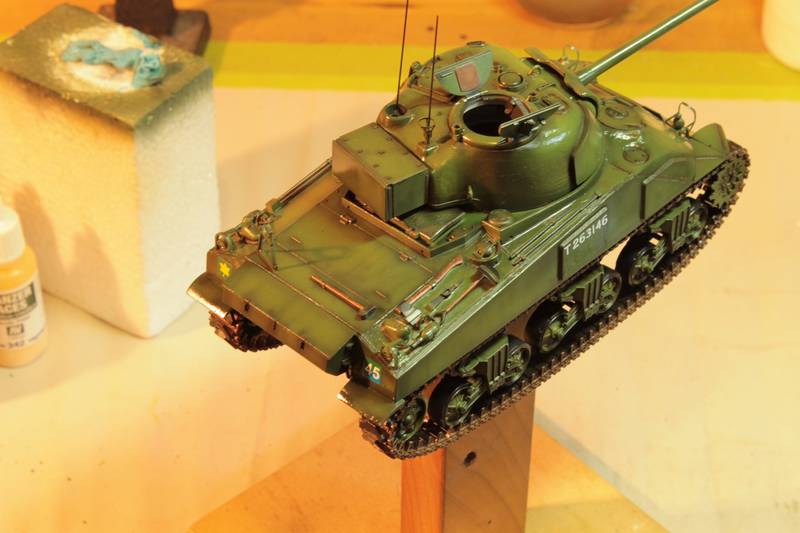
Sherman firefly 1c hybrid hull
asmodeuss
Visit this Community
Quebec, Canada
Joined: November 19, 2011
KitMaker: 1,389 posts
Armorama: 1,388 posts
Posted: Saturday, June 16, 2012 - 03:09 PM UTC

Quoted Text

You can carefully slice 1 link off. I use a thin strip of styrene on the inside that holds them securely in place, and if painted black or rubber color, it's hard to see unless you flip the model over.


Tanks Jesse, I'll try that tomorow morning.

Phil.
asmodeuss
Visit this Community
Quebec, Canada
Joined: November 19, 2011
KitMaker: 1,389 posts
Armorama: 1,388 posts
Posted: Sunday, June 17, 2012 - 02:53 AM UTC
I've cut one link nd it looks far better. Thanks for the styren tip Jesse, it worked very well. It is still a little saggy but cutting two links, I think would be to much.

BEFORE


AFTER


Thanks for watching.

Phil.
pseudorealityx
Visit this Community
Georgia, United States
Joined: January 31, 2010
KitMaker: 2,191 posts
Armorama: 1,814 posts
Posted: Sunday, June 17, 2012 - 03:51 AM UTC
That's where that adjustable idler helps out nicely...
BBD468
Visit this Community
Texas, United States
Joined: March 08, 2010
KitMaker: 2,465 posts
Armorama: 2,383 posts
Posted: Sunday, June 17, 2012 - 04:54 AM UTC
Hey Phil,

The Firefly's looking pretty sporty right now! Looks like youve just washed and waxed to a brilliant shine. I bet the decals laid down nicely, Yes? Great job man.Im looking forward to the Flat coat and weathering. Model on brother Phil!

Gary
asmodeuss
Visit this Community
Quebec, Canada
Joined: November 19, 2011
KitMaker: 1,389 posts
Armorama: 1,388 posts
Posted: Sunday, June 17, 2012 - 06:03 AM UTC

Quoted Text

That's where that adjustable idler helps out nicely...


You got that right Jesse! I wish this kit had some

Phil
asmodeuss
Visit this Community
Quebec, Canada
Joined: November 19, 2011
KitMaker: 1,389 posts
Armorama: 1,388 posts
Posted: Sunday, June 17, 2012 - 06:07 AM UTC

Quoted Text

Hey Phil,

The Firefly's looking pretty sporty right now! Looks like youve just washed and waxed to a brilliant shine. I bet the decals laid down nicely, Yes? Great job man.Im looking forward to the Flat coat and weathering. Model on brother Phil!

Gary


Yeah Gary I've just armorall the whole thing to flash for the ladies
The numerous decals went well and quick! Nothing like your greif!!
I've pinwashed the turret. I think I can wrap this one next week-end and then jump on the stug campaing. Will you be joining this one with us?
Thanks for the good words and help mon ami!

Phil.
asmodeuss
Visit this Community
Quebec, Canada
Joined: November 19, 2011
KitMaker: 1,389 posts
Armorama: 1,388 posts
Posted: Tuesday, June 19, 2012 - 01:13 AM UTC
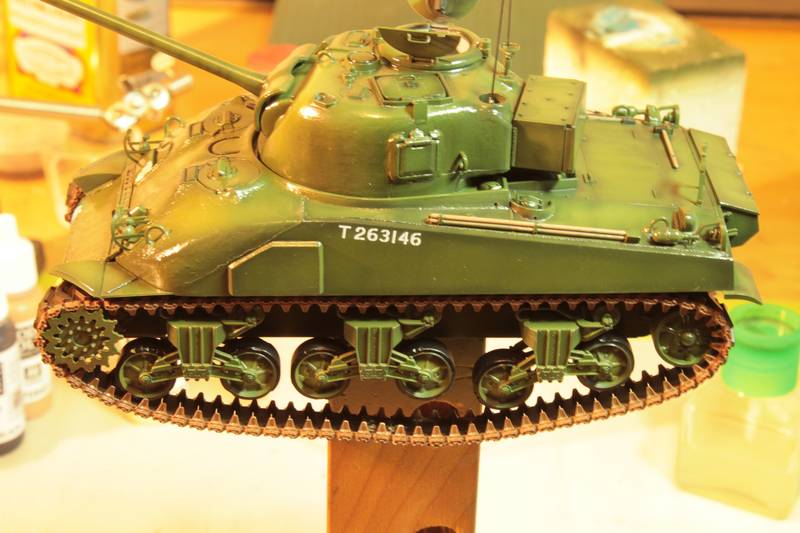
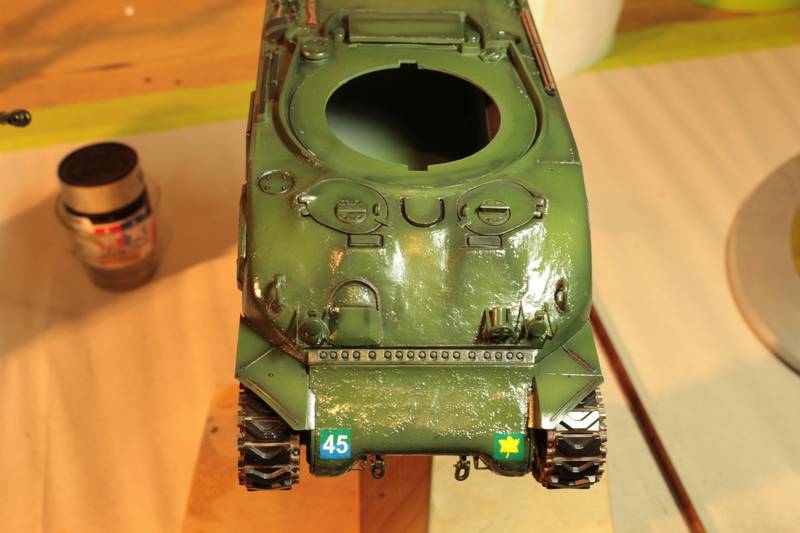
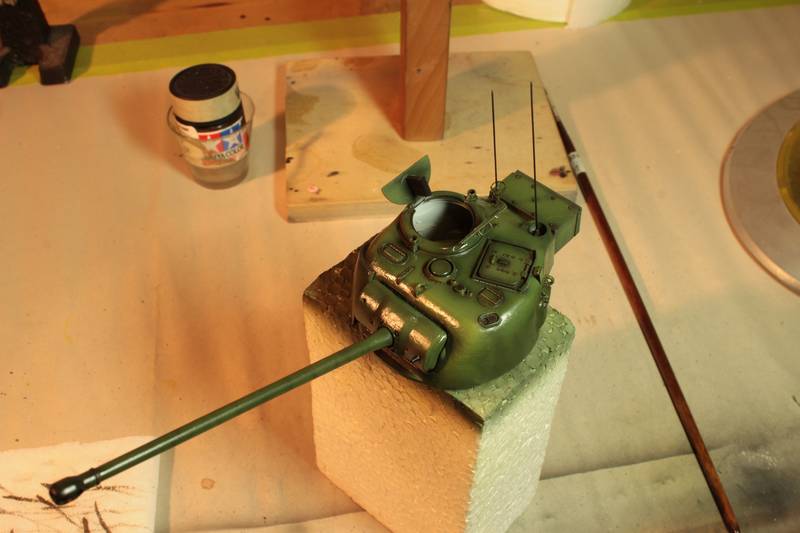
Hi guys! I've manage to do a little pinwash on the turret and front glacis. So here it is.


Thanks for watching

Phil.
pseudorealityx
Visit this Community
Georgia, United States
Joined: January 31, 2010
KitMaker: 2,191 posts
Armorama: 1,814 posts
Posted: Tuesday, June 19, 2012 - 02:06 AM UTC
Hey Phil...

I think you might be missing a part on the front hull. I believe there should be a ventilator cover between the hatches, where you've got that big horseshoe shaped hole.

Should look like this:


Check your sprues to see if Dragon provided it, but didn't call it out on the instructions.
asmodeuss
Visit this Community
Quebec, Canada
Joined: November 19, 2011
KitMaker: 1,389 posts
Armorama: 1,388 posts
Posted: Tuesday, June 19, 2012 - 02:23 AM UTC

Quoted Text

Hey Phil...

I think you might be missing a part on the front hull. I believe there should be a ventilator cover between the hatches, where you've got that big horseshoe shaped hole.

Should look like this:


Check your sprues to see if Dragon provided it, but didn't call it out on the instructions.


HI Jesse. No such pieceon the sprue or on the plan...Not really surprising. Nither on the art or pics on the box. Then I went nuts tryig to find pics on the net and i found a couple of hybrid hull and a couple of them had no cover like this... So I think I wont risk it (paint wise). But thanks, as always you got the goods my friend! Where do you get all those?


Phil.
BBD468
Visit this Community
Texas, United States
Joined: March 08, 2010
KitMaker: 2,465 posts
Armorama: 2,383 posts
Posted: Tuesday, June 19, 2012 - 03:04 AM UTC
Hi Phil,

Man, the pinwash makes that detail jump out at me. Looks awesome bro! Thats about right! Dragon leaves out something. You could always scratch up one paint and seal and attatch with a tiny bit of CA and you'd never know the difference. Just a thought.

Gary
pseudorealityx
Visit this Community
Georgia, United States
Joined: January 31, 2010
KitMaker: 2,191 posts
Armorama: 1,814 posts
Posted: Tuesday, June 19, 2012 - 03:09 AM UTC

Quoted Text


Quoted Text

Hey Phil...

I think you might be missing a part on the front hull. I believe there should be a ventilator cover between the hatches, where you've got that big horseshoe shaped hole.

Should look like this:


Check your sprues to see if Dragon provided it, but didn't call it out on the instructions.


HI Jesse. No such pieceon the sprue or on the plan...Not really surprising. Nither on the art or pics on the box. Then I went nuts tryig to find pics on the net and i found a couple of hybrid hull and a couple of them had no cover like this... So I think I wont risk it (paint wise). But thanks, as always you got the goods my friend! Where do you get all those?


Phil.


If you like Shermans, this is a good website to bookmark:

http://the.shadock.free.fr/sherman_minutia/
pseudorealityx
Visit this Community
Georgia, United States
Joined: January 31, 2010
KitMaker: 2,191 posts
Armorama: 1,814 posts
Posted: Tuesday, June 19, 2012 - 03:16 AM UTC

Quoted Text

Hi Phil,

Man, the pinwash makes that detail jump out at me. Looks awesome bro! Thats about right! Dragon leaves out something. You could always scratch up one paint and seal and attatch with a tiny bit of CA and you'd never know the difference. Just a thought.

Gary


Agreed. I think it would be rather easy to make the flat top plate out of a sheet of styrene, and then just put a strip of stryene in the U shape to give the flat top a little bit of stand off. That would still be better than about 90% of off-the-shelf Sherman kits.
Totalize
Visit this Community
Ontario, Canada
Joined: February 04, 2009
KitMaker: 743 posts
Armorama: 549 posts
Posted: Tuesday, June 19, 2012 - 05:30 AM UTC

Quoted Text


Quoted Text

Hi Phil,

Man, the pinwash makes that detail jump out at me. Looks awesome bro! Thats about right! Dragon leaves out something. You could always scratch up one paint and seal and attatch with a tiny bit of CA and you'd never know the difference. Just a thought.

Gary


Agreed. I think it would be rather easy to make the flat top plate out of a sheet of styrene, and then just put a strip of stryene in the U shape to give the flat top a little bit of stand off. That would still be better than about 90% of off-the-shelf Sherman kits.


Phil and Jesse,

My IC references show it as per the kit. The height of the ventilator was level with the hull.

See here:


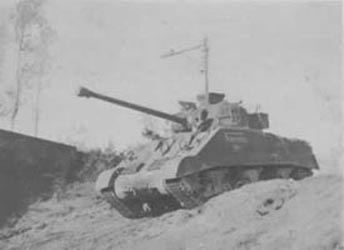
It looks like Jesse's picture is one of a M4A1 with T23 Turret as you can make out the distinctive lines of the Rotor Shield that was specific to the T23 turrets. The horn also makes me think it could be super Sherman?
pseudorealityx
Visit this Community
Georgia, United States
Joined: January 31, 2010
KitMaker: 2,191 posts
Armorama: 1,814 posts
Posted: Tuesday, June 19, 2012 - 07:32 AM UTC
Interesting... I can't find photos of a current large hatch composite right now. Every large hatch M4A1 I can find has the raised ventilator. Maybe the composites were different? Weird...

Update. It appears David is right. Every photo of a composite I can find, has the U shaped depression for a ventilator.

Sorry to steering you wrong Phil!
pseudorealityx
Visit this Community
Georgia, United States
Joined: January 31, 2010
KitMaker: 2,191 posts
Armorama: 1,814 posts
Posted: Tuesday, June 19, 2012 - 11:18 PM UTC
Here we go...

http://s554.photobucket.com/albums/jj423/Tegner/?start=all

Totalize
Visit this Community
Ontario, Canada
Joined: February 04, 2009
KitMaker: 743 posts
Armorama: 549 posts
Posted: Tuesday, June 19, 2012 - 11:59 PM UTC


That's the ticket. Great reference shots Jesse.
pseudorealityx
Visit this Community
Georgia, United States
Joined: January 31, 2010
KitMaker: 2,191 posts
Armorama: 1,814 posts
Posted: Wednesday, June 20, 2012 - 12:50 AM UTC

Quoted Text


That's the ticket. Great reference shots Jesse.


Thanks. They were posted by Stephen Tegner on Missing Lynx this morning, definitely not my photos.
asmodeuss
Visit this Community
Quebec, Canada
Joined: November 19, 2011
KitMaker: 1,389 posts
Armorama: 1,388 posts
Posted: Wednesday, June 20, 2012 - 01:27 AM UTC
Thanks guys for the kind words!
Jesse, you didn't steered me wrong, you forced me to do my homework, wich is what I need It is the point of this log.
Thanks for the links i've boolmarked them.

Dave, Thanks for the infos and link, Pretty sweet pic of an old firefly you posted. Was it part of a site or you google found it?

Gary! Me bro! I'm glad you like it. It is alays flatering when someone with your skills (and medal collection) is liking your work.

Ok, so, with the enlightment of those links and pics I will not build a vent cover. And if all goes well i'll be able to start the base this week-end since I got monday off
I'll update tonight with pics of the pinwash finished...I hope.

Thanks for watching and comments, it is most apreciated.

Phil.
Totalize
Visit this Community
Ontario, Canada
Joined: February 04, 2009
KitMaker: 743 posts
Armorama: 549 posts
Posted: Wednesday, June 20, 2012 - 04:37 AM UTC

Quoted Text

Thanks guys for the kind words!
Jesse, you didn't steered me wrong, you forced me to do my homework, wich is what I need It is the point of this log.
Thanks for the links i've boolmarked them.

Dave, Thanks for the infos and link, Pretty sweet pic of an old firefly you posted. Was it part of a site or you google found it?

Gary! Me bro! I'm glad you like it. It is alays flatering when someone with your skills (and medal collection) is liking your work.

Ok, so, with the enlightment of those links and pics I will not build a vent cover. And if all goes well i'll be able to start the base this week-end since I got monday off
I'll update tonight with pics of the pinwash finished...I hope.

Thanks for watching and comments, it is most apreciated.

Phil.


Hey Phil, No problem glad to help.

the Firefly pic is from the Concord entitled Book British Sherman tanks.
Biggles2
Visit this Community
Quebec, Canada
Joined: January 01, 2004
KitMaker: 7,600 posts
Armorama: 6,110 posts
Posted: Wednesday, June 20, 2012 - 05:21 AM UTC
I've just read your build blog so it's way too late for this suggestion, and I'm surprised no one noticed this before - the applique armour on the turret and hull sides should have weld beads. And it's too bad you did't use PE brush guards on the headlights and tail lights. Other than that, a good job on the build. BTW, British OD was a little greener than US OD.
BBD468
Visit this Community
Texas, United States
Joined: March 08, 2010
KitMaker: 2,465 posts
Armorama: 2,383 posts
Posted: Wednesday, June 20, 2012 - 05:47 AM UTC

Quoted Text

I've just read your build blog so it's way too late for this suggestion, and I'm surprised no one noticed this before - the applique armour on the turret and hull sides should have weld beads. And it's too bad you did't use PE brush guards on the headlights and tail lights. Other than that, a good job on the build. BTW, British OD was a little greener than US OD.


The PE brushguards were used on the headlights by Phil.
asmodeuss
Visit this Community
Quebec, Canada
Joined: November 19, 2011
KitMaker: 1,389 posts
Armorama: 1,388 posts
Posted: Thursday, June 21, 2012 - 01:13 AM UTC

Quoted Text

I've just read your build blog so it's way too late for this suggestion, and I'm surprised no one noticed this before - the applique armour on the turret and hull sides should have weld beads. And it's too bad you did't use PE brush guards on the headlights and tail lights. Other than that, a good job on the build. BTW, British OD was a little greener than US OD.


Biggles2, It is never too late for suggestion, there will always be a next time. So i'll keep those in my pocket for next time. I did use the PE fret fr head light, but there was none for the tail. Yes I kind of got lazy on the welds of the extra armor...didn't have cash to order quarter round styren and wanted this build to be finished by july....got sloppy on thi one.
asmodeuss
Visit this Community
Quebec, Canada
Joined: November 19, 2011
KitMaker: 1,389 posts
Armorama: 1,388 posts
Posted: Thursday, June 21, 2012 - 10:07 AM UTC
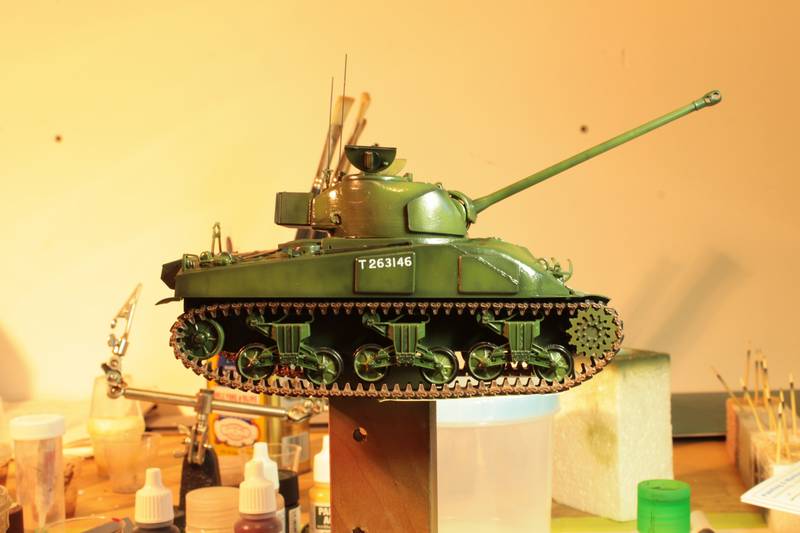
A little update...later than I wanted. I had some plumbing issues
Pinwash is done and flat coat is comming soon.

Enjoy.


The base will be based on this pic ( I know it is not the same model)


Comments are more than welcomed!
Thanks for watching.

Phil
BBD468
Visit this Community
Texas, United States
Joined: March 08, 2010
KitMaker: 2,465 posts
Armorama: 2,383 posts
Posted: Thursday, June 21, 2012 - 03:56 PM UTC
Hey Phil,

Sorry to hear your plumbing woes, that sux bro! I hope all is well now.

Once again Phil, i love the color!!! Man that flat coat is gonna make that thing into a sexy beast! Looking forward to it.

Gary
ALBOWIE
Visit this Community
New South Wales, Australia
Joined: February 28, 2006
KitMaker: 1,605 posts
Armorama: 1,565 posts
Posted: Friday, June 22, 2012 - 09:38 AM UTC

Quoted Text

Hey Phil...

I think you might be missing a part on the front hull. I believe there should be a ventilator cover between the hatches, where you've got that big horseshoe shaped hole.

Should look like this:


Check your sprues to see if Dragon provided it, but didn't call it out on the instructions.


That is an M4A1 Hull and not a composite (composite have a small cast bump in the middle of the glacis - ID feature). The kit is depicted correctly and it was the early Large hatch M4A1 that had the sheet metal cover not the composites.

Cheers
Al