Lisboa, Portugal
Joined: March 04, 2008
KitMaker: 5,386 posts
Armorama: 4,727 posts
Posted: Sunday, January 26, 2014 - 12:22 PM UTC
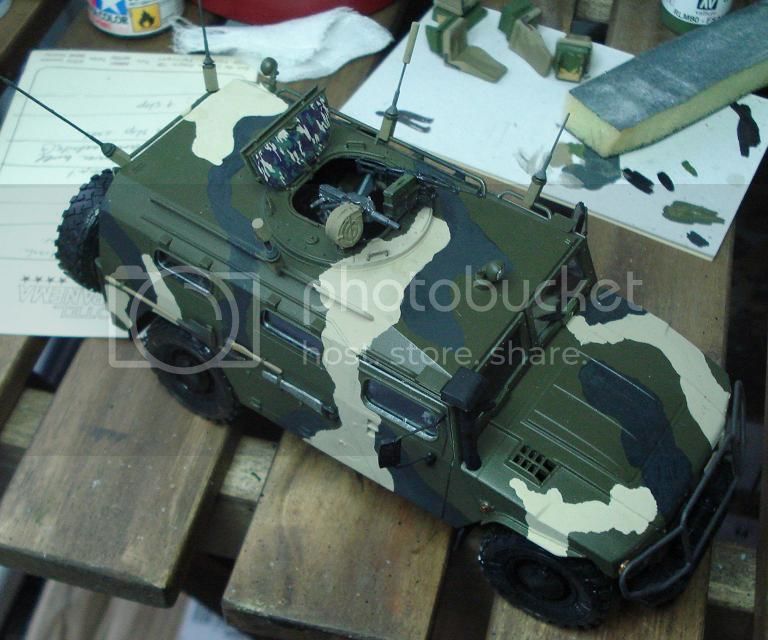
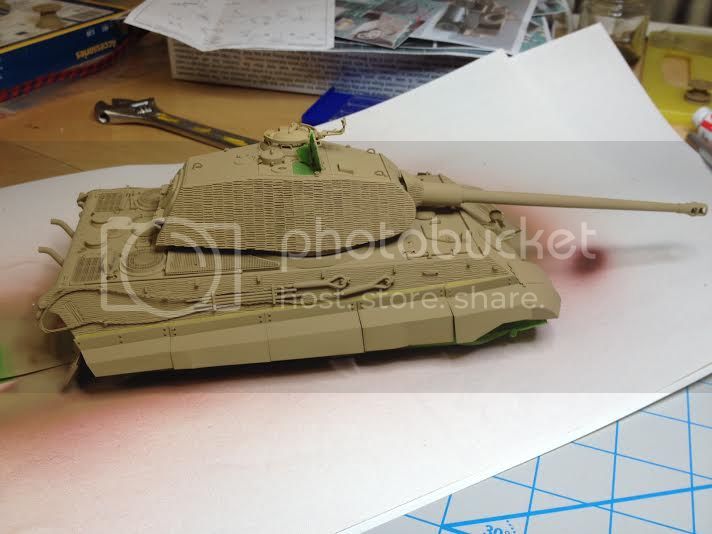
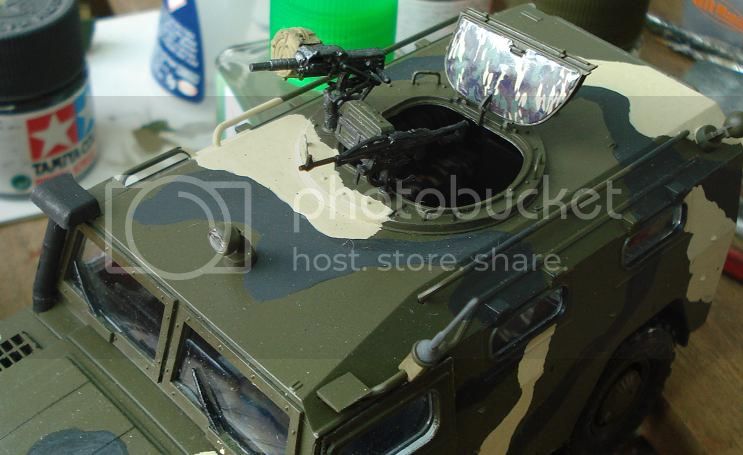
Working on the last details,
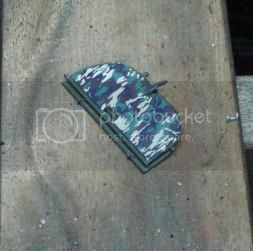
Also finished 3 antennas, still missing 2 antennas & rear view mirrors (left & right side).
Active Builds: 0
Active Campaigns: 0
Connecticut, United States
Joined: November 02, 2003
KitMaker: 984 posts
Armorama: 846 posts
Posted: Sunday, January 26, 2014 - 02:56 PM UTC
Looking good John.
Myself, i have been working on my Puma 234/2. Adding dome etch here and there. I also noticed that i missed some major parts that should have been added before the top and bottoms halves were mated together.

I have it glued so good, there was no way to separate it without really making a mess. I was able to get tehm in (tool boxes) but the first i added i altered when i really didn't need to.
I need to start highlighting all the parts on the plans i guess.
Lisboa, Portugal
Joined: March 04, 2008
KitMaker: 5,386 posts
Armorama: 4,727 posts
Posted: Sunday, January 26, 2014 - 03:16 PM UTC
Quoted Text
Looking good John.
Myself, i have been working on my Puma 234/2. Adding dome etch here and there. I also noticed that i missed some major parts that should have been added before the top and bottoms halves were mated together.
I have it glued so good, there was no way to separate it without really making a mess. I was able to get tehm in (tool boxes) but the first i added i altered when i really didn't need to.
I need to start highlighting all the parts on the plans i guess.
damn.
I know how you feel..
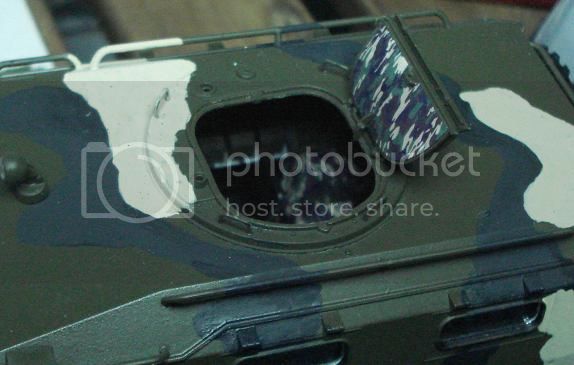
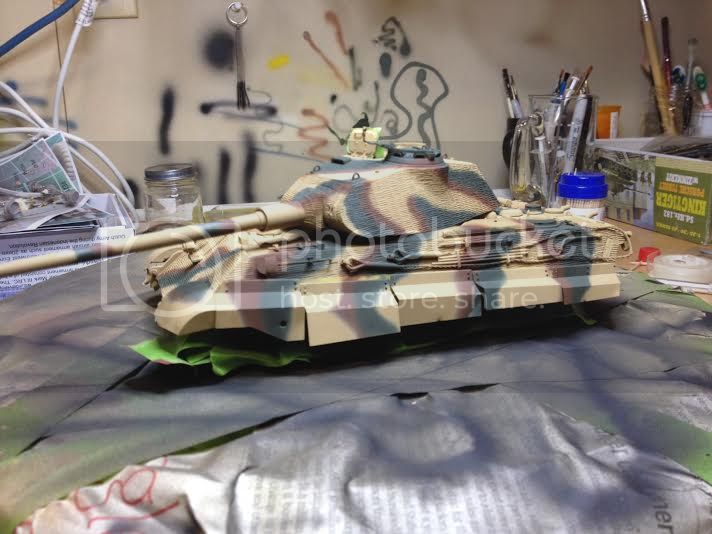
After taking the photos I noticed I'd broken a 2mm part of the grenade launcher... and while setting the external cable, I also broke a part but this one I recovered, the grenade launcher part is gone.
Active Builds: 0
Active Campaigns: 0
Lisboa, Portugal
Joined: March 04, 2008
KitMaker: 5,386 posts
Armorama: 4,727 posts
Posted: Monday, January 27, 2014 - 09:00 AM UTC
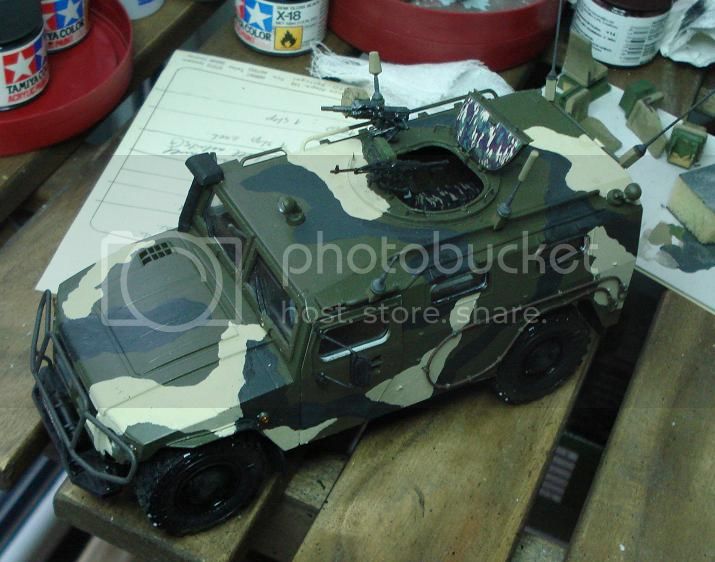
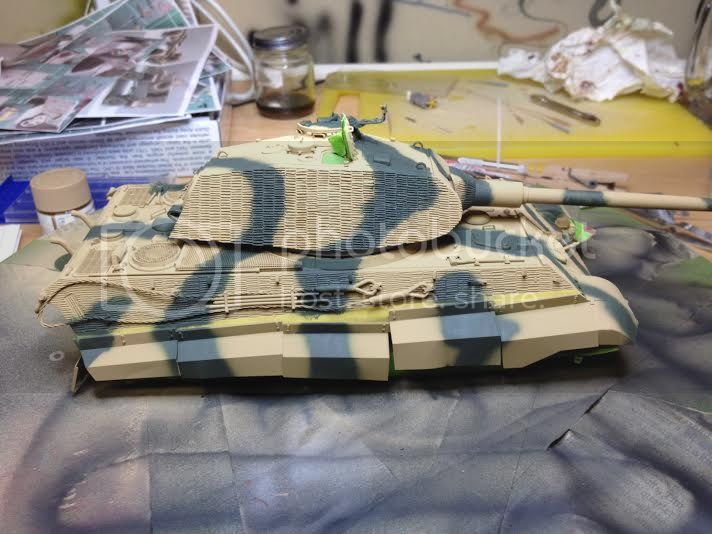
Base coat on the weapons,
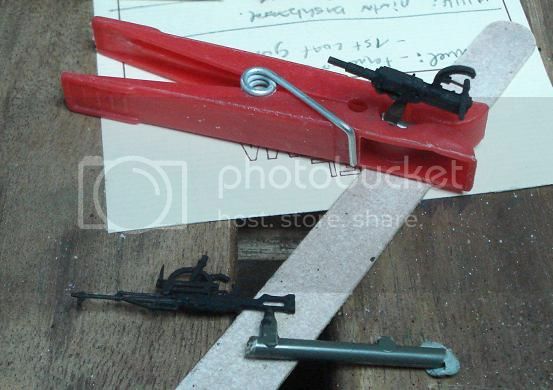
Antennas & cable are next.
Active Builds: 0
Active Campaigns: 0
Connecticut, United States
Joined: November 02, 2003
KitMaker: 984 posts
Armorama: 846 posts
Posted: Monday, January 27, 2014 - 02:14 PM UTC
SO i have been taking my time with this build and the last. I seem to make more stupid mistakes when i take my time!!
But all is fixed.
Current progress.


Lisboa, Portugal
Joined: March 04, 2008
KitMaker: 5,386 posts
Armorama: 4,727 posts
Posted: Wednesday, January 29, 2014 - 05:04 AM UTC
Active Builds: 0
Active Campaigns: 0
Lisboa, Portugal
Joined: March 04, 2008
KitMaker: 5,386 posts
Armorama: 4,727 posts
Posted: Thursday, January 30, 2014 - 07:04 AM UTC

Edit:
That's just great Photobucket just let me post my photos then just removes all my Photos for bandwidth issues... ain't that mice !!
"If you do reach the bandwidth cap for the free account, your linked out photos will be replaced by the above Photobucket image that states "this image exceeds bandwidth". To have this removed you will need to upgrade to a Plus subscription, or wait for your bandwidth to reset for the month. Your bandwidth will reset to zero every month on the day you registered your account"
I'm guessing that in 2 days images will be visible..
Active Builds: 0
Active Campaigns: 0
Ontario, Canada
Joined: March 25, 2010
KitMaker: 514 posts
Armorama: 261 posts
Posted: Friday, January 31, 2014 - 04:35 PM UTC
Lisboa, Portugal
Joined: March 04, 2008
KitMaker: 5,386 posts
Armorama: 4,727 posts
Posted: Saturday, February 01, 2014 - 07:03 AM UTC
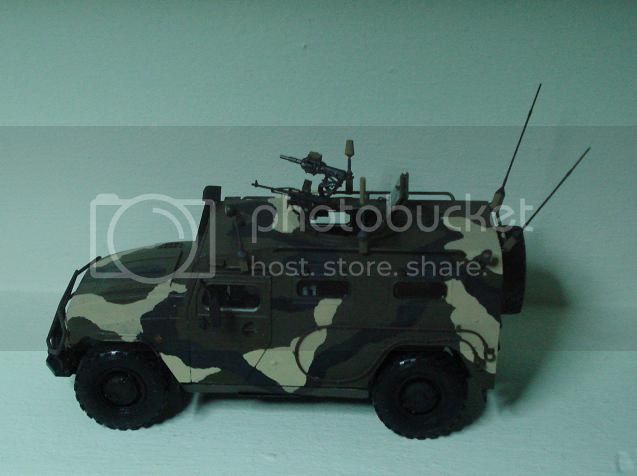
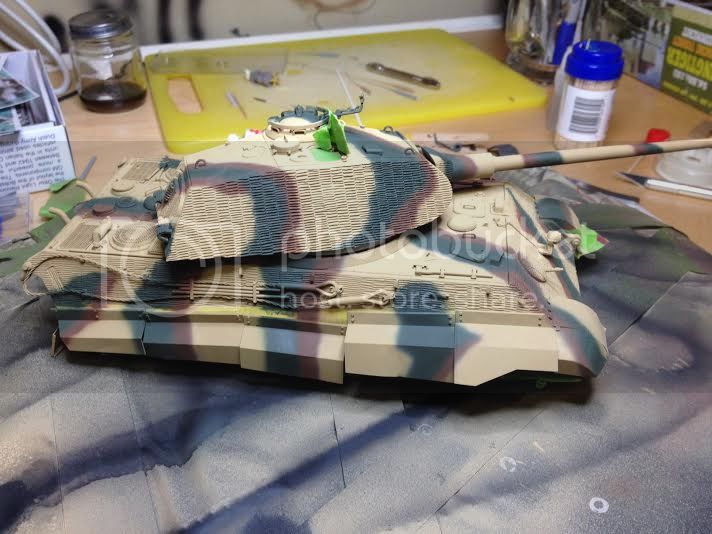
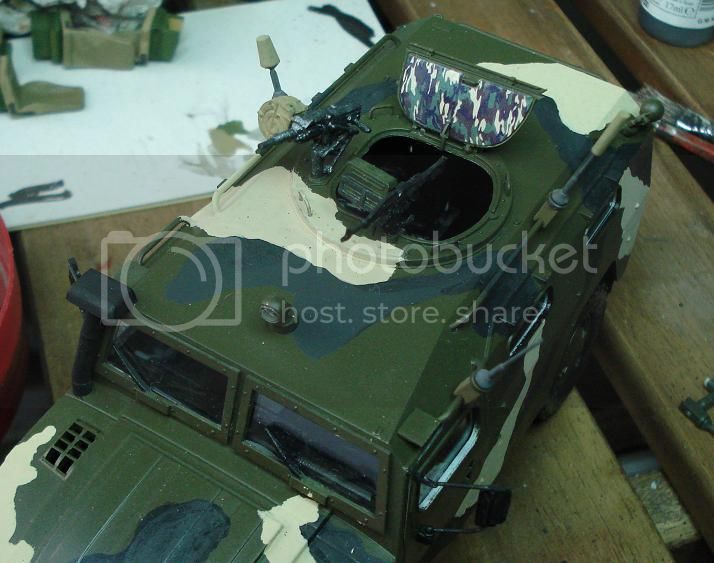
Gave a small coat of varnish before starting the weathering.
Active Builds: 0
Active Campaigns: 0
North Carolina, United States
Joined: June 06, 2006
KitMaker: 4,691 posts
Armorama: 3,509 posts
Posted: Saturday, February 01, 2014 - 10:34 AM UTC
Nice work on the camo John,looking forward to all those weathering products.I'm sure I missed it,but what paint did you use,was it that new color set from AK or Ammo ? Was wondering about them for a T-90 down the road
Lisboa, Portugal
Joined: March 04, 2008
KitMaker: 5,386 posts
Armorama: 4,727 posts
Posted: Saturday, February 01, 2014 - 11:55 AM UTC
Quoted Text
Nice work on the camo John,looking forward to all those weathering products.I'm sure I missed it,but what paint did you use,was it that new color set from AK or Ammo ? Was wondering about them for a T-90 down the road
Hi Anthony, I have my eyes on that MIG Ammo set Modern Russian Colours too. But no I used Tamyia TS-5 for the green base colour, Tamyia NatoBlack and Lifecolour RAL 7027 for the Sand colour.
Active Builds: 0
Active Campaigns: 0
Australian Capital Territory, Australia
Joined: October 26, 2012
KitMaker: 58 posts
Armorama: 58 posts
Posted: Saturday, February 01, 2014 - 09:25 PM UTC
Hi all, after a forced long absence with an unforeseen short oversees deployment I am back home. Unfortunately on my return, I took one look at what I started on my Dragon Maus, and have decided to put it on the backburner. I really need the time to focus on it properly, to get the results I want.
So with that said, I will have to bow out of this one, I am sorry.

I will see what other campaigns are going on, that don't require as much focus as the behemoth needs.
On the bench currently:
Lots of procrastination!!!!
The most over engineered, incorrectly instructed model I have ever had the displeasure of trying to build. Panda Hobby's M-ATV MRAP
Lisboa, Portugal
Joined: March 04, 2008
KitMaker: 5,386 posts
Armorama: 4,727 posts
Posted: Sunday, February 02, 2014 - 06:45 AM UTC
That's too bad Brad.
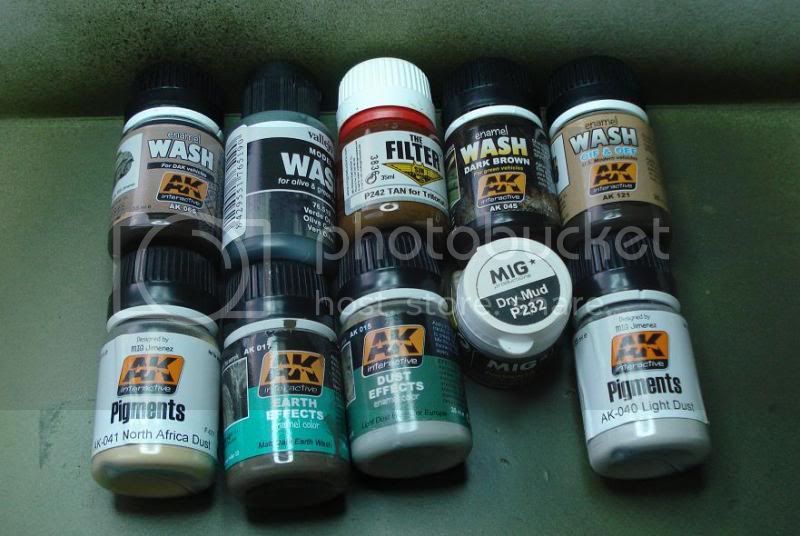
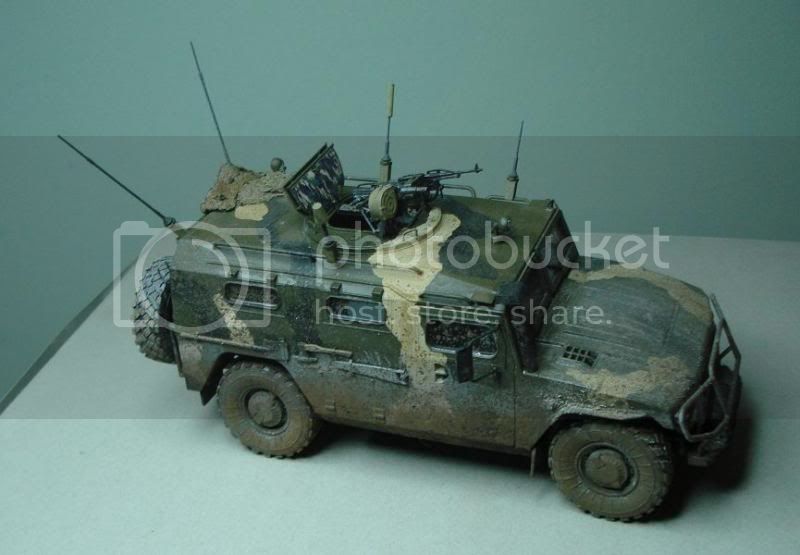
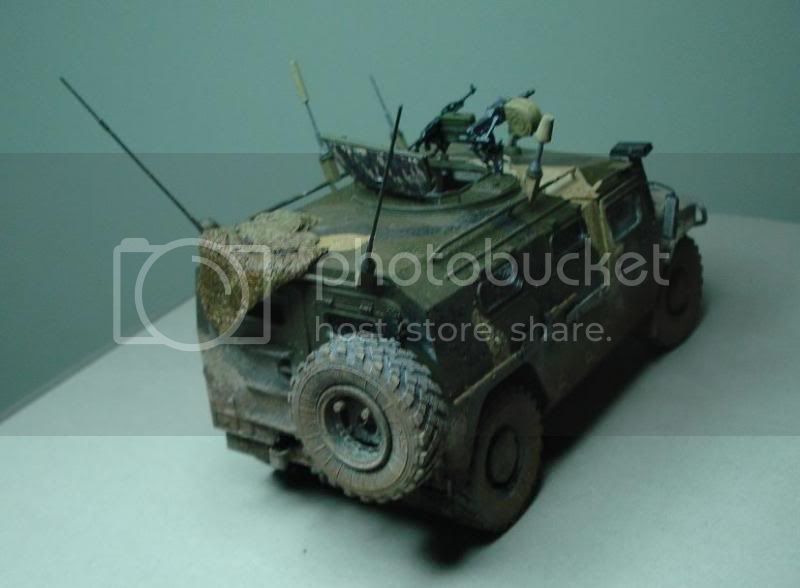
Final update, I used a MIG filter and a Vallejo pin wash for olive green.
Then I used AK dust effects & earth effects.
Finally some pigments too.

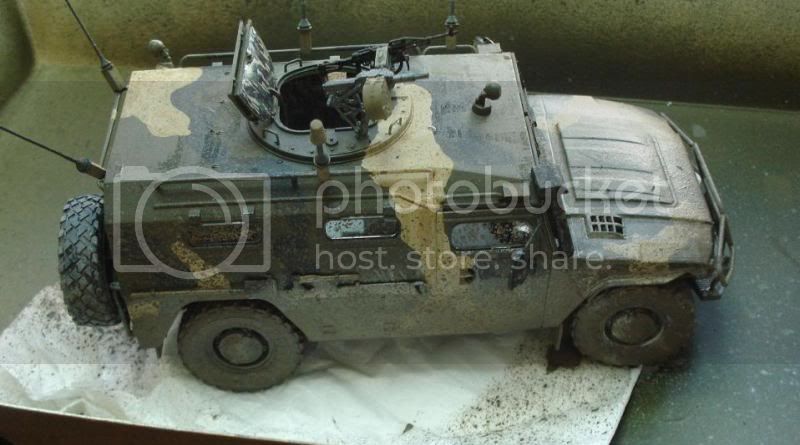


Then one of the rear windows fell...crap.

Anyway, a small tarp and final shots:
Active Builds: 0
Active Campaigns: 0
Australian Capital Territory, Australia
Joined: October 26, 2012
KitMaker: 58 posts
Armorama: 58 posts
Posted: Sunday, February 02, 2014 - 10:06 AM UTC
John, you need to get the transportee to take that thing down the wash point. Great effects with the dirt and mud.
On the bench currently:
Lots of procrastination!!!!
The most over engineered, incorrectly instructed model I have ever had the displeasure of trying to build. Panda Hobby's M-ATV MRAP
ColinEdm
 Associate Editor
Alberta, Canada
Joined: October 15, 2013
KitMaker: 1,355 posts
Armorama: 1,229 posts
Posted: Sunday, February 02, 2014 - 01:57 PM UTC
Wow! Very nice John.
So my T2 was on hold for a bit, waiting for a new compressor, airbrush parts and I was overseas for a bit, but made some progress this weekend. The PE bolts for the fenders/schurzen are a PITA and damn near impossible to trim cleanly (for me at least) so I decied to make me own out of hex rod:
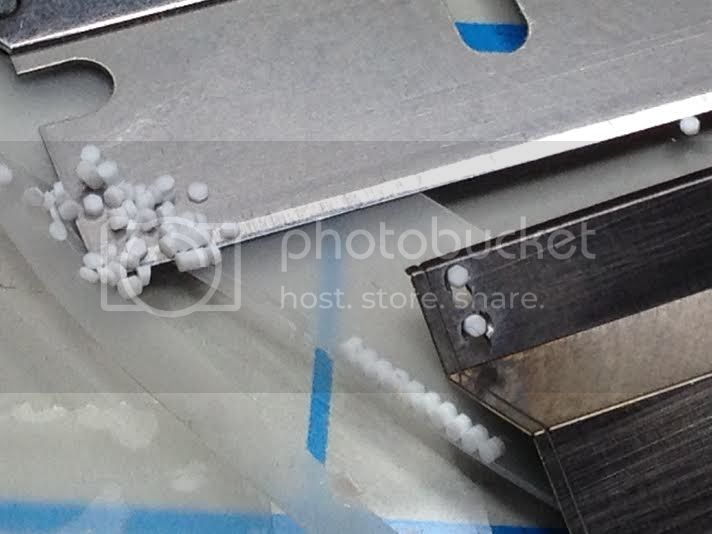
Worked out pretty good, a lot easier than the PE.
Then I primed the fenders and temporarily attached them for painting:
Then, my first attempt ever at airbrushing camo, freehand yet. Turned out not too bad, will let myself steady out a bit then do the brown. Have a bit of touchup to do. Like I said, first time I've done this so any advice/constructive criticism is welcome!

The voices are back.....excellent....
ColinEdm
Associate Editor Alberta, Canada
Joined: October 15, 2013
KitMaker: 1,355 posts
Armorama: 1,229 posts
Posted: Sunday, February 02, 2014 - 03:58 PM UTC
Finished off the camo:
The voices are back.....excellent....
Lisboa, Portugal
Joined: March 04, 2008
KitMaker: 5,386 posts
Armorama: 4,727 posts
Posted: Monday, February 03, 2014 - 01:58 AM UTC
Very nice camo ! It's looking great Colin !
Active Builds: 0
Active Campaigns: 0
Connecticut, United States
Joined: November 02, 2003
KitMaker: 984 posts
Armorama: 846 posts
Posted: Monday, February 03, 2014 - 10:12 AM UTC
Did some more etch work.
Tires are painted. interior of turret painted.
Primed the exterior today.

Connecticut, United States
Joined: November 02, 2003
KitMaker: 984 posts
Armorama: 846 posts
Posted: Tuesday, February 04, 2014 - 03:01 PM UTC
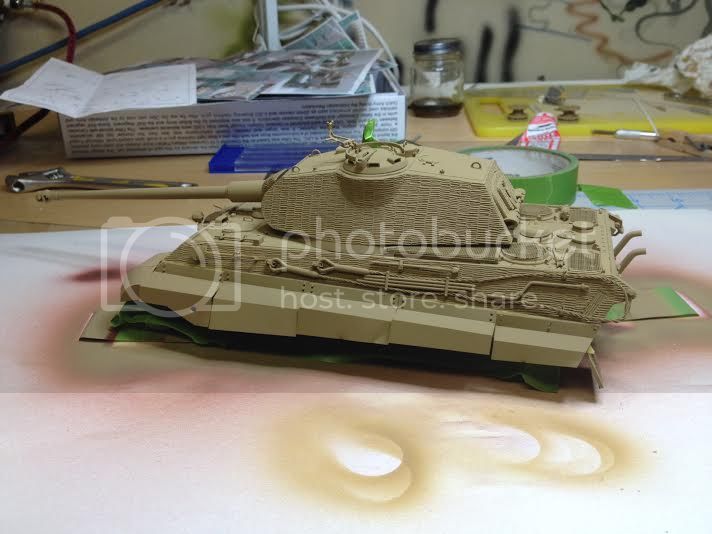
Applied the base coat today. I have the Vallejo German yellow modulation paint set. I started out following the steps, but i just didn't like the color change. So i went with Vallejo German dunkelgelb mixed with some white for the base. The lower hull and suspension still has some straight Vallejo dunkelgelb.
I ended up using a Jordio Rubio barrel.
Turret is just laying on the hull.

England - East Anglia, United Kingdom
Joined: October 15, 2012
KitMaker: 568 posts
Armorama: 561 posts
Posted: Tuesday, February 04, 2014 - 08:05 PM UTC
Top jobs Marc/Colin
Marc - is that a nice looking Brumm I can see Iin the background?
On the bench: Dragon flakvierling with armoured cab + AM Works PE
In the stash: Dragon Jagdpanther + AM Works PE
Dragon Panzer IV Ausf J + voyager jumbo PE
Tamiya B2 Bis - Flammenwerfer mod
ICM Henschel 33D1 + Dragon sFH18
Tamiya Tiger 1
Connecticut, United States
Joined: November 02, 2003
KitMaker: 984 posts
Armorama: 846 posts
Posted: Wednesday, February 05, 2014 - 01:40 AM UTC
Quoted Text
Top jobs Marc/Colin
Marc - is that a nice looking Brumm I can see Iin the background?
Thanks and yes it is a Brumm.
From the Big Guns campaign.
Connecticut, United States
Joined: November 02, 2003
KitMaker: 984 posts
Armorama: 846 posts
Posted: Wednesday, February 05, 2014 - 11:28 AM UTC
Ok, camouflage is applied.
I wanted to spray it, using masking tape and all, but i just didn't want to mess it up. (who am i kidding, i am impatient!!!)

My first time brush painting camo since i became and adult modeller. I first drew out my pattern on the model with pencil.
I used the instructions for the pattern.


Since there is no pattern for the top and right side,I painted the front, rear and left first. The just winged the rest.


Maybe a gloss coat tomorrow.

ColinEdm
Associate Editor Alberta, Canada
Joined: October 15, 2013
KitMaker: 1,355 posts
Armorama: 1,229 posts
Posted: Wednesday, February 05, 2014 - 04:25 PM UTC
The voices are back.....excellent....
New York, United States
Joined: March 08, 2010
KitMaker: 3,662 posts
Armorama: 3,078 posts
Posted: Thursday, February 06, 2014 - 12:03 AM UTC
John great looking finish there the weathering looks great

Colon 1st time airbrushing camo looks outstanding for 1st time
Marc Puma is looking good looking forward to seeing more

I still haven't deiced what to build here or when I will start but at the moment I am leaning towards this

Active Campaigns on the bench:
Operation Fall Gelb - Pz.Kpfw. IV Ausf. C
Engineering the Future - M-26 Recovery Vehicle
115 Campaigns completed
Lisboa, Portugal
Joined: March 04, 2008
KitMaker: 5,386 posts
Armorama: 4,727 posts
Posted: Thursday, February 06, 2014 - 12:52 AM UTC
Thanks Sal.
It was a very good kit, I recommend it.
I used AK weathering effects.
That's a very nice choice, O did the Henschel version a few years ago, typical Tamyia. I only added a metal gun barrel.
Active Builds: 0
Active Campaigns: 0


