Campaigns: Completed Campaigns
Campaigns that are completed should be grouped here.
Hosted by Richard S.
Operation Fall Gelb 1940 Campaign
panzerbob01
Visit this Community
Louisiana, United States
Joined: March 06, 2010
KitMaker: 3,128 posts
Armorama: 2,959 posts
Posted: Tuesday, January 14, 2014 - 02:48 AM UTC
[/quote]

Bronco is doing a 35(t)? good to know that before...
I bought the ALan Marder II D.... Bronco releases a new one
I bought the Heller R35... Bronco is anouncing a new one...

Hey you guys from Bronco, Iīve just recently bought the Somua (coudnīt pass it for the price) and Maquettes ZIS-30... would you mind not making these in the next 5 years?

As far as I know the Academy 35(t) was state of the art, as all the other (even the Tamiya one) are based on an older CMK kit[/quote]

You got it, Friend!

This reminds me much of last night sitting at the table continuing the repainting and detailing of my old Heller R-35 build ( ) with the wife sitting in and watching!

At one point, she offered the observation "that's a lot cuter than that little gray thing you just did - much more interesting camo job" (comparing it to my recently-finished HobbyBoss Pz II J). "Yeah" said I - "The French had some very cool camo jobs going into the Blitz in 1940 - probably one of the "inspirations" leading me to buy this dreadful little pile of plastic back in... oh, about 1971, I think!" "The interesting camo on the box-art caught me and reeled me in! " "But LITTLE did I know. When I got it home and opened the box... Heller, in all their strange awfulness, sprang out! The kit got compared to a couple of Tamiya things on my then bench, and R-35 went straight to the closet! Where it stayed, move after move, until 2009! When I saw some posted build of this beast and said "Hey! I have one of those! I'll get it out and fight through it!" Now, 3+ years later, it's finally almost as done as I'll get it... and HobbyBoss, and maybe Bronco, too, are coming along with a nice, new R-35!. Figures."

After a few moments, I added... "This sort of thing is like a standing joke in the armor modeling community! Nasty old kits of interesting subjects loiter for years on shelves and in closets. Modelers, hoping for a new, modern-standards kit to come along, wait and dream and wait and wait. Eventually we tire and despair ever to see that happen, and pull the monster out and start painfully trying to breathe life into it. Heck! I've been with this thing for almost 4 years, now! And when finally it starts to look almost respectable and you've put perhaps 5x as much effort into it as needed for a better kit... Voila! The kit-fairie pops up with exactly what you wanted (I WANTED, starting oh 40 years ago! ) .

The Somua is another of these old Heller dreadfuls (too bad they don't cost only a few cents - one might call them "Plastic Penny-Dreadfuls" )! At this point, I can only wonder why a French company, of all folks, did such a mediocre job of presenting their "national treasures" to the modeling world! Comes down to a bunch of Chinese to make buildable and (presumably...) more accurate kits of these salient historic vehicles!

Bob
Nito74
Visit this Community
Lisboa, Portugal
Joined: March 04, 2008
KitMaker: 5,386 posts
Armorama: 4,727 posts
Posted: Tuesday, January 14, 2014 - 10:10 AM UTC

Quoted Text


Bronco is doing a 35(t)? good to know that before...
I bought the ALan Marder II D.... Bronco releases a new one
I bought the Heller R35... Bronco is anouncing a new one...

Hey you guys from Bronco, Iīve just recently bought the Somua (coudnīt pass it for the price) and Maquettes ZIS-30... would you mind not making these in the next 5 years?

As far as I know the Academy 35(t) was state of the art, as all the other (even the Tamiya one) are based on an older CMK kit[/quote]

You got it, Friend!

This reminds me much of last night sitting at the table continuing the repainting and detailing of my old Heller R-35 build ( ) with the wife sitting in and watching!

At one point, she offered the observation "that's a lot cuter than that little gray thing you just did - much more interesting camo job" (comparing it to my recently-finished HobbyBoss Pz II J). "Yeah" said I - "The French had some very cool camo jobs going into the Blitz in 1940 - probably one of the "inspirations" leading me to buy this dreadful little pile of plastic back in... oh, about 1971, I think!" "The interesting camo on the box-art caught me and reeled me in! " "But LITTLE did I know. When I got it home and opened the box... Heller, in all their strange awfulness, sprang out! The kit got compared to a couple of Tamiya things on my then bench, and R-35 went straight to the closet! Where it stayed, move after move, until 2009! When I saw some posted build of this beast and said "Hey! I have one of those! I'll get it out and fight through it!" Now, 3+ years later, it's finally almost as done as I'll get it... and HobbyBoss, and maybe Bronco, too, are coming along with a nice, new R-35!. Figures."

After a few moments, I added... "This sort of thing is like a standing joke in the armor modeling community! Nasty old kits of interesting subjects loiter for years on shelves and in closets. Modelers, hoping for a new, modern-standards kit to come along, wait and dream and wait and wait. Eventually we tire and despair ever to see that happen, and pull the monster out and start painfully trying to breathe life into it. Heck! I've been with this thing for almost 4 years, now! And when finally it starts to look almost respectable and you've put perhaps 5x as much effort into it as needed for a better kit... Voila! The kit-fairie pops up with exactly what you wanted (I WANTED, starting oh 40 years ago! ) .

The Somua is another of these old Heller dreadfuls (too bad they don't cost only a few cents - one might call them "Plastic Penny-Dreadfuls" )! At this point, I can only wonder why a French company, of all folks, did such a mediocre job of presenting their "national treasures" to the modeling world! Comes down to a bunch of Chinese to make buildable and (presumably...) more accurate kits of these salient historic vehicles!

Bob [/quote]

I understand you ...
Got Alan's Marder II and Bison I and II.
After getting Dragon's Bison's I started thinking when I was going to build Alan's... mmmhhh NEVER.

Sold them 2 weeks ago at my LHS. As soon as I get my hands on Bronco's Marder the other Alan will be following the same route..

I did Heller's Somua maybe 5 years ago... that kit is at the same level some of Easter Express kits... it ruins the pleasure I have building them..
Raulito
Visit this Community
Buenos Aires, Argentina
Joined: January 24, 2013
KitMaker: 112 posts
Armorama: 105 posts
Posted: Tuesday, January 14, 2014 - 01:28 PM UTC

Quoted Text

BOB
That little PE is the lock-tab that fits on top of the receiver at the base of the exchangeable barrel... the lock tab is a sort of "set-screw" or key that prevents the barrel from unscrewing itself during firing. You need to have the front end of the "receiver" protrude out from the mantel so that the slot is exposed and on top. The RB barrel has the front end of the receiver milled in...

I cannot tell from your photos whether your barrel is far enough out to expose that slot, but there it is.


This is the RB barrel and the red arrow shows the notch that I told you .

The receiver is way inside the turret, behind the mantel, so what goes in that notch?

I donīt quite get it. Sorry.


Raul
panzerbob01
Visit this Community
Louisiana, United States
Joined: March 06, 2010
KitMaker: 3,128 posts
Armorama: 2,959 posts
Posted: Tuesday, January 14, 2014 - 02:27 PM UTC
Raul;

The notch you are pointing to...

Turns out, from closer inspection of that barrel set (have a few in my drawers...), that the RB KwK 30 barrel does NOT have that slot (nor the PE parts) for the lock-tab set-up I had mentioned before as being seen on their KwK and FlaK 38 barrels. That slot and PE are not features of the KwK 30 barrel. (And when looking at the FlaK 38 barrel... I notice that there is MORE receiver-tube represented there then on this KwK 30 barrel... )

So... that small notch or slot across that KwK 30 muzzle-brake may well be your target... the itty-bitty PE parts look like a pair of tiny bolt-heads... and there is actually one of those notches on either side of that muzzle-brake... I'll bet at this point that those 2 tiny PE bolt-heads go into those 2 notches and are meant to represent lock- or set-screws used to keep that M-B on the barrel.

I've never installed them on my KwK 30 builds! Out of ignorance, I'll add (I've simply ignored that tiny PE fret and marveled at the cool M-B and went right to installation!)! Perhaps my poor gunners will find one blazing afternoon that the muzzle-brake is working its way off in the heat of the moment!

To get them off that fret and onto your M-B... stick that fret onto a piece of tape, and use your small knife to nick off the connector tabs while the bolt-heads remain stuck to the tape. Mounting them calls for maybe just painting your barrel and M-B and, while the paint in those notches is still wet, placing a bolt-head into each groove (notch) with a water-wet tooth-pick. This may be easier then messing with getting a tiny droplet of CA in there, and the paint will hold that PE just fine!

Bob
PrickleHead
Visit this Community
Western Australia, Australia
Joined: December 31, 2013
KitMaker: 338 posts
Armorama: 121 posts
Posted: Tuesday, January 14, 2014 - 03:17 PM UTC
Hi

Just picked this up on my lunch hour (ok I snuck out of the office).


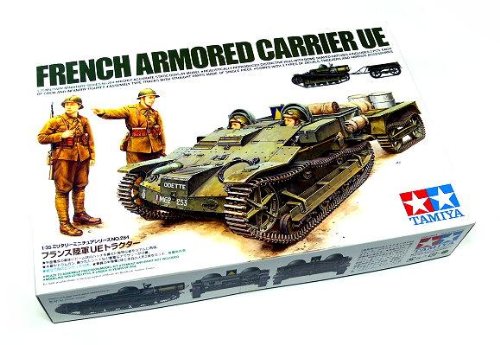
I like the fact that Tamiya supply it with tweezers!
petermade
Visit this Community
Noord-Holland, Netherlands
Joined: August 01, 2003
KitMaker: 5 posts
Armorama: 5 posts
Posted: Wednesday, January 15, 2014 - 07:27 AM UTC
Evening all,

After a few days of building,this old school Tamiya kit came together very easy.

Although it is an old one, it was still fun to build. Now primed it and ready to go for a paint job.


nng-nng
Visit this Community
Bayern, Germany
Joined: October 22, 2013
KitMaker: 380 posts
Armorama: 376 posts
Posted: Wednesday, January 15, 2014 - 11:29 AM UTC
@ PrickleHead: according to the reviews youīll need the tweezers

Well and Heller is Heller... nothing you can do about...
Iīve got the Somua for cheap, I wouldnīt have bought if for the normal price

As Im not in favor for those Heller Jerks, I had a look in my stash and found a pair of matching figures, poses are great and the detail is good. So i had to depict the tank someway broken/shot down.... letīs see how far I will go.


The Hobbyboos tracks arenīt too bad either, handling is quite easy, but I had to cut of the teeth of the drive weels. The other parts matched perfectly.
The broken track: (the lower part got lost during the shooting)


hofpig
Visit this Community
England - South East, United Kingdom
Joined: March 04, 2007
KitMaker: 1,330 posts
Armorama: 1,017 posts
Posted: Thursday, January 16, 2014 - 02:16 AM UTC
Some work so far.


Interior finished except the drivers seat, along with some of the figures I plan on adding.


Skp sitting soldier looks good but I think it feels a little over scale compared to the rest. DSecided to ditch the DES figure as it was a bit rubbish and I remembered I had the Miniart box set so I am going to use the one out of that set as seen partially finished sat in the turret.

The standing tanker I picked up on ebay dirt cheap, a nemrod one and I have to say it's quality is very good indead.


A dio base I have had for about ten years I decided to repaint it for this campagin.


Rough idea on layout. More soon.

Paul
Snorri23
Visit this Community
Ontario, Canada
Joined: March 25, 2010
KitMaker: 514 posts
Armorama: 261 posts
Posted: Thursday, January 16, 2014 - 08:55 AM UTC
I was searching another pile and came across this beauty a Sd. Kfz 232 which I started without taking photos of the start. So here are some showing my progress. I am using some RB replacement barrels and resin replacement tyres. I have applied some primer which has shown my old nemesis finger prints. I have also found a partially started PzIV Ausf D to a B by Ron Foulks in an old FSM mag. If I have time I will try and finish it as well for this campaign
 photo STH71274_zps68aecd6a.jpg
 photo STH71276_zps550cae4f.jpg
 photo STH71275_zps6c0a77ab.jpg
 photo STH71277_zps04ab53c3.jpg
PrickleHead
Visit this Community
Western Australia, Australia
Joined: December 31, 2013
KitMaker: 338 posts
Armorama: 121 posts
Posted: Thursday, January 16, 2014 - 04:27 PM UTC
Great looking work guys.

I am hoping to finish up my SBD-5 for the Douglas campaign this weekend and get cracking on my UE carrier
Raulito
Visit this Community
Buenos Aires, Argentina
Joined: January 24, 2013
KitMaker: 112 posts
Armorama: 105 posts
Posted: Friday, January 17, 2014 - 02:31 PM UTC

Quoted Text

BOB
So... that small notch or slot across that KwK 30 muzzle-brake may well be your target... the itty-bitty PE parts look like a pair of tiny bolt-heads... and there is actually one of those notches on either side of that muzzle-brake... I'll bet at this point that those 2 tiny PE bolt-heads go into those 2 notches and are meant to represent lock- or set-screws used to keep that M-B on the barrel.


Thanks again, Bob, and here it is.

I actually use a drop of super glue because I want to sand the PE once installed to give it a round shape and match the barrel profile. Before the usual cursing Iīm quite happy how it turns out.

Tonight Iīll prime the whole model.

See you soon.

Raul
16dollars
Visit this Community
Baden-Württemberg, Germany
Joined: September 14, 2012
KitMaker: 69 posts
Armorama: 69 posts
Posted: Saturday, January 18, 2014 - 03:40 AM UTC
Even more progress... I am entering the painting stage soon.


Raulito
Visit this Community
Buenos Aires, Argentina
Joined: January 24, 2013
KitMaker: 112 posts
Armorama: 105 posts
Posted: Saturday, January 18, 2014 - 06:10 AM UTC
@JENS
Hey! Your Pz. 35(t) is looking great! I have to give my CMK 35(t) a chance someday.

Ok, into Day 5 of the Pz. II building log.

I managed to prime the model and here it is. The metal parts will be primed later with another brand of primer.

Some photos.


Tonight Iīll start with the "boring" panzer grey.

See you soon.

Raul
16dollars
Visit this Community
Baden-Württemberg, Germany
Joined: September 14, 2012
KitMaker: 69 posts
Armorama: 69 posts
Posted: Saturday, January 18, 2014 - 06:19 AM UTC

Quoted Text

@JENS
Hey! Your Pz. 35(t) is looking great! I have to give my CMK 35(t) a chance someday.


Thank you Raul!
Looking at your photos I wonder if you use a light tent or something similar? Is there a way I can do such brilliant photos too?
Raulito
Visit this Community
Buenos Aires, Argentina
Joined: January 24, 2013
KitMaker: 112 posts
Armorama: 105 posts
Posted: Saturday, January 18, 2014 - 08:38 AM UTC

Quoted Text

JENS
Looking at your photos I wonder if you use a light tent or something similar? Is there a way I can do such brilliant photos too?


A very simple method that I think you already knows, because your photos arenīt bad either.

I use a continuous white (or any color you like) background. I use a regular A4 paper for most of my shots, for bigger subjects I have a piece of a rubber like material (here is called “Goma eva”) that you can get in a variety of colors. Then one or two sources of light, depending on the subject and what you really want to show. Sometimes I use a second piece of white paper or cardboard to bounce the light in very dark places of the model.

All the photos in this thread were shot with my Samsung S4 phone (thatīs a handy stuff!!) , except those last ones (barrel and the primed ones) in which I use my DSLR Sony Alfa 55 with a 50mm. Macro (the barrel ones) and 18-250mm zoom (the primed ones).

The photos taken with my phone are automatically uploaded via Dropbox to my computer (great handy stuff too!) where I adjust bright and contrast and refine the focus a little if needed. Then save the picture with an 800 pixels wide and load them to Photobucket for this blog.

I hope you donīt get upset but just for the purpose of this explanation I use your last photo and give it a twirl in PS. Here is how it looks then.


For the record, I own a light tent that I use some time mostly on finished subjects and macro stuff. This is not the case of those in this blog. The light is the regular light I use in my modeling room, a couple of lamps like those for drawing boards with day light bulbs.

Hereīs a good example of a finished model (also with my S4 )
In PS I crop the image, adjust the exposure and sharpen the edges, thats all. It takes just 2 minutes!
BTW you canīt get a great deep of field with the phone as in this case (the ammo carrier is out of focus) but for showing the building process of the model is far enough, at least for me.
For the purists, I should have also desaturate the greens a little bit because this pic has a greenish hue from a wall reflecting itīs color.


Thatīs it. Hope it helps!

See you soon.

Raul
AlanL
Visit this Community
England - East Anglia, United Kingdom
Joined: August 12, 2005
KitMaker: 14,499 posts
Armorama: 11,675 posts
Posted: Saturday, January 18, 2014 - 10:23 AM UTC
Hi folks,

Great builds and info going on here, nice work. Paul I know that base well .

The campaign is off to a great start.

Cheers

Al
Raulito
Visit this Community
Buenos Aires, Argentina
Joined: January 24, 2013
KitMaker: 112 posts
Armorama: 105 posts
Posted: Saturday, January 18, 2014 - 06:26 PM UTC
Day 6 - Dunkelgrau base

Fresh form the painting booth. I try some modulation on the dunkelgrau base.
Iīll let the paint dry for 24 hrs. The search for appropriate decals begins, Iīm very suspicious about Tamiyaīs.

See you soon

Raul
16dollars
Visit this Community
Baden-Württemberg, Germany
Joined: September 14, 2012
KitMaker: 69 posts
Armorama: 69 posts
Posted: Saturday, January 18, 2014 - 11:17 PM UTC
Raul,
Thank you! Your help is much appreciated!!!
It seems that I have to get more familiar with PS.


Base color applied:


MichaelSatin
Staff MemberCampaigns Administrator
AEROSCALE
Visit this Community
Colorado, United States
Joined: January 19, 2008
KitMaker: 3,909 posts
Armorama: 510 posts
Posted: Sunday, January 19, 2014 - 06:27 AM UTC
Nice work out there!

Here's some progress on the Citroen:

 photo 2014-01-19_11-01-07_729_zpsa901fe72.jpg

 photo 2014-01-19_11-00-47_480_zpsd5b15b14.jpg

And put together:

 photo 2014-01-19_11-08-02_596_zps5881c5af.jpg

I'm still sticking to the plan, follow the instructions, including the color call outs. The only deviation so far is that I assembled the front fenders to the body rather than the chassis first. It still all fit together like a Tamiya!

Michael
Bluestab
Visit this Community
South Carolina, United States
Joined: December 03, 2009
KitMaker: 2,160 posts
Armorama: 1,906 posts
Posted: Sunday, January 19, 2014 - 06:32 AM UTC
Time to get this build started. As a reminder, it's the Heller Renault R35 with the 25mm antitank gun.

The instructions would have you build the driver and commander first. I went for the lower hull. It's a multipart deal. The fit was okay, but I did take the liberty of reinforcing the rear to the sides with a strip of scrap styrene.


The next step is to add the fenders but I held off on this to make sure the tracks would be easy to add and remove. I went ahead and started on the running gear. I pre-painted the pieces, as well as the lower hull. Fit was less than Tamiya-esque and required a bit of trimming. For that matter, the molds were off-aligned slightly so parts required a lot of clean up.


I left the suspension to fully set up overnight. I went ahead and assembled and painted the driver. I really didn't spend a lot of time on him because you really won't see much of him. I had pictures but they were really blurry.
I test fit the upper hull. I still hadn't added the fenders yet. As others have mentioned, the tracks are garbage. The connection points were so flashed up that there was no real way to heat and push them through the holes. I ended up super gluing them. I'll have to try to hide the bad places as best as I can.


I turned my attention to the turret. Like most of the kit, the engineering is very dated. Fit wasn't bad.


You have to add the fenders so the upper hull can sit on them. I added the fenders and let them set up a bit before adding the upper hull. I used popsicle sticks as shims to keep the fenders pressed against the upper hull until they set.


That's it for now. There's not a whole lot of positive to say about this kit. You just have to slog through it. I'll probably step back from it for a couple of days and start of the mass of flash that is the 25mm gun.
nng-nng
Visit this Community
Bayern, Germany
Joined: October 22, 2013
KitMaker: 380 posts
Armorama: 376 posts
Posted: Sunday, January 19, 2014 - 07:07 AM UTC
Hi Alex, seems you were lucky with the tracks... mine were way too long..

Iīve almost completed the construction, but still a few details to add...


thatīs the piont Im currently stuck at, horn and light donīt seem to belong there, as I canīt open the lower drivers hach now..
Hangelafette
Visit this Community
Pennsylvania, United States
Joined: April 22, 2012
KitMaker: 344 posts
Armorama: 315 posts
Posted: Sunday, January 19, 2014 - 09:43 AM UTC
Hi all,

I'm joining in with Bronco's A13 Mk.I Cruiser Tank.


Some really nice work already guys! Jens - That Pz 35(t) looks mighty nice, I was going to hold out for the Bronco kit, but I may pick up the Academy kit now too.

Nate
panzerbob01
Visit this Community
Louisiana, United States
Joined: March 06, 2010
KitMaker: 3,128 posts
Armorama: 2,959 posts
Posted: Sunday, January 19, 2014 - 10:36 AM UTC

Quoted Text

Hi Alex, seems you were lucky with the tracks... mine were way too long..

Iīve almost completed the construction, but still a few details to add...


thatīs the piont Im currently stuck at, horn and light donīt seem to belong there, as I canīt open the lower drivers hach now..


I feel for you, slogging through this monster!

The solution is probably to move those items slightly to the left - enough to clear that hatch. Pics do show both that dinky horn and that French version of the "Notek" convoy light mounted there to the left, so...

When I built mine, I think I sort of closed my eyes on this little detail

Maybe the eventual modern kit will have a better geometry around these bits! That, and, oh, about a hundred or so other things!

Bob
Bluestab
Visit this Community
South Carolina, United States
Joined: December 03, 2009
KitMaker: 2,160 posts
Armorama: 1,906 posts
Posted: Sunday, January 19, 2014 - 12:58 PM UTC
Fabian,
Thanks. The tracks are loose. I'm sort of glad of that. The idler support arms are pretty flimsy and I suspect and amount of tension would snap them. And thanks for the heads-up on the light and horn. I'll mount them closer to the fender. I think that should do it.

Bob,
I typically don't care for Heller kits anyway, and this one hasn't done much to change my opinion of them. If it wasn't for the fit problems, excessive flash, horrid tracks, odd styrene, soft detail, over engineering, poor instructions, and bad figures...it's a nice little kit. The antitank gun appears to be worse in terms of flash. The gun is pretty simple though.
Darson
Visit this Community
Victoria, Australia
Joined: June 14, 2005
KitMaker: 247 posts
Armorama: 129 posts
Posted: Monday, January 20, 2014 - 11:20 PM UTC

Quoted Text

Hi all,

I'm joining in with Bronco's A13 Mk.I Cruiser Tank.


Nate


Hi Nate a word to the wise, if you are building the Bronco A13 you will need to get the Bronco A13 Track Link Set AB3516.

These indi link tracks are a must have for that Bronco kit as the tracks supplied in the kit are way too short and simply do not fit without seriously screwing up the suspension.

Cheers
Darren