Kildare, Ireland
Joined: November 21, 2007
KitMaker: 3,212 posts
Armorama: 2,807 posts
Posted: Tuesday, February 24, 2015 - 01:27 PM UTC
Quoted Text
Yoohoo! Another Stryker! How do you plan to do the anti-slip. Kind of stuck with mine on the ASLAV...
To be honest Cristian I hadn't planned on it....the amount of masking that would involve

Anyway, another step completed...just fitting the connectors on the front of the hull took nearly an hour....but I'm becoming a big fan of tamiya extra thin cement!

Lisboa, Portugal
Joined: March 04, 2008
KitMaker: 5,386 posts
Armorama: 4,727 posts
Posted: Tuesday, February 24, 2015 - 05:41 PM UTC
Active Builds: 0
Active Campaigns: 0
Torino, Italy
Joined: March 19, 2010
KitMaker: 50 posts
Armorama: 43 posts
Posted: Tuesday, February 24, 2015 - 09:00 PM UTC
I progressed with the rear of the vehicle first pic are the wedges with their bracket before glued.

This is the completed upper hull hatch with inner end outside details, 10 PE resin parts in total.

And rear ramp:

the only difficult thing is to bent the PE of the inner detail they need to be warmed up to to make the brass more malleable.

Kildare, Ireland
Joined: November 21, 2007
KitMaker: 3,212 posts
Armorama: 2,807 posts
Posted: Wednesday, February 25, 2015 - 01:24 PM UTC
Very neat work Dario!
Most of the undercarrige assembled last night:

getting the axels, shocks, & wishbones alligned was very simple because of the design and fit of the pars. Just using the Mk1 eye-ball they all look straight & level & alligned
Kildare, Ireland
Joined: November 21, 2007
KitMaker: 3,212 posts
Armorama: 2,807 posts
Posted: Thursday, February 26, 2015 - 05:33 PM UTC
Started on the top. Side bins were a bit fiddly to get alligned as there is a sperate front, bottom, both ends and really tiny posts but fit is perfect. Still lots more to go on top & sides. Keeping off the tools etc until after painting.

Bayern, Germany
Joined: September 30, 2013
KitMaker: 1,615 posts
Armorama: 1,500 posts
Posted: Thursday, February 26, 2015 - 06:50 PM UTC
Building logs: http://armored76.wordpress.com/
Finished projects: http://armored76.wordpress.com/portfolio/
North Carolina, United States
Joined: June 06, 2006
KitMaker: 4,691 posts
Armorama: 3,509 posts
Posted: Friday, February 27, 2015 - 06:51 AM UTC
Bayern, Germany
Joined: September 30, 2013
KitMaker: 1,615 posts
Armorama: 1,500 posts
Posted: Friday, February 27, 2015 - 11:26 AM UTC
Very cool, Anthony! Gotta love that shape!

Building logs: http://armored76.wordpress.com/
Finished projects: http://armored76.wordpress.com/portfolio/
Kildare, Ireland
Joined: November 21, 2007
KitMaker: 3,212 posts
Armorama: 2,807 posts
Posted: Saturday, February 28, 2015 - 12:56 AM UTC
It may not look like much has changed but this is after 2 reasonable sessions at the bench since last photo. Some of the bits are tiny and cutting & cleaning the sprue attachments is time consuming given the number and size. But fit is perfect on all bar 1 so far.

Sao Paulo, Brazil
Joined: January 24, 2012
KitMaker: 1,054 posts
Armorama: 1,050 posts
Posted: Saturday, February 28, 2015 - 02:33 AM UTC
Hi guys!
Long time without being here.
Lots of great works and I'm glad to see that Sean is building an M1132 because I'm out of mine.
The model is great but the SMP's pieces are to thin and I broke two or three of them. So, I'm done! Sean, watch out. Someone told me the SMP is hard and it is!
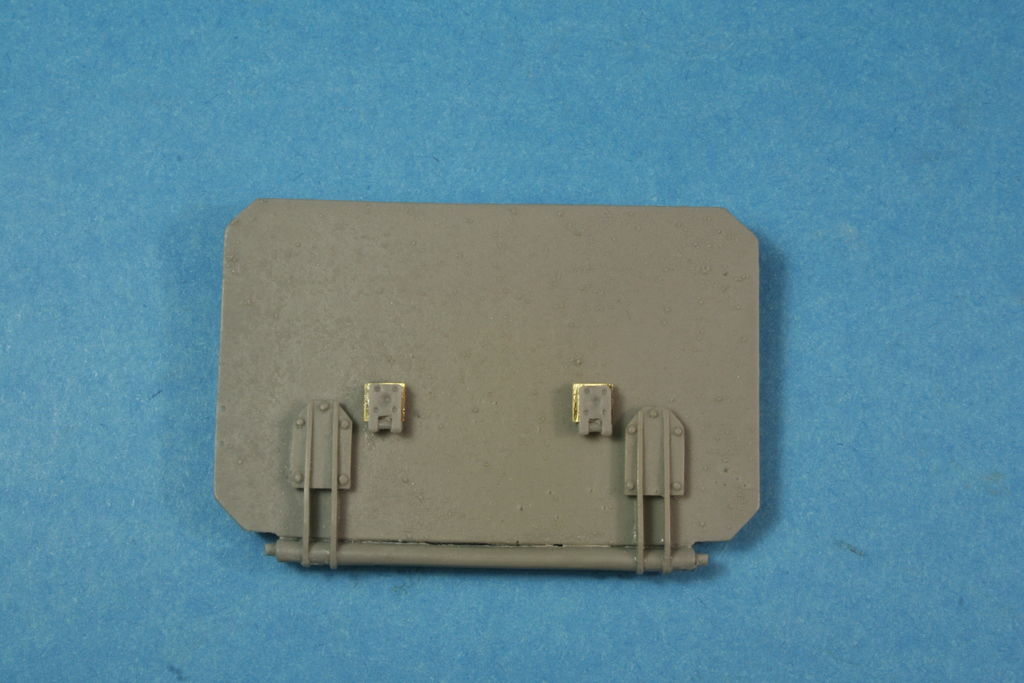
But I'm not out of this campaign. I started another 8x8 vehicle, look:


Yes, it's a HB's Boxer. I know it's a prototype, but is beautiful and it'll be paint in desert 3 tone camo. Yes, it'll be an what if.
As I said, I just started the build. I like to close the vehicle before build all other details.
So, look some pics:
Front plate:


Main body:


More pics later.
Cheers!
Marco
North Carolina, United States
Joined: June 06, 2006
KitMaker: 4,691 posts
Armorama: 3,509 posts
Posted: Saturday, February 28, 2015 - 02:49 AM UTC
Quoted Text
Very cool, Anthony! Gotta love that shape!
Thanks for the nic words
Kildare, Ireland
Joined: November 21, 2007
KitMaker: 3,212 posts
Armorama: 2,807 posts
Posted: Saturday, February 28, 2015 - 04:19 AM UTC
Hi Marco, looking forward to seeing that Boxer take shape: and what a lovely shape it is too. Very futuristic!
If the plow gives me any problems I'll just make it look like mine damage!
Sao Paulo, Brazil
Joined: January 24, 2012
KitMaker: 1,054 posts
Armorama: 1,050 posts
Posted: Saturday, February 28, 2015 - 04:57 AM UTC
Louisiana, United States
Joined: March 06, 2010
KitMaker: 3,128 posts
Armorama: 2,959 posts
Posted: Saturday, February 28, 2015 - 05:14 AM UTC
Marco;
Way cool! That must be one big sucker!
If I may suggest... while things are still open and relatively easy to get at - consider doing a fix on those top-hatch "hinge-pins" which HB appears to have cut a funky corner on - the "pins" appear as ridges and not as proud-standing pin-heads on the hull-top - these could, I think, be easily removed and replaced by small pieces of sprue or rod to better show as pin-heads?
Just a suggestion!
Bob
Sao Paulo, Brazil
Joined: January 24, 2012
KitMaker: 1,054 posts
Armorama: 1,050 posts
Posted: Saturday, February 28, 2015 - 09:14 PM UTC
Thanks a lot Bob! You're right. I'll do this!
Cheers!
Marco
Bayern, Germany
Joined: September 30, 2013
KitMaker: 1,615 posts
Armorama: 1,500 posts
Posted: Saturday, February 28, 2015 - 10:35 PM UTC
That Boxer is shaping up nicely, Marco! Looking forward to see more of it!
I tried Fabian's tip of using flour for the anti-skid coating on the ASLAV and it works like a charm. I'll post some images later!
Building logs: http://armored76.wordpress.com/
Finished projects: http://armored76.wordpress.com/portfolio/
Wisconsin, United States
Joined: July 30, 2013
KitMaker: 584 posts
Armorama: 525 posts
Posted: Saturday, February 28, 2015 - 11:20 PM UTC
Kildare, Ireland
Joined: November 21, 2007
KitMaker: 3,212 posts
Armorama: 2,807 posts
Posted: Sunday, March 01, 2015 - 04:30 AM UTC
RWS complete, but won't put the 50 on till after the painting. PE grills on the intakes and exhaust.

Will start the handles tomorrow then spray with rattle can before inserting the vision blocks from below then mating the two hull halves and doing the rear ramp
United States
Joined: February 23, 2009
KitMaker: 113 posts
Armorama: 91 posts
Posted: Sunday, March 01, 2015 - 06:00 AM UTC
There are some great builds going on here. I wanted to know if it is to late to be a part of this build. I think I have a Stryker kit around waiting to be built.
Dave
Louisiana, United States
Joined: March 06, 2010
KitMaker: 3,128 posts
Armorama: 2,959 posts
Posted: Sunday, March 01, 2015 - 08:55 AM UTC
I believe we have until 10 AUG 2015 on these 8-wheel things. I HOPE so, as I haven't started mine yet!

Bob
United States
Joined: February 23, 2009
KitMaker: 113 posts
Armorama: 91 posts
Posted: Sunday, March 01, 2015 - 10:55 AM UTC
I joined so let's see if I can get one done in time.
I had one I started before and painted with a digital camp for fun. It's not done but I'm not sure I like the way the camp was turning out. I'll post a photo later to share.
Good to be on board with this campaign.
Dave
Bayern, Germany
Joined: September 30, 2013
KitMaker: 1,615 posts
Armorama: 1,500 posts
Posted: Sunday, March 01, 2015 - 11:30 AM UTC
Hello,
Some closeups of the anti-skid coating done with Fabian's flour method.
Test piece raw and painted

Applied to the ASLAV upper surfaces

Cheers,
Cristian
Building logs: http://armored76.wordpress.com/
Finished projects: http://armored76.wordpress.com/portfolio/
United States
Joined: February 23, 2009
KitMaker: 113 posts
Armorama: 91 posts
Posted: Tuesday, March 03, 2015 - 10:27 PM UTC
I hate to do this but I've pulled out of this campaign because I was looking at the model I have for this and it's to much now. I have the Stryker 1130 and all the PE you can get for it including the slant armor. I figured I'm better off in the campaign for models not completed right now. Maybe I can get that done and then try this one.
I will be watching here to see how these turn out. Keep up the good work guys.
Dave
Lisboa, Portugal
Joined: March 04, 2008
KitMaker: 5,386 posts
Armorama: 4,727 posts
Posted: Tuesday, March 03, 2015 - 10:41 PM UTC
Active Builds: 0
Active Campaigns: 0
Kildare, Ireland
Joined: November 21, 2007
KitMaker: 3,212 posts
Armorama: 2,807 posts
Posted: Thursday, March 05, 2015 - 01:38 PM UTC
That's looking very nice John. I like the unusual camo colours.
Still working away on this. Didnt get a lot of time at the bench this week but nearly ready to spray the base colour before inserting the vision blocks and putting the body together.


Then can start all the real detailing and the plow.


