New York, United States
Joined: March 08, 2010
KitMaker: 3,662 posts
Armorama: 3,078 posts
Posted: Saturday, November 15, 2014 - 01:44 AM UTC
Love the look of those zimmed up Panthers cant wait to get started on mine

Oh but wait that means I would have to decide which 1 to build got 2 Panthers and 3 Jagdpanthers, all from Dragon in the stash

Active Campaigns on the bench:
Operation Fall Gelb - Pz.Kpfw. IV Ausf. C
Engineering the Future - M-26 Recovery Vehicle
115 Campaigns completed
Stockholm, Sweden
Joined: October 15, 2013
KitMaker: 444 posts
Armorama: 428 posts
Posted: Saturday, November 15, 2014 - 03:13 AM UTC
Nice job there Matthew!
Sal: my vote is on one of the jagdpanthers!
I fitted the stowage tube and left side track link holder

A pretty fiddly and delicate job... I think I will have to change my assembly order and get the upper and lower hull assembled before adding any more of the PE detail or it's bound to be breakage from handling!
Queensland, Australia
Joined: October 02, 2008
KitMaker: 658 posts
Armorama: 629 posts
Posted: Saturday, November 15, 2014 - 03:17 AM UTC
Quoted Text
A pretty fiddly and delicate job... I think I will have to change my assembly order and get the upper and lower hull assembled before adding any more of the PE detail or it's bound to be breakage from handling!
Johan
Very true, as I can attest from personal painful experience. In fact, I'm up to the weathering stage with mine and have still to add the aerial and "driver knows" guides on the front, as I know full well that otherwise I'll knock them off.
Regards
Rob
Removed by original poster on 11/16/14 - 04:12:11 (GMT).
District of Columbia, United States
Joined: March 05, 2009
KitMaker: 154 posts
Armorama: 137 posts
Posted: Saturday, November 15, 2014 - 09:20 AM UTC
Hi all,
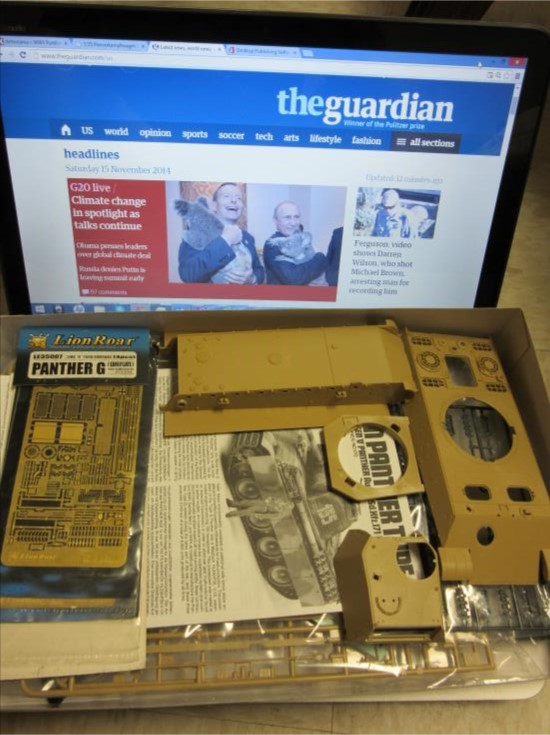
I am very happy to join this amazing campaign! I will be building an old Tamiya Panther G Early version. As there is no way around the zimmerit in this version, I will most likely be using a Cavalier set.
Workbench:
T-34/85 (Dragon)
T-80U (Skit T-80UD + SP Designs conversion)
ColinEdm
 Associate Editor
Alberta, Canada
Joined: October 15, 2013
KitMaker: 1,355 posts
Armorama: 1,229 posts
Posted: Saturday, November 15, 2014 - 09:34 AM UTC
The voices are back.....excellent....
Stockholm, Sweden
Joined: October 15, 2013
KitMaker: 444 posts
Armorama: 428 posts
Posted: Sunday, November 16, 2014 - 12:40 PM UTC
Nice job Colin!
Mine got shoes!

Being a real man i obviously did not look at the instructions before assembling the tracks so it was not until the end of the second run when i RAN OUT of magic tracks i realized you where supposed to use 8 special track pieces per run around the running gear...

So, a tip if you are building a dragon panther with magic tracks, read the instructions


Hessen, Germany
Joined: July 17, 2013
KitMaker: 338 posts
Armorama: 331 posts
Posted: Sunday, November 16, 2014 - 07:38 PM UTC
Hey folks,
this will be my entry, a Revell Panther G early version in Braille scale with Part PE Zimmerit, Voyager Model PE and AM barrel (don't know which one, yet as I have an RB and an Aber one). Still debating whether to buy OKB resin tracks...

This is my very first campaign, and I'm über excited.
Cheers!
Indiana, United States
Joined: June 10, 2005
KitMaker: 6,188 posts
Armorama: 5,960 posts
Posted: Sunday, November 16, 2014 - 08:16 PM UTC
Quoted Text
Hey folks,
this will be my entry, a Revell Panther G early version in Braille scale with Part PE Zimmerit, Voyager Model PE and AM barrel (don't know which one, yet as I have an RB and an Aber one). Still debating whether to buy OKB resin tracks...
This is my very first campaign, and I'm über excited.
Cheers!
First Campaign?!!! Well, I'm honored you chose this one as I'm sure you'll have a great time with your selection there!
Everyone is coming along nicely now... time to jump in soon!

Jeff
Hessen, Germany
Joined: July 17, 2013
KitMaker: 338 posts
Armorama: 331 posts
Posted: Sunday, November 16, 2014 - 09:35 PM UTC
Quoted Text
First Campaign?!!! Well, I'm honored you chose this one as I'm sure you'll have a great time with your selection there!
Jeff
Thanks! Looking at your nick and all, you seem like the right person to ask. Would a Normandie Panther G have had the rain guard between turret and gun mantle? The corresponding PE part looks sexy, but the Panther has to be accurate for a Normandie setting (Dio ahead...

)
United Kingdom
Joined: September 17, 2012
KitMaker: 462 posts
Armorama: 417 posts
Posted: Sunday, November 16, 2014 - 09:58 PM UTC
So my extra AM goodies arrived in the post today! Woohoo...

More progress pics at the weekend...
Ach, panthers really are just the way forward...
United Kingdom
Joined: September 17, 2012
KitMaker: 462 posts
Armorama: 417 posts
Posted: Sunday, November 16, 2014 - 10:07 PM UTC
Quoted Text
Hey folks,
this will be my entry, a Revell Panther G early version in Braille scale with Part PE Zimmerit, Voyager Model PE and AM barrel (don't know which one, yet as I have an RB and an Aber one). Still debating whether to buy OKB resin tracks...
This is my very first campaign, and I'm über excited.
Cheers!
Hey Nicolas,
I just built the same kit. The tracks are pretty nice, really. There is no real need to run out and buy resin replacements unless you are desperate to. The one thing I found though was that the individual links do need a little subtle persuasion to fit around the drive sprockets, but only ever so slightly....
Cheers
Matthew
Indiana, United States
Joined: June 10, 2005
KitMaker: 6,188 posts
Armorama: 5,960 posts
Posted: Sunday, November 16, 2014 - 10:22 PM UTC
Quoted Text
Would a Normandie Panther G have had the rain guard between turret and gun mantle?
Those were introduced in August of '44. So I would say no to that.
Jeff

#377
Texas, United States
Joined: June 27, 2010
KitMaker: 1,481 posts
Armorama: 93 posts
Posted: Monday, November 17, 2014 - 03:17 AM UTC
Hi all, I have been trying to post an update for the past couple of days but have been unable to post my photos to the Kit Maker Photo Album.
Anyway, my time on the bench has been limited but she is coming along slowly. I am slowly getting the turret complete and should be moving on to the tools here within the week. The track is complete as I am using Fruil Tracks for this build.
All of the builds are looking great and I am learning from each of you as we continue this campaign. Thanks for letting me participate.
Dave
In Dry Dock #1: 1/350 IJN SHOKAKU (Fujimi)
In Dry Dock #2: 1/350 IJN Tama (Aoshima)
Stockholm, Sweden
Joined: October 15, 2013
KitMaker: 444 posts
Armorama: 428 posts
Posted: Monday, November 17, 2014 - 04:03 AM UTC
Got the first of the tool racks finished today:

I need to consult my reference (IE. google) but I suspect there should be some kind of brackets holding the handles of the cutter in place.
Louisiana, United States
Joined: March 06, 2010
KitMaker: 3,128 posts
Armorama: 2,959 posts
Posted: Monday, November 17, 2014 - 07:14 AM UTC
Johan L.;
About those wire-cutter handle ends...
You are right. There was often a simple metal band across between and under those handle-ends - a flat bar or strap which curved up and around the ends to form a sort of holder or keeper. This was not, however, universal to all Wehrmacht vehicles - these cutters were clamped in place pretty firmly by the evident tool-clasp. There were also, in some cases, pins located between the jaws and/or behind (to the handle-side) the jaw-head which served to position the cutter, with the clasp serving to hold it in against or over these pins. The one thing you can be sure of... these cutters did NOT just loosely swing around and wiggle out of their clamps!
Losing the tools was frowned upon!

Bob
Utah, United States
Joined: May 27, 2003
KitMaker: 1,026 posts
Armorama: 654 posts
Posted: Monday, November 17, 2014 - 09:32 AM UTC
"Give up Glacis Plate! We have you surrounded!" Clamped that sucker down to ensure it dried flat and true against the chassis underneath. Not sure why Dragon went this route with the front end assembly.

Replaced the hooks and handles with different diameter wire.

More to come.
Keith
Build 'em better than the box art!
ColinEdm
Associate Editor Alberta, Canada
Joined: October 15, 2013
KitMaker: 1,355 posts
Armorama: 1,229 posts
Posted: Monday, November 17, 2014 - 09:40 AM UTC
Upper hull and turret done and ready for primer, test fit to lower hull, some warpage issues to deal with...

Added some battle scars...

onto the footwork!
The voices are back.....excellent....
Utah, United States
Joined: May 27, 2003
KitMaker: 1,026 posts
Armorama: 654 posts
Posted: Monday, November 17, 2014 - 09:48 AM UTC
Quoted Text
A pretty fiddly and delicate job... I think I will have to change my assembly order and get the upper and lower hull assembled before adding any more of the PE detail or it's bound to be breakage from handling!
Hmmm...makes sense and is good to know. Thanks Johan. I will plan accordingly.
This Dragon kit is the most PE intensive model I have tried building. I've taken to working on the PE at the kitchen counter. I don't know why, but I prefer standing at the high surface vs slumped over a low workbench.
The lighting is good, the 'peninsula' breakfast counter has ample room, there is plenty of real estate for flying parts to land on, and there is no carpet for a monster to reside in and eat the pieces that do hit the floor.
Keith
Build 'em better than the box art!
Indiana, United States
Joined: June 10, 2005
KitMaker: 6,188 posts
Armorama: 5,960 posts
Posted: Monday, November 17, 2014 - 11:39 AM UTC
You guys are flying at a record pace on your builds here and I am so impressed! So much progress.
Take it easy and don't burn out, hope to join in soon!
Jeff
Hessen, Germany
Joined: July 17, 2013
KitMaker: 338 posts
Armorama: 331 posts
Posted: Monday, November 17, 2014 - 01:30 PM UTC
Quoted Text
Quoted Text
Would a Normandie Panther G have had the rain guard between turret and gun mantle?
Those were introduced in August of '44. So I would say no to that.
Jeff
That was quick, thanks Jeff! Still, I think it's about time I get myself some proper reference material. Google is not always that helpful when it comes down to details...
Stockholm, Sweden
Joined: October 15, 2013
KitMaker: 444 posts
Armorama: 428 posts
Posted: Monday, November 17, 2014 - 01:38 PM UTC
Quoted Text
Johan L.;
About those wire-cutter handle ends...
You are right. There was often a simple metal band across between and under those handle-ends - a flat bar or strap which curved up and around the ends to form a sort of holder or keeper. This was not, however, universal to all Wehrmacht vehicles - these cutters were clamped in place pretty firmly by the evident tool-clasp. There were also, in some cases, pins located between the jaws and/or behind (to the handle-side) the jaw-head which served to position the cutter, with the clasp serving to hold it in against or over these pins. The one thing you can be sure of... these cutters did NOT just loosely swing around and wiggle out of their clamps!
Losing the tools was frowned upon!
Bob
Thanks for the info Bob!
Hessen, Germany
Joined: July 17, 2013
KitMaker: 338 posts
Armorama: 331 posts
Posted: Monday, November 17, 2014 - 01:42 PM UTC
Quoted Text
Quoted Text
Hey folks,
this will be my entry, a Revell Panther G early version in Braille scale with Part PE Zimmerit, Voyager Model PE and AM barrel (don't know which one, yet as I have an RB and an Aber one). Still debating whether to buy OKB resin tracks...
This is my very first campaign, and I'm über excited.
Cheers!
Hey Nicolas,
I just built the same kit. The tracks are pretty nice, really. There is no real need to run out and buy resin replacements unless you are desperate to. The one thing I found though was that the individual links do need a little subtle persuasion to fit around the drive sprockets, but only ever so slightly....
Cheers
Matthew
Hey Matthew,
I saw your build and you did a great job! About the tracks, there are two things that kind of annoy me. First of all, the Revell tracks are too large. They use 14 track links where the real thing would have had 17. That's rougly a 17 % difference, and now that I know it, I really see it...
More importantly, L & L tracks are a giant PITA in that scale. Gluing first makes it easier to mount, but then painting (with a paintbrush in my case) is really annoying. Or you paint first and mount later, but paint and glue don't work well together in that order. Not to mention that sagging tracks take even more even patience and time.
I think I'll go with the resin tracks and use my (scarce) time for detailing...
What filler will you use for the gaps between tank and Zimmerit? Have only tried diluted Mr. White Putty so far. It works but needs quite a lot of cleanup afterwards...
Queensland, Australia
Joined: October 02, 2008
KitMaker: 658 posts
Armorama: 629 posts
Posted: Monday, November 17, 2014 - 01:53 PM UTC
G'day fellas
Well, the beast is finally complete. Front view:

Rear:

Left side:

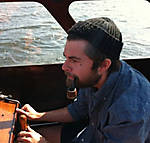
Commander:

Everything was built basically out of the box. The commander, is, I think, a Miniart figure with a Verlinden head and Archer badges.
The only additions were the Aber antenna and an Archer decal on the fire extinguisher.
Painting was Tamiya acrylics with a Burnt Umber wash and a touch of Tamiya weathering pastels here and there.
Regards
Rob
North-West, South Africa
Joined: September 12, 2012
KitMaker: 88 posts
Armorama: 49 posts
Posted: Monday, November 17, 2014 - 02:02 PM UTC
Wow Rob
Very nice indeed, congrats.
Cheers
Rob