Canelones, Uruguay
Joined: December 27, 2006
KitMaker: 773 posts
Armorama: 765 posts
Posted: Sunday, November 23, 2014 - 04:29 AM UTC
I started to envy Keith

Great works guys!
Regards from the south
Alvaro
ColinEdm
 Associate Editor
Alberta, Canada
Joined: October 15, 2013
KitMaker: 1,355 posts
Armorama: 1,229 posts
Posted: Sunday, November 23, 2014 - 04:32 AM UTC
...aaaand camo is done.


The voices are back.....excellent....
Kentucky, United States
Joined: August 10, 2008
KitMaker: 21 posts
Armorama: 19 posts
Posted: Sunday, November 23, 2014 - 09:07 AM UTC
England - North West, United Kingdom
Joined: July 28, 2005
KitMaker: 360 posts
Armorama: 334 posts
Posted: Sunday, November 23, 2014 - 06:50 PM UTC
California, United States
Joined: June 11, 2009
KitMaker: 461 posts
Armorama: 370 posts
Posted: Sunday, November 23, 2014 - 10:26 PM UTC
Completed building of the Jadgpanther out-of-the-box.

Next step is to prime and paint a base coat.
ColinEdm
 Associate Editor
Alberta, Canada
Joined: October 15, 2013
KitMaker: 1,355 posts
Armorama: 1,229 posts
Posted: Monday, November 24, 2014 - 12:48 AM UTC
The voices are back.....excellent....
Indiana, United States
Joined: June 10, 2005
KitMaker: 6,188 posts
Armorama: 5,960 posts
Posted: Monday, November 24, 2014 - 06:17 AM UTC
Stayed up late last night and worked on the back plate for the Panther II.
BEFORE: AFTER:
I'm about half way through... still have a few more items to add and massage over but it's a start. Probably need to get a few more sheets of PE too.

Jeff
Hessen, Germany
Joined: July 17, 2013
KitMaker: 338 posts
Armorama: 331 posts
Posted: Monday, November 24, 2014 - 01:55 PM UTC
Quoted Text
Completed building of the Jadgpanther out-of-the-box.

Next step is to prime and paint a base coat.
Hey Joseph,
good job so far. But how will you glue the gun mount inside the tank, now that it's closed?
California, United States
Joined: June 11, 2009
KitMaker: 461 posts
Armorama: 370 posts
Posted: Monday, November 24, 2014 - 09:39 PM UTC
Quoted Text
Quoted Text
Completed building of the Jadgpanther out-of-the-box.

Next step is to prime and paint a base coat.
Hey Joseph,
good job so far. But how will you glue the gun mount inside the tank, now that it's closed?
Hi there Nicolas,
Thanks very much! No problem, though the hull has been glued in place, the mantlet was only dry-fitted to be photographed. I can still insert the gun after painting.

Joseph
Arkansas, United States
Joined: June 29, 2009
KitMaker: 11,610 posts
Armorama: 7,843 posts
Posted: Monday, November 24, 2014 - 10:56 PM UTC
After checking the kit and my bank account, I have decided to withdraw from this campaign.
Ideals are peaceful. History is violent.
Lisboa, Portugal
Joined: March 04, 2008
KitMaker: 5,386 posts
Armorama: 4,727 posts
Posted: Tuesday, November 25, 2014 - 12:09 AM UTC
Quoted Text
After checking the kit and my bank account, I have decided to withdraw from this campaign.
That's too bad Matt, but there will be many more Panther Campaigns in the future.

Active Builds: 0
Active Campaigns: 0
Stockholm, Sweden
Joined: October 15, 2013
KitMaker: 444 posts
Armorama: 428 posts
Posted: Tuesday, November 25, 2014 - 12:33 AM UTC
Quoted Text
I'm about half way through... still have a few more items to add and massage over but it's a start. Probably need to get a few more sheets of PE too. 
You'll put us all to shame if you keep adding more and more details like that

Utah, United States
Joined: May 27, 2003
KitMaker: 1,026 posts
Armorama: 654 posts
Posted: Tuesday, November 25, 2014 - 08:53 AM UTC
@Colin, Greg, Gary--nice builds, nice paint jobs, great work!!
For anyone building a Dragon kit: I ran into a potential issue with getting the upper and lower hulls together, and decided to try to improve on the design and make the kit more workable.
The issue:

My fix:

Keith
Build 'em better than the box art!
Indiana, United States
Joined: June 10, 2005
KitMaker: 6,188 posts
Armorama: 5,960 posts
Posted: Tuesday, November 25, 2014 - 10:00 PM UTC
Matt... so sorry to hear you won't be joining us but the Campaign is still young so maybe things will change.
If I had an extra kit I'd send it to you but a few months ago I sold off 4 Panther kits and now wish I hadn't done so.
Hope you have a Happy Thanksgiving!

Jeff
Stockholm, Sweden
Joined: October 15, 2013
KitMaker: 444 posts
Armorama: 428 posts
Posted: Wednesday, November 26, 2014 - 01:38 AM UTC
Quoted Text
For anyone building a Dragon kit: I ran into a potential issue with getting the upper and lower hulls together, and decided to try to improve on the design and make the kit more workable.
Keith: I definitely had this issue! Since I had already glued the rear armor in place i had to cut of a large portion of the "lip" and then i just forced it in place (good ol elbow grease).
Your solution is very elegant

United Kingdom
Joined: September 17, 2012
KitMaker: 462 posts
Armorama: 417 posts
Posted: Thursday, November 27, 2014 - 10:25 PM UTC
Panther progress!


Now what scheme to do it in?....
Cheers
Matthew
Utah, United States
Joined: May 27, 2003
KitMaker: 1,026 posts
Armorama: 654 posts
Posted: Friday, November 28, 2014 - 02:45 AM UTC
More fun with PE.
Spare track hangers and cleaning rod tube doo-dads:

And a very historically inaccurate addition. There is no way these lengthy and unsupported parts would survive my ham-handed handling of the kit during the duration of the build, so I fashioned some additional brackets out of spare PE (PE 'sprue' tree) and glued them in place. They will be barely visible once the kit is finished.

Also modified the idler armatures with a length of rod to make them movable. Being able to swing them out of the way, and press them against the track should make installing the track easier.

Keith
Build 'em better than the box art!
British Columbia, Canada
Joined: October 16, 2006
KitMaker: 480 posts
Armorama: 399 posts
Posted: Friday, November 28, 2014 - 03:09 AM UTC

Hey all, been slacking, or rather building other beasts and tying flies. Heres a couple quick shots of my Ausf.G before the first trip to the paint booth.

Really impressed with everyones work so far, great looking stuff!
Eric.

#152
Texas, United States
Joined: December 07, 2002
KitMaker: 487 posts
Armorama: 441 posts
Posted: Saturday, November 29, 2014 - 12:39 AM UTC
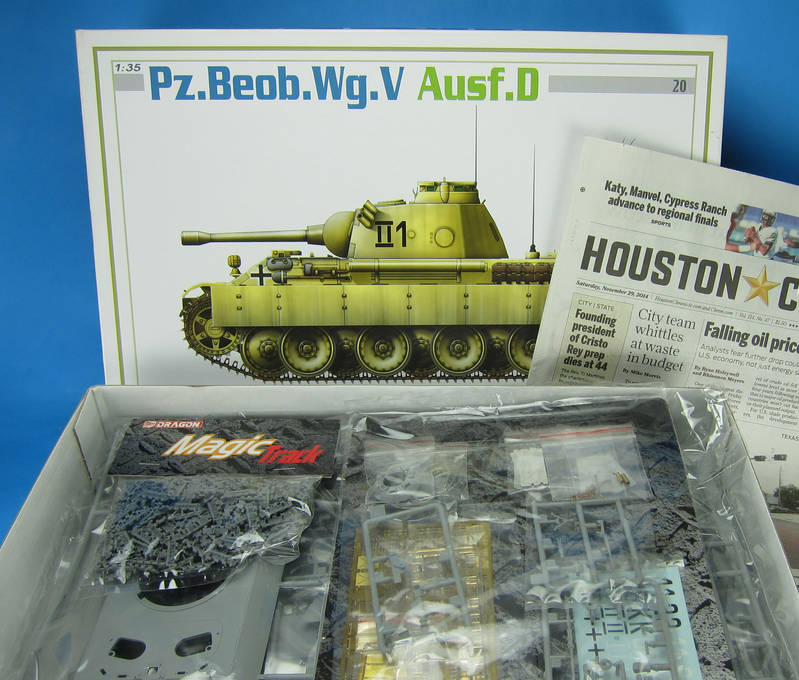
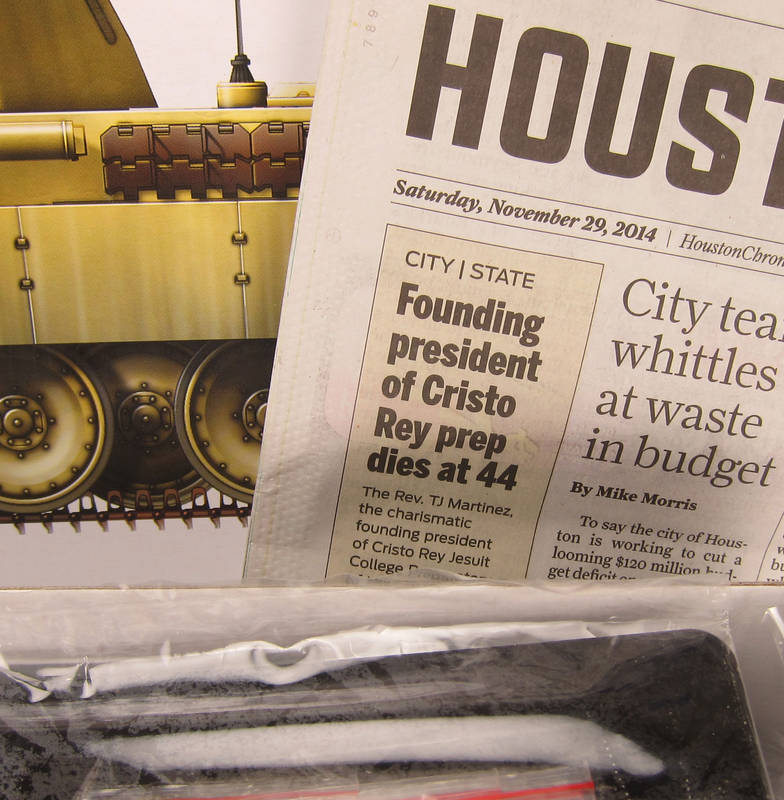
Here are my start up photos for the campaign.
Pz Beob Wg Ausf D Dragon/Cyber Hobby 6419


Tom
Long time modeller. Starting when I was a teenager, then I found out about girls and college and work and kids. But now that I have one girl, no school, no work and the kids are grown, I'm back to full time modelling. My prime area of interest is armor, b
Kentucky, United States
Joined: August 10, 2008
KitMaker: 21 posts
Armorama: 19 posts
Posted: Saturday, November 29, 2014 - 04:19 AM UTC

#377
Texas, United States
Joined: June 27, 2010
KitMaker: 1,481 posts
Armorama: 93 posts
Posted: Saturday, November 29, 2014 - 04:42 AM UTC
Hi all,
Thought I would provide an update before I go to the paint booth tomorrow. My plan is to lay down a thin layer of Vallejo Black Surface Primer, allow that to dry and then continue with the overall paint scheme.


The white stuff is Milliput Fine Grain putty is used to fill in zimmerit gaps and provide zimmerit for the main gun mantel.
Here are the twins together. I am thinking of acquiring another set of Fruil Model tracks for the other Panther. The Tamiya individual tracks are just not meeting my approval. Which is the pits since I spent so many hours drilling out the individual teeth on the tracks. I hate to have put in so much time and effort for it to go in the trash. Oh well.

Once these two are complete they will be put aside until I can acquire a couple Bedford QLB's and a 40mm Bofors. Then the scene depicting cutting Hell's Highway will begin.
@Greg, your Pnather looks great. Hope these two turn out as well as your did.
Hope everyone's build is going smoothly and as always comments are welcomed and desired.
thanks
Dave
In Dry Dock #1: 1/350 IJN SHOKAKU (Fujimi)
In Dry Dock #2: 1/350 IJN Tama (Aoshima)
Kentucky, United States
Joined: August 10, 2008
KitMaker: 21 posts
Armorama: 19 posts
Posted: Saturday, November 29, 2014 - 04:52 AM UTC
Thanks David! Your kitties are lookin nice.

#226
British Columbia, Canada
Joined: February 20, 2012
KitMaker: 1,909 posts
Armorama: 1,066 posts
Posted: Saturday, November 29, 2014 - 07:36 AM UTC
Well done Greg!

Cheers Rob.
Anything without guns is a target!
27 completed campaigns and counting :)
ColinEdm
 Associate Editor
Alberta, Canada
Joined: October 15, 2013
KitMaker: 1,355 posts
Armorama: 1,229 posts
Posted: Saturday, November 29, 2014 - 08:11 AM UTC
Looks mighty nice to me Greg! Twins are are coming along nicely Rob. 40 cm of snow and -35 with the wind chill, so got the tracks done over the last couple days.

Got a little kink in the track to work out...

Gotta head down to Houston for a few days (warm!!!!) so I'll mate up the upper hull and weather when I get back.
The voices are back.....excellent....
Utah, United States
Joined: May 27, 2003
KitMaker: 1,026 posts
Armorama: 654 posts
Posted: Saturday, November 29, 2014 - 09:49 AM UTC
I found two more areas of the Dragon kit that need modifying and fixing.
The headlamp mounting post was too small for my liking, so I replaced it with a bit of stiff wire:


For some reason the forward and aft armor skirt plates would not fit on the mounting brackets. The openings were too wide. I'm pretty certain I got them glued on correctly. Anyway, cutting the outside openings deaper did the trick:

With that the assembly is around 95% complete. Just have the tools, periscopes, the jack, and some minor PE to install. The Magic Track runs are glued together, but will need some fine-tuning after painting.


Keith
Build 'em better than the box art!


