

Hosted by Richard S.
WWII Panther Tanks!
Removed by original poster on 01/18/15 - 13:31:39 (GMT).
SGTJKJ

#041

Joined: July 20, 2006
KitMaker: 10,069 posts
Armorama: 4,677 posts

Posted: Sunday, January 18, 2015 - 01:43 PM UTC
Keith, nice job on the wheels.
Matt, If yo want to do an ambush scheme go for it. In my humble opinion it would not look out of place.
Crazier things have been seen: PZ. IV E in Normandy in 1944, StuG III Ausf.C/D w/7.5cm L48 saukopf mantlet in Hungay in 1945 etc.
Here is my entry for this campaign, The Dragon Panther F. I have not decided on a camo scheme, but I might end up with the ambush scheme

More to follow....
Matt, If yo want to do an ambush scheme go for it. In my humble opinion it would not look out of place.
Crazier things have been seen: PZ. IV E in Normandy in 1944, StuG III Ausf.C/D w/7.5cm L48 saukopf mantlet in Hungay in 1945 etc.
Here is my entry for this campaign, The Dragon Panther F. I have not decided on a camo scheme, but I might end up with the ambush scheme
More to follow....


retiredyank

Joined: June 29, 2009
KitMaker: 11,610 posts
Armorama: 7,843 posts
Posted: Sunday, January 18, 2015 - 02:17 PM UTC
Jesper: Nice choice.
As for the camo, I'm considering building the tank as if the primer has just been laid down. I know of a figure kit, with a German soldier using a compressor and spray gun.
As for the camo, I'm considering building the tank as if the primer has just been laid down. I know of a figure kit, with a German soldier using a compressor and spray gun.

retiredyank
Joined: June 29, 2009
KitMaker: 11,610 posts
Armorama: 7,843 posts
Posted: Sunday, January 18, 2015 - 04:53 PM UTC
Jagdpanther, finished. It is dead flat, in real life.


Steel_Spektor

Joined: December 19, 2012
KitMaker: 74 posts
Armorama: 68 posts

Posted: Monday, January 19, 2015 - 11:32 AM UTC
All done. I have posted a few pics in the campaign gallery. I'm a bit burnt out on armor right now so the next kit will be wheels or wings.


SGTJKJ
#041
Joined: July 20, 2006
KitMaker: 10,069 posts
Armorama: 4,677 posts
Posted: Monday, January 19, 2015 - 02:11 PM UTC
Thanks, Matt.
Luke, I understand you are getting tired of tanks. Tamiya's old Panther can make everybody burn out.
A little more progress on my Panther. Hull slowly taking shape.
Luke, I understand you are getting tired of tanks. Tamiya's old Panther can make everybody burn out.
A little more progress on my Panther. Hull slowly taking shape.

retiredyank
Joined: June 29, 2009
KitMaker: 11,610 posts
Armorama: 7,843 posts
Posted: Monday, January 19, 2015 - 02:26 PM UTC
[url=http://www.miniart-models.com/Images/ModelKits/35174.jpg[/url]
Removed by original poster on 01/20/15 - 09:29:01 (GMT).

roman

Joined: July 20, 2004
KitMaker: 99 posts
Armorama: 95 posts

Posted: Monday, January 19, 2015 - 03:26 PM UTC
Hallo,
Is it OK built Pantherturm for this campaign?
roman
Is it OK built Pantherturm for this campaign?
roman

PantherF
Joined: June 10, 2005
KitMaker: 6,188 posts
Armorama: 5,960 posts

Posted: Monday, January 19, 2015 - 10:41 PM UTC
Quoted Text
Hallo,
Is it OK built Pantherturm for this campaign?
roman
Well, sure. Why not! As long as it's not just the turret. Either add the box underneath or set up on some landscape.
Jeff


ZAPanzer

Joined: September 12, 2012
KitMaker: 88 posts
Armorama: 49 posts
Posted: Tuesday, January 20, 2015 - 02:53 PM UTC
Hi
I need some advice please, how do you get vinyl tracks to "Sag". I haven't bothered in the past, and have used individule tracks to achieve the look, but now I want to do it with my Jagdpanther and all I have are the kit vinyl tracks.
Cheers
Rob
I need some advice please, how do you get vinyl tracks to "Sag". I haven't bothered in the past, and have used individule tracks to achieve the look, but now I want to do it with my Jagdpanther and all I have are the kit vinyl tracks.
Cheers
Rob
retiredyank
Joined: June 29, 2009
KitMaker: 11,610 posts
Armorama: 7,843 posts
Posted: Tuesday, January 20, 2015 - 03:26 PM UTC
Robert: For the sag on a Panther, just glue the vinyl tracks to the wheels. If prior to painting, you may be able to use plastic cement. Otherwise, just put a drop of ca glue on the top of every wheel and hold the tracks on, until they are secure. Be sure to wash your tracks, before trying this.
ZAPanzer
Joined: September 12, 2012
KitMaker: 88 posts
Armorama: 49 posts
Posted: Tuesday, January 20, 2015 - 04:30 PM UTC
Thanks Matt, I tried the plastic glue but it keeps pulling loose, willt ry ca glue tonight, my current attempts are messing up my paint and weathering at the moment 
retiredyank
Joined: June 29, 2009
KitMaker: 11,610 posts
Armorama: 7,843 posts
Posted: Tuesday, January 20, 2015 - 05:03 PM UTC
Quoted Text
Thanks Matt, I tried the plastic glue but it keeps pulling loose, willt ry ca glue tonight, my current attempts are messing up my paint and weathering at the moment
If all else fails, you can use bb size dots of epoxy. It sounds like the paint is pulling loose. I had a horrible time, with my jagdpanther, due to that.
Dragon164

#226

Joined: February 20, 2012
KitMaker: 1,909 posts
Armorama: 1,066 posts

Posted: Tuesday, January 20, 2015 - 06:43 PM UTC
Try thread or small wire to tie the track to the wheel centers. 
Cheers Rob.
Cheers Rob.

ZAPanzer
Joined: September 12, 2012
KitMaker: 88 posts
Armorama: 49 posts
Posted: Tuesday, January 20, 2015 - 07:16 PM UTC
Thanks Rob, option 2.
Cheers Rob
Cheers Rob
bulivyf
Vendor

Joined: April 03, 2006
KitMaker: 2,450 posts
Armorama: 2,409 posts
Posted: Wednesday, January 21, 2015 - 12:12 AM UTC
Next Panther 90% done.


PantherF
Joined: June 10, 2005
KitMaker: 6,188 posts
Armorama: 5,960 posts
Posted: Wednesday, January 21, 2015 - 12:35 AM UTC
You're a Panther Buildin' Machine Miloslav! Looks good... a steel wheeled Late Panther with an early mantlet. 
I STILL have not used those turrets you sent me. I was going to use the late piece as a Panther II entry, but really got to looking at the drawings of the proposed Panther II turret and decided to go that direction.
But it will most likely go on a steel wheeled Panther.
Jeff
I STILL have not used those turrets you sent me. I was going to use the late piece as a Panther II entry, but really got to looking at the drawings of the proposed Panther II turret and decided to go that direction.
But it will most likely go on a steel wheeled Panther.
Jeff
bulivyf
Vendor
Joined: April 03, 2006
KitMaker: 2,450 posts
Armorama: 2,409 posts
Posted: Wednesday, January 21, 2015 - 01:38 AM UTC
Quoted Text
You're a Panther Buildin' Machine Miloslav! Looks good... a steel wheeled Late Panther with an early mantlet.
I STILL have not used those turrets you sent me. I was going to use the late piece as a Panther II entry, but really got to looking at the drawings of the proposed Panther II turret and decided to go that direction.
But it will most likely go on a steel wheeled Panther.
Jeff
Hi Jeff,
Thanks. I now rebuild old Dragon/Gunze Panther G with Smart kit spare parts. This is "152" or "202" LSSAH Ardennes 1944. Zimmerit turret, un zimmerit hull.
I now also rebuild Flakvierling turret.
Miloslav

JoeOsborne
Joined: October 08, 2013
KitMaker: 111 posts
Armorama: 67 posts
Posted: Wednesday, January 21, 2015 - 07:20 PM UTC
Quoted Text
Hi
I need some advice please, how do you get vinyl tracks to "Sag". I haven't bothered in the past, and have used individual tracks to achieve the look, but now I want to do it with my Jagdpanther and all I have are the kit vinyl tracks.
Cheers
Rob
I'm also puzzled by the amount of sag question... I'm almost finished with my jagdpanther, and I see photos like this:

and it makes me wonder..... how should the track touch the top of the wheeels? I'm using DS track, and I do not think it can touch the tops of all the wheels... any help will be appreciated.
Thanks!
SGTJKJ
#041
Joined: July 20, 2006
KitMaker: 10,069 posts
Armorama: 4,677 posts
Posted: Wednesday, January 21, 2015 - 11:38 PM UTC
Awesome build, Miroslav! Looks great with the camouflage. Spot on!
Thanks for participating.
Thanks for participating.
ZAPanzer
Joined: September 12, 2012
KitMaker: 88 posts
Armorama: 49 posts
Posted: Thursday, January 22, 2015 - 12:59 AM UTC
Hi Joe
That is an interesting photo, makes me question my
'sag quest'. It seems the ca glue fixed my problem and I have the sag I was looking for, time will tell if it holds, but I'm happy so far.
Cheers
Rob
That is an interesting photo, makes me question my
'sag quest'. It seems the ca glue fixed my problem and I have the sag I was looking for, time will tell if it holds, but I'm happy so far.
Cheers
Rob

wedgetail53
Joined: October 02, 2008
KitMaker: 658 posts
Armorama: 629 posts
Posted: Thursday, January 22, 2015 - 04:39 AM UTC
Robert
I've successfully sagged the tracks on various tanks by inserting a piece of 0.8mm brass rod right through the tank, on top of the tracks, positioned to hold the track where I want it and stopping just before the outside edge of the tracks. When painted and weathered to match the tracks it's almost invisible and is the best method I know to "sag" tracks.
Regards
Rob

panzerbob01
Joined: March 06, 2010
KitMaker: 3,128 posts
Armorama: 2,959 posts
Posted: Friday, January 23, 2015 - 01:57 AM UTC
Joe's Jagdpanther pic actually nicely addresses part of the reality... Track tension is and was a key concern - too tight and you stress the track and the idler arm, etc., and increase potential for pin wear and in some cases for snapping the track. Too loose a track = more sag, and loose tracks have a greater potential for skipping off of the idler and / or road wheels, etc. Loose tracks also lead to track slap and excessive jerking of the track when the vehicle changes motion... There was a happy medium between these extremes of tight and loose.
Many Panther and Tiger tank pics appear to show a degree of tension similar to that in Joe's pic... many P and T builds, on the other hand, seem to favor a looser, sagged look with greater contact between the top run and those wheels.
IMHO, we probably should be snugging tracks up a bit on these P and T - bearing in mind that many pics show dead and used-up relic tanks and not tanks actually still in use - and dead tanks may reflect burn effects, etc., which changed tension and apparent sag (weakened torsion-bars, tracks stretching when heated in fire, etc.). A snugger track may not touch hardly any of those road wheels, but will instead assume pretty much a sloped "catenary curve" form from the top of the idler to the slightly higher top of the driver sprocket (the unequal heights produce a slope with the catenary bellying down closer to the lower idler - as seen in Joe's pic).
Various ways to get this - using a cemented "Magic Track" - type link set: one would build a top run length, let it mostly set up, and then prop it between the idler and sprocket on the built hull, form it down as desired to get a little belly, and let it fully dry. IF one is using a workable metal, resin, or styrene link set - adjust your tension to get the right "natural" belly or sag. IF using "rubberbands"... metal rods or pins, as mentioned in posts above, would, I think, be your way to go - probably you would have little opportunity to cement the track run to any wheel-top - or maybe only that last wheel in front of the idler?
Of course, take a look at several P and T pics and determine the degree of sag you really want, and adjust the above assembly approaches accordingly!
Just my opinion and suggestion!
Bob

Pytagoras

Joined: December 03, 2012
KitMaker: 300 posts
Armorama: 285 posts
Posted: Friday, January 23, 2015 - 02:38 AM UTC
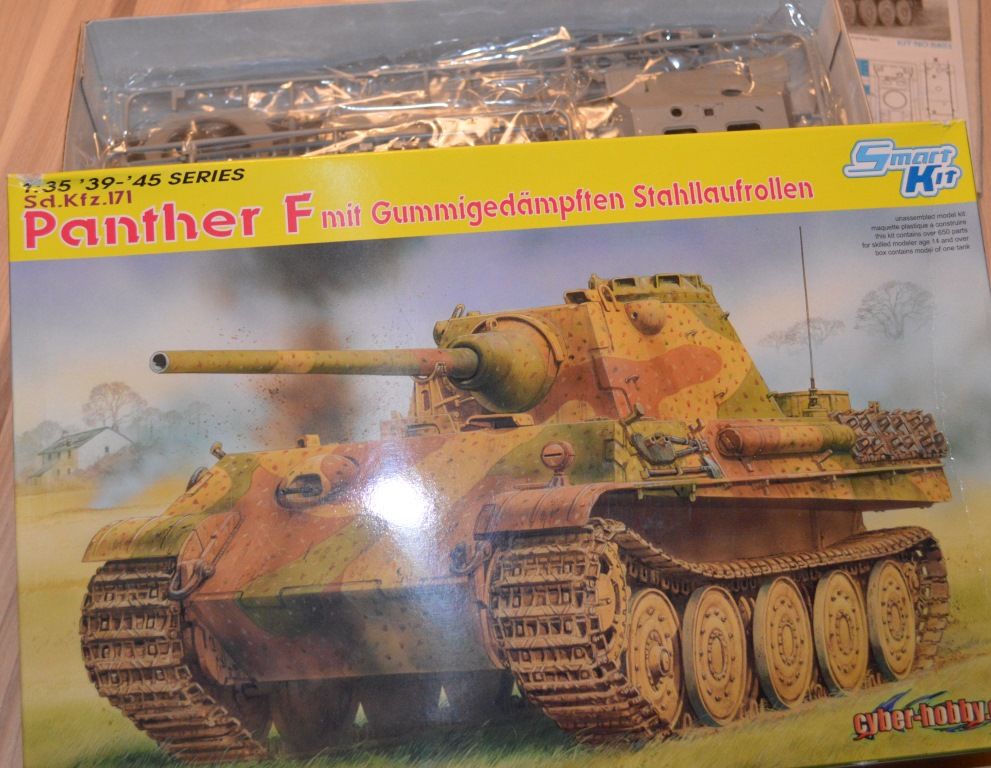
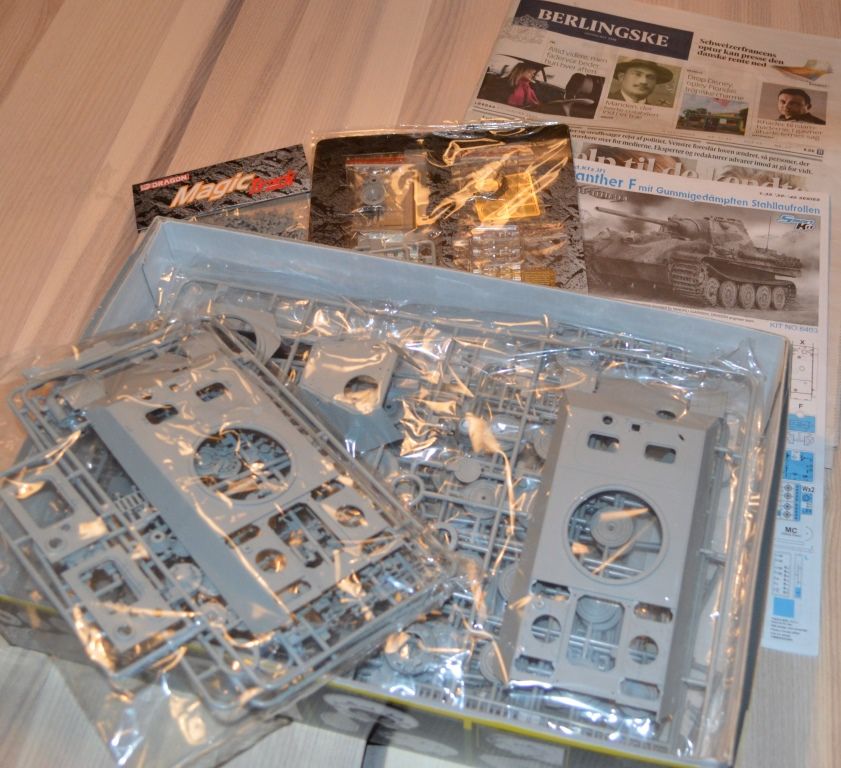
I'm starting on my entry to this campaign with the same kit as Jesper; Dragon #6403 Panther F.
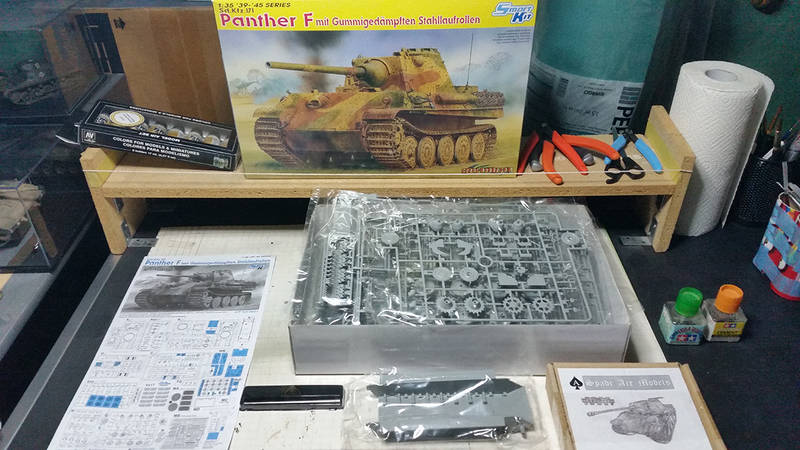
This is actually the same kit retiredyank sold me in 2013. It's finally getting built
This is actually the same kit retiredyank sold me in 2013. It's finally getting built
 |

WEB HOSTING BY


Copyright ©2021 Armorama and Kitmaker Network, a subsidiary of Silver Star Enterprises
All Rights Reserved. Please read our Conditions of Use and Privacy Policy.
All Rights Reserved. Please read our Conditions of Use and Privacy Policy.