Campaigns: Completed Campaigns
Campaigns that are completed should be grouped here.
Hosted by Richard S.
WWII Panther Tanks!
bm4247
Visit this Community
Scotland, United Kingdom
Joined: December 29, 2014
KitMaker: 88 posts
Armorama: 60 posts
Posted: Wednesday, January 28, 2015 - 10:19 PM UTC

Quoted Text

@Brian--welcome back to the hobby, welcome to Armorama, welcome to Photobucket, and welcome to the world of miniature tanks. You're gonna love it.


Thanks Keith, I am looking forward to it.


Quoted Text

Brian, remember to dry fit that Eduard PE zimmerit for the Panther before gluing. I am not sure it will fit the Tamiya kit. There are some strange dimensions for that old Tamiya kit.

If the Eduard set does not fit, just save it for another Panther. It should fit most of the Panther kits out there.

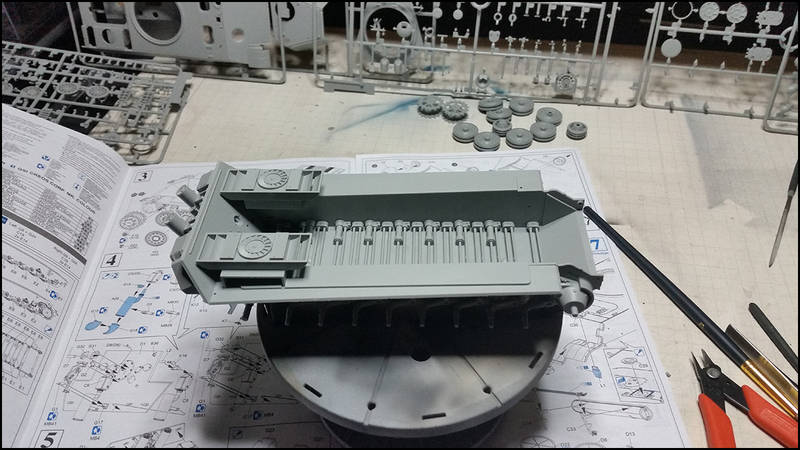
The Tamiya kit is a great kit for getting into the hobby. A relatively straight forward build and will build into a nice model despite some inaccuracies.


Good advice Jesper, I will do that. The label on the PE kit states it is for the same kit but we should all find out soon,

Thanks

Brian
bulivyf
Visit this Community
Praha, Czech Republic
Joined: April 03, 2006
KitMaker: 2,450 posts
Armorama: 2,409 posts
Posted: Wednesday, January 28, 2015 - 10:41 PM UTC
Panther number 3. finished. Still antenna and periscopes.


JoeOsborne
Visit this Community
California, United States
Joined: October 08, 2013
KitMaker: 111 posts
Armorama: 67 posts
Posted: Thursday, January 29, 2015 - 04:41 AM UTC
Milo,

You are a Panther machine! Another very nice build. Well done. Are you going for #4?
bulivyf
Visit this Community
Praha, Czech Republic
Joined: April 03, 2006
KitMaker: 2,450 posts
Armorama: 2,409 posts
Posted: Thursday, January 29, 2015 - 01:37 PM UTC

Quoted Text

Milo,

You are a Panther machine! Another very nice build. Well done. Are you going for #4?


Yes, I rebuild old Dragon model.
Befehls Panther Ausf.G "152" Ustuf Arnold Fischer Ardennes 1944
I started out small reconstruction. I used parts from Smart kits, which left a lot and help improve the model. Fans, fan covers, tool holders (for Smart kit I use PE parts), axes, wheels (I have 3 sets of SW Panthers and Ausf.F)


turtle65
Visit this Community
Dunedin, New Zealand
Joined: September 17, 2012
KitMaker: 266 posts
Armorama: 70 posts
Posted: Thursday, January 29, 2015 - 04:01 PM UTC
All,
being as I'm an armour 'virgin' I thought I'd start out with something very basic - can't get much more basic than Airfix's 1/76th Panther :


While completely new to armour I'm not new to modelling , but am usually more comfortable with 24th scale scratch building .
Anywho the plan for this tiny cat is that there won't be much of the original used (low-budget build) and the end result (fingers crossed) will still be identifiable as a Panther.

Some very nice builds in progress and finished models shown here already, certainly gives me a very high benchmark to aim for .

As they say - more to follow soon _ _ _ _
woltersk
Visit this Community
Utah, United States
Joined: May 27, 2003
KitMaker: 1,026 posts
Armorama: 654 posts
Posted: Thursday, January 29, 2015 - 08:00 PM UTC
@Brent--Great little builds and some great photography! The holes I was referring to are the ones running down the length of the hulls. From afar they looked jaggedy and ragged, as if you had bored them out for some unknown reason. Now I see what they are for. They seem large for tool mounting though. In that scale the 'pin in divot' would seem more appropriate, such as on some of my ROCO 1/87th (HO scale) armor.

Waayyy
Speaking of ROCO HO scale (how's that for a transition!), the reason I asked about the game is--about 35 years ago some friends of mine developed a 'table top' armor combat game. Only our 'table top' was the floor of the LHS. A few of our players tried to copyright the rules with the hopes of marketing the game, but were told by publishers that the rules were 'too generic' and resembled those that had been adopted by the US Army--probably by a few of our players who attended the local New Mexico Military Institute which was (at the time) the second largest producer of commissioned army officers after the US Military Academy. Talk about irony.

Here's a bit of coincidence between you mentioning what your builds will be used for, and my history with wargaming: after talking to my Warhammer 40K playing son-in-law about table top games, I've been scanning the yellowing pages of my typed copy of the MiniTank rules and converting them to a Word doc in order to preserve them and to share with him.


Now back to the Panthers

Keith
panzerbob01
Visit this Community
Louisiana, United States
Joined: March 06, 2010
KitMaker: 3,128 posts
Armorama: 2,959 posts
Posted: Thursday, January 29, 2015 - 11:12 PM UTC
Wow.

Seeing that floor game ... That is a real trip back into time, for me!

I was deep into RoCo tanks back in the late '60's and early '70's - a group of us would commandeer some parent's basement space (or, if possible, the much-better lit and nicer (and closer to the kitchen... livingroom floor) and lay out with tape rivers, town-outlines, etc., add building and other stuff models, and wage war! We used those AirFix figure-sets for unit symbols (depending on the game scale, squads, platoons, etc.) and trotted out our miniature armored forces...

I still have 1000's of relics - figures, rolled-up dio-grass mats marked with map details for game-boards, various buildings and other infrastructure items both scratch and kit-based, and several hundred RoCo tanks... More stuff!

Bob
bulivyf
Visit this Community
Praha, Czech Republic
Joined: April 03, 2006
KitMaker: 2,450 posts
Armorama: 2,409 posts
Posted: Friday, January 30, 2015 - 12:57 AM UTC

Quoted Text


Quoted Text

Milo,

You are a Panther machine! Another very nice build. Well done. Are you going for #4?


Yes, I rebuild old Dragon model.
Befehls Panther Ausf.G "152" Ustuf Arnold Fischer Ardennes 1944
I started out small reconstruction. I used parts from Smart kits, which left a lot and help improve the model. Fans, fan covers, tool holders (for Smart kit I use PE parts), axes, wheels (I have 3 sets of SW Panthers and Ausf.F)


In color


DaGreatQueeg
Visit this Community
Napier, New Zealand
Joined: August 01, 2005
KitMaker: 1,049 posts
Armorama: 841 posts
Posted: Friday, January 30, 2015 - 03:54 AM UTC
Miloslav - fantastic Panther (s)! They're finished to a std to aspire to.

Roger - Good luck with the Airfix Panther. You may find the tracks the toughest part of the build though. If you run into probs just ask as there's ways to ease the pain.


And my build progress. Moving along quickly as I need to get paint on today as these guys are on a deadline. Both of these have a full std tool outfit (filling all those nasty Dragon supplied holes).

The metal hulled G got aerial pots and the MG port plugged as it's loosly meant to be LAH 151. The late steel wheeler got the compass and gas mounts as its basically straight from the factory. I replaced most of the grab handles with wire but had to leave a few on the metal hull.

Priming and base colours to follow later today .....


And off topic (sorry)

Keith - fantastic nostalgia gaming pics!!!! That first pic is almost a mirror of how our first games looked, I even still have some of the same buildings, the rails sheds! We mixed Roco with Aifix and Esci, always waiting for the latest release so we could add new tanks. Definitely save your rules. I have all mine, right back from when I started writing them when I was around 10, yellowed, fading and full of cool spelling mistakes!

Maybe we should start a "gaming" thread as I'm sure there are a few closet gamers on this site like you me and Bob ....

cheers
Brent
turtle65
Visit this Community
Dunedin, New Zealand
Joined: September 17, 2012
KitMaker: 266 posts
Armorama: 70 posts
Posted: Saturday, January 31, 2015 - 06:36 AM UTC
Brent,
The first thing that got thrown out was the tracks , will be scratch building my own due to the multiple alterations that are planned . Slicing and dicing has commenced today, so will post some progress soon.

You have an impressive blog going there , have already picked up quite a few pointers - thanks.
DaGreatQueeg
Visit this Community
Napier, New Zealand
Joined: August 01, 2005
KitMaker: 1,049 posts
Armorama: 841 posts
Posted: Saturday, January 31, 2015 - 12:55 PM UTC

Quoted Text

Brent,
The first thing that got thrown out was the tracks , will be scratch building my own due to the multiple alterations that are planned . Slicing and dicing has commenced today, so will post some progress soon.

You have an impressive blog going there , have already picked up quite a few pointers - thanks.


Thanks Roger,

Been quite on the blog for the last few months as we had an extended family illness to deal with over xmas. Back on deck now and have plenty of stuff to update it with.

On your Panther tracks, OKB make resin link n length replacements that should fit your Panther. They're the best tracks in braille scale anywhere and I've only seen great reviews of them. Might be worth a look ?

http://shop.okbgrigorov.com/search.html?phrase=Panther


And made good progress on my boys. Got the base camo pretty much sorted on 151 and 231. I'll be having a crack at the disc camo tomorrow. Brush painted with mostly GW acrylics although I used Humbrol 83 for the first coat of yellow disruptive to help with coverage over the green.


Base green .....


Base colours on the steel wheeler which is getting dot camo.


Factory late camo for 151.


cheers
Brent
bm4247
Visit this Community
Scotland, United Kingdom
Joined: December 29, 2014
KitMaker: 88 posts
Armorama: 60 posts
Posted: Saturday, January 31, 2015 - 03:30 PM UTC


Eduard Zimm kit fits. Now to glue it on!


Wheels ready for primer, but wondering if I should really have painted them on the sprue.


Wondering why I have to cut the pins off the idler wheels when


Figure 18 shows pins still in place. Any ideas why they should be cut off, or should I leave them in place?

Thanks
DaGreatQueeg
Visit this Community
Napier, New Zealand
Joined: August 01, 2005
KitMaker: 1,049 posts
Armorama: 841 posts
Posted: Saturday, January 31, 2015 - 03:49 PM UTC

Quoted Text


Figure 18 shows pins still in place. Any ideas why they should be cut off, or should I leave them in place?

Thanks


Hey Brian,

Your kit is the old motorised version and the rear idlers was given teeth to help drive the track. The teeth should be removed and the rear idlers should be smooth ......

Good to see an old (very) kit being brought to life!

cheers
Brent
bm4247
Visit this Community
Scotland, United Kingdom
Joined: December 29, 2014
KitMaker: 88 posts
Armorama: 60 posts
Posted: Saturday, January 31, 2015 - 04:00 PM UTC

[/quote]
Quoted Text

Your kit is the old motorised version and the rear idlers was given teeth to help drive the track. The teeth should be removed and the rear idlers should be smooth ......


Hi Brent, thanks for the advice, out with the modelling knife.

Brian
Pytagoras
Visit this Community
Møre og Romsdal, Norway
Joined: December 03, 2012
KitMaker: 300 posts
Armorama: 285 posts
Posted: Saturday, January 31, 2015 - 08:33 PM UTC
Quick progress update on my Panther F:


Building is going well, no problems so far. The kit quality and detail is very good. Dragon instructions are complex as hell though.
SGTJKJ
#041
Visit this Community
Kobenhavn, Denmark
Joined: July 20, 2006
KitMaker: 10,069 posts
Armorama: 4,677 posts
Posted: Saturday, January 31, 2015 - 09:41 PM UTC
Wow, one is gone for a few days and a whole army of Panthers appear

Miloslav, another fantastic build from you, and another great Panther on the bench. Great work!

Brian, great that the PE fit. It will elevate the quality of the old Tamiya kit quite a bit.

Brent, great and fast work on the Panthers. You hit the camouflage spot on! Did you mask it and spray? If yes, how did you mask it? With tape or a stencil?
DaGreatQueeg
Visit this Community
Napier, New Zealand
Joined: August 01, 2005
KitMaker: 1,049 posts
Armorama: 841 posts
Posted: Saturday, January 31, 2015 - 10:12 PM UTC

Quoted Text


Brent, great and fast work on the Panthers. You hit the camouflage spot on! Did you mask it and spray? If yes, how did you mask it? With tape or a stencil?


Hey Jesper,

I brushed the camo freehand and mixed my colours as I use GW acrylics. I used the profiles from Duel in the Mist as refs having them up on the computer screen and used thin acrylics to get the outlines before blocking in the colours. They're a little off in places but it was my first time trying to do "authentic" factory patterns. Normally I just make something up when it comes to German camouflage .....

Doing the disc camo on a third Panther today, that might prove a little trickier!

cheers
Brent
Northern_Lad
Visit this Community
United Kingdom
Joined: September 17, 2012
KitMaker: 462 posts
Armorama: 417 posts
Posted: Sunday, February 01, 2015 - 01:45 AM UTC
done!


Cheers

Matthew
bulivyf
Visit this Community
Praha, Czech Republic
Joined: April 03, 2006
KitMaker: 2,450 posts
Armorama: 2,409 posts
Posted: Sunday, February 01, 2015 - 02:47 AM UTC


And made good progress on my boys. Got the base camo pretty much sorted on 151 and 231. I'll be having a crack at the disc camo tomorrow. Brush painted with mostly GW acrylics although I used Humbrol 83 for the first coat of yellow disruptive to help with coverage over the green.


Brent[/quote]

Very nice Panthers. You have any camouflage schema for this two Panthers.
I plane this in 1/35.
Miloslav
DaGreatQueeg
Visit this Community
Napier, New Zealand
Joined: August 01, 2005
KitMaker: 1,049 posts
Armorama: 841 posts
Posted: Sunday, February 01, 2015 - 11:34 AM UTC

Quoted Text

done!
Cheers
Matthew


Nice Panther Matt !!!


Quoted Text

Very nice Panthers. You have any camouflage schema for this two Panthers.
I plane this in 1/35.
Miloslav


Hi Miroslav,

No I don't have any good specific refs of the tanks I'm doing (apart from the one well known pic of 151). My customer wanted one late camo, one dot and one disc. One of the Panthers had to be 151 and one had to be a steel wheeler. The combinations didn't allow for much accuracy I'm afraid.

The camo I chose for 151 is slightly wrong. The turret definitely looks like the MAN/DB "Classic Factory" pattern from page 276 in Vol1 of the Duel in the Mist series. The hull pattern looks a little different but as it's only a partial view the rest of the vehicle is up for speculation.

I also added a raised crew heater although the machine is probably of a similar production batch to his adjutants 152 mount and shouldn't have it.


All the steelwheelers seemed to be issued to the Company and Platoon leaders (201, 211, 221, 231) but none had disc or dot camo so my 231 will be inaccurate with dot camo.

I think the only disc panthers were in the first company, the well photographed 131 and 124 which is the one I will do.

I look fwd to seeing your next two!

cheers
Brent
DaGreatQueeg
Visit this Community
Napier, New Zealand
Joined: August 01, 2005
KitMaker: 1,049 posts
Armorama: 841 posts
Posted: Sunday, February 01, 2015 - 11:52 AM UTC
And my attempt at disc camo in 1/72.

I tried a stencil and then stamping the discs but both were epic failures.

In the end I just hand painted discs of various sizes (the real stencil use 6 different sizes) in the approximate camo pattern positions.


Once the discs were laid down I joined up and blended the edges. Hopefully it look a little like the real thing which was yellow disc edges applied through a mask overlay over the standard green and brown disruptive camouflage. I'm not that happy with it but I learnt a lot and my next attempt will be better . . .


cheers
Brent
Piratos
Visit this Community
Aarhus, Denmark
Joined: May 24, 2011
KitMaker: 137 posts
Armorama: 137 posts
Posted: Monday, February 02, 2015 - 01:12 AM UTC
Just wanted to post a quick progress shot of my Panther, last post was on page 6 when I had just finished assembling it.

Still a few things left to do


Not the best picture since I took it with my phone.
SGTJKJ
#041
Visit this Community
Kobenhavn, Denmark
Joined: July 20, 2006
KitMaker: 10,069 posts
Armorama: 4,677 posts
Posted: Monday, February 02, 2015 - 08:51 PM UTC
Great job, Brent. I might use this method in 1/35. You have done a great job in 1/72.

Thanks for sharing your method.

Great job on the camouflage, Christoffer! Looking forward to see it finished.
DaGreatQueeg
Visit this Community
Napier, New Zealand
Joined: August 01, 2005
KitMaker: 1,049 posts
Armorama: 841 posts
Posted: Monday, February 02, 2015 - 09:31 PM UTC
Thanks Jesper. The discs took some time but it was more tedious than difficult.

And I've been working on the detailing and weathering. A little bit more to go before the pigments go on but they're getting close now .....


cheers
Brent
SGTJKJ
#041
Visit this Community
Kobenhavn, Denmark
Joined: July 20, 2006
KitMaker: 10,069 posts
Armorama: 4,677 posts
Posted: Tuesday, February 03, 2015 - 09:02 PM UTC
Great camouflage, Brent! Especially considering the scale. A nice study of late war camouflages.

Looking forward to see more.