Campaigns: Completed Campaigns
Campaigns that are completed should be grouped here.
Hosted by Richard S.
WWII Panther Tanks!
retiredyank
Visit this Community
Arkansas, United States
Joined: June 29, 2009
KitMaker: 11,610 posts
Armorama: 7,843 posts
Posted: Friday, January 23, 2015 - 02:51 AM UTC

Quoted Text

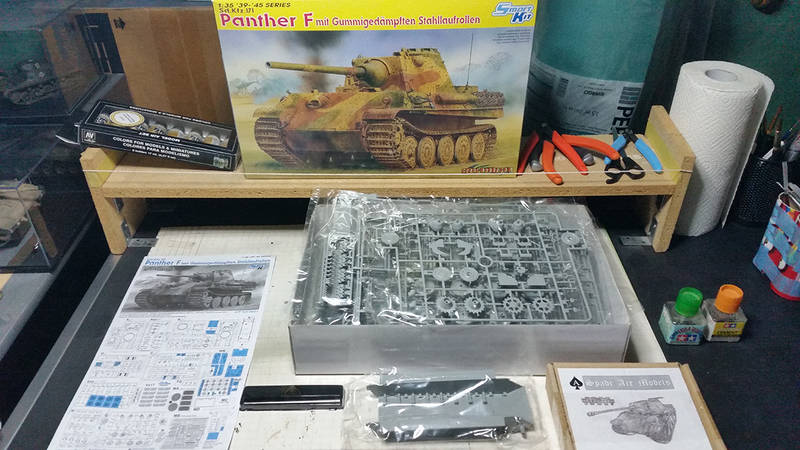
I'm starting on my entry to this campaign with the same kit as Jesper; Dragon #6403 Panther F.


This is actually the same kit retiredyank sold me in 2013. It's finally getting built


Nice choice.

I'm not going to be able to start my kit, for some time. I am waiting on etch sets and have some other builds to move off of my bench, first. I have also found that I have some artistic licenses, when it comes to how the Panther was primered.
MLD
Visit this Community
Vermont, United States
Joined: July 21, 2002
KitMaker: 3,569 posts
Armorama: 2,070 posts
Posted: Saturday, January 24, 2015 - 03:44 AM UTC
Got a little work in on the Real Models Flak turret and ancient DML Panther G chassis today.

The old DML kit is interesting in a lot of ways, different from their other Panthers. The rear hull plate is molded interlocked with the hull sides.
This version has location holes for the hatch stops on the front hull roof edges, but has not pieces to go in them! Later kits have molded on stops, something the Tamiya kits miss. I ended up making mine from toothpick wood and strip styrene. Overscale I am sure, but oh well..
Also a locator for the mg plug, seen there to the left of the missing gun crutch. I'll make one of those later.

Some time back, knowing I was going to eventually use this resin turret, I sold or traded off the kit turret.. DML had hull parts moved onto that sprue that I missed at the time. The spacers in front of the front rectangular engine grills and hull hatches
Panther spares to the rescue for the hatches, I cobbled together the strips.


It took a little doing to get the pour block off the front of the turret there under the gun. Still needs some smoothing along the edges. I will have to drill the foilage loops deeper and add solder loops near the end of the build.

True to form, I mixed up too much Dk Yellow for the lower hull/roadwheels so this is not the final paint, but a base coat on the front/sides for now.
Fun build so far.
retiredyank
Visit this Community
Arkansas, United States
Joined: June 29, 2009
KitMaker: 11,610 posts
Armorama: 7,843 posts
Posted: Saturday, January 24, 2015 - 01:01 PM UTC
MLD: Some of the old Dragon kits used the Gunze Sangyo molds. I'm not sure if the one you are building is from this, but it may account for the strange molding.
JoeOsborne
Visit this Community
California, United States
Joined: October 08, 2013
KitMaker: 111 posts
Armorama: 67 posts
Posted: Sunday, January 25, 2015 - 12:53 AM UTC
Howdy Folks,

Just about finished. Would like some feedback before I button her up. My BIG thanks to papakilo for the DS tracks!

P.S. I know need to work on my photo lighting.


wedgetail53
Visit this Community
Queensland, Australia
Joined: October 02, 2008
KitMaker: 658 posts
Armorama: 629 posts
Posted: Sunday, January 25, 2015 - 05:06 AM UTC
G'day Joe

Looking good, however, I would recommend that you allow the effects of gravity to show on the camo net - in reality, it would not be sticking out like that.

Regards

Rob
JoeOsborne
Visit this Community
California, United States
Joined: October 08, 2013
KitMaker: 111 posts
Armorama: 67 posts
Posted: Sunday, January 25, 2015 - 05:34 AM UTC

Quoted Text

G'day Joe

Looking good, however, I would recommend that you allow the effects of gravity to show on the camo net - in reality, it would not be sticking out like that.

Regards

Rob


Good idea. More of a hanging effect. Will work on that.


Thanks!


ZAPanzer
Visit this Community
North-West, South Africa
Joined: September 12, 2012
KitMaker: 88 posts
Armorama: 49 posts
Posted: Monday, January 26, 2015 - 02:49 PM UTC
Hi

I'm calling it done, any comments before I put it in the campaign gallery?

 photo WP_20150123_005_zps76a3cfae.jpg

 photo WP_20150122_006_zps43f70d84.jpg

 photo WP_20150123_007_zpsda2b26db.jpg

Cheers

Rob
bm4247
Visit this Community
Scotland, United Kingdom
Joined: December 29, 2014
KitMaker: 88 posts
Armorama: 60 posts
Posted: Tuesday, January 27, 2015 - 12:27 AM UTC
Hi everyone. Just back into modelling after a 38 year gap and have no experience other than gluing bits together. Looking forward to taking part building my first tank ever, so I may as a lot of dumb questions, and look for advice, so please be patient and I am always happy to receive help.

This is what I will be building and hopefully it proves I am not starting early.

bm4247
Visit this Community
Scotland, United Kingdom
Joined: December 29, 2014
KitMaker: 88 posts
Armorama: 60 posts
Posted: Tuesday, January 27, 2015 - 12:32 AM UTC
No idea why my picture is so small. It is normal size in the gallery. Any ideas folks?
Northern_Lad
Visit this Community
United Kingdom
Joined: September 17, 2012
KitMaker: 462 posts
Armorama: 417 posts
Posted: Tuesday, January 27, 2015 - 03:38 AM UTC

Quoted Text

No idea why my picture is so small. It is normal size in the gallery. Any ideas folks?


https://gallery.kitmaker.net/data/29671/thumbs/DSC_000511.JPG


In the string to the picture you'll see /thumbs/. If you remove that parts the picture should be the proper size. Like this...

https://gallery.kitmaker.net/data/29671/DSC_000511.JPG

I'd upload to photo bucket if I were you and copy the URL from there.

cheers

Matthew
JoeOsborne
Visit this Community
California, United States
Joined: October 08, 2013
KitMaker: 111 posts
Armorama: 67 posts
Posted: Tuesday, January 27, 2015 - 04:14 AM UTC

Quoted Text


Quoted Text

No idea why my picture is so small. It is normal size in the gallery. Any ideas folks?


I'd upload to photo bucket if I were you and copy the URL from there.

cheers

Matthew


I would definitely agree photobucket is the best way to go and it's free.

I found this topic as well on posting photos. Think it might help:

https://archive.kitmaker.net/forums/120940&page=1

DaGreatQueeg
Visit this Community
Napier, New Zealand
Joined: August 01, 2005
KitMaker: 1,049 posts
Armorama: 841 posts
Posted: Tuesday, January 27, 2015 - 08:00 AM UTC
Hi all,

Lots of great stuff throughout this thread, plenty of inspiration and good info sprinkled in.

I'm joining with a few 72nd Panthers I have to build for a project that was delayed from late last year. They'll be quick builds for wargaming, pretty much OOB and paint although I will be attempting to brush late factory schemes for the first time. One will be late std factory, one in dot and one in disc camo .... or close enough hopefully lol

cheers
Brent


SGTJKJ
#041
Visit this Community
Kobenhavn, Denmark
Joined: July 20, 2006
KitMaker: 10,069 posts
Armorama: 4,677 posts
Posted: Tuesday, January 27, 2015 - 02:13 PM UTC
Brian, welcome to the hobby. You will not regret it. Looking forward to follow your build

Brent, nice choices. Looking forward to see that disc camouflage. It will be a challenge in 1/72.
bm4247
Visit this Community
Scotland, United Kingdom
Joined: December 29, 2014
KitMaker: 88 posts
Armorama: 60 posts
Posted: Tuesday, January 27, 2015 - 11:04 PM UTC
Matthew, thanks for the advice, I now have Photobucket.
Joe, thanks for the link and advice.
Jesper, thanks for the kind words. Not sure my build will live up to your expectations so feel free to point the way.

Brian
bm4247
Visit this Community
Scotland, United Kingdom
Joined: December 29, 2014
KitMaker: 88 posts
Armorama: 60 posts
Posted: Tuesday, January 27, 2015 - 11:09 PM UTC


And there we have it in full size.

Thanks again guys
PantherF
Visit this Community
Indiana, United States
Joined: June 10, 2005
KitMaker: 6,188 posts
Armorama: 5,960 posts
Posted: Wednesday, January 28, 2015 - 01:35 AM UTC
Hmmm, didn't know there was a zimm kit that would fit the old Tamiya Panther A?

Nice if it works!


Jeff
bm4247
Visit this Community
Scotland, United Kingdom
Joined: December 29, 2014
KitMaker: 88 posts
Armorama: 60 posts
Posted: Wednesday, January 28, 2015 - 01:51 AM UTC

Quoted Text

Hmmm, didn't know there was a zimm kit that would fit the old Tamiya Panther A?

Jeff


Hi Jeff, the PE kits are Eduard.

Got them at Amazon

http://www.amazon.co.uk/Eduard-Photoetch-Zimmerit-Panther-EDP35425/dp/B0044S9YW4
DaGreatQueeg
Visit this Community
Napier, New Zealand
Joined: August 01, 2005
KitMaker: 1,049 posts
Armorama: 841 posts
Posted: Wednesday, January 28, 2015 - 02:03 AM UTC
Started production. There is organisation in this chaos despite what it looks like. The plan is to build 3 complete Panthers(and a Tiger2) for a customers project and get 4 Panther hulls squared away for some of my '46 conversions.

cheers
Brent


woltersk
Visit this Community
Utah, United States
Joined: May 27, 2003
KitMaker: 1,026 posts
Armorama: 654 posts
Posted: Wednesday, January 28, 2015 - 07:52 AM UTC
@Brent--that is a good looking stable of tanks you got there. Would you mind if I get inquisitive?
1. Are those holes drilled down the chassis hulls that I see? If so, what are they for?
2. Do you know in what game your customer uses these?
3. What is that dio-looking thing in the background of the pic in your first post?

Looking forward to seeing the lil' kitties progress!

Thanks,

Keith
woltersk
Visit this Community
Utah, United States
Joined: May 27, 2003
KitMaker: 1,026 posts
Armorama: 654 posts
Posted: Wednesday, January 28, 2015 - 08:03 AM UTC
@Mike D--whoa, that is a monstrous looking turret! Looking forward to seeing it come along.

@Joe--great looking Jagd! Are you having any luck getting the camo net to cooperate? Have you tried wetting it down and letting it dry as it would naturally sit? Or soaking it in a mixture of water and white glue to settle it into place?

@Robert--and another great looking Jagd! Two on one page, who'd a thunk it.

@Brian--welcome back to the hobby, welcome to Armorama, welcome to Photobucket, and welcome to the world of miniature tanks. You're gonna love it.

Keith
retiredyank
Visit this Community
Arkansas, United States
Joined: June 29, 2009
KitMaker: 11,610 posts
Armorama: 7,843 posts
Posted: Wednesday, January 28, 2015 - 12:05 PM UTC
These builds are very inspiring. Unfortunately, my 35 Panther project has grown exponentially. I doubt I will be able to finish in time, for this campaign.
DaGreatQueeg
Visit this Community
Napier, New Zealand
Joined: August 01, 2005
KitMaker: 1,049 posts
Armorama: 841 posts
Posted: Wednesday, January 28, 2015 - 02:33 PM UTC

Quoted Text

@Brent--that is a good looking stable of tanks you got there. Would you mind if I get inquisitive?
1. Are those holes drilled down the chassis hulls that I see? If so, what are they for?
2. Do you know in what game your customer uses these?
3. What is that dio-looking thing in the background of the pic in your first post?

Looking forward to seeing the lil' kitties progress!

Thanks,
Keith


Hey Keith, you've got pretty sharp eyes !!

Not sure what hole you mean exactly as the 72nd Dragon Panther hulls are full of them. The rear decks are two piece and have holes for the fans and the hull sides are pre drilled for mounting the tools, which is a real pain as they req filling if you're not going to mount them.

You might also just be able to see the solid posts and mounting hole which you're meant to use to screw the top and bottom hull halves together on the metal chassied kits, although I never do. Its the hole in the rear hull underneath where the deck engine screens fit.

Here's another progress shot of the hulls which may show things better .... I've ground off the track guard supports on the metal hulls (used a bench grinder, then file and emery) and filled the tool holes. Both those hulls will be used to make Panther F's or some other '46 conversion.


And here's a couple of shots of the customers project Panthers. Basic assembly completed and ready for paint (close your eyes on the Tiger2).


As for rules I'm not sure what set he uses, most likely one of the common three, Rapid Fire, Operation Overlord or Crossfire. I use a self written set for my own 20mm games.


Lastly the "dio" thingy in the background is one of our gaming tables. It's currently set up for play-testing a set of modern skirmish rules I'm working on. I've attached a piccie of some of it. The Brit vehicles are 1/48th Airfix, the MATVs are Empress Miniatures as are the figures we're using.


cheers
Brent
SGTJKJ
#041
Visit this Community
Kobenhavn, Denmark
Joined: July 20, 2006
KitMaker: 10,069 posts
Armorama: 4,677 posts
Posted: Wednesday, January 28, 2015 - 06:53 PM UTC
Great stuff, Brent. I love it when strategy games and plastic models come together. Perfect match

Brian, remember to dry fit that Eduard PE zimmerit for the Panther before gluing. I am not sure it will fit the Tamiya kit. There are some strange dimensions for that old Tamiya kit.

If the Eduard set does not fit, just save it for another Panther. It should fit most of the Panther kits out there.

The Tamiya kit is a great kit for getting into the hobby. A relatively straight forward build and will build into a nice model despite some inaccuracies.
ZAPanzer
Visit this Community
North-West, South Africa
Joined: September 12, 2012
KitMaker: 88 posts
Armorama: 49 posts
Posted: Wednesday, January 28, 2015 - 07:14 PM UTC

Quoted Text


@Robert--and another great looking Jagd! Two on one page, who'd a thunk it.


Keith


Thanks Keith
JoeOsborne
Visit this Community
California, United States
Joined: October 08, 2013
KitMaker: 111 posts
Armorama: 67 posts
Posted: Wednesday, January 28, 2015 - 07:55 PM UTC

Quoted Text


@Joe--great looking Jagd! Are you having any luck getting the camo net to cooperate? Have you tried wetting it down and letting it dry as it would naturally sit? Or soaking it in a mixture of water and white glue to settle it into place?


Keith


Keith,

Thanks for the nice comments. I used the water and white glue mix and it looks much better. Final photos coming this weekend.